Well summer is knocking on the door here in Pennsylvania and I am glad for it! I will be making earrings all summer long! They are such fun, quick projects. I love to make them for myself and they make great gifts, because they always fit.

Aren’t these fun?! I gave this pair to my mom for Mother’s Day! Now I’m making another pair for myself.
I like flowers! I am always cutting flowers from our yard and bringing them inside to put in vases. It’s one of my favorite things to bring the outside in. I just started planting flowers this week as we had to wait until the tree stumps were ground out (if you didn’t read my last post, we had several trees taken out.) I can’t wait for them to fill in and sit on my back patio, drinking my fave diet Pepsi, watching the kids play, and crocheting!
These flower cluster stud earrings turned out so fun! I like to wear stud earrings because I have long hair and sometimes big dangly ones get caught in my hair. BUT I still want the studs to stand out, so here you go with these big beauties! You’ll need three colors of Aunt Lydia’s Crochet Thread, size 6/0 beads, and flat back stud earring findings. I used a 1.4 mm size hook, but you could use a little bigger or smaller. As long as you stitch tightly they’ll look great!

This pair is made with Aunt Lydia’s Crochet Thread size 10 in colors Maize, Mint, and Ocean. What colors would you use?
As usual, I like to offer the pattern for free here on the blog! You can read all the instructions and necessary information below. However, I also created a PDF version of the pattern! The PDF is available for a low cost on Ravelry and LoveCrafts. It is 9 pages long and includes 5 pages of photo tutorial. This pattern is an intermediate pattern, but the photo tutorial is pretty extensive so if you are a confident beginner I think you could manage.
I’m having such fun participating in the May Flowers Blog Hop being hosted by Stardust Crochet! Head over to her blog to check out all the amazing flower themed patterns! As part of the event I’m offering a discount on ANY of my earring patterns in my ravelry shop. Through the end of May 2024, use the code EARS40 to take 40% off any of my earring patterns like these:


But no worries if you want to use the free version here on the blog! Sometimes I like to use the blog version of a pattern, then if I need more help or think I’m going to make something over and over, I purchase the PDF. So here you go:
Supplies
- Aunt Lydia’s Crochet Thread, size 10 in three colors, one preferably green for the leaf 10 yards each color
- Size 1.40 mm crochet hook
- Tapestry needle and scissors
- Earring findings: 2 posts/stud earring findings
- E600 jewelry glue or Gorilla glue
- 16 size 6/0 beads, preferably 8 green ones for the leaf
Stitches (US Terms)
- ch=chain
- sc=single crochet
- sl st= slip stitch
- st/sts=stitch/stitches
- MC=magic circle
- dc=double crochet
- tr=treble crochet
- sc w/bead= single crochet with bead: insert hook into st, yarn over, pull through. Push bead down next to hook, push towards Right Side with finger from behind. Yarn over and pull through both loops on hook.
Notes
- You can choose to block these if you would like them to keep shape better. I use Aleene’s Fabric Stiffening Spray and t-pins on a blocking mat.
- At end of round 3 of leaf, do not join, continue in the round.
Gauge
Gauge is not really necessary for this pattern. If you want it: swatch of double crochet should be 5 rows of 11 sts to equal 1 inch. Personally, I find the smallest hook I can handle for the yarn (for earrings) produces the best, tightly stitched look.
I used Aunt Lydia’s thread for these, because that is what I had at the time, BUT I’ve been making all my earrings with WeCrochet’s Curio 10 recently! The color selections are lovely and they have a nice sheen to them that Aunt Lydia’s doesn’t. If you’ve never tried it before, I highly recommend it. They even have a multipack so you can experiment with color!
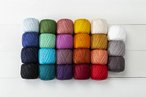
Complete Curio #10 Value Pack
Instructions
To make the 1st leaf:
First, thread 4 green beads onto your green thread.
Round 1: MC, sc 6 into MC and sl st to join. (6 sc)
Round 2: 2 sc in each st around, sl st to first st to join. (12 sc)
Round 3: Ch 3, sk 1st st, sl st next st, *sc next st, 2 sc next st, repeat from*. (15 sc, 1 ch-3 space, 1 sl st)
Round 4: (sc, ch 3, sc) into ch-3 space, (sc, 2 sc) 3 times, [sc w/bead, 2 sc] 4 times, sc next 2, (sc, ch 3, sc) into ch-3 space, sl st next 2 sts, fasten off. (23 sc, 4 sc w/bead, 2 sl sts, 2 ch-3 spaces)
Use invisible finish method to finish off. (After last st, cut yarn and thread though tapestry needle. Insert under next st, then into the middle of last st and pull to create invisible finish.)
Weave in end and trim.
For the 2nd leaf:
First, thread 4 green beads onto your green thread.
Round 1: MC, sc 6 into MC and sl st to join. (6 sc)
Round 2: 2 sc in each st around, sl st to first st to join. (12 sc)
Round 3: Ch 3, sk 1st st, sl st next st, *sc next st, 2 sc next st, repeat from*. (15 sc, 1 ch-3 space, 1 sl st)
Round 4: (sc, ch 3, sc) into ch-3 space, sc, 2 sc, [sc w/bead, 2 sc] 4 times, (sc, 2 sc) 3 times, (sc, ch 3, sc) into ch-3 space, sl st next 2 sts, fasten off. (23 sc, 4 sc w/bead, 2 sl sts, 2 ch-3 spaces)
To make the large flower: (5 petals)
Round 1: Make MC, sc 7 into MC. (7 sc)
Round 2: Sl st to join, ch 2, (dc,tr,dc) in next st, ch 2, sl st in next st, *ch 2 (dc, tr, dc) in same as sl st, ch 2, sl st in next st repeat from * three times, sl st in remaining st. (6 sl st, 10 dc, 5 tr)
Fasten off, leaving an 8 in strand of thread. Fold the petals inwards to create a partially closed flower. Clasp closed petals with fingers and use tail to sew tightly into place, criss-crossing through the bottom ball of the flower. (See photos pg 8.) Weave thread up through the middle, remove needle and thread one bead. Reattach needle and sew tightly into middle of flower. Repeat for the other two beads, then weave end through bottom of flower and cut thread.
To make the small flower: (3 petals)
Round 1: Make MC, sc 4 into MC. (4 sc)
Round 2: Sl st to join, ch 2, (dc,tr,dc) in next st, ch 2,* sl st in next st, ch 2 (dc, tr, dc) in same as sl st, ch 2, repeat from *, sl st in remaining st. (6 dc, 3 tr, 4 sl st)
Fasten off, leaving an 8 in strand of thread. Fold the petals inwards to create more of a closed flower. Clasp closed petals with fingers and use tail to sew into place as desired, criss-crossing through the bottom ball of the flower. (See photos pg 8.) Weave thread up through the middle, remove needle and thread one bead. Reattach needle and sew tightly into middle of flower. Weave end into bottom of flower and cut thread.
Attach flowers tightly to the leaf close together for the clustered look.
Block your pieces using pins and stiffening spray if you’d like. You may block each piece individually, then glue together, or attach with yarn, then block the entire piece.
Use Gorilla glue or E600 jewelry glue to attach flat back posts to middle of the leaf.

Some of my earring patterns are a little easier, this one is definitely a bit fiddly. If you think you need more guidance, the PDF has a full photo tutorial. Remember it’s 40% off through end of May! Code is EARS40
Leave a Reply