The Mother Lode

Crafts and Crochet

  • Home
  • Crochet Pattern Library
  • Faith Based Patterns
  • About Me
  • Privacy Policy

January 28, 2022 by Priscilla

Chill Stopper Beanie

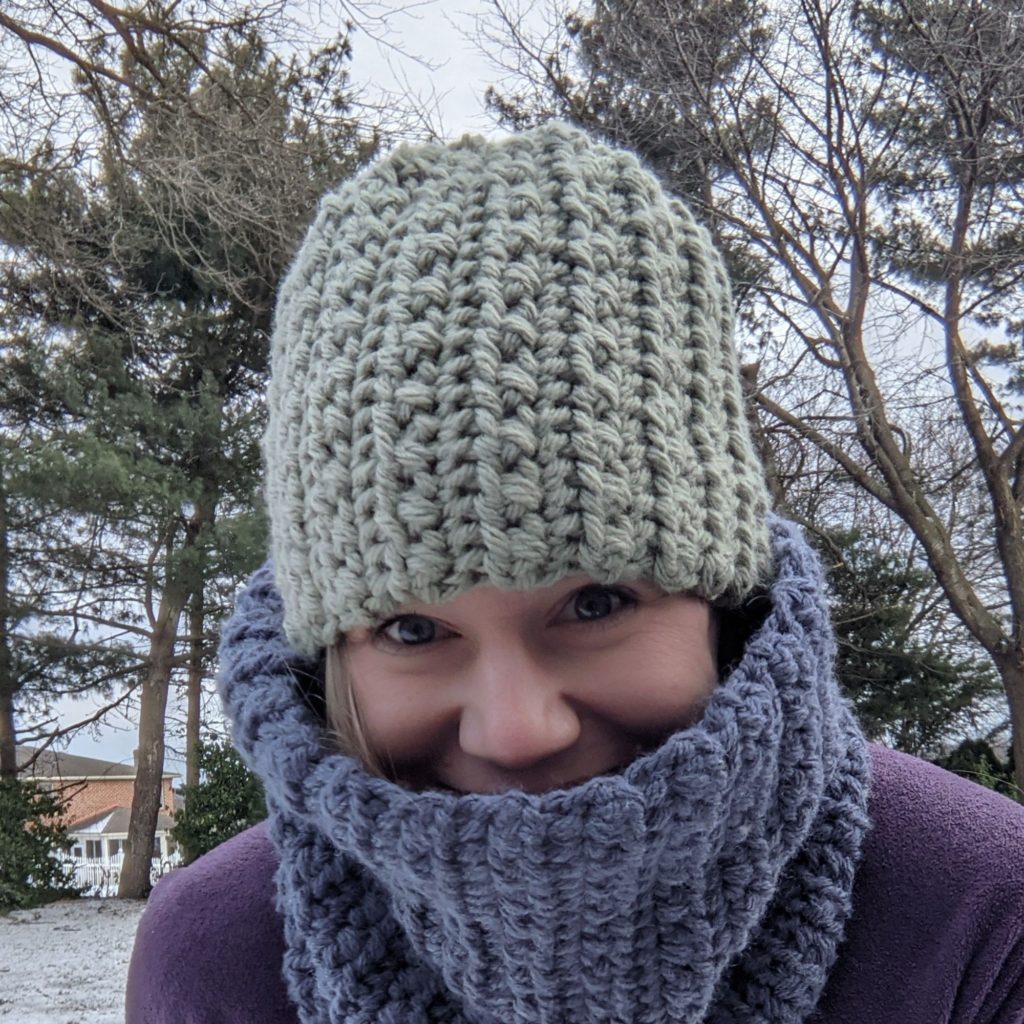
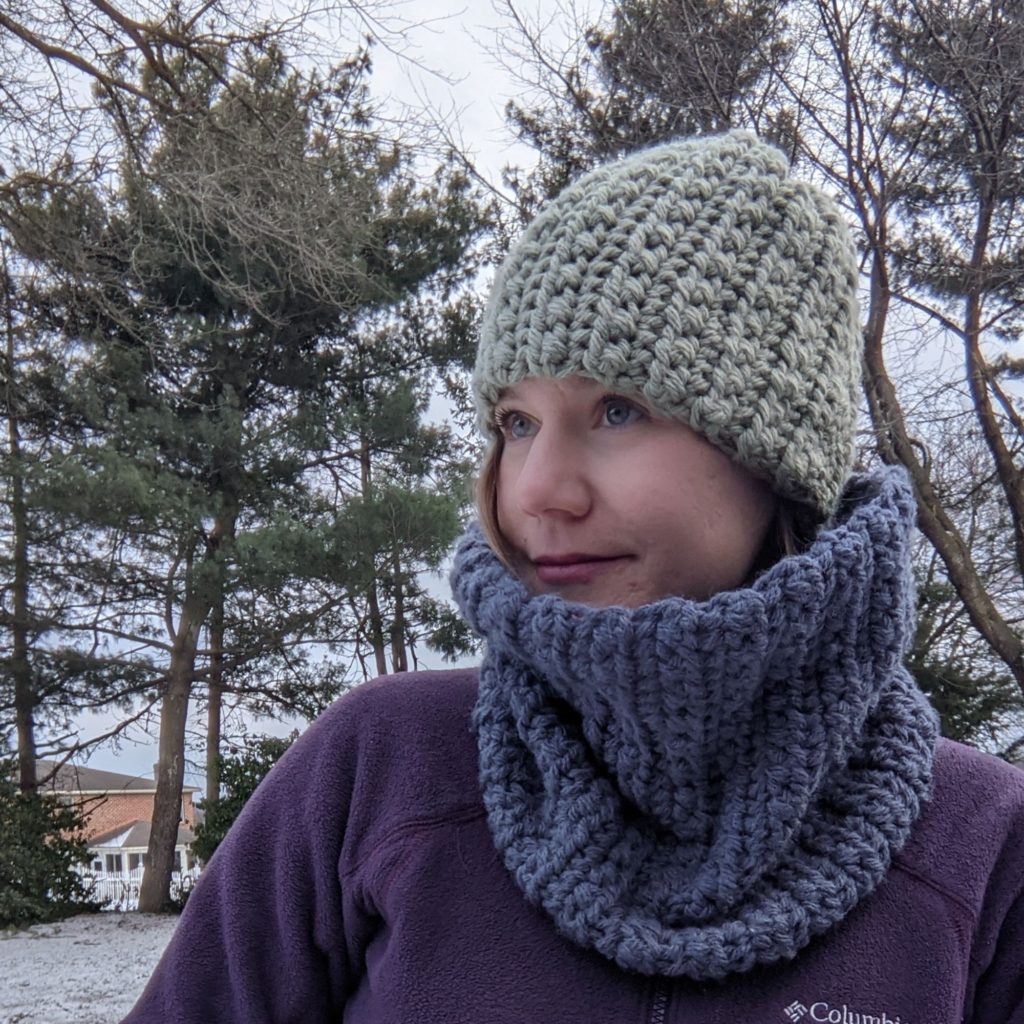
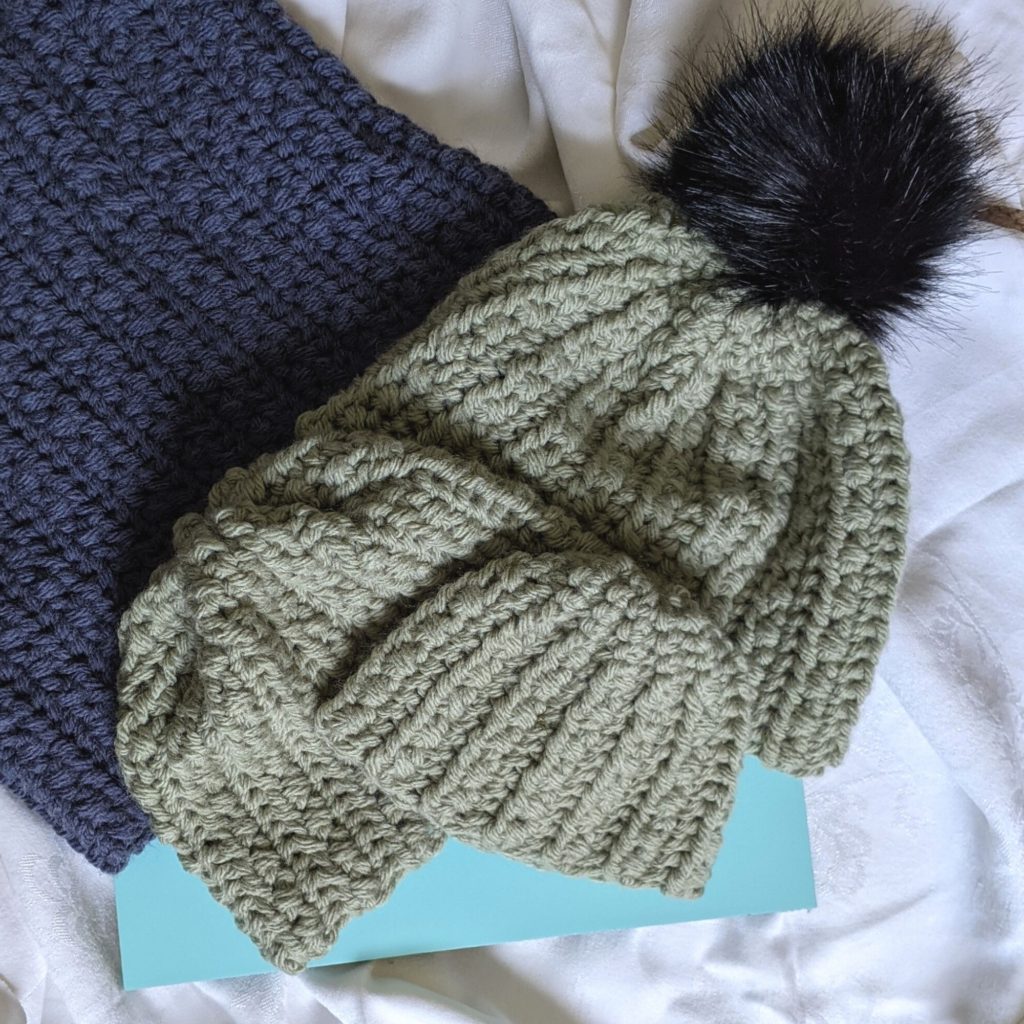
As a mom of three boys, it’s hard to “twin.” There aren’t many options for matching outfits! BUT I’ve enjoyed making us a few matching hats. I’m working towards creating more patterns for wearables for the family. Items where you can buy one or two patterns, a few colors of the same yarn, and make coordinating outfits for the whole family! Sounds great, right??!! I’m starting with this Chill Stopper set! There is a matching headband pattern here. The matching cowl comes out next week!
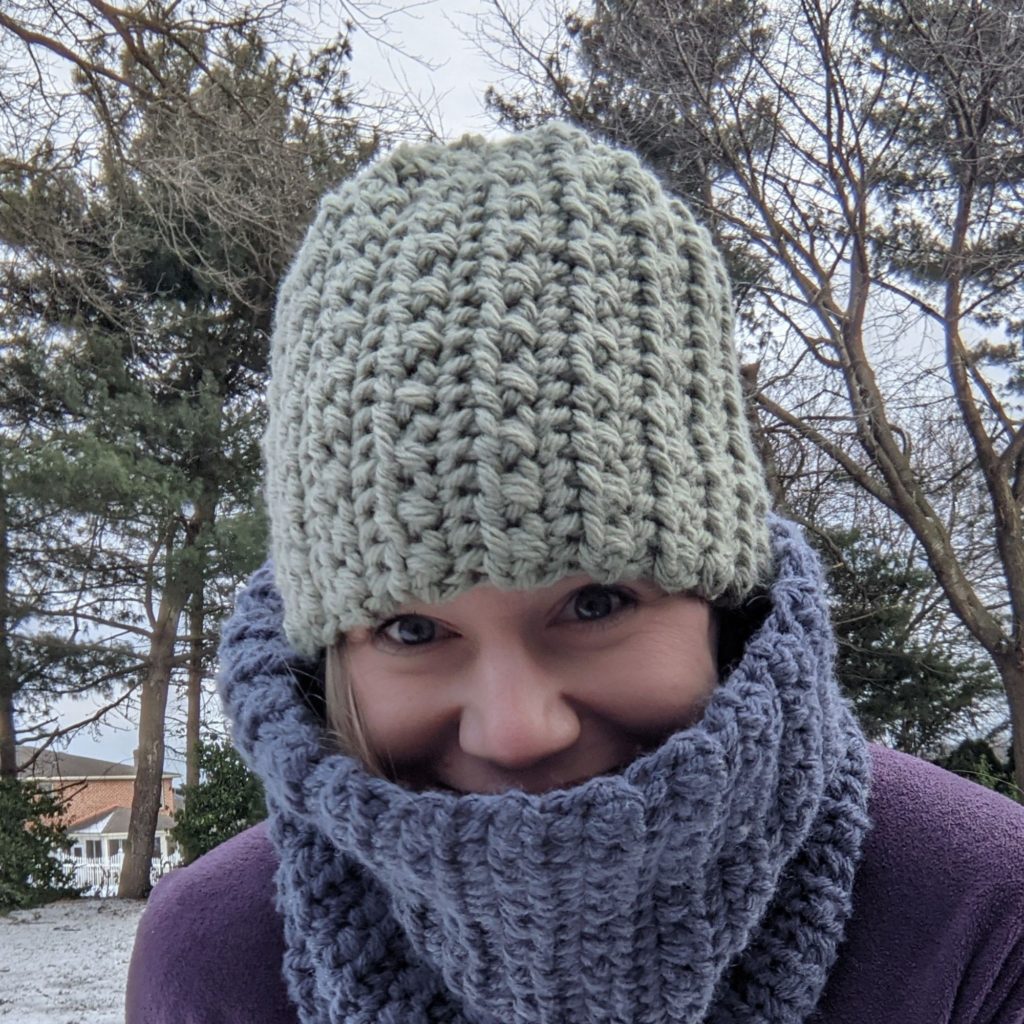
The Lion Brand Hue + Me is my new favorite bulky yarn! I still have a few skeins of my old favorite, Red Heart Soft Essentials, but I think it is discontinued. Two great things about this yarn: it’s super warm since it is a wool/acrylic blend, and the colors are AMAZING. Seriously you could pick a bunch of them randomly and they would look great together. I don’t know how they did it, some kind of color wizardry.

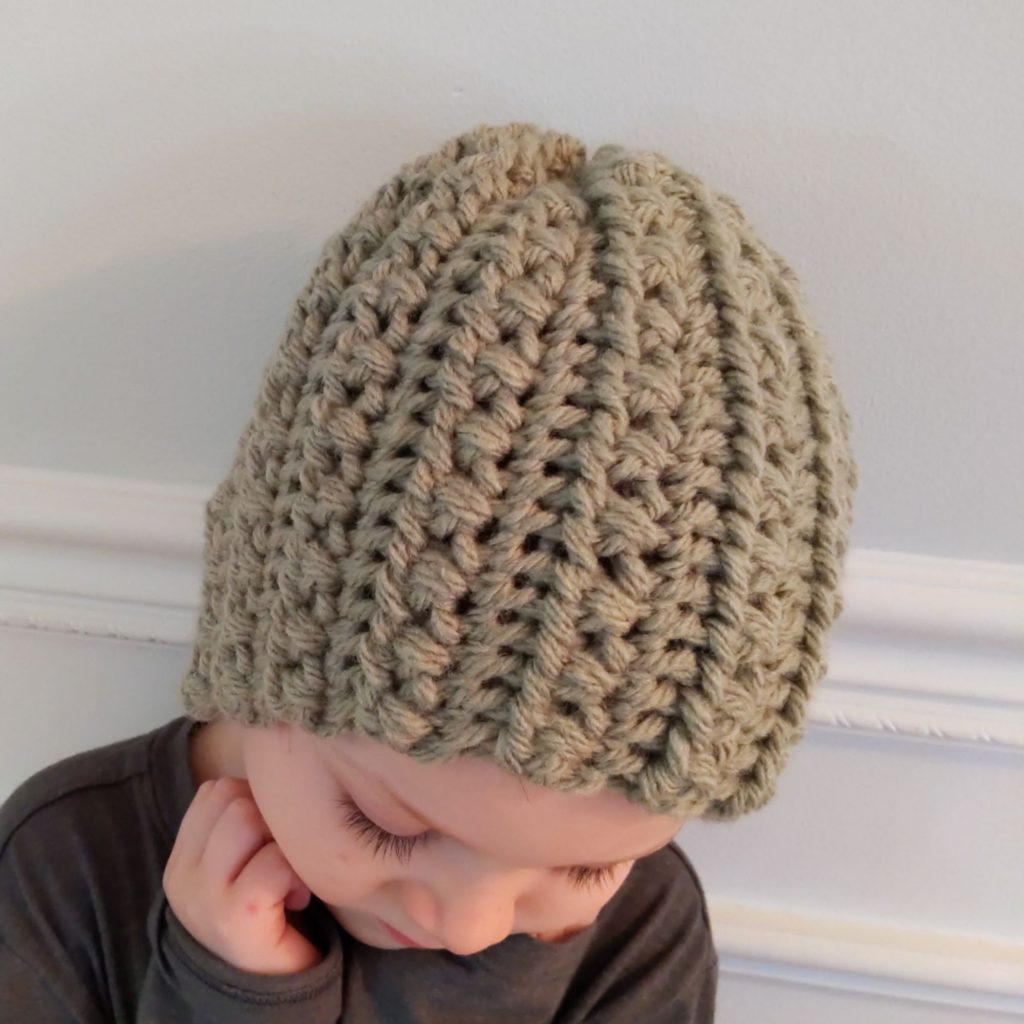
On to the pattern: you’ll need one skein of Lion Brand Hue + Me. From one skein I made an adult medium, child, and baby size, so even for a slouchy style adult size, I think one skein is enough. This beanie is easy! It’s a two row repeat that uses “crossed” half double crochet and single crochet in the FLO. You’ll need an 8mm crochet hook and scissors, tapestry needle, measuring tape. I added a removeable pom to mine and I’ve been wearing it everyday!

The PDF has a photo guide page to show the steps of the half double crochet row, as well as instructions to assemble the beanie. It’s available on ravelry and Etsy! You can work from the free version below, and if you need more help, head over and grab the PDF. It’s on sale through Feb 3rd! No code needed.

Supplies

  • 125-200 yards bulky (CYC 5) yarn, samples: Lion Brand Hue + Me, substitute: Red Heart Yarns Soft Essentials
  • crochet hook US size L (8 mm) or size needed to obtain gauge
  • tapestry sewing needle
  • scissors and measuring tape
  • optional: pom/decorative buttons

Stitches

ch = chain

sc = single crochet

st/sts = stitch/stitches

FLO = front loop only

sk = skip

hdc = half double crochet

sl st = slipstitch

Notes

  • Finished dimensions: baby: 14 x 6.5 in, toddler: 16 x 7 in, child: 18 x 7 in, teen/adult sm: 20 x 8 in, adult med: 21 x 8.5 in, adult lg: 22 x 9 in, adult xl: 23 x 9 in
  • Sizes are marked with parentheses ( ) and stitch counts are marked at the end of each row in brackets [ ].
  • Pattern is worked flat and seamed at the end.
  • Work the slipstitches loosely. The slipstitch/single crochet portion will be the top of the hat.
  • The hdc row will be made by working in front of the previous stitch, not behind. Front is always the side of the work closest to you.
Gauge

4 in by 4 in swatch

12 sts in 8 rows of the pattern repeat which is:

Row 1: sc FLO

Row 2: (sk st, hdc, hdc in skipped st) repeat

Size Modification

Hats can be made in all sizes, and I want you to be able to modify this pattern to get the exact fit that you want! The stitch multiple for this hat is 2. That means you can add or subtract stitches to the beginning chain in multiples of 2 to make your hat taller or shorter. To get a slouchy fit to your hat, I suggest an extra 4 beginning chain stitches on the smaller sizes, and an extra 6 beginning chain stitches on the adult sizes.

The hat pattern repeat is in rows of 2. For the best look at the seam, you want the final row to be the hdc row. A great way to fit your hat is to have the person you are making the hat for give you a measurement around their head (go above the ears and across the eyebrows.) You want the hat to be about an inch smaller than that measurement (called head circumference.) This will ensure the hat fits without falling off! There are finished hat size measurements in the notes section. Use these to help you decide which size to make, and add or subtract rows in multiples of 2, according to your measurements for the best fit!

Baby (Toddler, Child) Leave 10 in tail at beginning for seaming

Row 1: Ch 17 (19, 21), sl st second st from hook and next three, sc each st across, ch 1, turn. [4 sl st, 12, (14, 16) sc]

Row 2: Sk first st, hdc next st, hdc in previously skipped st, *sk next st, hdc, hdc in skipped st, repeat from * to last 4 sts, sc last 4 sts, ch 1, turn. [12 (14, 16) hdc, 4 sc]

Row 3: Sl st FLO each of first 4 sts, then sc FLO each st across, ch 1, turn. [4 sl st, 12, (14, 16) sc FLO]

Row 4- 25 (29, 33): Repeat rows 2 and 3 respectively.

Row 26 (30, 34): Repeat row 2. Fasten off, leaving about 8 inches for cinching the top.

How is the pattern going?

Join my subscriber list for pattern updates, discounts, and other crafty fun!

Thank you!

You have successfully joined our subscriber list.

.

Teen/adult small (medium, large, extra large) Leave 12 in tail at beginning for seam

Row 1: Ch 23 (25, 27, 27), sl st second st from hook and next three, sc each st across, ch 1, turn. [4 sl st, 18, (20, 22, 22) sc]

Row 2: Sk first st, hdc next st, hdc in previously skipped st, *sk next st, hdc, hdc in skipped st, repeat from * to last 4 sts, sc last 4 sts, ch 1, turn. [18 (20, 22, 22) hdc, 4 sc]

Row 3: Sl st FLO each of first 4 sts, then sc FLO each st across, ch 1, turn. [4 sl st, 18, (20, 22, 22) sc FLO]

Row 4- 35 (37, 39, 41): Repeat rows 2 and 3 respectively.

Row 36 (38, 40, 42): Repeat row 2. Fasten off, leaving about 8 inches for seaming.

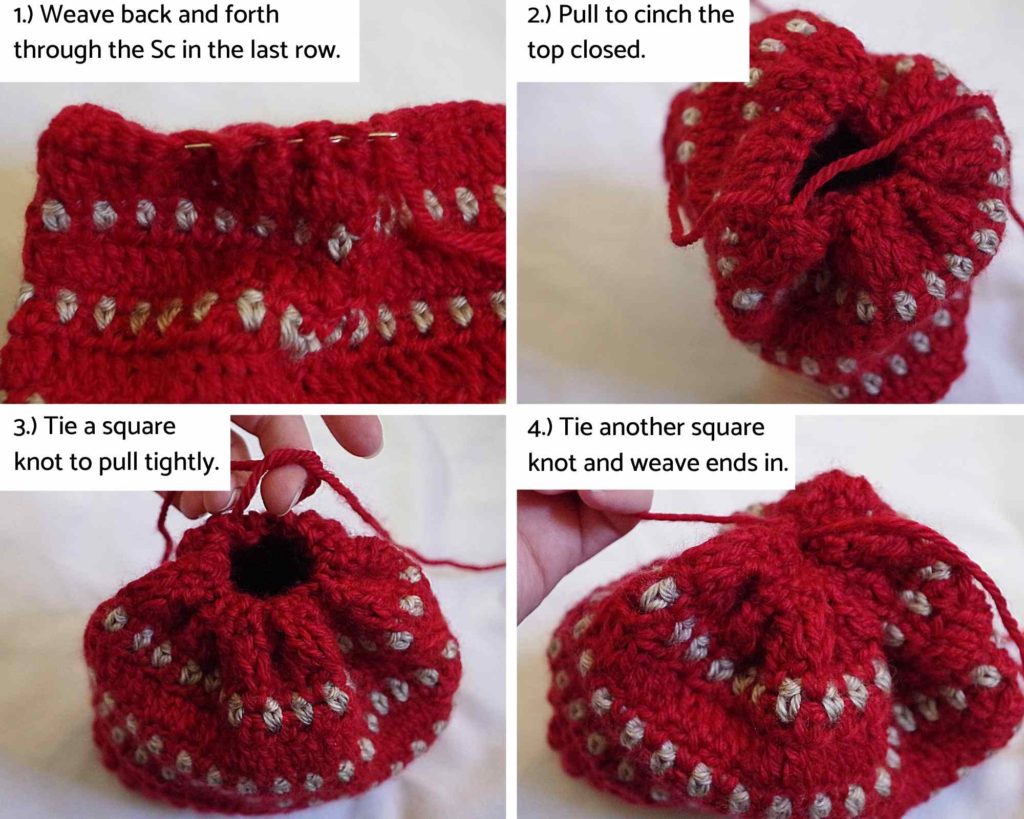
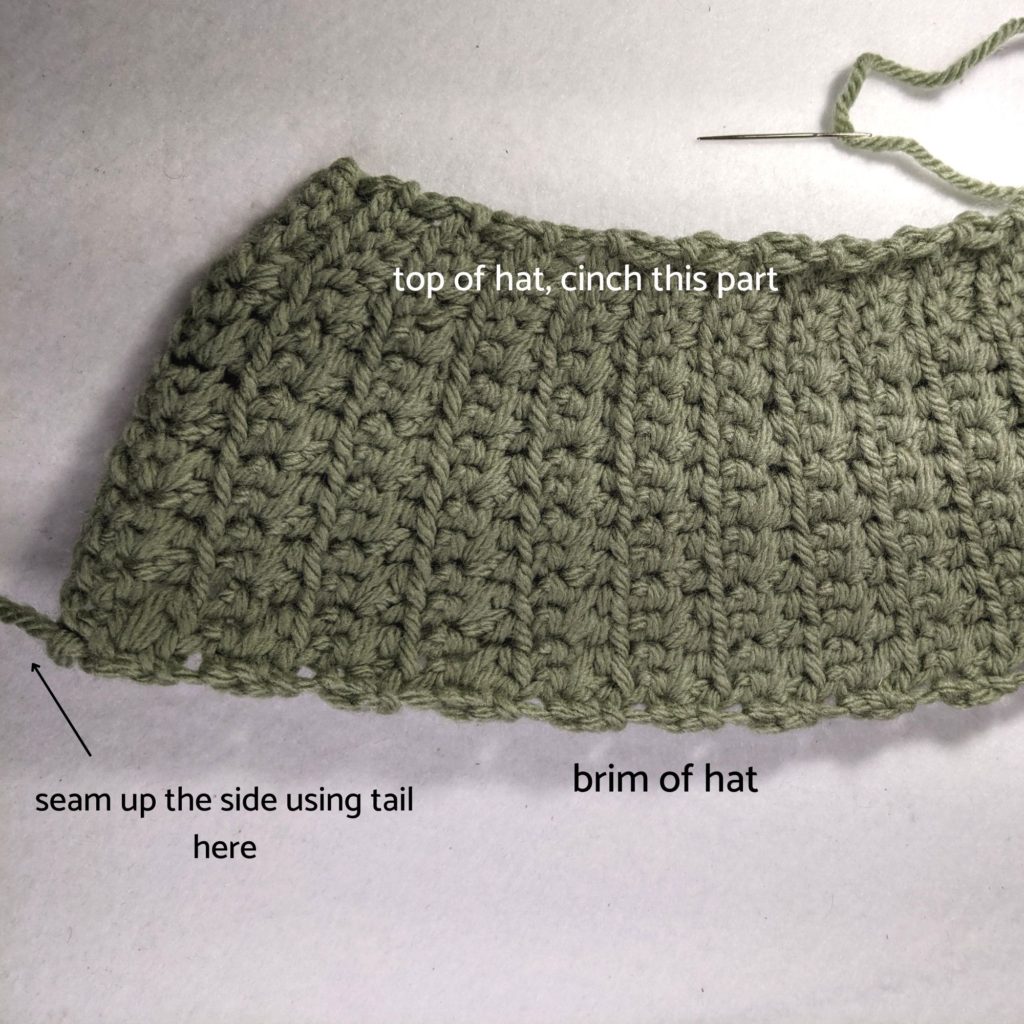
Fold hat and seam the back together using the beginning tail with a tapestry needle and mattress stitch or whipstitch, whichever you prefer. Use end tail to cinch top of hat. Weave through the top of every other row, then pull tightly to cinch. You may then sew back and forth over the hole at the top to close it better, if necessary.

Again the premium version PDF in my pattern shops has tutorial photos like the one below, easy printing/digital viewing, and no ads! Check it out here on ravelry, or on Etsy.
August 18, 2020 by Priscilla

Almost Stripes Beanie

I’m still here making all the hats! I just love a quick project, because, as a stay at home mom, so much of my “work” is stuff that never feels completed: laundry, dishes, weeding the garden, etc. Crochet is something I can do in the evenings or during play time and get a sense of accomplishment from. I like expressing creativity through it, but the completion of it is something that really fuels me. So I am a big fan of hats and ear warmers that I can finish in a couple of days. One of my new favorites is crochet earrings, which are even faster! Make sure you sign up for my email list, because a pattern for those will be coming in the future, too! It’s so cute, you don’t want to miss it!

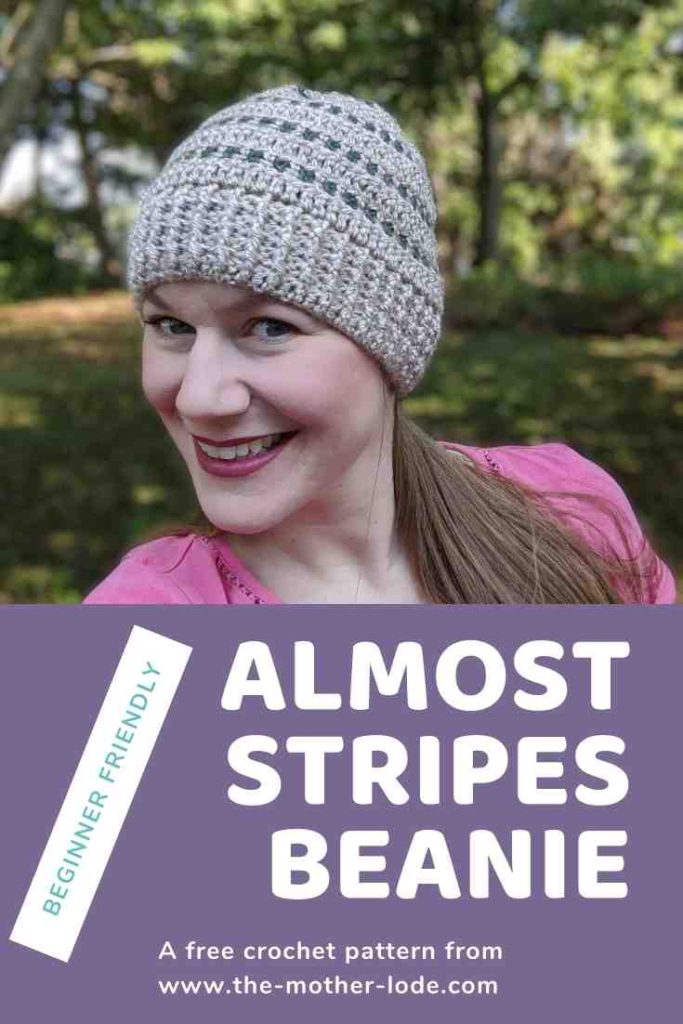
Back to today: I’ve got the Almost Stripes Beanie crochet pattern for you! This one is a little more complicated than my first pattern, because there are color changes and a few different stitches. I created it to be another rectangle that is seamed and constructed, though, so if you are not ready for crochet in the round, you can tackle this hat! I graded this hat to include 7 sizes, which was a challenge! I am not a fan of math in any way, but I managed. I know often people tease about the necessity of math in high school. I’m sure I said probably several times: “When am I ever going to need to know this?!” Well, the answer to 15 year old me was, “When you grow up and want to design your own crochet patterns and you have to multiply and divide and do percentages to figure out the stitch counts and yardage.” I didn’t even beg help from my scientist husband for the stitch counts. How about that?! 


almost stripes beanie pin

Alrighty, keep on scrolling for the pattern! I did make the pattern available for purchase here on Ravelry. You can get the PDF filled with photos and clear guides on each section of the hat for $4. I love being able to print out the pattern so it’s easy to use from the couch! 

Materials

  • Worsted weight (4) yarn (samples are Lion Brand Heartland and Basic Stitch) may use two colors for stripes as written if desired. Color A approx 200-250 yds, Color B approx 30 yds
  • Crochet hooks: 5.5 mm and 6 mm or two hooks needed to meet gauge
  • Scissors
  • Tapestry needle
  • Measuring tape


Gauge: 7 rows of 15 DC stitches = 4 in x 4 in with 5.5 mm hook (If you go up a hook size to meet gauge, you would use a 6 mm hook for the gauge swatch, if you need to go down you will use a 5 mm hook for the gauge swatch.) Alternatively, the length of the brim per size is listed in the notes section. You may complete the first three rows and check for length to match the desired size. 


Abbreviations

  • Ch = Chain
  • DC = Double Crochet
  • HDC = Half-Double Crochet
  • Sc = Single Crochet
  • LS = Linen Stitch (Ch 1, sk st, Sc)
  • FPHDC = Front Post Half-double Crochet
  • BPHDC = Back Post Half-double Crochet
  • DC BLO = Double Crochet Back Loop Only (the loop farthest from you)
  • DC FLO = Double Crochet Front Loop Only (the loop closest to you)
  • st = stitch
  • sk = skip 

Notes

  • The first section has the pattern for the baby/toddler sizes, the second section is the child/adult sizes. 
  • Parentheses indicate different stitch counts for different sizes: {newborn (3-6 months, 6-12 months, toddler)} and {child (teen/adult small, adult medium/large)} These stitch counts do not include the turning chain. 
  • Instructions between * are repeated
  • This hat is constructed by the brim first, the body of the hat is crocheted onto it, then the top of the body has decreases to allow for some shaping at the top. This will create a sort of rectangle-trapezoid shape which will turn into a hat with seaming and gathering.
  • The brim of the hat should be approximately the following in length:
    • Newborn: 11-12 inches
    • 3-6 months: 12-14 inches
    • 6-12 months: 14-16 inches
    • Toddler: 16-17 inches
    • Child: 18 inches
    • Teen/Adult small: 20 inches
    • Adult medium/large: 22 inches

Newborn (3-6 months, 6-12 months, toddler) 

With 5.5 mm hook and color A Ch 55 (61, 65, 71.). 

Row 1: HDC in 2nd st from hook. HDC in each st to end of row. Turn, Ch 1. {54 HDC (60, 64, 70)} 

Row 2: *FPHDC in 1st st. BPHDC in next st.* Repeat * to end. HDC in the turning chain. Turn, Ch 1. {27 FPHDC, 26 BPHDC, 1 HDC (30/29/1, 32/31/1, 35/34/1)}

Row 3: *BPHDC in 1st st. FPHDC in next st.* Repeat * to end. HDC in the turning chain. Turn, Ch 1. {27 BPHDC, 26 FPHDC, 1 HDC (30/29/1, 32/31/1, 35/34/1)}

Row 4: Repeat row 2.

Row 5: Repeat row 3.

Row 6: Switch to 6 mm (larger) hook. DC FLO in 1st st. DC FLO in each st to end of row. Turn, Ch 1. {54 DC (60, 64, 70)}

Row 7: sk 1st st, Sc in 2nd st. *Ch 1, sk next st, Sc* Repeat * to end, with the last Sc in the turning chain. Turn, change to color B, Ch 1. {27 Sc, 26 Ch (30/29, 32/31, 35/34)}

Row 8: sk 1st st, Sc in next Ch 1 space. *Ch 1, sk next st, Sc in next Ch 1 space* Repeat * to end, ending with Sc in turning Ch. Turn, change to color A, Ch 1.{27 Sc, 26 Ch (30/29, 32/31, 35/34)}

Row 9: Repeat row 8, without changing colors. {27 Sc, 26 Ch (30/29, 32/31, 35/34)}

Row 10: DC BLO in 1st st. DC BLO each st to end of row. Turn, Ch 1. {54 DC (60, 64, 70)}

Row 11: Repeat row 7.

Row 12: Repeat row 8.

Row 13: Repeat row 9. 

Row 14: Repeat row 10. (NOTE: For newborn size, skip to row 19 after completing row 14.)

Row 15: Repeat row 7.

Row 16: Repeat row 8.

Row 17: Repeat row 9.

Row 18: Repeat row 10.

Row 19: Switch to 5.5 mm (smaller) hook. Sc in 1st 3 stitches. *Sc 2 tog. Sc next 3 st.* Repeat * to end of row. {44 Sc (48, 52, 56)}


(NOTE: for toddler size, repeat row 19 for a row 20 and 21.) Leave a long tail, fasten off. Weave in the ends of the stripes that are hanging on the sides. Fold hat together with the wrong side facing out (wrong side has the DC near the brim in the back loop away from you.) Use the long tail you left to seam the hat from the top to the bottom with an invisible mattress stitch.  


Cut a length of yarn about 10 inches. Weave back and forth through the single crochet at the top of the hat. Pull tightly to cinch the hat together. Tie two or three knots. Put the remaining tails through your tapestry needle and criss cross over the hole a few times if necessary to cover the top. Weave the ends in and cut remaining. Turn right side out.

Child (teen/adult small, adult medium/large)

With 5.5 mm hook, and color A Ch 81 (85, 91) 

Row 1: HDC in 2nd st from hook. HDC in each st to end of row. Turn, Ch 1. {80 HDC (84, 90)}

Row 2: *FPHDC in 1st st. BPHDC in next st.* Repeat * to end. HDC in the turning chain. Turn, Ch 1. {40 FPHDC, 39 BPHDC, 1 HDC (42/41/1, 45/44/1)}

Row 3: *BPHDC in 1st st. FPHDC in next st.* Repeat * to end. HDC in the turning chain. Turn, Ch 1. {40 BPHDC, 39 FPHDC, 1 HDC (42/41/1, 45/44/1)}

Row 4-9: Repeat Row 2 and 3, alternately.

Row 10: Switch to 6 mm (larger) hook. DC BLO in 1st st. DC BLO in each st to end of row. Turn, Ch 1.  {80 DC (84, 90)}

Row 11: sk 1st st, Sc in 2nd st. *Ch 1, sk next st, Sc* Repeat * to end of row. Turn, change to color B, Ch 1. {40 Sc, 39 Ch (42/41, 45/44)}

Row 12: sk 1st st, Sc in next Ch 1 space. *Ch 1, sk next st, Sc in next Ch 1 space* Repeat * to end, ending with Sc in turning Ch. Turn, change to color A, Ch 1. {40 Sc, 39 Ch (42/41, 45/44)}

Row 13: Repeat row 12, without changing colors.

Row 14: DC FLO in 1st st. DC FLO in each st to end of row. Turn, Ch 1. {80 DC (84, 90)} 

Rows 15-22: Repeat rows 11-14 twice.

Row 23: Repeat row 11.

Row 24: Repeat row 12.

Row 25: Repeat row 13. (NOTE: To add extra slouch, repeat row 14 again, followed by 11, 12, and 13.)

Row 26: Switch to 5.5 mm (smaller) hook. Sc in each stitch to end of row. Turn, Ch 1. {80 Sc (84, 90)}

Row 27: Sc in 1st 3 stitches. *Sc 2 tog. Sc in next 3 st.* Repeat * to end of row. {64 Sc (68, 72)}

Row 28: Repeat Row 27. {52 Sc (55, 58)}  

Row 29: Sc in 1st st. *Sc2tog. Sc.* Repeat * to end of row. {35 Sc (37, 39)} 

Row 30: Repeat Row 29. {24 Sc (25, 26)}

 Leave a long tail, fasten off. Weave in the ends of the stripes that are hanging on the sides. Fold hat together with the wrong side facing out (wrong side has the DC near the brim in the back loop away from you.) Use the long tail you left to seam the hat from the top to the bottom using an invisible mattress stitch. 


Cut a length of yarn about 10 inches. Weave back and forth through the single crochet at the top of the hat. Pull tightly to cinch the hat together. Tie two or three knots. Put the remaining tails through your tapestry needle and criss cross over the hole a few times if necessary to cover the top. Weave the ends in and cut remaining. Turn right side out. 


Ok, that’s all I’ve got today! Whew, I’m tired. I think I’ll be happy when my next pattern is a quick little pair of earrings with only ONE size! 

May 1, 2020 by Priscilla

Simple Ripples Baby Hat

I’m so thrilled to offer to you my first crochet pattern! I’ve been crocheting almost 7 years. On and off at first and now I am definitely a yarn hoarder. I just kept coming back to it as my craft of choice!

You know, it’s funny, I’m in my 30’s and really just now starting to dream of what I want to be when I grow up. Meaning, I never had much of a career aspiration. I liked French class in high school, so I decided to major in French in college. In college, I planned on getting married and starting a family, so I studied education as well, because I thought it would be a less difficult career to raise a family while doing (haha, oh young Priscilla, who knew nothing.) I intended to teach high school French. That never happened and I ended up teaching preschool, which I loved, but admittedly, wasn’t interested in doing long-term. I’ve now been a stay at home mom for almost 7 years. My little ones are getting older and I’m looking to the future. What am I going to do when they are all at school!?

Now don’t get me wrong, my buddy, laundry will always be around and the little boy pee around the toilets won’t clean itself, but, in between that stuff, I want some kind of creative outlet and some kind of part-time work. As I have grown my crochet skills in the last few years, I am seeing the potential as a career for myself that allows me to hop over to school for volunteering and throw dinner in the crock-pot while I’m at home testing patterns, creating my own, and sharing them on my blog!

I started testing patterns for other designers in January to get some practice. I needed to start understanding how pattern design works on the paperwork end. It’s been such fun being part of a community of crocheters and I’m loving it!

Okay, hold your horses, I’m getting to the pattern! One thing I’ve always made is hats. My boys all wear mommy-made hats, my nieces and nephews, etc. I like making them because there is SO much you can do from the very simple to the very complicated. They are generally a smaller project, too, so you get that feeling of accomplishment sooner. If you’ve ever crocheted and thought hats were hard, you’ve got to make this one! It’s crocheted as a rectangle, then stitched to form a tube, then cinched at the top to make a hat! No tricky rounds to count here! I hope you love this hat and I plan to make it in adult sizes in the fall if you haven’t little ones in your life to make for. The PDF is available for $2 on Ravelry! If you’ve never made this kind of hat before, it is helpful to be able to print the pattern. It has 12 progress photos and more detailed explanations to help you!

Supplies

  • Lion Brand Feels Like Butta yarn in color of choice (samples: Charcoal, Sage, Ice Blue) 2 oz; 130 yds (1 skein) 
  • crochet hook US size I /9 (5.5mm) or size needed to obtain gauge
  • pom-pom maker (optional)
  • tapestry sewing needle
  • scissors

Stitches

  • Ch= Chain
  • HDC= Half Double Crochet
  • DC= Double Crochet
  • SS= Slipstitch
  • BLO= Back Loop Only

Sizing in the pattern is marked as follows:

Newborn (0-6 month, 6-12 month, 1-3 years) Stitch counts marked as { } at the end of the row. Turning chain does not count towards stitch count.

Gauge: 16 HDC in 11 rows= 4″ (10cm) OR 15 DC in 8 rows = 4″ (10cm)

Instructions

Ch 26 (30, 34, 38).

Row 1: HDC in 3rd chain from hook. HDC in each stitch across. Turn. {24 (28, 32, 36) HDC}

Row 2: Ch 2, DC in BLO in each stitch across. Turn.

{24 (28, 32, 36) DC}

Row 3: Ch 2, HDC in each stitch across. Turn. {24 (28, 32, 36) HDC}

Rows 4- 24 (28, 32, 36): Repeat Rows 2 and 3.

(Final row should be a row of double crochet BLO.)

At end of last row, turn and SS to seam the short sides of the rectangle with the wrong side (flat side) facing out. Finish off, leaving a tail of at least 12 inches. Use this long tail to sew with a tapestry needle every few stitches around the top, pulling tightly to cinch the top of the hat closed. Stitch back and forth across the top of the hat a few times to be sure the top is tightly closed. Weave in the remaining tail, or use it to attach a pom. Weave in any remaining ends.

Well that’s all she wrote! It’s been a crazy past few weeks getting this together, but I’m so happy I made the jump to do it! What is something new you are going to challenge yourself with?

Welcome! My name is Priscilla and I love designing crochet patterns for your family. I live in beautiful Pennsylvania where I enjoy all sorts of crafts, but I’m most passionate about crochet! I’m a Catholic mom of 4 and I sometimes incorporate my faith into my designs. Thank you so much for supporting me by visiting my crochet website and I hope you find something here that you are excited to make.

Recent Posts

  • Soft Crochet Hat Pattern
  • Cozy Men’s Scarf Crochet Pattern
  • Bulky Textured Beanie Crochet Pattern
  • Cozy Fall Baby Beanie Pattern
  • Spider Basket Crochet Pattern

Categories

Follow Me

  • Etsy
  • Facebook
  • Instagram
  • Pinterest
  • YouTube

Pretty Chic Theme By: Pretty Darn Cute Design