The Mother Lode

Crafts and Crochet

  • Home
  • Crochet Pattern Library
  • Faith Based Patterns
  • About Me
  • Privacy Policy

January 12, 2024 by Priscilla

The Blustery Cowl

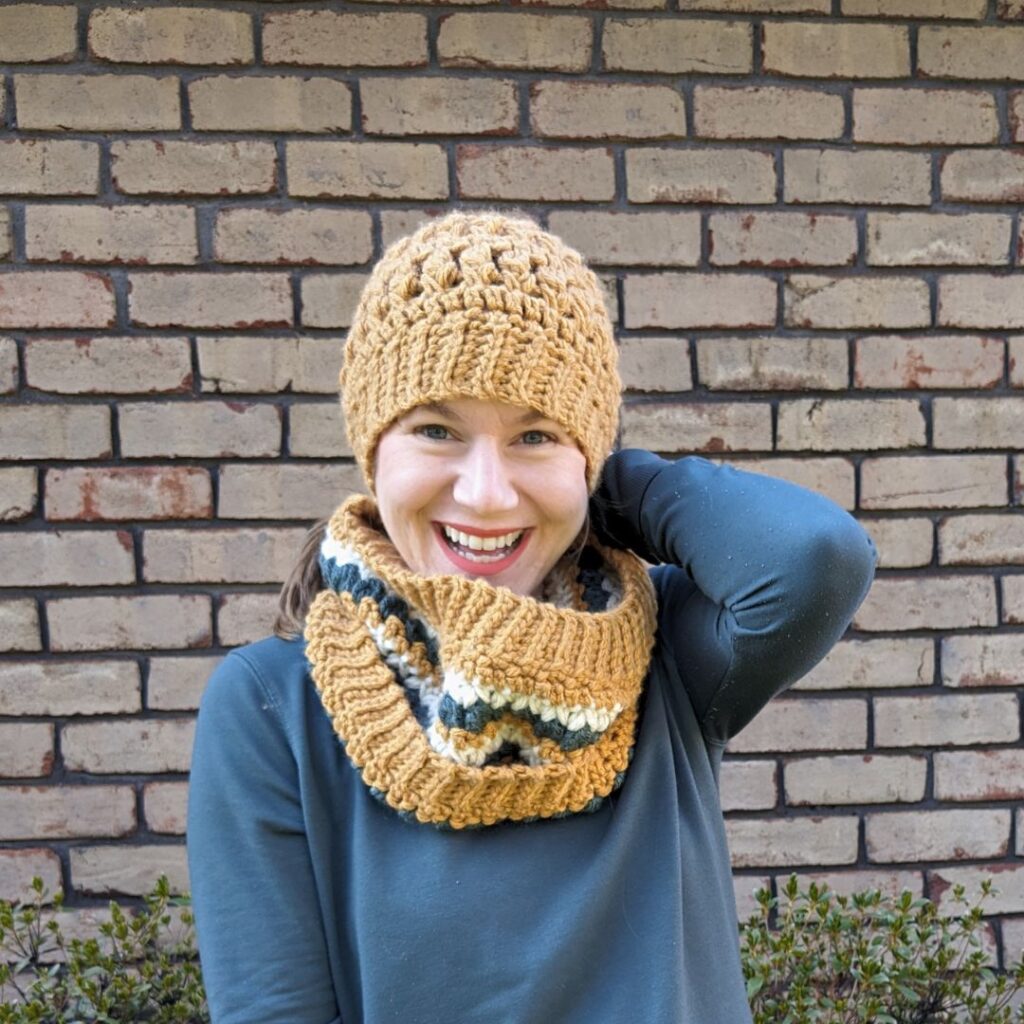
It’s the start of a new year! It’s definitely winter in Pennsylvania! We even had snow last weekend. I love to play in the snow with the kids. We made a snowman and I pushed them down the tiny hill between our house and the neighbors’. I threw on a cowl to go out with them, and I checked with all of my boys before we went out if they wanted one. Of course after about 5 minutes outside, my 10 year old asked if he could have one. I gave him the one I was wearing and wished I had this one in my laundry room to snag because I knew it would be super warm! I hadn’t taken photos yet, though, so it was still upstairs in my craft room. Next time, I will be wearing it!
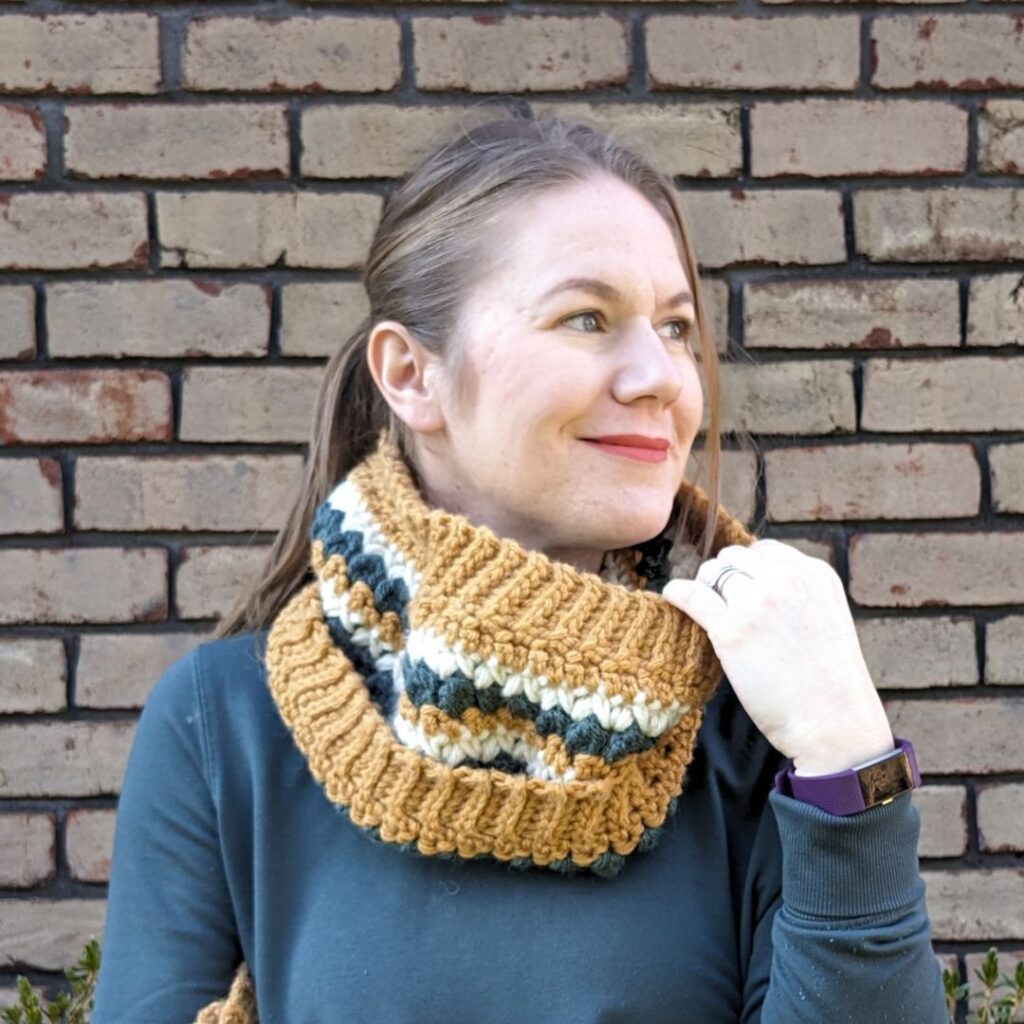
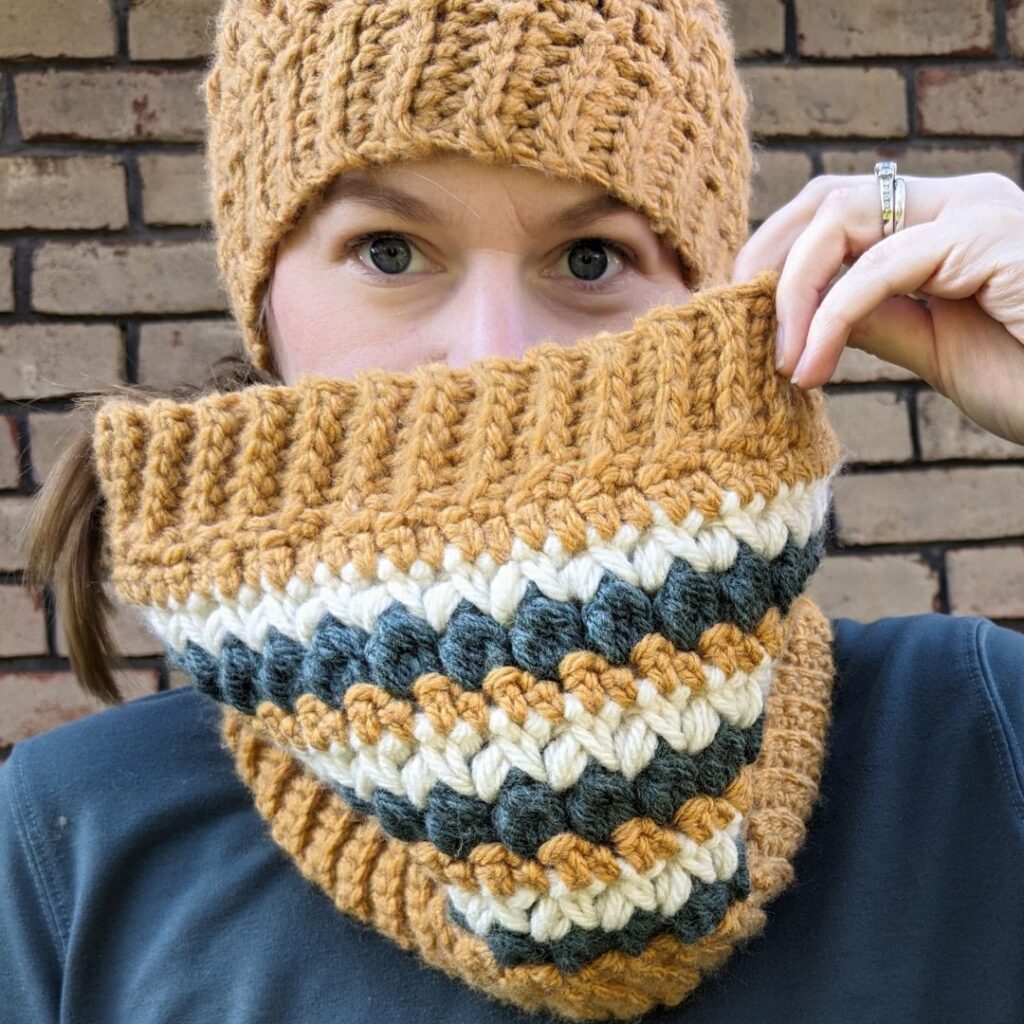
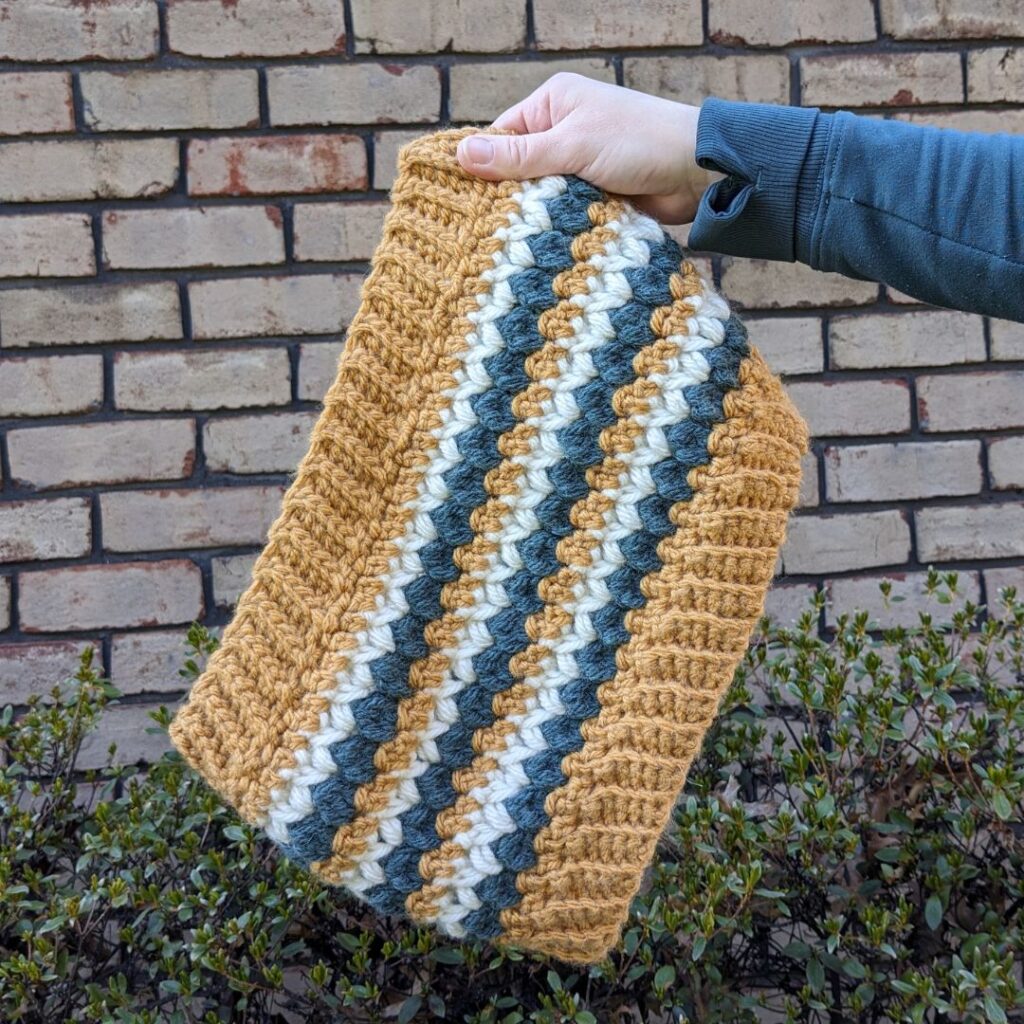
This Cowl is the sibling pattern to the Blustery Beanie! You can make them coordinating colors or the exact same. This MIGHT be my favorite cowl design so far! The colorwork just turned out so great, I think it looks really special.

You can keep reading the full pattern here, or zip over to one of my pattern shops to buy the low cost PDF. It has some photo tutorial pages to help you with the stitches and of course makes it a bit easier to crochet-on-the-couch.

Ravelry
Etsy
LoveCrafts

Supplies:

  • 200 yards bulky (CYC 5) yarn OR for multiple colors: color A: 100 yds, color B: 50 yds, color C: 50 yds, samples: Lion Brand Yarn Hue + Me: color A Mustard, color B Juniper, color C Salt
  • crochet hook US size L (8 mm) or size needed to obtain gauge
  • tapestry sewing needle
  • scissors and measuring tape/gauge ruler

Notes:

  • Finished dimensions after seaming: 15 in by 9 in
  • Stitch counts are marked with ( ).
  • Pattern is worked flat and in the round.
  • For multiple colors: Start with color A for top edging and esc row, change to color B for each CL row and change to color C for each puff row, then change back to color A for esc rows and edging at the bottom.

Stitches:

ch = chain stitch

st/sts = stitch/stitches

BLO = back loop only

sk = skip

esc= extended single crochet

dc = double crochet

sc = single crochet

sl st = slip stitch

sp = space

beg CL = beginning cluster: ch 3, yo, insert hook in same stitch as ch-3, pull up a loop, yo, pull through 2 loops on hook, yo, insert hook in same stitch, pull up a loop, yo, pull through 2 loops on hook, yo, pull through all 4 loops on hook

CL = double crochet 3 stitches together in same stitch

puff = puff stitch: yo, insert hook in next ch-1 space, pull up a loop, yo, insert hook in same stitch, pull up a loop, yo, pull through all 5 loops on hook, sc in previous stitch

Gauge Swatch:

4 in by 4 in swatch = 6 rows of pattern repeat below x 10 esc sts/ 5 CL sts/ 5 puff sts

Row 1: Ch 17, esc 2nd st from hook and each across, ch 3, turn.

Row 2: Beg CL, *ch 1, sk st, CL next st, repeat from * across dc in last st, ch 2, turn.

Row 3: Puff first 2 sts, repeat puff to end of row ch 1, turn.

Repeat rows 1, 2, and 3 respectively.

Written Instructions:

Row 1: With color A, ch 7, sc 2nd ch from hook and each st across, ch 1, turn. (6 sc)

Row 2: Sl st BLO each st across, ch 1, turn. (6 sl st BLO)

Row 3: Sc BLO each st across, ch 1, turn. (6 sc BLO)

Rows 4-78: Repeat rows 2 and 3 respectively.

Row 79: Sl st to row 1.

Turn right side out.

Round 1: Ch 1, esc in end of each row around, sl st to join. (78 esc)

Round 2: Change to color B, ch 1 beg CL, ch 1, skip next st,* CL, ch 1, skip next st, repeat from * around, sl st to join. (1 beg CL, 38 CL, 39 ch-1)

Round 3: Change to color C, ch 1, puff each st around, sl st to top of first puff to join. (39 puff)

Round 4: Change to color A, ch 1, esc each st around, sl st to join.(78 esc)

Rounds 5-10: Repeat rounds 2-4 respectively.

How is it going? Need the PDF photo tutorial pages?

Row 1: Ch 7, sc 2nd ch from hook and next 5 ch, sl st next two row ends, turn. (6 sc)

Row 2: Sl st BLO each st across, ch 1, turn. (6 sl st BLO)

Row 3: Sc BLO each st across, sl st next two row ends, turn. (6 sc BLO, 2 sl st)

Rows 4-78: Repeat rows 2 and 3 respectively.

Row 79: Sl st to row 1. Fasten off. Weave in remaining ends.

I hope you love your cowl! Please share with me on socials! I’d love to see your work!
  • Instagram
  • Pinterest
  • Facebook

February 4, 2022 by Priscilla

Chill Stopper Cowl

It has been a WEEK here! Do you ever feel like that? You get to Friday and think “what did I even do this week?” Thank goodness this cowl pattern is SO easy that I only had a few simple corrections after my testers finished up! If it had been more complicated, it would have needed pushed back!

I’m working on a colorwork hat design, it was going well until I tried it on and realized I had made the brim FAR too large and ended up frogging the whole thing. I still have a plan for it and I think it’s going to turn out wonderful, but it is going to be a couple of weeks until I’m able to publish it. Next week I’m planning instead to share a tutorial video! It was just my birthday and my husband got me an amazing light so that I can film tutorials! I’m thrilled to be able to do that moving forward.

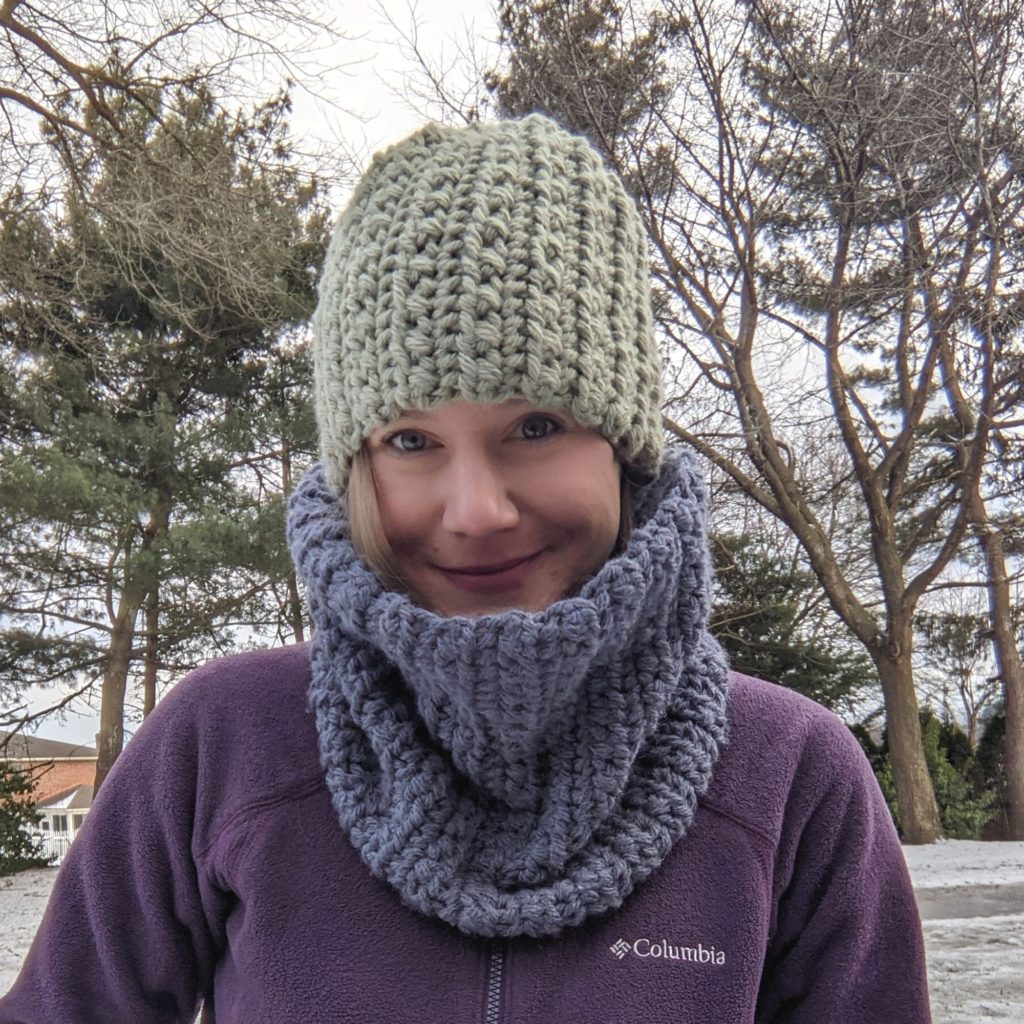
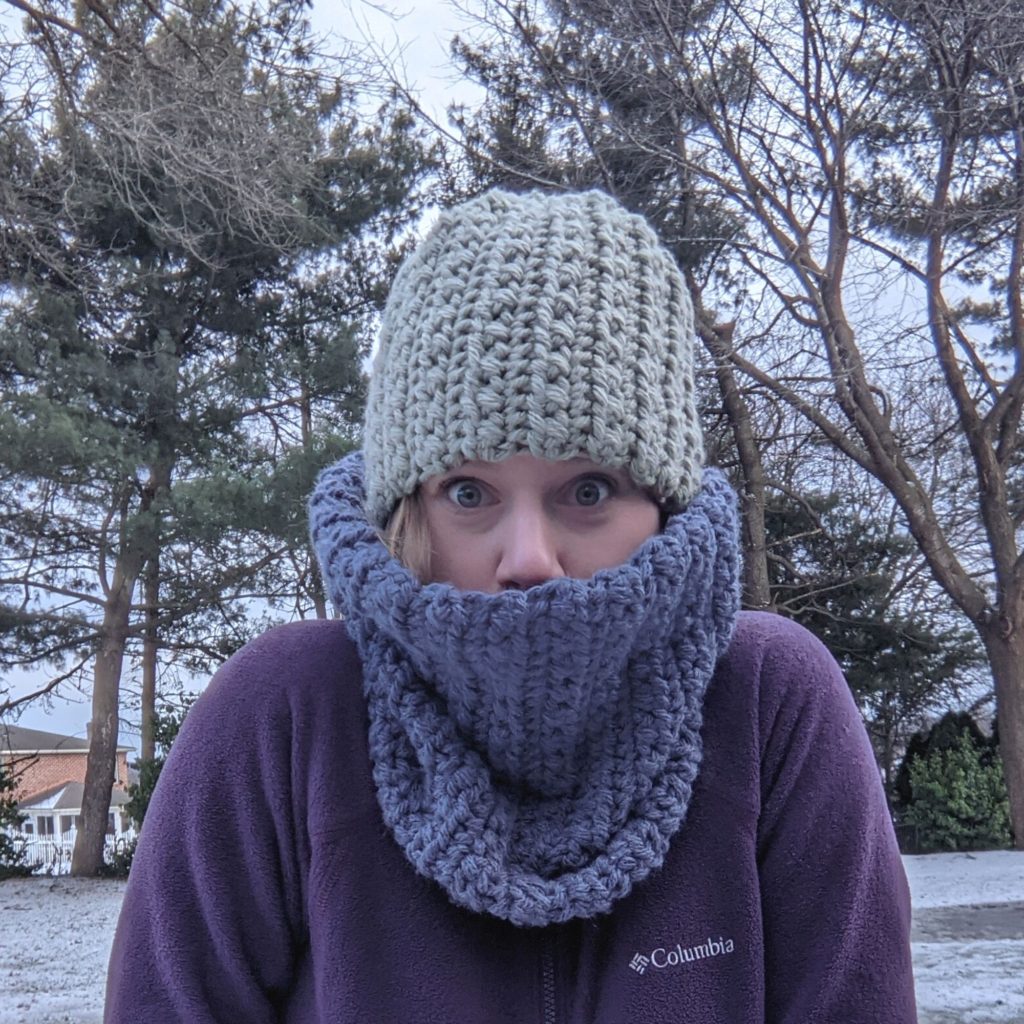
On to today’s pattern! You’ll need two skeins of Lion Brand Hue + Me or similar weight 5 yarn. It is a simple two row repeat with an easy seam to make this slightly textured chunky cowl! It really keeps your neck warm, and even your face. My little 5 year old asked me to make him “a circle for my neck like you” after I had been wearing another cowl all winter, so this pattern includes a child size! For the low cost PDF, head over to my pattern shops! The PDF has a photo tutorial page in addition to the instructions provided here.

Ravelry
Etsy
Lovecrafts

Supplies

  • 250 yards bulky (CYC 5) yarn, samples: Lion Brand Hue and Me, Red Heart Yarns Soft Essentials
  • crochet hook US size L (8 mm) or size needed to obtain gauge
  • tapestry sewing needle
  • scissors and measuring tape

Stitches

ch = chain

sc = single crochet

st/sts = stitch/stitches

FLO = front loop only

sk = skip

hdc = half double crochet

Notes

  • Finished dimensions after seaming: child size 6.5 in by 10.5 in /adult size 10.5 in by 13 in
  • Sizes are marked with parentheses ( ) and stitch counts are marked at the end of each row in brackets [ ].
  • Pattern is worked flat and seamed at the end.
  • The right side is the side where the hdc stitches puff out more, pictured below.
  • The crossed hdc will be made by working in front of the previous stitch, not behind. Front is always the side of the work closest to you.
  • This is a beginner pattern, and all of the instructions are available here. However, there is a PDF available in my pattern shops that includes a photo tutorial page: Ravelry Etsy Lovecrafts

If you’d like to modify this pattern to get the exact fit that you want, the stitch multiple for this cowl is 2. That means you can add or subtract stitches to the beginning chain in multiples of 2 to make your cowl taller or shorter.

The pattern repeat is in rows of 2. For the best look at the seam, you want the final row to be the hdc row. If you want your cowl to be a tighter fit to the neck, you could subtract 2 rows at a time or add 2 rows to make the cowl more loose.

Gauge

4 in by 4 in swatch = 12 sts in 8 rows of the pattern repeat which is:

Row 1: Ch 15, sc each st across, ch 1, turn.

Row 2: *Sk st, hdc, hdc in skipped st, repeat from * to end, ch 1, turn.

Row 3: Sc FLO each st across, ch 1, turn.

Repeat rows 2 and 3, respectively.

Written Instructions

Child (Adult)

Row 1: Ch 25 (31), sc in 2nd ch from hook and each st across, ch 1, turn. [24 (30) sc]

Row 2: Sk first st, hdc next st, hdc in previously skipped st, *sk next st, hdc, hdc in skipped st, repeat from * across, ch 1, turn. [ 24 (30) hdc]

How is the pattern going?

Join my subscriber list for pattern updates, discounts, and other crafty fun!

Thank you!

You have successfully joined our subscriber list.

.

Row 3: Sc FLO each st across, ch 1, turn. [24 (30) sc FLO]

Row 4- 43(47): Repeat rows 2 and 3 respectively.

Row 44 (48): Repeat row 2. Fasten off, leaving about 12 inches for seaming.

Fold right sides together and seam using the remaining end with a tapestry needle. Use whipstitch to sew together the chain row from the beginning to the the back loop of the last row. Weave in remaining ends.

April 23, 2021 by Priscilla

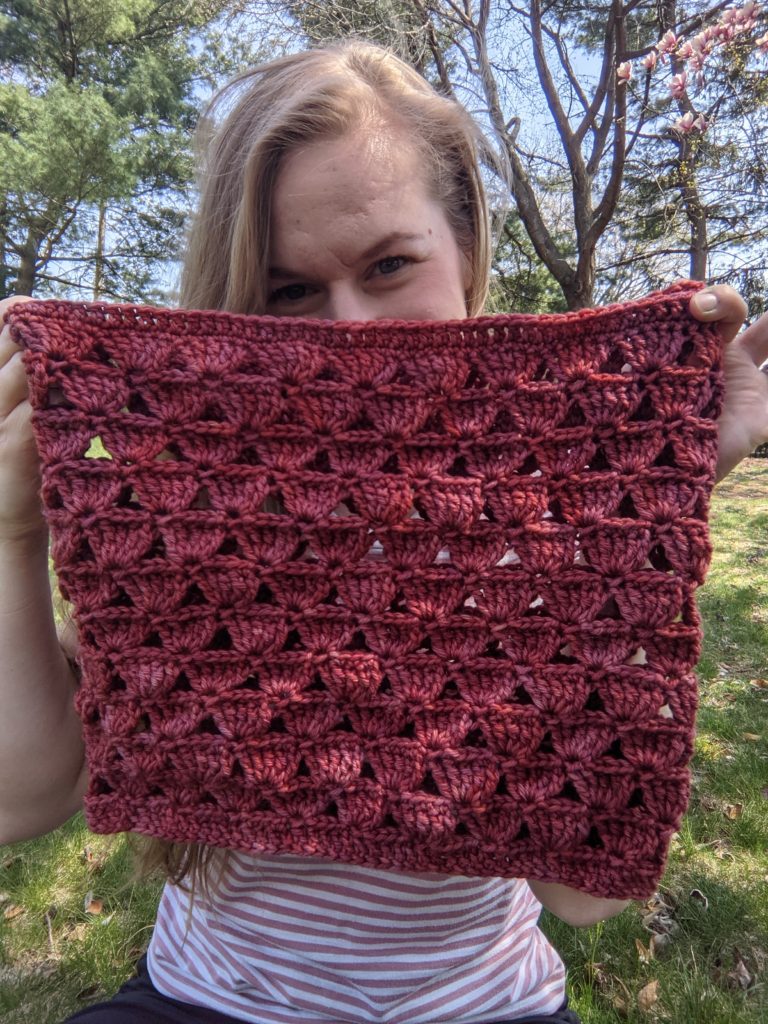
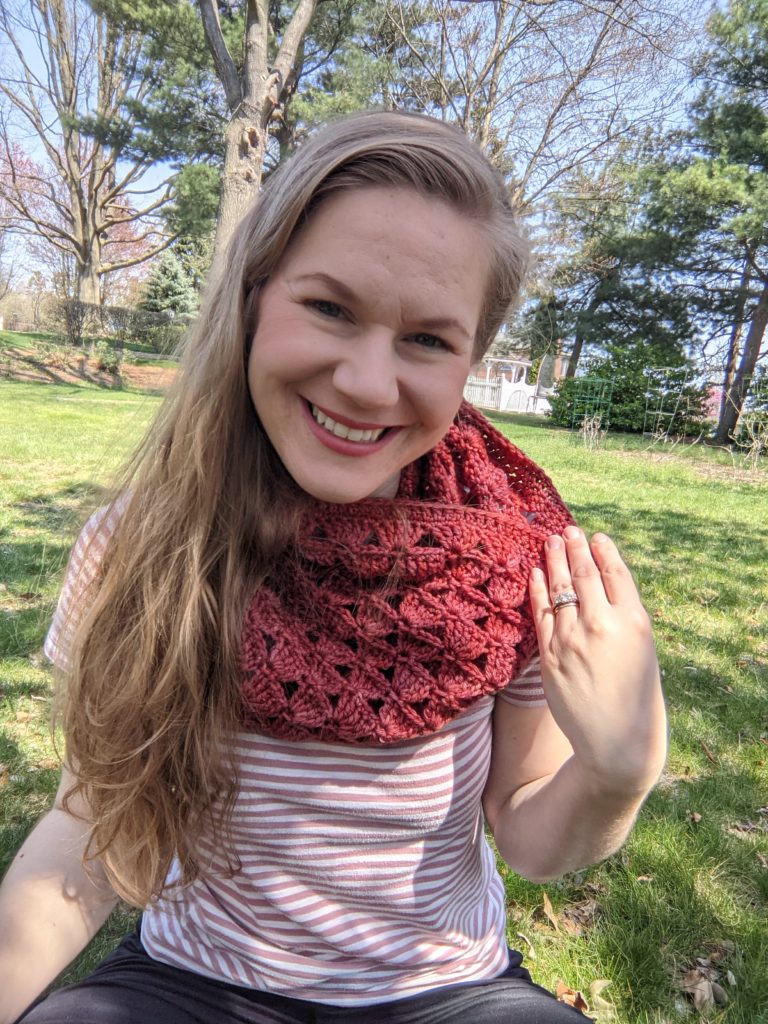
Spring Triangles Cowl

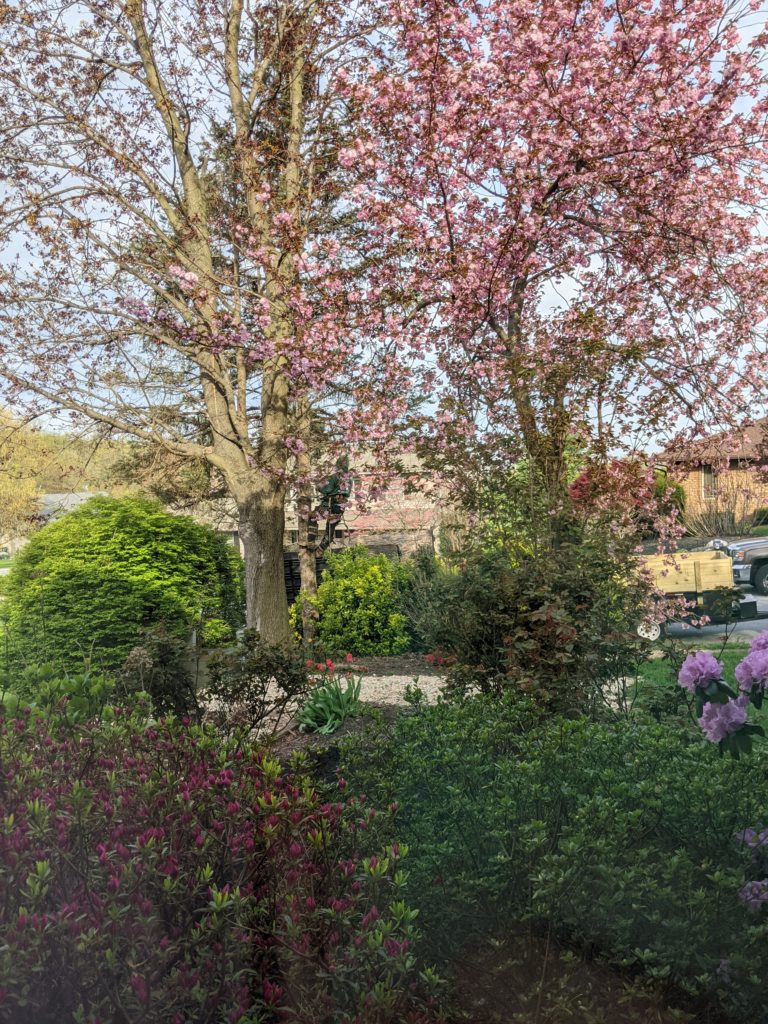
Happy Spring! We’ve started this spring with a giant overhaul of our lawn and garden. We love having a vegetable patch, but the space that was here when we bought our house doesn’t actually get enough sun AND it’s in the middle of the backyard. SO my sweet husband built a little raised garden bed and we are going to put it on the side of our house where the sun shines. Then we decided we needed more rock and mulch. We cut a large flower bed out in the front yard where the grass is spotty because it is so shady. We’ve been wanting to take down some trees (they were unhealthy hemlocks that were crowded together,) and we’re in the middle of that right now! This week they got the trees down, next week they’ll take the stumps out. Fingers crossed in a few weeks I will be planting ALL the flowers and veggies and then crocheting on my back patio while my boys play soccer, climb trees, and dig in the dirt.

Can you spot “the tree guy?” He told us he loves climbing trees!

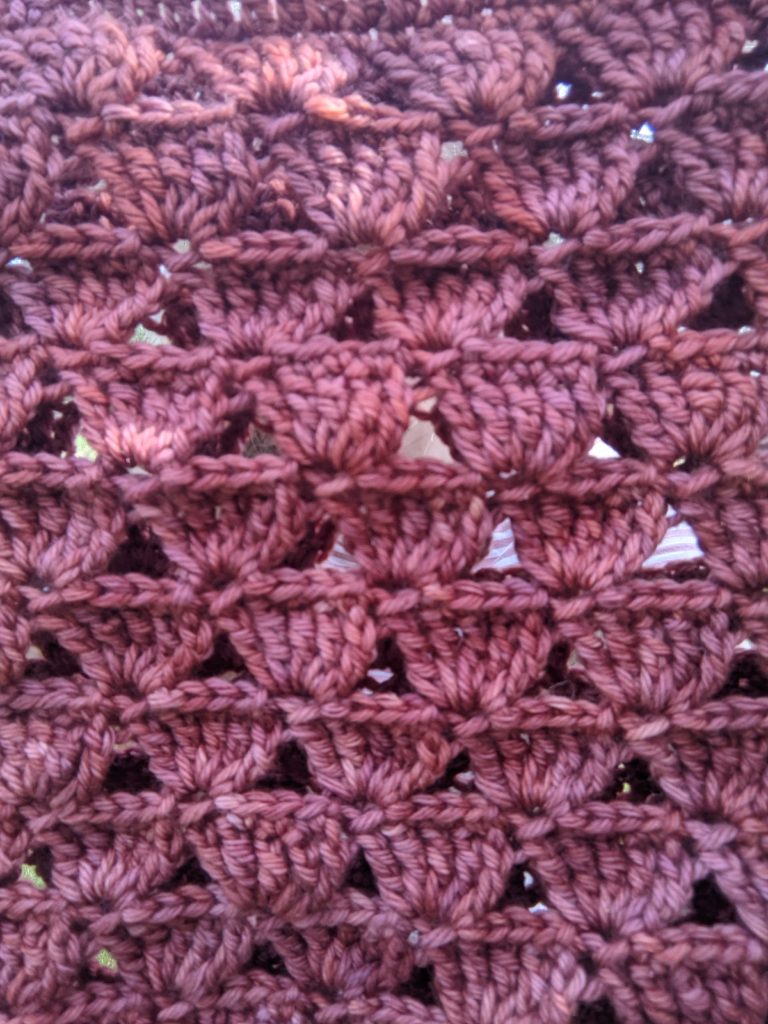
I’m sure we are in for a few more chilly days to wear this cowl! It actually was very wintery here today, we even had snow flurries! You’ll need some worsted weight yarn: about 315 yards (one of my testers used Caron Simply Soft and one skein was the perfect amount!) I used some gorgeous merino worsted yarn from my favorite yarn dyer Rita Mae Yarns. She has such wonderful colors! A size J hook should work for you, but check the gauge below just in case. I hope you love this cowl, I’m really proud of the stitch pattern and I’m working on a shawl with it!

I’ve got the free version of the pattern right here for you, with written instructions and a few photos. A PDF is also available for $3 on Ravelry and Lovecrafts! The PDF includes everything below ready to print as well as photo tutorial pages for the stitches. It’s especially helpful if you need to learn the foundation chain.

Supplies

  • 315 yards worsted weight yarn (CYC 4) samples used Rita Mae
  • Yarns Worsted Merino in colorway Hey Mrs. Robinson OR Caron
  • Simply Soft in colorway Orchid
  • crochet hook US size J (6 mm) or size needed to obtain gauge
  • tapestry sewing needle
  • scissors and measuring tape

Stitches (US terms)

  • ch = chain
  • sl st = slipstitch
  • st/sts = stitch/stitches
  • tr = treble crochet
  • dc = double crochet
  • sc = single crochet
  • fdc = foundation double crochet

Notes

  • Photo tutorial follows the written instructions.
  • Finished Dimensions: 26 in around, 13 in wide, 11 in tall
  • Stitch counts are marked at the end of each round in parentheses.
  • Pattern is worked in the round without turning.
  • In round 1, the ch-3 does not count as a stitch. Join to the 1st fdc st.
  • In round 3, the first ch-3 will end up as the last tr of the round and counts as a stitch.

Gauge

14 sts of dc in 7 rows = 4in x 4in

Written Instructions

Round 1: Fdc 100, sl st to beg fdc to form a circle, being careful not to twist the chain. Ch 1, do not turn. (100 fdc)
Round 2: *Sc next 3 sts, sl st in next st, ch 3, sl st in next st, repeat from * to end of round, with final sl st in the first sc from the round. (60 sc, 40 sl st)
Round 3: Ch 3, sk 5 sts, then 5 trin the first ch-3 space, *sk 5 sts, 5 tr in next ch-3 space, repeat from *, ending with 4 tr in the last ch-3 space of round, join with sl st to the first tr from last round. (99 tr, 1 ch-3 which counts as the last tr of the round)
Rounds 4-23: Repeat rounds 2 and 3, alternating. End with a repeat of round 3 on round 23.
Round 24: Sc in each st around. (100 sc)
Round 25: Ch 1, dc in each st around, sl st to beg dc to join. Fasten off.
(100 dc)

Welcome! My name is Priscilla and I love designing crochet patterns for your family. I live in beautiful Pennsylvania where I enjoy all sorts of crafts, but I’m most passionate about crochet! I’m a Catholic mom of 4 and I sometimes incorporate my faith into my designs. Thank you so much for supporting me by visiting my crochet website and I hope you find something here that you are excited to make.

Recent Posts

  • Soft Crochet Hat Pattern
  • Cozy Men’s Scarf Crochet Pattern
  • Bulky Textured Beanie Crochet Pattern
  • Cozy Fall Baby Beanie Pattern
  • Spider Basket Crochet Pattern

Categories

Follow Me

  • Etsy
  • Facebook
  • Instagram
  • Pinterest
  • YouTube

Pretty Chic Theme By: Pretty Darn Cute Design