The Mother Lode

Crafts and Crochet

  • Home
  • Crochet Pattern Library
  • Faith Based Patterns
  • About Me
  • Privacy Policy

November 20, 2024 by Priscilla

Sassy Snowflake Earrings

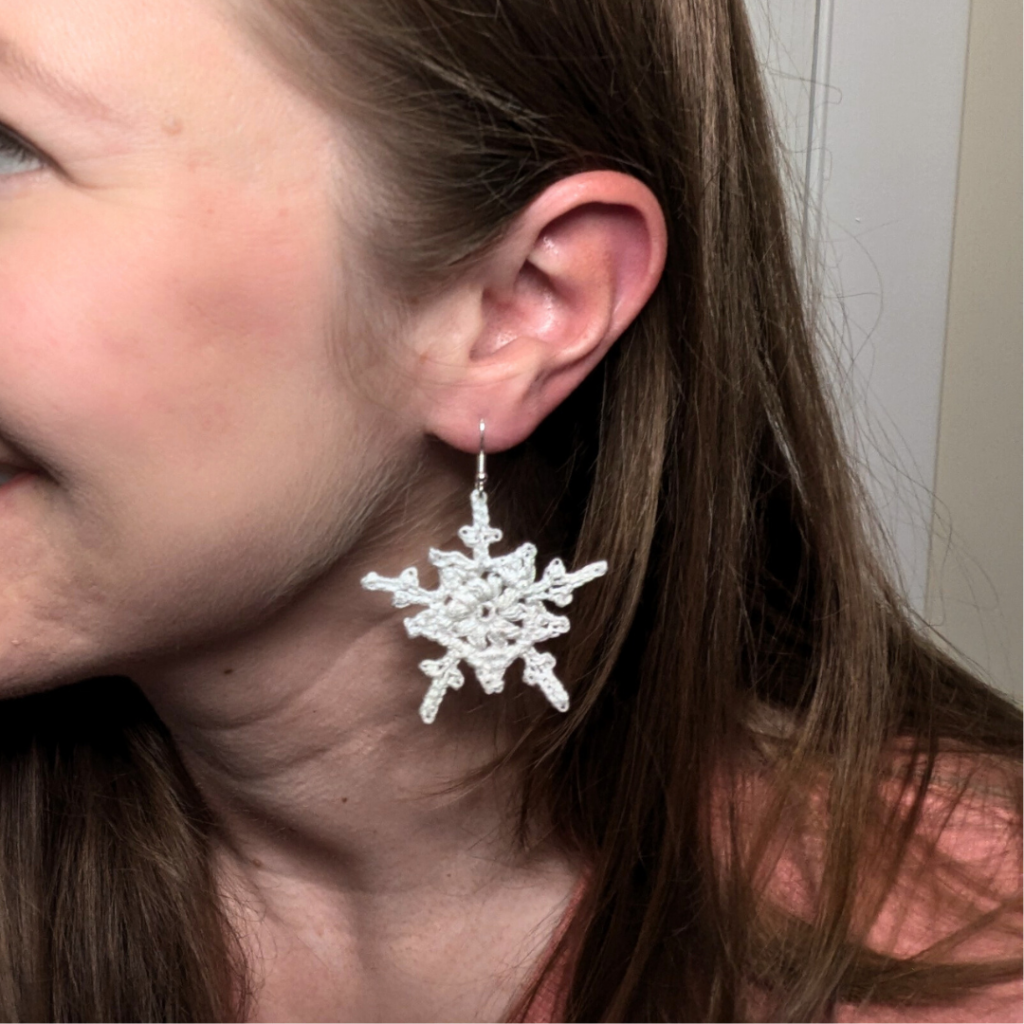
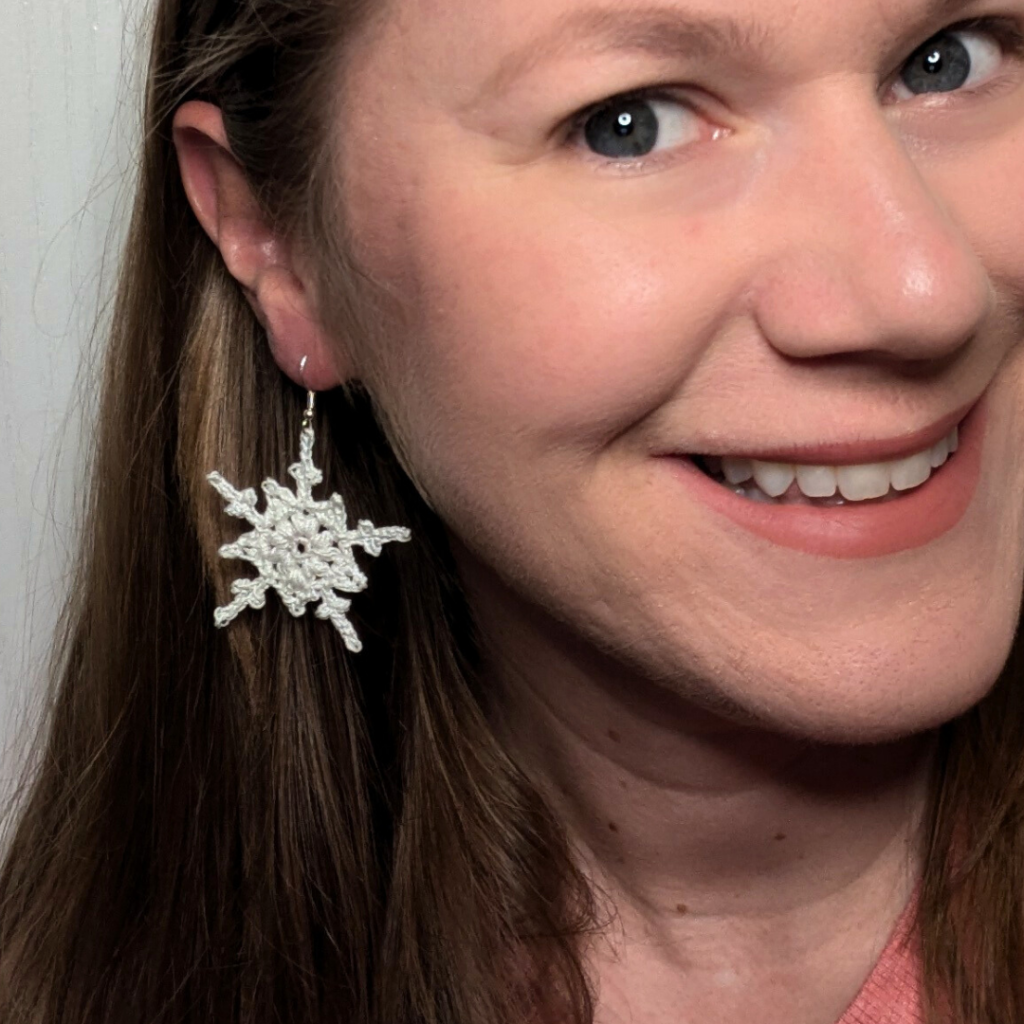
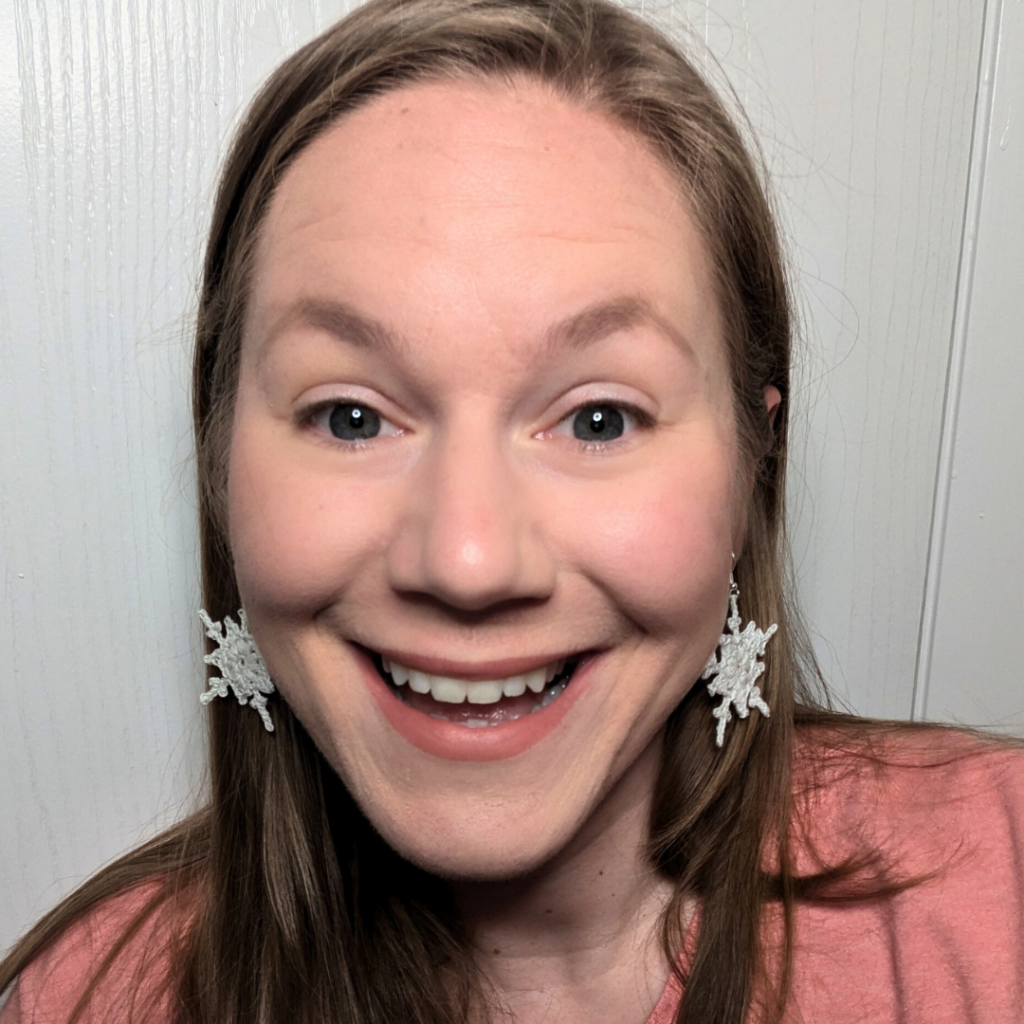
Here we are with the Sassy Snowflake Earrings! I’ve been planning these since the summertime when I designed my summer earring collection! They turned out just as I wanted, delicate little snowflakes to wear all winter long. I hope you enjoy making and wearing them!
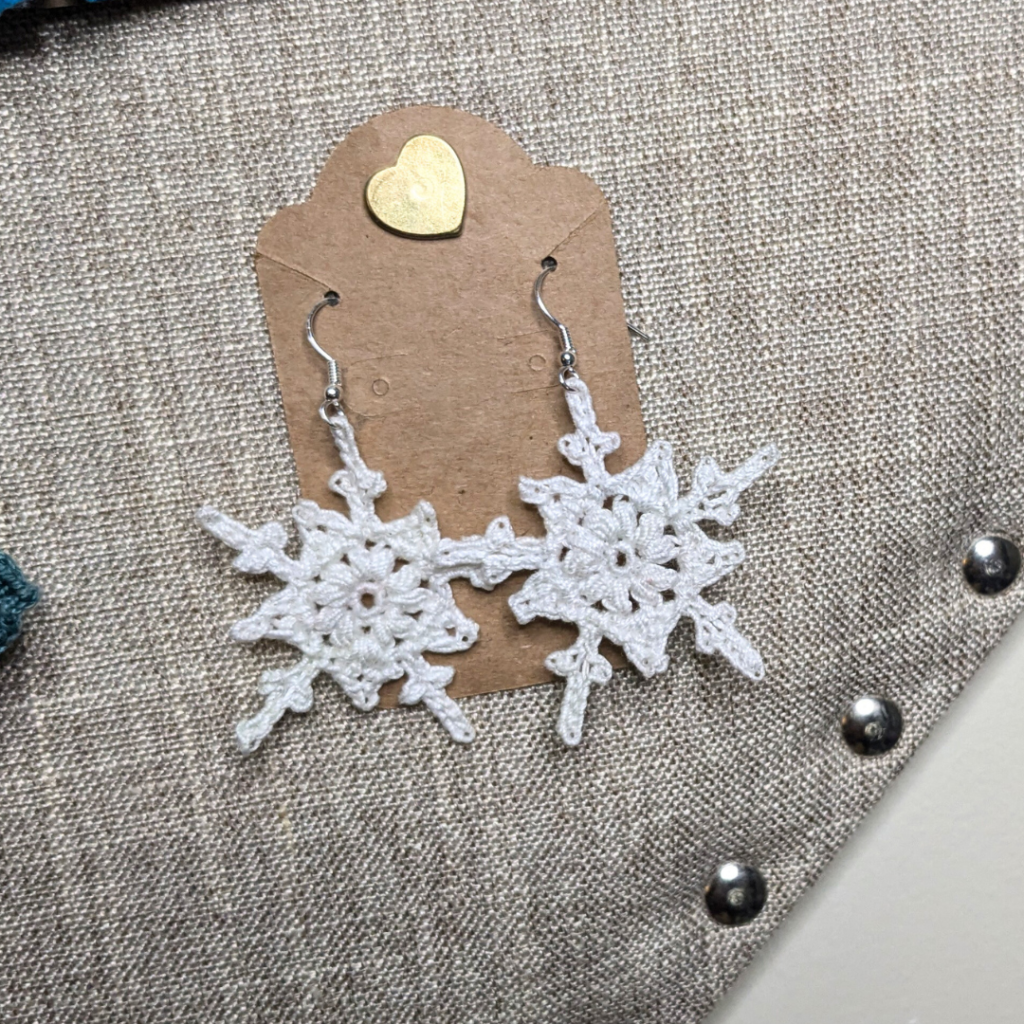
These come together in just three rounds of crochet thread. Yes, the final round is a little tricky with all those picot stitches, but I believe in you! I used two brands of thread when making my samples. These white ones are made with Aunt Lydia’s Crochet Thread size 10. The light blue samples in my pattern photos are WeCrochet Curio size 10 crochet thread in the color Clarity. Several of my testers used metallic thread for theirs and they turned out BEAUTIFUL. I have some of this type of thread but haven’t found time to make them yet!

If you have experience with crochet thread, you can absolutely make these with the written instructions provided for free on the blog. I think a crocheter with experience with larger yarns could also likely handle these with just the written instructions. If you still consider yourself a beginner in any way, you’ll probably need the PDF. It has 2 pages of photo tutorial so you see each step, particularly of that last round. Either way, please contact me if you have any struggles with the pattern! I’d love to help. You can leave a comment or find me on social media!

Get the PDF in ravelry

Additionally, grab some light colored worsted cotton yarn and make an ornament to get a feel for the pattern first! I made two with WeCrochet Dishie yarn and 4.5mm hook and they are quite pretty! These could be a tree ornament, a garland, or a gift decoration. You could even make one and sew it onto a simple beanie pattern.
Supplies

  • Size 10 crochet thread, preferably white or other light colors, approx 20 yards
  • Size 1.65 mm crochet hook
  • Tapestry needle and scissors
  • Earring findings: 2 fishhook style earrings
  • Fabric stiffener, like Aleene’s Fabric Stiffening Spray, t-pins, and a blocking mat
  • Optional: size 6/0 seed beads and beading needle

Stitches (US Terms)

  • ch = chain
  • sc = single crochet
  • sl st = slip stitch
  • st/sts = stitch/stitches
  • dc = double crochet
  • sp = space
  • beg = beginning
  • MR = magic ring
  • picot = ch 3, sl st in 3rd ch from hook
  • puff = (yo, insert hook, pull up a loop) 3 times, yo, pull through all loops on hook

Gauge

Gauge is not really necessary for this pattern. Personally, I find the smallest hook I can handle for the thread size (for earrings) produces the best, tightly stitched look. If you desire to gauge swatch: use double crochet in 5 rows with 11 sts to equal a 1 inch square.

Notes

  • For the best look, stiffen the earrings. I use Aleene’s Fabric Stiffening Spray and t-pins on a blocking mat.
  • May use beading needle and beads to add some sparkle as desired. Do this before blocking.
  • Stitch counts are marked at the end of each round with ( )
  • Finished dimensions: 1.75 in diameter
  • For additional use of pattern, this makes a great ornament! Use some cotton worsted yarn and a 4.5 mm hook. Use starch or fabric stiffener as above.

Written Instructions

Make 2

Round 1: Form a MR, 5 sc into MR, sl st to join. (5 sc)

Round 2: Ch 1, (puff, ch 2, puff, ch 1) each st around, sl st to top of first puff to join. (10 puff)

Round 3: *Sl st into next ch-2 sp, ch 2, picot, ch 2, picot, turn, sl st next 2 sts, picot, sl st next 2 sts, sl st in ch-2 sp, (sc, dc, picot, dc, sc) in next ch-1 sp, repeat from * around. (20 picot, 30 sl st, 10 sc, 10 dc) Fasten off and weave in ends.

Blocking and Assembly

Pin to the blocking mat to desired shape. Spray from about 6-10 inches away with fabric stiffening spray, or pour some of the spray liquid into a small cup and paint the liquid on. Once dry, attach fish hook style earring to top of snowflake.
December 14, 2023 by Priscilla

Christmas Wreath Earrings

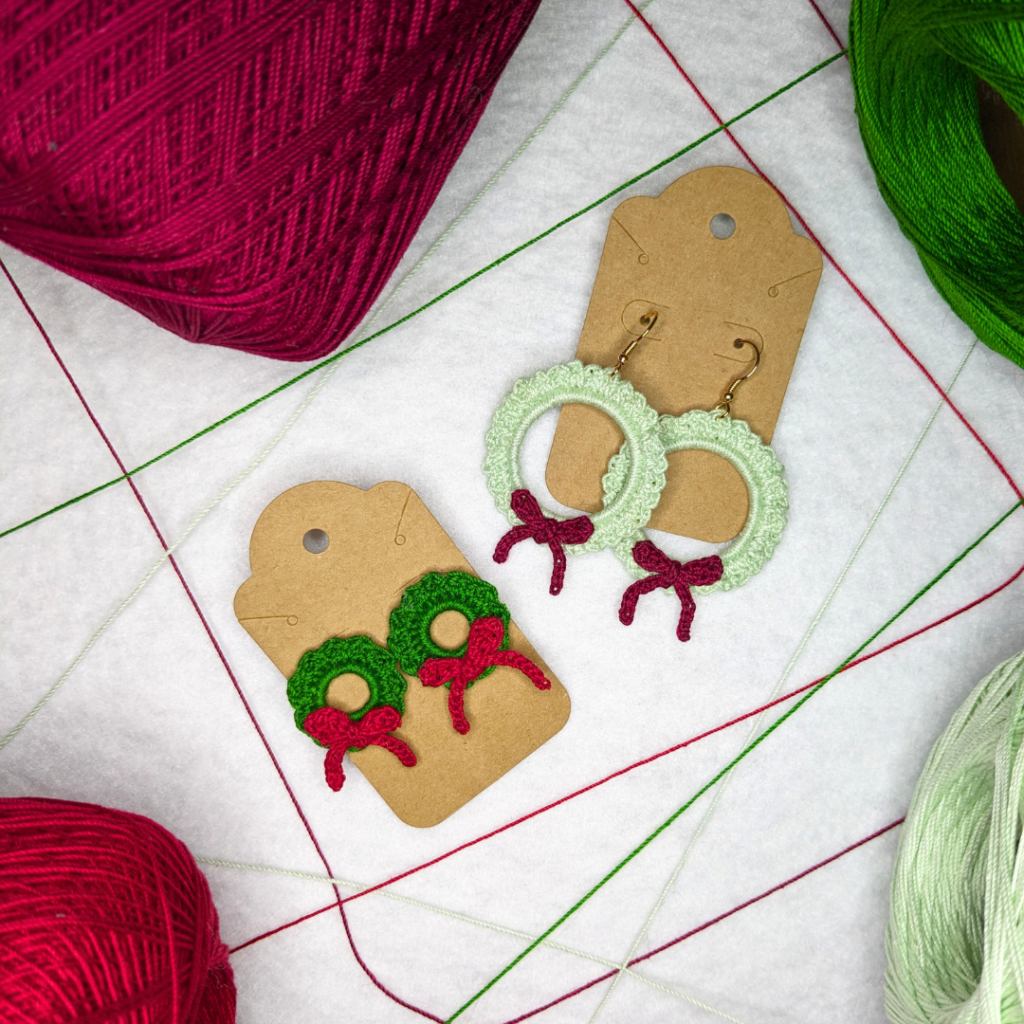
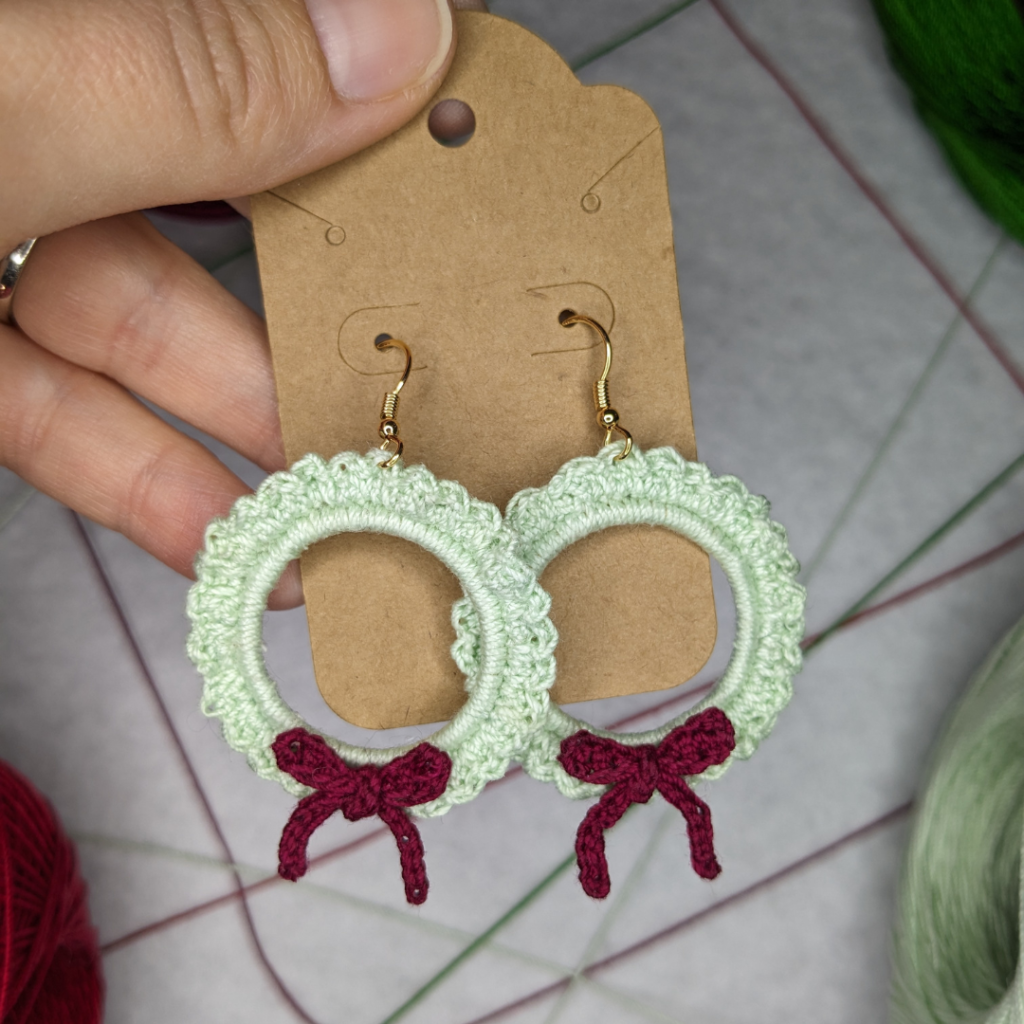
The most wonderful time of the year is here and you need some festive earrings! These Christmas Wreath Earrings are simple and versatile. Make them in your preferred traditions Christmas colors, or go wild with some lime green and hot pink. They could be great gifts or even market items! Use your favorite 1.5 mm hook, size 10 thread, earring findings, glue, and stiffening spray to make these earrings.

I love to offer free versions of my patterns here on the blog. I think it’s an awesome way to spread crochet knowledge. If you want to use the free version, great! Enjoy! The PDF does include photo tutorials that aren’t here on the blog and of course being printable makes it easier. I often use a free pattern from a blog and then when I know OOOO I’m making more of these, I go back and buy the PDF.

ravelry
LoveCrafts
Etsy

Supplies

  • Size 10 crochet thread, preferably red and green, approx 10 yards each, samples are Aunt Lydia’s Crochet Thread size 10 color A: Forest Green, color B: Cardinal Red and color A: Mint Green, color B: Burgundy
  • Size 1.5 mm crochet hook
  • Two 10mm or 25 mm metal jewelry hoops
  • Tapestry needle and scissors
  • Earring findings: 2 fishhook style earrings or 2 flat stud earring
  • Fabric stiffener, like Aleene’s Fabric Stiffening Spray, t-pins, and a blocking mat
  • Optional: Quick bond glue (cyanoacrylate) like Krazy Glue/Super Glue/Gorilla Glue OR E600 jewelry glue

Stitches (US Terms)

  • ch = chain
  • sc = single crochet
  • sl st = slip stitch
  • st/sts = stitch/stitches
  • dc = double crochet
  • hdc = half double crochet
  • beg = beginning

Gauge

Gauge is not really necessary for this pattern. Personally, I find the smallest hook I can handle for the thread size (for earrings) produces the best, tightly stitched look. If you desire to gauge swatch: use double crochet in 5 rows with 11 sts to equal a 1 inch square.

Notes

  • Pattern is worked in several pieces and glued or sewn together.
  • For the best look, stiffen the earrings. I use Aleene’s Fabric Stiffening Spray and t-pins on a blocking mat.
  • Two hoop sizes are given and are noted in the pattern as 10mm (25mm) however, use any hoop size for this pattern: Sc an even number around the hoop.
  • If you are going to sew the bow to the wreath instead of using glue, do not cut the remaining end off the bow and use it to sew onto the wreath before blocking.
  • Stitch counts are marked in { } at the end of each row/round with ( ) noting the sizes.
  • Finished dimensions: 10 mm: 1 inch diameter, 25 mm: 2 inch diameter

Written Instructions

Wreaths with color A: (make 2)

Round 1: Sc 24 (58) around 10 (25) mm hoop, sl st to join. {24 (58) sc}

Round 2: Ch 1, sc , *2 dc, sc , repeat from * around, 2 dc last st, sl st to beg sc, fasten off, weave in ends. {12 (29) sc, 24 (58) dc}

Bows with color B (make 2)

Row 1: Ch 10, dc 3rd ch from hook, dc, hdc, sl st next 2 sts, hdc, dc, dc, ch 2, sl st to beg-ch. Fasten off, weave in ends. {4 dc, 2 hdc, 2 sl st}

Ribbons with color B (make 2)

Row 1: Ch 23, sl st 2nd ch from hook and each remaining ch across, fasten off. Weave in ends. {22 sl st}

Blocking and Assembly

Tie Ribbon tightly around middle of Bow. Pin assembled Bow to the blocking mat to desired shape. Pin Wreath to blocking mat. Spray from about 6-10 inches away with fabric stiffening spray, or pour some of the spray liquid into a small cup and paint the liquid on. Once dry, glue the Bow onto the Wreath and glue to the stud earring, or attach fish hook style earring to top of Wreath.

Christmas Wreath Earrings

December 10, 2021 by Priscilla

Wineglass Earrings

Do you set projects aside for the future? I think there are times to power through the struggle, and other times to set it aside and come back with a clear mind later. I want to create a whole library of libations themed crochet earring patterns. I have a daquiri glass written, but I had lost the crojo for it back in the summer, so it’s on hold until next summer. I’m not sure what cocktail will be coming next, but for now, enjoy these beautiful wineglass earrings!

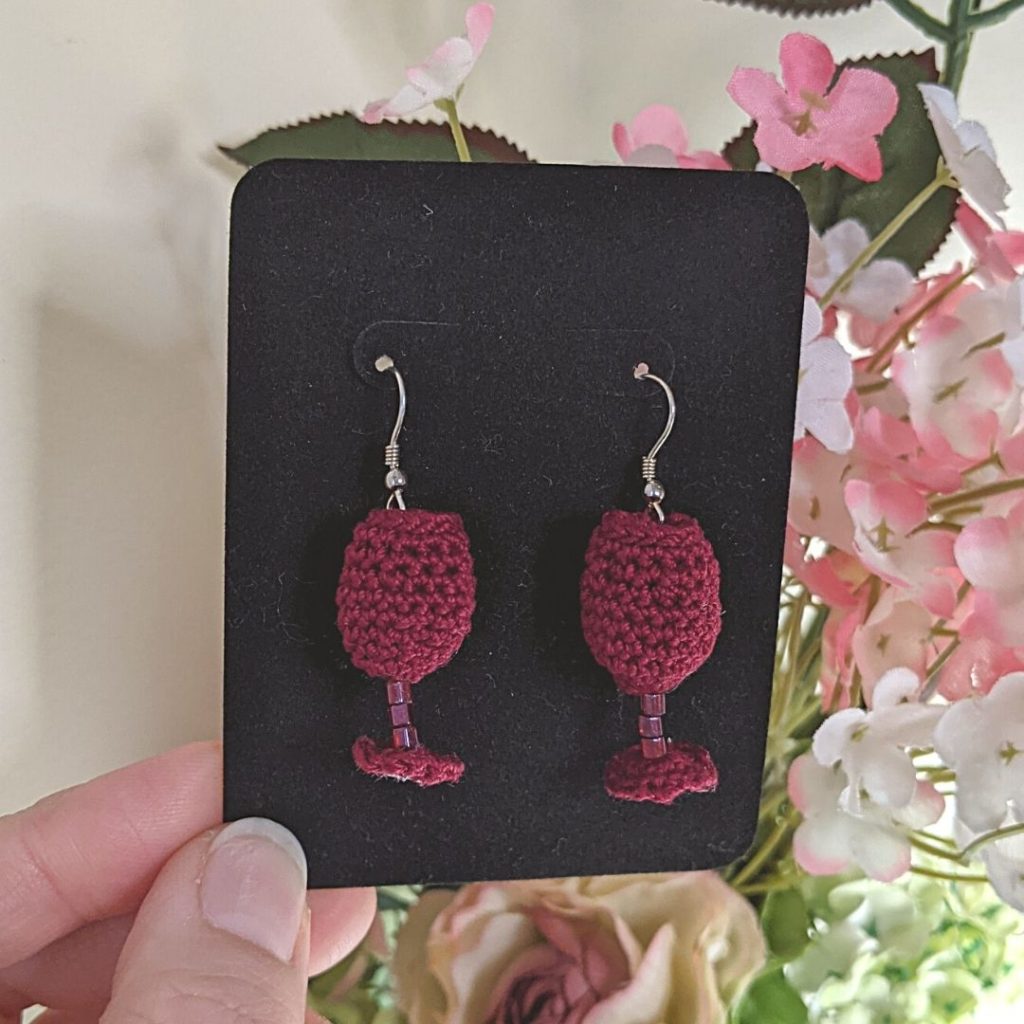
You know I love a fun crochet earring! They come together quickly for gifts, the styles you could make are endless, so you get to be creative, and they are just so darn cute. I ended up buying a bunch more colors of Aunt Lydia’s Crochet Thread this year. They have such a beautiful wine color, I just HAD to create these wineglass crochet earrings! I love how the beads give it some good sparkle. You’ll need a 1.5 mm hook, 25 yards of size 10 thread, earring findings, beads, and stiffening spray to make these earrings.

I think if you are a beginner crocheter, these might be pretty tricky. It is a fairly easy pattern if you have even stitch tension that comes with crochet practice and muscle memory. The premium version of the pattern is available here on ravelry and Etsy. It has two full pages of photo tutorial to walk you through all the steps. Below you’ll find the free version that has all the information and written instructions. I’m the most active on Instagram, so if you run into any issues, feel free to message me there @motherlodecrafts I’d love to help you make these.

Supplies

  • Aunt Lydia’s Crochet Thread, size 10 in color Burgundy, approx 25 yds
  • Size 1.50 mm crochet hook
  • Tapestry needle and scissors
  • Earring findings: 2 fishhook style earrings
  • 6 size 6/0 beads, preferably wine colored to match your glass
  • Fabric stiffener, like Aleene’s Fabric Stiffening Spray, t-pins, and a blocking mat
  • optional: more jump rings and beads to add extra sparkle, glue for added stability

Stitches (US terms)

ch = chain

sc = single crochet

sl st = slip stitch

st/sts = stitch/stitches

MC = magic circle

sc2tog = single crochet two together

( ) = work instructions within parentheses as many times as directed

Notes

  • Photo tutorial follows the written instructions.
  • Pattern is worked in two pieces and sewn together.
  • Pattern is worked in joined rounds.
  • Top of glass is formed with wrong side facing out.
  • For the best look, stiffen these once they’ve been assembled. I use Aleene’s Fabric Stiffening Spray and t-pins on a blocking mat.

Gauge

Gauge is not really necessary for this pattern. Personally, I find the smallest hook I can handle for the thread size (for earrings) produces the best, tightly stitched look. If you desire to gauge swatch: use double crochet in 5 rows with 11 sts to equal a 1 inch square.

Written Instructions

Make two

To make the bottom of the glass:

Round 1: MC, sc 4 in MC and sl st to join. (4 sc)

Round 2: Ch 1, 2 sc in each st around, sl st to join. (8 sc)

Round 3: Ch 1, (sc in first st, 2 sc in next st,) repeat ( ) 3 more times, sl st to join, fasten off. (12 sc)

Weave in remaining ends.

How is the pattern going?

Join my subscriber list for pattern updates, discounts, and other crafty fun!

Thank you!

You have successfully joined our subscriber list.

.

To make the top of the glass:

Round 1: Leave an 8 inch tail, then MC, sc 4 in MC and sl st to join. (4 sc)

Round 2: Ch 1, 2 sc in each st around, sl st to join. (8 sc)

Round 3: Ch 1, (sc, 2 sc) repeat ( ) 3 more times, sl st to join. (12 sc)

Round 4: Ch 1, (sc, 2 sc) repeat ( ) 5 more times, sl st to join. (18 sc)

Round 5: Ch 1, sc in each st around, sl st to join. (18 sc)

Rounds 6-7: Repeat round 5.

Round 8: Ch 1, sc2tog, (sc next 2, sc2tog) repeat ( ) 4 more times, sl st to join. (13 sc)

Round 9: Ch 1, sc in each st around, sl st to join. (13 sc)

Rounds 10-11: Repeat round 9.

Round 12: Ch 1, sl st in each st around, do not join, fasten off. (13 sl st)

If you feel stuck, think about purchasing the premium version. The photos can really help you as they go step by step through the rounds and show how to put the pieces together. It is available on ravelry and Etsy.

Weave in end at top of glass. Use end from bottom of cup part for the stem. Thread 3 beads onto the stem, then sew tightly through the bottom of the glass. (You can also choose to put a bit of glue on the thread, then add your beads for added stability.) Pin the bottom to blocking mat in a circle shape. Then use pins to prop up the top of the glass. Finally, spray from about 6-10 inches away with fabric stiffening spray. Let dry. Finish by attaching the fish hook style earring finding at the top edge of the glass. You can add additional beads and jump rings if you like for extra swing and sparkle!

Don’t forget to subscribe to my newsletter! I send out an email every Friday with new pattern releases and other yarnie info! I sometimes put coupon codes in there for pattern discounts, as well as where you can get free patterns during blog hops!

July 2, 2021 by Priscilla

Margarita Earrings

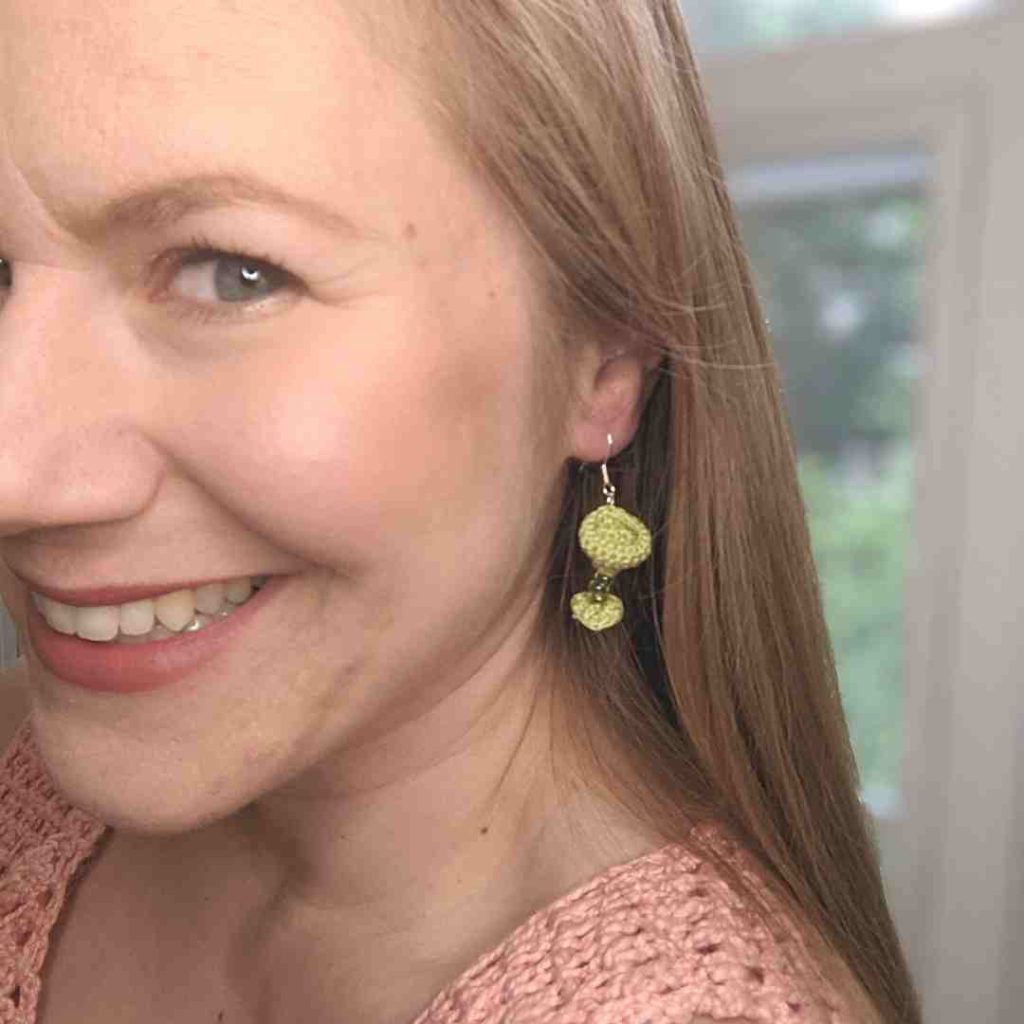
I think I learned to like margaritas at El Rodeo in Blacksburg, VA. My husband was in graduate school at Virginia Tech and El Rod’s had delicious food and frosty margaritas! I’m not a huge drinker: beer is gross, wine gives me a headache, and hard seltzer is just seltzer that is even worse than regular seltzer. BUT I can down a margarita like a college kid on spring break! A few months ago, my forever friends group text was giggling over one of those funny memes that said “What actually runs in the veins of the 16 personality types” and mine was margarita mix.

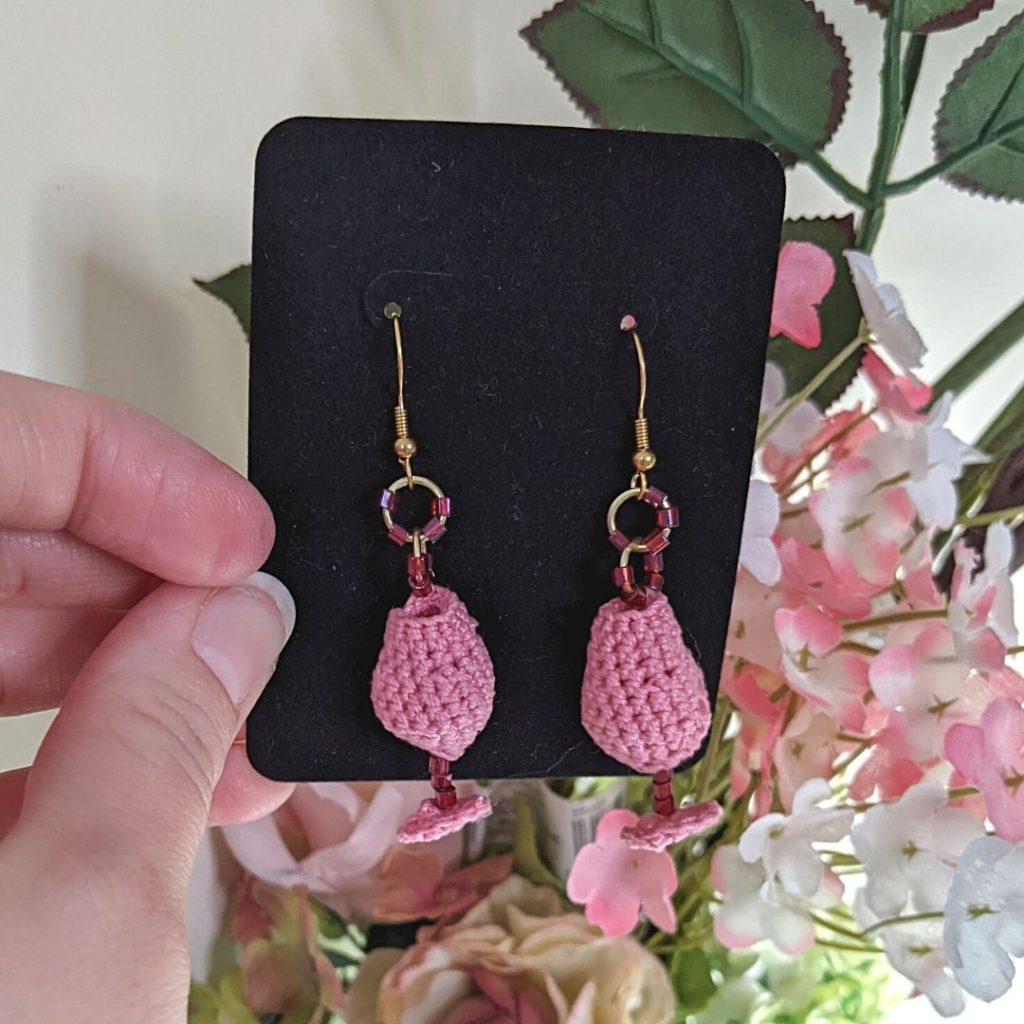
Anyway, I had the idea that some margarita earrings would be fun! I had to search FAR and WIDE for the color I wanted of crochet thread, though. My husband found it on Etsy. So if you are looking for that Wasabi color in Aunt Lydia’s Crochet thread and can’t find it in store, check there! I also think the WeCrochet’s Curio thread in color Jalapeño would work. You could also opt for a strawberry marg! Some of my testers made those and they were cute!

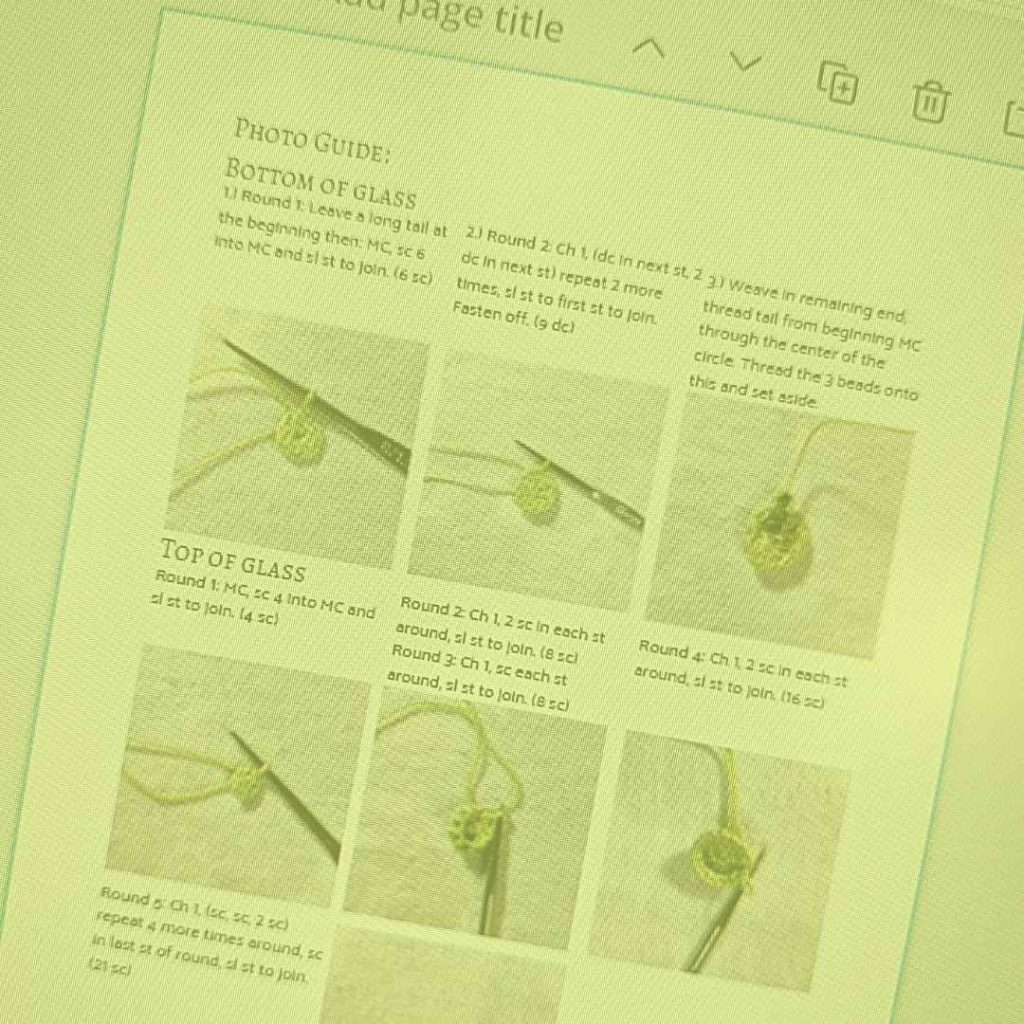
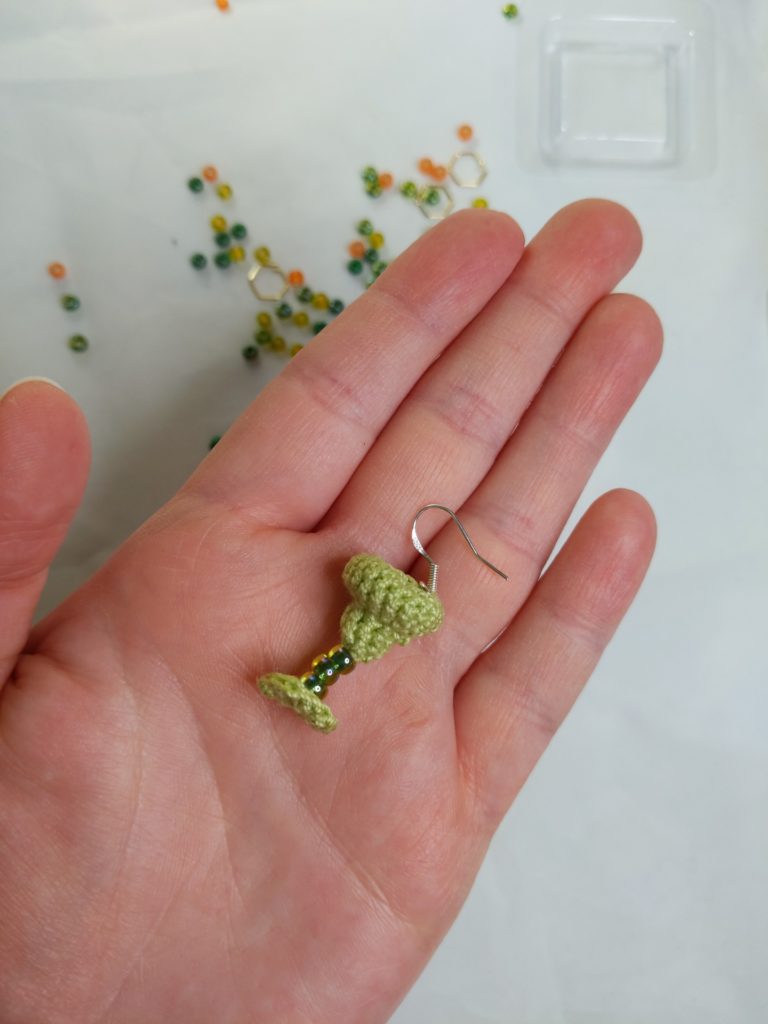
I would call this pattern intermediate since crochet thread takes some experience, but it is actually pretty simple if you are familiar with crocheting in the round. You will basically be crocheting a tiny circle for the bottom of the glass and then a small cup shape for the top, then attaching the beads and sewing the parts together. I put 2 full pages of photos in the premium version of the pattern, which you can snag for a low cost on Ravelry or LoveCrafts!

Okay, let’s get to it!

Supplies

  • Aunt Lydia’s Crochet Thread, size 10 in color Wasabi, approx 20 yds
  • Size 1.50 mm crochet hook
  • Tapestry needle and scissors
  • Earring findings: 2 fishhook style earrings
  • 6 size 6/0 beads, preferably green to match your glass
  • Fabric stiffener, like Aleene’s Fabric Stiffening Spray

Stitches (US Terms)

  • ch = chain
  • sc = single crochet
  • sl st = slip stitch
  • st/sts = stitch/stitches
  • MC = magic circle
  • dc = double crochet

Notes

  • Photo tutorial available in low cost PDF: Ravelry or LoveCrafts
  • You should block these in order to make the stems of the “glass” straight. I use Aleene’s Fabric Stiffening Spray and t-pins on a blocking mat.
  • Pattern is worked in two pieces and sewn together.
  • Pattern is worked in joined rounds.

Gauge

Gauge is not really necessary for this pattern. Personally, I find the smallest hook I can handle for the thread size (for earrings) produces the best, tightly stitched look. If you desire to gauge swatch: use double crochet in 5 rows with 11 sts to equal a 1 inch square.

Instructions

To make the bottom of the glass:

Round 1: Leave a long tail at the beginning then: MC, sc 6 into MC and sl st to join. (6 sc)

Round 2: Ch 1, (dc in next st, 2 dc in next st) repeat 2 more times, sl st to first st to join. Fasten off. (9 dc)

Weave in remaining end, thread tail from beginning MC through the center of the circle. Thread the 3 beads onto this and set aside.

To make the top of the glass:

Round 1: MC, sc 4 into MC and sl st to join. (4 sc)

Round 2: Ch 1, 2 sc in each st around, sl st to join. (8 sc)

Round 3: Ch 1, sc each st around, sl st to join. (8 sc)

Round 4: Ch 1, 2 sc in each st around, sl st to join. (16 sc)

Round 5: Ch 1, (sc, sc, 2 sc) repeat 4 more times around, sc in last st of round, sl st to join. (21 sc)

Round 6-7: Ch 1, sc in each st around. (21 sc) Fasten off after round 7. Weave in end.

If they aren’t turning out as you like, remember that the premium version on Ravelry and LoveCrafts has photos with step by step instructions! Or feel free to send me an email [email protected] and I’ll try my best to help you out!

Use tail with beads on it to sew to the bottom of the upper glass part. Pull firmly to set it in place as straight as possible. Pin to blocking mat, and spray generously with fabric stiffening spray to stiffen your earring.

When the earrings are dry, finish by attaching first a jump ring, then a fish hook style earring finding.

I would love to see your hard work!!!! Share with me on Instagram! You can use the hashtags #margaritaearrings or #motherlodecrafts

Here are some of my other crochet patterns:

  • Soft Crochet Hat Pattern
  • Cozy Men’s Scarf Crochet Pattern
  • Bulky Textured Beanie Crochet Pattern
  • Cozy Fall Baby Beanie Pattern
  • Spider Basket Crochet Pattern

Welcome! My name is Priscilla and I love designing crochet patterns for your family. I live in beautiful Pennsylvania where I enjoy all sorts of crafts, but I’m most passionate about crochet! I’m a Catholic mom of 4 and I sometimes incorporate my faith into my designs. Thank you so much for supporting me by visiting my crochet website and I hope you find something here that you are excited to make.

Recent Posts

  • Soft Crochet Hat Pattern
  • Cozy Men’s Scarf Crochet Pattern
  • Bulky Textured Beanie Crochet Pattern
  • Cozy Fall Baby Beanie Pattern
  • Spider Basket Crochet Pattern

Categories

Follow Me

  • Etsy
  • Facebook
  • Instagram
  • Pinterest
  • YouTube

Pretty Chic Theme By: Pretty Darn Cute Design