The Mother Lode

Crafts and Crochet

  • Home
  • Crochet Pattern Library
  • Faith Based Patterns
  • About Me
  • Privacy Policy

February 19, 2026 by Priscilla

Sedge Stitch Crochet Headband Pattern

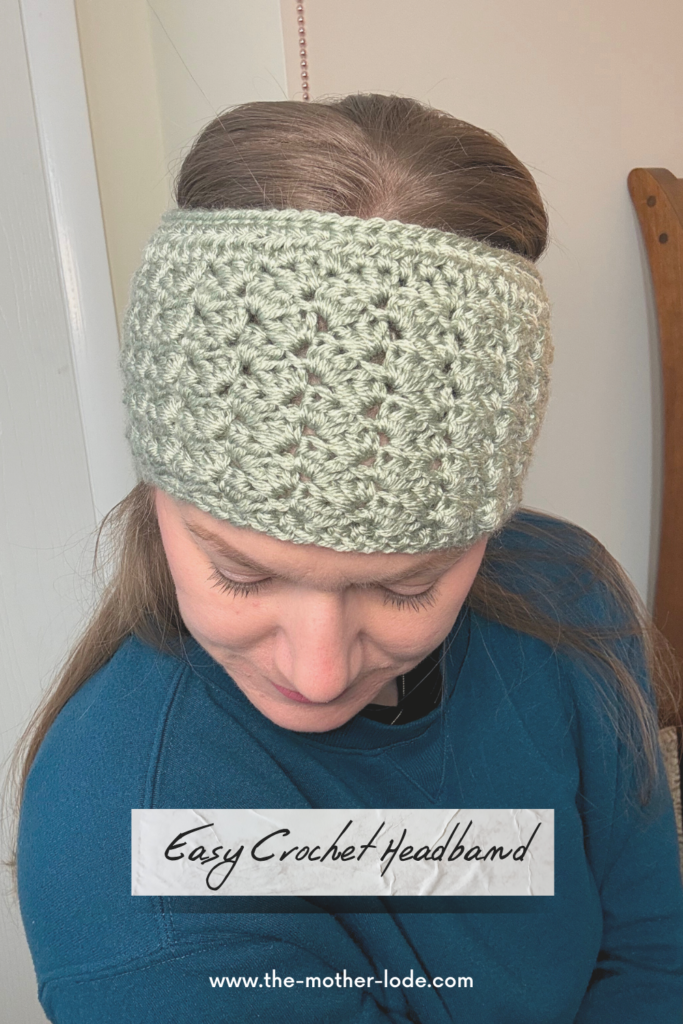
Let’s make a beautifully textured crochet headband today! If you love texture that comes together simply, this pattern is for you! I love a good pattern that you can veg out in front of a good show with at the end of a long day. The sedge stitch crochet headband pattern is easy to make and comes in several sizes. I love making designs that can be matching sets among family members. This headband called the Fields Headband has a matching bonnet pattern that is super sweet. You can read all about that pattern here!
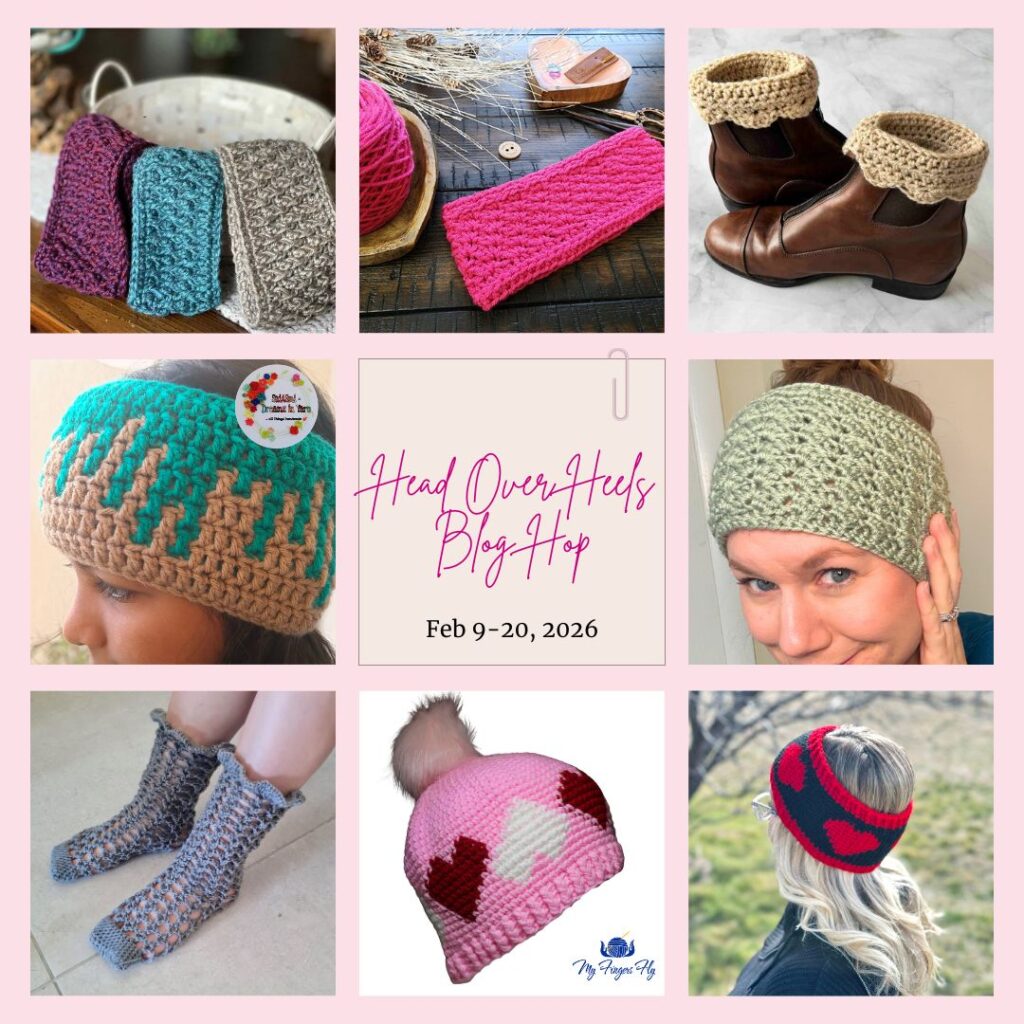
This pattern was featured in the Head over Heels Blog Hop from Madame Stitch in February 2026. This is such a neat hop with patterns for heads and feet! The event has now ended, but you can still look through the patterns, many of which are free on the designer’s blogs like mine!
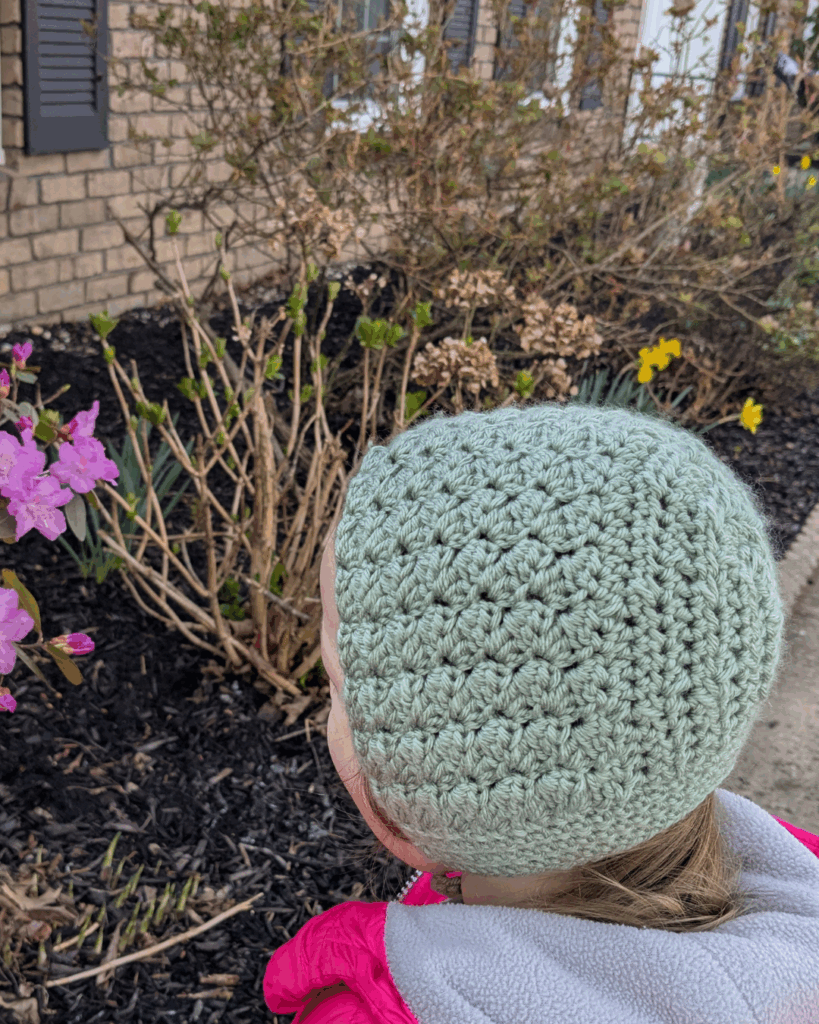
I used a basic acrylic yarn for this pattern for ease. I love the Lion Brand Basic Stitch for this, I think it’s a great acrylic yarn that is soft and wears well. Here, you can see the matching Fields Bonnet Pattern on my daughter when I designed it last year! Don’t you love making things for your family to wear? Want a little chuckle? Probably about 8 years ago I made a Hokie Bird hat for my then 4 year old son. I just free-handed it and it has little ear flaps that come down and a Hokie Bird on the forehead. He loved it and wore it often until it didn’t fit anymore. My super girly daughter, now 3, LOVES it and has been wearing it everywhere for the last several weeks. You never know what they’ll love, so just make a bunch of things and then they’ll pick the most worn-out hat to wear! (P.S. A Hokie Bird is the Virginia Tech mascot, my husband went to graduate school there.)
Now, let’s make this sedge stitch crochet headband pattern!

Supplies

  • CYC 4 worsted yarn: 100-150 yards (sample is Lion Brand Yarn Basic Stitch in color Sage)
  • crochet hook US size J (6 mm) or size needed to obtain gauge
  • tapestry sewing needle
  • scissors and measuring tape/gauge ruler

Stitches and Abbreviations (US Terms)

ch = chain

st/sts = stitch/stitches

sc = single crochet

sl st = slip stitch

hdc = half double crochet

fhdc = foundation half double crochet

sedge stitch = *single crochet, half double crochet, double crochet in the same stitch, sk 2 sts, repeat from *

noted as {sc, hdc, dc} within pattern

The sedge stitch is so easy to learn and I love the texture in this stitch. It isn’t bobbly or anything, just enough to be interesting and it works up quickly. I especially love it for baby blankets and I have made several baby blankets for friends with this stitch.

Notes

  • Stitch counts are marked in [ ] at the end of each row.
  • Sizing in pattern is denoted as follows: Child, (Teen/Adult Small, Adult Medium, Adult Large)
  • Please note that the headband will stretch about 1.5 inches to fit snugly on the head. If desired, you can do the beginning row of Fhdc to desired length made to measure as long as you use a stitch count with multiples of 3.
SIZEChildteen/adult smalladult mediumadult large
circumference18 in19 in21 in22 in
width4 in4.5 in5 in5.5 in

This headband will have a slight curve. It is meant for the top to be slightly tighter to help the headband stay on. The final sl st row is what causes this. If you find that it makes the headband too tight and you prefer to wear it under your hair instead, you may want to leave that row out to loosen it.

I chose to use mattress stitch to seam. This is so seamless looking, and looks like it was crocheted in the round so much that, when I went to make my 2nd sample, I thought that’s what I had done in the first draft!
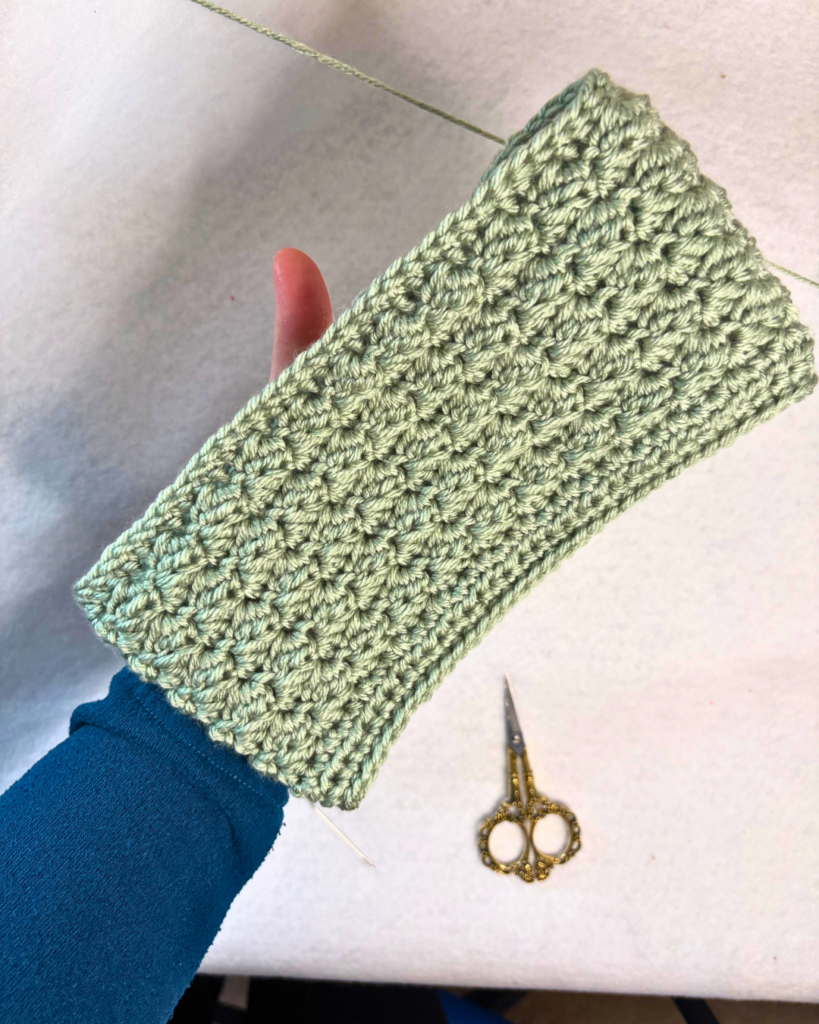
sedge stitch crochet headband pattern photo

Written Instructions

Size: Child, (Teen/Adult Small, Adult Medium, Adult Large)

Row 1: Fhdc 63 (69, 75, 81) ch 1, turn. [63 (69, 75, 81) fhdc]

Row 2: {Sc, hdc, dc} first st, sk next 2 sts, *{sc, hdc, dc} next st, sk next 2 sts, repeat from* until last st, sc last st. [21 ( 23, 25, 27) sedge sts, 1 sc]

Row 2: Ch 1, turn, *{sc, hdc, dc} first st, sk next 2 sts, repeat from* until last st, sc last st. [12 (14, 16, 18) sedge sts, 1 sc]

Rows 3-9 (11, 12, 13): Repeat Row 2.

Row 10 (12, 13, 14): Hdc each st across, turn.[63 (69, 75, 81) hdc]

Row 11 (13, 14, 15): Sc each st across, turn.[63 (69, 75, 81) sc]

Row 12 (14, 15, 16): Sl st each st across. [63 (69, 75, 81) sl st]

Fasten off, leave long tail for sewing headband together. Use a mattress stitch to sew the ends together for the most seamless look.

More free headband patterns!
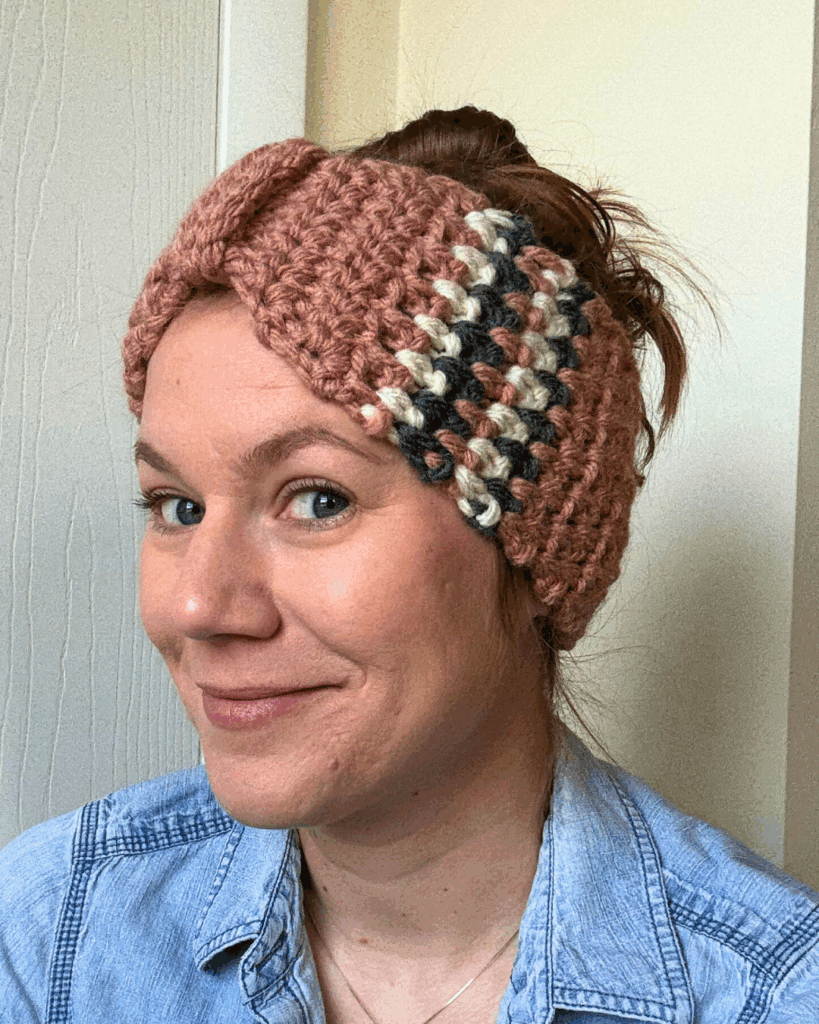
The Linen Stripe Headband is stretchy and cozy! Use up a few scraps for those stripes!

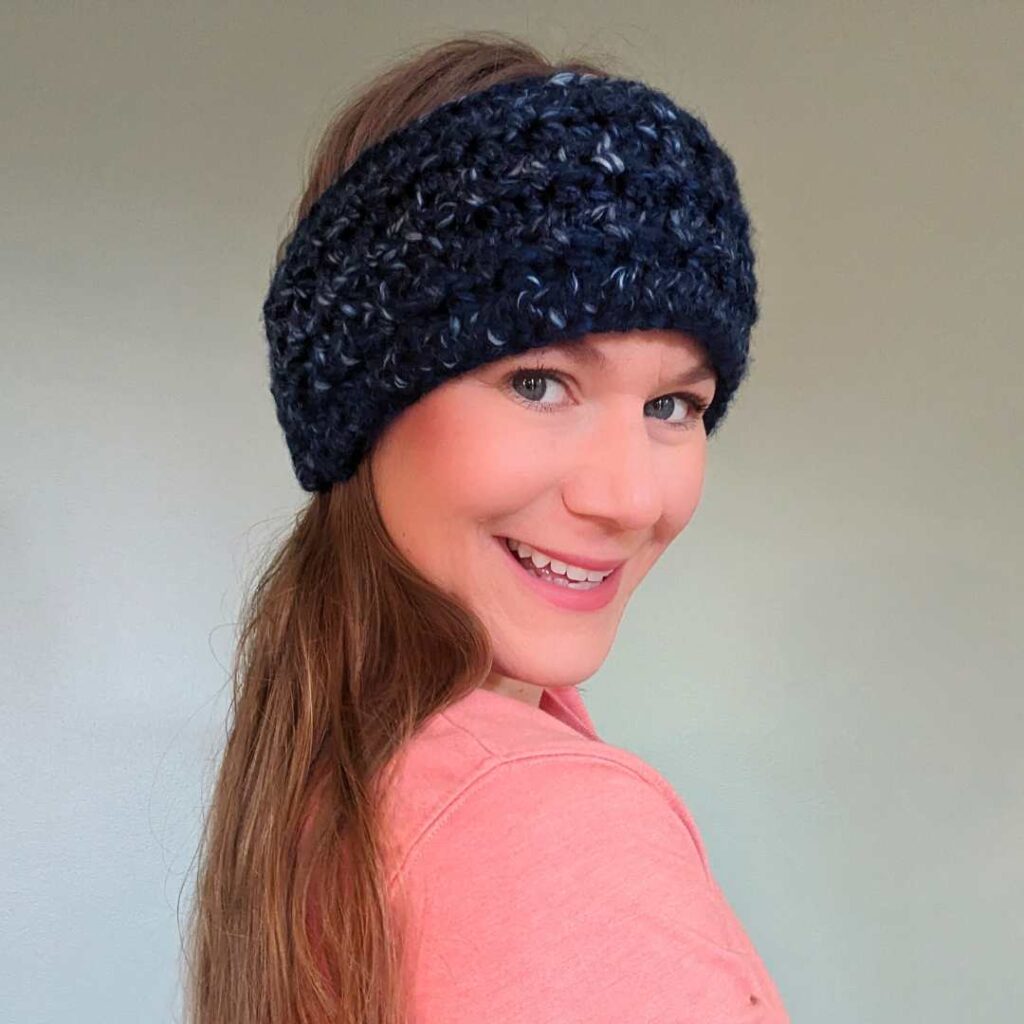
The Minimalist Headband has a cozy waffle stitch that works up fast in super bulky weight yarn.
November 26, 2021 by Priscilla

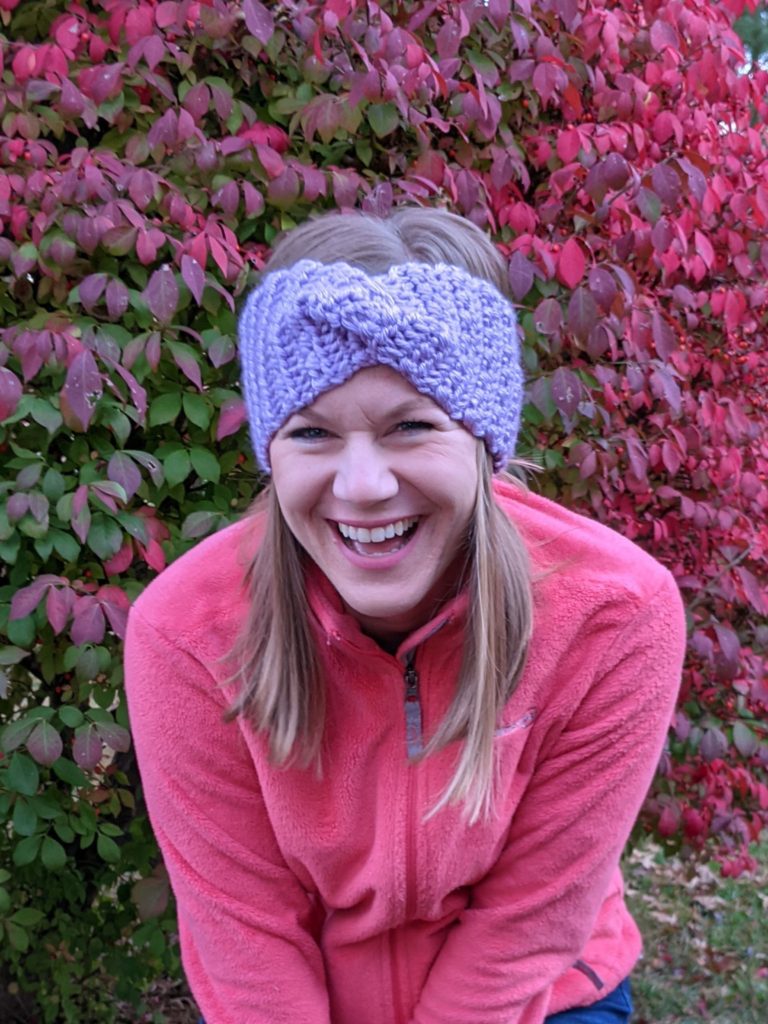
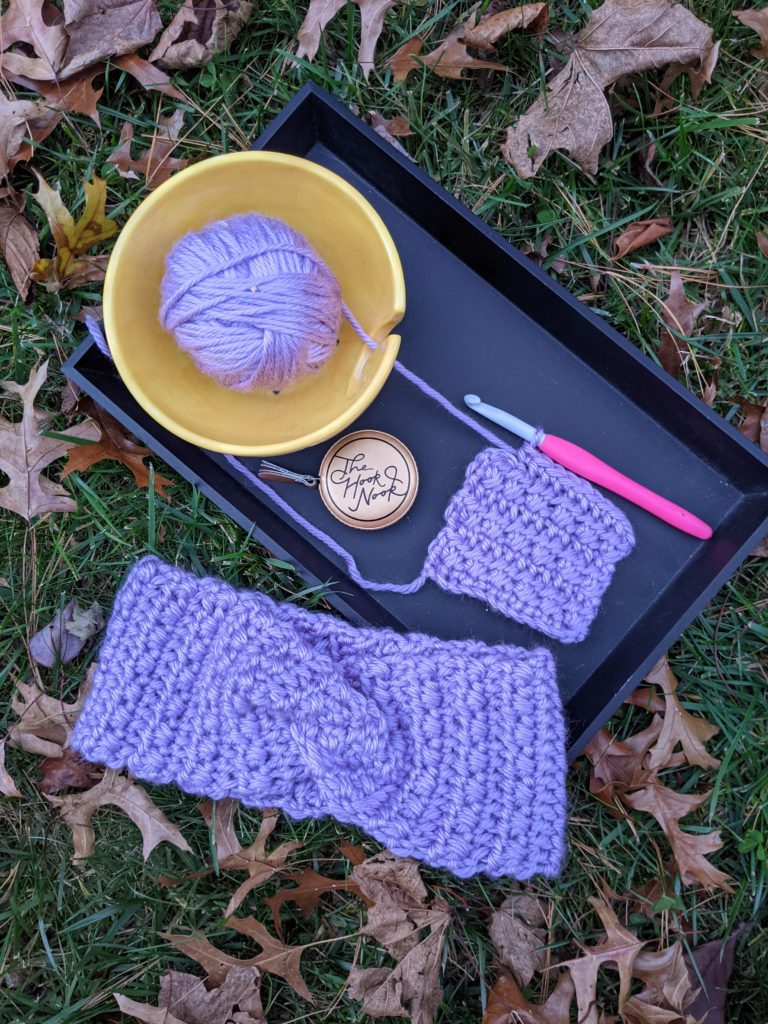
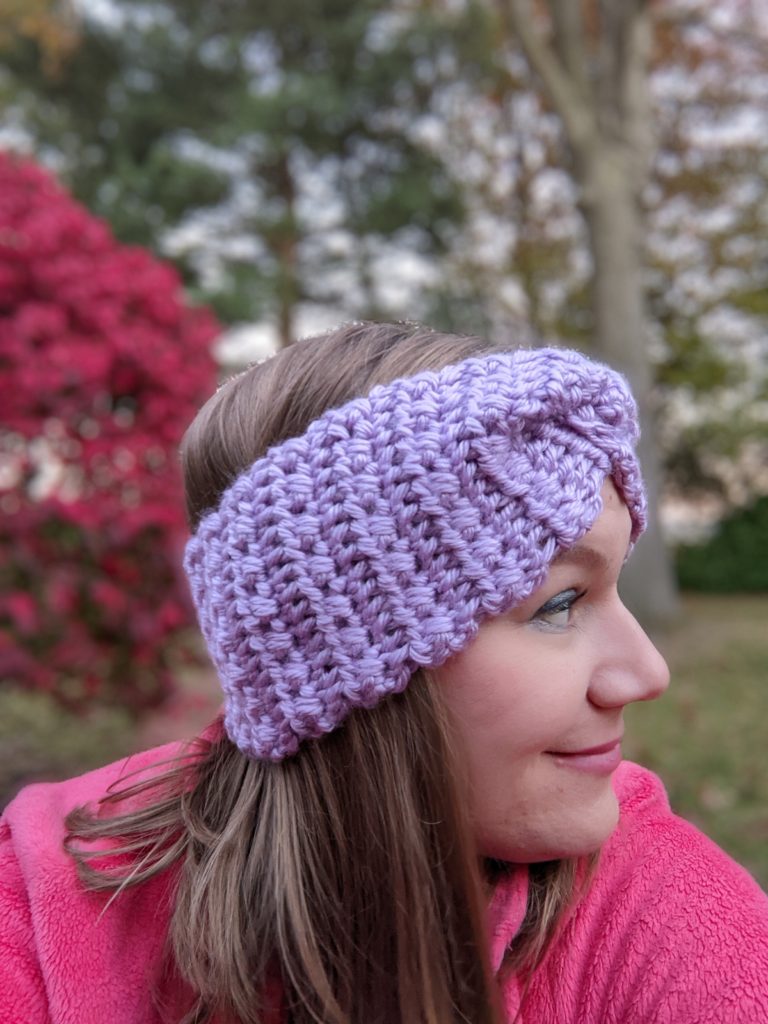
Chill Stopper Headband

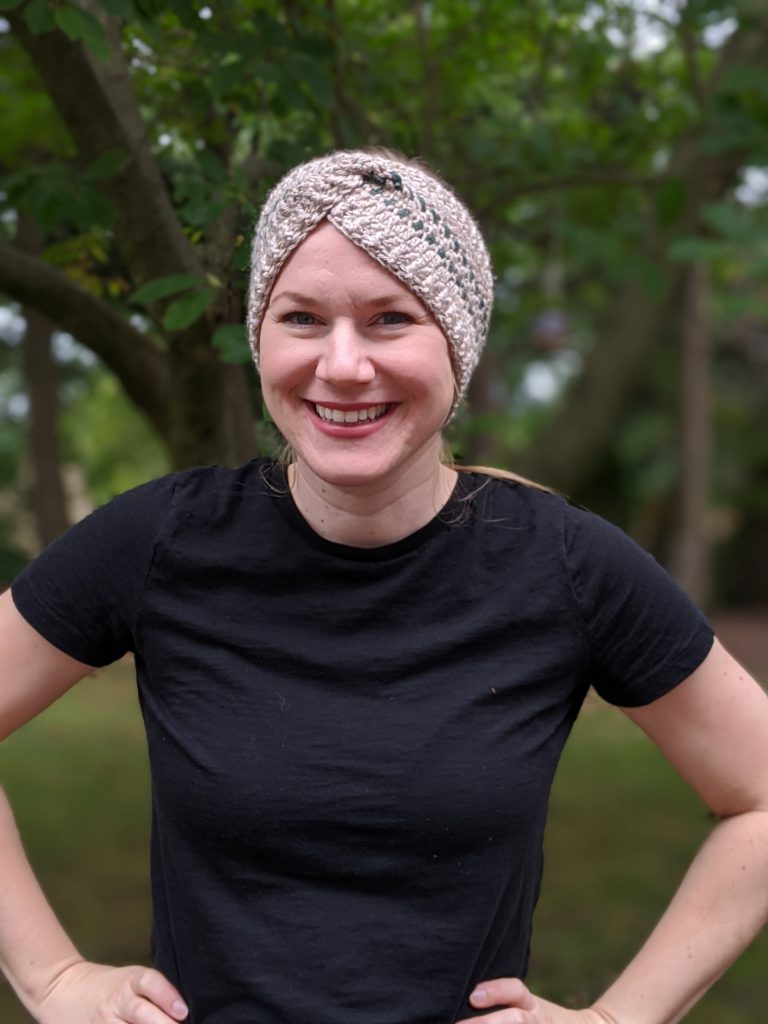
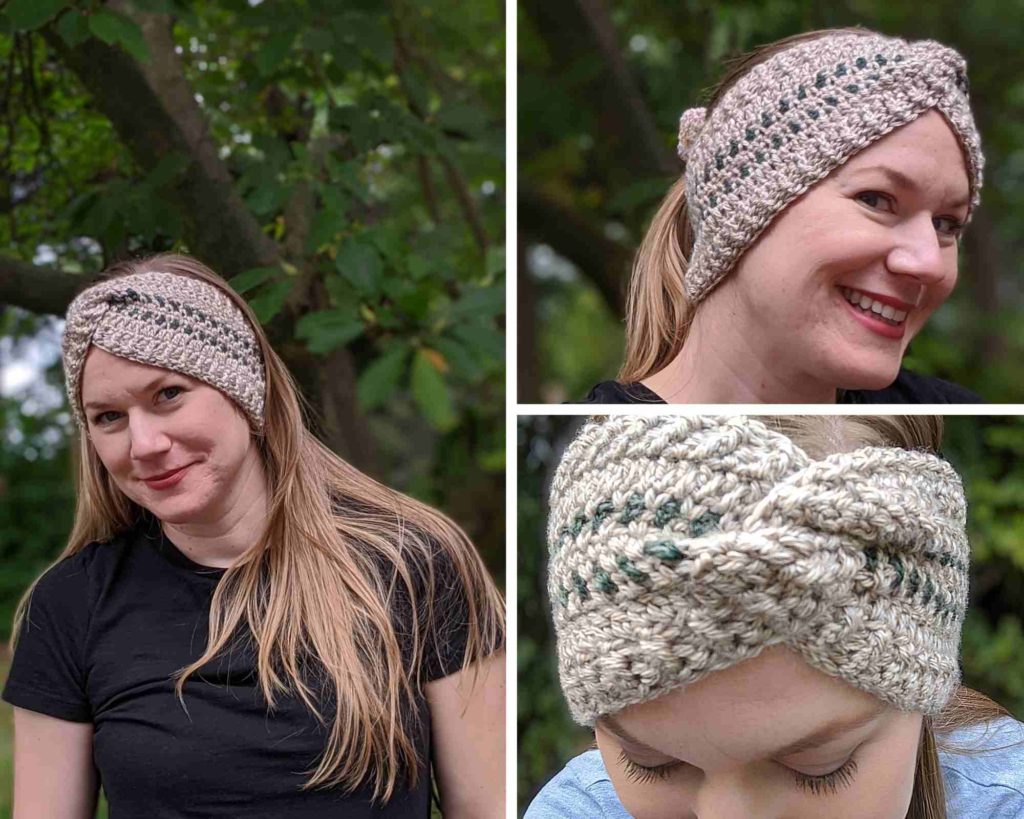
I’m delighted with the turnout of this headband pattern! It’s cozy without being too thick, just right for keeping the chill off your ears in cold weather. I had 14 testers for this pattern, and a few of them made more than one. That’s when you know it’s a good pattern! I think you’ll love having this crochet pattern in your library as a staple for markets and gifting. There are six sizes, so you can make one for anyone! I like the way the crossed hdc stitches worked up in this headband, so I’m in the middle of designing a coordinating hat and cowl. Subscribe to my email list so you can get notified when the coordinating patterns come out in December.

Okay, I’m keeping this one short, because frankly, it’s late at night and I’m out of words! Let’s get to the pattern!

You can use the free version of the pattern below! It’s an easy, beginner pattern. If you need extra help with the stitches or forming the twist, you can get the low cost PDF on ravelry, Lovecrafts, or Etsy. It has photo tutorials to help with the tricky bits.

Supplies

  • 100 yards bulky (CYC 5) yarn, sample is Red Heart Yarns Soft Essentials in color Sugar Plum (Michael’s Loops and Threads Charisma or Hobbii Amigo Chunky would be good substitutes. The Amigo Chunky is on sale right now for Black Friday weekend!
  • crochet hook US size L (8 mm) or size needed to obtain gauge
  • tapestry sewing needle
  • scissors and measuring tape

Stitches (US terms)

ch = chain

sc = single crochet

st/sts = stitch/stitches

FLO = front loop only

sk = skip

hdc = half double crochet

Notes

  • Finished dimensions: baby: 14 in, toddler: 16 in, child: 18 in, teen/adult sm: 20 in, adult med: 21 in, adult lg: 22 in around.
  • Stitch counts are marked at the end of each row in parentheses.
  • Pattern is worked flat and seamed at the end.
  • The right side is the side where the hdc stitches puff out more, pictured below.

Gauge

4 in by 4 in swatch

12 sts in 8 rows of the pattern repeat which is:

Row 1: sc FLO

Row 2: (sk st, hdc, hdc in skipped st) repeat

Written Instructions

Baby (Toddler, Child)

Row 1: Ch 13, sc in second st from hook and each st across, ch 1, turn. (12 sc)

Row 2: Sk first st, hdc next st, hdc in previously skipped st, *sk next st, hdc, hdc in skipped st, ch 1, turn. (12 hdc)

Row 3: Sc FLO each st across, ch 1, turn. (12 sc FLO)

Row 4- 27 (31, 35): Repeat rows 2 and 3 respectively.

Row 28 (32, 36): Repeat row 2. Fasten off, leaving about 8 inches for seaming.

Fold headband in half. Put the ends, right side together so that one end is halfway on top of the other end. Wrap the bottom end around the top and and weave the remaining tail through to create the twisted knot look.

How is the pattern going?

Join my subscriber list for pattern updates, discounts, and other crafty fun!

Thank you!

You have successfully joined our subscriber list.

.

Teen/small (medium, large)

Row 1: Ch 15, sc in second st from hook and each st across, ch 1, turn. (14 sc)

Row 2: Sk first st, hdc next st, hdc in previously skipped st, *sk next st, hdc, hdc in skipped st, ch 1, turn. (14 hdc)

Row 3: Sc FLO each st across, ch 1, turn. (14 sc FLO)

Row 4- 39 (41, 43): Repeat rows 2 and 3 respectively.

Row 40 (42, 44): Repeat row 2. Fasten off, leaving about 8 inches for seaming.

Fold headband in half. Put the ends, right side together so that one end is halfway on top of the other end. Wrap the bottom end around the top and and weave the remaining tail through to create the twisted knot look. Don’t forget, if you struggle with this part, the PDF version has tutorial photos to help. It’s available on ravelry, Lovecrafts, and Etsy.

May 28, 2021 by Priscilla

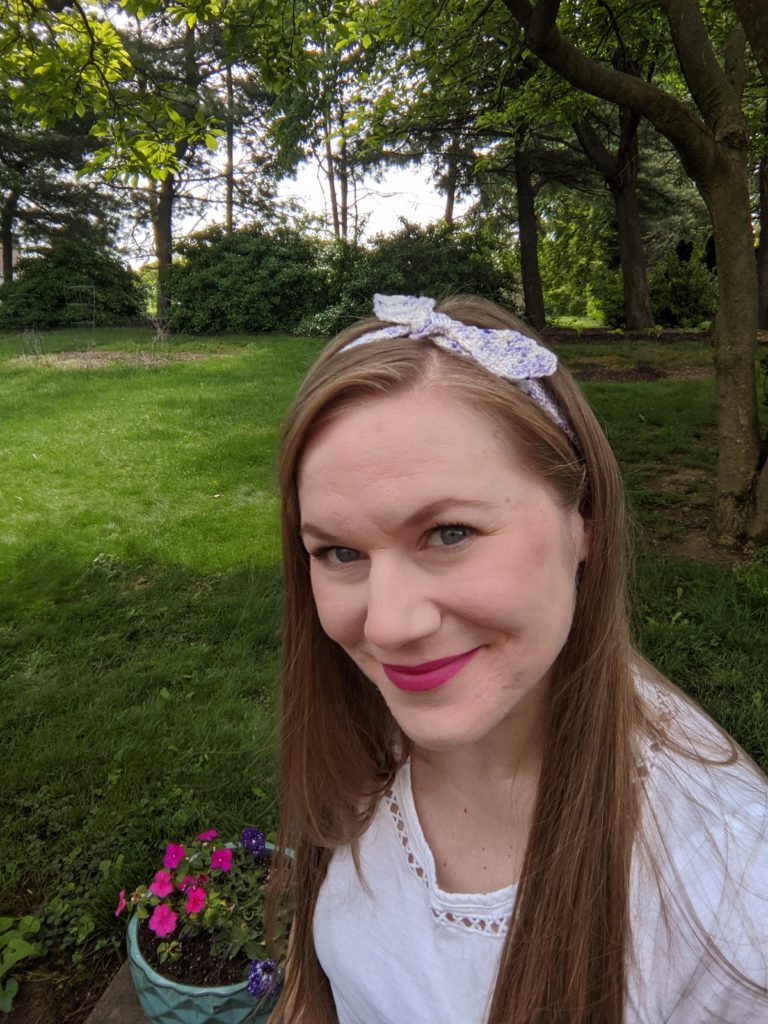
Simple Summer Headband

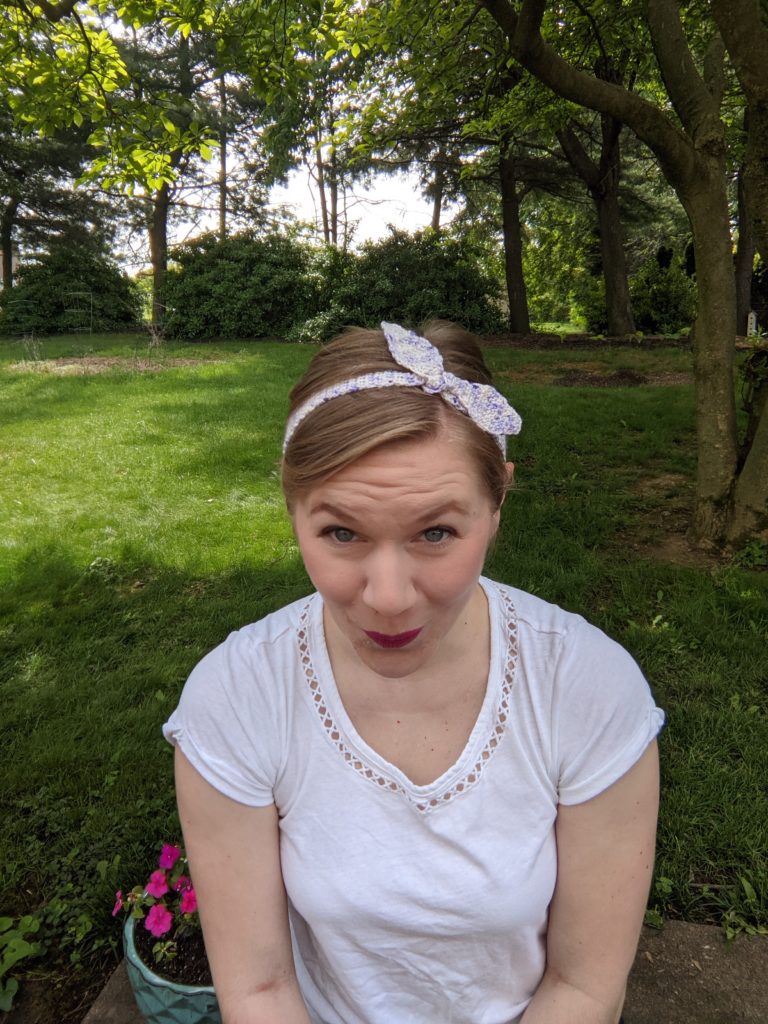
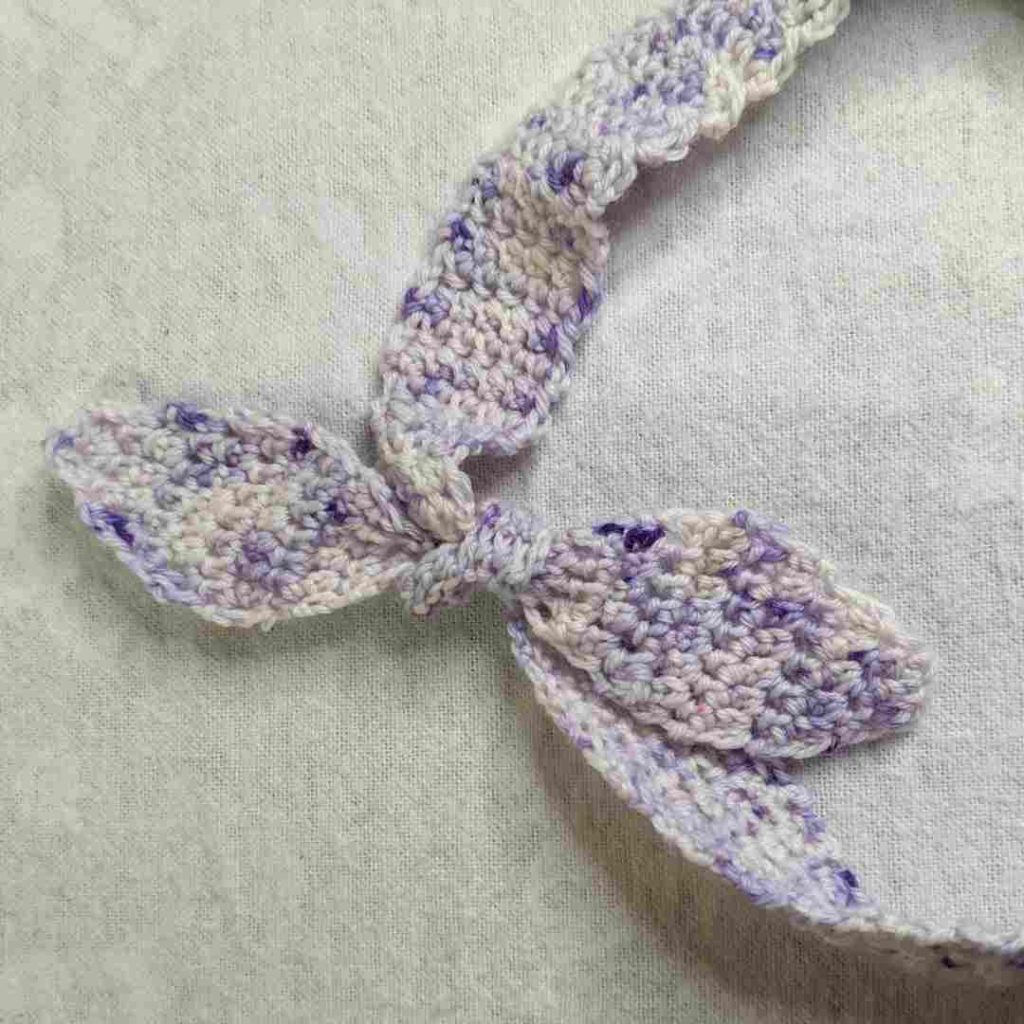
Hi! I have a fun and simple headband pattern for you today! I designed this for two purposes/reasons. First of all, I love hand-dyed yarn because, well, there is no denying its beauty and quality! It is costly because of this though, so I want to use up every scrap. I have some yarn leftover from my advent calendar from the fantastic Rita Mae Yarns and wanted to use it for another hair accessory for summer. Secondly, I have been enjoying making yarn music videos on my Instagram account, and I wanted to do Meghan Trainor’s All About That Bass which I turned into All About Crochet. (I crack myself up, clearly.) Anyway, she wears headbands all throughout that music video so this was born of that!

I can’t say what my next design will be because I’m working on a few things and I’m not sure what will be ready for testers yet, but I have earrings planned and hopefully some kitchen items I’m working on the design for with one of my new favorite yarns: Caron Cotton Ripple Cakes. I just finished a tank top with it and it was really fun to work with. My mom used it for some beautiful trivets for wedding shower gifts a few weeks ago, and I think the texture will be just right for a handy kitchen wipe. If only I could crochet as fast as I think!

Alright enough rambling about crochet and on to the pattern! This pattern is a nice beginner pattern, but you still might want the PDF because there are quite a few rows and it will be easier to check off as you work. It’s only $2, less than a fancy coffee! Available on Ravelry and LoveCrafts.

Summer Vibes Blog Hop!

If you missed snagging the free PDF as part of the Summer Vibes Blog Hop, you can still get it at a HUGE discount by purchasing the Blog Hop Bundle! This Bundle has ALL the patterns from the blog hop: 39 patterns! For less than $13! Here is the link to purchase! Go to the pattern round up below if you want to see all the patterns. Then “hop” back here and use the link above to get it for yourself! Think of the pattern stockpile you’ll have!

You’ll need 100 yards of that fabulous hand-dyed yarn from your stash, or any fingering weight yarn you want to use up! I’m working on my third headband now (I want to film a cool time-lapse video for Instagram.) So don’t get mad if you end up making more than one! You’ll also need a 3.25 mm crochet hook, or whatever helps you meet gauge.

Additional Materials

  • 100 yds/10g Sock/fingering/baby/sport yarn super fine CYC weight 1 OR 2 to meet gauge (Samples are Rita Mae Yarns in Berries N’ Cream and Universal Yarn Finn in Rose Quartz)
  • crochet hook US size D (3.25mm) or size needed to obtain gauge
  • tapestry sewing needle
  • scissors and measuring tape

Stitches (US Terms)

  • ch = chain
  • esc = extended single crochet: insert hook into st, yo, draw through the st, yo and pull through one loop on hook, yo, pull through both loops on hook.
  • sl st = slipstitch
  • BLO = back loop only
  • st/sts = stitch/stitches
  • dec = 1 esc in 2 sts: insert hook into st, yo, draw through the st, yo and pull through one loop, insert hook in next st, yo draw through st, yo and pull through one loop on hook, yo pull through all 3 loops on hook.
  • sk = skip

Notes

  • Finished Dimensions: Approx 26 in X 1 in
  • I suggest blocking this headband to get it very straight and make sure the ends don’t curl.
  • Photo guide pages 5 and 6 will help you check your work.
  • Stitch counts are marked with parentheses ( ) at the end of each row. Repeating rows also have a number of rows marked at the end with { }

Gauge Swatch

Chain 10, esc in 2nd ch from hook and each remaining st. (9 esc) Ch 1 and turn. *Esc each st across. Repeat from * for 6 more rows. Square should be 1 inch by 1 inch. (9 esc sts in 8 rows)

Instructions

Ch 3.

Row 1: 2 esc in 2nd chain from hook, 2 esc in next st. Ch 1, turn. (4 esc)

Row 2: Esc in each st across. Ch 1, turn. (4 esc)

Row 3: 2 esc in first st, esc until last st, 2 esc in last st. Ch 1, turn. (6 esc)

Row 4: Esc in each st across. Ch 1, turn. (6 esc)

Row 5: 2 esc in first st, esc until last st, 2 esc in last st. Ch 1, turn. (8 esc)

Row 6-7: Esc in each st across. Ch 1, turn. (8 esc)

Row 8: Dec, esc in each st until last two, dec in last two sts. Ch 1, turn. (6 esc)

Row 9: Esc in each st across. Ch 1, turn. (6 esc)

Row 10: Dec, esc in each st until last two, dec in last two sts. Ch 1, turn. (4 esc)

Row 11-19: Esc in each st across. Ch 1, turn. (4 esc) {9 rows}

Row 20: 2 esc in first st, esc until last st, 2 esc in last st. Ch 1, turn. (6 esc)

Row 21-47: Esc in each st across. Ch 1, turn. (6 esc) {27 rows}

Row 48-78: Esc BLO in eash st across. Ch 1, turn. (6 esc BLO) {30 rows}

Row 79-111: Esc in each st across. Ch 1, turn. (6 esc) {32 rows}

Row 112: Dec, esc in each st until last two, dec in last two sts. Ch 1, turn. (4 esc)

Row 113-122: Esc in each st across. Ch 1, turn. (4 esc) {9 rows}

Row 123: 2 esc in first st, esc until last st, 2 esc in last st. Ch 1, turn. (6 esc)

Row 124: Esc in each st across. Ch 1, turn. (6 esc)

Row 125: 2 esc in first st, esc until last st, 2 esc in last st. Ch 1, turn. (8 esc)

Row 126-127: Esc in each st across. Ch 1, turn. (8 esc)

Row 128: Dec, esc in each st until last two, dec in last two sts. Ch 1, turn. (6 esc)

Row 129: Esc in each st across. Ch 1, turn. (6 esc)

Row 130: Dec, esc in each st until last two, dec in last two sts. Ch 1, turn. (4 esc)

Row 131: Esc in each st across. Ch 1, turn. (4 esc)

Row 132: Dec twice. Ch 1, turn. (2 esc)

Row 133: sk first st, sl st in 2nd st. Fasten off and weave in ends. Tie with a square knot at the two thinner areas near each end of the band.

October 2, 2020 by Priscilla

Almost Stripes Ear Warmer

So here’s a question: are you an idea person or an execution person?

I’m totally an idea person. This doesn’t mean I can’t or don’t execute my goals, it just means that I find it easy to create, to think of something new to do, or to figure out something. My strength does NOT lie in prioritizing which ideas will be most fruitful or which things I can actually accomplish in any given time. Some people thrive on planning and organizing and I absolutely have to work at it. My closets are always a mess. My craft room is tidy only for photographs and my yarn, well, it is partially sorted. But I have a wealth of ideas for things to make and different stitches to try, so I think if I keep pushing myself, I can keep going with my little crochet design business and make it work! If I continue to get out of my comfort zone of chaos, I will be able to share some really wonderful things with you over the next few months.

I’m just about to listen in on a webinar by the amazing Crochetpreneur and I even have a folder for Instagram hashtags so I can use them to my advantage. I looked at 2021 planners today at Michael’s. It’s October and I’m thinking ahead to 2021? Who even am I? I’m going to keep holding myself accountable for doing things like that instead of staying up til 1am reading Nora Roberts.

Well, if you aren’t one of my best pals reading this just to check in and you are actually here for a pattern, let’s get to it!!!!!! (And if you are one of my best pals, thanks for the support!)

The Almost Stripes Ear Warmer is a sibling of the Almost Stripes Beanie! It’s a little easier and works up more quickly. There are 7 sizes from newborn to adult large. You’ll need two colors of worsted weight (4) yarn and two crochet hooks, (5.5mm and 6mm.) You could likely use a scrap of yarn for the accent color. I really like the way this pattern turned out and I hope you like it, too!

You can purchase a low cost PDF of this pattern here through Ravelry! It has photo guides to help with some of the stitches if you haven’t done them before.

Materials

  • Worsted weight (4) yarn (samples are Lion Brand Heartland and Basic Stitch) may use two colors for stripes as written if desired. Color A approx 150-200 yds, Color B approx 20 yds
  • Crochet hooks: 5.5 mm and 6 mm or two hooks needed to meet gauge
  • Scissors
  • Tapestry needle
  • Measuring tape

Gauge

7 rows of 15 DC stitches = 4 in x 4 in with 5.5 mm hook (If you go up a hook size to meet gauge, you would use a 6 mm hook for the gauge swatch, if you need to go down you will use a 5 mm hook for the gauge swatch.) Alternatively, the length of the brim per size is listed in the notes section. You may complete the first three rows and check for length to match the desired size.

Abbreviations

  • Ch = Chain
  • DC = Double Crochet
  • HDC = Half-Double Crochet
  • Sc = Single Crochet
  • LS = Linen Stitch (Ch 1, sk st, Sc)
  • FPHDC = Front Post Half-double Crochet
  • BPHDC = Back Post Half-double Crochet
  • DC BLO = Double Crochet Back Loop Only (the loop farthest from you)
  • DC FLO = Double Crochet Front Loop Only (the loop closest to you)
  • st = stitch
  • sk = skip 
  • FHDC = Foundation Half Double Crochet

Notes

  • The first section has the pattern for the baby/toddler sizes, the second section is the child/adult sizes. 
  • Parentheses indicate different stitch counts for different sizes: {newborn (3-6 months, 6-12 months, toddler)} and {child (teen/adult small, adult medium/large)}  
  • Instructions between [ ] are repeated
  • This hat is constructed as a rectangle, then seamed to make a twist finish. 
  • The brim of the hat should be approximately the following in length:
    • Newborn: 11-12 inches
    • 3-6 months: 12-14 inches
    • 6-12 months: 14-16 inches
    • Toddler: 16-17 inches
    • Child: 18 inches
    • Teen/Adult small: 20 inches
    • Adult medium/large: 22 inches
  • Size adjustments should be made in multiples of 2. 
  • Where LS is used, you’ll stitch into the chain spaces from the previous LS row. 
  • Turning chain counts as a stitch.
  • Do not carry color A and B throughout. Fasten off and weave in ends. 

Instructions

Newborn (3-6 months, 6-12 months, toddler) 

Row 1: With 5.5 mm hook and color A:  Foundation Half Double Crochet 54 (60, 64, 70.) Turn upside down, Ch 1. (This will have you working in the wider stitches you’ve made in the foundation.) 

Row 2: [FPHDC in 1st st. BPHDC in next st.] Repeat until one stitch left. HDC in last st. Turn, Ch 1. {27 FPHDC, 26 BPHDC, 1 HDC (30/29/1, 32/31/1, 35/34/1)}

Row 3: [BPHDC in 1st st. FPHDC in next st.] Repeat until one stitch left. HDC in last st. Turn, Ch 1. {27 BPHDC, 26 FPHDC, 1 HDC (30/29/1, 32/31/1, 35/34/1)}

Row 4: Switch to 6 mm (larger) hook. DC in 1st st. DC in each st to end of row. Turn. {54 DC (60, 64, 70)}

Row 5: LS across row, ending with Sc in the turning chain. Turn. Change to color B. {27 Sc, 26 Ch (30/29, 32/31, 35/34)}

Row 6: LS across row, ending with Sc in the last st. Turn. Change to color A. {27 Sc, 26 Ch (30/29, 32/31, 35/34)}

Row 7: LS across row, ending with Sc in the turning chain. Turn. {27 Sc, 26 Ch (30/29, 32/31, 35/34)}

Row 8: Ch 1. DC in each st to end. Change back to 5.5 mm hook. Turn. {54 DC (60, 64, 70)}

Row 9: Ch 1. HDC each st to end. Turn. Ch 1. {54 HDC (60, 64, 70)}

Row 10:  [FPHDC in 1st st. BPHDC in next st.] Repeat until one stitch left. HDC in last st. Turn, Ch 1. {27 FPHDC, 26 BPHDC, 1 HDC (30/29/1, 32/31/1, 35/34/1)}

Row 11: [BPHDC in 1st st. FPHDC in next st.] Repeat until one stitch left. HDC in last st.  Fasten off, leaving a long tail for sewing. {27 BPHDC, 26 FPHDC, 1 HDC (30/29/1, 32/31/1, 35/34/1)}Weave ends except for fastening off tail.

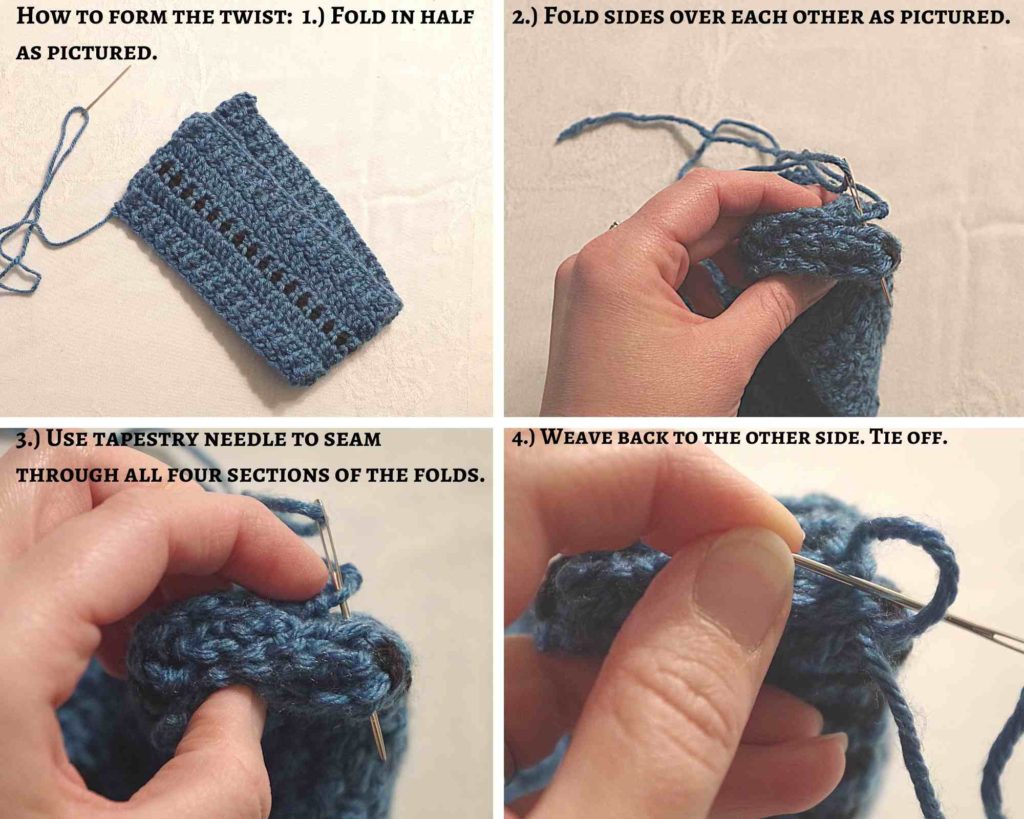
See photo tutorial below for sewing to make the twist.  

Child (teen/adult small, adult medium/large)

Row 1: With 5.5 mm hook and color A:  Foundation Half Double Crochet 80 (84, 90.) Turn upside down, Ch 1. (This will have you working in the wider stitches you’ve made in the foundation.) 

Row 2: [FPHDC in 1st st. BPHDC in next st.] Repeat until one stitch left. HDC in last st. Turn, Ch 1. {40 FPHDC, 39 BPHDC, 1 HDC (42/41/1, 45/44/1)}

Row 3: [BPHDC in 1st st. FPHDC in next st.] Repeat until one stitch left. HDC in last st. Turn, Ch 1.{40 BPHDC, 39 FPHDC, 1 HDC (42/41/1, 45/44/1)}

Row 4: Switch to 6 mm (larger) hook. DC in 1st st. DC in each st to end of row. Turn. {80 DC (84, 90)}

Row 5: LS across row, ending with Sc in the turning chain. Turn. Change to color B. {40 Sc, 39 Ch (42/41, 45/44)} 

Row 6: LS across row, ending with Sc in the last st. Turn. Change to color A. {40 Sc, 39 Ch (42/41, 45/44)}

Row 7: LS across row, ending with Sc in the turning chain. Turn. {40 Sc, 39 Ch (42/41, 45/44)}

Row 8-9 : Repeat row 7. 

Row 10: Change to color B. LS across row, ending with Sc in the last st. Turn. 

Row 11: Change to color A. LS across row, ending with Sc in the last st. Turn.  

Row 12: Ch 1. DC in each st to end. Change back to 5.5 mm hook. Turn. {80 DC (84, 90)}

Row 13: Ch 1. HDC each st to end. Turn. Ch 1. {80 HDC (84, 90)}

Row 14:  [FPHDC in 1st st. BPHDC in next st.] Repeat until one stitch left. HDC in last st. Turn, Ch 1. {40 FPHDC, 39 BPHDC, 1 HDC (42/41/1, 45/44/1)}

Row 15: [BPHDC in 1st st. FPHDC in next st.] Repeat until one stitch left. HDC in last st. Fasten off, leaving a long tail for sewing. {40 FPHDC, 39 BPHDC, 1 HDC (42/41/1, 45/44/1)} Weave ends except for fastening off tail.

Let’s form the twist! It’s easier than you think, I promise:

Don’t hesitate to contact me if you need any help with this ear warmer pattern! Find me on Instagram @motherlodecrafts or send a message in Ravelry!

Welcome! My name is Priscilla and I love designing crochet patterns for your family. I live in beautiful Pennsylvania where I enjoy all sorts of crafts, but I’m most passionate about crochet! I’m a Catholic mom of 4 and I sometimes incorporate my faith into my designs. Thank you so much for supporting me by visiting my crochet website and I hope you find something here that you are excited to make.

Recent Posts

  • Soft Crochet Hat Pattern
  • Cozy Men’s Scarf Crochet Pattern
  • Bulky Textured Beanie Crochet Pattern
  • Cozy Fall Baby Beanie Pattern
  • Spider Basket Crochet Pattern

Categories

Follow Me

  • Etsy
  • Facebook
  • Instagram
  • Pinterest
  • YouTube

Pretty Chic Theme By: Pretty Darn Cute Design