The Mother Lode

Crafts and Crochet

  • Home
  • Crochet Pattern Library
  • Faith Based Patterns
  • About Me
  • Privacy Policy

October 12, 2024 by Priscilla

10 Stunning Crochet Patterns to make for Fall

The chilly temps have arrived in Pennsylvania and I’m loving it! I want to share some FREE patterns with you today from amazing crochet designers that are stunning for fall! We’ve got shawls, blankets, hats, scarves, all the cozy things that are also beautiful! I’ve joined a lovely facebook group this year full of talented, hard-working designers. It’s been so nice for us to share each other’s work through events like blog hops and roundups such as this.

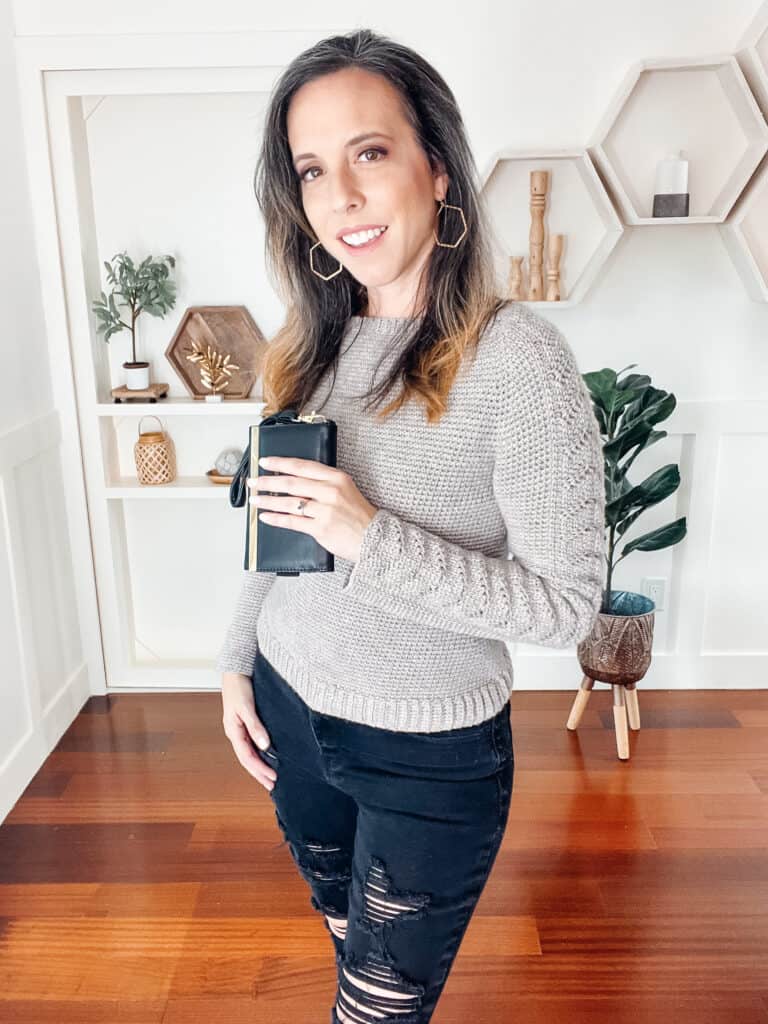
Lace Sleeve Pullover by Briana K Designs

Truly, Briana is one of the most talented designers! I dare anyone to browse her patterns without finding 10 things you want to make! This Lace Sleeve Pullover is so pretty and stunning for fall!
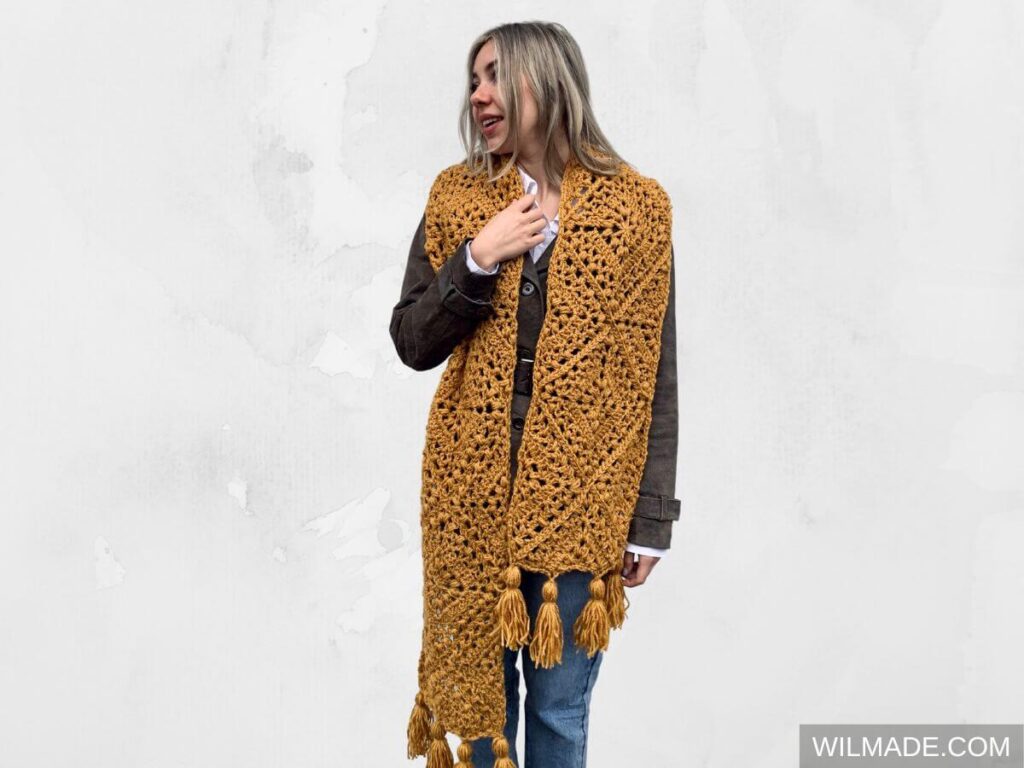
Tulip Square Scarf by Wilmade

Wilma creates beautiful patterns! I particularly like her granny squares. This Tulip Square Scarf uses granny squares to form this lovely scarf. I love the balance of the oversize plus the lacy squares, it’s magnificent!
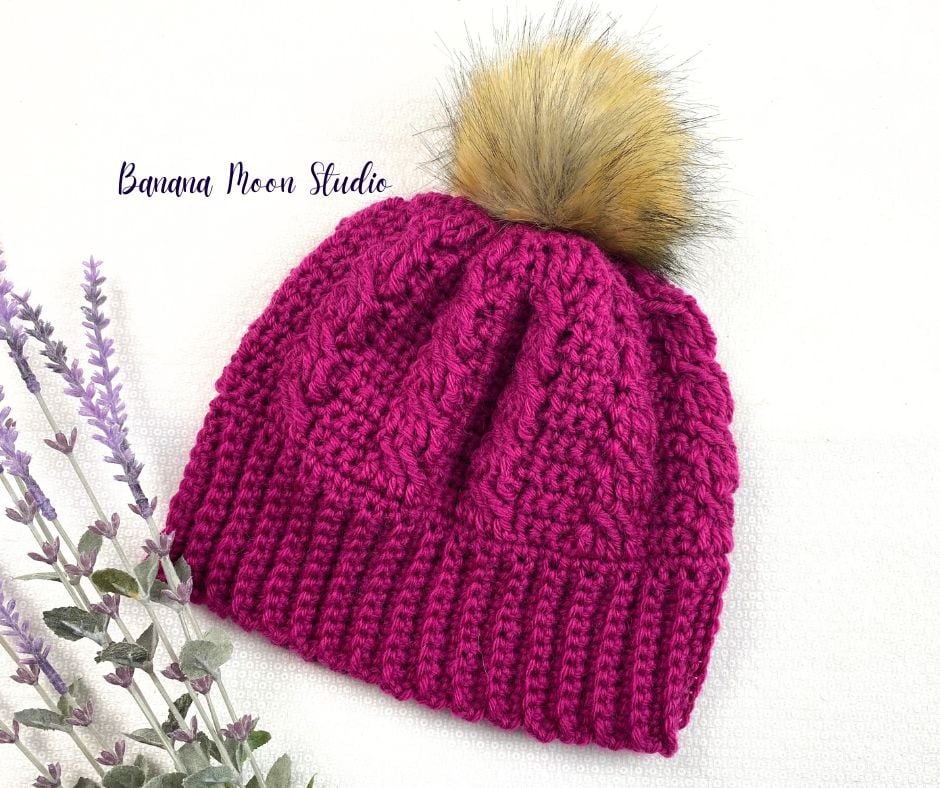
Cable Stitch Hat by Banana Moon Studio

This hat is so pretty! I love the texture of the cables, and it looks warm and cozy for fall! The Blair Beanie has 4 sizes, so you could make one for everyone in the family.
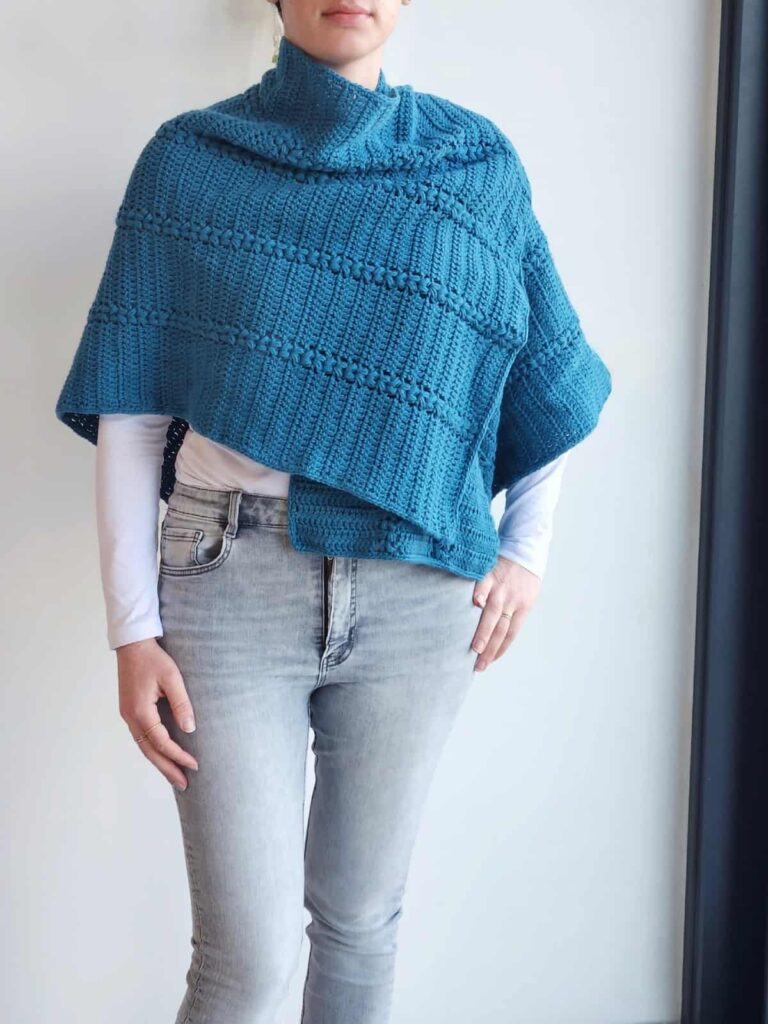
Harvest Fields Wrap from Made by Gootie

This wrap is GORGEOUS and it’s unique construction gives is some extra oomph and versatility. The little bit of texture there is pretty and it looks quite cozy. What color would you choose for the Harvest Fields Wrap?
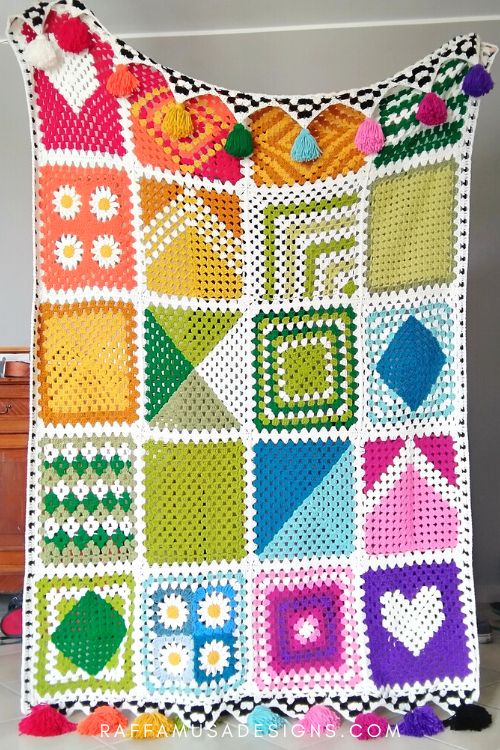
Rainbow Granny Square Blanket by Raffamusa Designs

I mean. Come on. This design is so fun! Stunning in it’s bright colors and unique granny squares. How can you keep from cracking a smile over this pattern!? The Rainbow Granny Square Blanket began as a crochet-a-long, and now you can head to the blog post and make all the pieces!
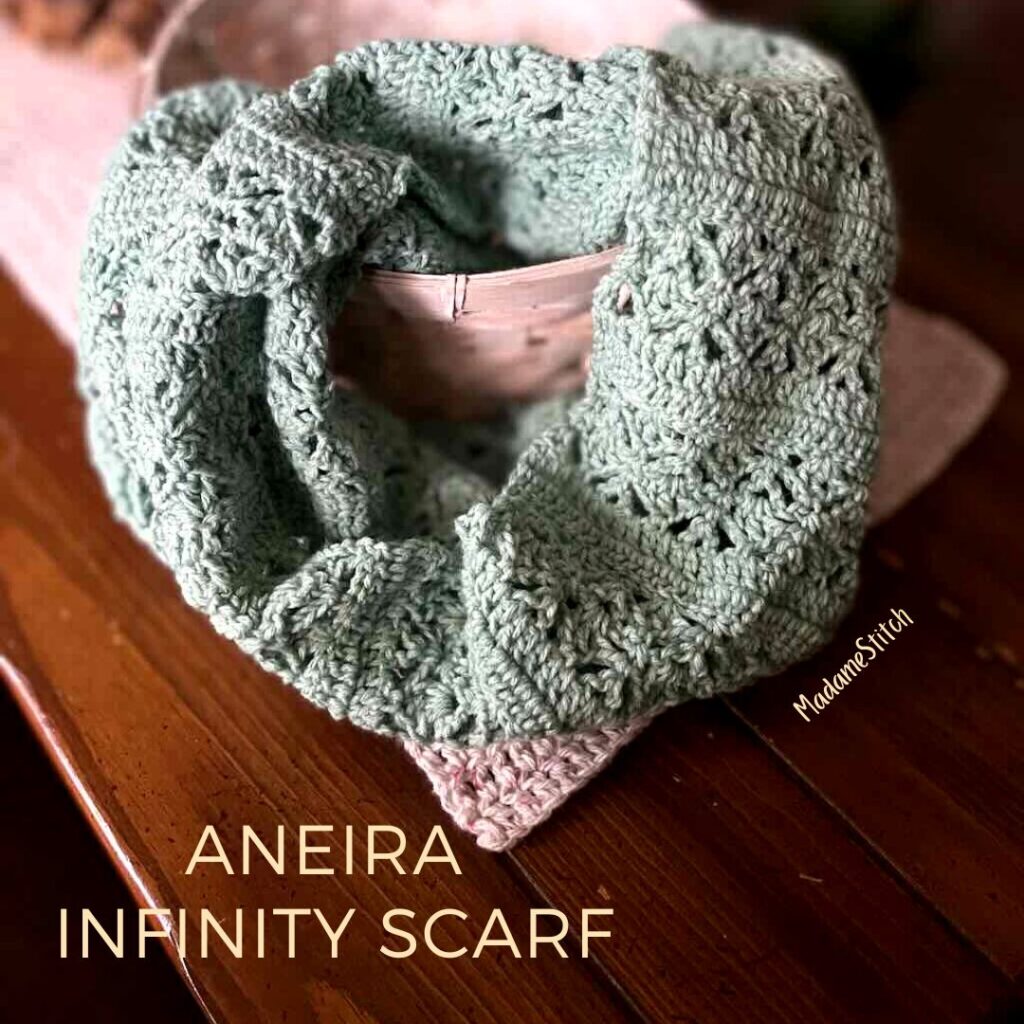
Aneira Infinity Scarf by Madame Stitch

This is such a lovely infinity scarf pattern! The lacy part is so pretty, I can imagine it being perfect for fall when you might be sweating by the middle of the afternoon! The Aneira Infinity Scarf could even be a hit as a gift this season!
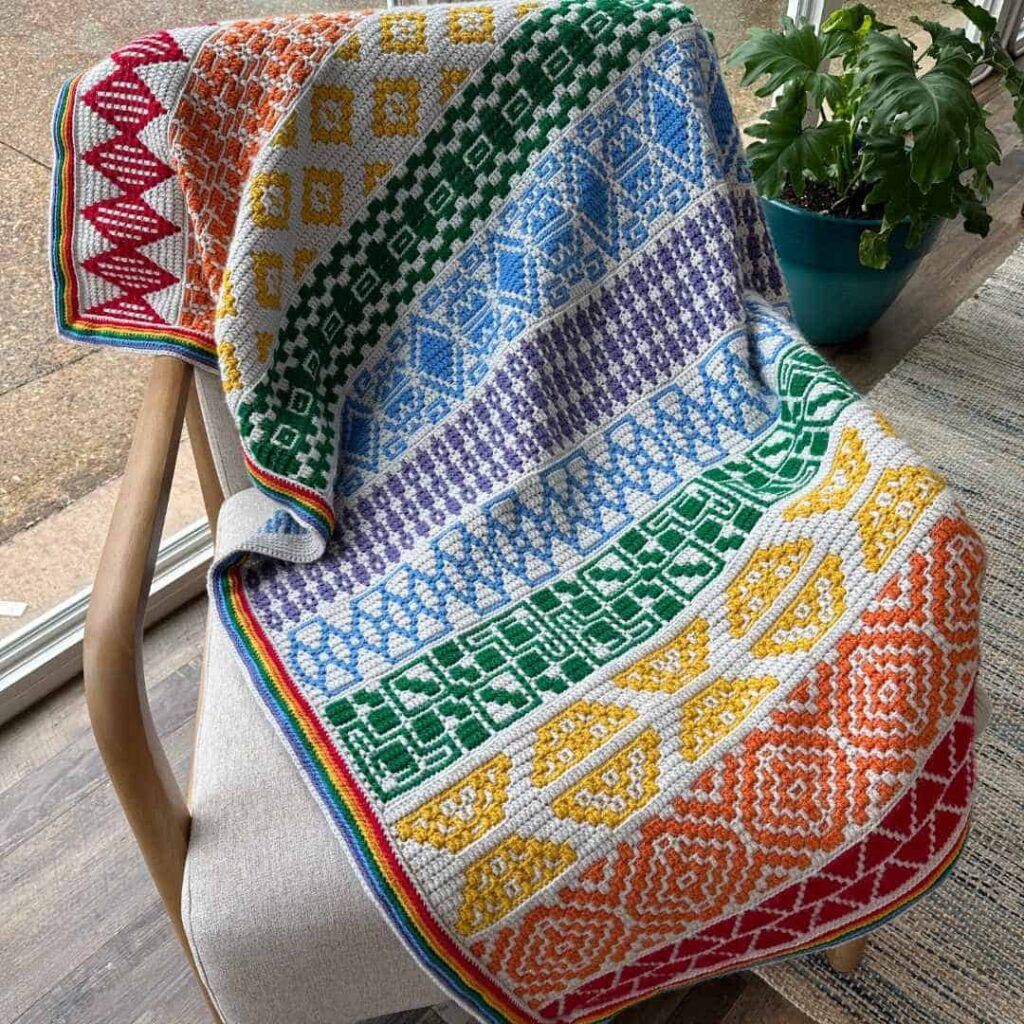
Mosaic in a Month Blanket by Juniper and Oakes

This blanket was a collaborative effort for the design and it is a masterpiece! You’ll have to jump around a bit to each section to make this blanket, but I’m sure it’s worth the effort because it is SO gorgeous. The Mosaic in a Month blanket would be a great challenge to make this “crochet season.”
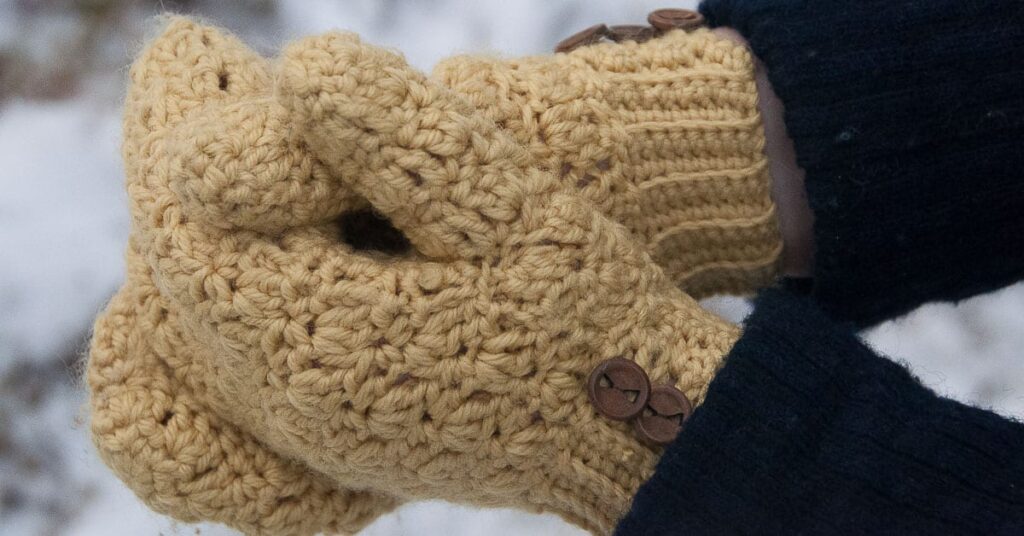
Bellus Mittens by Joy of Motion Crochet

These are lovely! The texture is pretty, but they still look very warm! These would make a great gift if you don’t need a pair of mittens yourself! I would make the Bellus Mittens in a pretty dark pink.
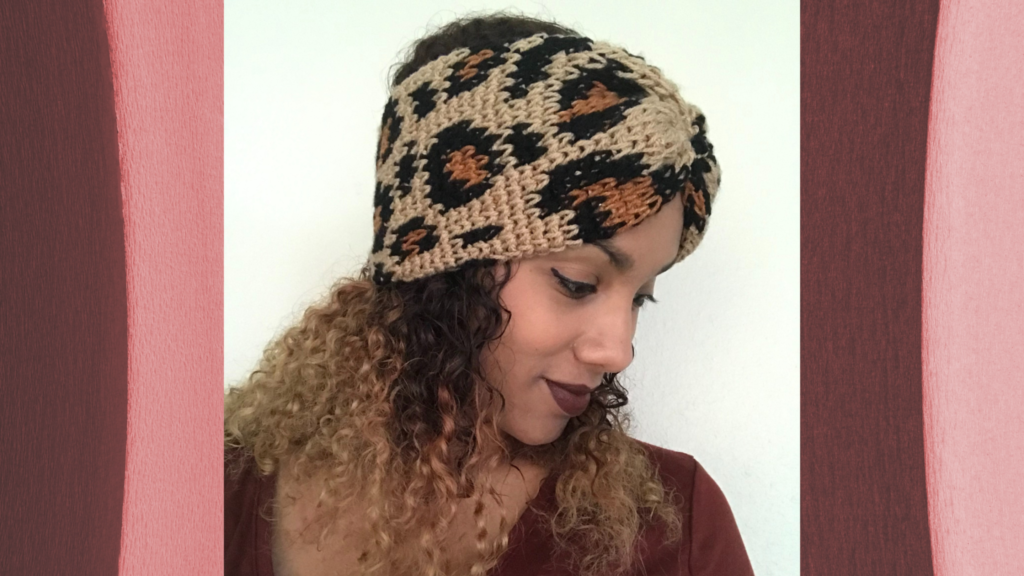
Luxe Leopard Headband by Crafting for Weeks

I see this every fall and I always think I’m going to make one, and I still have yet to! Maybe this fall is the time! It’s such a beautiful pattern. The Luxe Leopard pattern has all the sizes you could possibly need, go check it out!
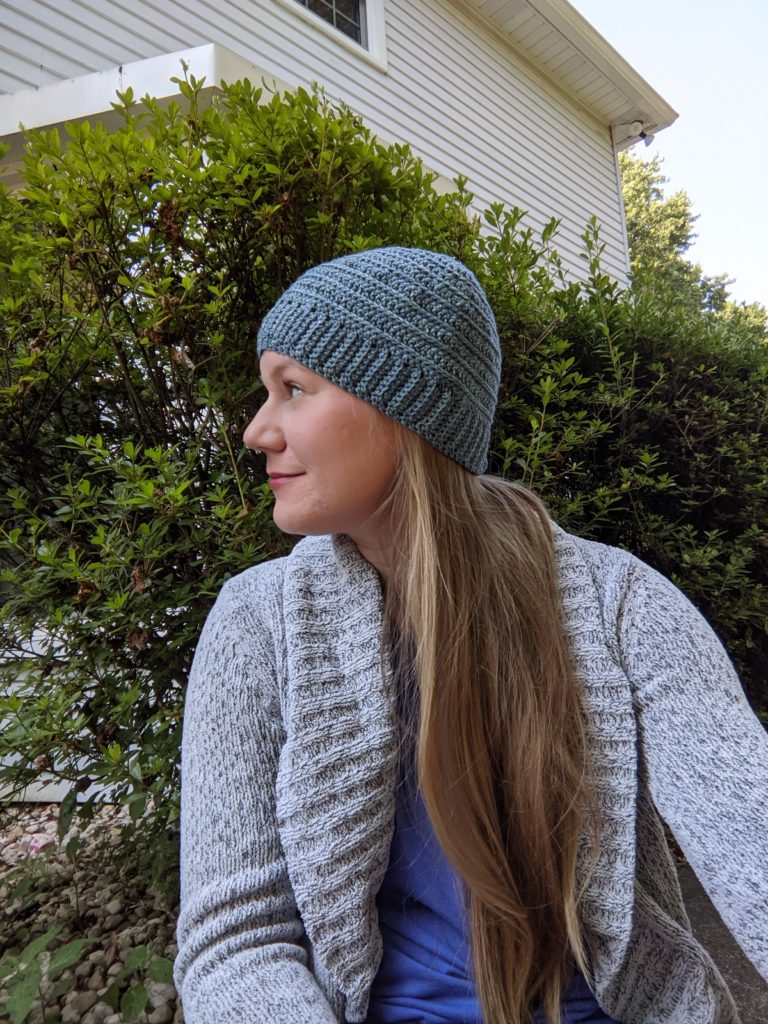
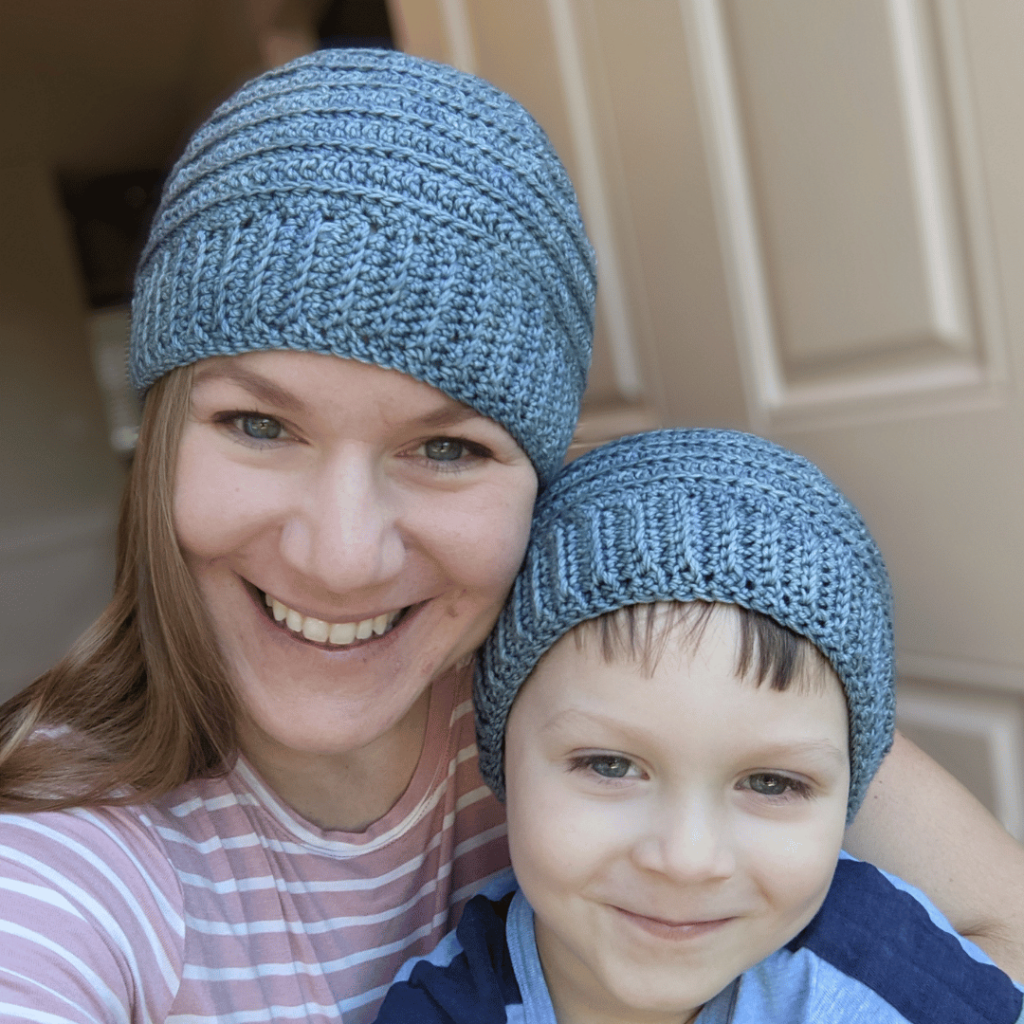
Simple Ridges Beanie by me!

This is one of my favorite designs! Use some of that fancy hand dyed fingering weight someday yarn for this light beanie! Hold the fingering yarn double to make this pretty hat. The Simple Ridges Beanie is perfect for fall when you might not need that thick hat yet.
Which one will you make?!!? If only my fingers could fly so I could make them all in my limited mom time! I’ve been eyeing the Luxe Leopard Headband ever since Kelsie published it, though, so I think that’s going to be the one that I make. Ooooo you know what? I’m going to make that my car project for the foreseeable future. Follow me on Instagram, I’ll share about it there! @motherlodecrafts
September 13, 2021 by Priscilla

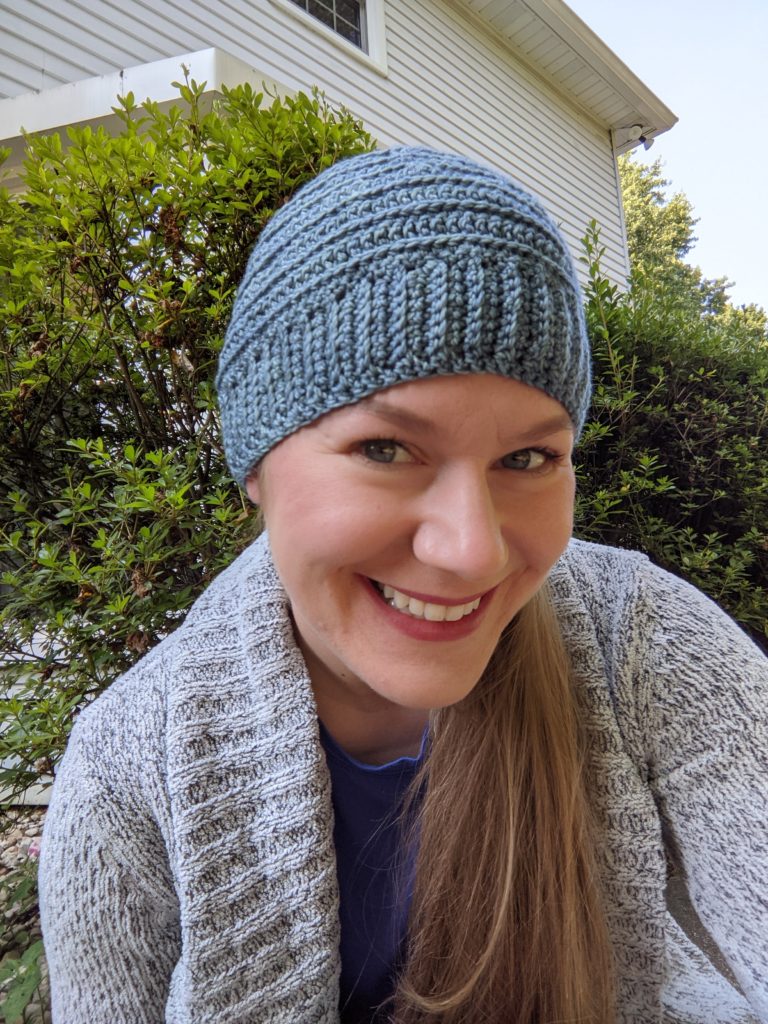
Simple Ridges Beanie

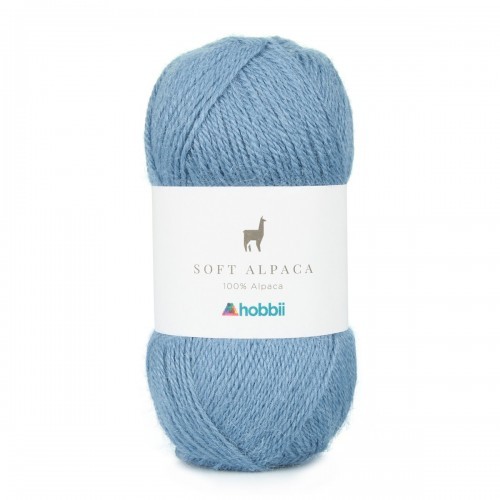
I truly love making cozy hats and ear warmers! Most of my first projects were actually hats, and I’ve been hooked ever since! (wink wink, hooked, get it?) Budget friendly yarn at Michael’s or Joann Fabrics make up most of my yarn stash, but I also sometimes indulge in what I like to call fancy yarn. The good stuff like: extra warm wool that makes your stitches look amazing, super soft alpaca for cuddling, and mohair for a beautiful yarn halo. However, when I do buy “fancy yarn” it can be daunting to choose a project, because I want to really love and cherish the item (or gift it to someone amazing who will love it.) For this project, I used some beautiful hand dyed yarn, but ALAS the dyer has taken a different route with her business and is focusing on wholesale, right now. SO instead I am recommending some fancy yarn from Hobbii! You can find so many amazing options from Hobbii. I bet their Soft Alpaca yarn would be a good fit for this project.

SO.

I’ve started to use some of the fancy yarn in designs! I know I’ll love it because it’s a design from my own mind, and it will work with the yarn since it’s designed with it in the first place. If you’ve been hunting down a crochet project for your first ever fancy yarn, this is it! This beanie was designed for hand dyed sock yarn. I’ve noticed in the world of hand dyed yarn, most dyers stock more of the fingering weight yarns, which aren’t used in crochet design quite as much as knitting. Consequently, there aren’t as many crochet designs available for this type of yarn. Well this is my 3rd crochet design using it and I’m not stopping!

Grab your beautiful yarn, and make this beanie! You’ll love the simple texture and the snug fit. As always, I’ve got the free version here for you! If you are struggling with the instructions below, think about snagging the premium, low cost version on ravelry or lovecrafts.

Hobbii - Soft Alpaca - Cold Water (35)

Supplies

  • 350-380 yards fingering weight yarn (CYC 1) yarn HELD DOUBLE, sample is Rita Mae Yarns Sweet Pea Sock in color Blue Suede Shoes ALSO suggest Hobbii Soft Alpaca as above
  • crochet hook US size G (4.25 mm) or size needed to obtain gauge. I typically use aluminum hooks like these from Annie’s

Aluminum Crochet Hook Set, Sizes D-K

  • tapestry sewing needle
  • scissors and measuring tape
  • stitch marker

Stitches (US Terms)

ch = chain

sc = single crochet

sl st = slipstitch

st/sts = stitch/stitches

BLO = back loop only

hdc = half double crochet

esc = extended single crochet

WS/RS = wrong side/right side

edc = extended double crochet: yo, insert hook, pull up a loop, yo, pull through one loop, yo, pull through 2 loops, yo, pull through last 2 loops.

in the 3rd loop = the hdc st creates a “3rd loop” on the WS this is where you will insert the hook on the edc sts (photo pg 9)

hdc2tog = half double crochet 2 sts together: yo, insert hook, pull up a loop, yo in next st, pull up a loop, yo, pull through all loops on hook

Notes

  • Finished Dimensions are: child: 17-18 in around, adult sm/med: 19-20 in around, adult lg/xl: 21-22 in around for a snug cozy fit.
  • Stitch counts are marked at the end of each round in parentheses.
  • The brim of the pattern is worked in rows and the rest of the pattern is worked in turned rounds.

Gauge

alternating rows of hdc and edc in the 3rd loop of the hdc

Suggest ch 25, hdc 1st st from hook and each st across. Next row edc in the 3rd loop of the hdc. Continue alternating rows and check gauge which should be 21 sts by 11 rows = 4 inches

Written Instructions

Child Size

Brim, with yarn held double:

Row 1: ch 9, turn, sc in the 2nd ch from hook and each st across, ch 1, turn. (8 sc)

Row 2: sc each st across BLO, ch 1, turn. (8 sc)

Row 3: esc each st across BLO. ch 1, turn. (8 esc)

Repeat rows 2-3 until brim reaches 17-18 inches.

Fold in half and sl st edges together using the BLO of the last row made.

Ch 1, sc 75 evenly around the brim. Fasten off. Reattach yarn on other side of brim on the WS (seam side).

Body, with yarn held double:

Round 1 : sc 95 evenly around the brim, sl st to join the round, ch 1, turn. (95 sc)

Round 2: hdc each st around, sl st to join round, ch 2, turn. (95 hdc)

Round 3: edc each st around in the 3rd loop, sl st to join round, ch 1, turn. (95 edc)

Round 4: repeat row 2 (95 hdc)

Round 5: repeat row 3 (95 edc)

Round 6: repeat row 2 (95 hdc)

Round 7: repeat row 3 (95 edc)

Round 8: hdc in each of 1st 4 sts, hdc 2 tog, *hdc next 4 sts, hdc 2tog repeat from * to end of round, sl st to join, ch 2, turn. (64 hdc, 16 hdc2tog)

Feeling stuck? The low cost PDF is available on ravelry or lovecrafts! It has 4 pages of photos to help you out!

Round 9: repeat row 3 (80 edc)

Round 10: repeat row 8 (54 hdc, 13 hdc2tog)

Round 11: repeat row 3 (67 edc)

Round 12: hdc 1st 3 sts, *hdc 2 tog. hdc next 3 sts repeat from * to end of round, sl st to join, ch 2, turn. (41 hdc, 13 hdc2tog)

Round 13: repeat row 3 (54 edc)

Round 14: repeat row 12 (34 hdc, 10 hdc2tog)

Round 15: repeat row 12 (28 hdc, 8 hdc2tog)

Round 16: hdc 1st 2 sts, *hdc2tog, hdc next 2 sts repeat from * to end of round, sl st to join, ch 1, turn. (18 hdc, 9 hdc2tog)

Round 17: repeat round 16 (15 hdc, 6 hdc2tog)

Round 18: repeat round 16 (11 hdc, 5 hdc2tog)

Round 19: hdc2tog around. Fasten off. (8 hdc2tog)

Teen/Adult Small

Brim, with yarn held double:

Row 1: ch 9, turn, sc in the 2nd ch from hook and in each st across, ch 1, turn. (8 sc)

Row 2: sc each st across BLO, ch 1, turn. (8 sc)

Row 3: esc each st across BLO. ch 1, turn. (8 esc)

Repeat rows 2-3 until brim reaches 19-20 inches.

Fold in half and sl st edges together using the BLO of the last row made.

Ch 1, sc 85 evenly around the brim. Fasten off. Reattach yarn on other side of brim on the WS (seam side).

Body, with yarn held double:

Round 1 : sc 105 evenly around the brim, sl st to join the round, ch 1, turn. (105 sc)

Round 2: hdc each st around, sl st to join round, ch 2, turn. (105 hdc)

Round 3: edc each st around in the 3rd loop, sl st to join round, ch 1, turn. (105 edc)

Round 4: repeat row 2 (105 hdc)

Round 5: repeat row 3 (105 edc)

Round 6: repeat row 2 (105 hdc)

Round 7: repeat row 3 (105 edc)

Round 8: hdc in each of 1st 4 sts, *hdc 2 tog, hdc next 4 sts repeat from * to end of round, sl st to join, ch 2, turn. (71 hdc, 17 hdc2tog)

Round 9: repeat row 3 (88 edc)

Round 10: repeat row 8 (60 hdc, 14 hdc2tog)

Round 11: repeat row 3 (74 edc)

Round 12: hdc 1st 3 sts, *hdc 2 tog. hdc next 3 sts repeat from * to end of round, sl st to join, ch 2, turn. (45 hdc, 14 hdc2tog)

Round 13: repeat row 3 (59 edc)

Round 14: repeat row 12 (36 hdc, 12 hdc2tog)

Round 15: repeat row 12 30hdc, 9 hdc2tog)

Round 16: repeat row 12 (25 hdc, 7 hdc2tog)

Round 17: hdc 1st 2 sts, *hdc2tog, hdc next 2 sts repeat from * to end of round, sl st to join, ch 1, turn. (16 hdc, 8 hdc2tog)

Round 18: repeat round 17 (12 hdc, 6 hdc2tog)

Round 19: repeat round 17 (10 hdc, 4 hdc2tog)

Round 20: hdc2tog around. Fasten off. (7 hdc2tog)

Adult Large

Brim, with yarn held double:

Row 1: ch 9, turn, sc in the 2nd ch from hook and in each st across, ch 1, turn. (8 sc)

Row 2: sc each st across BLO, ch 1, turn. (8 sc)

Row 3: esc each st across BLO. ch 1, turn. (8 esc)

Repeat rows 2-3 until brim reaches 21-22 inches.

Fold in half and sl st edges together using the BLO of the last row made.

Ch 1, sc 95 evenly around the brim. Fasten off. Reattach yarn on other side of brim on the WS (seam side).

Body, with yarn held double:

Round 1 : sc 115 evenly around the brim, sl st to join the round, ch 1, turn. (115 sc)

Round 2: hdc each st around, sl st to join round, ch 2, turn. (115 hdc)

Round 3: edc each st around in the 3rd loop, sl st to join round, ch 1, turn. (115 edc)

Round 4: repeat round 2 (115 hdc)

Round 5: repeat round 3(115 edc)

Round 6: repeat round 2 (115 hdc)

Round 7: repeat round 3 (115 edc)

Round 8: repeat round 2 (115 hdc)

Round 9: repeat round 3 (115 edc)

Round 10: hdc in each of 1st 4 sts, *hdc 2 tog, hdc next 4 sts repeat from * to end of round, sl st to join, ch 2, turn. (77 hdc, 19 hdc2tog)

Round 11: repeat row 3 (86 edc)

Round 12: repeat row 10 (54 hdc, 16 hdc2tog)

Round 13: repeat row 3 (70 edc)

Round 14: hdc 1st 3 sts, *hdc 2 tog. hdc next 3 sts repeat from * to end of round, sl st to join, ch 2, turn. (48 hdc, 16 hdc2tog)

Round 15: repeat row 3 (54 edc)

Round 16: repeat row 14 (40 hdc, 12 hdc2tog)

Round 17: repeat row 14 (32 hdc, 10 hdc2tog)

Round 18: repeat row 14 (26 hdc, 8 hdc2tog)

Round 19: hdc 1st 2 sts, *hdc2tog, hdc next 2 sts repeat from * to end of round, sl st to join, ch 1, turn. (18 hdc, 8 hdc2tog)

Round 20: repeat round 19 (14 hdc, 6 hdc2tog)

Round 21: repeat round 19 (10 hdc, 5 hdc2tog)

Round 22: hdc in 1st st, then hdc2tog remaining sts around. Fasten off. (7hdc2tog)

Don’t forget to head over to ravelry or lovecrafts if you need more help!

August 18, 2020 by Priscilla

Almost Stripes Beanie

I’m still here making all the hats! I just love a quick project, because, as a stay at home mom, so much of my “work” is stuff that never feels completed: laundry, dishes, weeding the garden, etc. Crochet is something I can do in the evenings or during play time and get a sense of accomplishment from. I like expressing creativity through it, but the completion of it is something that really fuels me. So I am a big fan of hats and ear warmers that I can finish in a couple of days. One of my new favorites is crochet earrings, which are even faster! Make sure you sign up for my email list, because a pattern for those will be coming in the future, too! It’s so cute, you don’t want to miss it!

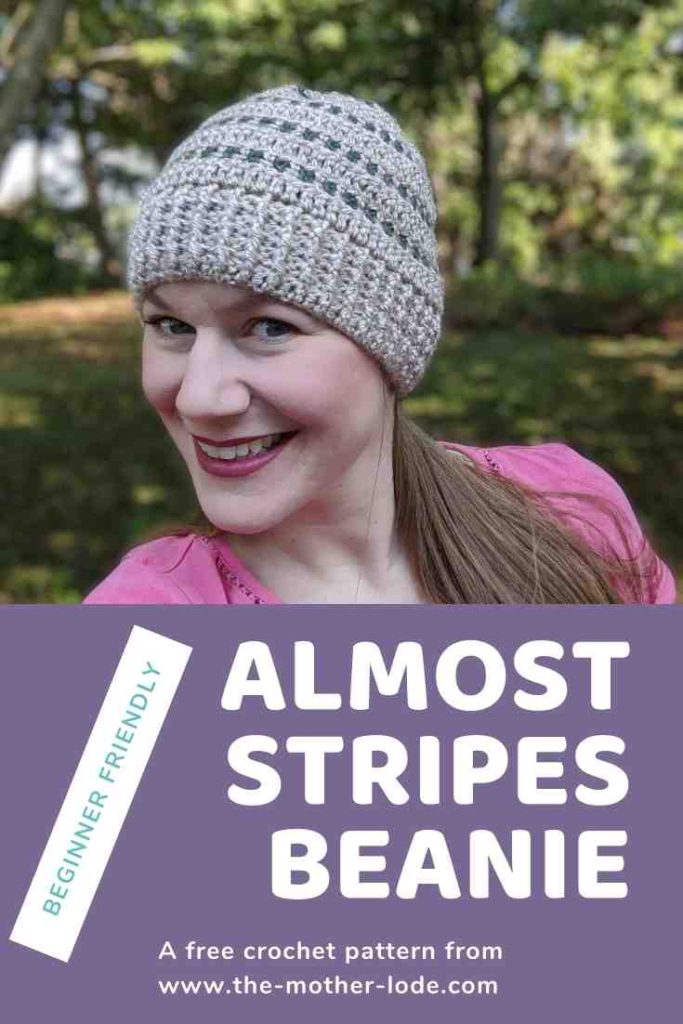
Back to today: I’ve got the Almost Stripes Beanie crochet pattern for you! This one is a little more complicated than my first pattern, because there are color changes and a few different stitches. I created it to be another rectangle that is seamed and constructed, though, so if you are not ready for crochet in the round, you can tackle this hat! I graded this hat to include 7 sizes, which was a challenge! I am not a fan of math in any way, but I managed. I know often people tease about the necessity of math in high school. I’m sure I said probably several times: “When am I ever going to need to know this?!” Well, the answer to 15 year old me was, “When you grow up and want to design your own crochet patterns and you have to multiply and divide and do percentages to figure out the stitch counts and yardage.” I didn’t even beg help from my scientist husband for the stitch counts. How about that?! 


almost stripes beanie pin

Alrighty, keep on scrolling for the pattern! I did make the pattern available for purchase here on Ravelry. You can get the PDF filled with photos and clear guides on each section of the hat for $4. I love being able to print out the pattern so it’s easy to use from the couch! 

Materials

  • Worsted weight (4) yarn (samples are Lion Brand Heartland and Basic Stitch) may use two colors for stripes as written if desired. Color A approx 200-250 yds, Color B approx 30 yds
  • Crochet hooks: 5.5 mm and 6 mm or two hooks needed to meet gauge
  • Scissors
  • Tapestry needle
  • Measuring tape


Gauge: 7 rows of 15 DC stitches = 4 in x 4 in with 5.5 mm hook (If you go up a hook size to meet gauge, you would use a 6 mm hook for the gauge swatch, if you need to go down you will use a 5 mm hook for the gauge swatch.) Alternatively, the length of the brim per size is listed in the notes section. You may complete the first three rows and check for length to match the desired size. 


Abbreviations

  • Ch = Chain
  • DC = Double Crochet
  • HDC = Half-Double Crochet
  • Sc = Single Crochet
  • LS = Linen Stitch (Ch 1, sk st, Sc)
  • FPHDC = Front Post Half-double Crochet
  • BPHDC = Back Post Half-double Crochet
  • DC BLO = Double Crochet Back Loop Only (the loop farthest from you)
  • DC FLO = Double Crochet Front Loop Only (the loop closest to you)
  • st = stitch
  • sk = skip 

Notes

  • The first section has the pattern for the baby/toddler sizes, the second section is the child/adult sizes. 
  • Parentheses indicate different stitch counts for different sizes: {newborn (3-6 months, 6-12 months, toddler)} and {child (teen/adult small, adult medium/large)} These stitch counts do not include the turning chain. 
  • Instructions between * are repeated
  • This hat is constructed by the brim first, the body of the hat is crocheted onto it, then the top of the body has decreases to allow for some shaping at the top. This will create a sort of rectangle-trapezoid shape which will turn into a hat with seaming and gathering.
  • The brim of the hat should be approximately the following in length:
    • Newborn: 11-12 inches
    • 3-6 months: 12-14 inches
    • 6-12 months: 14-16 inches
    • Toddler: 16-17 inches
    • Child: 18 inches
    • Teen/Adult small: 20 inches
    • Adult medium/large: 22 inches

Newborn (3-6 months, 6-12 months, toddler) 

With 5.5 mm hook and color A Ch 55 (61, 65, 71.). 

Row 1: HDC in 2nd st from hook. HDC in each st to end of row. Turn, Ch 1. {54 HDC (60, 64, 70)} 

Row 2: *FPHDC in 1st st. BPHDC in next st.* Repeat * to end. HDC in the turning chain. Turn, Ch 1. {27 FPHDC, 26 BPHDC, 1 HDC (30/29/1, 32/31/1, 35/34/1)}

Row 3: *BPHDC in 1st st. FPHDC in next st.* Repeat * to end. HDC in the turning chain. Turn, Ch 1. {27 BPHDC, 26 FPHDC, 1 HDC (30/29/1, 32/31/1, 35/34/1)}

Row 4: Repeat row 2.

Row 5: Repeat row 3.

Row 6: Switch to 6 mm (larger) hook. DC FLO in 1st st. DC FLO in each st to end of row. Turn, Ch 1. {54 DC (60, 64, 70)}

Row 7: sk 1st st, Sc in 2nd st. *Ch 1, sk next st, Sc* Repeat * to end, with the last Sc in the turning chain. Turn, change to color B, Ch 1. {27 Sc, 26 Ch (30/29, 32/31, 35/34)}

Row 8: sk 1st st, Sc in next Ch 1 space. *Ch 1, sk next st, Sc in next Ch 1 space* Repeat * to end, ending with Sc in turning Ch. Turn, change to color A, Ch 1.{27 Sc, 26 Ch (30/29, 32/31, 35/34)}

Row 9: Repeat row 8, without changing colors. {27 Sc, 26 Ch (30/29, 32/31, 35/34)}

Row 10: DC BLO in 1st st. DC BLO each st to end of row. Turn, Ch 1. {54 DC (60, 64, 70)}

Row 11: Repeat row 7.

Row 12: Repeat row 8.

Row 13: Repeat row 9. 

Row 14: Repeat row 10. (NOTE: For newborn size, skip to row 19 after completing row 14.)

Row 15: Repeat row 7.

Row 16: Repeat row 8.

Row 17: Repeat row 9.

Row 18: Repeat row 10.

Row 19: Switch to 5.5 mm (smaller) hook. Sc in 1st 3 stitches. *Sc 2 tog. Sc next 3 st.* Repeat * to end of row. {44 Sc (48, 52, 56)}


(NOTE: for toddler size, repeat row 19 for a row 20 and 21.) Leave a long tail, fasten off. Weave in the ends of the stripes that are hanging on the sides. Fold hat together with the wrong side facing out (wrong side has the DC near the brim in the back loop away from you.) Use the long tail you left to seam the hat from the top to the bottom with an invisible mattress stitch.  


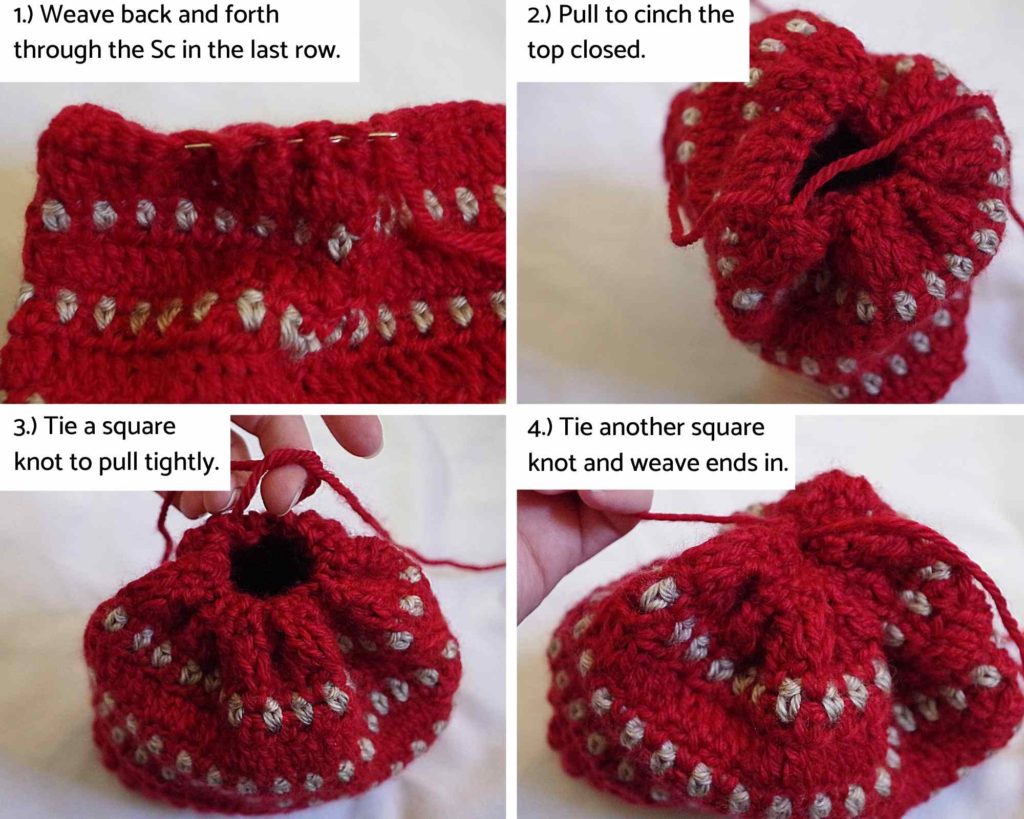
Cut a length of yarn about 10 inches. Weave back and forth through the single crochet at the top of the hat. Pull tightly to cinch the hat together. Tie two or three knots. Put the remaining tails through your tapestry needle and criss cross over the hole a few times if necessary to cover the top. Weave the ends in and cut remaining. Turn right side out.

Child (teen/adult small, adult medium/large)

With 5.5 mm hook, and color A Ch 81 (85, 91) 

Row 1: HDC in 2nd st from hook. HDC in each st to end of row. Turn, Ch 1. {80 HDC (84, 90)}

Row 2: *FPHDC in 1st st. BPHDC in next st.* Repeat * to end. HDC in the turning chain. Turn, Ch 1. {40 FPHDC, 39 BPHDC, 1 HDC (42/41/1, 45/44/1)}

Row 3: *BPHDC in 1st st. FPHDC in next st.* Repeat * to end. HDC in the turning chain. Turn, Ch 1. {40 BPHDC, 39 FPHDC, 1 HDC (42/41/1, 45/44/1)}

Row 4-9: Repeat Row 2 and 3, alternately.

Row 10: Switch to 6 mm (larger) hook. DC BLO in 1st st. DC BLO in each st to end of row. Turn, Ch 1.  {80 DC (84, 90)}

Row 11: sk 1st st, Sc in 2nd st. *Ch 1, sk next st, Sc* Repeat * to end of row. Turn, change to color B, Ch 1. {40 Sc, 39 Ch (42/41, 45/44)}

Row 12: sk 1st st, Sc in next Ch 1 space. *Ch 1, sk next st, Sc in next Ch 1 space* Repeat * to end, ending with Sc in turning Ch. Turn, change to color A, Ch 1. {40 Sc, 39 Ch (42/41, 45/44)}

Row 13: Repeat row 12, without changing colors.

Row 14: DC FLO in 1st st. DC FLO in each st to end of row. Turn, Ch 1. {80 DC (84, 90)} 

Rows 15-22: Repeat rows 11-14 twice.

Row 23: Repeat row 11.

Row 24: Repeat row 12.

Row 25: Repeat row 13. (NOTE: To add extra slouch, repeat row 14 again, followed by 11, 12, and 13.)

Row 26: Switch to 5.5 mm (smaller) hook. Sc in each stitch to end of row. Turn, Ch 1. {80 Sc (84, 90)}

Row 27: Sc in 1st 3 stitches. *Sc 2 tog. Sc in next 3 st.* Repeat * to end of row. {64 Sc (68, 72)}

Row 28: Repeat Row 27. {52 Sc (55, 58)}  

Row 29: Sc in 1st st. *Sc2tog. Sc.* Repeat * to end of row. {35 Sc (37, 39)} 

Row 30: Repeat Row 29. {24 Sc (25, 26)}

 Leave a long tail, fasten off. Weave in the ends of the stripes that are hanging on the sides. Fold hat together with the wrong side facing out (wrong side has the DC near the brim in the back loop away from you.) Use the long tail you left to seam the hat from the top to the bottom using an invisible mattress stitch. 


Cut a length of yarn about 10 inches. Weave back and forth through the single crochet at the top of the hat. Pull tightly to cinch the hat together. Tie two or three knots. Put the remaining tails through your tapestry needle and criss cross over the hole a few times if necessary to cover the top. Weave the ends in and cut remaining. Turn right side out. 


Ok, that’s all I’ve got today! Whew, I’m tired. I think I’ll be happy when my next pattern is a quick little pair of earrings with only ONE size! 

Welcome! My name is Priscilla and I love designing crochet patterns for your family. I live in beautiful Pennsylvania where I enjoy all sorts of crafts, but I’m most passionate about crochet! I’m a Catholic mom of 4 and I sometimes incorporate my faith into my designs. Thank you so much for supporting me by visiting my crochet website and I hope you find something here that you are excited to make.

Recent Posts

  • Soft Crochet Hat Pattern
  • Cozy Men’s Scarf Crochet Pattern
  • Bulky Textured Beanie Crochet Pattern
  • Cozy Fall Baby Beanie Pattern
  • Spider Basket Crochet Pattern

Categories

Follow Me

  • Etsy
  • Facebook
  • Instagram
  • Pinterest
  • YouTube

Pretty Chic Theme By: Pretty Darn Cute Design