The Mother Lode

Crafts and Crochet

  • Home
  • Crochet Pattern Library
  • Faith Based Patterns
  • About Me
  • Privacy Policy

November 26, 2021 by Priscilla

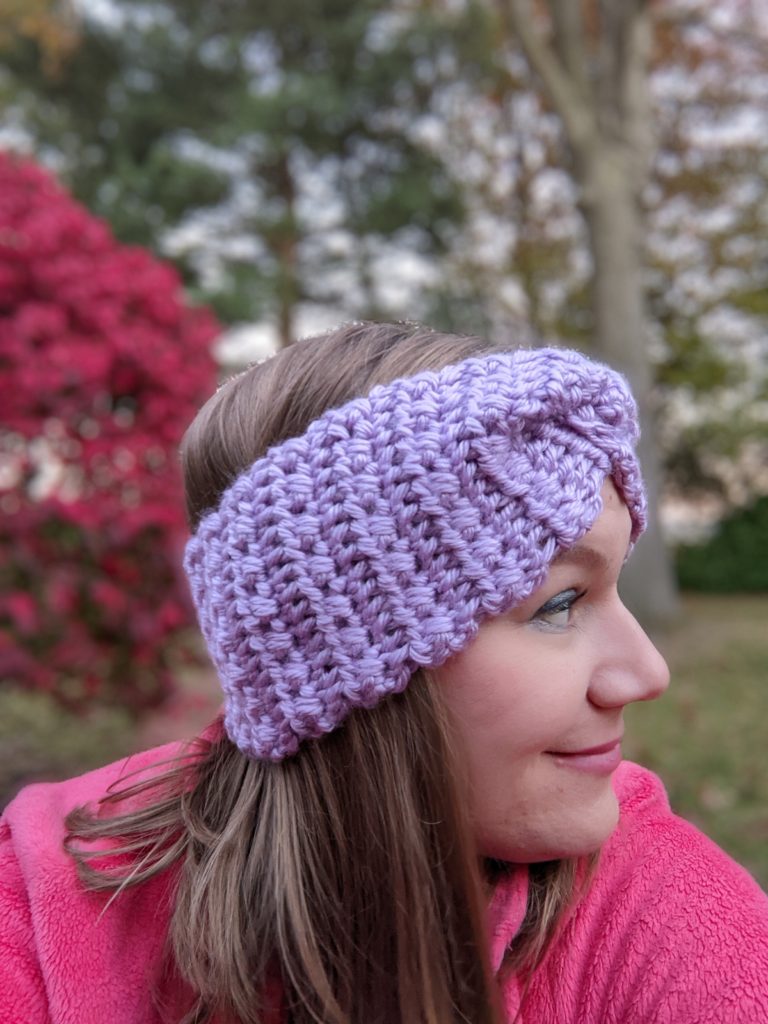
Chill Stopper Headband

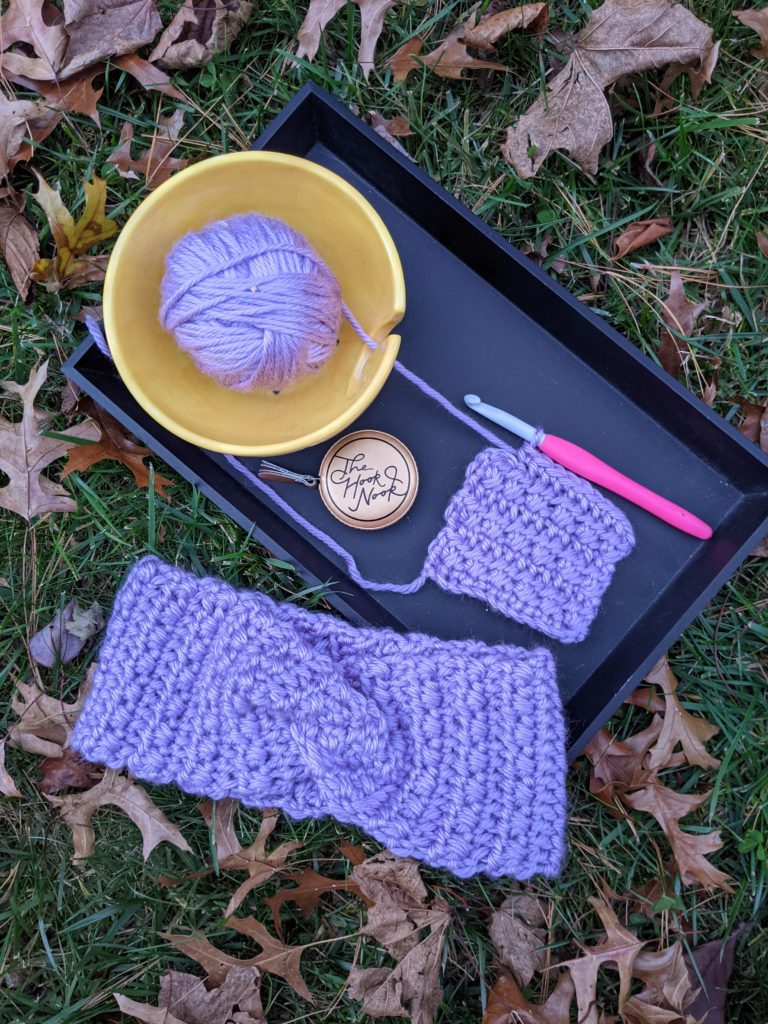
I’m delighted with the turnout of this headband pattern! It’s cozy without being too thick, just right for keeping the chill off your ears in cold weather. I had 14 testers for this pattern, and a few of them made more than one. That’s when you know it’s a good pattern! I think you’ll love having this crochet pattern in your library as a staple for markets and gifting. There are six sizes, so you can make one for anyone! I like the way the crossed hdc stitches worked up in this headband, so I’m in the middle of designing a coordinating hat and cowl. Subscribe to my email list so you can get notified when the coordinating patterns come out in December.
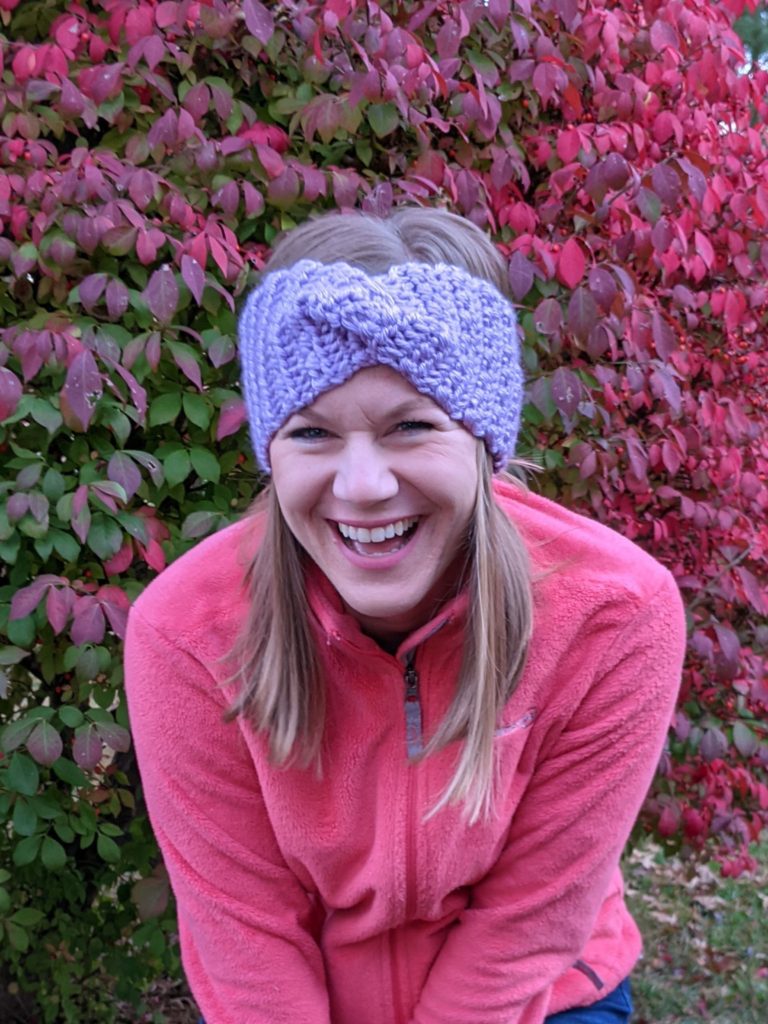
Okay, I’m keeping this one short, because frankly, it’s late at night and I’m out of words! Let’s get to the pattern!

You can use the free version of the pattern below! It’s an easy, beginner pattern. If you need extra help with the stitches or forming the twist, you can get the low cost PDF on ravelry, Lovecrafts, or Etsy. It has photo tutorials to help with the tricky bits.

Supplies

  • 100 yards bulky (CYC 5) yarn, sample is Red Heart Yarns Soft Essentials in color Sugar Plum (Michael’s Loops and Threads Charisma or Hobbii Amigo Chunky would be good substitutes. The Amigo Chunky is on sale right now for Black Friday weekend!
  • crochet hook US size L (8 mm) or size needed to obtain gauge
  • tapestry sewing needle
  • scissors and measuring tape

Stitches (US terms)

ch = chain

sc = single crochet

st/sts = stitch/stitches

FLO = front loop only

sk = skip

hdc = half double crochet

Notes

  • Finished dimensions: baby: 14 in, toddler: 16 in, child: 18 in, teen/adult sm: 20 in, adult med: 21 in, adult lg: 22 in around.
  • Stitch counts are marked at the end of each row in parentheses.
  • Pattern is worked flat and seamed at the end.
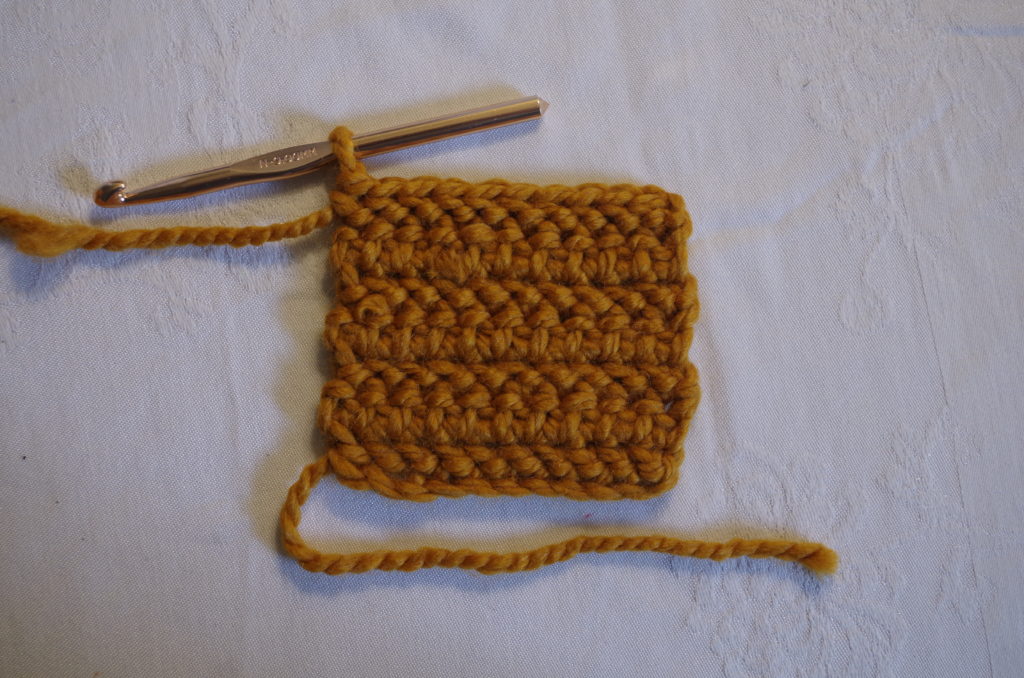
  • The right side is the side where the hdc stitches puff out more, pictured below.

Gauge

4 in by 4 in swatch

12 sts in 8 rows of the pattern repeat which is:

Row 1: sc FLO

Row 2: (sk st, hdc, hdc in skipped st) repeat

Written Instructions

Baby (Toddler, Child)

Row 1: Ch 13, sc in second st from hook and each st across, ch 1, turn. (12 sc)

Row 2: Sk first st, hdc next st, hdc in previously skipped st, *sk next st, hdc, hdc in skipped st, ch 1, turn. (12 hdc)

Row 3: Sc FLO each st across, ch 1, turn. (12 sc FLO)

Row 4- 27 (31, 35): Repeat rows 2 and 3 respectively.

Row 28 (32, 36): Repeat row 2. Fasten off, leaving about 8 inches for seaming.

Fold headband in half. Put the ends, right side together so that one end is halfway on top of the other end. Wrap the bottom end around the top and and weave the remaining tail through to create the twisted knot look.

How is the pattern going?

Join my subscriber list for pattern updates, discounts, and other crafty fun!

Thank you!

You have successfully joined our subscriber list.

.

Teen/small (medium, large)

Row 1: Ch 15, sc in second st from hook and each st across, ch 1, turn. (14 sc)

Row 2: Sk first st, hdc next st, hdc in previously skipped st, *sk next st, hdc, hdc in skipped st, ch 1, turn. (14 hdc)

Row 3: Sc FLO each st across, ch 1, turn. (14 sc FLO)

Row 4- 39 (41, 43): Repeat rows 2 and 3 respectively.

Row 40 (42, 44): Repeat row 2. Fasten off, leaving about 8 inches for seaming.

Fold headband in half. Put the ends, right side together so that one end is halfway on top of the other end. Wrap the bottom end around the top and and weave the remaining tail through to create the twisted knot look. Don’t forget, if you struggle with this part, the PDF version has tutorial photos to help. It’s available on ravelry, Lovecrafts, and Etsy.
May 28, 2021 by Priscilla

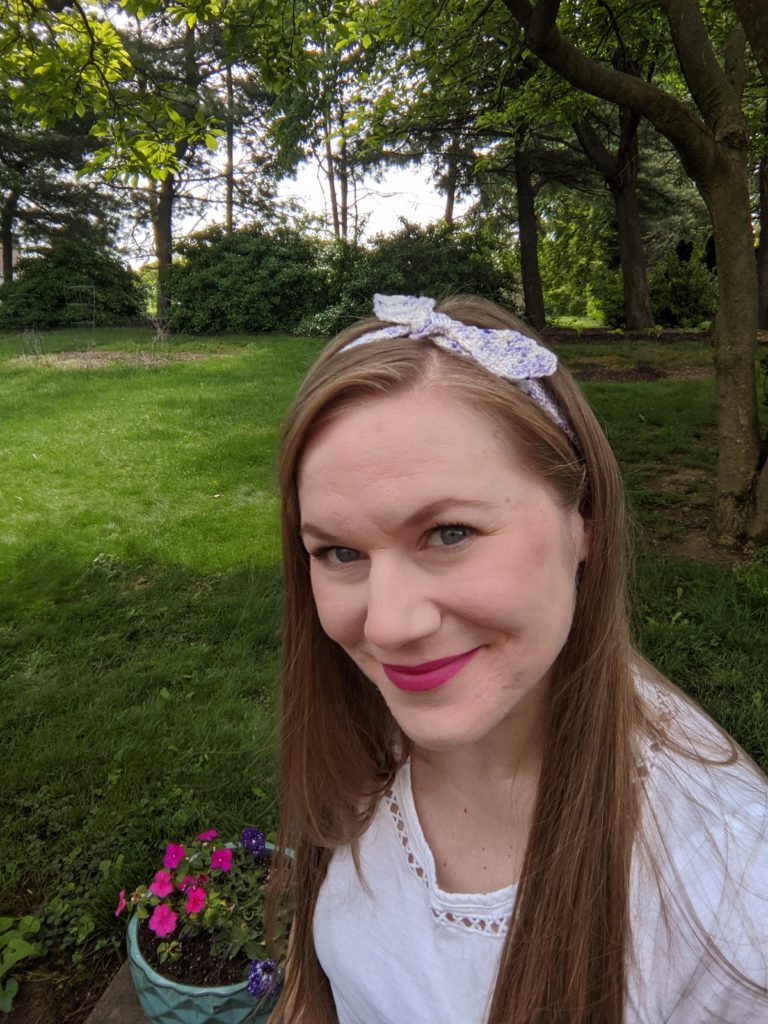
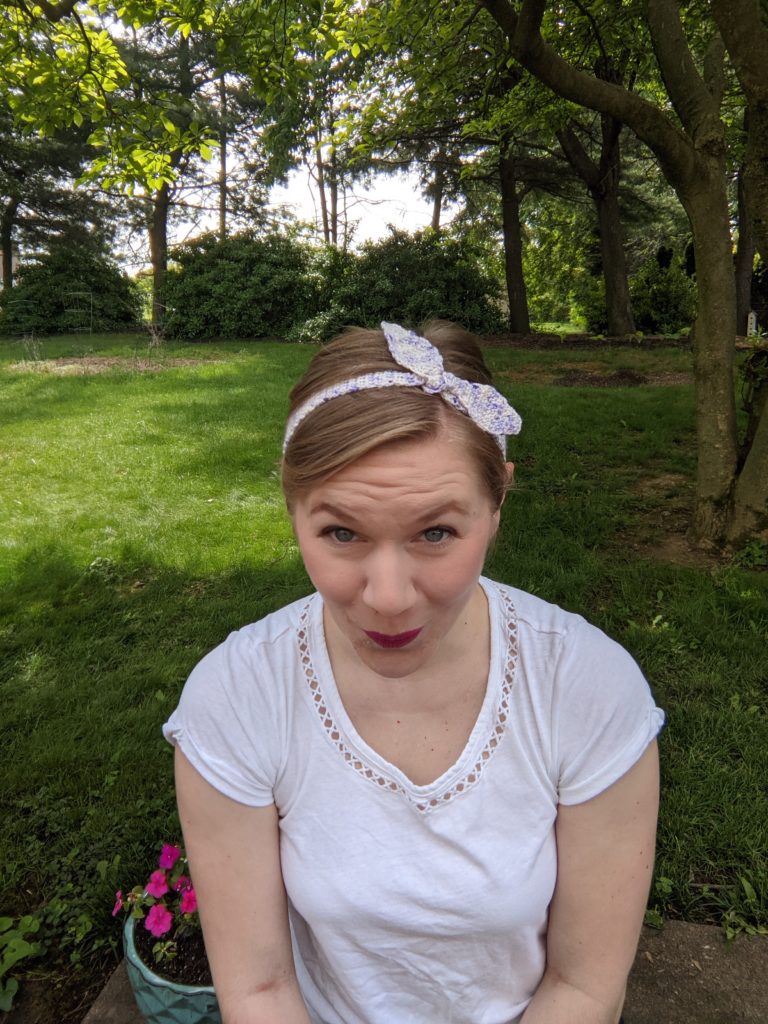
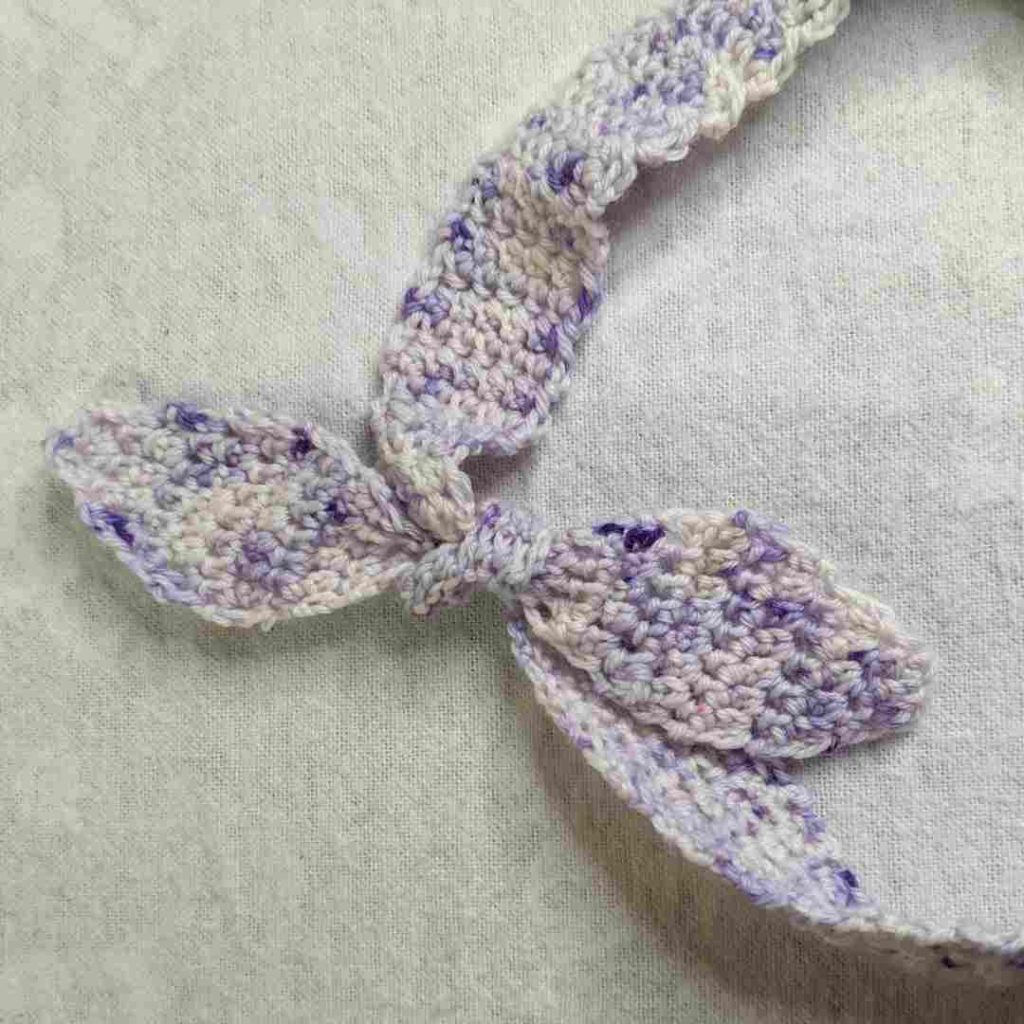
Simple Summer Headband

Hi! I have a fun and simple headband pattern for you today! I designed this for two purposes/reasons. First of all, I love hand-dyed yarn because, well, there is no denying its beauty and quality! It is costly because of this though, so I want to use up every scrap. I have some yarn leftover from my advent calendar from the fantastic Rita Mae Yarns and wanted to use it for another hair accessory for summer. Secondly, I have been enjoying making yarn music videos on my Instagram account, and I wanted to do Meghan Trainor’s All About That Bass which I turned into All About Crochet. (I crack myself up, clearly.) Anyway, she wears headbands all throughout that music video so this was born of that!

I can’t say what my next design will be because I’m working on a few things and I’m not sure what will be ready for testers yet, but I have earrings planned and hopefully some kitchen items I’m working on the design for with one of my new favorite yarns: Caron Cotton Ripple Cakes. I just finished a tank top with it and it was really fun to work with. My mom used it for some beautiful trivets for wedding shower gifts a few weeks ago, and I think the texture will be just right for a handy kitchen wipe. If only I could crochet as fast as I think!

Alright enough rambling about crochet and on to the pattern! This pattern is a nice beginner pattern, but you still might want the PDF because there are quite a few rows and it will be easier to check off as you work. It’s only $2, less than a fancy coffee! Available on Ravelry and LoveCrafts.

Summer Vibes Blog Hop!

If you missed snagging the free PDF as part of the Summer Vibes Blog Hop, you can still get it at a HUGE discount by purchasing the Blog Hop Bundle! This Bundle has ALL the patterns from the blog hop: 39 patterns! For less than $13! Here is the link to purchase! Go to the pattern round up below if you want to see all the patterns. Then “hop” back here and use the link above to get it for yourself! Think of the pattern stockpile you’ll have!

You’ll need 100 yards of that fabulous hand-dyed yarn from your stash, or any fingering weight yarn you want to use up! I’m working on my third headband now (I want to film a cool time-lapse video for Instagram.) So don’t get mad if you end up making more than one! You’ll also need a 3.25 mm crochet hook, or whatever helps you meet gauge.

Additional Materials

  • 100 yds/10g Sock/fingering/baby/sport yarn super fine CYC weight 1 OR 2 to meet gauge (Samples are Rita Mae Yarns in Berries N’ Cream and Universal Yarn Finn in Rose Quartz)
  • crochet hook US size D (3.25mm) or size needed to obtain gauge
  • tapestry sewing needle
  • scissors and measuring tape

Stitches (US Terms)

  • ch = chain
  • esc = extended single crochet: insert hook into st, yo, draw through the st, yo and pull through one loop on hook, yo, pull through both loops on hook.
  • sl st = slipstitch
  • BLO = back loop only
  • st/sts = stitch/stitches
  • dec = 1 esc in 2 sts: insert hook into st, yo, draw through the st, yo and pull through one loop, insert hook in next st, yo draw through st, yo and pull through one loop on hook, yo pull through all 3 loops on hook.
  • sk = skip

Notes

  • Finished Dimensions: Approx 26 in X 1 in
  • I suggest blocking this headband to get it very straight and make sure the ends don’t curl.
  • Photo guide pages 5 and 6 will help you check your work.
  • Stitch counts are marked with parentheses ( ) at the end of each row. Repeating rows also have a number of rows marked at the end with { }

Gauge Swatch

Chain 10, esc in 2nd ch from hook and each remaining st. (9 esc) Ch 1 and turn. *Esc each st across. Repeat from * for 6 more rows. Square should be 1 inch by 1 inch. (9 esc sts in 8 rows)

Instructions

Ch 3.

Row 1: 2 esc in 2nd chain from hook, 2 esc in next st. Ch 1, turn. (4 esc)

Row 2: Esc in each st across. Ch 1, turn. (4 esc)

Row 3: 2 esc in first st, esc until last st, 2 esc in last st. Ch 1, turn. (6 esc)

Row 4: Esc in each st across. Ch 1, turn. (6 esc)

Row 5: 2 esc in first st, esc until last st, 2 esc in last st. Ch 1, turn. (8 esc)

Row 6-7: Esc in each st across. Ch 1, turn. (8 esc)

Row 8: Dec, esc in each st until last two, dec in last two sts. Ch 1, turn. (6 esc)

Row 9: Esc in each st across. Ch 1, turn. (6 esc)

Row 10: Dec, esc in each st until last two, dec in last two sts. Ch 1, turn. (4 esc)

Row 11-19: Esc in each st across. Ch 1, turn. (4 esc) {9 rows}

Row 20: 2 esc in first st, esc until last st, 2 esc in last st. Ch 1, turn. (6 esc)

Row 21-47: Esc in each st across. Ch 1, turn. (6 esc) {27 rows}

Row 48-78: Esc BLO in eash st across. Ch 1, turn. (6 esc BLO) {30 rows}

Row 79-111: Esc in each st across. Ch 1, turn. (6 esc) {32 rows}

Row 112: Dec, esc in each st until last two, dec in last two sts. Ch 1, turn. (4 esc)

Row 113-122: Esc in each st across. Ch 1, turn. (4 esc) {9 rows}

Row 123: 2 esc in first st, esc until last st, 2 esc in last st. Ch 1, turn. (6 esc)

Row 124: Esc in each st across. Ch 1, turn. (6 esc)

Row 125: 2 esc in first st, esc until last st, 2 esc in last st. Ch 1, turn. (8 esc)

Row 126-127: Esc in each st across. Ch 1, turn. (8 esc)

Row 128: Dec, esc in each st until last two, dec in last two sts. Ch 1, turn. (6 esc)

Row 129: Esc in each st across. Ch 1, turn. (6 esc)

Row 130: Dec, esc in each st until last two, dec in last two sts. Ch 1, turn. (4 esc)

Row 131: Esc in each st across. Ch 1, turn. (4 esc)

Row 132: Dec twice. Ch 1, turn. (2 esc)

Row 133: sk first st, sl st in 2nd st. Fasten off and weave in ends. Tie with a square knot at the two thinner areas near each end of the band.

November 2, 2020 by Priscilla

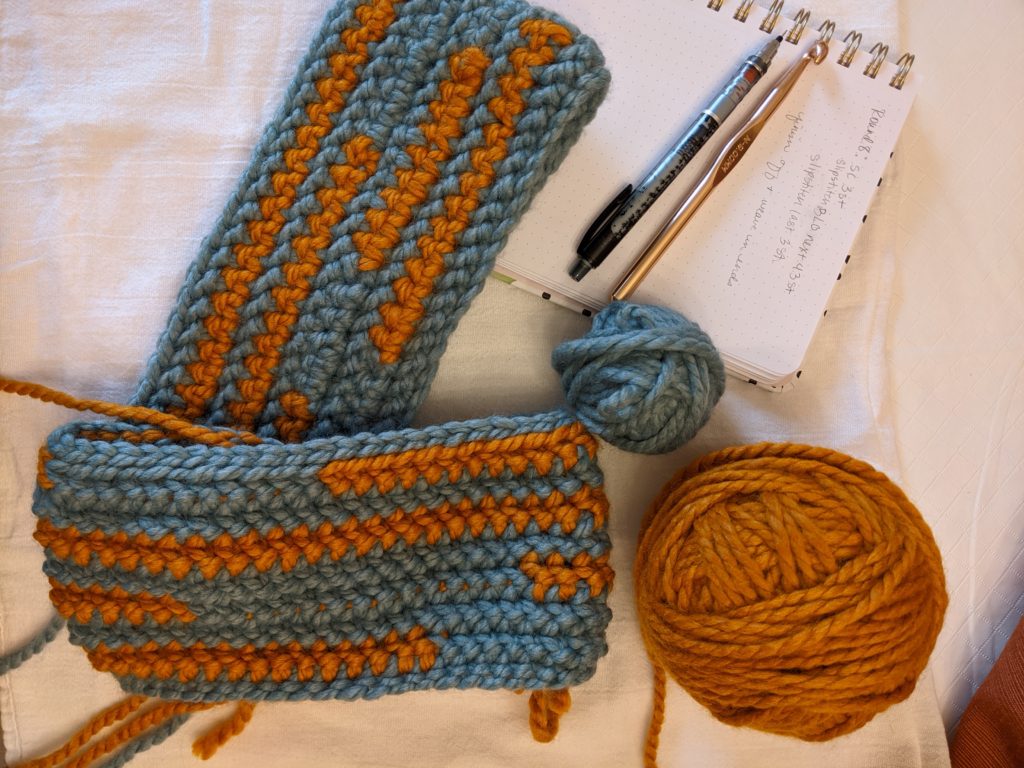
Funky Chunky Headband

November is here! I’ll decorate for Christmas in the coming weeks, work on some crochet Christmas gifts for my family, and maybe even publish a couple of patterns. Last week, I got caught up in finishing Halloween things and on Friday I called it at 4pm and said, “Priscilla, you do not have time to publish this pattern today properly. Postpone it until Monday and enjoy Trunk or Treat with your kids.” So, I did. Anyone else have to do some serious self-talk from time to time? I’m just such an idea person and get all frazzled that I need to talk myself out of (or sometimes into) certain things.

A few months ago, I was enjoying my second favorite hobby: yarn shopping. Two beautiful colors of Wool Ease Thick and Quick yarn by Lion Brand Yarn jumped out at me! I just loved the colors and had been wearing an outfit all summer that matched. SO I snatched them up and brought them home and they sat all pretty in my craft yarn room for a month.

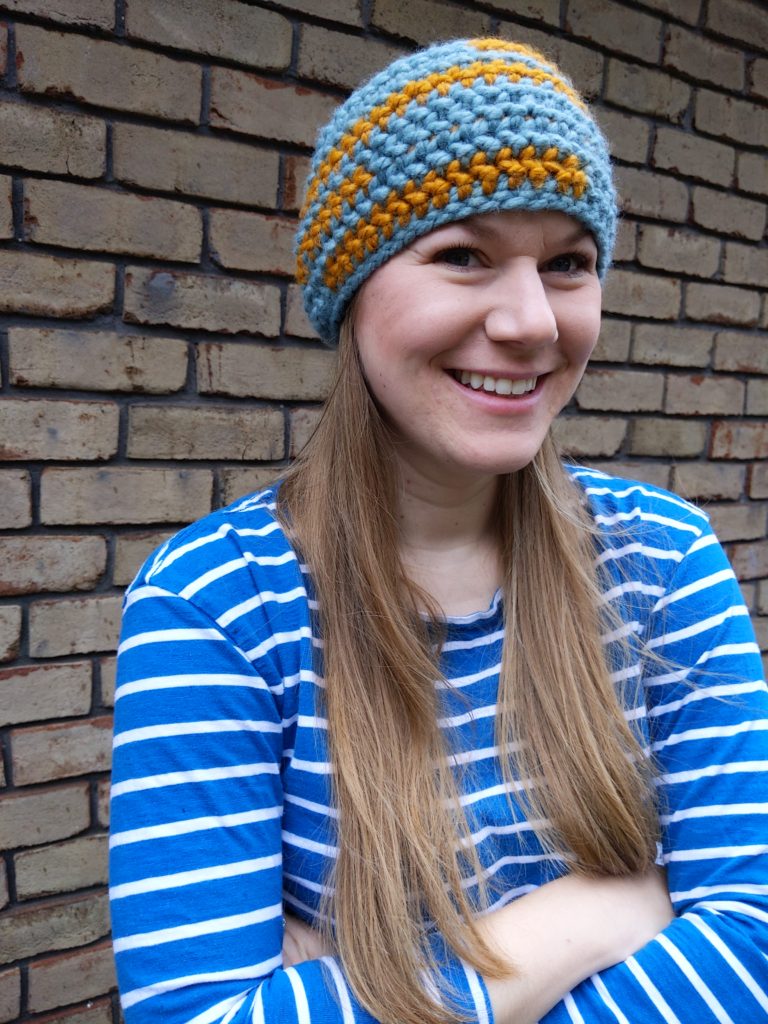
I got the pretties out and designed a funky, modern crochet headband that will keep the chill away from your ears all winter long! I hate having cold ears. I love all the cozy hats and headbands. Sometimes, though, they get all stretched out easily and/or don’t really keep ALL the wind out. Let me tell you, friends, no wind is getting through this headband and it is staying nicely snug on your head!

Funky Chunky Headband Pattern

Alright here it is! As usual, you can use the pattern here for free, but the low-cost PDF includes photo tutorials to show you how to change colors and use the herringbone half-double crochet stitch (which I’m in love with right now. Don’t tell my husband.) It has each of the three sizes on its own page, so you can pick and choose which ones you need to print to save on ink and paper! It’s available here on Ravelry or here on Lovecrafts.

Supplies

  • 100 yards super bulky (CYC 6) yarn in two colors, sample is Lion Brand Wool Ease Thick and Quick in Succulent (70 yds) and Butterscotch (30 yds)
  • crochet hook US size N (9 mm) or size needed to obtain gauge
  • tapestry sewing needle
  • scissors and measuring tape
  • stitch marker

Notes

  • Photo tutorial follows the written instructions.
  • Finished Dimensions: child: 17-18 in around, teen/adult sm: 18-19 in around, adult med/lg: 20-21 in around for a snug cozy fit.
  • Stitch counts are marked at the end of each round in parentheses.
  • Pattern is worked in the round without turning.
  • Some of the rounds state to carry the yarn. If it does not say to carry, then leave a tail and cut the yarn to be woven in later. As written, there are 10 ends to weave in. You may choose not to carry the yarn and have more ends to weave.
  • If you get confused with the color changes, look back to the last bold color and that is what color you should be working with.
  • Round 1 and 2 can be substituted with foundation sc if you find it difficult to sl st into a chain. This will also help make the brim a bit wider if you prefer.

Stitches

  • ch = chain
  • sl st = slip stitch
  • st/sts = stitch/es
  • BLO = back loop only
  • hhdc = herringbone half-double crochet: yo, insert hook, yo, pull through one loop, yo, pull through two loops.

Gauge

10 sts of hhdc in 7 rows = 4in x 4in

Ch 11, hhdc in 2nd ch from hook. Hhdc to end, ch 1, turn, *hhdc 10 sts, ch 1, turn. Repeat from * to make 7 rows. This is meant to be fairly tight, so you may need to go down a hook size to obtain gauge.

Child Size

Round 1: with color A ch 44, sl st to beg ch to form a circle, being careful not to twist the chain.

Round 2: sl st in each st around, placing a stitch marker in the first st to mark your beginning. (44 sl st)

Round 3: sl st in first 3 sts. hhdc in 16 sts, switch to color B, carrying color A behind. hhdc 14 sts, switch to color A, hhdc 8 sts, sl st next 3 sts. (6 sl st, 38 hhdc)

Round 4: sl st in first 3 sts, hhdc each st around until last 3 sts, sl st in last 3 sts.(6 sl st, 38 hhdc)

Round 5: sl st in first 2 sts, switch to color B, carrying color A behind, sl st, hhdc next 11 sts, switch to color A, carrying color B behind, hhdc in next 12 sts, switch to color B, carrying color A, hhdc 12, switch to color A, hhdc 3 sts, sl st 3 sts.(6 sl st, 38 hhdc)

Round 6: repeat round 4

Round 7: sl st in first 3 sts, hhdc 8, switch to color B, carrying color A behind, hhdc 23, switch to color A, hhdc 8, sl st in last 3 sts.(6 sl st, 38 hhdc)

Round 8: sl st 3 sts, sl st BLO in each st around until 3 remaining sts, sl st last 3 sts. Fasten off and weave in ends.(6 sl st, 38 sl st BLO)

Teen/adult small Size

Round 1: With color A ch 48,sl st to beg ch to form a circle, being careful not to twist the chain.

Round 2: sl st in each st around, placing a stitch marker in the first st to mark your beginning. (48 sl st)

Round 3: sl st in first 3 sts. hhdc in 17 sts, switch to color B, carrying color A behind. hhdc 15 sts, switch to color A, hhdc 10 sts, sl st next 3 sts.(6 sl st, 42 hhdc)

Round 4: sl st in first 3 sts, hhdc each st around until last 3 sts, sl st in last 3 sts.(6 sl st, 42 hhdc)

Round 5: sl st in first 2 sts, switch to color B, carrying color A behind, sl st, hhdc next 13 sts, switch to color A, carrying color B behind, hhdc in next 14 sts, switch to color B, carrying color A behind, hhdc in next 13 sts, switch to color A, hhdc 2 sts, sl st 3 sts.(6 sl st, 42 hhdc)

Round 6: repeat round 4

Round 7: sl st in first 3 sts, hhdc 9, switch to color B, carrying color A behind, hhdc 25, switch to color A, hhdc 8, sl st in last 3 sts.(6 sl st, 42 hhdc)

Round 8: repeat round 4

Round 9: sl st in first 3 sts, hhdc 3 sts, switch to color B, carrying color A behind, hhdc 19 sts, switch to color A, carrying color B behind, hhdc 11 sts, switch to color B, carrying color A behind, hhdc 9 sts, switch to color A,sl st 3 sts.(6 sl st, 42 hhdc)

Round 10: sl st 3 sts, sl st BLO in each st around until 3 remaining sts, sl st last 3 sts. Fasten off and weave in ends.(6 sl st, 42 sl st BLO)

Adult medium/large Size

Round 1: With color A ch 52, sl st to beg ch to form a circle, being careful not to twist the chain.

Round 2: sl st in each st around, placing a stitch marker in the first st to mark your beginning. (52 sl st)

Round 3: sl st in first 3 sts. hhdc in 19 sts, switch to color B, carrying color A behind, hhdc 17 sts, switch to color A, hhdc 10 sts, sl st next 3 sts.(6 sl st, 46 hhdc)

Round 4: sl st in first 3 sts, hhdc each st around until last 3 sts, sl st in last 3 sts.(6 sl st, 46 hhdc)

Round 5: sl st in first 2 sts, switch to color B, carrying color A behind, sl st, hhdc next 15 sts, switch to color A, carrying color B behind, hhdc in next 14 sts, switch to color B, carrying color A behind, hhdc in next 13 sts switch to color A, hhdc 4 sts, sl st 3 sts.(6 sl st, 46 hhdc)

Round 6: repeat round 4

Round 7: sl st in first 3 sts, hhdc 11, switch to color B, carrying color A behind, hhdc 26, switch to color A, hhdc 9, sl st in last 3 sts.(6 sl st, 46 hhdc)

Round 8: repeat round 4

Round 9: sl st in first 3 sts, hhdc 4 sts, switch to color B, carrying color A behind, hhdc 20 sts, switch to color A, carrying color B behind, hhdc 12 sts, switch to color B, carrying color A behind, hhdc 10 sts, switch to color A, sl st 3 sts.(6 sl st, 46 hhdc)

Round 10: sl st 3 sts, sl st BLO in each st around until 3 remaining sts, sl st last 3 sts. Fasten off and weave in ends.(6 sl st, 46 sl st BLO)

Welcome! My name is Priscilla and I love designing crochet patterns for your family. I live in beautiful Pennsylvania where I enjoy all sorts of crafts, but I’m most passionate about crochet! I’m a Catholic mom of 4 and I sometimes incorporate my faith into my designs. Thank you so much for supporting me by visiting my crochet website and I hope you find something here that you are excited to make.

Recent Posts

  • Soft Crochet Hat Pattern
  • Cozy Men’s Scarf Crochet Pattern
  • Bulky Textured Beanie Crochet Pattern
  • Cozy Fall Baby Beanie Pattern
  • Spider Basket Crochet Pattern

Categories

Follow Me

  • Etsy
  • Facebook
  • Instagram
  • Pinterest
  • YouTube

Pretty Chic Theme By: Pretty Darn Cute Design