The Mother Lode

Crafts and Crochet

  • Home
  • Crochet Pattern Library
  • Faith Based Patterns
  • About Me
  • Privacy Policy

April 23, 2021 by Priscilla

Spring Triangles Cowl

Happy Spring! We’ve started this spring with a giant overhaul of our lawn and garden. We love having a vegetable patch, but the space that was here when we bought our house doesn’t actually get enough sun AND it’s in the middle of the backyard. SO my sweet husband built a little raised garden bed and we are going to put it on the side of our house where the sun shines. Then we decided we needed more rock and mulch. We cut a large flower bed out in the front yard where the grass is spotty because it is so shady. We’ve been wanting to take down some trees (they were unhealthy hemlocks that were crowded together,) and we’re in the middle of that right now! This week they got the trees down, next week they’ll take the stumps out. Fingers crossed in a few weeks I will be planting ALL the flowers and veggies and then crocheting on my back patio while my boys play soccer, climb trees, and dig in the dirt.
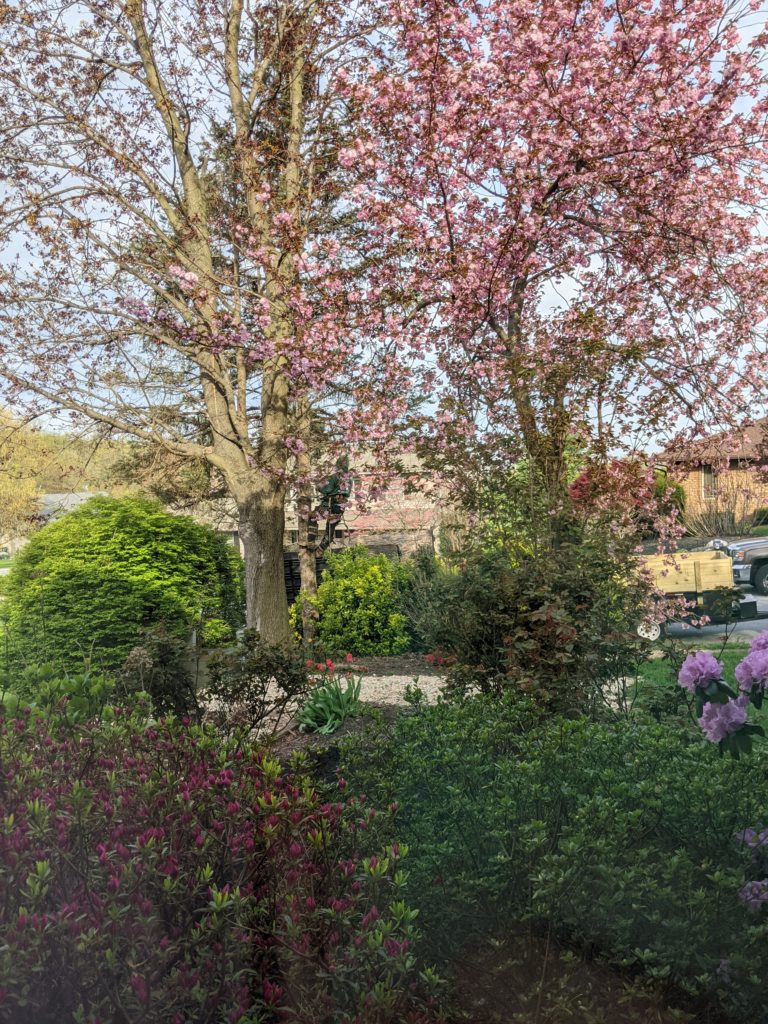
Can you spot “the tree guy?” He told us he loves climbing trees!

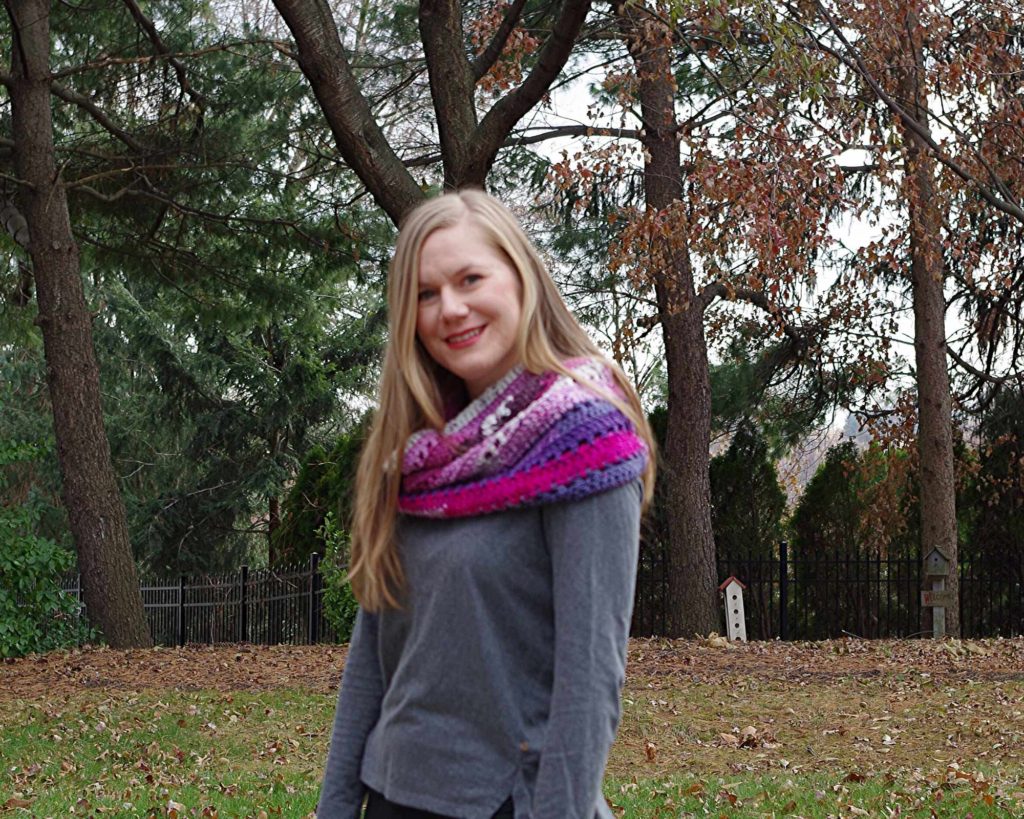
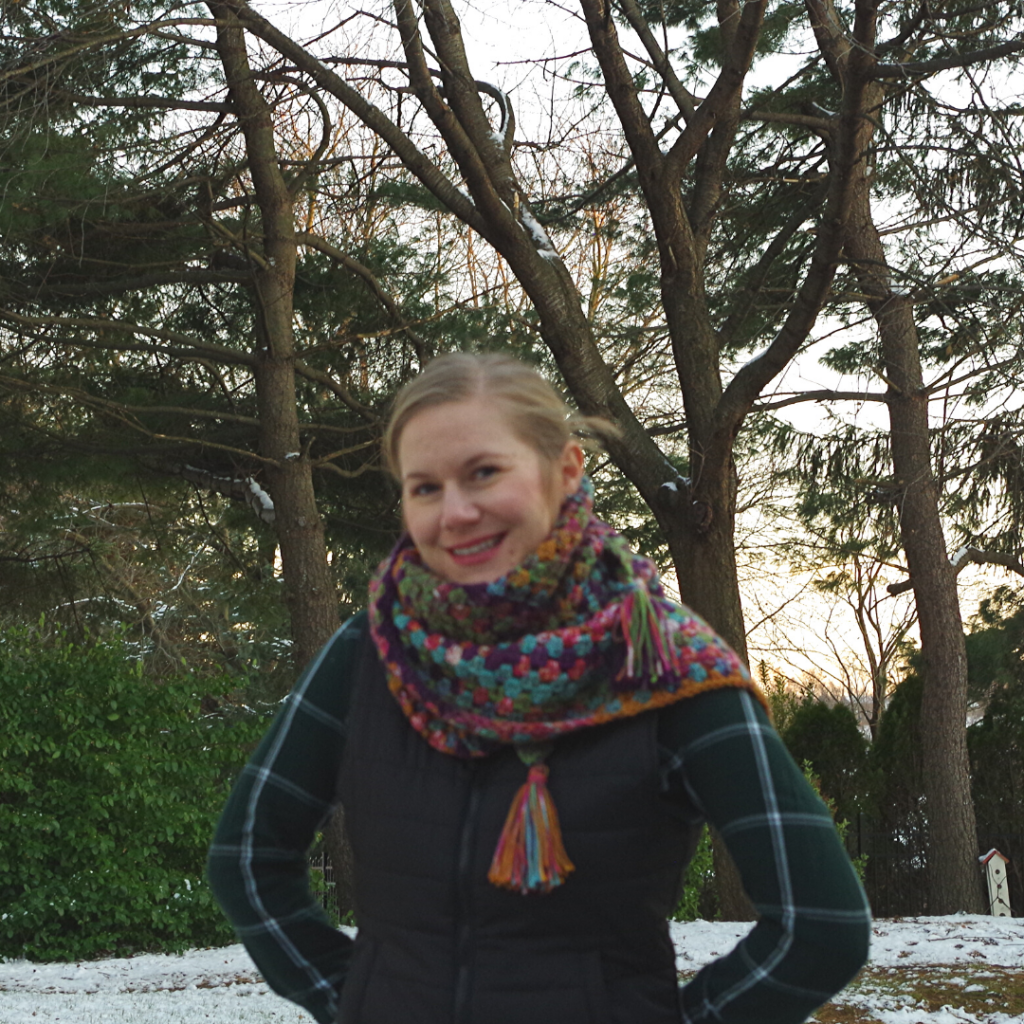
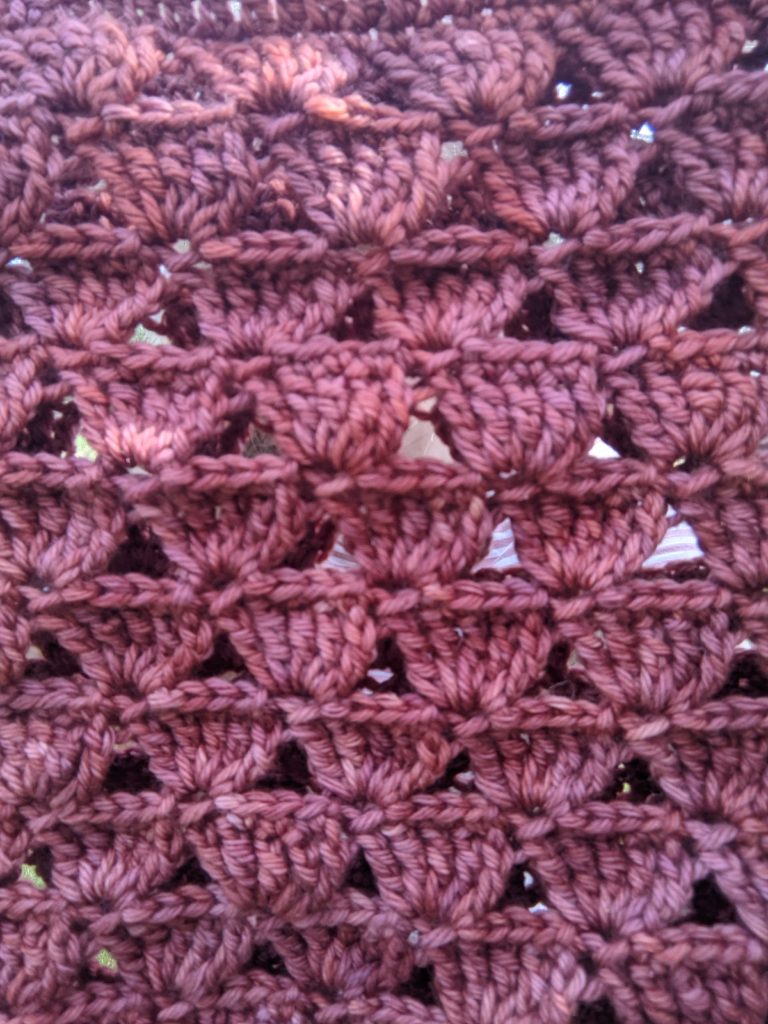
I’m sure we are in for a few more chilly days to wear this cowl! It actually was very wintery here today, we even had snow flurries! You’ll need some worsted weight yarn: about 315 yards (one of my testers used Caron Simply Soft and one skein was the perfect amount!) I used some gorgeous merino worsted yarn from my favorite yarn dyer Rita Mae Yarns. She has such wonderful colors! A size J hook should work for you, but check the gauge below just in case. I hope you love this cowl, I’m really proud of the stitch pattern and I’m working on a shawl with it!
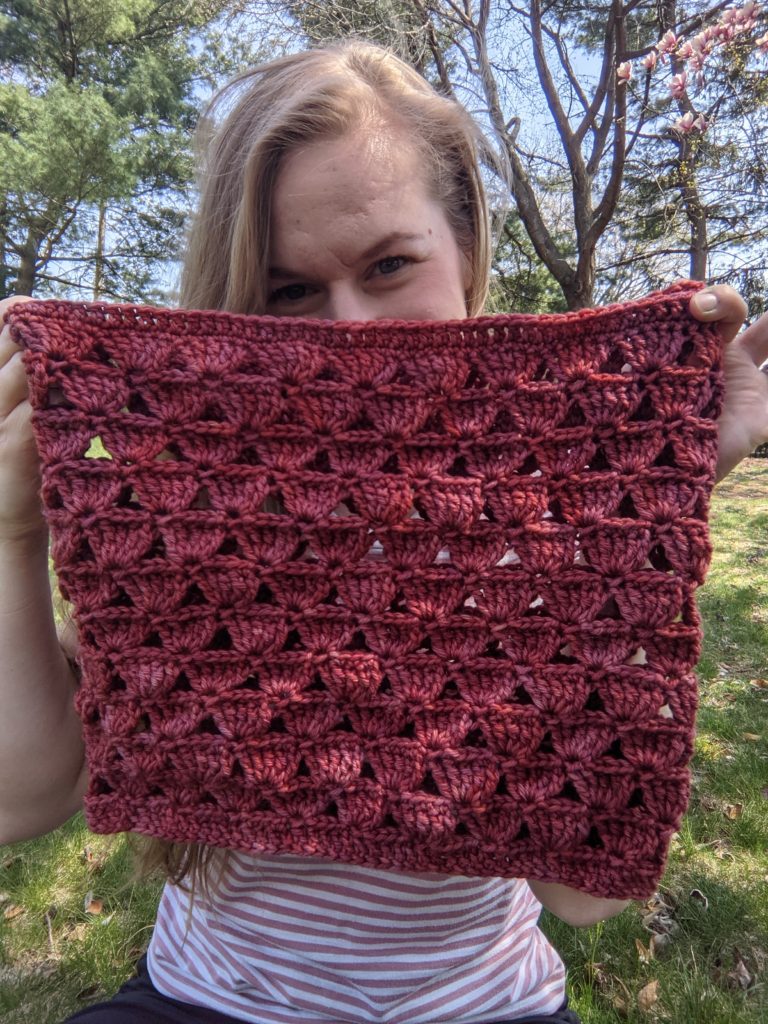
I’ve got the free version of the pattern right here for you, with written instructions and a few photos. A PDF is also available for $3 on Ravelry and Lovecrafts! The PDF includes everything below ready to print as well as photo tutorial pages for the stitches. It’s especially helpful if you need to learn the foundation chain.
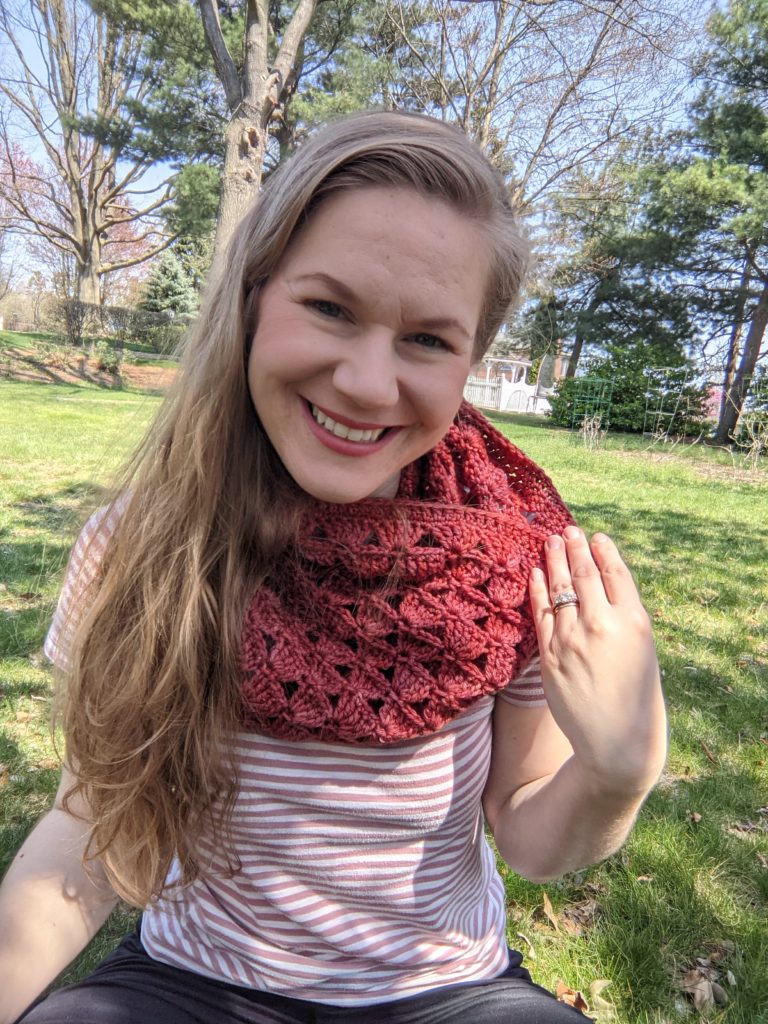
Supplies

  • 315 yards worsted weight yarn (CYC 4) samples used Rita Mae
  • Yarns Worsted Merino in colorway Hey Mrs. Robinson OR Caron
  • Simply Soft in colorway Orchid
  • crochet hook US size J (6 mm) or size needed to obtain gauge
  • tapestry sewing needle
  • scissors and measuring tape

Stitches (US terms)

  • ch = chain
  • sl st = slipstitch
  • st/sts = stitch/stitches
  • tr = treble crochet
  • dc = double crochet
  • sc = single crochet
  • fdc = foundation double crochet

Notes

  • Photo tutorial follows the written instructions.
  • Finished Dimensions: 26 in around, 13 in wide, 11 in tall
  • Stitch counts are marked at the end of each round in parentheses.
  • Pattern is worked in the round without turning.
  • In round 1, the ch-3 does not count as a stitch. Join to the 1st fdc st.
  • In round 3, the first ch-3 will end up as the last tr of the round and counts as a stitch.

Gauge

14 sts of dc in 7 rows = 4in x 4in

Written Instructions

Round 1: Fdc 100, sl st to beg fdc to form a circle, being careful not to twist the chain. Ch 1, do not turn. (100 fdc)
Round 2: *Sc next 3 sts, sl st in next st, ch 3, sl st in next st, repeat from * to end of round, with final sl st in the first sc from the round. (60 sc, 40 sl st)
Round 3: Ch 3, sk 5 sts, then 5 trin the first ch-3 space, *sk 5 sts, 5 tr in next ch-3 space, repeat from *, ending with 4 tr in the last ch-3 space of round, join with sl st to the first tr from last round. (99 tr, 1 ch-3 which counts as the last tr of the round)
Rounds 4-23: Repeat rounds 2 and 3, alternating. End with a repeat of round 3 on round 23.
Round 24: Sc in each st around. (100 sc)
Round 25: Ch 1, dc in each st around, sl st to beg dc to join. Fasten off.
(100 dc)
February 11, 2021 by Priscilla

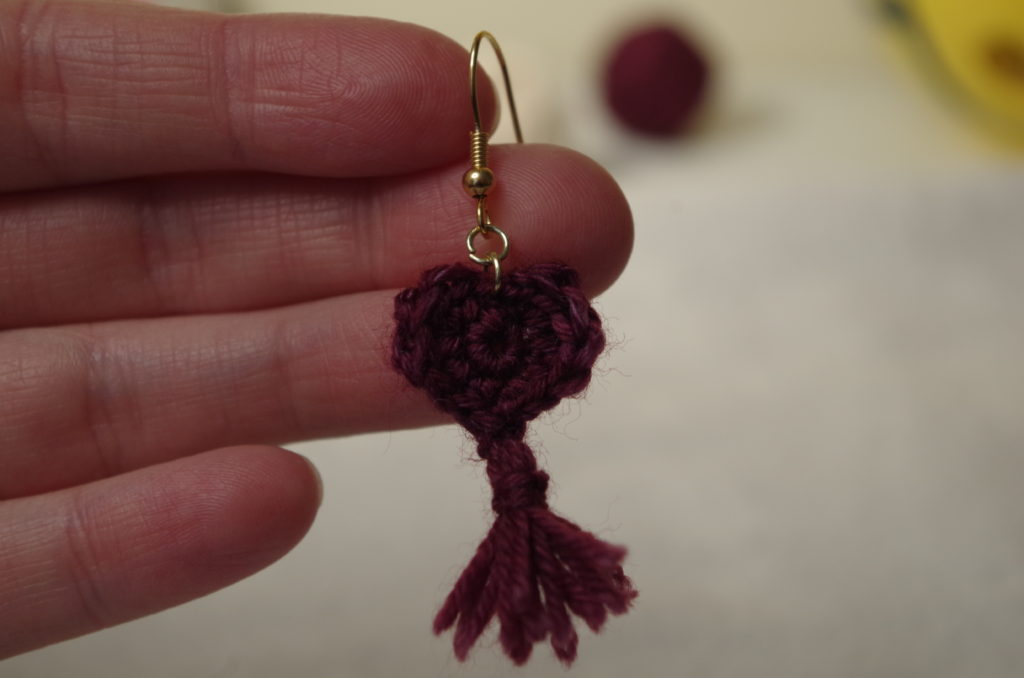
Heart Tassel Earrings

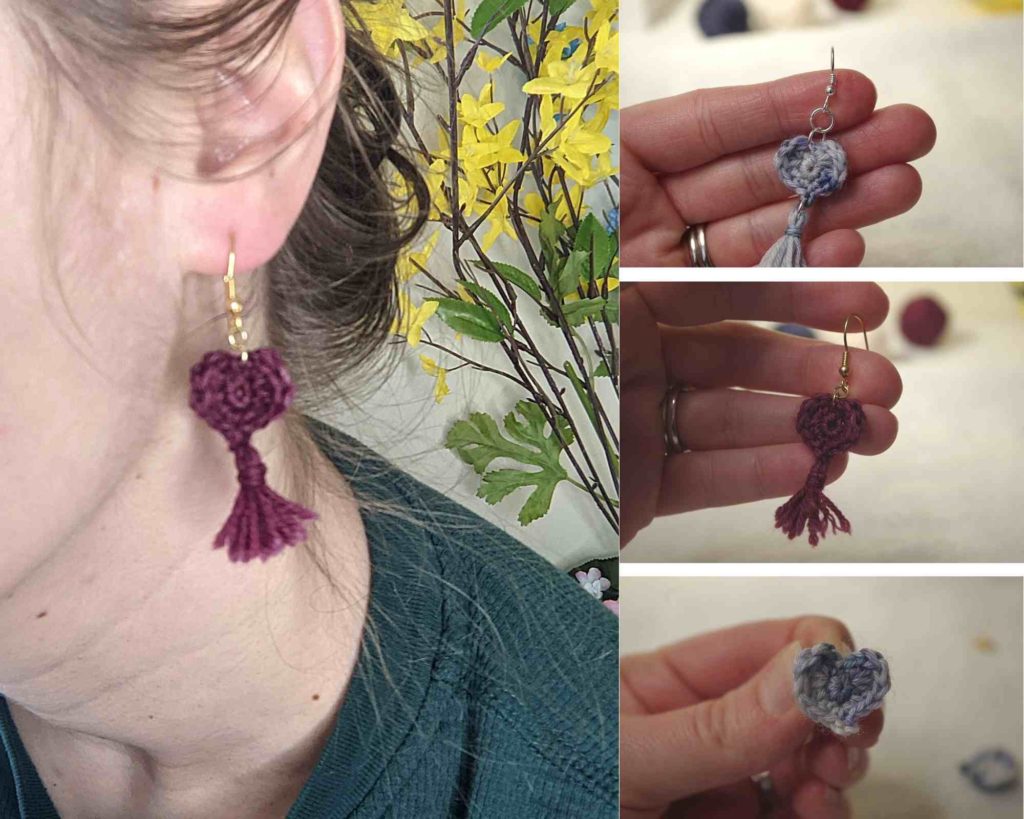
It’s almost Valentine’s Day and I am juuuuuuuust squeaking out this pattern in time! These sweet crochet earrings work up fast, though, so they can definitely be finished in time to wear on Sunday. (Although, there aren’t too many people venturing out for Valentine’s day right now due to the pandemic! Right?!)

Well, I will be at home, making some kind of fancy-ish dinner for my husband and maybe chicken nuggets for my children because, let’s face it, that’s what they want anyway! Last year I made homemade pizza for Valentine’s Day and did one as a heart shape. They liked that, maybe I’ll do that again! If I put a fancy ingredient on the pizza does that make it fancy? I’m thinking yes!

Alright to the pattern: I made a beautiful shawl last year with some hand-dyed yarn. I had a bit leftover and designed my Hairbow Scrunchie pattern with it, and I loved being able to use the scraps of the fancy, expensive yarn. In thinking about a Valentine’s earring design, I decided to use the scrap hand-dyed sock yarn again! I’m still working on a pair of socks with my advent calendar yarn, but I know I won’t use it all. Sometimes the struggle is real for estimating how much yarn you need for a project and so often we end up with leftovers. I think this pattern highlights that you can always find a use for that last little bit of precious yarn for something fun. These are especially great if you’ve never made crochet earrings before and want to give it a try!

If you are a beginning crocheter, there is a low cost PDF available on Ravelry. It has a full photo tutorial for each step! Otherwise the pattern is free below!!!!

Supplies

  • Scrap sock yarn (CYC 1), maybe 10 yards or so. Sample uses Rita Mae Yarns Sweet Pea Sock in color Mama’s Special Grape Juice.
  • Size 2.25 mm crochet hook
  • Tapestry needle and scissors
  • Earring findings: 2 fish hook style or 2 posts (will need Gorilla glue or similar for posts)
  • (Optional) 2 6mm jump rings

Stitches (US terms)

ch = chain
sc = single crochet
sl st = slip stitch
st/sts = stitch/stitches
MC = magic circle
dc = double crochet
tr = treble crochet
hdc = half double crochet

Special Stitches

picot = ch 3, sl st in back bump of 1st ch.

Notes

  • You can choose to block the heart if you would like them to keep shape better. I use Aleene’s Fabric Stiffening Spray and t-pins on a blocking mat.

Gauge

Gauge is not really necessary for this pattern. It depends on the size you would like the earrings to be. Personally, I find the smallest hook I can handle for the yarn (for earrings) produces the best, tightly stitched look.

Written Instructions

To make the heart:

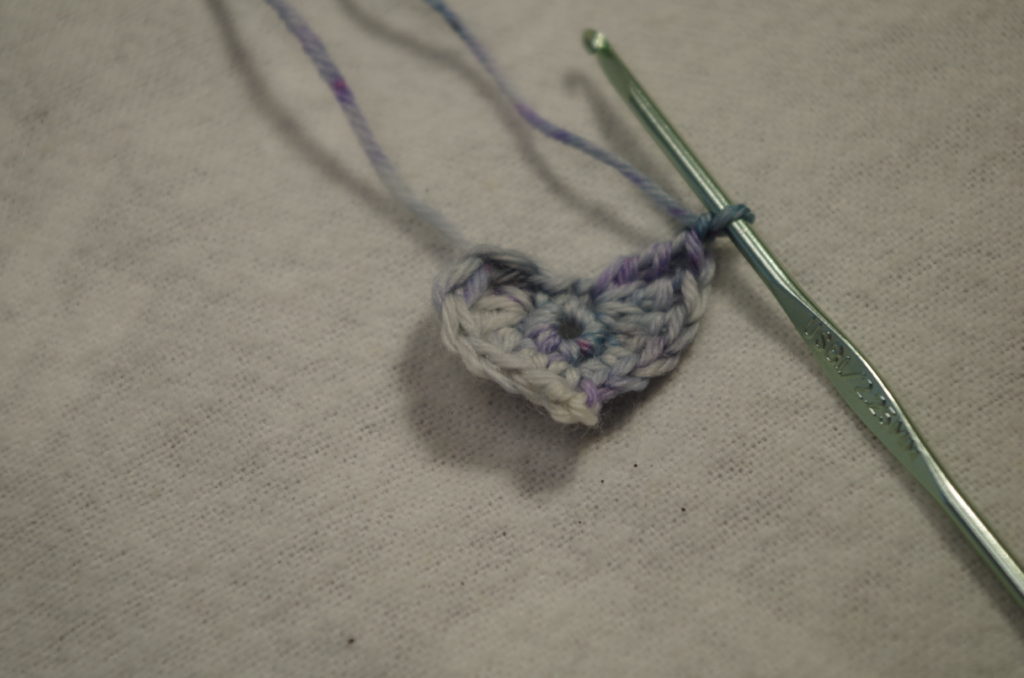
Round 1: MC, sc 8 into MC and sl st to join. (8 sc)

Round 2: Ch 1, 3 tr in 1st st, dc in next st, hdc next st, sc next st, picot, sc next st, hdc next st, dc next st, 3 tr next st, ch 1, sl st into the join st from round 1. (6 tr, 2 dc, 2 hdc, 2 sc, 1 picot, 1 sl st, 2 ch)

Use invisible finish method to finish off. (After last st, cut yarn and thread though tapestry needle. Insert under next st, then into the middle of last st and pull to create invisible finish.)

Weave in end and trim. Pull MC tightly, weave in remaining end and trim.

To make tassel:

Cut a strip of cardstock to 1 inch. Wrap yarn around approximately 8 times. Cut.

Insert hook under yarn, grab a 3 inch strand of yarn and pull through, tie tightly. Remove cardstock and tie tightly once more. Cut tassel.

Use washi tape or masking tape to affix top and bottom of tassel to table or other flat surface. Use another 3 inch strand of yarn to tie around top half of tassel. Wrap around a few times, then thread end through tapestry needle and weave into middle of tassel through to the bottom. Trim tassel bottom as desired.

Additional Assembly Instructions

Block your heart using pins and stiffening spray if you’d like. The heart seems to keep it’s shape pretty well without blocking, though, especially if you stitch tightly.

You can assemble in a few different ways depending on what you prefer and what jump rings you have. Here are some suggestions:

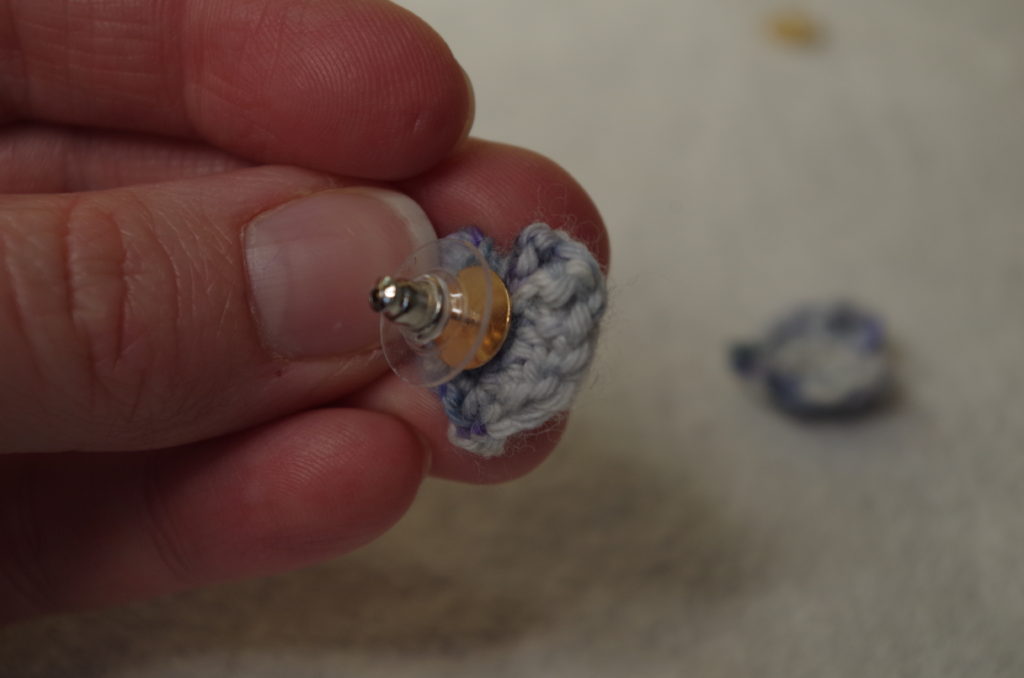
Option 1: Use Gorilla glue/super glue to attach flat back posts to middle of heart for simple heart stud earrings.
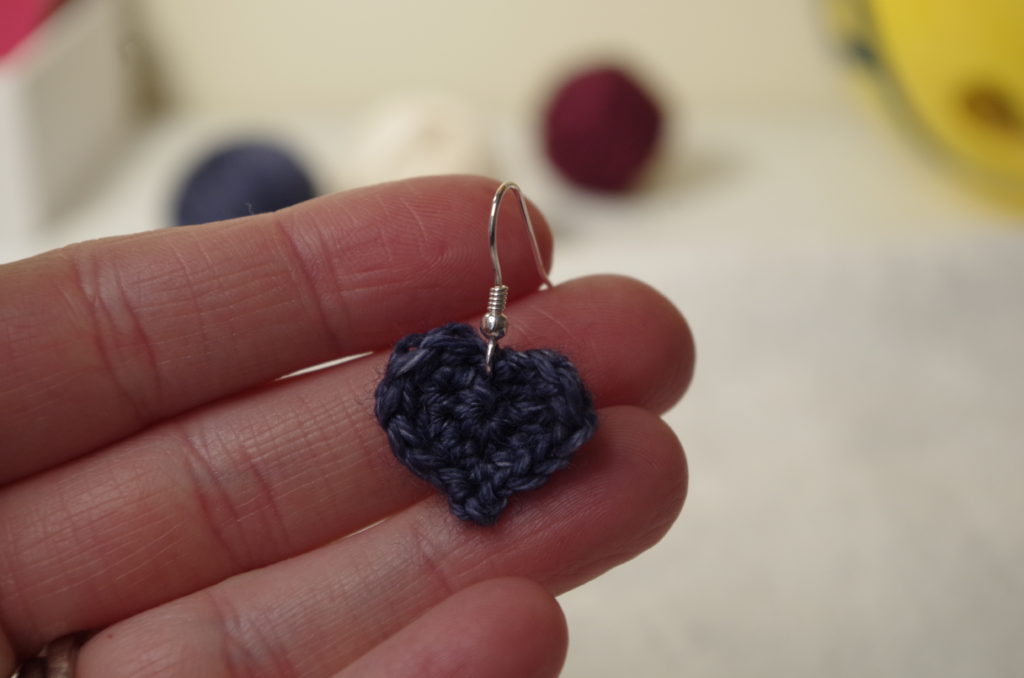
Option 2: Attach fish hook earring finding to final st at top of heart.
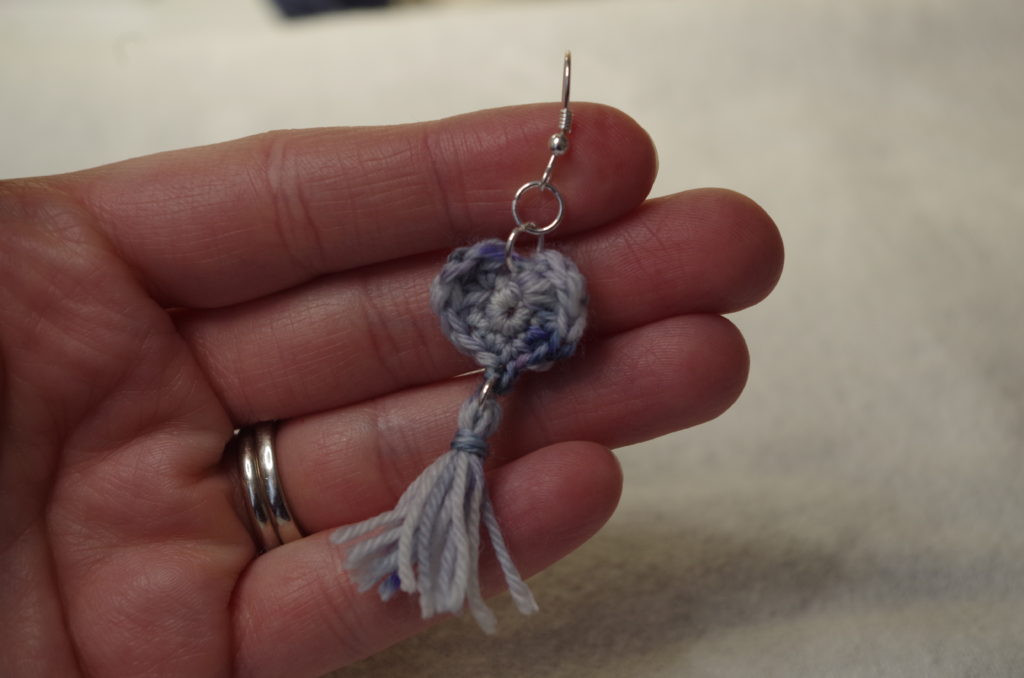
Option 3: Attach tassel into picot at bottom of heart with a jump ring. Attach fish hook style earring to top of heart with 2 jump rings.
Option 4: Attach tassel into picot at bottom of heart with method above. Attach fish hook style earring to top of heart with 2 jump rings.

September 18, 2020 by Priscilla

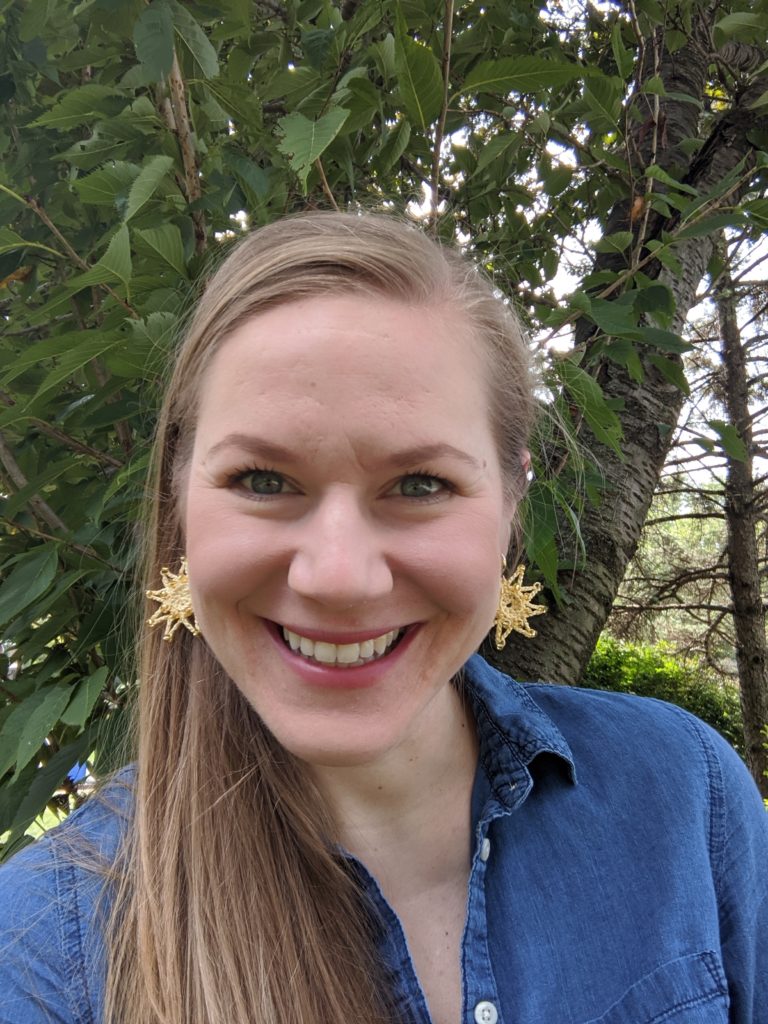
The Flower of the Sun Earrings

Get it?! Like the “power” of the sun? I’m too much, sometimes, I know. Anywayyyyyyyyyy this past Spring, E’Claire Makery had a cool blog hop with a free crochet pattern everyday. One of the days was the Spring Rain Earrings by Amber Bliss Calderon and I thought how fun it would be to make them for my mom for Mother’s Day! I ordered the supplies for them, but of course they didn’t have everything at Joann Fabrics due to Covid (it ruins everything.) I eventually got all the materials and now I can’t stop making crochet earrings! They are so quick and satisfying which is perfect for me. I’ve been testing earring patterns for the absolutely fabulous Chalia’s Craft and let me tell you, some friends of mine are getting some pretty earrings this Christmas!

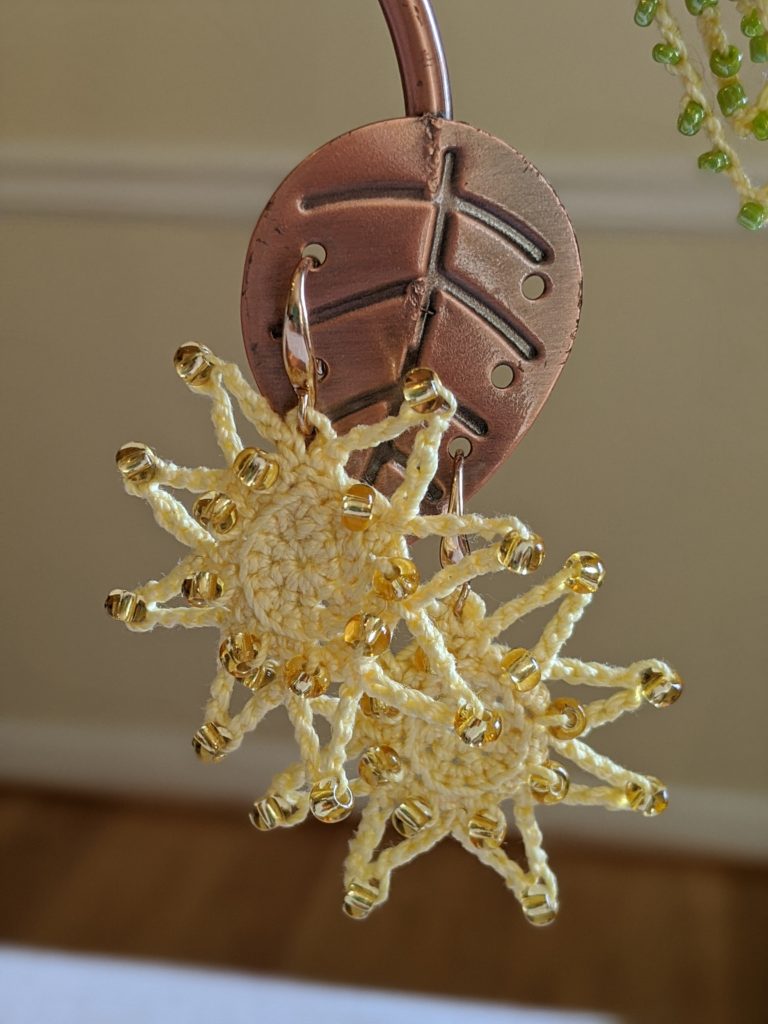
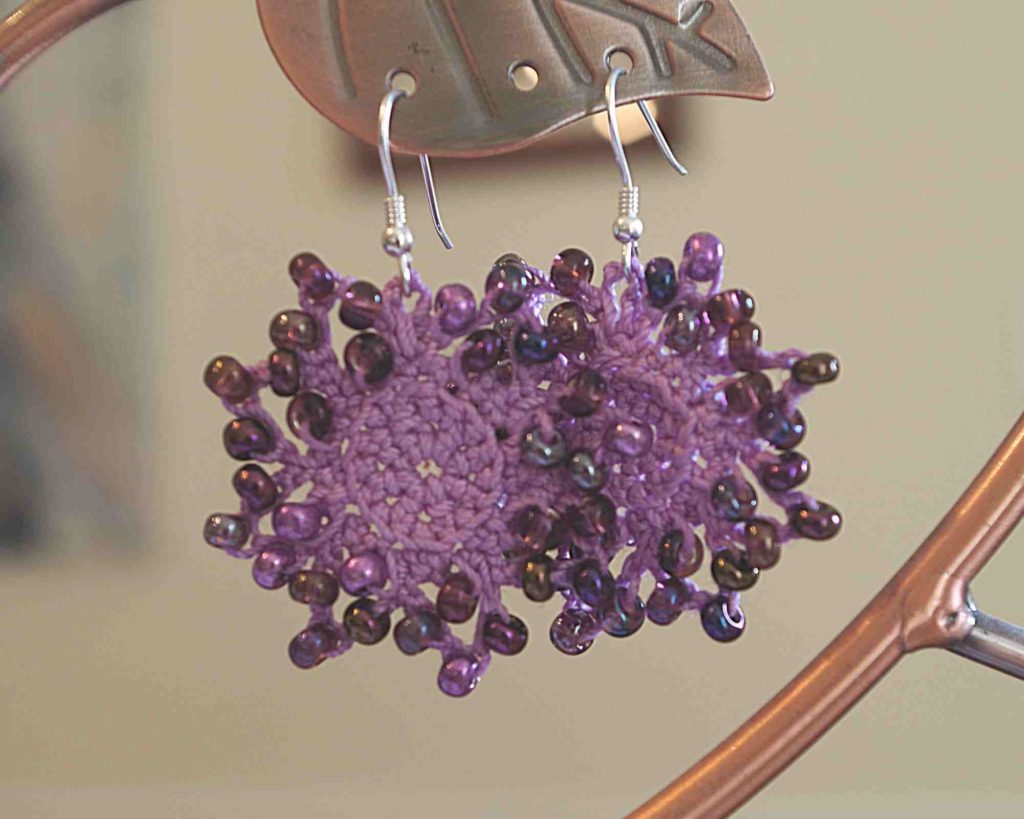
Since I was making all these earrings this summer, I decided to design my own pattern! Originally I designed a flower with smaller beads, but because those beads were actually too small for the thread, I had to change my plan. In working with my materials, I ended up with this sun pattern that is so happy and pretty! I fixed the flower to work with the correct size beads, but I’m not blind, I know the sun is what shines in these two earring patterns!

The free pattern is below, and I’ve got a few pictures here in the blog post, but if you’d like the full photo tutorial, you can purchase the PDF here on Ravelry or LoveCrafts for $3! If you add that to the cost of some crochet thread and earring findings, you can make these earrings for only a few dollars a pair! (For the first pair I ever made, I was able to use the earring wire from an old pair of earrings that I don’t wear anymore to see if I actually liked doing it before I bought a pack of findings. Just a thought if you’ve got beads and crochet thread but no earring wires!)

Materials 

  • Aunt Lydia’s size 10 Crochet Thread (samples are color Maize and Wood Violet)
  • Fabric stiffener or starch spray
  • 1.5 mm steel crochet hook
  • Tapestry needle 
  • Scissors
  • Fish Hook earring findings
  • Small craft/ jewelry pliers
  • Pins and a blocking mat
  • 6/0 glass seed beads 
    • 64 for 2 flower earrings
    • 32 for 2 sun earrings

Abbreviations

  • Ch = Chain
  • Sc = Single crochet
  • sl st = slipstitch
  • st = stitch
  • sk = skip
  • Sc FLO = Single crochet, front loop only
  • Sc w/bead = Single crochet with bead
  • Ch w/bead = Chain with bead

Notes

  • There is no gauge necessary for this pattern, basically: crochet as tightly as you can to achieve the best look. 
  • Fabric stiffener and pins will really help the finish of crochet earrings.
  • There are a few ways to chain and single crochet with beads. For this pattern, you will use the back facing method, where you do not push the bead through the chain or slide the bead to the front, it simply stays on the back. When you finish the earrings, what is typically the wrong side (facing away from you) is actually the finished right side of these earrings. 
  • If you need help figuring out the beaded stitches, there are some great tutorials on YouTube. This one from Interweave Craft is helpful, and check out the tutorials by Chalia’s Craft.

Instructions

Before you begin, thread all the beads you will need onto the crochet thread. I like to thread 2 earrings worth at a time and put a few extra beads on just in case I counted wrong. If you don’t have a bead threader, you can moisten the end of the thread. You can also spray with some of the fabric stiffener, allow to dry, and then slide the beads on easily.

(Make 2)

Make a magic ring. Ch 1.

Round 1: 8 Sc into magic ring. Pull to close the ring and sl st to the 1st Sc. (8 Sc)

Round 2: Ch 1. 2 Sc in each Sc around. Sl st to the 1st Sc. (16 Sc)

Round 3: Ch 1. *Sc FLO in 1st st, Sc w/bead FLO in same st, Sc FLO next st. Repeat from * 7 times. Sl st to 1st Sc. (8 Sc with bead, 16 Sc)

Do not fasten off, continue with round 4 in either Sun or Flower below:

Flower:

Round 4: *Ch 1, Ch w/bead 3 times, Ch 1. Sk 2 st, sl st next st. Repeat from *7 times. Ch 4 and sl st in same st as last sl st. (20 ch, 24 Ch w/bead, 9 sl st) 

Sun:

Round 4: *Ch 4, Ch w/bead, Ch 4. Sk 2 st, sl st next st. Repeat from * 7 times. Ch 4 and sl st in same st as last sl st. (68 Ch, 8 Ch w/bead, 9 sl st)

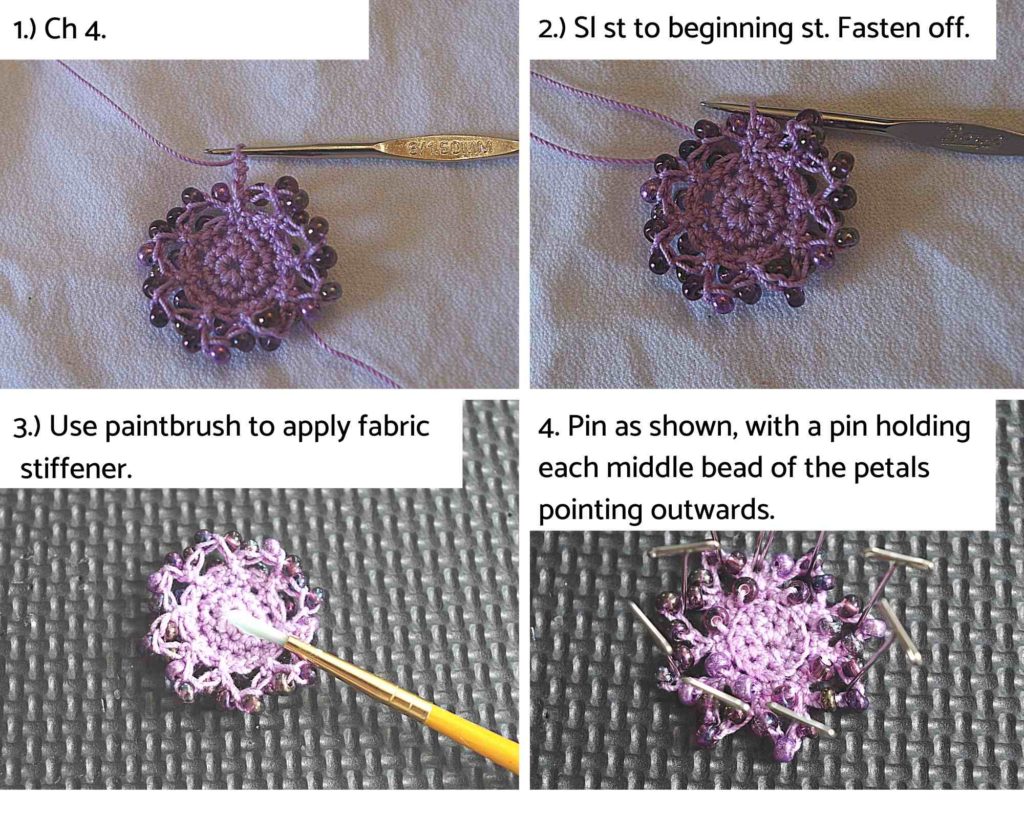
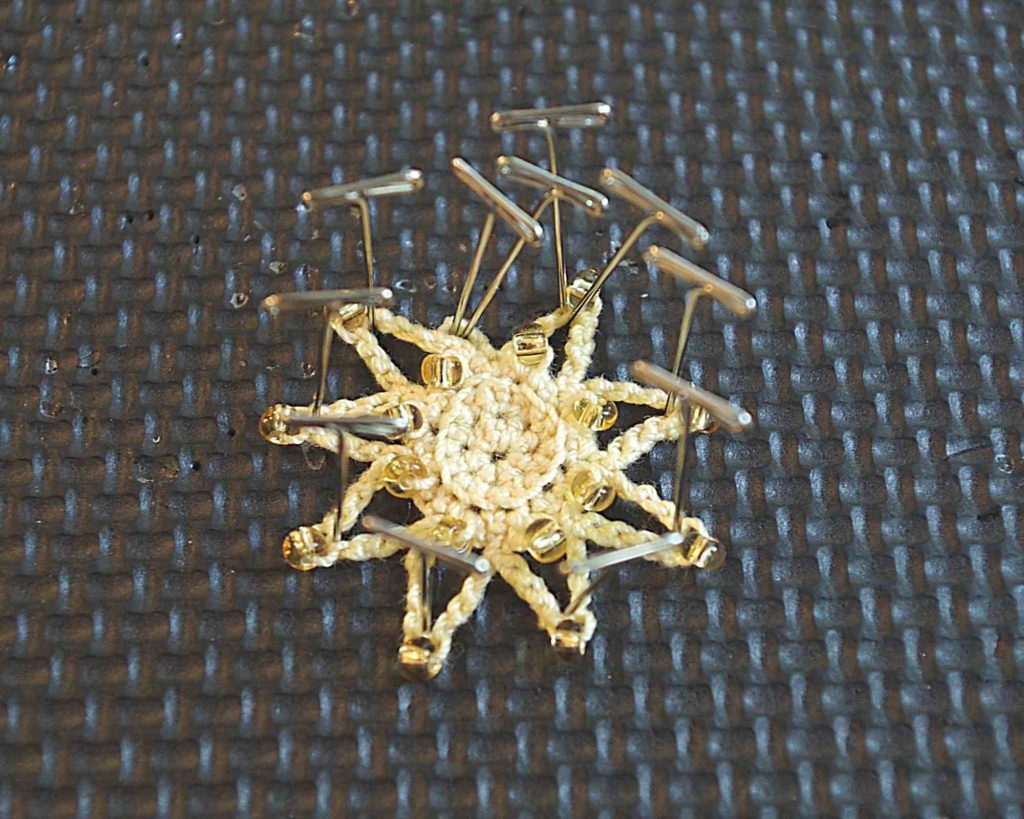
Finish off and weave in ends on the back of the earring with a tapestry needle. Put some fabric stiffener in a paint cup and use a small paintbrush to apply to the back side of the earring. Pin in place as pictured.. Put two pins inside the little loop you made with the Ch-4 and sl st at the end of the last round. This will be where you attach the earring finding. Use paintbrush to apply the liquid to the front of the earring, going in between beads to reach as much of the crochet thread as you can to achieve the most structure for your earring. Allow to dry at least two hours. Attach earring finding to the little loop at the top. Wear your new crochet jewelry proudly!


The last few steps of making the Flower version. The PDF has photos like this of every step!
How to pin the sun in place to form the shape! So cute!

If you need any help with the pattern, feel free to leave a comment here or message me on Instagram: motherlodecrafts

I’d love to help you bring these earrings to your life!

August 9, 2020 by Priscilla

5 Perfect Ear Warmer Crochet Patterns

One of the best beginner crochet items to make is ear warmers! Crochet a small, simple rectangle, and easily seam it together to make a cozy headband that keeps your ears toasty warm in the chilly weather. The first one I ever made was for my mom, who taught me to crochet in the first place. Worsted weight or bulky weight yarn is nice for keeping the cold out. My new favorite yarn for ear warmers and hats is Red Heart Soft: it’s a worsted weight that is true to its name and has a good squish to it.

This Twisted Step-Sister Headband from Yarnspirations is that first one I ever made for my mom. The twist is a little tricky, but once you get it the first time, it’s not hard. The body of it is all double crochet, so it’s fast and easy.

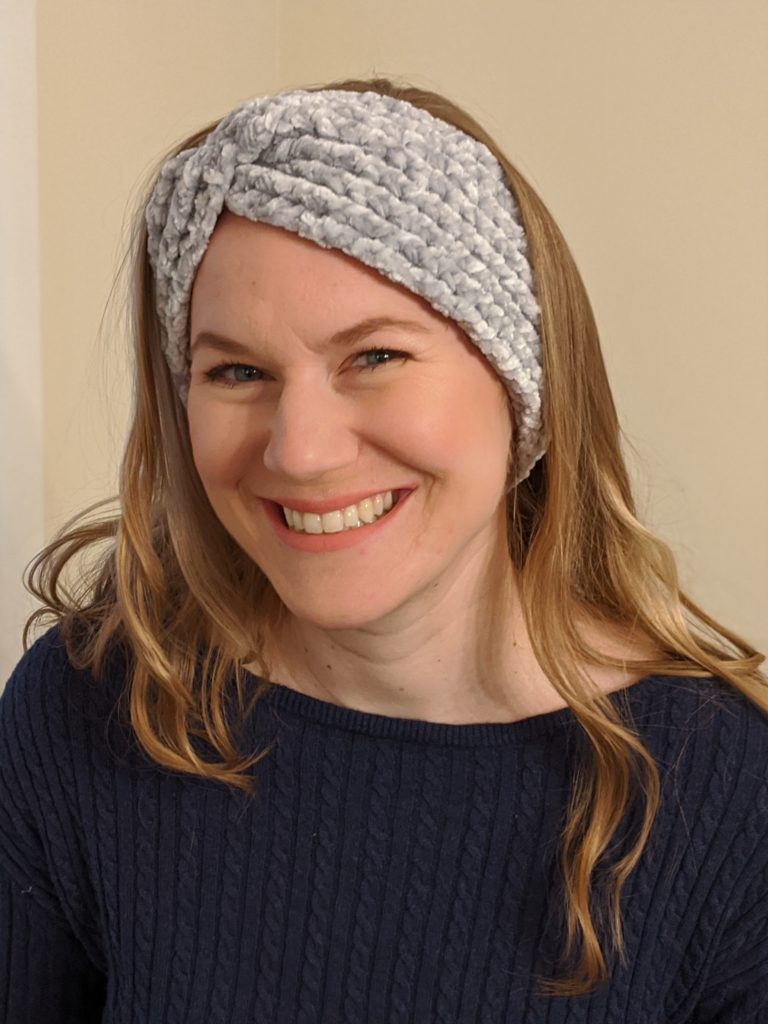
This Ribbed Velvet Twist pattern by Daisy Farm Crafts is so amazing! Truthfully, the velvet yarn is tricky to work with, so it’s not exactly easy, but the stitches are not complicated, it just takes a little extra hand strength. It’s so beautiful and soft, though, it’s totally worth the effort. I think I made at least 3 of these last winter as gifts. They have a BEAUTIFUL velvet hat pattern, too, that you should check out.

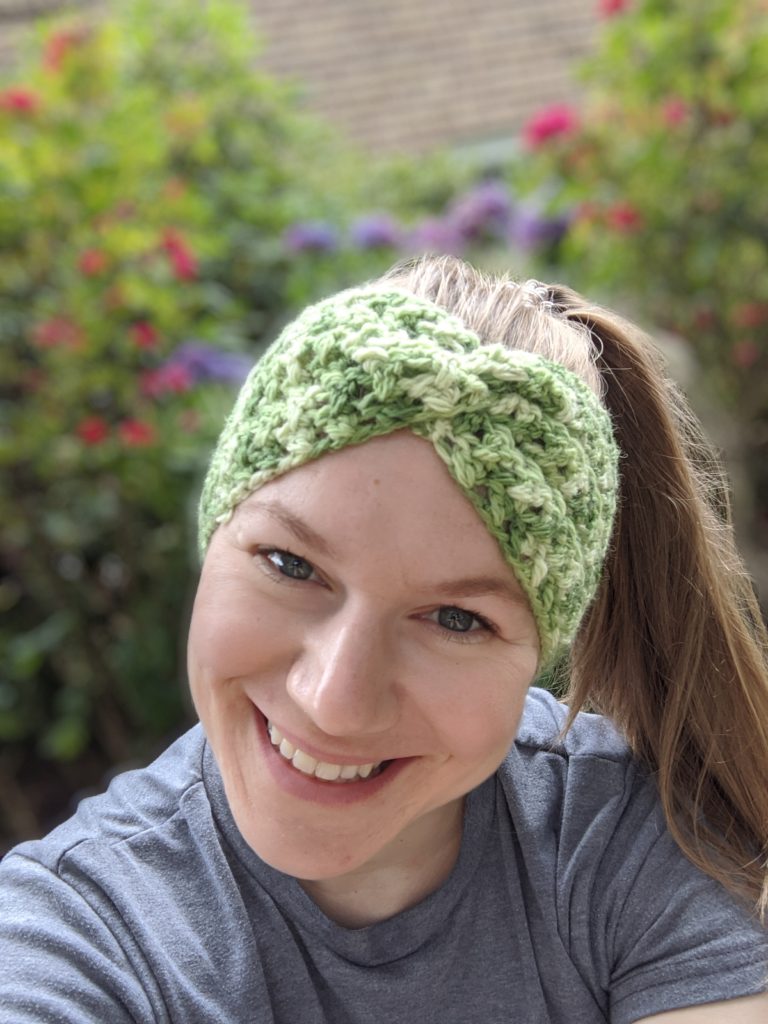
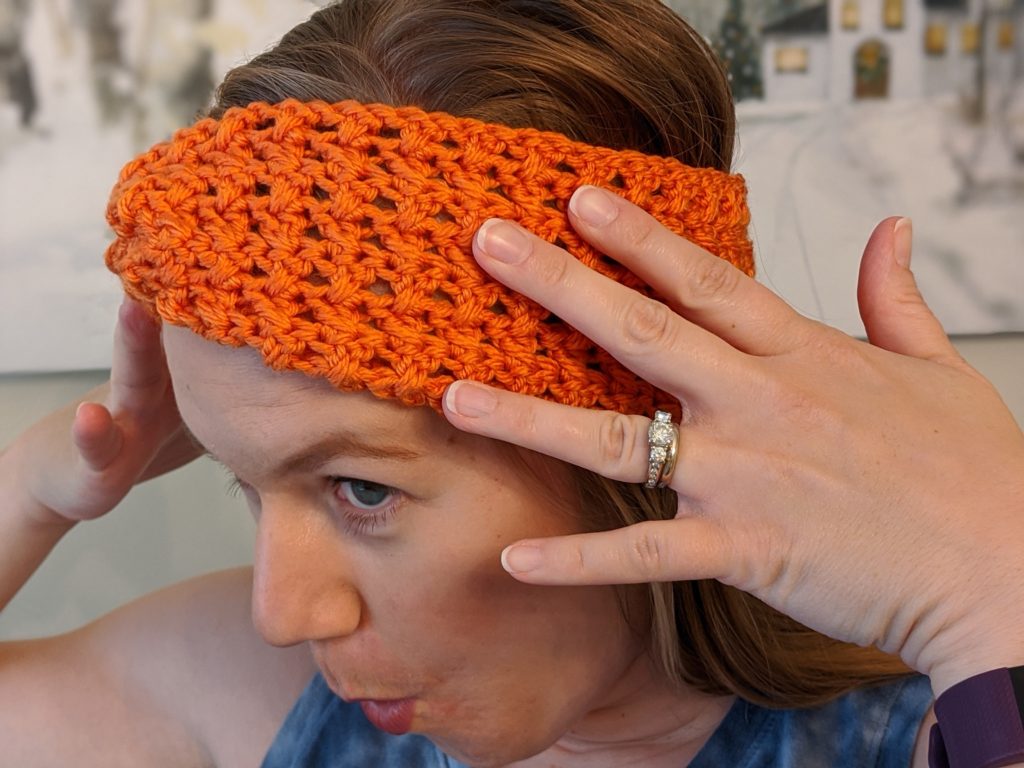
I recently tested the Grace Ear Warmer pattern for Amy at Another Mum Fights the Dust and I fell in love. It is so dang easy and quick. The texture is awesome and the twist is so on point. Amy has bunches of other great patterns, too, you should definitely check her site! I made two of these in July and it’s my new go-to pattern when I’m not ready to start a big project but I need something in my hands.

So cute, right?!
No doubt about it, I am a HAM in front of a camera.

Here are a two more beautiful ear warmer patterns that are on my “to make” list!

  • Faux-Bow Headband Pattern by Mama in a Stitch: I love her patterns! I made one of her sweaters in January and it turned out so great. This ear warmer is crocheted by creating a tube, then cinching the ends of the tubes and attaching them together to create the “bow.” It’s so cute! I think the double fabric on it would make it extra warm!
  • Charleigh Twist Headband Pattern by Crochetastic Boutique: The texture on this one is great! This is one that I would love in a few bright colors. This beginner pattern uses simple stitches to create a unique texture. This talented designer has a variety of lovely designs, so far from her collection I’ve made mug rugs and a cute purse!

Now I think I need to design my own headband for the fall! Maybe something in a bulky yarn that is a quick make…… or maybe a stripey one…..

March 17, 2020 by Priscilla

DIY Crochet Flower Wreath

The very first crochet item I ever made was a wonky scarf for my mom. It was uneven FOR SURE. I ended up crocheting a flower to add to it, and it did help it look a little better. It was still bad, though, haha. With practice comes consistency, and the last several larger projects I’ve made have really shown me how much muscle memory my hands have gained in keeping stitches even in size. So, if you are just starting out, or creating a project here and there, know that with practice and time comes consistency to make a beautiful piece!

In the meantime, there are many crochet flower patterns that are easy to follow and require only a few simple stitches. They are very forgiving since they are attempting to mimic real flowers, which aren’t uniform anyway. You can easily master a few different flower designs and work them up in your favorite colors to adorn anything! They are popular on headbands, pillows, and occasionally garments. I’ve seen a few wreaths out there that are entirely made from crocheted flowers. I wanted to mimic that but with a little less time and a little more simplicity.

Read on for how I created this Crochet Flower wreath!

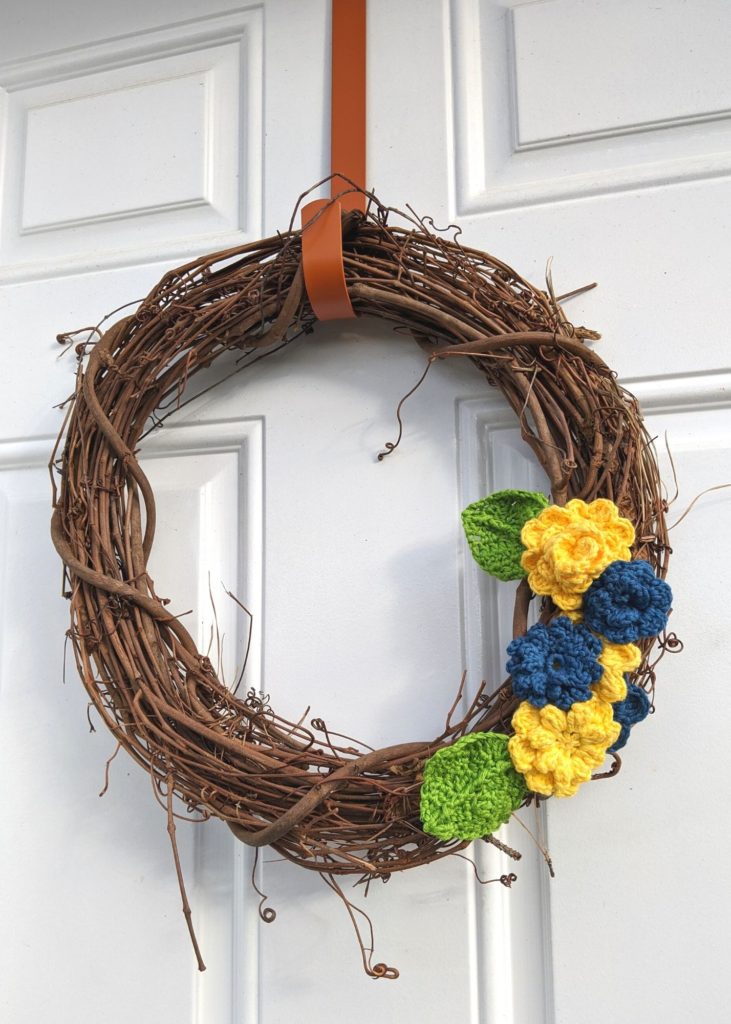
stick wreath with crocheted flowers

I bought this gorgeous Lion Brand Yarn called Coboo made from cotton and bamboo. The colors are so pretty and it’s very silky soft. I bought three colors from JoAnn Fabrics to create this bold spring wreath and I’m so happy with how it turned out. The stick wreath form I got at Michael’s for like 5 bucks, and since I just attached the flowers with wire, I can use the wreath form again if I want to create something else!

Step One: Choose your yarn. Any yarn will do for making flowers. For these, I wanted smaller, tightly stitched flowers, so I used the Coboo yarn which is a weight 3 yarn. Coordinate your hook with your chosen yarn. Again, I was going for smaller with mine, so I went down a hook size from the recommendation on the yarn package. (I used an E hook.)

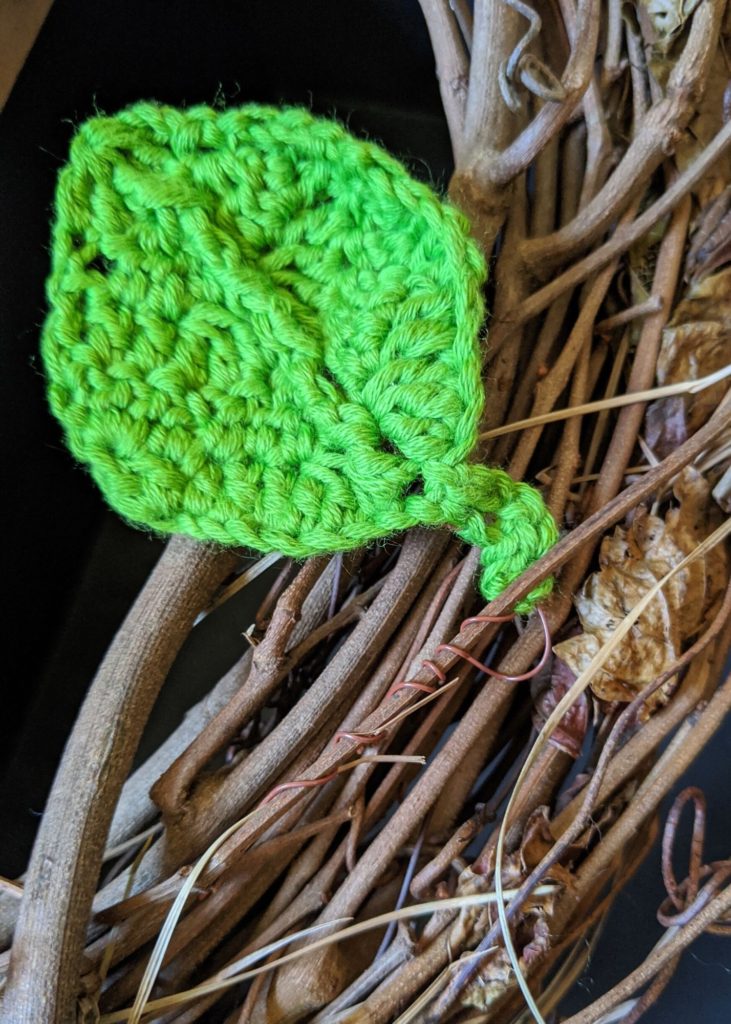
Step Two: Crochet flowers in varying sizes, about 6. Here is an easy pattern by Crochet 365. This tutorial from Love Life Yarn I used for the larger carnation flowers. Then crochet two leaves to go with the flowers. You can find a simple leaf pattern from MamaChee. Weave in the ends of everything and cut the excess yarn.

crochet leaf

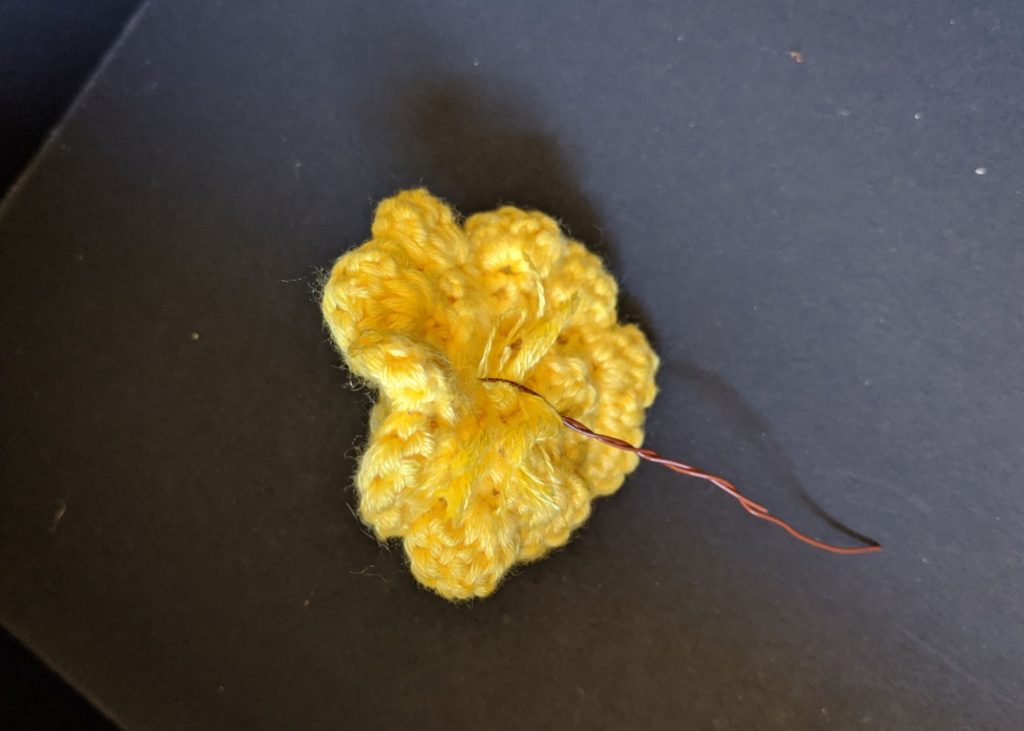
Step Three: Arrange the flowers and leaves on the wreath so you can plan which shall go on first and which shall overlap on top. Attach the leaf at the top using floral wire. Cut a length of floral wire of about 8 inches. Bend in half and feed part of it through the back of your leaf. Once it feels securely part of the leaf, weave the wire onto the sticks of the wreath as you would a Christmas pick. For the flowers, I bent a bit of the length of wire at the top, then I stuck it through the center of the flower at the back sideways and bent it in the center of the flower, so as to have two lengths of wire coming from the center. These lengths I wound together and then placed into the wreath and wove a bit around the sticks. Continue attaching each element until your desired effect is achieved!

back of crochet flower

I hope you liked this project! I’m already envisioning a sunflower one in the height of summer, wouldn’t that be lovely!?

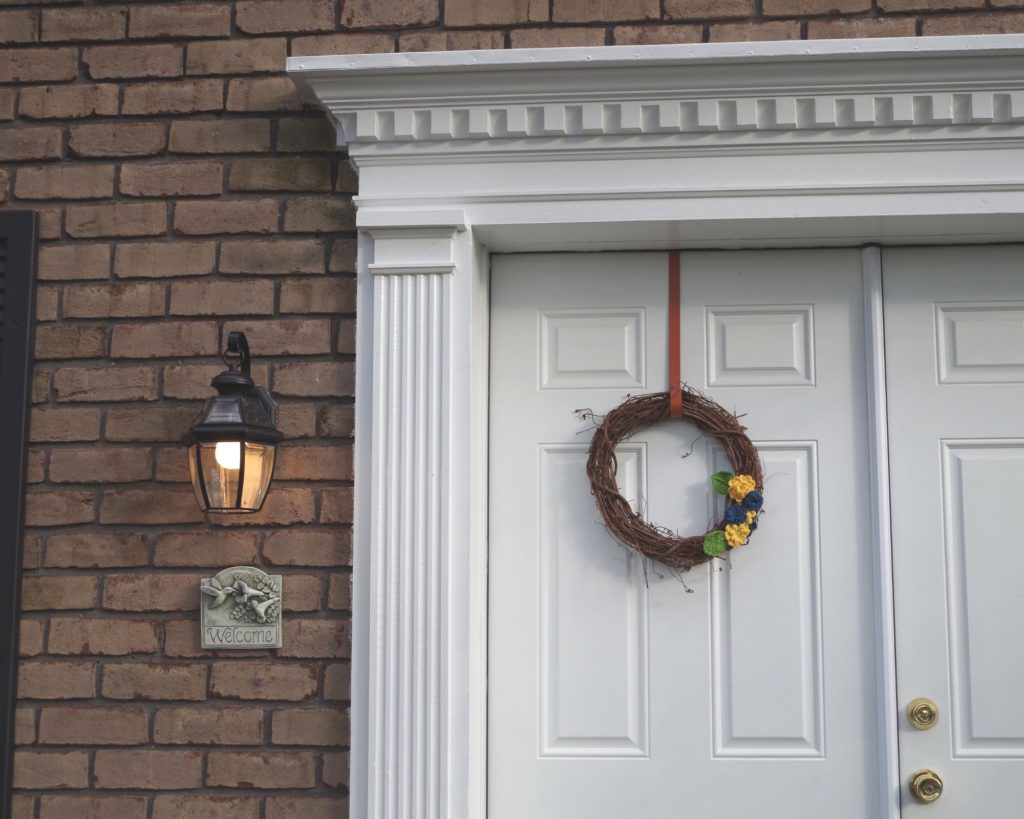
Front door wreath

January 21, 2020 by Priscilla

5 Beginner Crochet Patterns

1.5 Hour Beanie by Make and Do Crew

I love the patterns from Make and Do Crew! They are fun and this one is so quick, you won’t believe it! I did change it a bit to use Caron Simply Soft yarn instead of the bulkier yarn that they used in the original pattern. This did make it take longer for me, but it was still quick to me! I usually make hats in the round which sometimes feels like it takes all of forever.

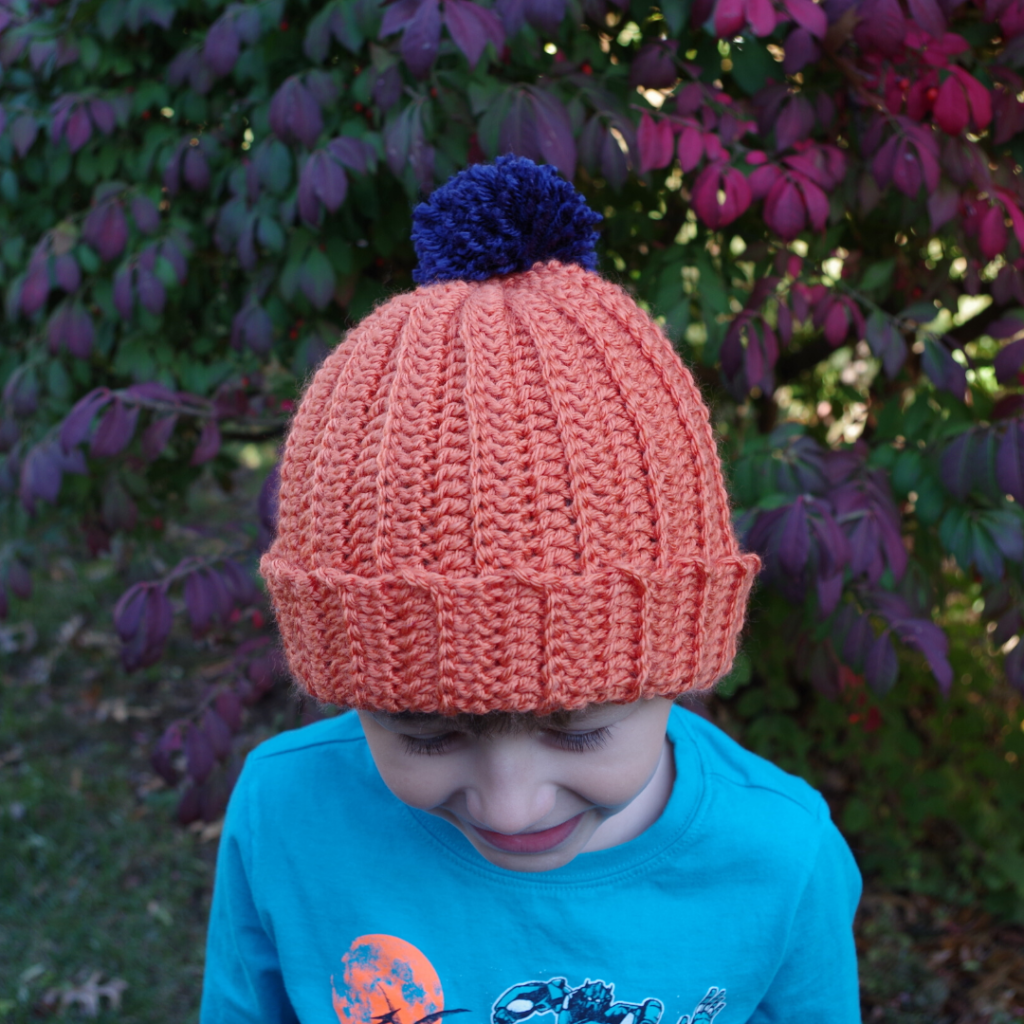
shows my version of the 1.5 hour beanie by Make and Do Crew
My oldest in the hat I made for his cousin that he desperately wanted for himself!

Waffle Dishcloth by Hooked on Tilly

I love this dishcloth as practice for Front Post Double Crochet. Since it is a dishcloth, I feel like the pressure is off to be perfect with your stitches, so this project is great for learning the Front Post Double Crochet (FPDC.) When you progress to making more complicated projects, particularly hats in the round and sweaters, the FPDC stitch is wonderful for adding ribbing at the edges, and is commonly used. I’m working on the finishing touches on my own hat pattern right now that has ribbing and it is turning out so cute!

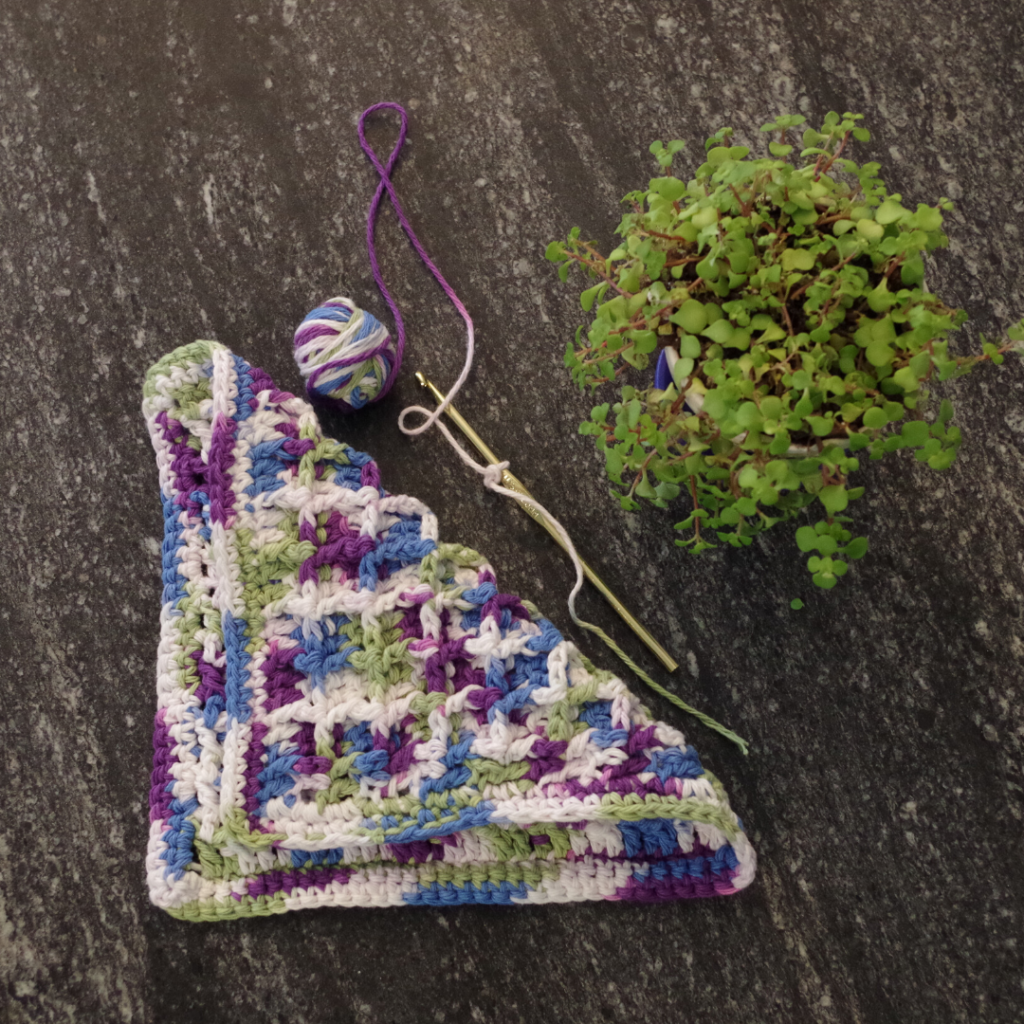
Waffle dishcloth by Hooked on Tilly
My curated Instagram post, haha!

This one that I made has two extra rows of single crochet to make it a little bigger. I made it for my mother-in-law and she likes larger dishcloths.

Velvet Scrunchie by RthingsCreations on Sierra’s Crafty Creations Blog

Love these scrunchies! Velvet is definitely having a moment again and these scrunchies are a great way to wear it. I’ve made several and they are a quick, satisfying project. I will say that they are pretty tight on your hair when you make them with a regular hair-tie in the middle. You can make them a bit more loose by tying or sewing a length of elastic instead for the middle. That’s what I did. I actually intended to give them to my niece, but they are so comfortable, I may have to make more for her because I keep wearing them!

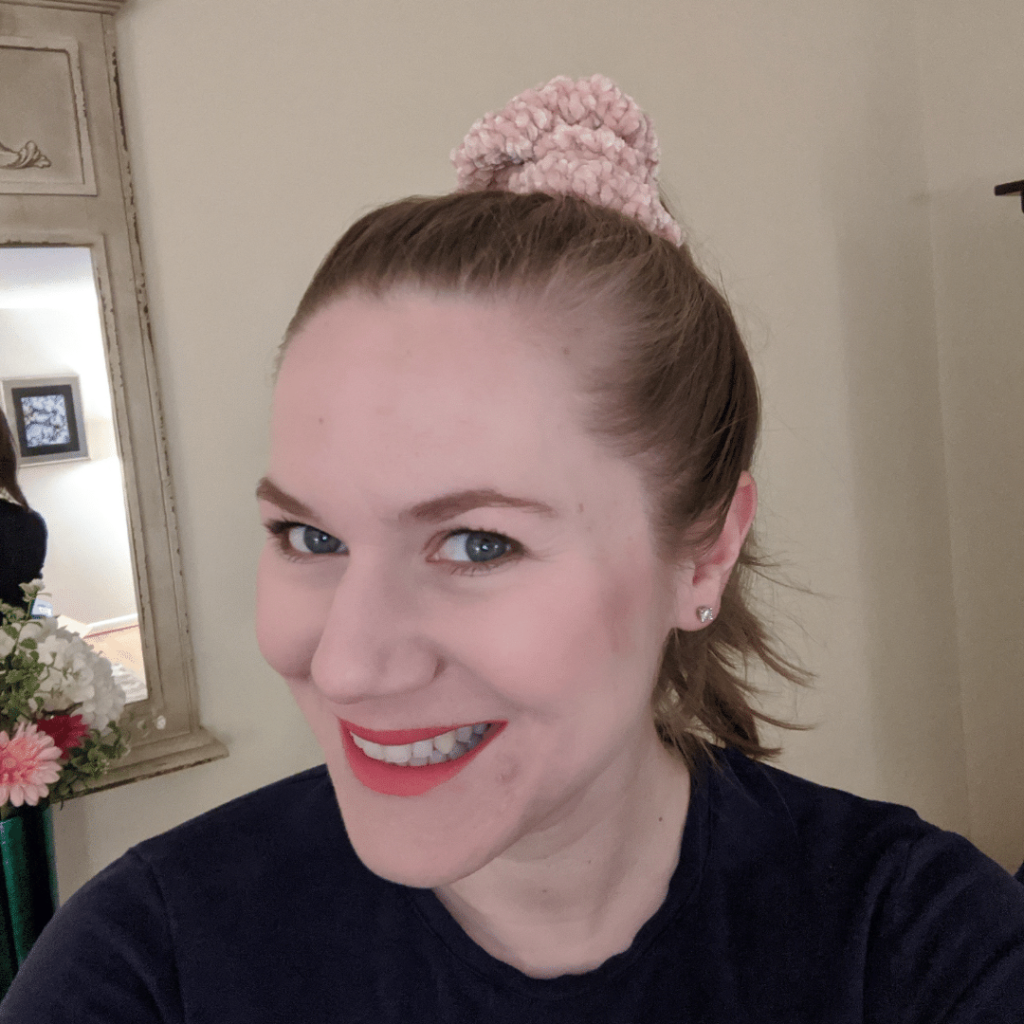
velvet scrunchie
My scrunchie selfie!

Chi-Town Crochet Cowl by Kathy Kelly (crochetbird)

I adore this pattern. It is so easy, particularly because gauge is not important, so if you are just starting out and learning the right tension, it is a great pattern. You only need two stitches: double crochet and single crochet. Another reason I like this pattern is that you can really use any yarn to make it! Seriously, I’ve used Lion Brand Homespun which is a bulky yarn as well as the Caron Simply Soft with lovely results.

my version of cowl by Crochet bird
Love the bright colors on this cowl. This yarn is from a Caron Cake.

Crochet Triangle Wrap by Mama in a Stitch

This wrap is a great starter pattern. The gauge isn’t super-important and the stitches are easy. It is one of those projects which after a few rows you don’t need to look at the pattern anymore. (These are my favorite kind of patterns!) This wrap looks wonderful in a variegated color yarn. I also made one as a stash buster, using several leftover colors I had in the same type of yarn. I made two wraps this past fall and loved the way they turned out. One of them I made fairly small, then seamed the back to create a cowl and it turned out so pretty.

Granny triangle wrap
LOVE the way this one turned out. I particularly like the tassels, I have one more skein of this yarn somewhere and I want to make a matching hat!
granny triangle cowl
This is one of my favorite yarns (Lion Brand Homespun) and I had several small balls of it leftover from various projects which turned into this soft and beautiful cowl!
  • « Previous Page
  • 1
  • 2
  • 3
  • 4

Welcome! My name is Priscilla and I love designing crochet patterns for your family. I live in beautiful Pennsylvania where I enjoy all sorts of crafts, but I’m most passionate about crochet! I’m a Catholic mom of 4 and I sometimes incorporate my faith into my designs. Thank you so much for supporting me by visiting my crochet website and I hope you find something here that you are excited to make.

Recent Posts

  • Soft Crochet Hat Pattern
  • Cozy Men’s Scarf Crochet Pattern
  • Bulky Textured Beanie Crochet Pattern
  • Cozy Fall Baby Beanie Pattern
  • Spider Basket Crochet Pattern

Categories

Follow Me

  • Etsy
  • Facebook
  • Instagram
  • Pinterest
  • YouTube

Pretty Chic Theme By: Pretty Darn Cute Design