The Mother Lode

Crafts and Crochet

  • Home
  • Crochet Pattern Library
  • Faith Based Patterns
  • About Me
  • Privacy Policy

October 29, 2026 by Priscilla

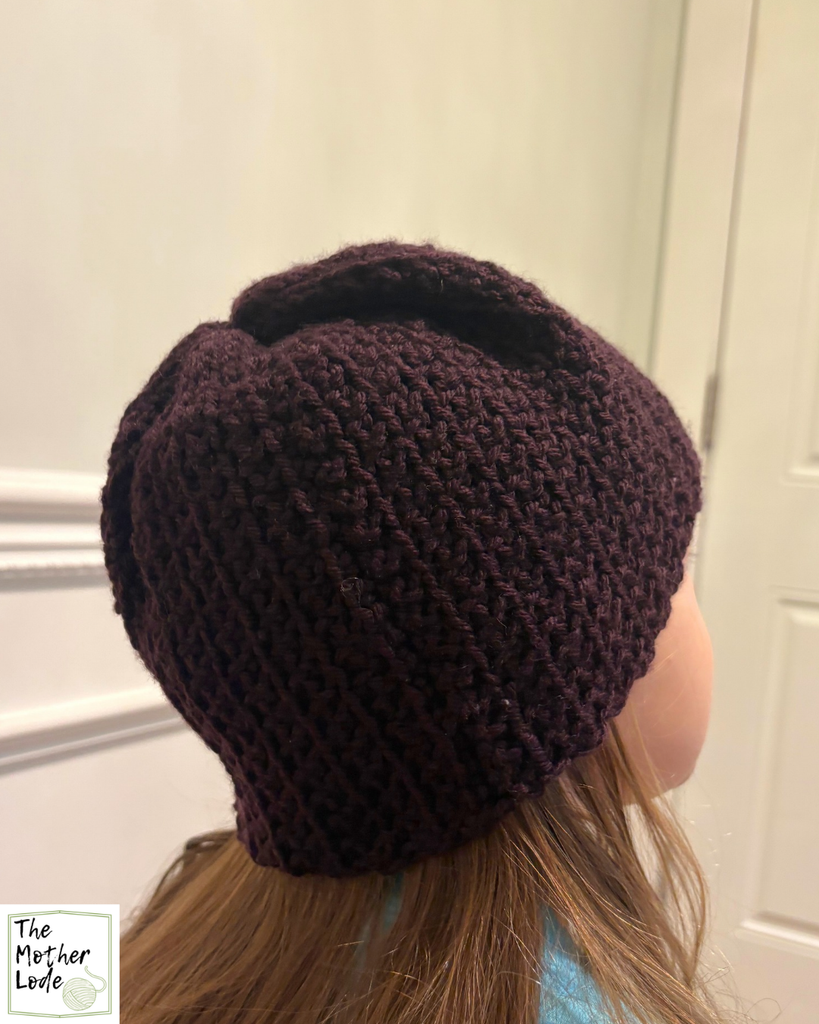
Soft Crochet Hat Pattern

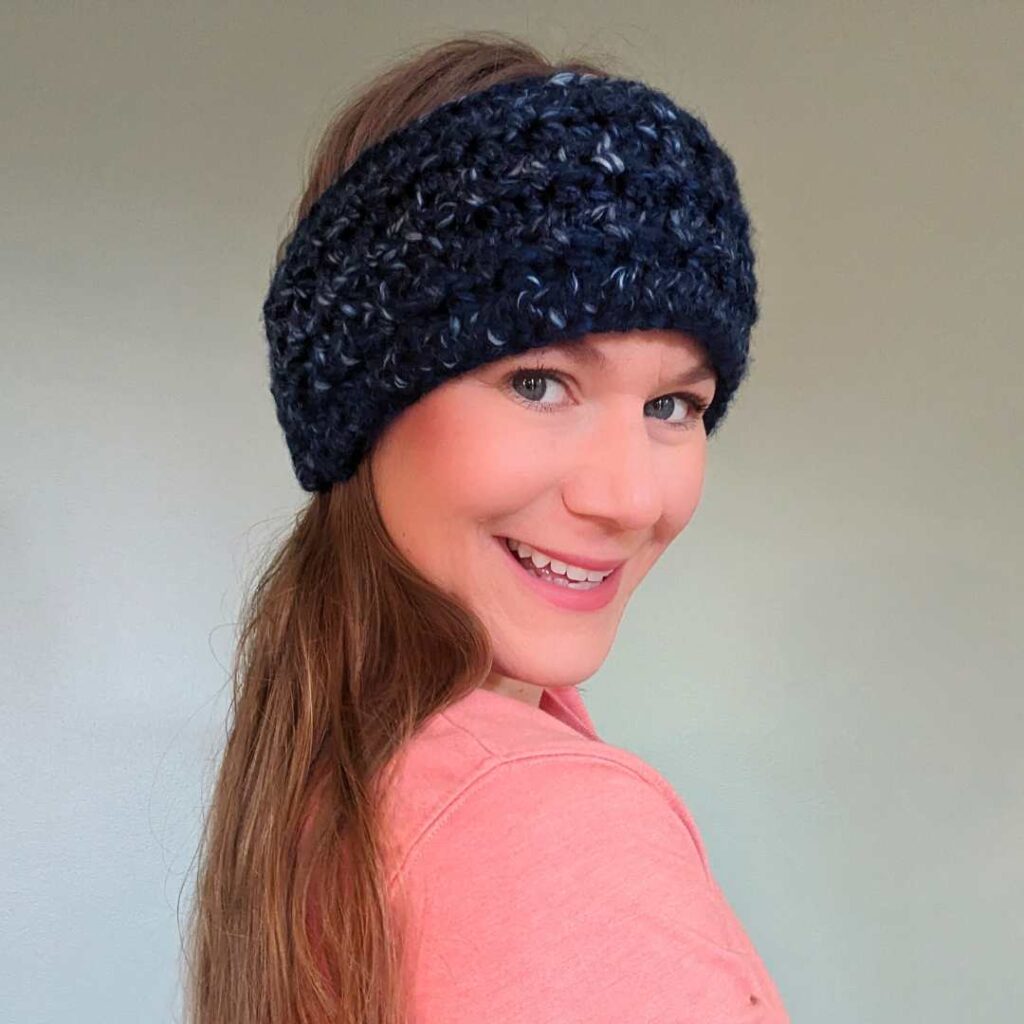
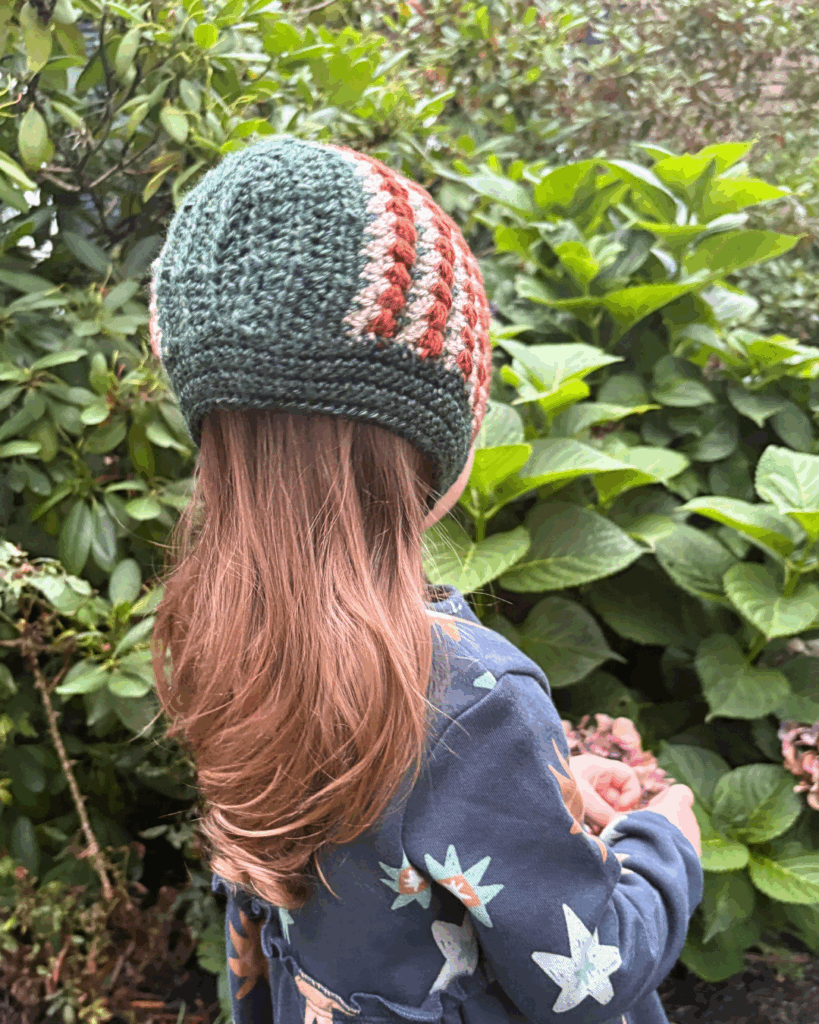
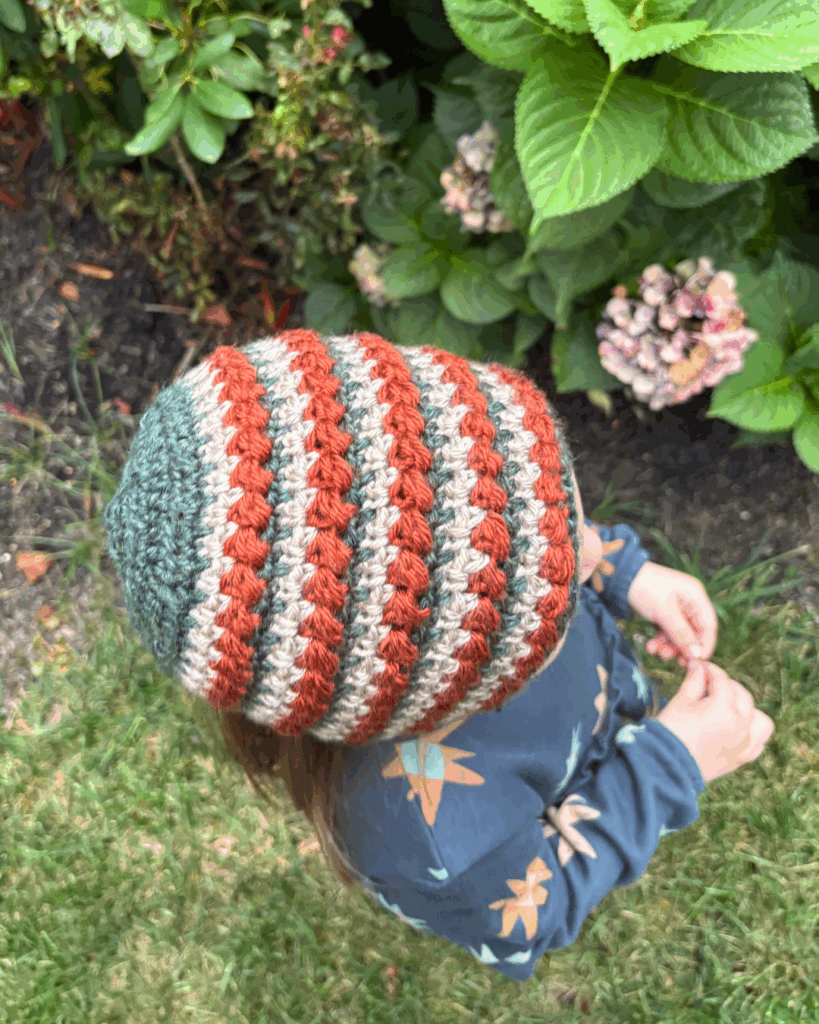
As crocheters, we often like to gift our makes and from time to time we even craft for donations to different organizations like Warm Up America, the Linus Project, etc. Every October, Sweet Potato 3 hosts a wonderful event called the Crochet Cancer Challenge. A new pattern is available for free each day during the month, and each download is a pledge to donate a hat to your local cancer charities! Today, Oct 30th, 2026, is my feature day and you can download the One More Memory Cap free! This promotion is available through end of day on Monday, November 2nd.

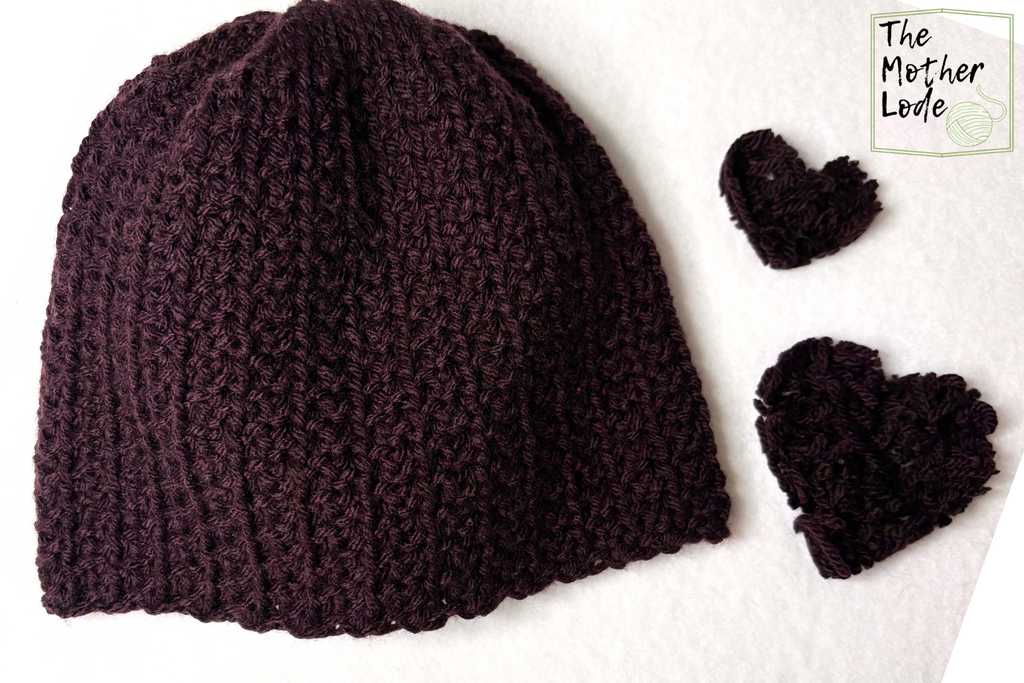
The inspiration for my design is from my sweet friend who lost her dad to prostate cancer this year. When talking with her earlier in his cancer progression, she had told me that they were always focusing on making one more memory with him. Sometimes a cancer diagnosis isn’t one that truly allows someone to fight, and the better place to put energy and focus is on giving and receiving love instead. Each memory matters and keep them close to your heart!
This pattern is worked in easy rows. The stitch pattern is my current obsession, which is like a front loop only linen stitch. It gives the pattern great texture but easy stretch. I like to use slip stitches on one side of the hat to help make the top less bulky when you cinch it. It’s like magic!
Supplies

  • CYC 4 worsted yarn 150 yards sample is Lion Brand Yarn Basic Stitch (100% acrylic)
  • Size 5.5 mm crochet hook
  • Tapestry needle and scissors
  • Measuring tape/gauge ruler

Abbreviations (US Terms)

ch = chain

sl st = slip stitch

st/sts = stitch/stitches

sp = space

sc = single crochet

sc FLO = single crochet in the front loop only

sl st FLO = slip stitch in the front loop only
Gauge

20 sts in 13 rows = 4 inches

Row 1: Ch 27, sc 2nd st from hook and each st across, ch 1, turn. [26 sc]

Row 2: Sc FLO, ch 1, repeat from * across, sc FLO last st, ch 1, turn. [13 sc FLO, 13 ch-1]

Row 3: Sc FLO, ch 1, repeat from * across, sc FLO in the turning chain, ch 1, turn. [13 sc FLO, 13 ch-1]

Rows 4-15: Repeat rows 2 and 3 respectively.

Notes

  • Sizing is denoted in ( ) as follows: child (teen/adult small, adult medium, adult large)
  • Pattern is worked flat in rows and seamed at the end.
  • Stitch counts are marked at the end of each round with [ ]
  • Finished dimensions: 18 (19, 20, 21) in around.
  • The sc FLO will be worked into the ch-1 from the previous row. This loop is easy to find because it sticks up a bit.

Written Instruction

Child (Teen/Adult Small, Adult Medium, Adult Large)

Row 1: Ch 40 (46, 50, 54) sl st 2nd ch from hook and next 5, sc, sk st, ch 1, repeat from * to end, sl st final st, ch 1, turn. [7 sl st, 16 (20, 22, 24 sc)]

Row 2: Sc FLO into the ch-1, ch 1, sk st, sc FLO, repeat from * to last 6 sts sc, ch 1, sc FLO last 6 sts, ch 1, turn. [6 sc FLO, 22 (26, 28, 30 sc FLO]

Row 3: Sl st FLO 1st 6 sts, sc FLO into the ch-1, * ch 1, sk st, sc FLO, repeat from * to last, sl st into the turning ch. [1 sl st, 6 sl st FLO, 16 (20, 22, 24 sc FLO]

Rows 4-58 (62, 66, 70): Repeat rows 2 and 3 respectively.

Fasten off, leaving a long tail for seaming. Seam with preferred stitch, I like the mattress stitch. Then sew around the top and pull closed to cinch. Weave in ends.
Many of the patterns from this event are available free all month long, so there are still other patterns you could get as well. Head over to the main blog post and look through them. Remember that each download is a pledge to donate a hat!
Thanks so much for visiting my blog today! I hope you like the pattern and that you enjoyed crafting in community this month!
August 31, 2026 by Priscilla

Spider Basket Crochet Pattern

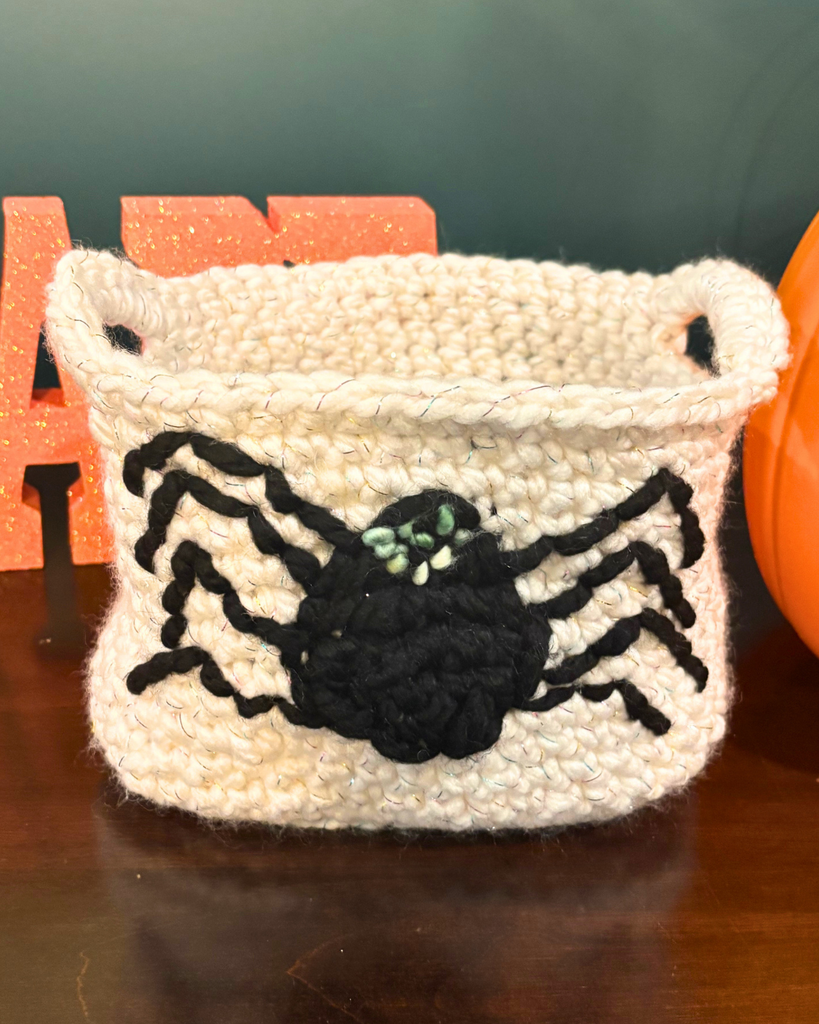
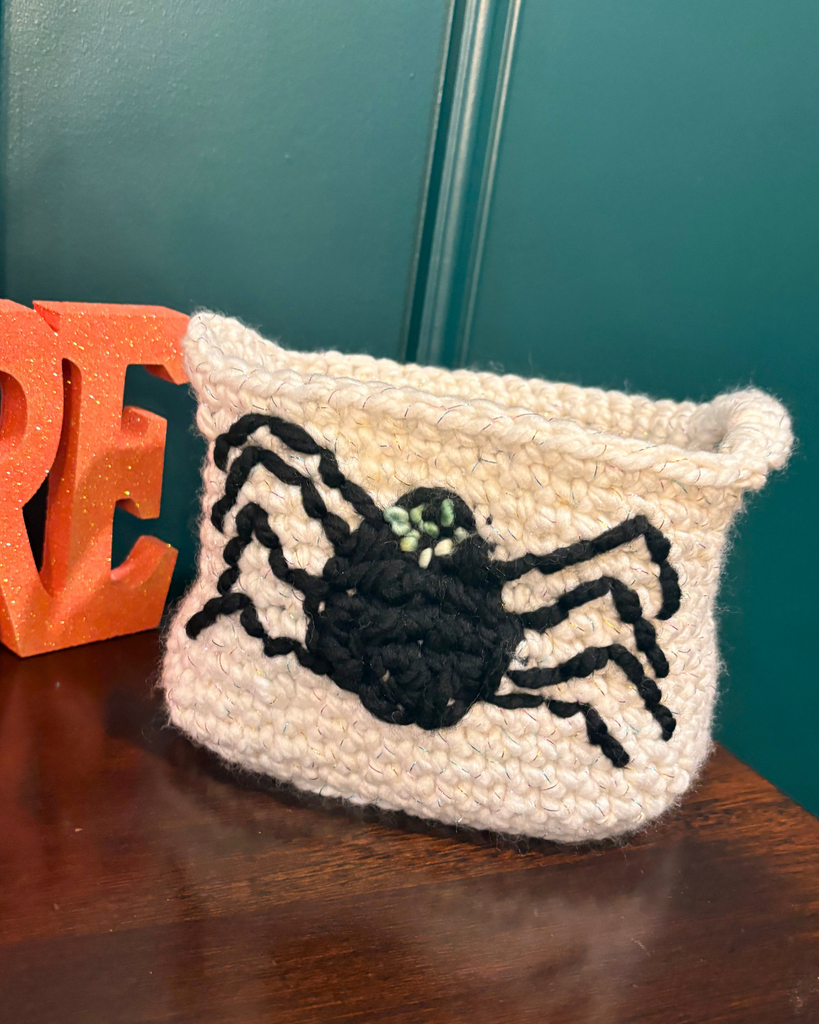
The Sparkle Spider Basket crochet pattern is ready for you to make for your spooky Halloween decor! This is really fun to make and works up quickly with some super bulky yarn! I designed this pattern specifically for the Halloween crochet-a-long from CAL Central Crochet which is a great event and you should join in the joy of making.

How the 2026 Halloween CAL Works

Every Monday and Thursday from August 10 through September 24, 2026, we’ll share a free crochet pattern for a Halloween-themed project. These patterns include decorations, toys, costume elements, and more.

Forbidden Fiber Co., Furls, GlassEyesOnline, Knitter’s Relief Balm, LennyMudPottery, Underground Crafter, and Unicorn have generously provided us with fabulous prizes for our end-of-CAL giveaway. Don’t forget to enter the giveaway in this post on Underground Crafter by 11:59 pm Eastern on Sunday, September 27, 2026!

How To Join the 2025 Halloween CAL

  • You can join in by crocheting the patterns as you have time.
  • Share your progress and post pictures of your finished projects. Tag your projects and posts #CALCentralCrochet on all social media.
  • If you’d like to chat with other crocheters, join the CAL Central Crochet Facebook group, or visit this thread in the CAL Central Ravelry group.
  • By the end of the CAL, you’ll have up to 14 spooky Halloween projects. 

Visit Underground Crafter to learn more about the prizes, enter the end-of-CAL giveaway, and to get links to each Halloween CAL pattern as it is released.

I hope you’ll join in this fun event, it’s really cool to see these great Halloween projects work up in different ways!

This pattern was written for one of my favorite yarns, Lion Brand Wool-Ease Thick and Quick. I think it’s a great color palette and I was pleased with how easy it was to work with the color Celebration, which is the white with a thread of rainbow stellina that I used. I was worried it might catch on the sparkle strand, but it was fine, and the result is so cute!

Supplies

  • Size 6 super bulky weight yarn, 150 yards of color A and 50 yards of color B, sample is Lion Brand Wool Ease Thick and Quick in Celebration (this adds the sparkle, as it has a strand of stellina fiber throughout) and Black
    • A different option would be some Glow in the Dark yarn such as Lion Brand DIY Glow Chenille yarn
  • scrap amount of any size 4,5, or 6 green yarn for eyes, if desired
  • Size 8 mm crochet hook
  • Large tapestry needle and scissors

Abbreviations (US Terms)

ch = chain

sl st = slip stitch

st/sts = stitch/stitches

sp = space

beg = beginning

sc = single crochet

inc = increase: 2 single crochet stitches in same space

sk st = skip stitch

sc BLO = single crochet in the back loop only

Notes

  • Pattern is worked in continuous rounds. I suggest placing a stitch marker in the first stitch of each round to help you keep track, and move it to the next round as you work.
  • Stitch counts are marked at the end of each round with [ ]
  • Finished dimensions: 5.5 in height by 7 in wide by 6 in deep
  • This pattern is a quick make, but give your hands a stretch break as you are crocheting quite tightly to make the bag stiff.

Gauge

10 sts in 11 rows of single crochet = 4 inches

Follow pattern, stopping at end of round 6. This should measure 4 inches by 5 inches.

Written Instructions

Round 1: Ch 4, inc 2nd ch from hook, sc, inc, continue onto other side of beg ch, inc, sc, inc, do not join. [10 sc]

Round 2: Inc, sc next 3, inc, inc, sc next 3, inc. [14 sc]

Round 3: Inc, inc, sc next 3, inc next 4, sc next 3, inc, inc. [22 sc]

Round 4: Sc, inc next 2, sc next 5, inc next 2, sc next 2, inc next 2, sc next 5, inc next 2, sc [30 sc]

Round 5: Sc first 2, inc, inc, sc next 7, inc, inc, sc next 4, inc, inc, sc next 7, inc, inc, sc last 2. [38 sc]

Round 6: Sc first 2, inc, inc, sc next 11, inc, inc, sc next 4, inc, inc, sc next 11, inc, inc, sc last 2. [46 sc]

Round 7: Sc first 3, inc, sc, inc, sc next 11, inc, sc, inc, sc next 6, inc, sc, inc, sc next 11, inc, sc, inc, sc last 3. [54 sc]

Round 8: Sc BLO each st around. [54 sc BLO]

Round 9: Sc each st around. [54 sc]

Round 10: Sc first 5, sk st, sc next 15, sk st, sc next 10, sk st, sc next 15, sk st, sc last 5. [50 sc]

Round 11: Sc each st around. [50 sc]

Round 12 : Sc first 5, sk st, sc next 6, change to color B, sc 2, change to color A sc 6, sk st, sc next 9, sk st, sc next 14, sk st, sc last 4. [46 sc]

Round 13: Sc first 10, change to color B, sc 5, change to color A, sc around. [46 sc]

Round 14: Repeat round 13.

Round 15: Sc first 11, change to color B, sc 3, change to color A, sc around. [46 sc]

Round 16: Sc first 12, change to color B, sc 2, change to color A, sc around. [46 sc]

Rounds 17-18: Sc each st around. [46 sc]

Rounds 19-20: (continuously work from round 19 into 20 as you make the basket handles) Sc 22, ch 7, sk 5 sts, sc next 19 sts, ch 7, sk 4 sts, sc 19, sc 9 into ch-7 sp, sc next 19 sts, sc 9 into ch-7 sp, sl st next 2, fasten off. [46 sc]

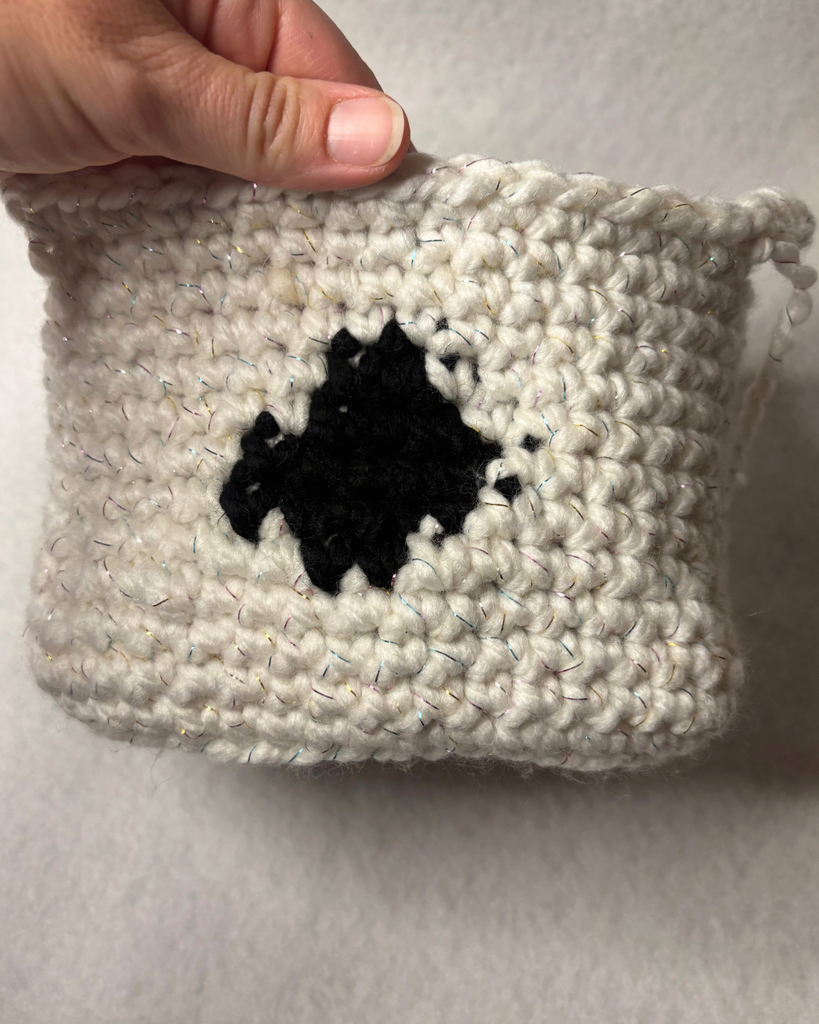
Here is what you should have now:

Finishing the Sparkle Spider Basket Crochet Pattern

Thread a long strand of color B onto a tapestry sewing needle. Use this to sew around the outside of the spider body shape as shown to make the shape more oval. Next, thread another long strand and sew legs on as desired. I also used scrap green yarn to make some spooky eyes on mine. Weave in all your remaining ends. I think this has quite a nice shape as is, but you could absolutely starch it for a bit more stiffness, or block it to a more desired shape.

If you prefer a PDF, I have that available in my ravelry shop! Here is the link to this pattern in my shop.

Thank you so much!

Don’t forget to go and join the CAL here on the Facebook page!

You can also go to this blog post from Underground Crafter to see all the patterns that have been released so far in the event!

May 22, 2026 by Priscilla

Classic Hairbow Crochet Pattern

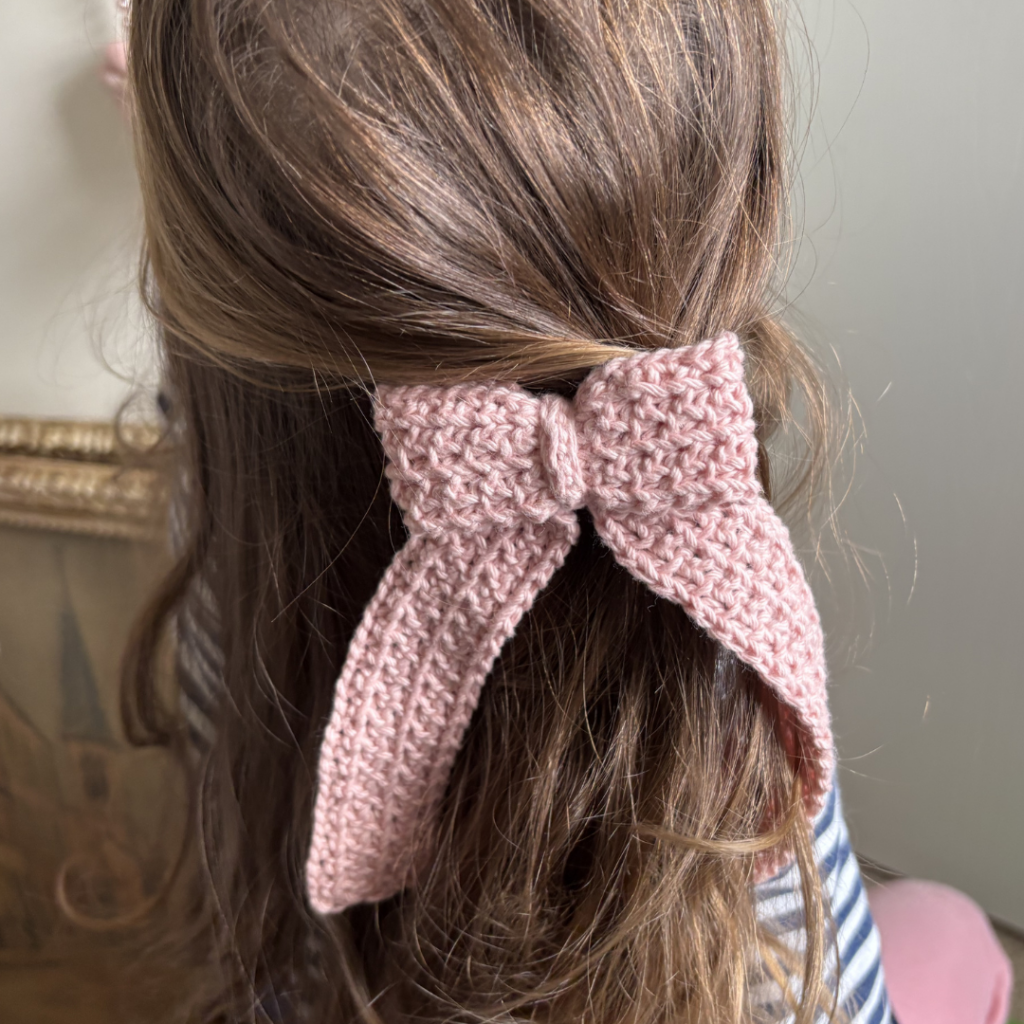
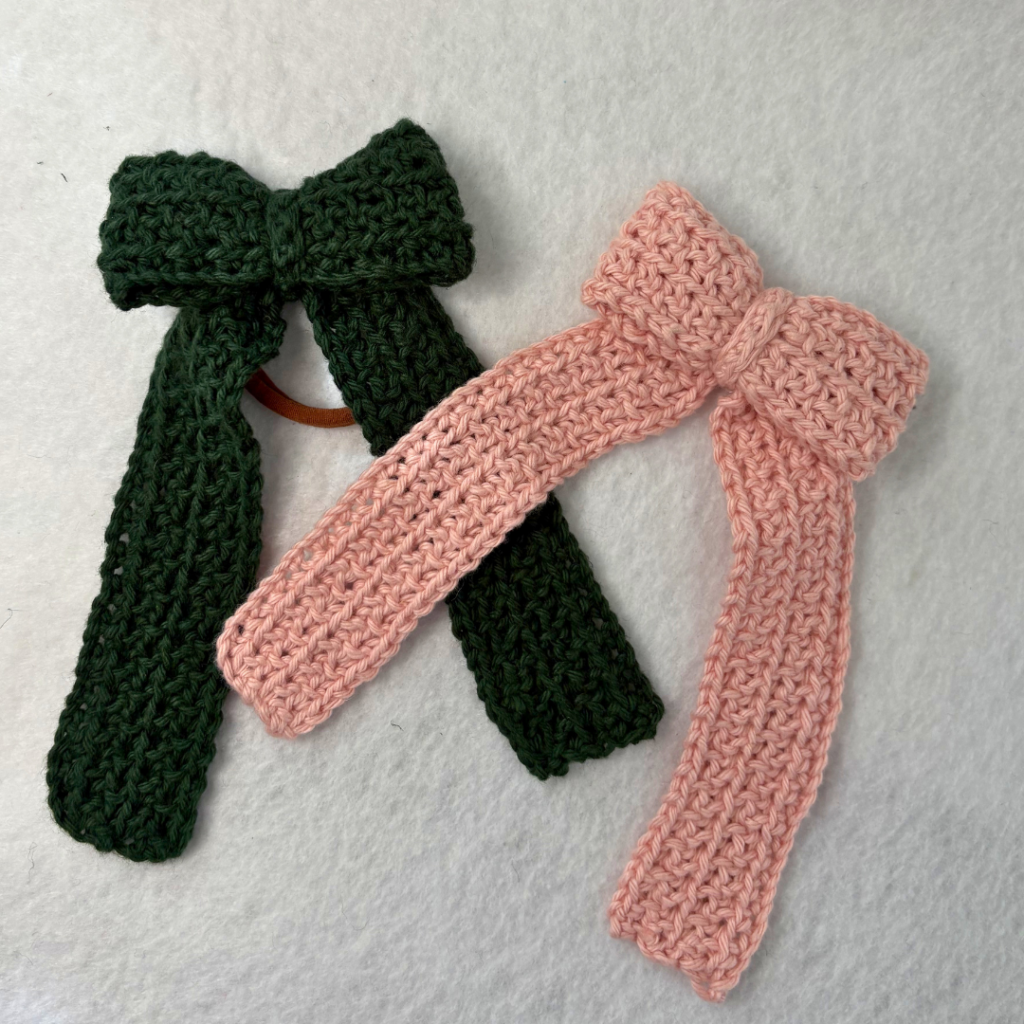
From time to time, I like to wear a fun hair accessory. This one is more of a everyday accessory, so I’m happy to introduce to you the Everyday Hairbow! You’ll make this classic hairbow crochet pattern over and over again because it is quick to make and the texture is a unique pattern. The other great thing about this pattern is that you could customize and make it versatile. I wrote the pattern with CYC 3 DK cotton yarn, but you can use lighter yarn for a little bow or thicker yarn for a big statement piece.

classic hairbow crochet pattern

I love the stitch pattern I created for this hairbow! The way you work in the front loops give it a really nice texture. You’ll work up three separate pieces and then seam them together. Then you can attach the bow to a hair tie or clip. I think these are a great little gift pattern to have in your arsenal when you want to give handmade but you are short on time.

I used Cotlin yarn from KnitPicks/Crochet.com. P.S. Weird rant: I hate that the “crochet” counterpart isn’t really WeCrochet anymore. It makes it hard to write about the company, like I can’t say oh it’s Cotlin yarn from Crochet. End rant. I like this yarn! The colors are so pretty and it is an easier cotton to work with than others.

Supplies

  • CYC 3 DK yarn: 100-125 yards (sample is KnitPicks Cotlin)
  • crochet hook US size E (3.5 mm) or size needed to obtain gauge
  • tapestry sewing needle
  • scissors and measuring tape/gauge ruler
  • hair elastic or alligator style hair clip (optional: glue)

Notes

Stitch counts are marked in ( ) at the end of each row.

Abbreviations (US Terms)

  • ch = chain
  • st/sts = stitch/stitches
  • sc = single crochet
  • sk st = skip stitch
  • FLO = front loop only

Gauge Swatch

2 in by 2 in swatch = 12 sts in 8 rows

Row 1: Ch 18, sc 2nd ch from hook, *ch 1, sk st, sc next st, repeat from * across. (9 sc)

Rows 2-9: Turn, *ch 1, sk st, sc next st, repeat from * across. (9 sc)

Finished Measurements

2.5 in by 4.5 in

Written Instructions

Bow:

Row 1: Ch 40, sc 2nd ch from hook, * ch 1, sk st, sc, repeat from * across. (20 sc, 19 ch-1 sp)

Row 2: Turn, ch 1, sk st, sc FLO, repeat from * across. (20 sc FLO, 19 ch-1 sp)

Rows 3-5: Repeat row 2.

Fasten off, use ends to sew end to end.

Ribbon:

Row 1: Ch 70, sc 2nd ch from hook, * ch 1, sk st, sc, repeat from * across. (35 sc, 34 ch-1 sp)

Row 2: Turn, ch 1, sk st, sc FLO, repeat from * across. (35 sc FLO, 34 ch-1 sp)

Rows 3-5: Repeat row 2.

Fasten off and weave in ends.

Tie:

Row 1: Ch 10, sc 2nd ch from hook, sc each st across, fasten off. (10 sc) Place the middle of the bow and the middle of the ribbon together, place the hair tie or hair clip in as well, then wrap the tie around and sew end to end around the middle of the bow. Alternatively, assemble bow and glue to desired hair clip.

I hope you loved making this pattern! Hair accessories are fun to make and perfect when you need something satisfying. Here are some other hair accessory patterns:

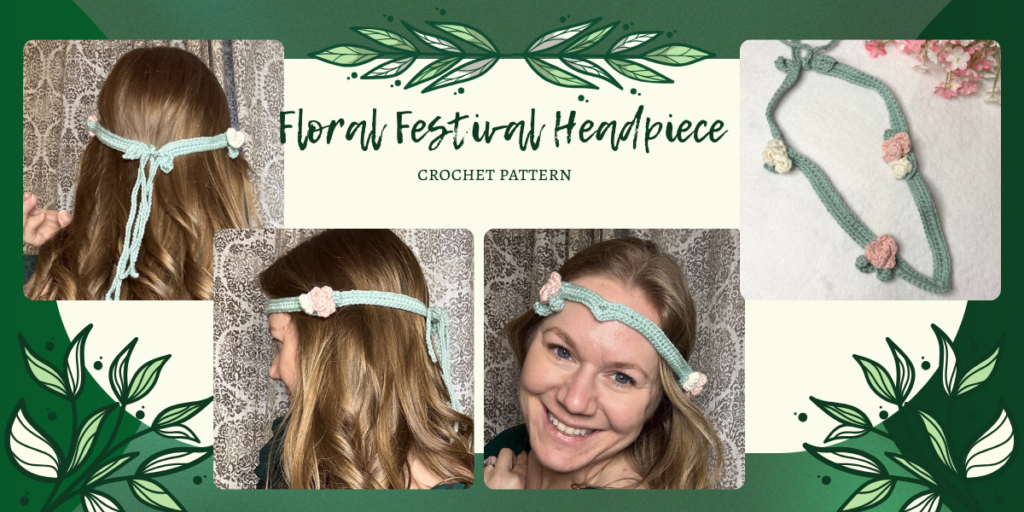
crochet floral festival headpiece

February 19, 2026 by Priscilla

Sedge Stitch Crochet Headband Pattern

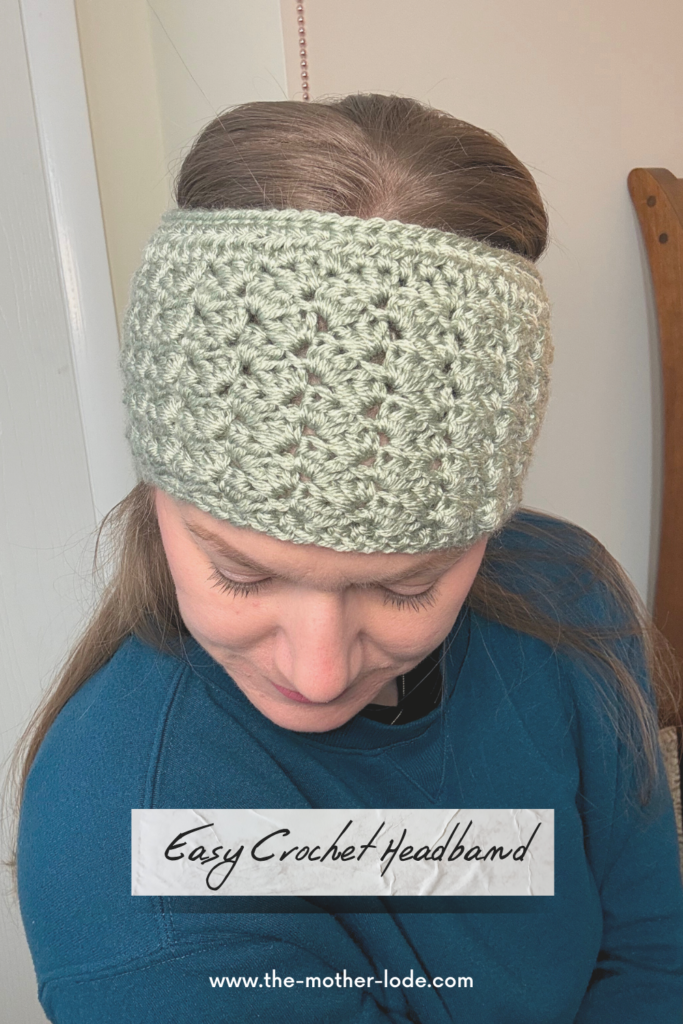
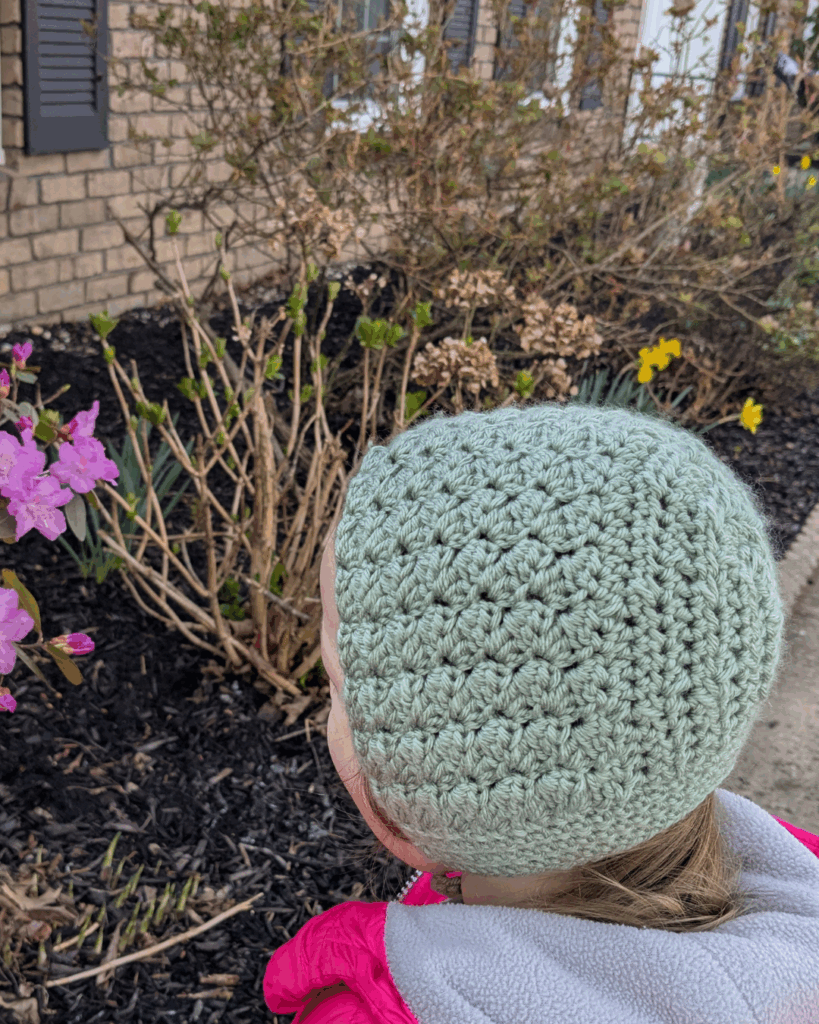
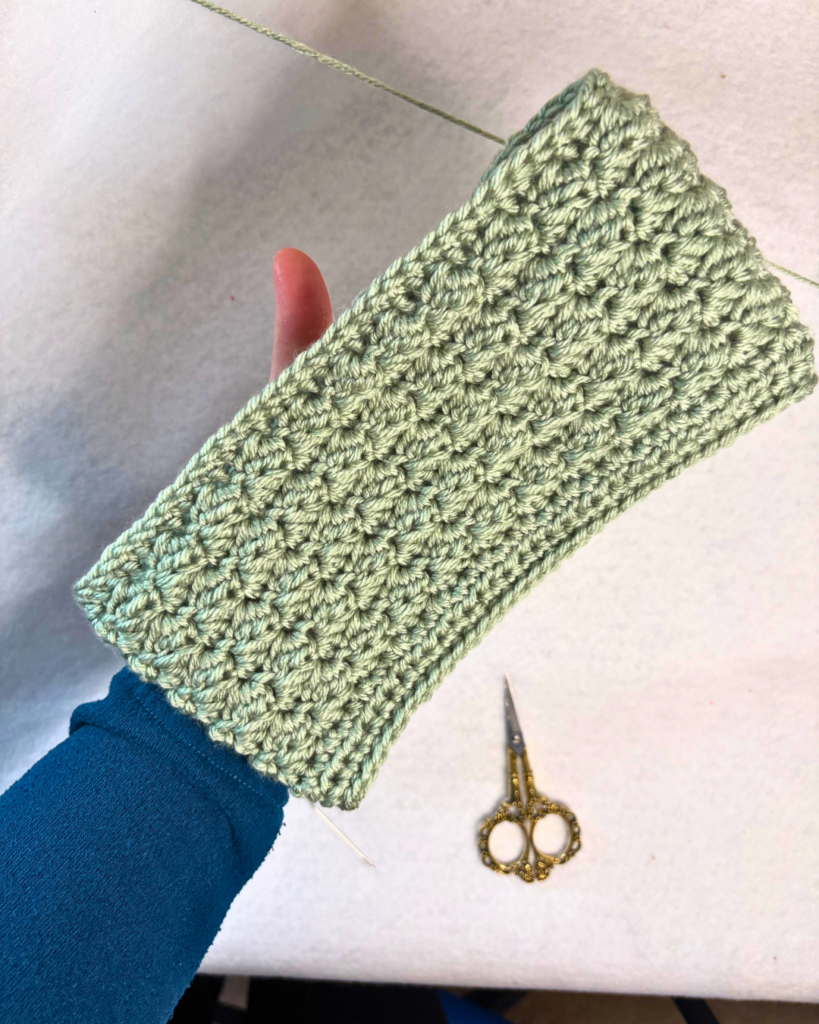
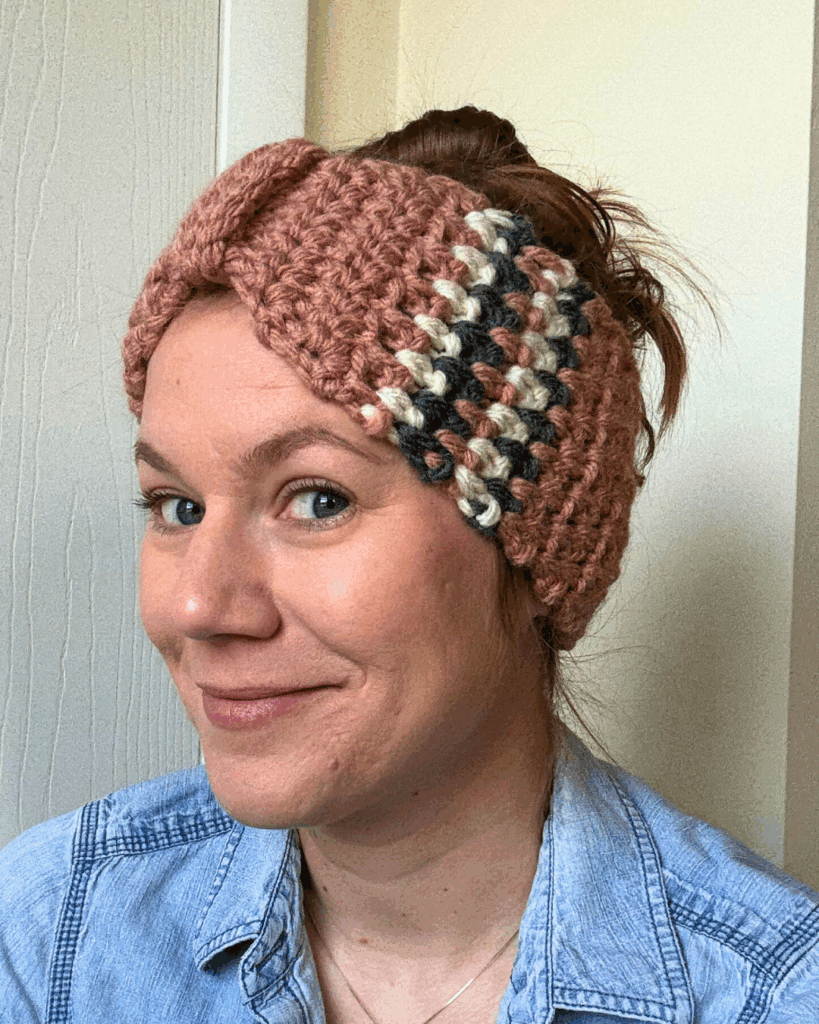
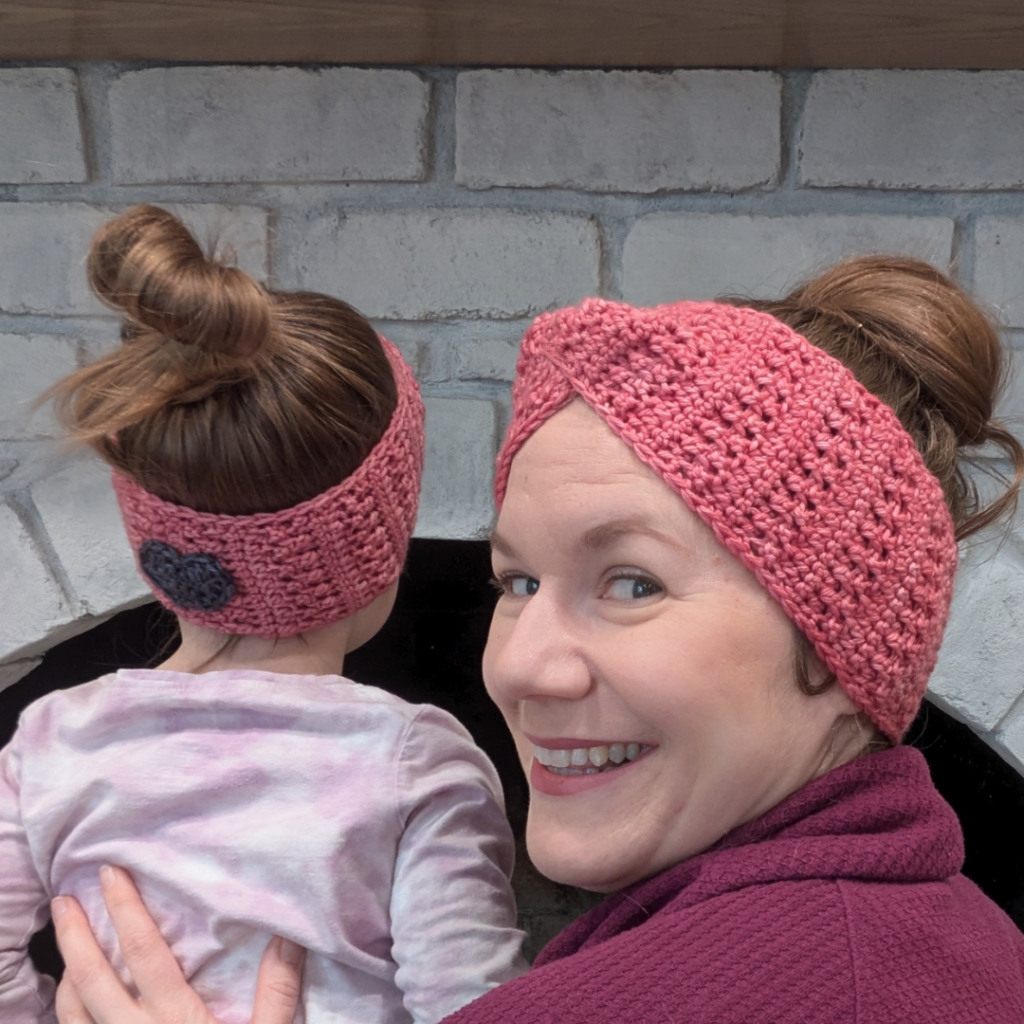
Let’s make a beautifully textured crochet headband today! If you love texture that comes together simply, this pattern is for you! I love a good pattern that you can veg out in front of a good show with at the end of a long day. The sedge stitch crochet headband pattern is easy to make and comes in several sizes. I love making designs that can be matching sets among family members. This headband called the Fields Headband has a matching bonnet pattern that is super sweet. You can read all about that pattern here!

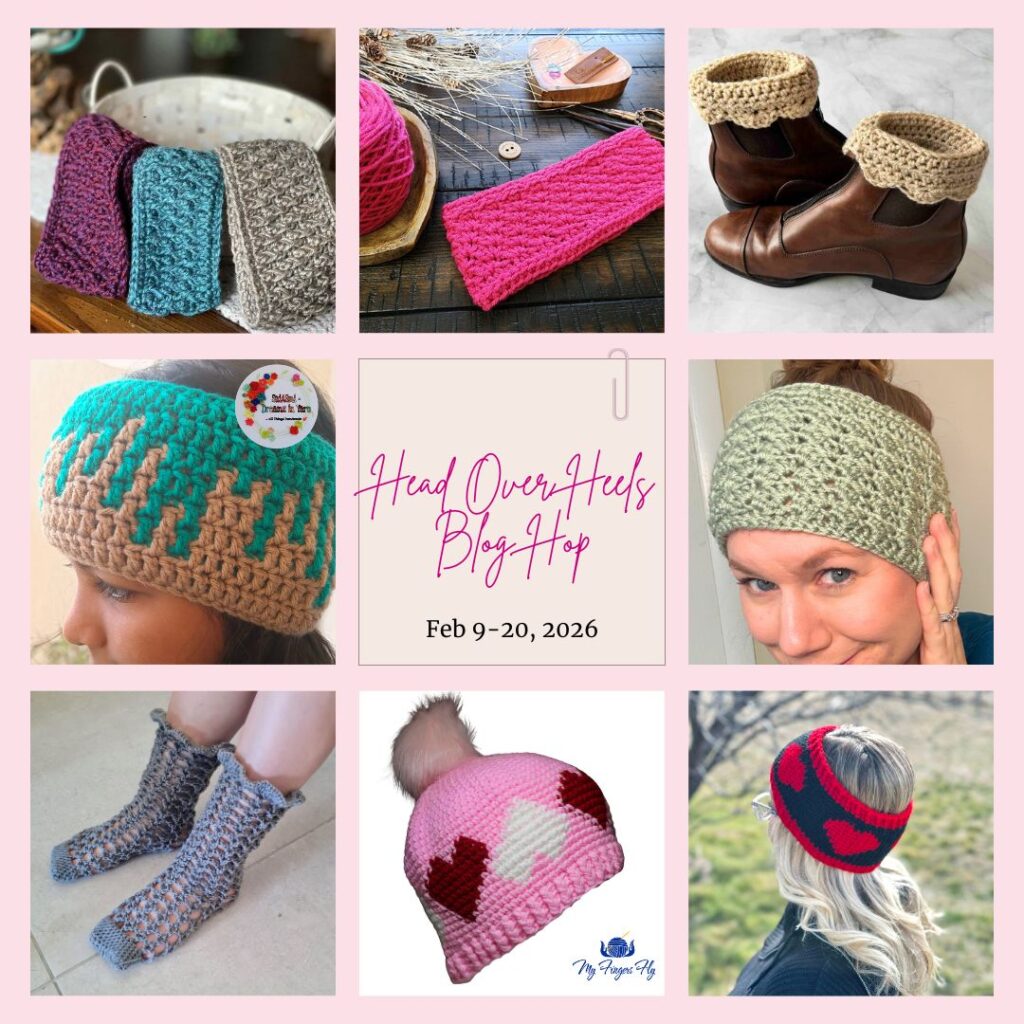
This pattern was featured in the Head over Heels Blog Hop from Madame Stitch in February 2026. This is such a neat hop with patterns for heads and feet! The event has now ended, but you can still look through the patterns, many of which are free on the designer’s blogs like mine!

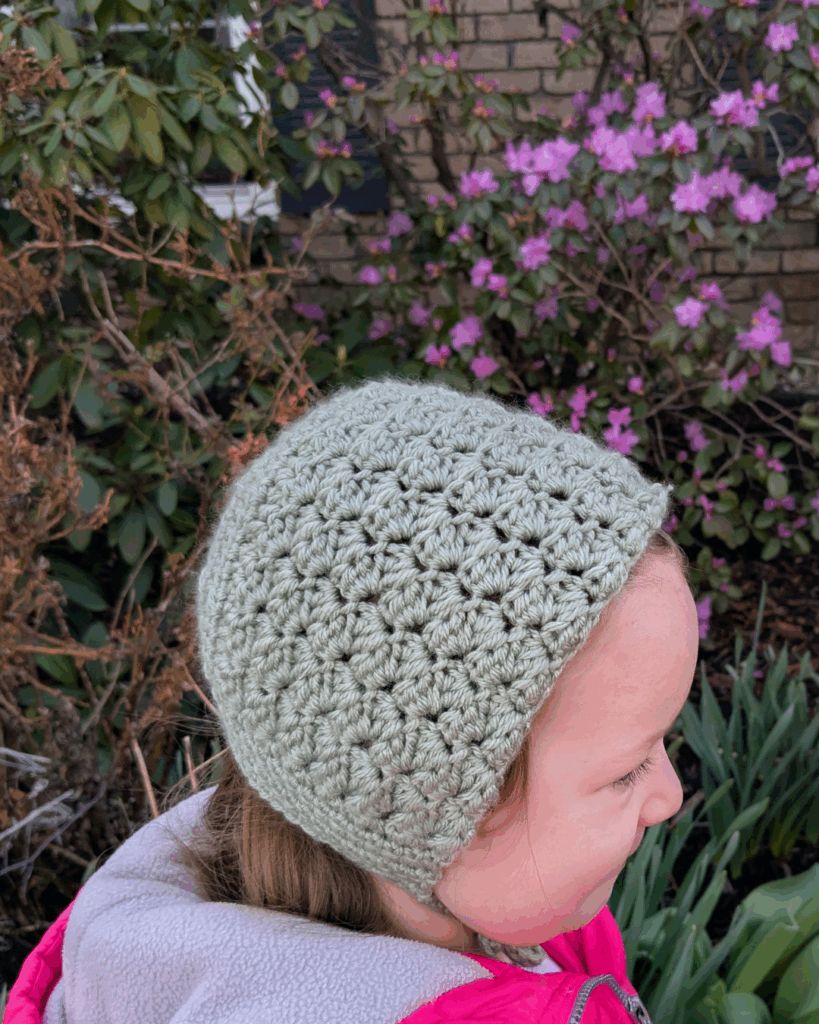
I used a basic acrylic yarn for this pattern for ease. I love the Lion Brand Basic Stitch for this, I think it’s a great acrylic yarn that is soft and wears well. Here, you can see the matching Fields Bonnet Pattern on my daughter when I designed it last year! Don’t you love making things for your family to wear? Want a little chuckle? Probably about 8 years ago I made a Hokie Bird hat for my then 4 year old son. I just free-handed it and it has little ear flaps that come down and a Hokie Bird on the forehead. He loved it and wore it often until it didn’t fit anymore. My super girly daughter, now 3, LOVES it and has been wearing it everywhere for the last several weeks. You never know what they’ll love, so just make a bunch of things and then they’ll pick the most worn-out hat to wear! (P.S. A Hokie Bird is the Virginia Tech mascot, my husband went to graduate school there.)

Now, let’s make this sedge stitch crochet headband pattern!

Supplies

  • CYC 4 worsted yarn: 100-150 yards (sample is Lion Brand Yarn Basic Stitch in color Sage)
  • crochet hook US size J (6 mm) or size needed to obtain gauge
  • tapestry sewing needle
  • scissors and measuring tape/gauge ruler

Stitches and Abbreviations (US Terms)

ch = chain

st/sts = stitch/stitches

sc = single crochet

sl st = slip stitch

hdc = half double crochet

fhdc = foundation half double crochet

sedge stitch = *single crochet, half double crochet, double crochet in the same stitch, sk 2 sts, repeat from *

noted as {sc, hdc, dc} within pattern

The sedge stitch is so easy to learn and I love the texture in this stitch. It isn’t bobbly or anything, just enough to be interesting and it works up quickly. I especially love it for baby blankets and I have made several baby blankets for friends with this stitch.

Notes

  • Stitch counts are marked in [ ] at the end of each row.
  • Sizing in pattern is denoted as follows: Child, (Teen/Adult Small, Adult Medium, Adult Large)
  • Please note that the headband will stretch about 1.5 inches to fit snugly on the head. If desired, you can do the beginning row of Fhdc to desired length made to measure as long as you use a stitch count with multiples of 3.
SIZEChildteen/adult smalladult mediumadult large
circumference18 in19 in21 in22 in
width4 in4.5 in5 in5.5 in

This headband will have a slight curve. It is meant for the top to be slightly tighter to help the headband stay on. The final sl st row is what causes this. If you find that it makes the headband too tight and you prefer to wear it under your hair instead, you may want to leave that row out to loosen it.

I chose to use mattress stitch to seam. This is so seamless looking, and looks like it was crocheted in the round so much that, when I went to make my 2nd sample, I thought that’s what I had done in the first draft!

sedge stitch crochet headband pattern photo

Written Instructions

Size: Child, (Teen/Adult Small, Adult Medium, Adult Large)

Row 1: Fhdc 63 (69, 75, 81) ch 1, turn. [63 (69, 75, 81) fhdc]

Row 2: {Sc, hdc, dc} first st, sk next 2 sts, *{sc, hdc, dc} next st, sk next 2 sts, repeat from* until last st, sc last st. [21 ( 23, 25, 27) sedge sts, 1 sc]

Row 2: Ch 1, turn, *{sc, hdc, dc} first st, sk next 2 sts, repeat from* until last st, sc last st. [12 (14, 16, 18) sedge sts, 1 sc]

Rows 3-9 (11, 12, 13): Repeat Row 2.

Row 10 (12, 13, 14): Hdc each st across, turn.[63 (69, 75, 81) hdc]

Row 11 (13, 14, 15): Sc each st across, turn.[63 (69, 75, 81) sc]

Row 12 (14, 15, 16): Sl st each st across. [63 (69, 75, 81) sl st]

Fasten off, leave long tail for sewing headband together. Use a mattress stitch to sew the ends together for the most seamless look.

More free headband patterns!

The Linen Stripe Headband is stretchy and cozy! Use up a few scraps for those stripes!

The Minimalist Headband has a cozy waffle stitch that works up fast in super bulky weight yarn.

December 18, 2025 by Priscilla

Simple Crochet Hoop Earrings Free Pattern

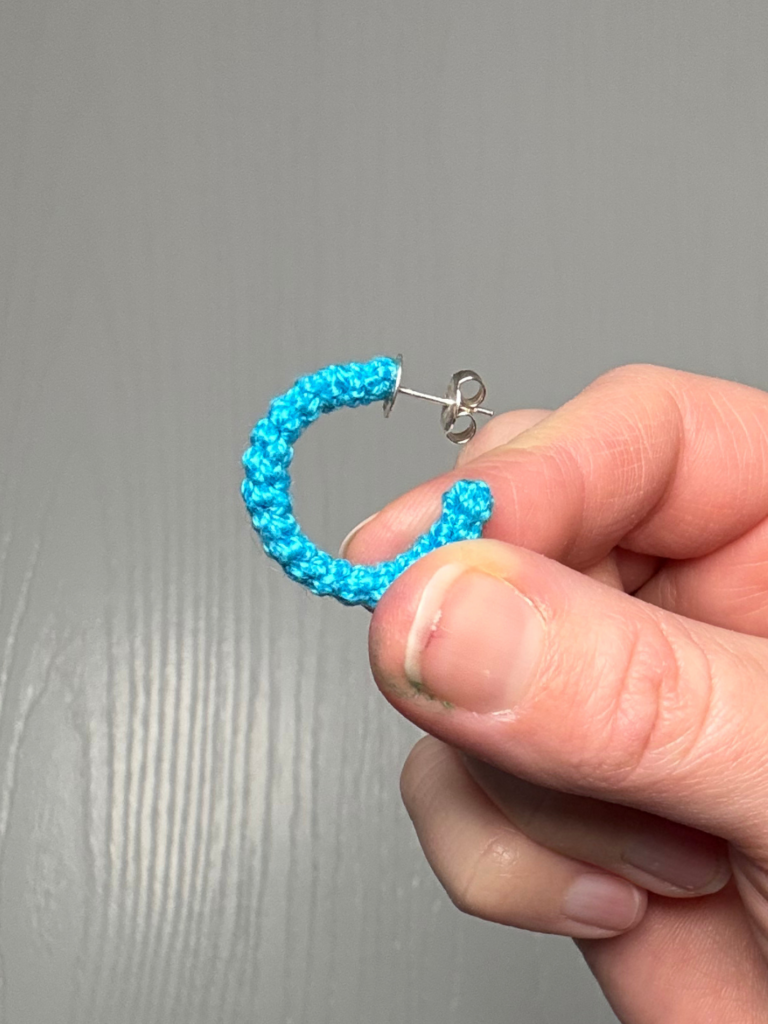
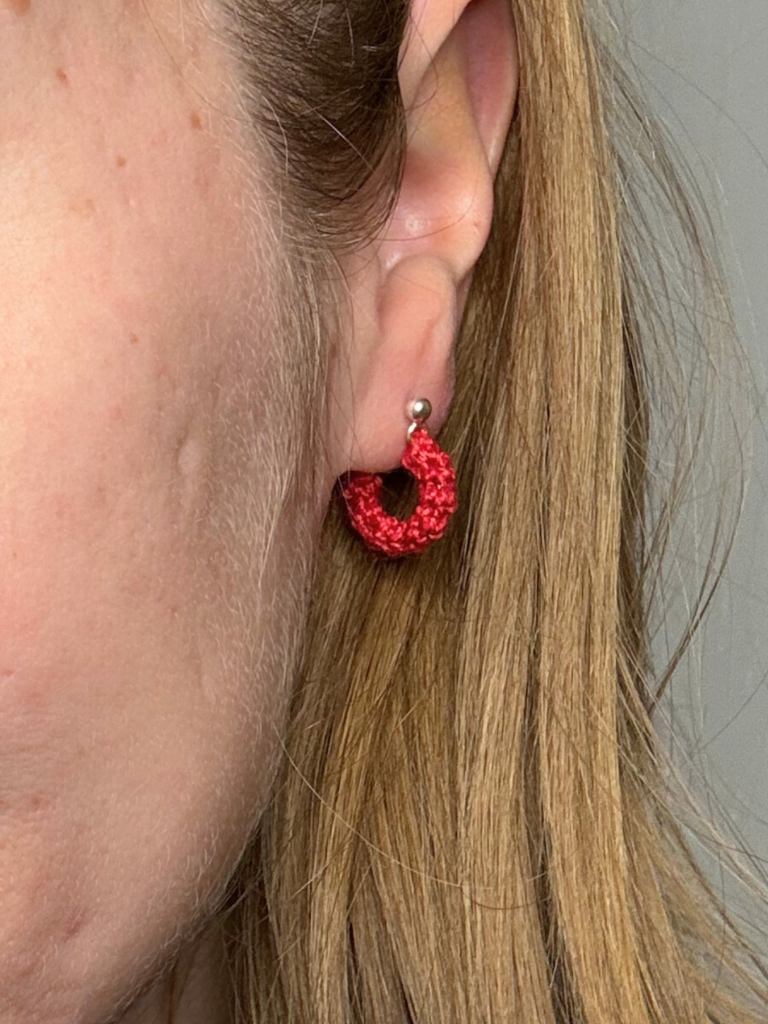
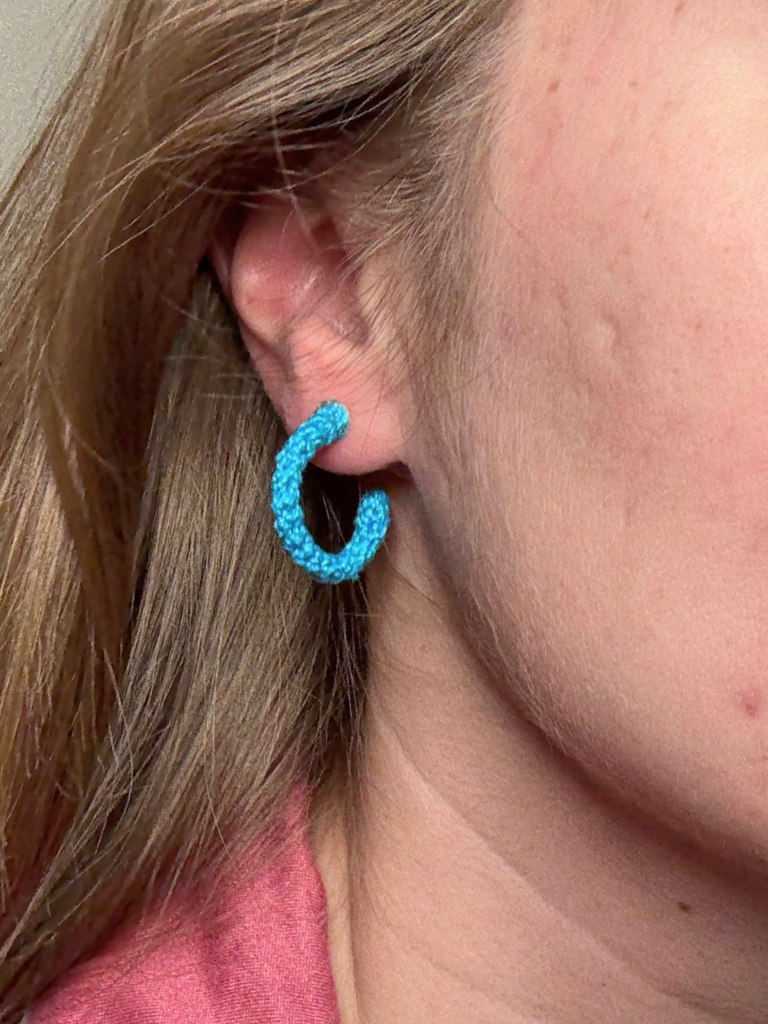
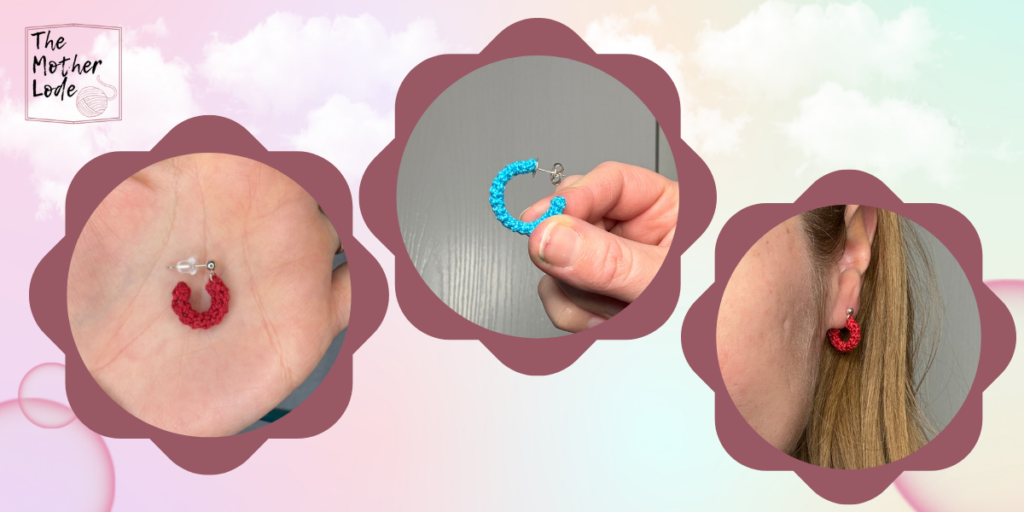
Let’s make some simple crochet hoop earrings! These are simple in style, but they are a unique pattern for making crochet hoop earrings. I have several pairs of resin hoop earrings that I bought from a beautiful shop called Fenna and Fei. They are my favorites and I wear them all the time. They inspired me to create these crochet hoops in the same shape! I thought they could offer the same timeless style, and I’m so happy my idea worked!

I’m so pleased this simple crochet hoop earrings free pattern was part of the 2 X $2 Holiday Magic Hop being hosted by Green Fox Farms!

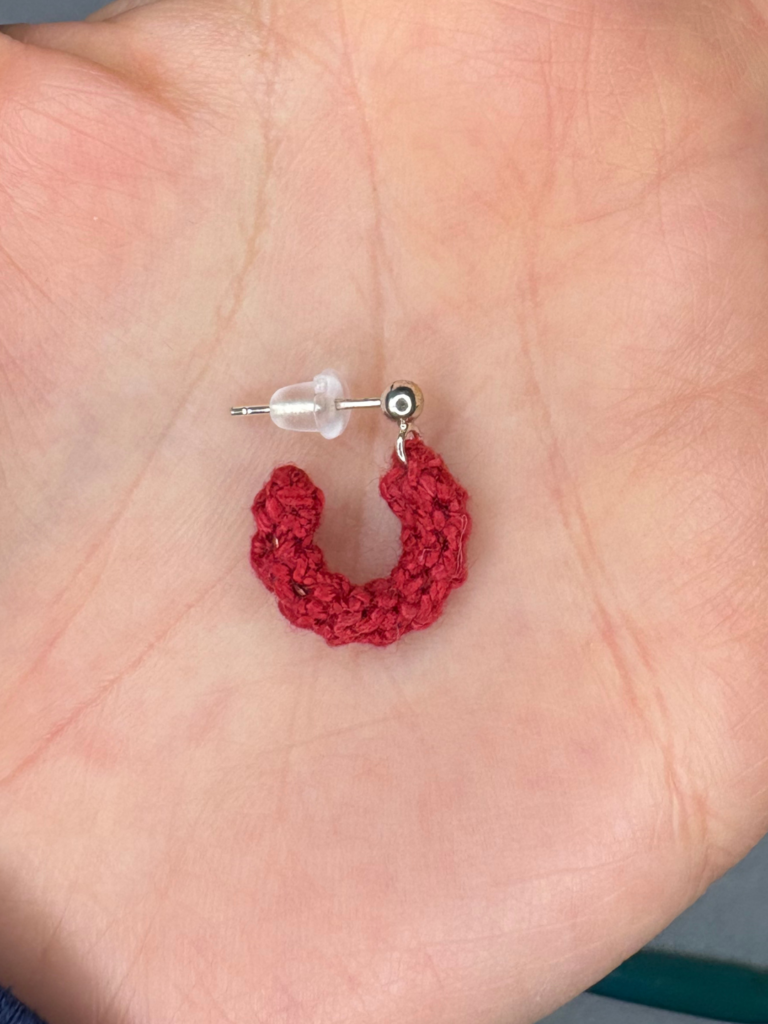
You’ll need some extra supplies for these than most of my earring patterns. Choose some metal hoops, and use cutters to cut them. You’ll need a post style earring finding, either a ball with small ring attached or a small flat back post. I bought my ball/ring ones from Michael’s and the flat back ones from Amazon so I could get sterling silver since my ears are sensitive.

These would make really great gifts, because the style is such that anyone would wear them. You can make them in a few sizes based on the size hoops you like or can find. I bought mine from Michael’s. I like to check the clearance section every time I go to Michael’s. They often have random jewelry findings, I think that’s where I got the hoops I used on these. The small, red pair is actually a large jump ring.

I’ve got the free version of the pattern right here on the blog. These are pretty simple, but they are a bit fiddly, so getting the PDF is a great idea if you may need extra support. The PDF has two pages of step by step photos. You can purchase the PDF from any of my shops: Etsy, ravelry, or LoveCrafts. Thanks so much!

simple crochet hoop earrings free pattern
ravelry
Etsy
LoveCrafts

Making the Earrings

Supplies

  • Size 10 crochet thread, any color, approx 20 yards (I like Curio 10 from KnitPicks/WeCrochet)
  • Size 1.65 mm crochet hook
  • Tapestry needle and scissors
  • 2 flat back post earring findings, no more than 5 mm diameter, OR 2 ball with small ring post earring findings
  • Closed metal jewelry hoops, any size
  • Wire cutters to cut the hoops
  • Quality jewelry glue like E600 for flat back posts

Notes

  • You could stiffen these with starch spray but I didn’t think it was necessary for these earrings.
  • Stitch counts are marked at the end of each round with ( )
  • Finished dimensions: depends on your hoop size
  • These are quite fiddly to make. If you are struggling, try going up a hook size, or try to do 5 sts around instead of 4.
  • Cut the hoops such that you are cutting 1/4 of the hoop away. You should be able to sit the corner of a piece of paper in the hole you leave as a right angle.

Abbreviations (US Terms)

sc = single crochet

st/sts = stitch/stitches

beg = beginning

MR = magic ring

sc BLO = single crochet in the back loop only

Gauge

Gauge is not really necessary for this pattern. Personally, I find the smallest hook I can handle for the thread size (for earrings) produces the best, tightly stitched look. If you desire to gauge swatch: use single crochet in 8 rounds, 4 sts around to equal 1 inch long.

Written Instructions for these simple crochet hoop earrings free pattern

Make 2

Round 1: Form a MR, 4 sc into MR. (4 sc)

Round 2: Working in continuous rounds, sc BLO each st around. (4 sc BLO)

Use hook to pull beg tail through bottom of MR, give a gentle tug to help a cup shape form.

Rounds 3-end : Sc each st around, working in continuous rounds until you reach a long enough tube to fit around the length of your hoop. (4 sc) Fasten off and weave in ends.

Assembly

You can use two different types of posts for these earrings.

  • Use quality jewelry glue and a flat back post.
  • Use a ball stud with ring attached. Open ring and thread through the top end of the earring.

Here are some more of my free earrings patterns!

simple crochet hoop earrings free pattern

September 17, 2025 by Priscilla

Textured Baby Bonnet Crochet Pattern

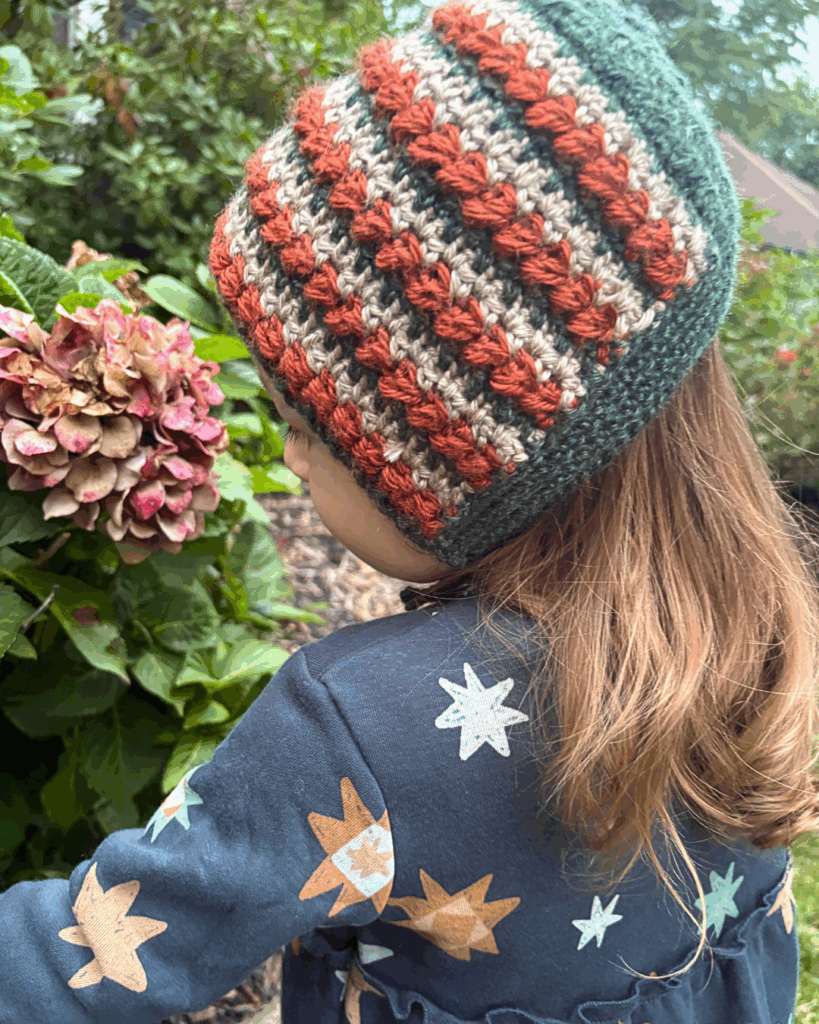
Hello! I’m so delighted to share this pattern with you today! The Spice Bonnet is a textured bonnet pattern for the little ones, from preemies all the way to children. This was designed for the Preemie Crochet Challenge that is put on by Sunflower Cottage Crochet every year. I’m so glad to be a part of it this year! For the release of this pattern it will be available as a free download from Sept 19, 2025 through the end of the month!

The Preemie Crochet Challenge is an event through the whole month of September, which is Prematurity Awareness Month! When you download one of the free patterns available through the month, you pledge to make one item to donate to your local NICU or pregnancy/baby center. It’s really a beautiful event and you should go read more about it here. Though I haven’t had a premature birth myself, my youngest son did have a short NICU stay due to fluid in his lungs and those five days were a tiny glimpse into the difficulty those families experience. Participating in this event to help raise awareness and give to those families is wonderful!

You’ll need worsted weight yarn for this pattern in three colors, though I do think the texture is lovely and you could make a one color version. A 5 mm hook met gauge for most of my testers, though I personally used 5.5 mm as I have tight tension. This pattern is an intermediate pattern, as the bead stitch may not be familiar.

I’ve used one of my favorite yarns for this one, Lion Brand Heartland. I love the slight heathered look in this yarn line and I think it’s very soft and easy to work with.

Let’s get to making it!

Supplies

  • CYC 4 worsted yarn: color A: green: 75 yards, color B: orange: 75 yards, color C: tan: 60 yards (sample is acrylic worsted yarn)
  • crochet hook 5 mm or size needed to obtain gauge
  • tapestry sewing needle
  • scissors and measuring tape/gauge ruler

Notes

  • Stitch counts are marked in [ ] at the end of each row, with different sizing in parentheses as follows: Preemie, Infant: 0-6 months, (Baby: 6-12 months, Toddler: 1-3 years, Child: 4-10 yrs)
  • Turning chains do not count as stitches.
  • There is a RS (right side) noted in Row 5.
  • Color changes are noted as “with color x,” at the beginning of the rows. If there is not a color noted, you are continuing with the color from the previous row. I like to change colors by finishing the final stitch of the previous color with the new color.
  • The striped top of the bonnet will have numerous ends. You could minimize end weaving a bit by carrying color C along the edges of the stripes. This will be hidden because you will be crocheting a neckband along those edges.

Abbreviations (US Terms)

  • ch = chain
  • st/sts = stitch/stitches
  • sk = skip
  • sc = single crochet
  • dc = double crochet
  • sl st = slip stitch
  • hdc = half double crochet
  • dec = hdc two stitches together
  • sc FLO = single crochet front loop only
  • linen st = sc, sk st, ch 1

Special Stitches

  • bead st = skip next st, sc next st, yo, insert hook around post of the sc just made, pull up a loop, yo, insert hook around post again, pull up a loop, yo, pull through all loops on hook
  • FSC= foundation single crochet: ch 3, insert hook in 3rd ch from hook, *pull up a loop, yo, pull through one loop on hook, yo, pull through two loops, insert hook in st made by bold section above, repeat from *

Gauge Swatch

4 in by 4 in swatch = 9 bead sts in 4 row 2-5 repeats

Row 1: With color A, FSC 24 [24 sc]

Row 2: With color B, ch 2, bead st across [12 bead sts, 1 dc]

Row 3: With color C, ch 1, linen stitch across.[14 linen sts]

Row 4: Repeat row 3.

Row 5: With color A, ch 1, *sc FLO, sc ch-1 sp, repeat from * across [12 sc, 12 sc FLO]

Rows 6-14: Repeat rows 2-5 respectively.

Written Instructions

Size: Preemie (Infant: 0-6 months, 17,Baby: 6-12 months, Toddler: 1-3 years, Child: 4-10 yrs)

ALL SIZES

Row 1: With color A, FSC 32 (38, 44, 50, 56). [32 (38, 44, 50, 56 sc)]

Row 2: With color B, ch 2, bead st across until last, hdc last st. [15 (18, 21, 24, 27) bead sts, 1 hdc]

Row 3: With color C, ch 1, linen st across.[15 (18, 21, 24, 27) linen sts]

Row 4: Repeat row 3.

Row 5: With color A, ch 1, *sc FLO, sc ch-1 sp, repeat from * across [15 (18, 21, 24, 27) sc, 15 (18, 21, 24, 27) sc FLO]

Row 6-13 (17, 17, 21, 21): Repeat rows 2-5 respectively.

Continue below to appropriate size.

Preemie

Row 14: With color A, hdc first 4 sts, dec, hdc next 3 sts, dec, hdc next 2 sts, dec, hdc next 2 sts, dec, hdc next 2 sts, dec, hdc next 3 sts, dec, hdc last 4 sts.

Row 15: Hdc first 3 sts, dec, hdc next 3 sts, dec, hdc next 2 sts, dec, hdc next 2 sts, dec, hdc next 3 sts, dec, hdc last 3 sts.

Row 16: Hdc first 3 sts, dec, hdc next 3 sts, dec, hdc, dec, hdc next 3 sts, dec, hdc last 3 sts.

Continue to page 8 for neckband.

Infant

Row 18: With color A, hdc first 4 sts, dec, hdc next 4 sts, dec, hdc next 4 sts, dec, hdc next st, dec, hdc next 4 sts, dec, hdc next 4 sts, dec, hdc last 4 sts. [6 dec, 25 hdc]

Row 19: Hdc first 4 sts, dec, hdc next 4 sts, dec, hdc next 7 sts, dec, hdc next 4 sts, dec, hdc last 4 sts. [4 dec, 23 hdc]

Row 20: Hdc first 3 sts, dec, hdc next 3 sts, dec, hdc next st, dec, hdc next st, dec, hdc next st, dec, hdc next 3 sts, dec, hdc last 3 sts. [6 dec, 15 hdc]

Row 21: Hdc first 3 sts, dec, hdc next 2 sts, dec, hdc next 3 sts, dec, hdc next 2 sts, dec, hdc last 3 sts. [4 dec, 13 hdc]

Row 22: Hdc first 2 sts, dec, hdc next 2 sts, dec, hdc next st, dec, hdc next 2 sts, dec, hdc last 2 sts. [4 dec, 9 hdc]

Continue to page 8 for neckband.

Baby

Row 18: With color A, hdc each st across. [44 hdc]

Row 19: Repeat row 18.

Row 20: With color A, hdc first 4 sts, dec, hdc next 4 sts, dec, hdc next 5 sts, dec, hdc next 5 sts, dec, hdc next 5 sts, dec, hdc next 4 sts, dec, hdc last 4 sts. [6 dec, 31 hdc]

Row 21: Hdc first 4 sts, dec, hdc next 4 sts, dec, hdc next 4 sts, dec, hdc next st, dec, hdc next 4 sts, dec, hdc next 4 sts, dec, hdc last 4 sts. [6 dec, 25 hdc]

Row 22: Hdc first 4 sts, dec, hdc next 4 sts, dec, hdc next st, dec, hdc next st, dec, hdc next st, dec, hdc next 4 sts, dec, hdc last 4 sts. [6 dec, 19 hdc]

Row 23: Hdc first 3 sts, dec, hdc next 3 sts, dec, hdc next 5 sts, dec, hdc next 3 sts, dec, hdc last 3 sts. [4 dec, 18 hdc]

Row 24: Hdc first 2 sts, dec, hdc next 2 sts, dec, dec, hdc next st, dec, dec, hdc next 2 sts, dec, hdc last 2 sts. [6 dec, 9 hdc]

Continue to page 8 for neckband

Toddler

Row 22: With color A, hdc first 4 sts, dec, hdc next 4 sts, dec, hdc next 4 sts, dec, hdc next 4 sts, dec, dec, hdc next 4 sts, dec, hdc next 4 sts, dec, hdc next 4 sts, dec, hdc last 4 sts. [8 dec, 32 hdc]

Row 23: Hdc first 4 sts, dec, hdc next 4 sts, dec, hdc next 4 sts, dec, hdc next 4 sts, dec, hdc next 4 sts, dec, hdc next 4 sts, dec, hdc last 4 sts. [6 dec, 30 hdc]

Row 24: Hdc first 4 sts, dec, hdc next 4 sts, dec, hdc next 3 sts, dec, dec, hdc next 3 sts, dec, hdc next 4 sts, dec, hdc last 4 sts. [6 dec, 22 hdc]

Row 25: Hdc first 3 sts, dec, hdc next 3 sts, dec, hdc next 2 sts, dec, dec, hdc next 2 sts, dec, hdc next 3 sts, dec last 3 sts. [6 dec, 16 hdc]

Row 26: Hdc first 3 sts, dec, hdc next 3 sts, dec, hdc next 2 sts, dec, hdc next 3 sts, dec, hdc last 3 sts. [4 dec, 14 hdc]

Continue to page 8 for neckband

Child

Row 22: With color A, hdc each st across. [56 hdc]

Row 23: Hdc first 4 sts, dec, hdc next 3 sts, dec, hdc next 4 sts, dec, hdc next 4 sts, dec, hdc next 2 sts, dec, hdc next st, dec, hdc next 2 sts, dec, hdc next 3 sts, dec, hdc next 4 sts, dec, hdc next 4 sts, dec, hdc last 4 sts. [10 dec, 35 hdc]

Row 24: Hdc first 4 sts, dec, hdc next 4 sts, dec, hdc next 4 sts, dec, hdc next 2 sts, dec, hdc next st, dec, hdc next 2 sts, dec, hdc next 4 sts, dec, hdc next 4 sts, dec, hdc last 4 sts. [8 dec, 29 hdc]

Row 25: Hdc first 4 sts, dec, hdc next 4 sts, dec, hdc next 4 sts, dec, hdc next st, dec, hdc next 4 sts, dec, hdc next 4 sts, dec, hdc last 4 sts. [6 dec, 25 hdc]

Row 26: Hdc first 4 sts, dec, hdc next 4 sts, dec, hdc next 7 sts, dec,, dec, hdc next 4 sts, dec, hdc last 4 sts. [4 dec, 23 hdc]

Row 27: Hdc first 3 sts, dec, hdc next 3 sts, dec, hdc next st, dec, hdc next st, dec, hdc next st, dec, hdc next 3 sts, dec, hdc last 3 sts. [6 dec, 15 hdc]

Row 28: Hdc first 3 sts, dec, hdc next 3 sts, dec, hdc next st, dec, hdc next 3 sts, dec, hdc last 3 sts. [4 dec, 13 hdc]

Row 29: Hdc first 2 sts, dec, hdc next 2 sts, dec, hdc next st, dec, hdc next 2 sts, dec, hdc last 2 sts. [4 dec, 9 hdc]

Continue to page 8 for neckband

Neckband ALL SIZES

Fold the last hdc row in half and sl st together to close the back of the bonnet, or fasten off and seam together. Fasten off, turn right side out.

Reattach color A in the bottom corner of bonnet (Row 1.) Sc 38 (44, 48, 54, 60) evenly across the bottom of bonnet, working approximately 1 st in the end of each row, ch 1, turn. Continue for 4 rows of single crochet for Preemie, Infant and Baby sizes, 6 rows for Toddler and Child. Do not fasten off.

Create ties: Ch 27, sl st each ch across, then sl st along bottom of bonnet (where you just completed the single crochet rows) to opposite corner. Ch 27, sl st each ch across, fasten off and weave in ends.

Alternatively, if you dislike the ties for practicality, make two small pom poms and attach to the corners of the bonnet, this would be equally as sweet!

I’d love to help you make this pattern! Please contact me with any questions! Send an email to [email protected] for assistance. Come and see what I’m sharing on Pinterest so you can find your next project. Join my newsletter so you can get the best discounts on new pattern releases. Follow me on Instagram where I love to share funny reels about crochet!

May 24, 2025 by Priscilla

Father’s Day Crochet Bookmark

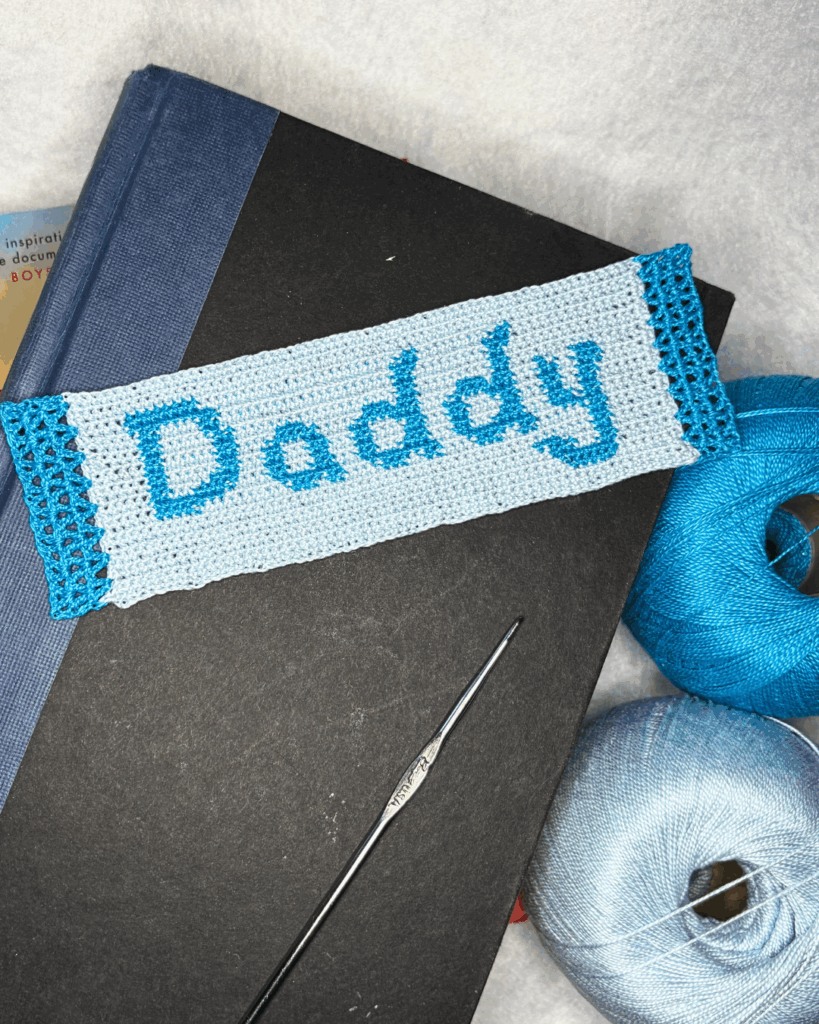
I’m thrilled to join Green Fox Farms Designs this year for her Father’s Day Blog Hop! I think it is such wonderful idea because crochet patterns to make for men aren’t as easy to find as those for women and children. It’s not so hard to find patterns for winter accessories, but, personally, I’m not gifting winter accessories in June in Pennsylvania! I wanted to go light for this project, and designing with crochet thread is one of my favorite things to do, so that led me to create this bookmark pattern! The bookmark features a tapestry crochet section that says “Daddy” and there is a variation that you could make that says “grandpa” as well!

The Father’s Day Blog Hop runs May 24th, 2025, through June 7th, 2025. There are 15 patterns and most of them are available as a free download on their feature day. You can also buy all the patterns in one convenient bundle which is only available during the blog hop.

What are you making?? I think I want to make the sunglasses case for my husband and maybe the dad cap for my dad. I also love the gamer eye mask but I don’t think my husband would use it; it’s adorable, though!

Okay, let’s get to it!

Supplies

  • Size 10 crochet thread, any 2 colors, approx 70 yards of each.
  • Size 1.65 mm crochet hook
  • Tapestry needle and scissors
  • Fabric stiffener, like Aleene’s Fabric Stiffening Spray, t-pins, and a blocking mat

I used size 10 Curio thread from Crochet.com! I love this thread, the colors are so pretty, I wish they had even more colors! I used the colors Clarity and Bahama (I think they replaced this color!)

Abbreviations (US Terms)

ch = chain

dc = double crochet

sl st = slip stitch

st/sts = stitch/stitches

sp = space

sc = single crochet

( ) = complete these instructions in one stitch

* = indicates where to begin repeat from

Notes

  • For the best look to achieve a flat bookmark, you’ll need to stiffen it. I use Aleene’s Fabric Stiffening Spray and t-pins on a blocking mat.
  • Stitch counts are marked at the end of each row with [ ] except for tapestry section where each row is 63 stitches
  • Finished dimensions: 2 in by 6.5 in
  • Beginning chains count as stitches for the stitch counts.
  • You may carry the thread behind the stitches in order to minimize end weaving. When you reach the last st of each row using color B, tuck color B onto the other side so that you may pick it back up when you reach the first st using color B on the next row.

Gauge

Gauge is not really necessary for this pattern. Personally, I find the smallest hook I can handle for the thread size produces the best, tightly stitched look. If you desire to gauge swatch: 12 sts in 13 rows of single crochet = 1 inch

ravelry
Etsy
LoveCrafts

Written Instructions

Tapestry portion Daddy

For the tapestry crochet section, there are two set up rows:

Row 1: With color A, ch 64, sc 2nd ch from hook and each ch across, ch 1, turn. [63 sc]

Row 2: Sc each st across, ch 1, turn. [63 sc]

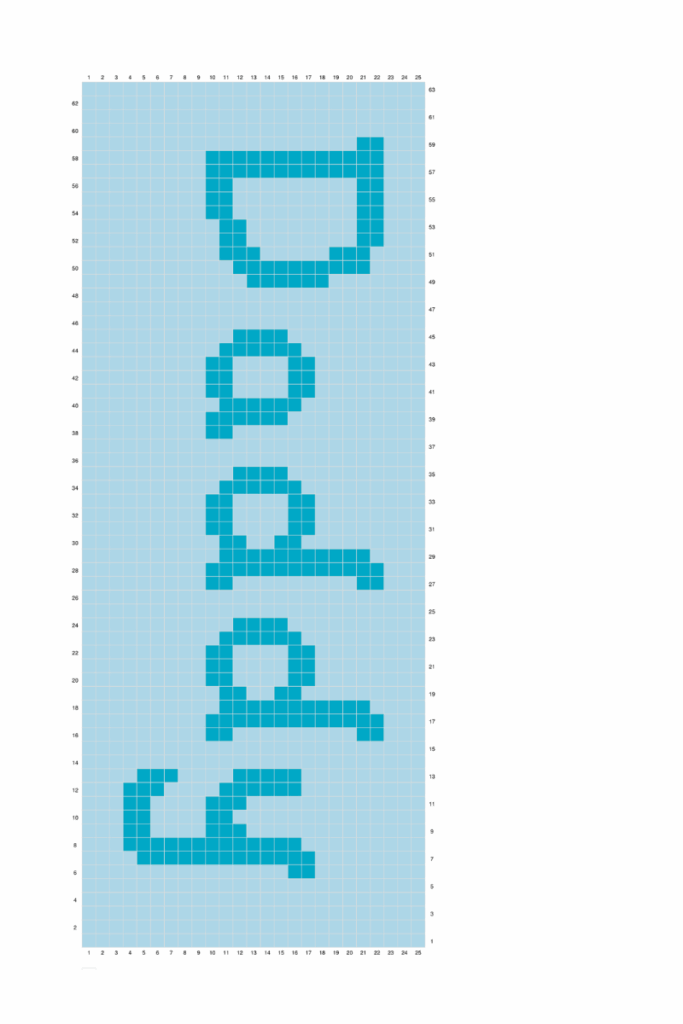
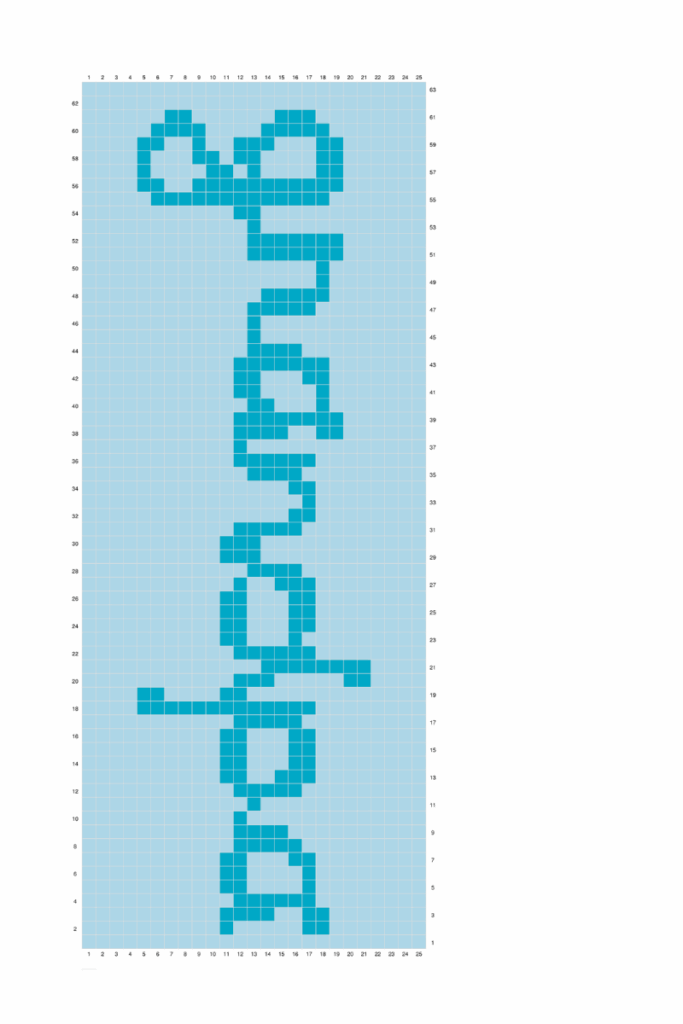
After the set up rows, you’ll be continuing in sc each st, with a ch-1 and turn at the end of each row. A represents color A and B is for color B. A 4 means crochet 1 sc in each of the next four stitches with color A. You can also use the provided chart for this part.

Row 3: A 63

Row 4: A 51, B 5, A 7

Row 5: A 6, B 7, A 50

Row 6: A 49, B 3, A 3, B 2, A 6

Row 7: A 6, B 2, A 4, B 2, A 49

Row 8: A 55, B 2, A 6

Row 9: A 6, B 2, A 55

Row 10: A 5, B 5, A 10, B 3, A 1, B 2, A 4, B 3, A 2, B 2, A 4, B 3, A 2, B 2, A 4, B 5, A 6

Row 11: A 6, B 6, A, 3, B 8, A 3, B 8, A 3, B 7, A6, B 8, A 5

Row 12: A 5, B 2, A 3, B 4, A 4, B 2, A 3, B 2, A 3, B 2, A 3, B 3, A 3, B 2, A 3, B 3, A 3, B 3, A 1, B 3, A 6

Row 13: A 6, B 2, A 3, B 2, A 3, B 2, A 4, B 2, A 3, B 2, A 4, B 2, A 3, B 2, A 3, B 2, A 3, B 3, A 5, B 2, A 5

Row 14: A 5, B 2, A 6, B 2, A 3, B 2, A 3, B 2, A 3, B 2, A 4, B 2, A 3, B 2, A 4, B 2, A 3, B 2, A 3, B 2, A 6

Row 15: A 6, B 2, A 3, B 2, A 3, B 3, A 3, B 2, A 3, B 3, A 3, B 2, A 3, B 2, A 3, B 2, A 3, B 2 A 6, B 2, A 5

Row 16: A 5, B 2, A 6, B 2, A 4, B 5, A 5, B 7, A 4, B 7, A 3, B 2, A 3, B 3, A 5

Row 17: A 5, B 2, A 9, B 2, A 1, B 3, A 5, B 2, A 1, B 3, A 7, B 3, A 5, B 2, A 6, B 2, A 5

Row 18: A 5, B 2, A 6, B 2, A 19, B 2, A 9, B 2, A 16

Row 19: A 16, B 2, A 9, B 2, A 20, B 2, A 5, B 2, A 5

Row 20: A 5, B 2, A 5, B 2, A 20, B 2, A 9, B 2, A 16

Row 21: A 15, B 3, A 8, B 3, A 20, B 10, A 4

Row 22: A 4, B 8, A 23, B 2, A 9, B 2, A 15

Row 23: A 63

Row 24: A 63

Row 25: A 63

Next, crochet the lace on the ends of the bookmark:

Row 1: With color A, sc in the end of each row, turn. Change to color B. [25 sc]

Row 2: Ch 2, sk 2 sts {(dc, ch 1, dc) next st, sk 2 sts}, repeat { } twice, then (dc, ch 1, dc) next st, sk st, repeat { } three times, (dc, ch 1, dc), sk st, dc last st, turn. [ 18 dc]

Row 3: Ch 2, (dc, ch 1, dc) in each ch -1 sp until last, dc, last st, turn. [18 dc]

Row 4: Repeat row 3, fasten off, weave in ends. [18 dc]

Repeat on other end of bookmark.

Charts

Blocking and Assembly

Pin to the blocking mat to desired shape. Spray from about 6-10 inches away with fabric stiffening spray, or pour some of the spray liquid into a small cup and paint the liquid on.

Thanks so much for coming to my blog! If you like thread crochet, check out my pattern library here! I have an awesome summer earring collection that is perfect for this time of year.

April 16, 2025 by Priscilla

Fields Bonnet

Let’s make a bonnet! I adore the look of a bonnet on a little one! They have a sweetness about them and they keep little ones’ ears warm. I also enjoy using the sedge stitch. I love the ease of this stitch, as well as the nice even texture of it. I’ve found myself gravitating to improvise baby blankets with this stitch over the years, I even did a big chunky blanket for my 8 year old this past Christmas with it. I decided to design this bonnet with it, perfect for a chilly spring day!

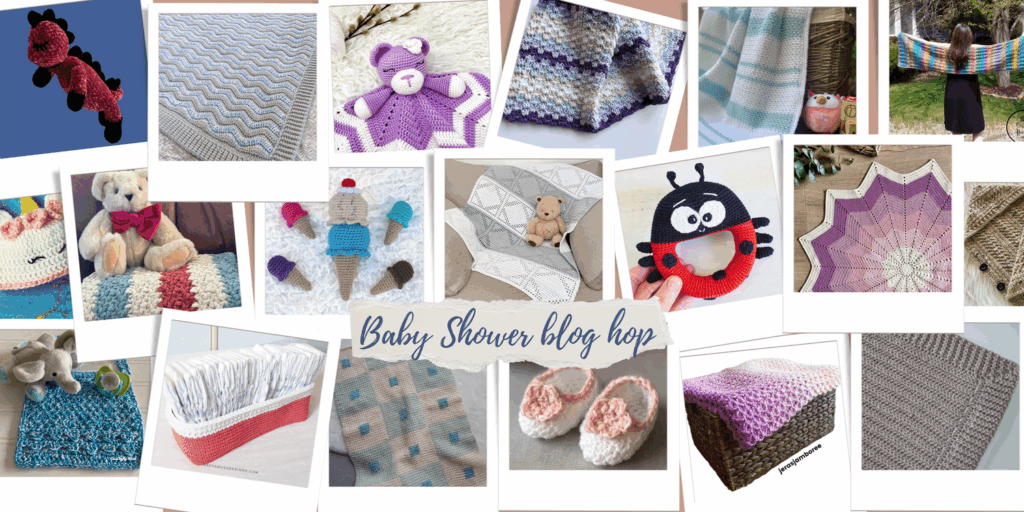
It’s time for a blog hop!!!! Kristine at Ambassador Crochet is hosting a Baby Shower Blog Hop from Sunday, April 27th to Saturday, May 24th! 4 weeks of awesome baby patterns! You can get the bundle right here! This will get you ALL the patterns for a low cost, and this is a great option specifically for this blog hop because about half the patterns are 50% off downloads and half are free. May 11th, 2025, you can get 50% off this pattern! Follow this link to the blog hop roundup where you can get the discount code!
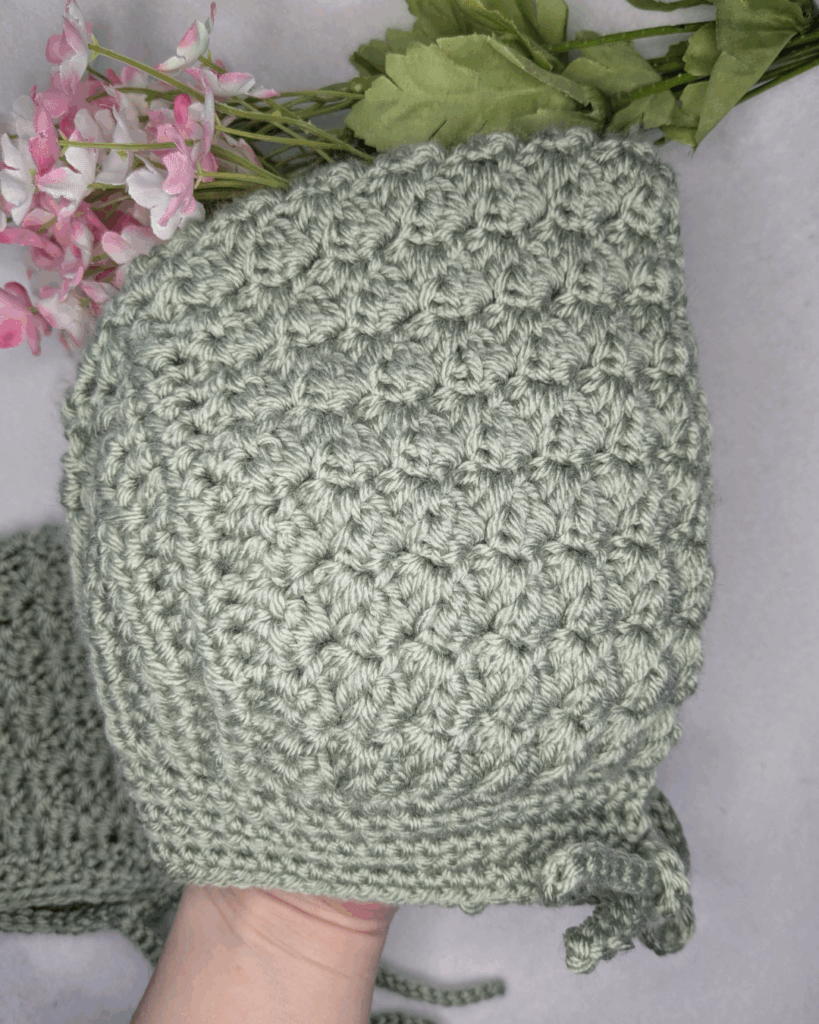
Let’s talk some more about the sedge stitch! This stitch is very easy to learn. After you create your chain, each sedge stitch is a single crochet, half double crochet, and double crochet in the same stitch, then skip two stitches. It creates a gentle texture that I really like. The stitches end up slanting together so it is a slightly dense fabric even though you are skipping stitches.
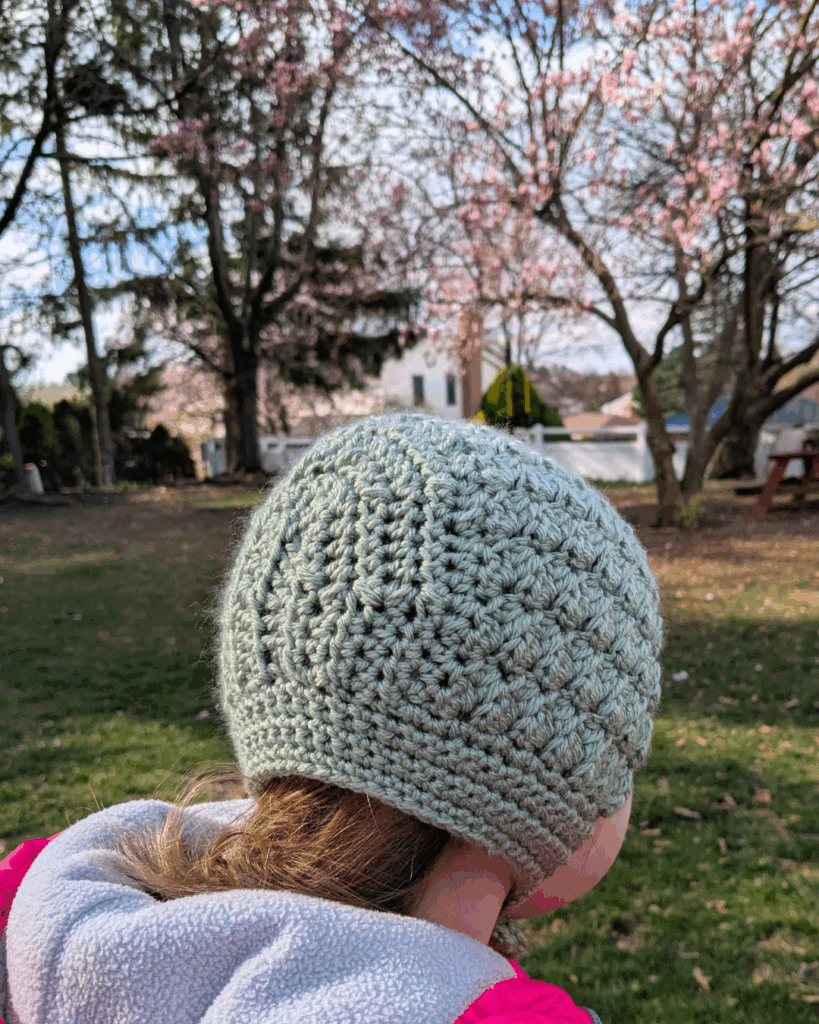
For this easy baby bonnet crochet pattern, I chose to use easy to care for acrylic yarn. I’m sure it would be lovely in a nice superwash wool, but generally for little ones I tend to go for a soft acrylic instead. I tend to buy Lion Brand’s acrylic yarn. For this I used their Basic Stitch Anti-Pilling which I think is super soft and I like the colors and the price! I also think if you used their Heartland line that would be a good match for this pattern, too.
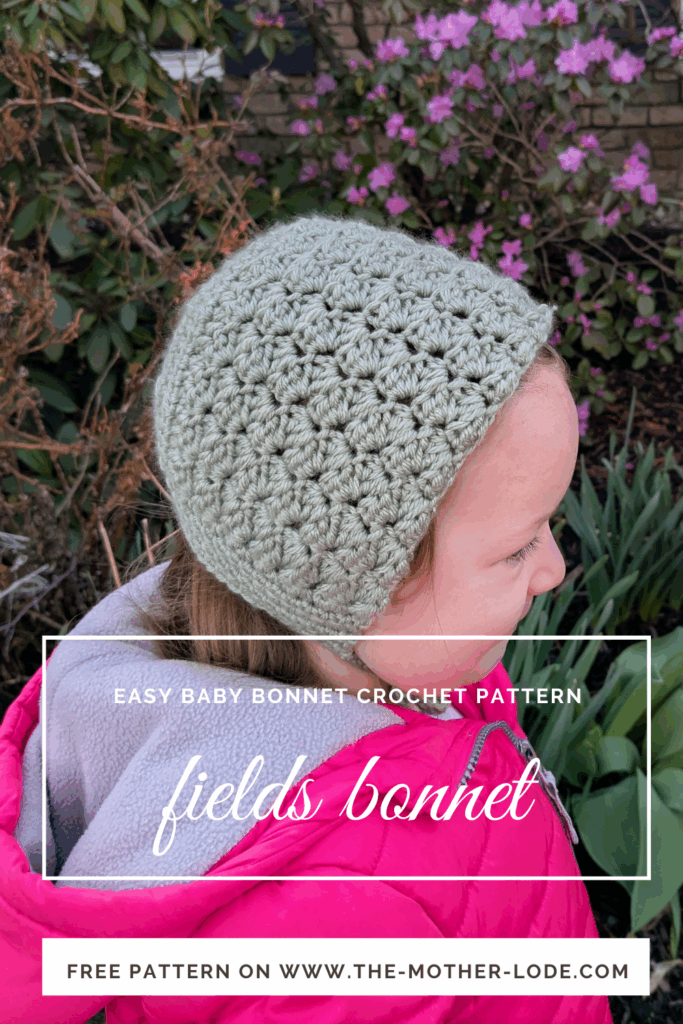
This pattern has a PDF downloadable file available on ravelry, Etsy, and LoveCrafts. The pattern file is 7 pages and has more photos and charts than I put here in the blog post, but all the written instructions are exactly the same as below. Personally, I love to be able to print a pattern for easy couch crochet, but I know that not everyone can purchase a pattern and I’m happy to offer patterns here on my website and let the advertisers pay for them! Bookmark this page and come back over and over to complete your baby bonnet!

ravelry
Etsy
LoveCrafts

Supplies

  • CYC 4 worsted yarn: 100-150 yards (sample is Lion Brand Yarn Basic Stitch in color Sage)
  • crochet hook US size J (6 mm) or size needed to obtain gauge
  • tapestry sewing needle
  • scissors and measuring tape/gauge ruler

Abbreviations

ch = chain

st/sts = stitch/stitches

sc = single crochet

dc = double crochet

sl st = slip stitch

hdc = half double crochet

sedge stitch = *single crochet, half double crochet, double crochet in the same stitch, sk 2 sts, repeat from *

(noted as {sc, hdc, dc} within pattern)

dec = hdc two stitches together

Gauge Swatch

4 in by 4 in swatch = 6 sedge stitches in 6 rows of sedge stitch

Notes


Stitch counts are marked in [ ] at the end of each row.

ravelry
Etsy
LoveCrafts

Written Instructions

Size: Infant: 0-6 months, (Baby: 6-12 months, Toddler: 1-3 years, Child: 4-10 yrs)

ALL SIZES

Row 1: Ch 38 ( 44, 50, 56), {sc, hdc, dc} 2nd ch from hook, sk next 2 sts, *{sc, hdc, dc} next st, sk next 2 sts, repeat from* until last st, sc last st. [12( 14, 16, 18) sedge sts, 1 sc]

Row 2: Ch 1, turn, *{sc, hdc, dc} first st, sk next 2 sts, repeat from* until last st, sc last st. [12 (14, 16, 18) sedge sts, 1 sc]

Rows 3-11 (13, 15, 17): Repeat Row 2

Continue below to appropriate size.

Infant

Row 12: Hdc first 4 sts, dec, hdc next 4 sts, dec, hdc next 4 sts, dec, hdc next st, dec, hdc next 4 sts, dec, hdc next 4 sts, dec, hdc last 4 sts. [6 dec, 25 hdc]

Row 13: Hdc first 4 sts, dec, hdc next 4 sts, dec, hdc next 7 sts, dec, hdc next 4 sts, dec, hdc last 4 sts. [4 dec, 23 hdc]

Row 14: Hdc first 3 sts, dec, hdc next 3 sts, dec, hdc next st, dec, hdc next st, dec, hdc next st, dec, hdc next 3 sts, dec, hdc last 3 sts. [6 dec, 15 hdc]

Row 15: Hdc first 3 sts, dec, hdc next 2 sts, dec, hdc next 3 sts, dec, hdc next 2 sts, dec, hdc last 3 sts. [4 dec, 13 hdc]

Row 16: Hdc first 2 sts, dec, hdc next 2 sts, dec, hdc next st, dec, hdc next 2 sts, dec, hdc last 2 sts. [4 dec, 9 hdc]

Continue to neckband instructions below

Baby

Row 14: Hdc first 4 sts, dec, hdc next 4 sts, dec, hdc next 5 sts, dec, hdc next 5 sts, dec, hdc next 5 sts, dec, hdc next 4 sts, dec, hdc last 4 sts. [6 dec, 31 hdc]

Row 15: Hdc first 4 sts, dec, hdc next 4 sts, dec, hdc next 4 sts, dec, hdc next st, dec, hdc next 4 sts, dec, hdc next 4 sts, dec, hdc last 4 sts. [6 dec, 25 hdc]

Row 16: Hdc first 4 sts, dec, hdc next 4 sts, dec, hdc next st, dec, hdc next st, dec, hdc next st, dec, hdc next 4 sts, dec, hdc last 4 sts. [6 dec, 19 hdc]

Row 17: Hdc first 3 sts, dec, hdc next 3 sts, dec, hdc next 5 sts, dec, hdc next 3 sts, dec, hdc last 3 sts. [4 dec, 18 hdc]

Row 18: Hdc first 2 sts, dec, hdc next 2 sts, dec, dec, hdc next st, dec, dec, hdc next 2 sts, dec, hdc last 2 sts. [6 dec, 9 hdc]

Continue to neckband instructions below

Toddler

Row 16: Hdc first 4 sts, dec, hdc next 4 sts, dec, hdc next 4 sts, dec, hdc next 4 sts, dec, hdc next st, dec, hdc next 4 sts, dec, hdc next 4 sts, dec, hdc next 4 sts, dec, hdc last 4 sts. [8 dec, 33 hdc]

Row 17: Hdc first 4 sts, dec, hdc next 4 sts, dec, hdc next 4 sts, dec, hdc next 5 sts, dec, hdc next 4 sts, dec, hdc next 4 sts, dec, hdc last 4 sts. [6 dec, 31 hdc]

Row 18: Hdc first 4 sts, dec, hdc next 4 sts, dec, hdc next 3 sts, dec, hdc next st, dec, hdc next 3 sts, dec, hdc next 4 sts, dec, hdc last 4 sts. [6 dec, 22 hdc]

Row 19: Hdc first 3 sts, dec, hdc next 3 sts, dec, hdc next 2 sts, dec, hdc next st, dec, hdc next 2 sts, dec, hdc next 3 sts, dec last 3 sts. [6 dec, 17 hdc]

Row 20: Hdc first 3 sts, dec, hdc next 3 sts, dec, hdc next 3 sts, dec, hdc next 3 sts, dec, hdc last 3 sts. [4 dec, 15 hdc]

Row 21: Hdc first 2 sts, dec, hdc next 3 sts, dec, hdc next st, dec, hdc next 3 sts, dec, hdc last 2 sts. [4 dec, 11 hdc]

Continue to neckband instructions below

Child

Row 18: Hdc first 4 sts, dec, hdc next 3 sts, dec, hdc next 4 sts, dec, hdc next 4 sts, dec, hdc next 2 sts, dec, hdc next st, dec, hdc next 2 sts, dec, hdc next 3 sts, dec, hdc next 4 sts, dec, hdc next 4 sts, dec, hdc last 4 sts. [10 dec, 35 hdc]

Row 19: Hdc first 4 sts, dec, hdc next 4 sts, dec, hdc next 4 sts, dec, hdc next 2 sts, dec, hdc next st, dec, hdc next 2 sts, dec, hdc next 4 sts, dec, hdc next 4 sts, dec, hdc last 4 sts. [8 dec, 29 hdc]

Row 20: Hdc first 4 sts, dec, hdc next 4 sts, dec, hdc next 4 sts, dec, hdc next st, dec, hdc next 4 sts, dec, hdc next 4 sts, dec, hdc last 4 sts. [6 dec, 25 hdc]

Row 21: Hdc first 4 sts, dec, hdc next 4 sts, dec, hdc next 7 sts, dec,, dec, hdc next 4 sts, dec, hdc last 4 sts. [4 dec, 23 hdc]

Row 22: Hdc first 3 sts, dec, hdc next 3 sts, dec, hdc next st, dec, hdc next st, dec, hdc next st, dec, hdc next 3 sts, dec, hdc last 3 sts. [6 dec, 15 hdc]

Row 23: Hdc first 3 sts, dec, hdc next 3 sts, dec, hdc next st, dec, hdc next 3 sts, dec, hdc last 3 sts. [4 dec, 13 hdc]

Row 24: Hdc first 2 sts, dec, hdc next 2 sts, dec, hdc next st, dec, hdc next 2 sts, dec, hdc last 2 sts. [4 dec, 9 hdc]

Continue to neckband instructions below

How is the pattern going?

Join my subscriber list for pattern updates, discounts, and other crafty fun!

Thank you!

You have successfully joined our subscriber list.

Neckband ALL SIZES

Fold the last hdc row in half and sl st together to close the back of the bonnet. Fasten off, turn right side out.

Reattach the yarn in the bottom corner of bonnet (Row 1.) Sc evenly across the bottom of bonnet, ch 1, turn. Continue for 4 rows of single crochet for Infant and baby sizes, 6 rows for toddler and child. Do not fasten off.

Create ties: Ch 27, sl st each ch across, then sl st along bottom of bonnet (where you just completed the single crochet rows) to opposite corner. Ch 27, sl st each ch across, fasten off and weave in ends.

I hope you loved making this easy baby bonnet crochet pattern. It’s perfect for keeping a little one warm on a cool spring day. Please reach out to me if you have any struggles with the pattern! My social links are listed below so you can contact me. I’d love to see your finished bonnet, so tag me on Instagram!

February 12, 2025 by Priscilla

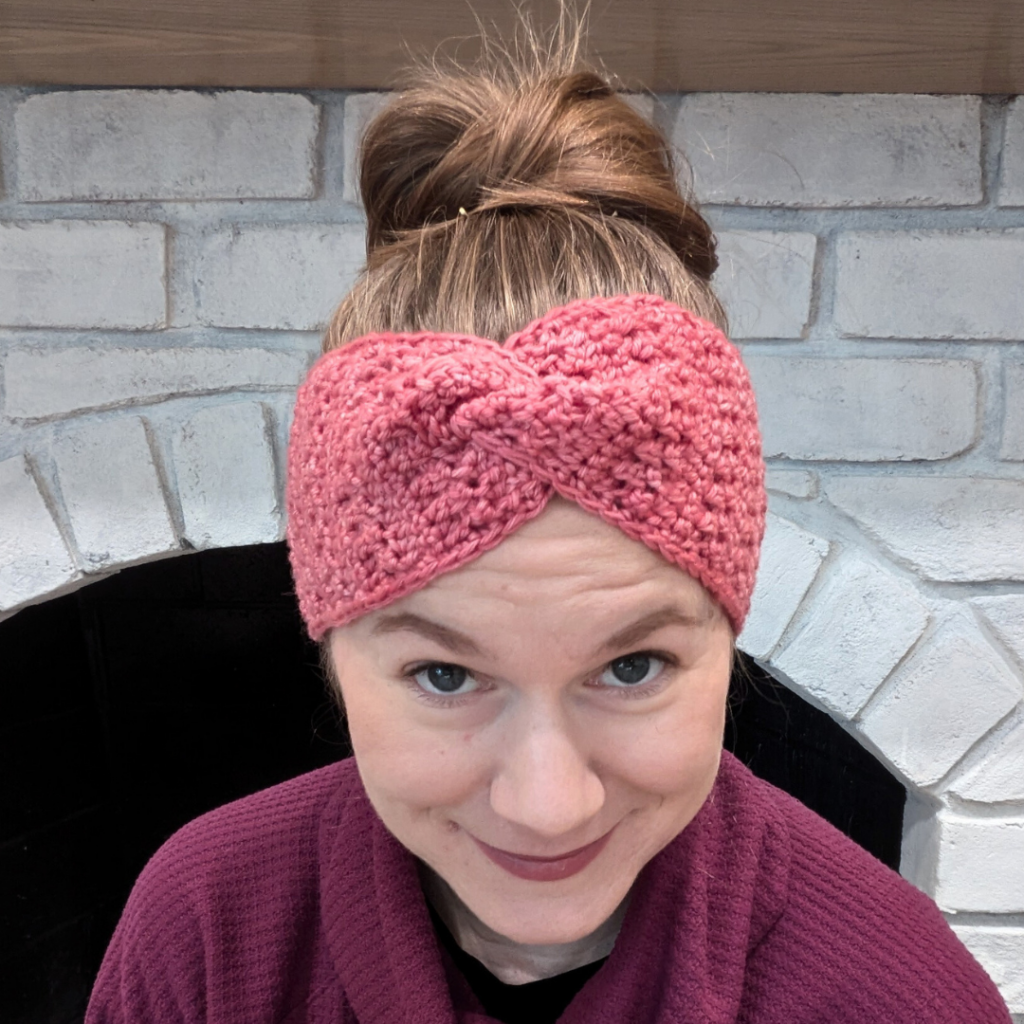
Secret Heart Headband Crochet Pattern

Hearts are everywhere this time of year and I’m okay with it! I understand Valentine’s Day isn’t popular with everyone, but I really enjoy that, culturally, it’s like a reminder to show your love to someone. St. Valentine’s Feast Day is the origin of this holiday, but there have certainly been influences over the years to turn it into what we celebrate in 2025! When my oldest was a baby, I did a Valentine’s photo shoot in our guest bedroom and sent out cute Valentines to our family! (Did I do that for any of my other babies? Nope, that’s how life is lol!) Some years, if time allows, we do enjoy making Valentines together and sending them out!

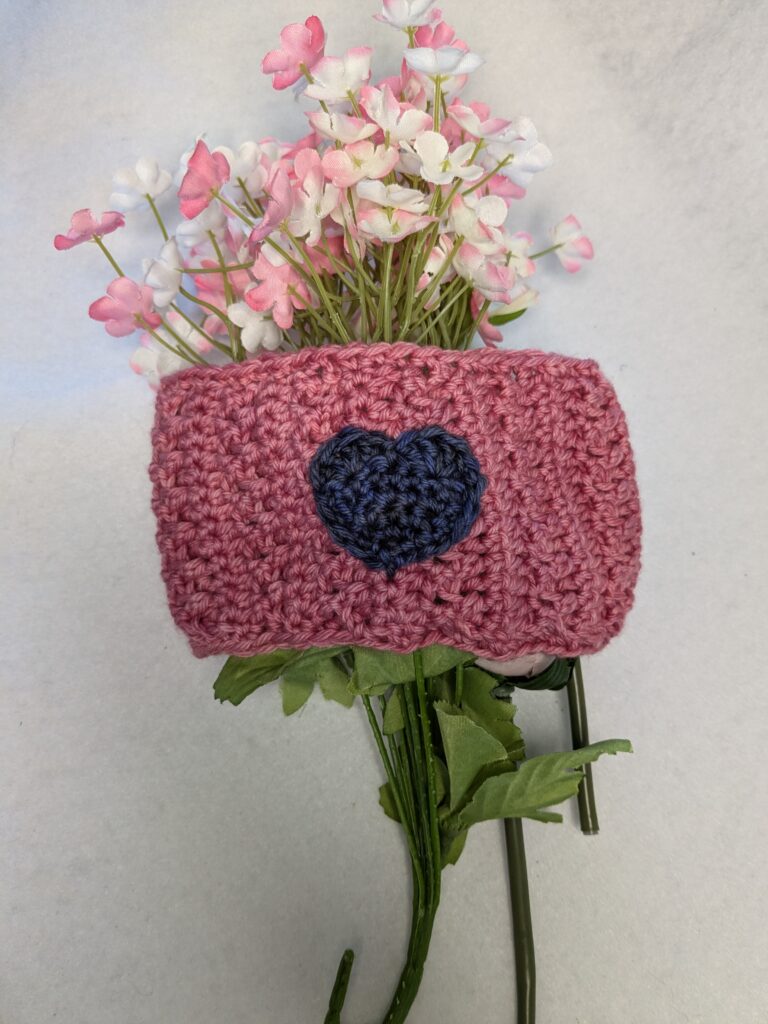
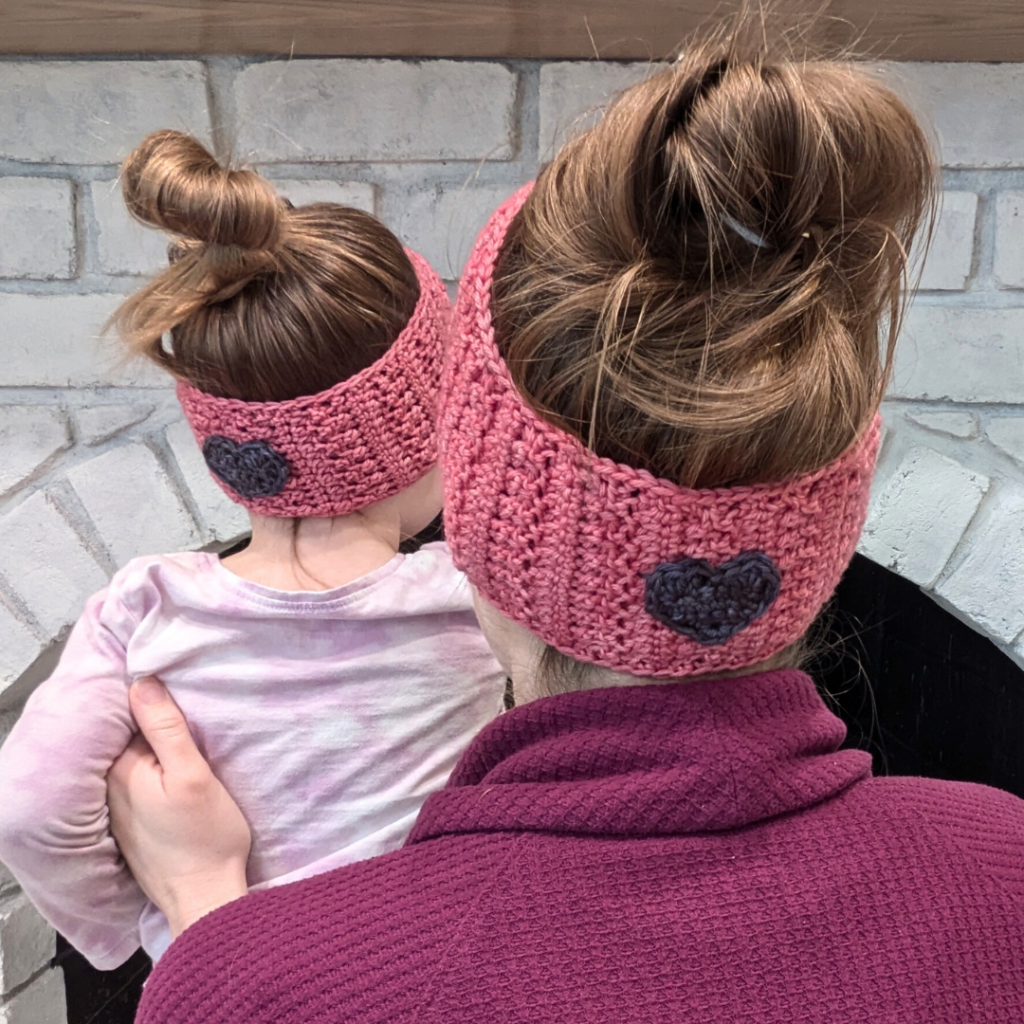
The Secret Heart Headband has a tiny heart hidden in the back of the headband! I did this so you could absolutely make plain headbands, or add this sweet heart to the back, or really anywhere you like.

The texture on this headband crochet pattern is my favorite part. I used hdc in the 3rd loop and hdc BLO to create it. I’ll probably use it in another design soon, because it was easy and fun!

Worsted weight yarn and a 5 mm hook were my choice for this headband. I think it has great stretch and is going to be awesome to wear as the weather starts to warm up soon (I hope!) for Spring. I’ll probably still be wearing one of my bulky hats for a few more weeks like the Blustery Beanie or the Chill Stopper Beanie. Those are also available in many sizes so you can make matching sets.

Supplies

  • worsted (CYC 4) yarn: Color A: 100- 150 yards, Color B: 15 yards
  • crochet hook US size H (5 mm) or size needed to obtain gauge
  • tapestry sewing needle
  • scissors and measuring tape

Abbreviations (US Terms)

  • ch = chain
  • sc = single crochet
  • st/sts = stitch/stitches
  • BLO = back loop only
  • hdc = half double crochet
  • sl st = slip stitch
  • dc = double crochet
  • hdc2tog = half double crochet two stitches together
  • hdc in the 3rd loop = half double crochet in the 3rd loop on the working side
  • FHDC = foundation half double crochet

Notes

  • Finished dimensions: baby: 14 in, toddler: 16 in, child: 18 in, teen/adult sm: 20 in, adult med: 21 in, adult lg: 22 in around. Feel free to use measurements to make this headband: repeat the rows as written to about 1 inch less than the measured head circumference.
  • Sizes are denoted by parentheses: baby (toddler, child) teen/adult sm, (adult med, adult lg.)
  • Stitch counts are marked at the end of each row in {brackets}.
  • Pattern is worked flat and seamed at the end.

Gauge

4 in by 4 in swatch = 18 sts in 15 rows of stitch repeat

Row 1: FHDC 20, ch 1, turn.

Row 2-3: Hdc BLO first st,* hdc in the 3rd loop next st, hdc BLO next st, repeat from * to last st, hdc in the 3rd loop final st, ch 1, turn.

Row 4: Sc each st across, ch 1, turn.

Row 5: Hdc each st across, ch 1, turn.

Repeat rows 2-5 respectively to row 16

Written Instructions: Baby, Toddler, Child

Baby (toddler, child) with Color A

Row 1: FHDC 12 (14, 14), ch 1, turn. {12 (14, 14) FHDC}

Row 2-3: Hdc BLO first st,* hdc in the 3rd loop next st, hdc BLO next st, repeat from * to last st, hdc in the 3rd loop final st, ch 1, turn. {6 (7, 7) hdc BLO, 6 (7, 7) hdc in the 3rd loop}

Row 4: Sc each st across, ch 1, turn. {12 (14, 14) sc}

Row 5: Hdc each st across, ch 1, turn. {12 (14, 14) hdc}

Repeat rows 2-5 respectively 12 (13, 14) times.

Finishing: Sc evenly along the following three edges of the band until you reach the beginning of the final row. Fasten off, leaving a long tail to seam the headband.

Written Instructions: Adult sizes

Teen/adult sm (adult med, adult lg) with Color A

Row 1: FHDC 16 (18, 20), ch 1, turn. {16 (18, 20) FHDC}

Row 2-3: Hdc BLO first st,* hdc in the 3rd loop next st, hdc BLO next st, repeat from * to last st, hdc in the 3rd loop final st, ch 1, turn. {8 (9, 10) hdc BLO, {8 (9, 10) hdc in the 3rd loop}

Row 4: Sc each st across, ch 1, turn. {16 (18, 20) sc}

Row 5: Hdc each st across, ch 1, turn. {16 (18, 20) hdc}

Repeat rows 2-5 respectively 16 (17, 18) times.

Finishing: Sc evenly along the following three edges of the band until you reach the beginning of the final row. Fasten off, leaving a long tail to seam the headband.

Written Instructions: Heart

with Color B

Row 1: Ch 2, sc 2nd st from hook, ch 1, turn. {1 sc}

Row 2: 3 sc, ch 1, turn. {3 sc}

Row 3: 2 sc, sc, 2 sc, ch 1, turn. {5 sc}

Row 4: 2 sc, sc next 3, 2 sc, ch 1, turn. {7 sc}

Row 5: Sc each st across, ch 1, turn. {7 sc}

Row 6: Sk 1st st, 4 dc next st, sk next st, sl st, ch 1, sk next st, 4 dc next st, sl st last st of row. {8 dc, 2 sl st}

Round 1: Sc 11 evenly around the bottom of the heart, placing a ch 1 at the bottom point of the heart, finish with sl st in the 1st dc at the top of the heart. {11 sc, 1 ch, 1 sl st} (This round only goes around the bottom of the heart, not the top part.) Fasten off and leave a long tail to sew onto the band.

Assembly

Lay the band flat in front of you with the sc border facing you. Sew the heart onto the middle of the band with tail. Secure ends and cut tail. Next, put right sides together of band. Fold each right side end and sandwich together into four layers and sew together through all four layers. Turn right side out.

January 16, 2025 by Priscilla

Chunky Fingerless Mittens

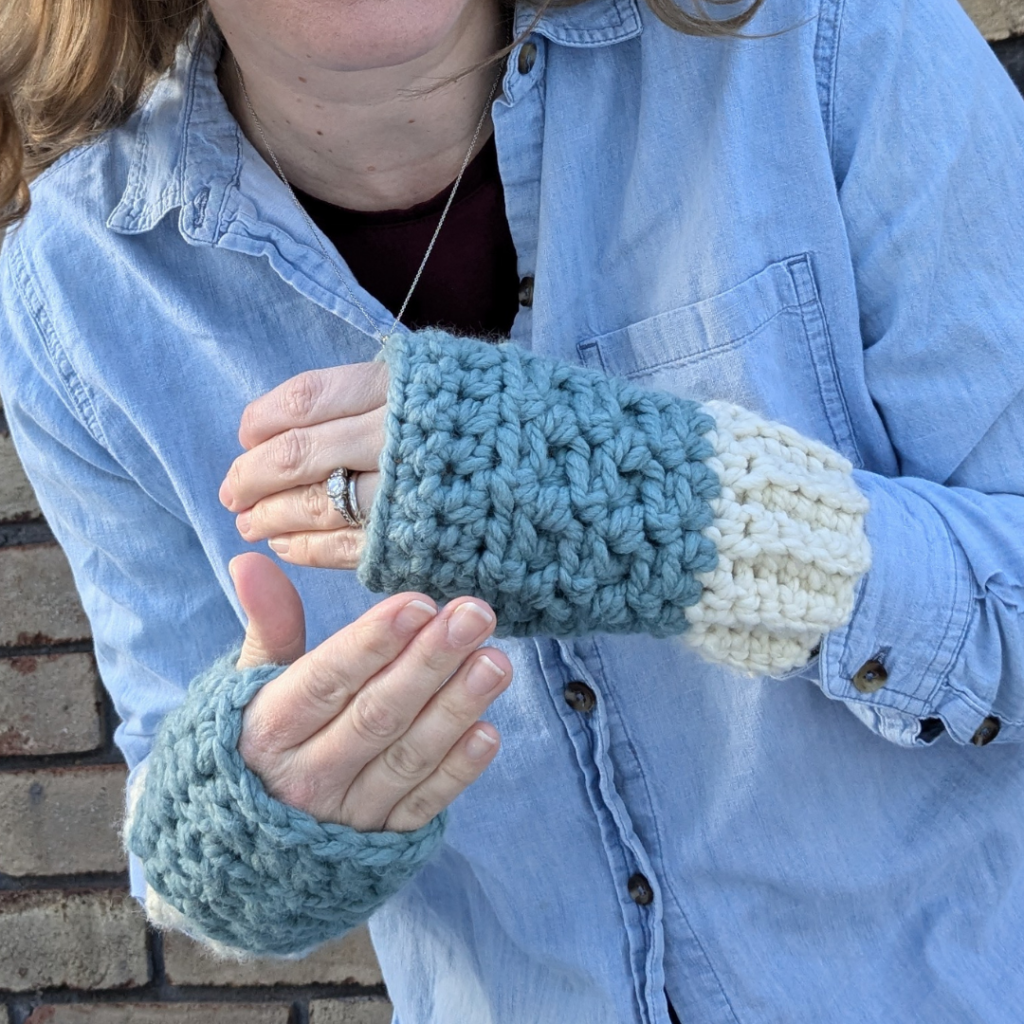
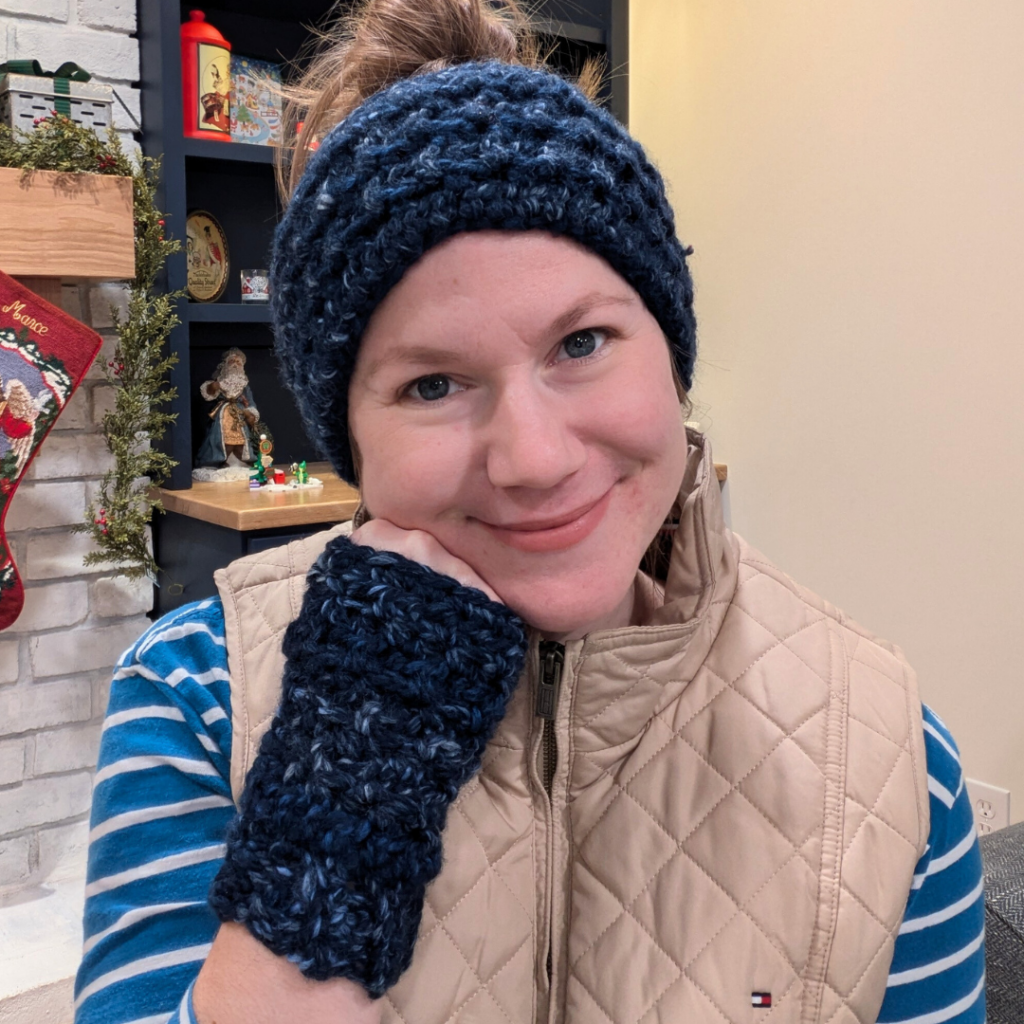
If you need to keep your fingers busy and your hands warm, make these chunky fingerless mittens! This pattern is called the Minimalist Mitts. I made a small size in a little over an hour! These would make a great gift set paired with the matching Minimalist Headband!

The set together was available in the Winter Sets Blog Hop hosted by Sandra Stitches in January 2025. You can still head to the blog round up to find a great selection of winter sets.

Some more pattern details! The pattern is written for 3 adult sizes, small, medium, and large. You’ll be working tight stitches with the thick yarn to keep it nice and warm! The pattern details call for an 8 and 9 mm hook, but definitely plan that you may need to go down to a 7 and 8 instead. You’ll need one skein of Lion Brand Yarn Wool Ease Thick and Quick. Several testers also had nice results with Bernat Blanket yarn. I also used the Bernat when I was testing the sizing and when I put that on my husband’s large hand he thought it felt so nice. Making these chunky fingerless mittens is a fun and fast project, I hope you love them!

The pattern for the mitts is below, free to use on the blog, and you can also zip here to the blog post containing the free matching headband I also offer the premium PDF in my pattern shops. This one includes 2 pages of photo tutorial to help with the half double crochet 3rd loop stitches, and of course, makes for easier offline crochet sessions.

ravelry
Etsy
Lovecrafts

Supplies

  • 100 yards super bulky (CYC 6) yarn, sample set is Lion Brand Yarn Wool Ease Thick-n-Quick
  • crochet hook size 8 mm AND 9 mm or sizes needed to obtain gauge
  • tapestry sewing needle
  • scissors and measuring tape

Abbreviations (US Terms)

  • ch = chain
  • sc = single crochet
  • st/sts = stitch/stitches
  • BLO = back loop only
  • hdc = half double crochet
  • sl st = slip stitch
  • hdc in the 3rd loop = half double crochet in the 3rd loop on the working side
  • hdc 2 tog = half double crochet 2 sts together

Gauge Swatch

4 in by 4 in swatch, with 9 mm hook

10 sts in 8 rows of the pattern repeat which is:

*hdc, hdc in the third loop, repeat from * across

Notes

  • Finished dimensions: small 6.5 in tall, 4 in wide, medium: 7.5 in tall, 5 in wide, large 8 in tall, 5.5 in wide
  • Sizes are denoted by parentheses: small (medium/large.)
  • Stitch counts are marked at the end of each row in {brackets}.
  • Pattern is worked flat at the wrist, then seamed and finished in the round.
  • Do not turn after the first round, turn after all other rounds.
  • Ch 1 counts as a hdc in all hdc rounds.

Written Instructions

Small (medium, large)

with 8mm hook

Row 1: Ch 7 (8, 9), sc second ch from hook and each st until last, sl st last st, ch 1, turn. {5 (6, 7) sc, 1 sl st}

Row 2: Sl st BLO first st, sc BLO each st across, ch 1, turn. {5 (6, 7) sc BLO, 1 sl st BLO}

Row 3: Sc BLO each st across until last, sl st BLO last st, ch 1, turn. {5 (6, 7) sc BLO, 1 sl st BLO}

Rows 4-17 (19, 21): Repeat rows 2 and 3 respectively.

Sl st BLO of row 17 (19, 21) to row 1, switch to 9mm hook and turn right side out.

Round 1: Ch 1, sc 18 (20, 22) sts in the end of each row (placing 1 in the seam), sl st to beg sc, do not turn. {sc 18 (20, 22)}

Round 2: Ch 1, hdc each st around, sl st to beg hdc to join, ch 1, turn. {hdc 18 (20, 22)}

Round 3-6 (7, 8): Hdc in the 3rd loop first st, *hdc next st, hdc in the 3rd loop next st, repeat from * around, sl st to join, ch 1, turn. {hdc 9 (10, 11), hdc in the 3rd loop 9 (10, 11)}

Round 7 (8, 9): Hdc in the 3rd loop and hdc next st together, *hdc in the 3rd loop next st, hdc next st repeat from * around until last st, hdc in the 3rd loop last st, sl st to join, ch 1, turn. {hdc 8 (9, 10), hdc in the 3rd loop 8 (9, 10), 1 hdc 2 tog}

Continue for left mitten:

Round 8 (9, 10): Hdc first 3 sts, ch 3, sk 2 sts, hdc each st around, sl st to join, ch 1, turn. {hdc 15 (17, 19)}

Round 9 (10, 11): Sc each st around [sc 3 in ch-3 space], sl st to join, ch 1, turn. {sc 18 (20, 22)}

Round 10 (11, 12): Sc 2 tog, sc each st around, sl st to join, fasten off, weave in ends. {sc 17 (19, 21)}

Continue for right mitten:

Round 8 (9, 10): Hdc first 12 sts, ch 3, sk 2 sts, hdc each st around, sl st to join, ch 1, turn. {hdc 15 (17, 19)}

Round 9 (10, 11): Sc each st around [sc 3 in ch-3 space], sl st to join, ch 1, turn. {sc 18 (20, 22)}

Round 10 (11, 12): Sc 2 tog, sc each st around, sl st to join, fasten off, weave in ends. {sc 17 (19, 21)}

Okay, now go make a matching headband! I wear this headband often because it is so comfortable. I designed it so that it tapers at the neck and isn’t bulky back there, but the thick yarn is still very warm on your head and ears!

  • 1
  • 2
  • 3
  • Next Page »

Welcome! My name is Priscilla and I love designing crochet patterns for your family. I live in beautiful Pennsylvania where I enjoy all sorts of crafts, but I’m most passionate about crochet! I’m a Catholic mom of 4 and I sometimes incorporate my faith into my designs. Thank you so much for supporting me by visiting my crochet website and I hope you find something here that you are excited to make.

Recent Posts

  • Soft Crochet Hat Pattern
  • Cozy Men’s Scarf Crochet Pattern
  • Bulky Textured Beanie Crochet Pattern
  • Cozy Fall Baby Beanie Pattern
  • Spider Basket Crochet Pattern

Categories

Follow Me

  • Etsy
  • Facebook
  • Instagram
  • Pinterest
  • YouTube

Pretty Chic Theme By: Pretty Darn Cute Design