The Mother Lode

Crafts and Crochet

  • Home
  • Crochet Pattern Library
  • Faith Based Patterns
  • About Me
  • Privacy Policy

November 29, 2022 by Priscilla

Striking Stripes Poncho

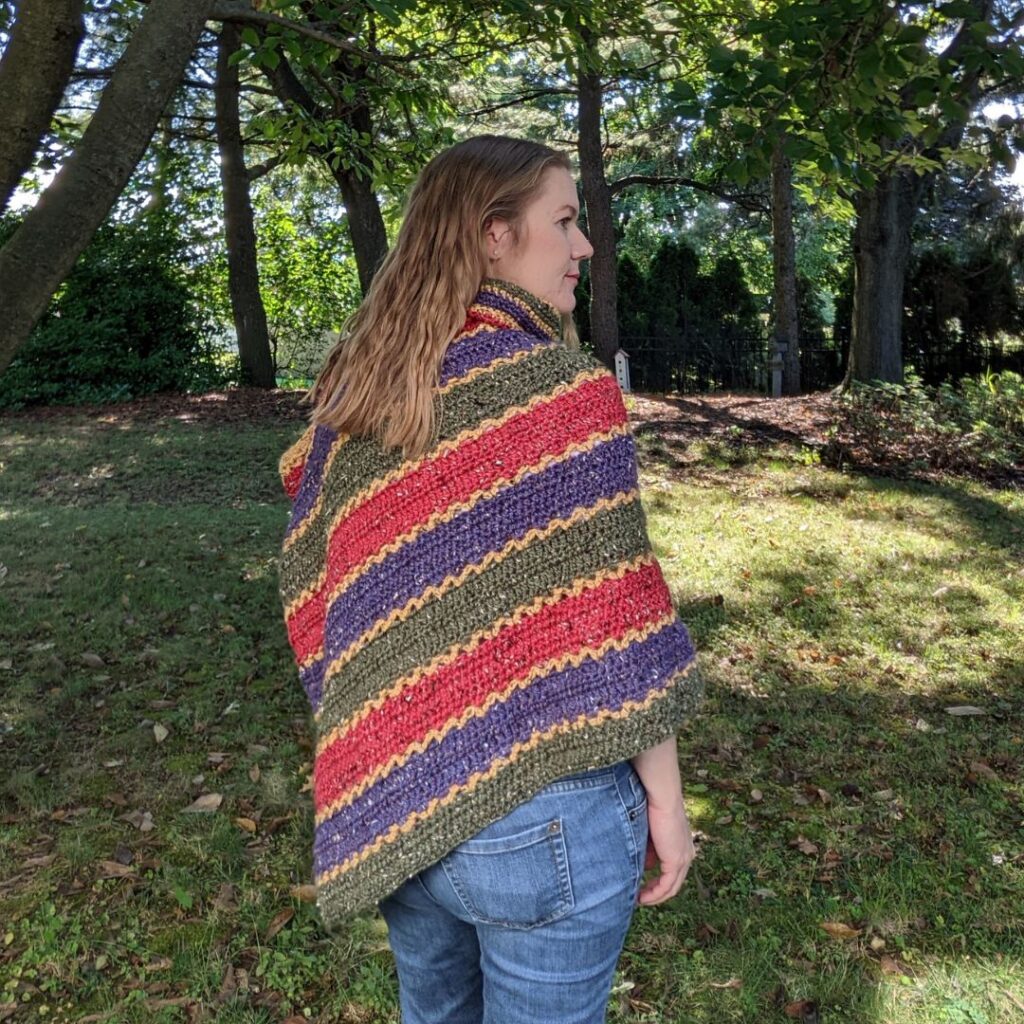
It’s a beautiful late fall day outside and I have the perfect pattern for you to cozy up with through these cold weather months! The Striking Stripes Poncho is made with a heavy worsted yarn and will keep you feeling warm and snuggly all season long. Use 4 colors to make it fun and funky, or opt for a simpler 2 color scheme to coordinate with your wardrobe.
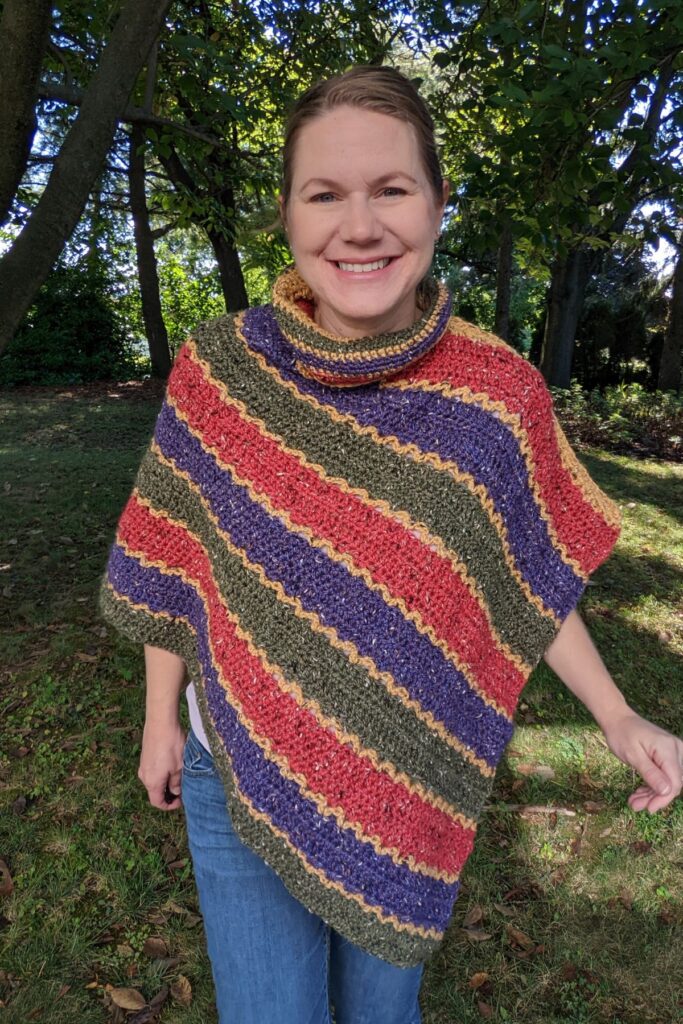
WeCrochet supplied me the yarn to design this pattern for the Winter Wonders blog hop! Their City Tweed yarn is super soft and squishy, and the colors are beautiful. I’m not usually a yellow fan but the Lemon Curd color is amazing!

This pattern is an easy make using mostly half double crochet stitches. It is crocheted in one flat piece, then seamed. The optional cowl neck is single crochet in the round, very simple! The yarn really shines in this poncho, so choose some colors you love! If you are subbing yarn, try to find something with some halo to it, as the WeCrochet City Tweed has a lovely halo to it.

Because I spent sooooo much time working on the sizing options for this pattern, I am not offering it free on the blog. (my next pattern will be a free one here!) BUT you can get the PDF free in the Winter Wonders Blog Hop on November 30th!!! Go to the blog round up link here for the coupon code (on Nov 30th) and come back to download your free copy via ravelry!

If you missed out on all the other beautiful patterns, consider purchasing the bundle! It’s truly a great deal, especially if you intend to make some Christmas gifts, as there is a great variety of patterns.

Okay, you’ve got the code from the blog hop round up page? Go get your pattern!

Thank you so much for supporting me! I love to keep designing and making new things and it’s possible through all the love and support of our wonderful yarnie community!
This post contains affiliate links. I make a small commission from sales made using these links, though the cost to you is the same!
January 28, 2022 by Priscilla

Chill Stopper Beanie

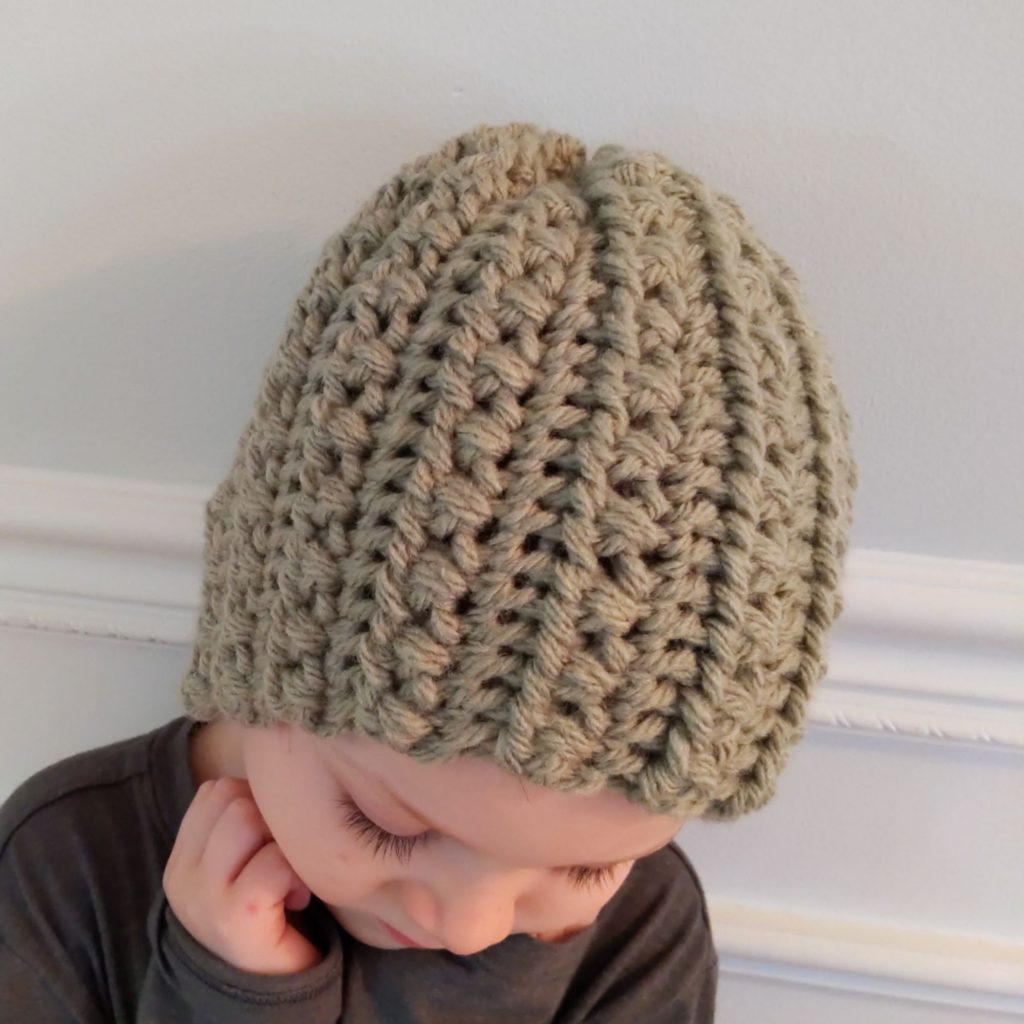
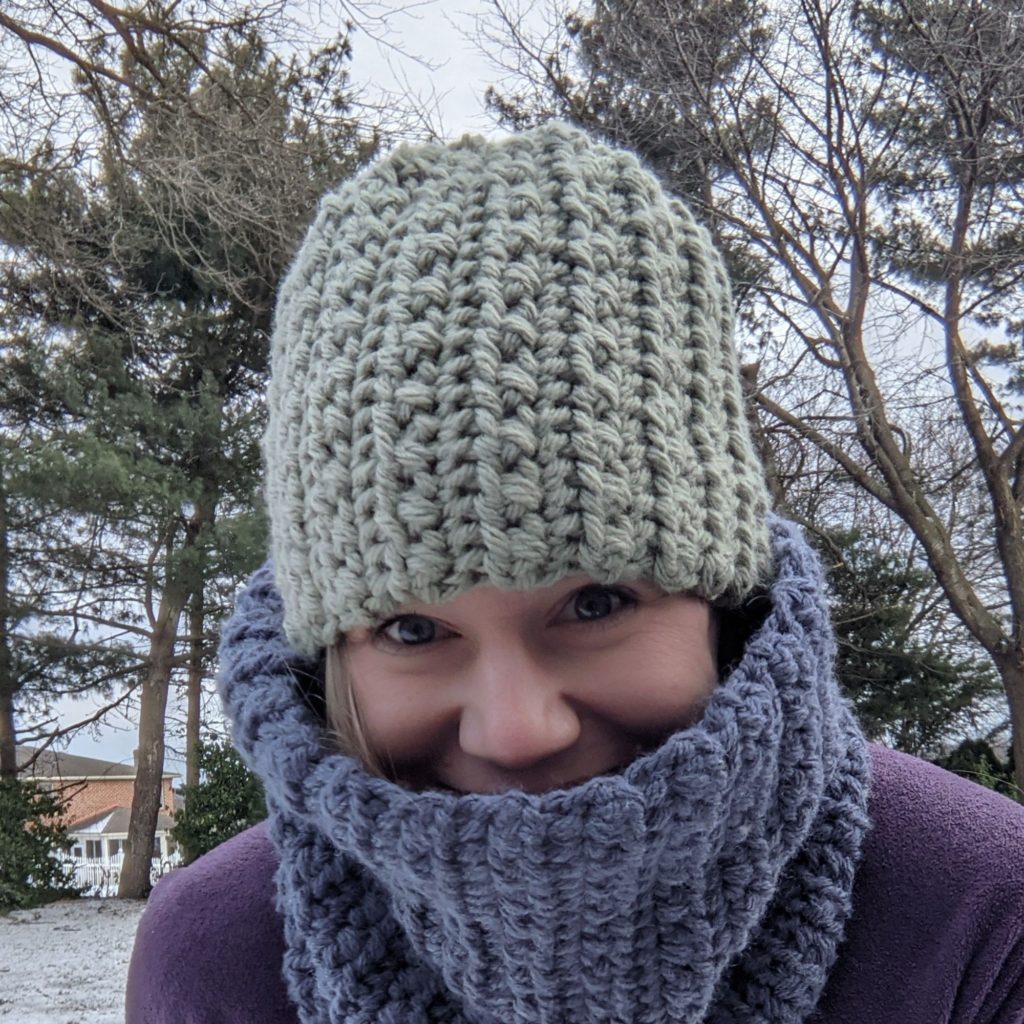
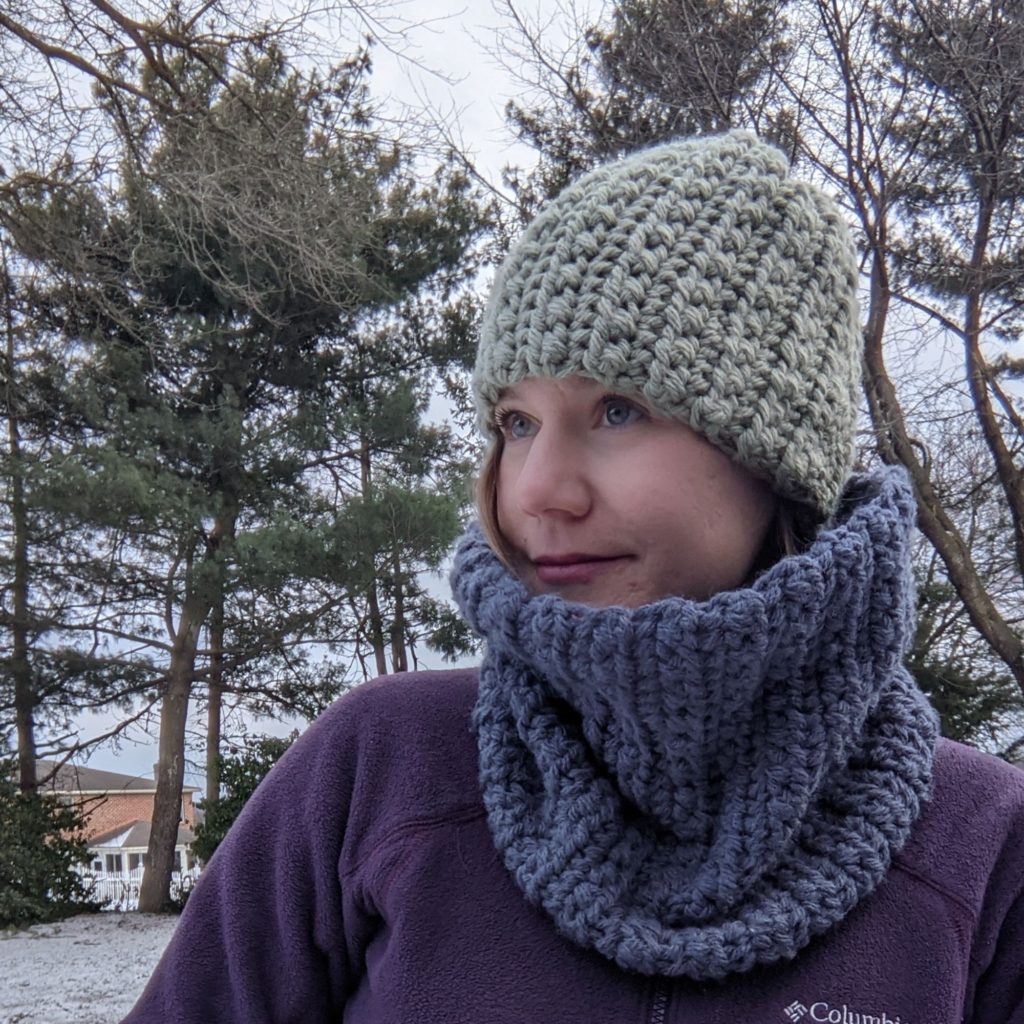
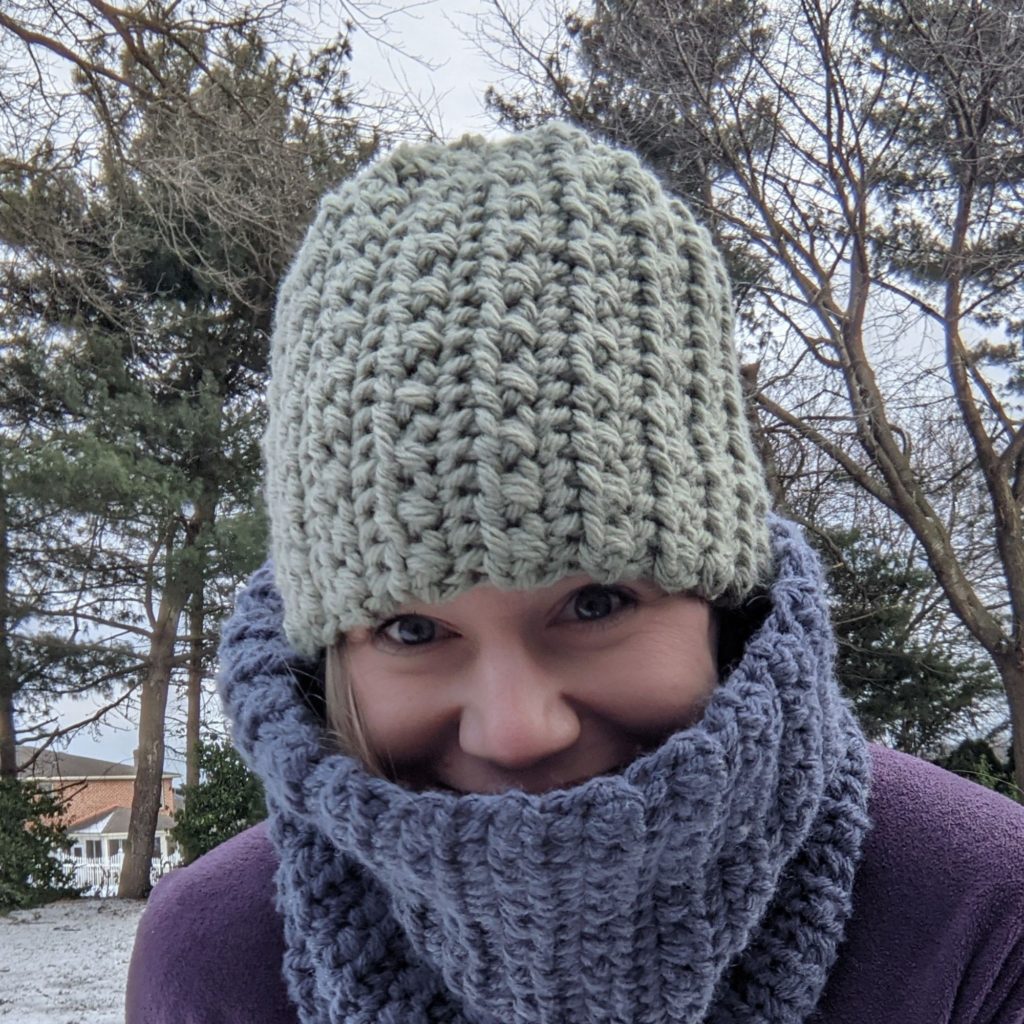
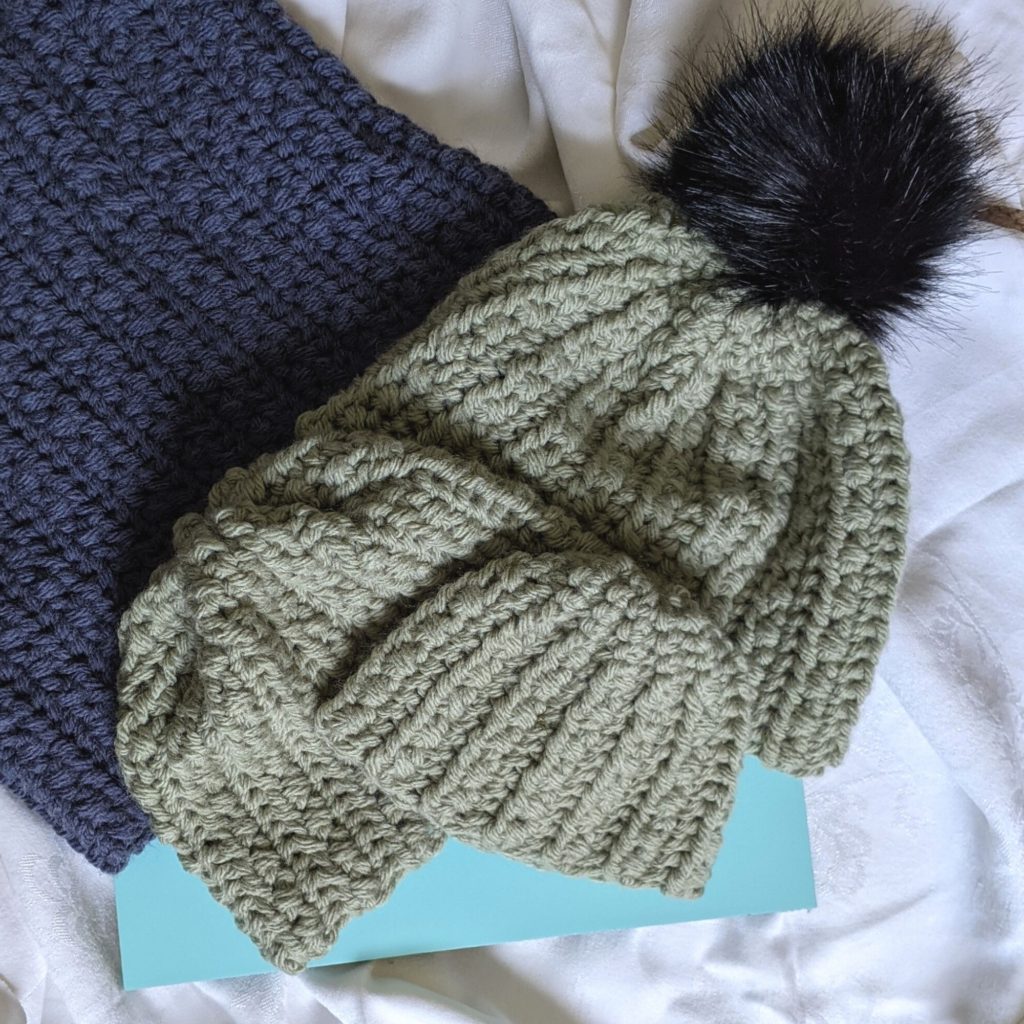
As a mom of three boys, it’s hard to “twin.” There aren’t many options for matching outfits! BUT I’ve enjoyed making us a few matching hats. I’m working towards creating more patterns for wearables for the family. Items where you can buy one or two patterns, a few colors of the same yarn, and make coordinating outfits for the whole family! Sounds great, right??!! I’m starting with this Chill Stopper set! There is a matching headband pattern here. The matching cowl comes out next week!

The Lion Brand Hue + Me is my new favorite bulky yarn! I still have a few skeins of my old favorite, Red Heart Soft Essentials, but I think it is discontinued. Two great things about this yarn: it’s super warm since it is a wool/acrylic blend, and the colors are AMAZING. Seriously you could pick a bunch of them randomly and they would look great together. I don’t know how they did it, some kind of color wizardry.

On to the pattern: you’ll need one skein of Lion Brand Hue + Me. From one skein I made an adult medium, child, and baby size, so even for a slouchy style adult size, I think one skein is enough. This beanie is easy! It’s a two row repeat that uses “crossed” half double crochet and single crochet in the FLO. You’ll need an 8mm crochet hook and scissors, tapestry needle, measuring tape. I added a removeable pom to mine and I’ve been wearing it everyday!

The PDF has a photo guide page to show the steps of the half double crochet row, as well as instructions to assemble the beanie. It’s available on ravelry and Etsy! You can work from the free version below, and if you need more help, head over and grab the PDF. It’s on sale through Feb 3rd! No code needed.

Supplies

  • 125-200 yards bulky (CYC 5) yarn, samples: Lion Brand Hue + Me, substitute: Red Heart Yarns Soft Essentials
  • crochet hook US size L (8 mm) or size needed to obtain gauge
  • tapestry sewing needle
  • scissors and measuring tape
  • optional: pom/decorative buttons

Stitches

ch = chain

sc = single crochet

st/sts = stitch/stitches

FLO = front loop only

sk = skip

hdc = half double crochet

sl st = slipstitch

Notes

  • Finished dimensions: baby: 14 x 6.5 in, toddler: 16 x 7 in, child: 18 x 7 in, teen/adult sm: 20 x 8 in, adult med: 21 x 8.5 in, adult lg: 22 x 9 in, adult xl: 23 x 9 in
  • Sizes are marked with parentheses ( ) and stitch counts are marked at the end of each row in brackets [ ].
  • Pattern is worked flat and seamed at the end.
  • Work the slipstitches loosely. The slipstitch/single crochet portion will be the top of the hat.
  • The hdc row will be made by working in front of the previous stitch, not behind. Front is always the side of the work closest to you.

Gauge

4 in by 4 in swatch

12 sts in 8 rows of the pattern repeat which is:

Row 1: sc FLO

Row 2: (sk st, hdc, hdc in skipped st) repeat

Size Modification

Hats can be made in all sizes, and I want you to be able to modify this pattern to get the exact fit that you want! The stitch multiple for this hat is 2. That means you can add or subtract stitches to the beginning chain in multiples of 2 to make your hat taller or shorter. To get a slouchy fit to your hat, I suggest an extra 4 beginning chain stitches on the smaller sizes, and an extra 6 beginning chain stitches on the adult sizes.

The hat pattern repeat is in rows of 2. For the best look at the seam, you want the final row to be the hdc row. A great way to fit your hat is to have the person you are making the hat for give you a measurement around their head (go above the ears and across the eyebrows.) You want the hat to be about an inch smaller than that measurement (called head circumference.) This will ensure the hat fits without falling off! There are finished hat size measurements in the notes section. Use these to help you decide which size to make, and add or subtract rows in multiples of 2, according to your measurements for the best fit!

Baby (Toddler, Child) Leave 10 in tail at beginning for seaming

Row 1: Ch 17 (19, 21), sl st second st from hook and next three, sc each st across, ch 1, turn. [4 sl st, 12, (14, 16) sc]

Row 2: Sk first st, hdc next st, hdc in previously skipped st, *sk next st, hdc, hdc in skipped st, repeat from * to last 4 sts, sc last 4 sts, ch 1, turn. [12 (14, 16) hdc, 4 sc]

Row 3: Sl st FLO each of first 4 sts, then sc FLO each st across, ch 1, turn. [4 sl st, 12, (14, 16) sc FLO]

Row 4- 25 (29, 33): Repeat rows 2 and 3 respectively.

Row 26 (30, 34): Repeat row 2. Fasten off, leaving about 8 inches for cinching the top.

How is the pattern going?

Join my subscriber list for pattern updates, discounts, and other crafty fun!

Thank you!

You have successfully joined our subscriber list.

.

Teen/adult small (medium, large, extra large) Leave 12 in tail at beginning for seam

Row 1: Ch 23 (25, 27, 27), sl st second st from hook and next three, sc each st across, ch 1, turn. [4 sl st, 18, (20, 22, 22) sc]

Row 2: Sk first st, hdc next st, hdc in previously skipped st, *sk next st, hdc, hdc in skipped st, repeat from * to last 4 sts, sc last 4 sts, ch 1, turn. [18 (20, 22, 22) hdc, 4 sc]

Row 3: Sl st FLO each of first 4 sts, then sc FLO each st across, ch 1, turn. [4 sl st, 18, (20, 22, 22) sc FLO]

Row 4- 35 (37, 39, 41): Repeat rows 2 and 3 respectively.

Row 36 (38, 40, 42): Repeat row 2. Fasten off, leaving about 8 inches for seaming.

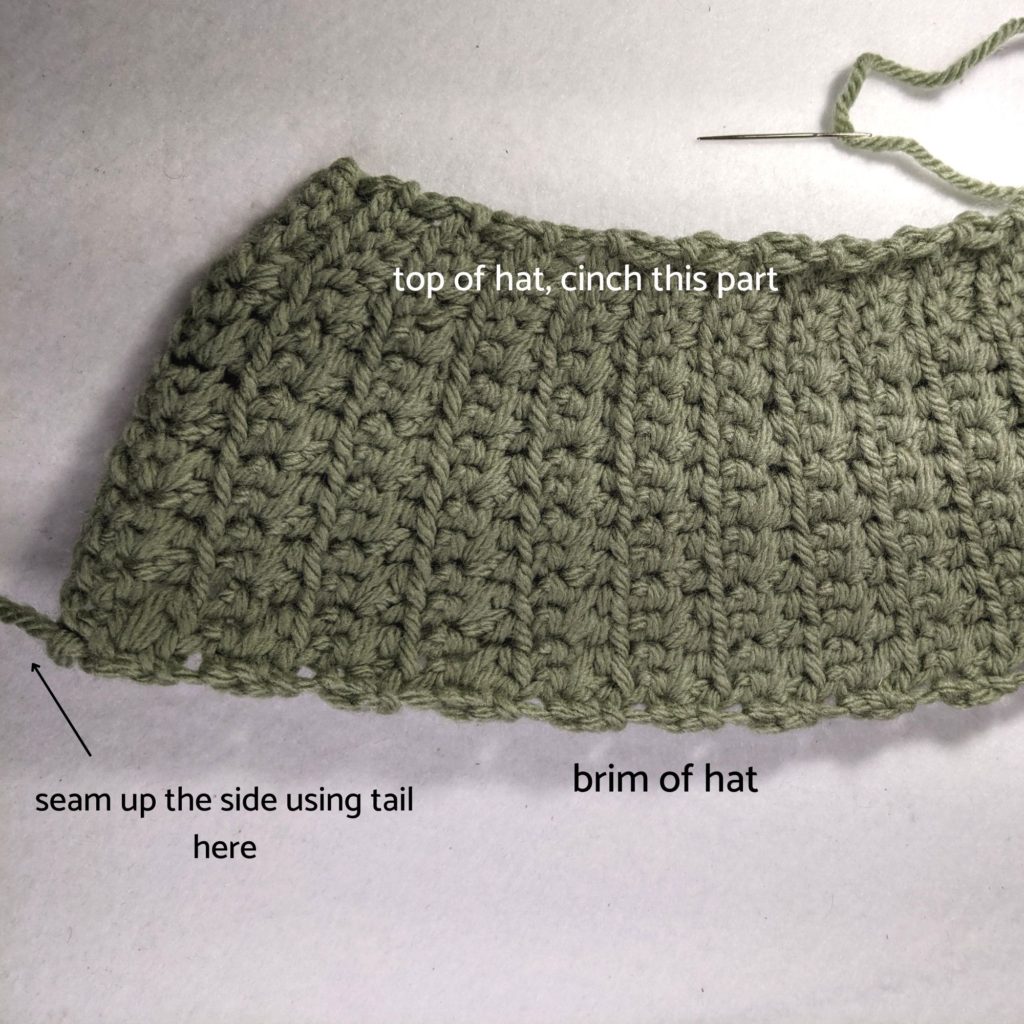
Fold hat and seam the back together using the beginning tail with a tapestry needle and mattress stitch or whipstitch, whichever you prefer. Use end tail to cinch top of hat. Weave through the top of every other row, then pull tightly to cinch. You may then sew back and forth over the hole at the top to close it better, if necessary.

Again the premium version PDF in my pattern shops has tutorial photos like the one below, easy printing/digital viewing, and no ads! Check it out here on ravelry, or on Etsy.

December 10, 2021 by Priscilla

Wineglass Earrings

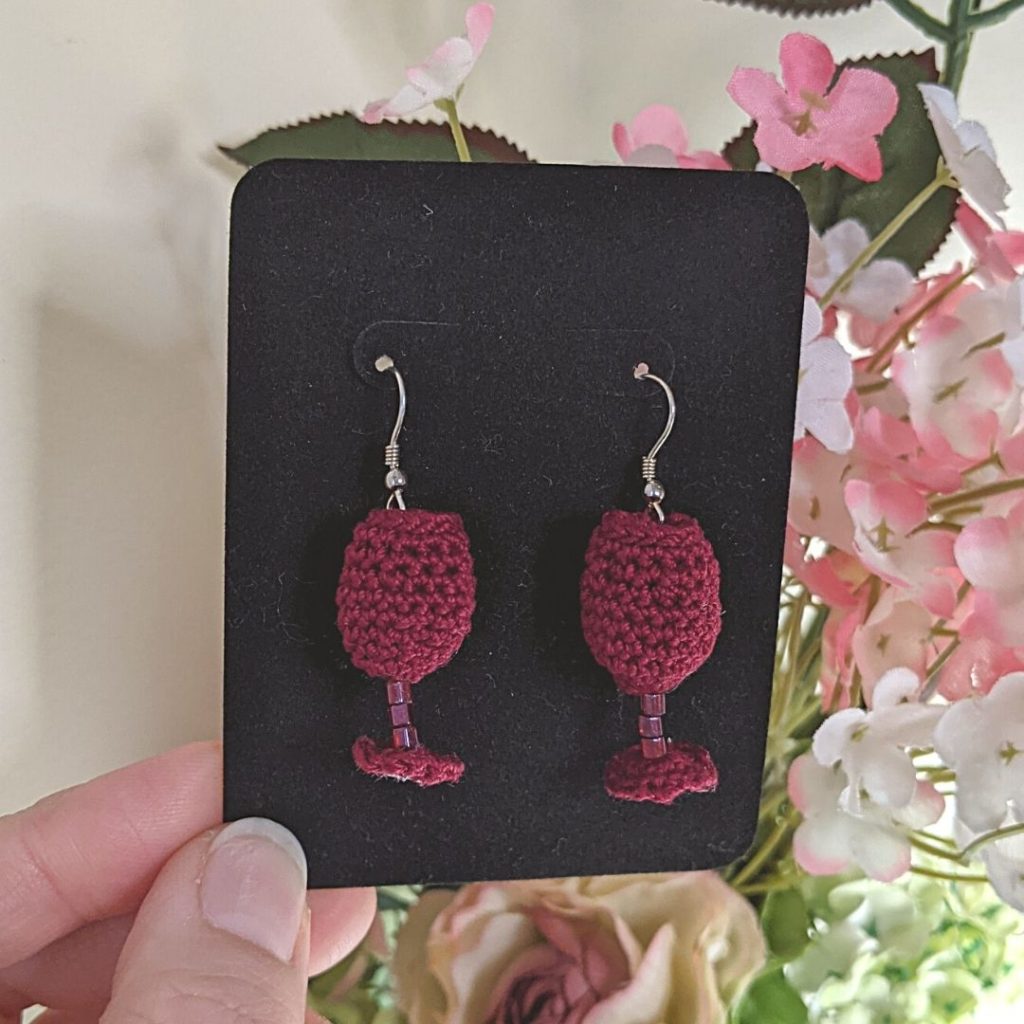
Do you set projects aside for the future? I think there are times to power through the struggle, and other times to set it aside and come back with a clear mind later. I want to create a whole library of libations themed crochet earring patterns. I have a daquiri glass written, but I had lost the crojo for it back in the summer, so it’s on hold until next summer. I’m not sure what cocktail will be coming next, but for now, enjoy these beautiful wineglass earrings!

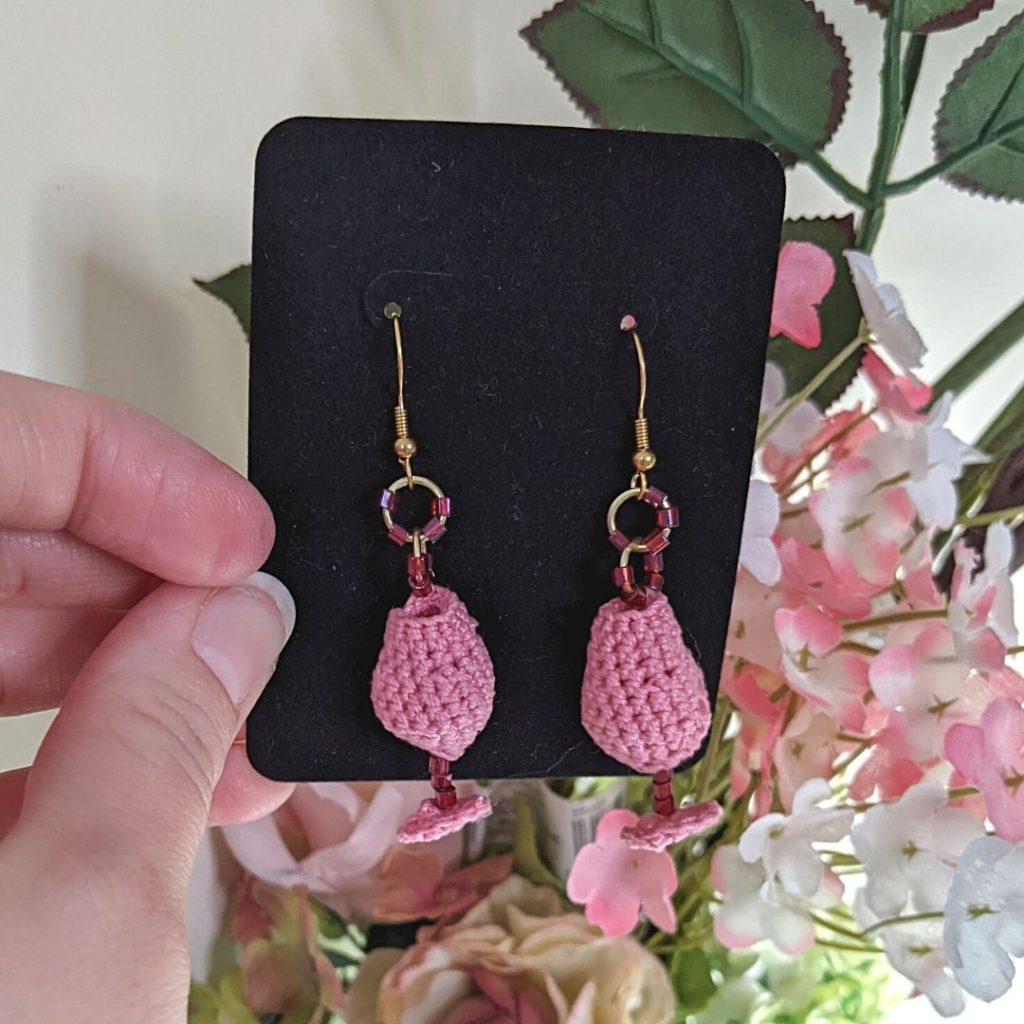
You know I love a fun crochet earring! They come together quickly for gifts, the styles you could make are endless, so you get to be creative, and they are just so darn cute. I ended up buying a bunch more colors of Aunt Lydia’s Crochet Thread this year. They have such a beautiful wine color, I just HAD to create these wineglass crochet earrings! I love how the beads give it some good sparkle. You’ll need a 1.5 mm hook, 25 yards of size 10 thread, earring findings, beads, and stiffening spray to make these earrings.

I think if you are a beginner crocheter, these might be pretty tricky. It is a fairly easy pattern if you have even stitch tension that comes with crochet practice and muscle memory. The premium version of the pattern is available here on ravelry and Etsy. It has two full pages of photo tutorial to walk you through all the steps. Below you’ll find the free version that has all the information and written instructions. I’m the most active on Instagram, so if you run into any issues, feel free to message me there @motherlodecrafts I’d love to help you make these.

Supplies

  • Aunt Lydia’s Crochet Thread, size 10 in color Burgundy, approx 25 yds
  • Size 1.50 mm crochet hook
  • Tapestry needle and scissors
  • Earring findings: 2 fishhook style earrings
  • 6 size 6/0 beads, preferably wine colored to match your glass
  • Fabric stiffener, like Aleene’s Fabric Stiffening Spray, t-pins, and a blocking mat
  • optional: more jump rings and beads to add extra sparkle, glue for added stability

Stitches (US terms)

ch = chain

sc = single crochet

sl st = slip stitch

st/sts = stitch/stitches

MC = magic circle

sc2tog = single crochet two together

( ) = work instructions within parentheses as many times as directed

Notes

  • Photo tutorial follows the written instructions.
  • Pattern is worked in two pieces and sewn together.
  • Pattern is worked in joined rounds.
  • Top of glass is formed with wrong side facing out.
  • For the best look, stiffen these once they’ve been assembled. I use Aleene’s Fabric Stiffening Spray and t-pins on a blocking mat.

Gauge

Gauge is not really necessary for this pattern. Personally, I find the smallest hook I can handle for the thread size (for earrings) produces the best, tightly stitched look. If you desire to gauge swatch: use double crochet in 5 rows with 11 sts to equal a 1 inch square.

Written Instructions

Make two

To make the bottom of the glass:

Round 1: MC, sc 4 in MC and sl st to join. (4 sc)

Round 2: Ch 1, 2 sc in each st around, sl st to join. (8 sc)

Round 3: Ch 1, (sc in first st, 2 sc in next st,) repeat ( ) 3 more times, sl st to join, fasten off. (12 sc)

Weave in remaining ends.

How is the pattern going?

Join my subscriber list for pattern updates, discounts, and other crafty fun!

Thank you!

You have successfully joined our subscriber list.

.

To make the top of the glass:

Round 1: Leave an 8 inch tail, then MC, sc 4 in MC and sl st to join. (4 sc)

Round 2: Ch 1, 2 sc in each st around, sl st to join. (8 sc)

Round 3: Ch 1, (sc, 2 sc) repeat ( ) 3 more times, sl st to join. (12 sc)

Round 4: Ch 1, (sc, 2 sc) repeat ( ) 5 more times, sl st to join. (18 sc)

Round 5: Ch 1, sc in each st around, sl st to join. (18 sc)

Rounds 6-7: Repeat round 5.

Round 8: Ch 1, sc2tog, (sc next 2, sc2tog) repeat ( ) 4 more times, sl st to join. (13 sc)

Round 9: Ch 1, sc in each st around, sl st to join. (13 sc)

Rounds 10-11: Repeat round 9.

Round 12: Ch 1, sl st in each st around, do not join, fasten off. (13 sl st)

If you feel stuck, think about purchasing the premium version. The photos can really help you as they go step by step through the rounds and show how to put the pieces together. It is available on ravelry and Etsy.

Weave in end at top of glass. Use end from bottom of cup part for the stem. Thread 3 beads onto the stem, then sew tightly through the bottom of the glass. (You can also choose to put a bit of glue on the thread, then add your beads for added stability.) Pin the bottom to blocking mat in a circle shape. Then use pins to prop up the top of the glass. Finally, spray from about 6-10 inches away with fabric stiffening spray. Let dry. Finish by attaching the fish hook style earring finding at the top edge of the glass. You can add additional beads and jump rings if you like for extra swing and sparkle!

Don’t forget to subscribe to my newsletter! I send out an email every Friday with new pattern releases and other yarnie info! I sometimes put coupon codes in there for pattern discounts, as well as where you can get free patterns during blog hops!

November 26, 2021 by Priscilla

Chill Stopper Headband

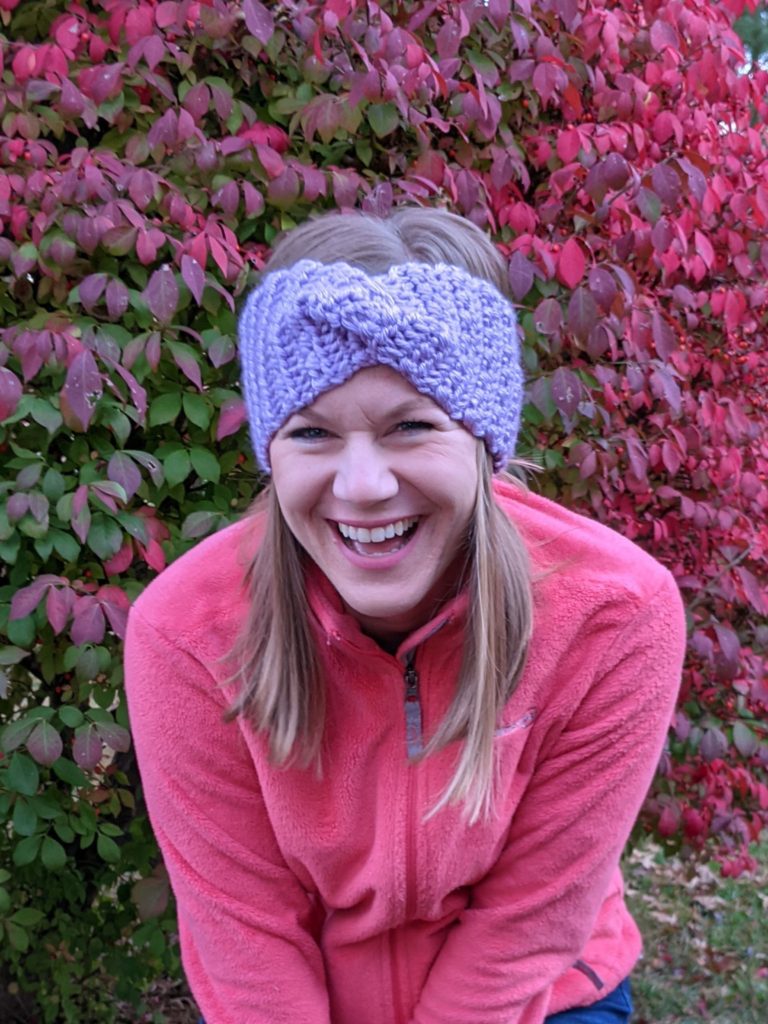
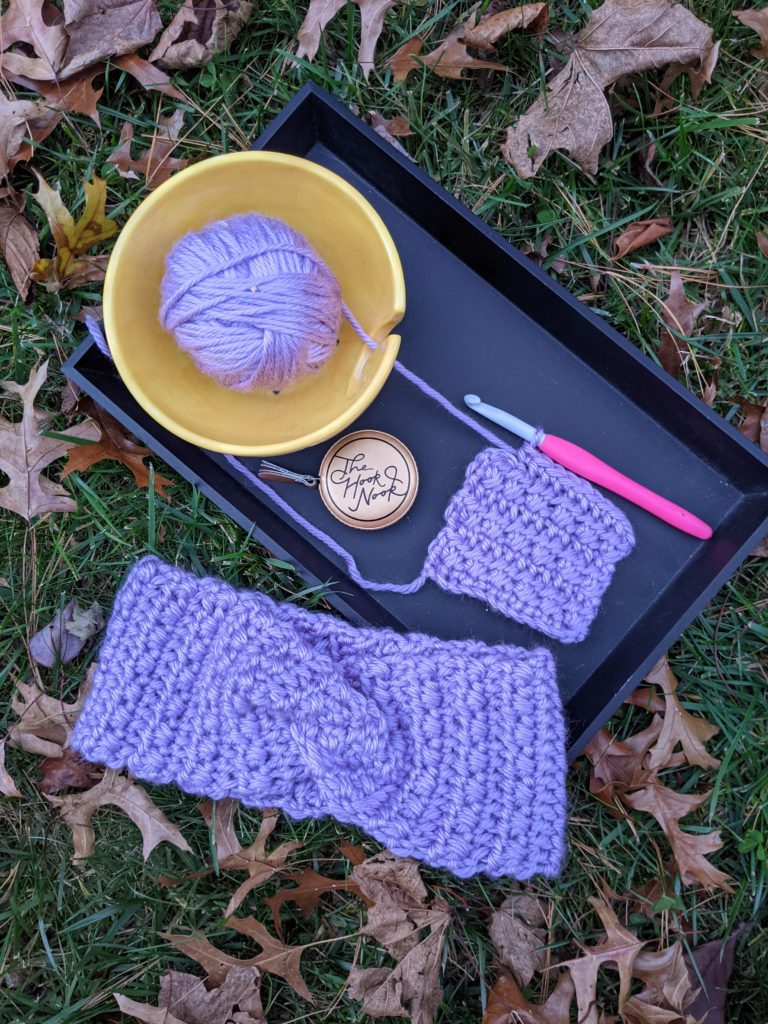
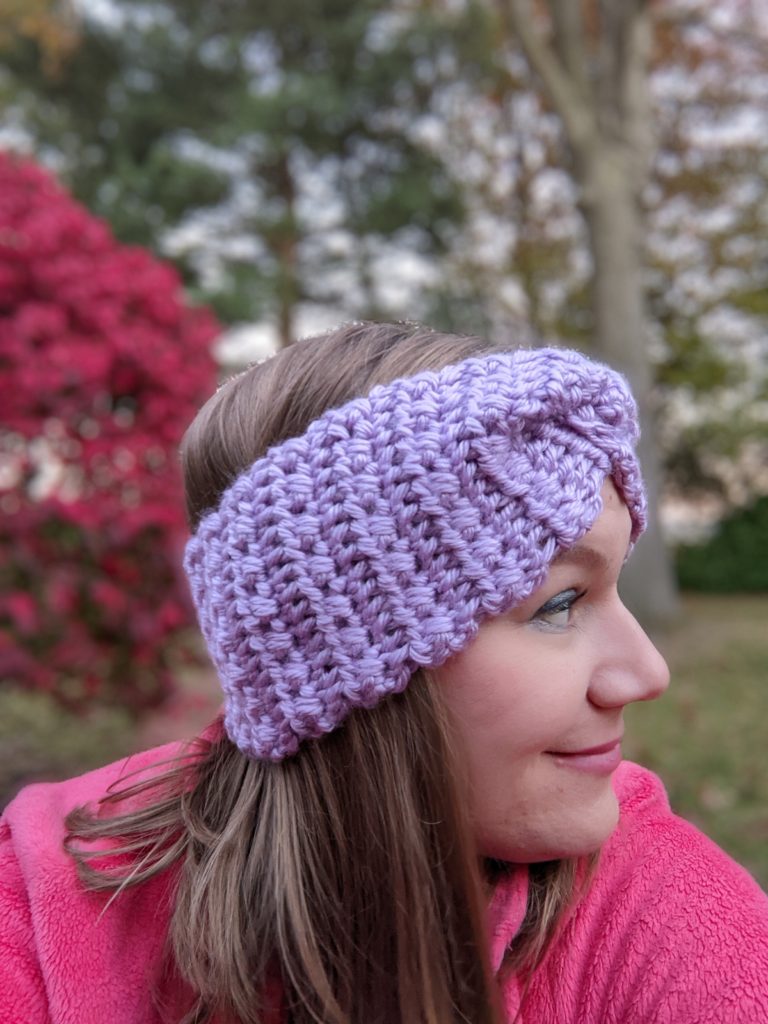
I’m delighted with the turnout of this headband pattern! It’s cozy without being too thick, just right for keeping the chill off your ears in cold weather. I had 14 testers for this pattern, and a few of them made more than one. That’s when you know it’s a good pattern! I think you’ll love having this crochet pattern in your library as a staple for markets and gifting. There are six sizes, so you can make one for anyone! I like the way the crossed hdc stitches worked up in this headband, so I’m in the middle of designing a coordinating hat and cowl. Subscribe to my email list so you can get notified when the coordinating patterns come out in December.

Okay, I’m keeping this one short, because frankly, it’s late at night and I’m out of words! Let’s get to the pattern!

You can use the free version of the pattern below! It’s an easy, beginner pattern. If you need extra help with the stitches or forming the twist, you can get the low cost PDF on ravelry, Lovecrafts, or Etsy. It has photo tutorials to help with the tricky bits.

Supplies

  • 100 yards bulky (CYC 5) yarn, sample is Red Heart Yarns Soft Essentials in color Sugar Plum (Michael’s Loops and Threads Charisma or Hobbii Amigo Chunky would be good substitutes. The Amigo Chunky is on sale right now for Black Friday weekend!
  • crochet hook US size L (8 mm) or size needed to obtain gauge
  • tapestry sewing needle
  • scissors and measuring tape

Stitches (US terms)

ch = chain

sc = single crochet

st/sts = stitch/stitches

FLO = front loop only

sk = skip

hdc = half double crochet

Notes

  • Finished dimensions: baby: 14 in, toddler: 16 in, child: 18 in, teen/adult sm: 20 in, adult med: 21 in, adult lg: 22 in around.
  • Stitch counts are marked at the end of each row in parentheses.
  • Pattern is worked flat and seamed at the end.
  • The right side is the side where the hdc stitches puff out more, pictured below.

Gauge

4 in by 4 in swatch

12 sts in 8 rows of the pattern repeat which is:

Row 1: sc FLO

Row 2: (sk st, hdc, hdc in skipped st) repeat

Written Instructions

Baby (Toddler, Child)

Row 1: Ch 13, sc in second st from hook and each st across, ch 1, turn. (12 sc)

Row 2: Sk first st, hdc next st, hdc in previously skipped st, *sk next st, hdc, hdc in skipped st, ch 1, turn. (12 hdc)

Row 3: Sc FLO each st across, ch 1, turn. (12 sc FLO)

Row 4- 27 (31, 35): Repeat rows 2 and 3 respectively.

Row 28 (32, 36): Repeat row 2. Fasten off, leaving about 8 inches for seaming.

Fold headband in half. Put the ends, right side together so that one end is halfway on top of the other end. Wrap the bottom end around the top and and weave the remaining tail through to create the twisted knot look.

How is the pattern going?

Join my subscriber list for pattern updates, discounts, and other crafty fun!

Thank you!

You have successfully joined our subscriber list.

.

Teen/small (medium, large)

Row 1: Ch 15, sc in second st from hook and each st across, ch 1, turn. (14 sc)

Row 2: Sk first st, hdc next st, hdc in previously skipped st, *sk next st, hdc, hdc in skipped st, ch 1, turn. (14 hdc)

Row 3: Sc FLO each st across, ch 1, turn. (14 sc FLO)

Row 4- 39 (41, 43): Repeat rows 2 and 3 respectively.

Row 40 (42, 44): Repeat row 2. Fasten off, leaving about 8 inches for seaming.

Fold headband in half. Put the ends, right side together so that one end is halfway on top of the other end. Wrap the bottom end around the top and and weave the remaining tail through to create the twisted knot look. Don’t forget, if you struggle with this part, the PDF version has tutorial photos to help. It’s available on ravelry, Lovecrafts, and Etsy.

October 22, 2021 by Priscilla

The Double Stripe Scarf

Part of the joy of making is giving that which you’ve made with your own hands to others! Of course, thoughtfully choosing a gift from a store is a beautiful thing. I don’t know anyone who gives exclusively handmade gifts; there simply isn’t time in our modern society, and that’s okay. BUT when you do have time and desire, it is almost magical to gift someone a handmade item. There aren’t too many feelings better than when the recipient loves it and uses it! Maybe holding newborn babies, birthdays for a beloved grandparent, and trips with best friends are better. Maybe.

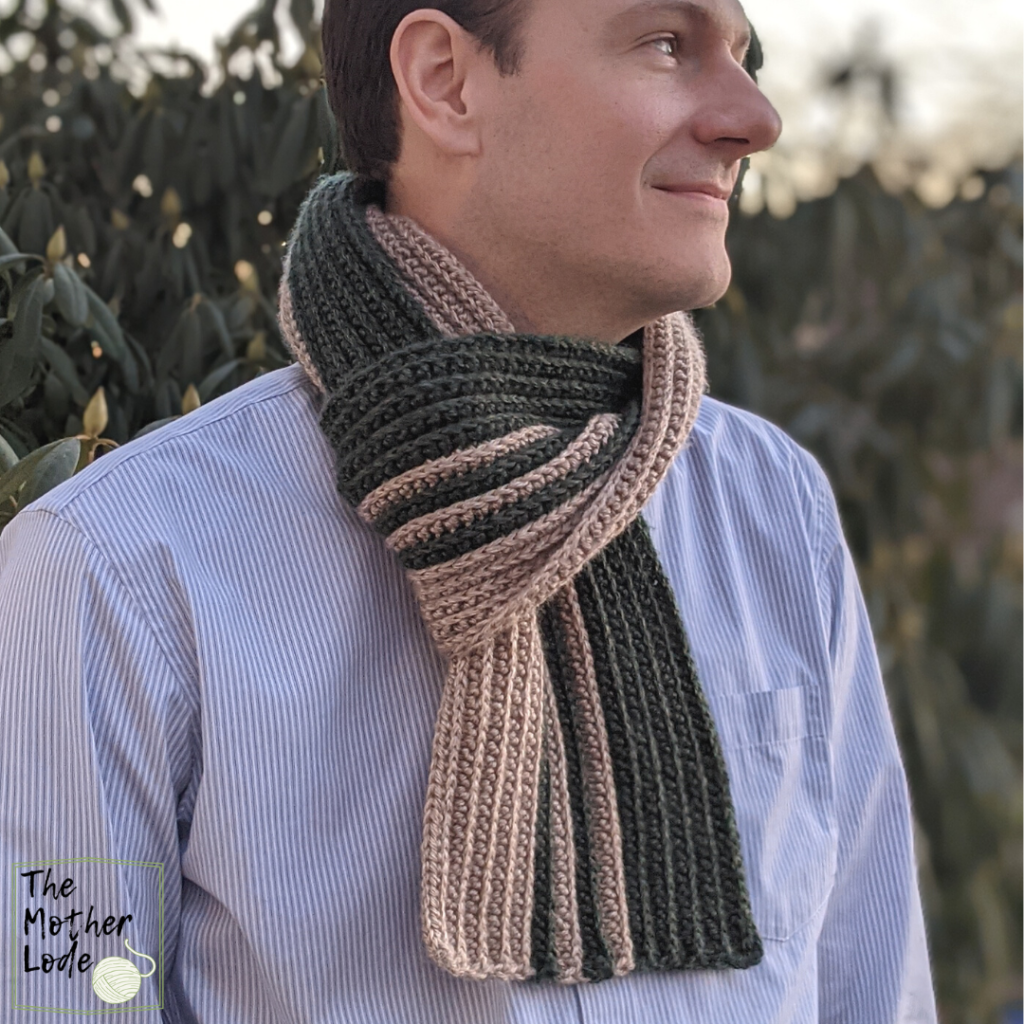
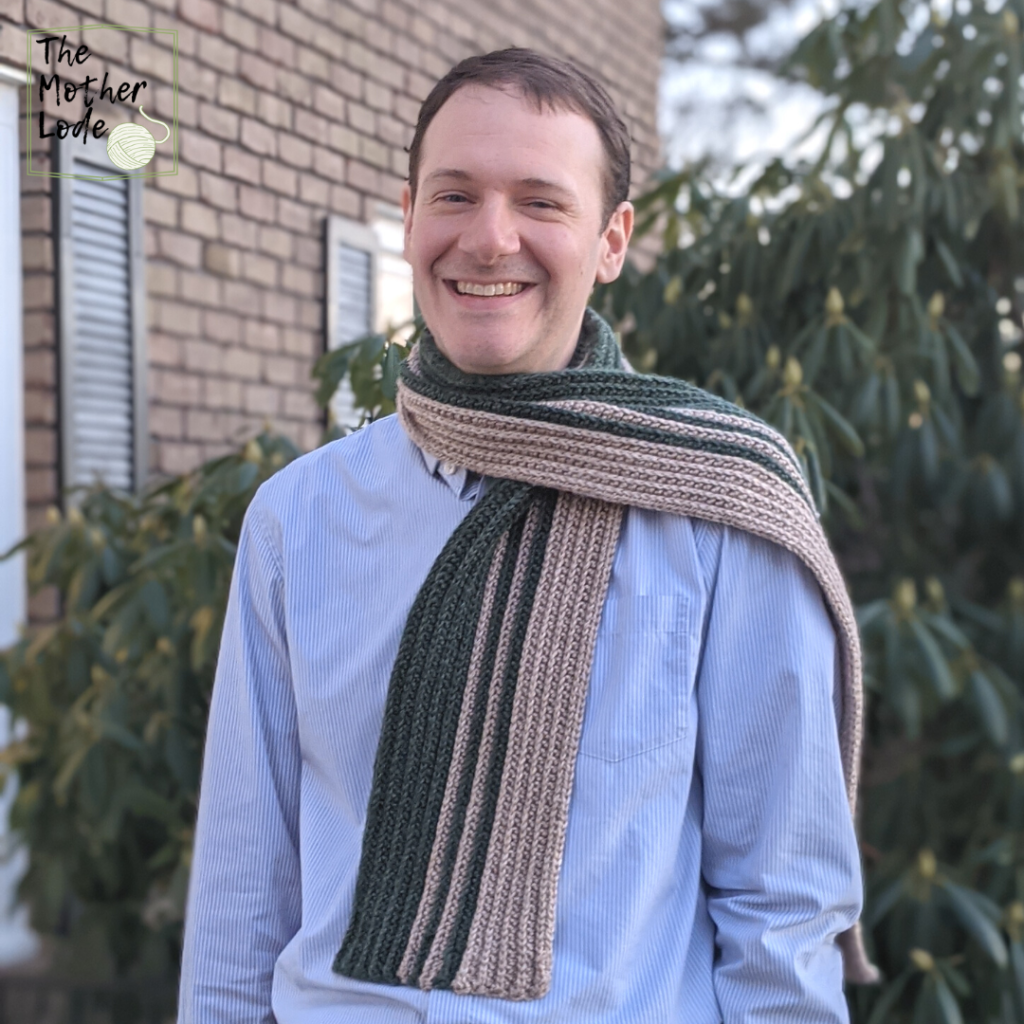
At the start of this year, my husband ASKED me to make him a scarf. I immediately and excitedly took him to my craft room (yarn bomb hazard area.) We chose two colors from my stash and I thought deeply about how to design something he would wear that wasn’t boring. My husband’s taste in clothing is complicated. If he could, he would wear Virginia Tech/ Philadelphia Eagles sportswear 24/7. When that’s not appropriate, he likes clothing that isn’t too loud but still uses color. Every now and then he’ll like a wacky print just to keep me on my toes. So I took a classic ribbed look scarf and added the stripes in a unique way to create this scarf just for him, and he wore it every day for the rest of winter!

I am calling this primarily a men’s scarf because that’s who I designed it for, but it could really be made to please anyone! Add a few stitches at the end of the foundation row and make it a bit longer, use two super vibrant colors with wild fringe. Make the entire scarf in one color, gather the two short ends, and attach pom poms for a fun young feel. Anything goes with this EASY pattern. Several of my testers for this pattern created projects on ravelry if you want to check their ideas! I can’t wait to see what you create!

The free version of this beginner pattern is right here for you! There is also a 6 page PDF available in all of my pattern shops if you would like to print it out for easy couch crochet time: ravelry, LoveCrafts, and NEW Etsy! Then you can mark your rows easily and use the 3 photo tutorial pages.

Supplies

  • 2 colors of worsted weight yarn, 275-300 yds each (sample uses Lion Brand Heartland in colors Grand Canyon and King’s Canyon
  • crochet hook US size H (5mm) or size needed to obtain gauge
  • tapestry sewing needle
  • scissors and measuring tape

Stitches

ch = chain

sl st = slipstitch

st/sts = stitch/stitches

hdc = half double crochet

hdc in 3rd loop (see notes)

fhdc = foundation half double crochet

sc = single crochet

hdc sl st = half double slipstitch

Notes

  • Finished Dimensions: 65 in by 9 in
  • Stitch counts are marked at the end of each row in parentheses.
  • Pattern is worked in rows.
  • The turning chain does not count as a stitch.
  • Color changes are made at the beginning of rows as indicated by the letters A or B.
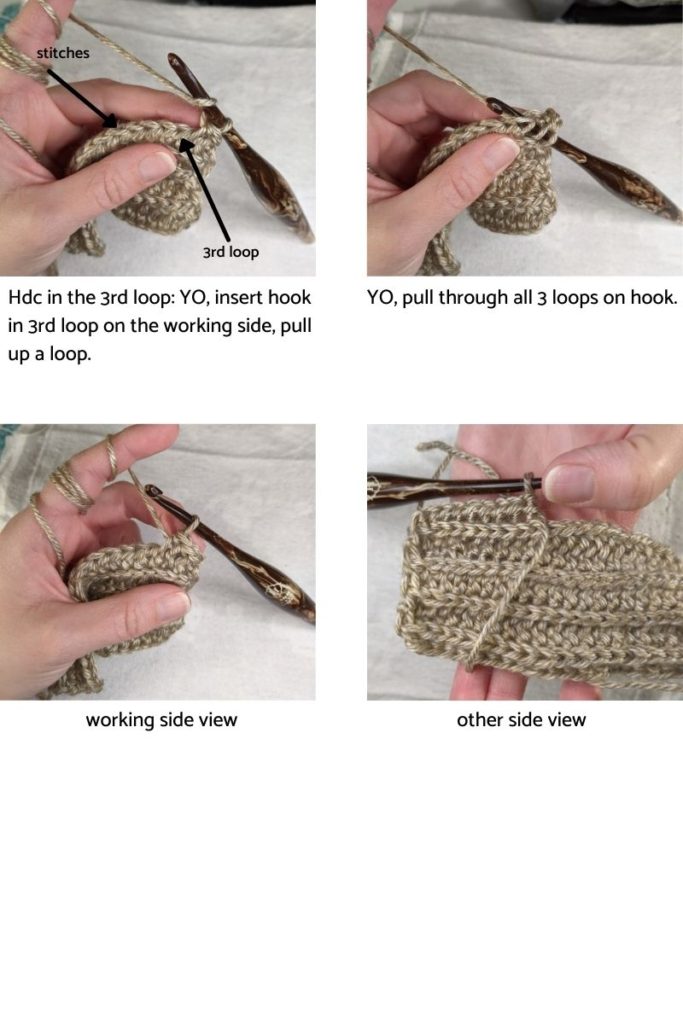
  • Each stitch in this pattern (except the foundation row) is worked in the 3rd loop, meaning you will not work in the top of the stitch as usual. Instead you will work in a spot unique to the half double crochet. See the photo tutorial below.
  • Don’t forget! You can purchase the easy to use PDF from my pattern shops! It’s available on ravelry, LoveCrafts, and

    How is the pattern going?

    Join my subscriber list for pattern updates, discounts, and other crafty fun!


    Loading…

    Thank you!

    You have successfully joined our subscriber list.

    "." “>Etsy

    !

Gauge

4x4in = 19 st 13 rows hdc in the 3rd loop

Instructions

Row 1: (A) Fhdc 230. (The PDF includes a full tutorial for this stitch.)

Row 2: (A) Ch 1, turn, hdc in the 3rd loop of the first st, hdc in the 3rd loop each st. (230 hdc)

Row 3-10 (A) Ch 1, turn, hdc in the 3rd loop of the first st, hdc in the 3rd loop each st across until last st, hdc into turning ch. (230 hdc)

Row 11-12 (B) Ch 1, turn, hdc in the 3rd loop of the first st, hdc in the 3rd loop each st across until last st, hdc into turning ch. (230 hdc)

Row 13-14 (A) Ch 1, turn, hdc in the 3rd loop of the first st, hdc in the 3rd loop each st across until last st, hdc into turning ch. (230 hdc)

How is the pattern going?

Join my subscriber list for pattern updates, discounts, and other crafty fun!


Loading…

Thank you!

You have successfully joined our subscriber list.


.

Row 15-16 (B) Ch 1, turn, hdc in the 3rd loop of the first st, hdc in the 3rd loop each st across until last st, hdc into turning ch. (230 hdc)

Row 17-18 (A) Ch 1, turn, hdc in the 3rd loop of the first st, hdc in the 3rd loop each st across until last st, hdc into turning ch. (230 hdc)

Row 19-27 (B) Ch 1, turn, hdc in the 3rd loop of the first st, hdc in the 3rd loop each st across until last st, hdc into turning ch. (230 hdc)

Row 28 (B) Ch 1 turn, hdc sl st in the 3rd loop of the first st, hdc sl st each st across. (230 hdc sl st) Fasten off.

I hope you loved making this scarf! I can see this as a staple I-want-to-make-something-for-someone-but-I-don’t-know-their-style because it is so versatile, and works up pretty fast, too. Tag me on Instagram @motherlodecrafts ! I would love to see your work!

February 17, 2020 by Priscilla

DIY “Beautiful Stuff” Bird Feeder

DIY bird feeder
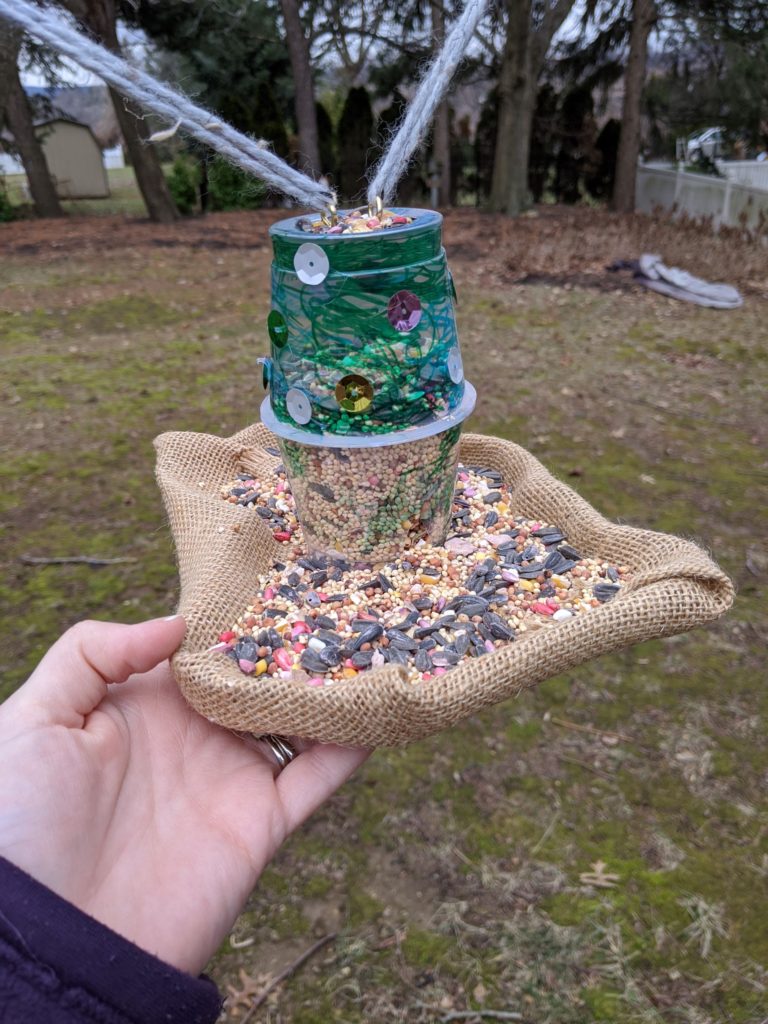
My DIY bird feeder made of recycled materials!

One of the things I love about our home is the trees in our yard! We have such a variety and I love how it feels like a forest in parts of the yard. I also really enjoy the birds! We’ve seen woodpeckers on the pine trees in the front yard, blue jays, chickadees, robins, and cardinals in the backyard. We’ve even had wild turkeys in our backyard! In the fall, the kids made pine cone bird feeders at school, and we used almond butter, pine cones, and birdseed to make some more to go with them. They look cute hanging from the magnolia tree in the yard. They are all nearly empty, now! It’s been great to watch the birds from the windows.

What seems like forever ago, I taught in a daycare in Virginia. The school was “Reggio-Emilia” based, which is similar to Montessori. We had a great art teacher there who taught me about “beautiful stuff.” This is a teaching idea from the book Beautiful Stuff: Learning with Found Materials by Cathy Weisman Topal and Lella Gandini. The gist of it is that found materials in nature, leftover scraps, recyclables can all be made into beautiful stuff: art, usable items, sculpture. I had students making cars from cardboard with milk top wheels, teachers used drink caps to create mosaics with their classes, etc. I loved it then, and I still love it. I am in the habit of keeping what I think of as beautiful stuff. Basically, if it can be hot-glued, painted, or colored with Sharpie markers, I will keep it for a “project.” (Honestly, I’m lucky my husband doesn’t throw my “beautiful stuff” out when I’m not home.) I love to make things out of old packaging like yogurt cups, soda bottles, clementine boxes, cardboard, etc.

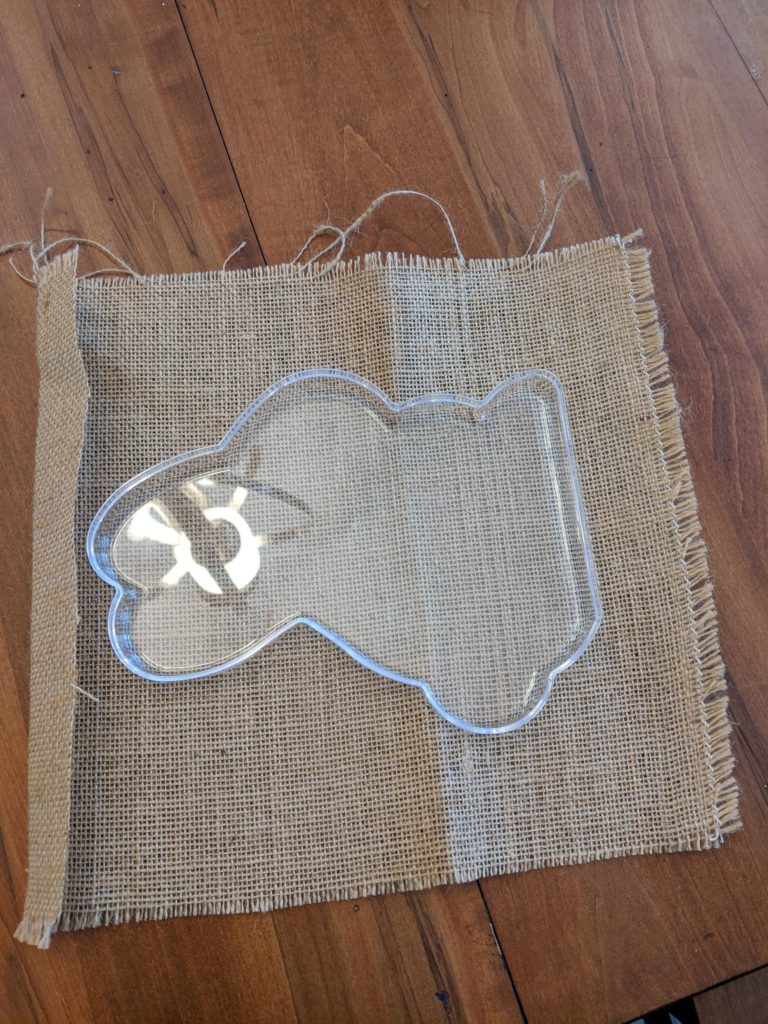
burlap

So my love for the birds and beautiful stuff collided this week to make a cute bird feeder! Last year I made a bird feeder from a soda bottle and a spoon and it turned out decent, but it didn’t work perfectly. This week, I made a better one! The kids and I used old yogurt cups to hold the bird seed, and the top from a plastic candy container (those hard plastic Ferrero Rocher ones.) It turned out so cute and it lets the bird seed out better. I’m hoping it keeps the birds coming and my boys happy as we watch them having a snack.

Materials list

  • empty, clean, yogurt cups (2)
  • bottom from Ferrero Rocher chocolates (anything that you can use as a tray for the birdseed to spill onto)
  • burlap (probably about a 12×12 inch square piece
  • hot glue gun
  • x-acto knife (you could probably use a box cutter razor, too, if its very sharp.)
  • sharpie markers
  • sequins
  • picture hanging kit pieces, yarn
  • birdseed
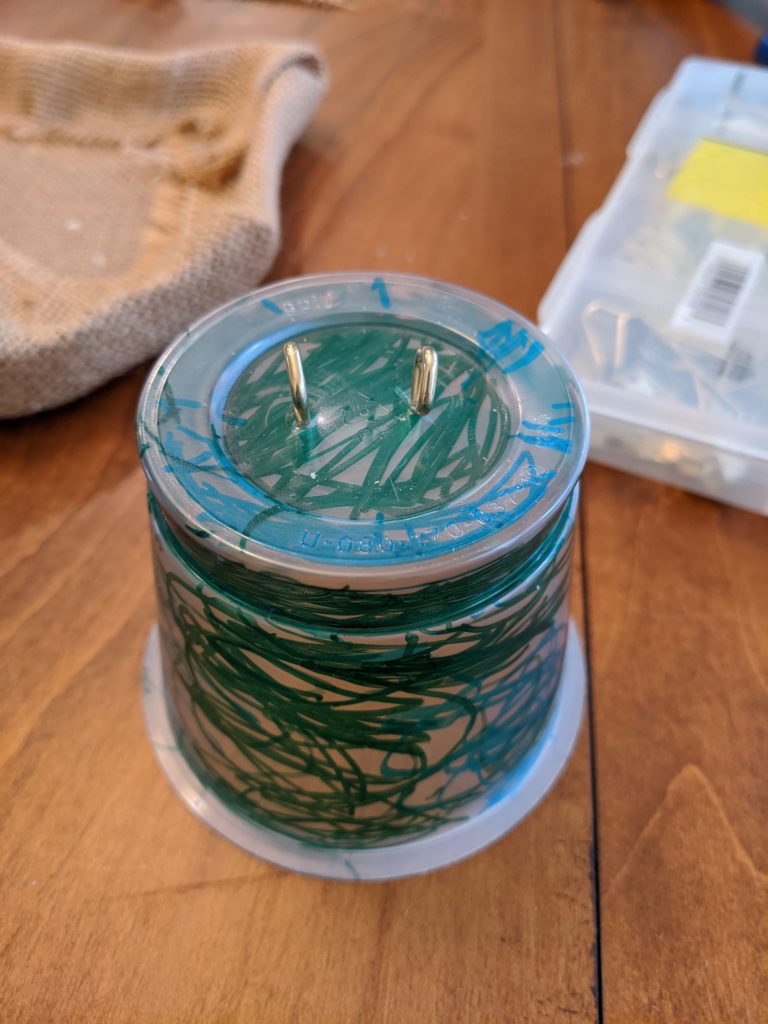
sharpie marker on yogurt cup
My little one’s Sharpie art. These picture hangers worked great for this project.

First, I let the kids draw on the yogurt cups with Sharpie markers. While they did that, I hot glued the burlap along the bottom and up onto the “tray” where the seed will spill. I didn’t worry about it being neat, as the birdseed will cover it. Once the kids were finished with their drawing, I used an x-acto knife to cut two triangles on each side of the bottom cup. The top cup got one triangle cut and bent instead of cut entirely out. This is where you can refill the feeder. I used picture hangers because that is what I had, but you could also cut small holes in the top and string the yarn through. I hot glued the bottom cup to the tray, then the top cup on top of that! I finished by hot gluing some big sequins that I bought simply because I have no self-control at the craft store. The kids immediately wanted to feed the birds, so we filled it up and went outside to hang it! I strung it between the branches so hopefully more birds will eat it and not just the fluffy tailed rats, I mean, squirrels. Have confidence in your crafting and you can DIY anything!

DIY BIRD FEEDER PIN

October 26, 2018 by Priscilla

Guide to Quick Kid Costume DIY

Halloween is coming! I love dressing the kids up in fun costumes. (I may also enjoy dressing us all up as a family.) This year I admittedly wasn’t into it. We recently moved and My sewing supplies are completely disorganized. SO we are going with a re-wear for my youngest with an alligator we had and a hand-me-down lion costume for my oldest from my in-laws.

My 3 year old son on the other hand is determined to be a ghost. Everything I could purchase is too scary, so I knew I was going to break down and use the sewing machine. I thought I had a white fleece blanket somewhere in my giant pile of fabrics to be recycled and it was NOWHERE to be found. I moved to Plan B and found the bride of Frankenstein I had made on the fly for myself two years ago. It was an old long sleeve white t shirt with a long strip of fabric attached at the shoulders and two long pieces attached at the back. I basically trimmed it to fit my son, hand stitched a felt face on, and made a VERY fast white hat. DONE. It was seriously a total of 45 minutes to accomplish this and he loves it. Here are my tips for easy ways to throw your own costume together!

  1. Re-use old costumes in a different way (Like I did, cutting up an old costume and adding different elements.)
  2. Think about what everyday items you have on hand that could be used. I’m thinking cotton balls (steam, animal fluff), aluminum foil (candy, robot), plastic bags/newspaper (to stuff and reshape clothing)
  3. Search the house for old clothing that no one is wearing. What can you do with that old pair of pink corduroy pants? (I turned mine into a piglet costume a few years ago for my then 6 month old.)  
  4. What fun costume only requires regular clothing and a headpiece that you could make with hot glue, some felt, and a cheap headband or hat from the dollar store? I’m thinking animals and TV characters.
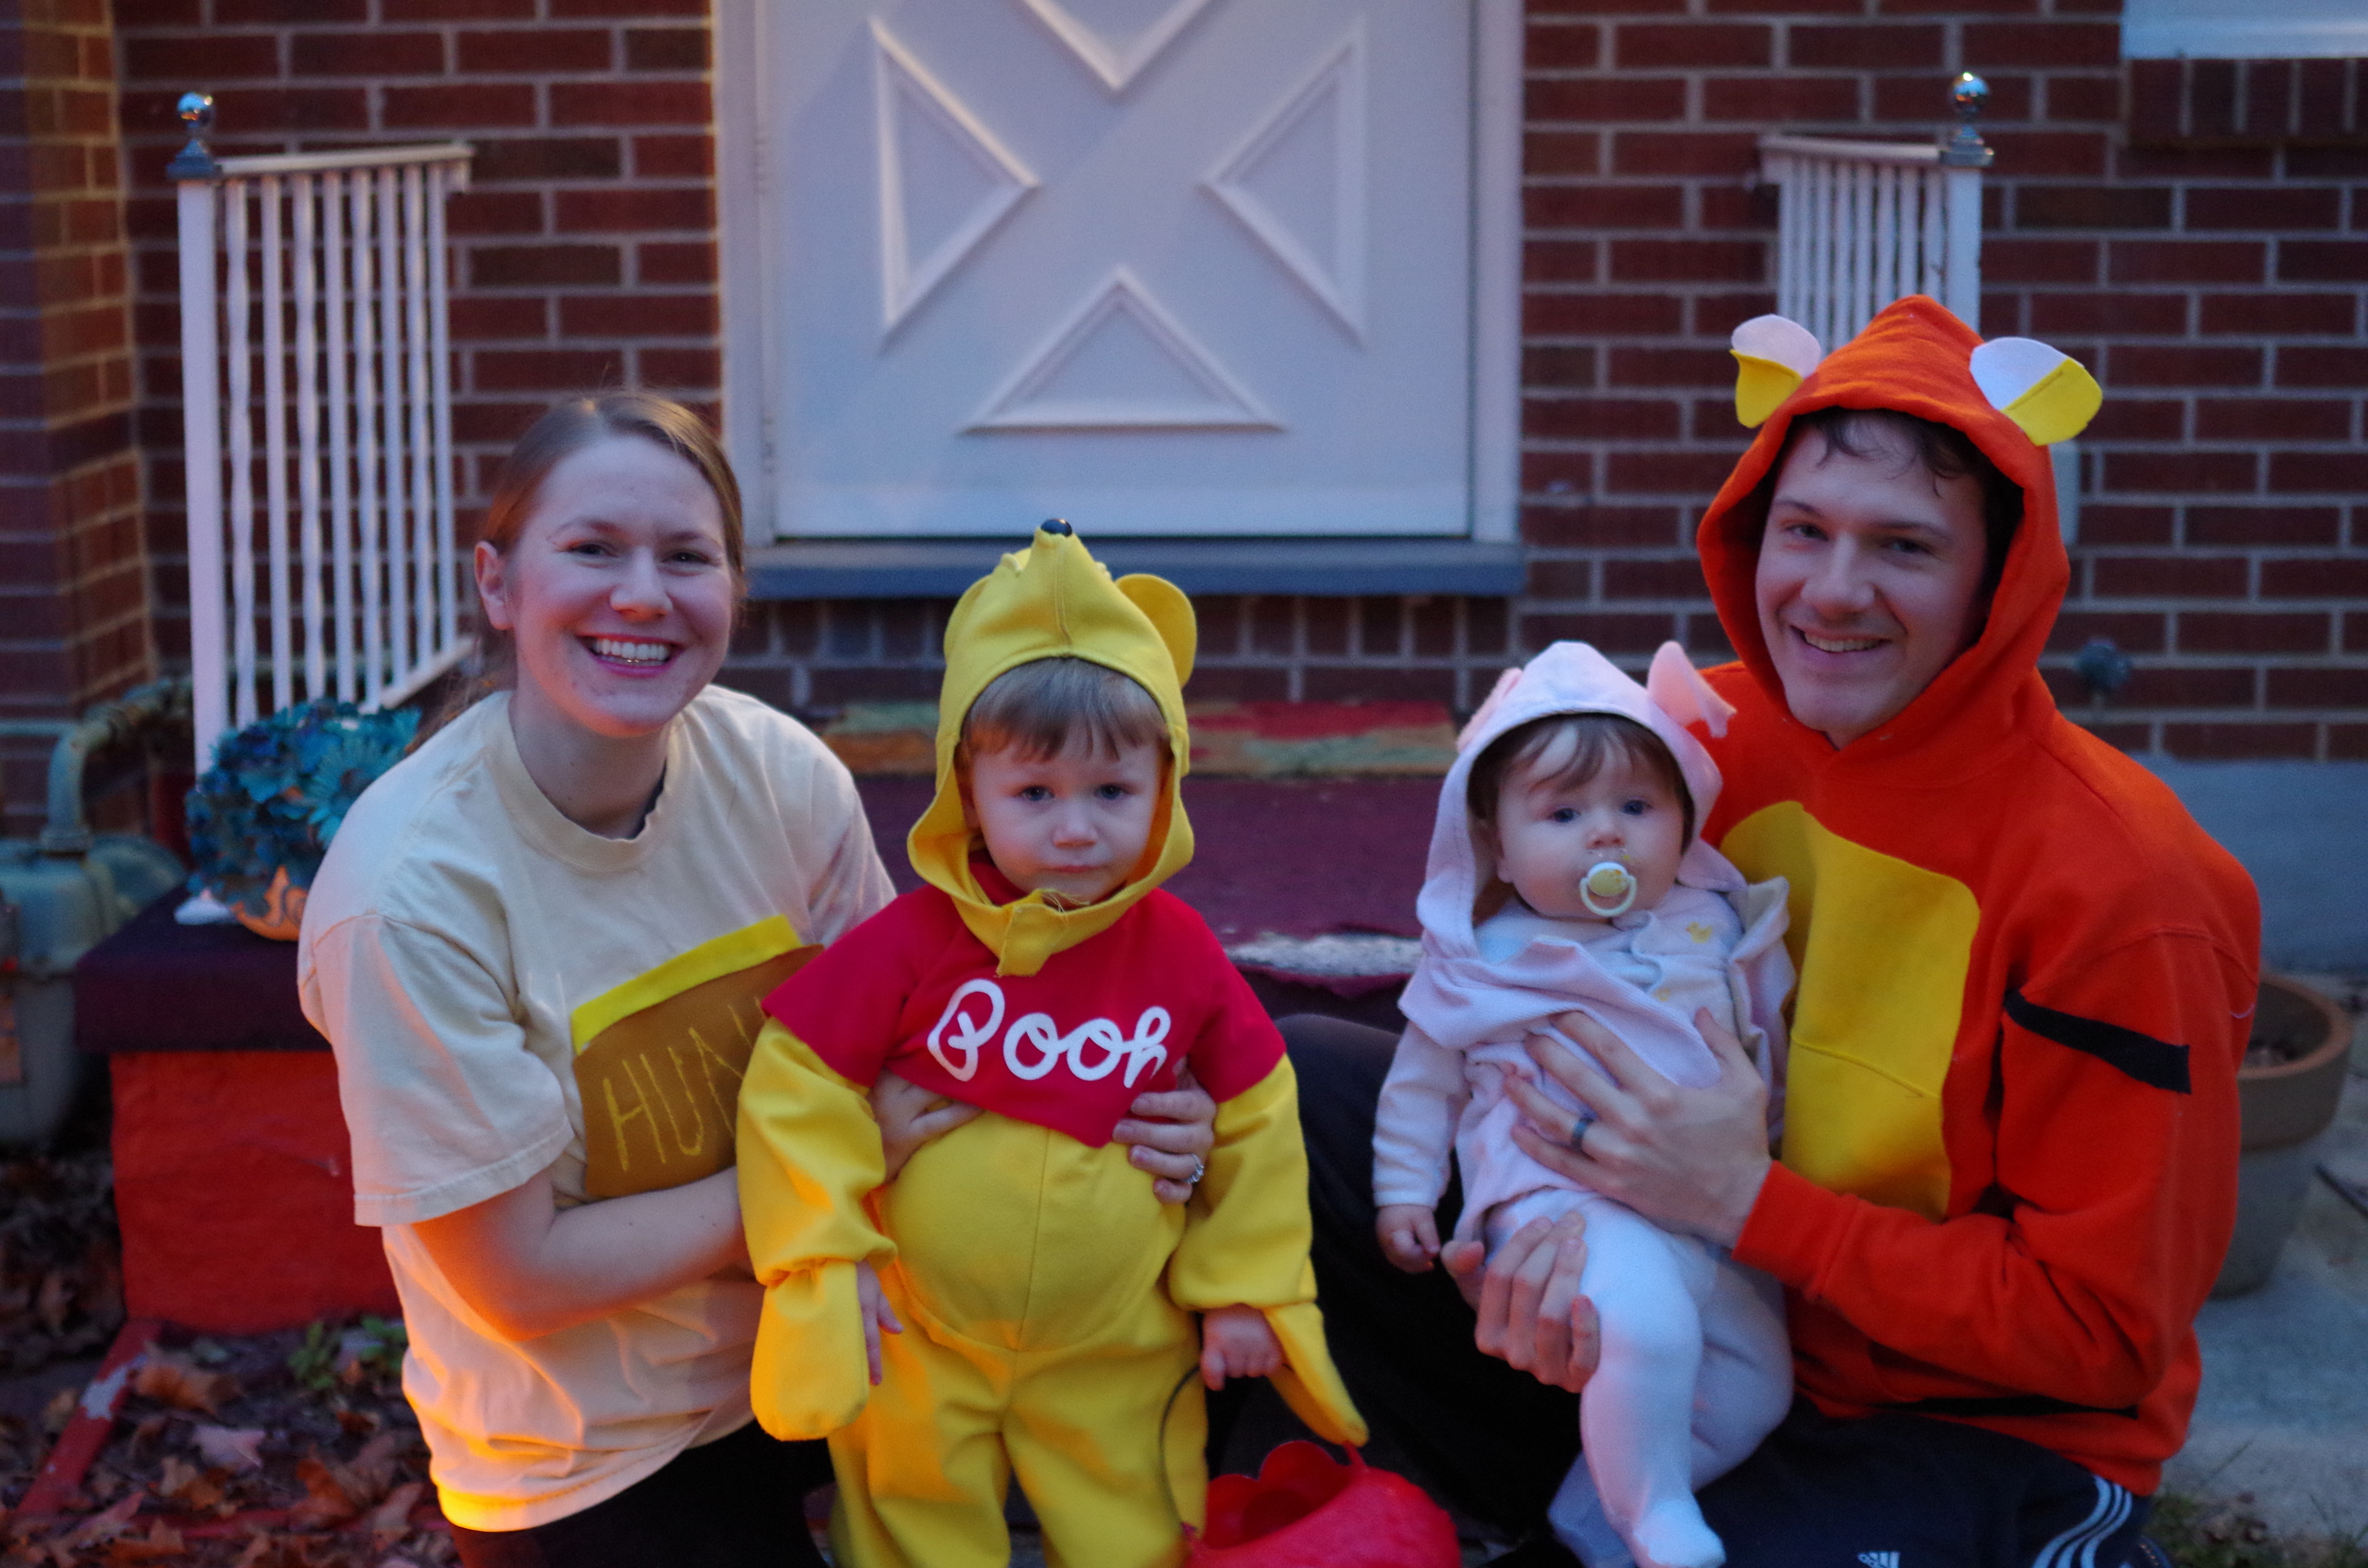
  5. Hot glue and felt are your friends. I made Tigger and a honey pot one year solely by hot gluing felt onto old clothing. (We had a Winnie the Pooh theme, clearly.)
  6. Hats are unbelievably simple to sew. Cut two pieces from the pattern and run through the sewing machine four times. That’s it! Here is the link for an easy, free, downloadable pattern from Fleece Fun. I made fleece ones last year for my kids Pokémon costumes and yesterday whipped up a white one with scrap pieces of knit and that worked, also! 

Comment with some of your ideas for easy costume DIY! 

Our family as Winnie the Pooh (re-used from my hubby’s childhood), Piglet (made out of old pink corduroy pants), Tigger and the “Hunny” pot made from old shirts, felt, and hot glue. 

July 5, 2016 by Priscilla

DIY Comforting Heat Pillow

Many years ago, my mom bought a heating pad for my dad at a kiosk at the mall. It was made of blue fabric with stars and moons on it, and was shaped to drape around your shoulders. He warmed it in the microwave and it smelled pretty terrible. However, my dad LOVED it. He would warm it up in the evening when his shoulders were tight or even if just when he was cold. Eventually, the blue pad was either misplaced or fell apart. A couple of years ago, I decided to make him a new one! I followed a tutorial from the blog An Oregon Cottage. It turned out well, he really likes it, and it smells good!

A while back (I honestly cannot remember when) my sister-in-law was talking about some back pain she was having. I asked if she ever used a heating pad, and she told me that she borrowed one from her mom every now and then. I picked out some fabric that I thought she would like and months later I finally made her a heat pillow! If you have aches and pains (and a sewing machine), you should make one, too! I haven’t been sewing for very long and I was able to complete this project easily (once I had some time when the kids were napping and there weren’t piles of dirty dishes/clothes/toys everywhere.) I changed a bit from the original tutorial, since I didn’t love the finishing on the first one.

How to begin:

Cut a pattern from paper of a 12 inch by 20 inch rectangle. Use this to cut out your fabric. You should choose a fabric that is 100% cotton (so it won’t catch fire or anything in the microwave.) Thicker broadcloth and home decor fabrics are best.

IMGP7756

Fold the fabric in half lengthwise with right sides together. Sew together beginning on one of the short sides, putting in a few backstitches to keep it together. Stop a bit before the corner, lift the presser foot up, turn the fabric and continue sewing the long side. Turn the next corner and sew halfway up the short side, then stop, again with a few backstitches.

IMGP7758

Cut the corners off a bit so they won’t make for a bulky corner. Turn right side out. Fill about halfway with flaxseed. (I like flaxseed because it doesn’t burn in the microwave and it creates a nice, moist heat that is helpful for aching muscles.) Fiddle around with it to figure out how much you like, as too empty won’t keep the heat in as well and too full will be hard. I also add about 1/4 cup of dried lavender. You don’t have to, but it smells nice!

IMGP7762

Finally use a ladder stitch to close the hole up. I learned this stitch while fixing some stuffed animals that were torn. It is a great way to hide the hole and it honestly isn’t that hard, especially with this thick fabric. It takes about five minutes to learn from a few YouTube videos. I like this one:


Once you stitch it closed, you are finished!

IMGP7768 Diy warming pillow www.the-mother-lode.com

When you are ready to use it, heat it in the microwave about 45 seconds. Give it a shake, then heat another 20 seconds until it feels warm enough to soothe what ails you.


  • « Previous Page
  • 1
  • 2
  • 3

Welcome! My name is Priscilla and I love designing crochet patterns for your family. I live in beautiful Pennsylvania where I enjoy all sorts of crafts, but I’m most passionate about crochet! I’m a Catholic mom of 4 and I sometimes incorporate my faith into my designs. Thank you so much for supporting me by visiting my crochet website and I hope you find something here that you are excited to make.

Recent Posts

  • Soft Crochet Hat Pattern
  • Cozy Men’s Scarf Crochet Pattern
  • Bulky Textured Beanie Crochet Pattern
  • Cozy Fall Baby Beanie Pattern
  • Spider Basket Crochet Pattern

Categories

Follow Me

  • Etsy
  • Facebook
  • Instagram
  • Pinterest
  • YouTube

Pretty Chic Theme By: Pretty Darn Cute Design