The Mother Lode

Crafts and Crochet

  • Home
  • Crochet Pattern Library
  • Faith Based Patterns
  • About Me
  • Privacy Policy

August 31, 2026 by Priscilla

Spider Basket Crochet Pattern

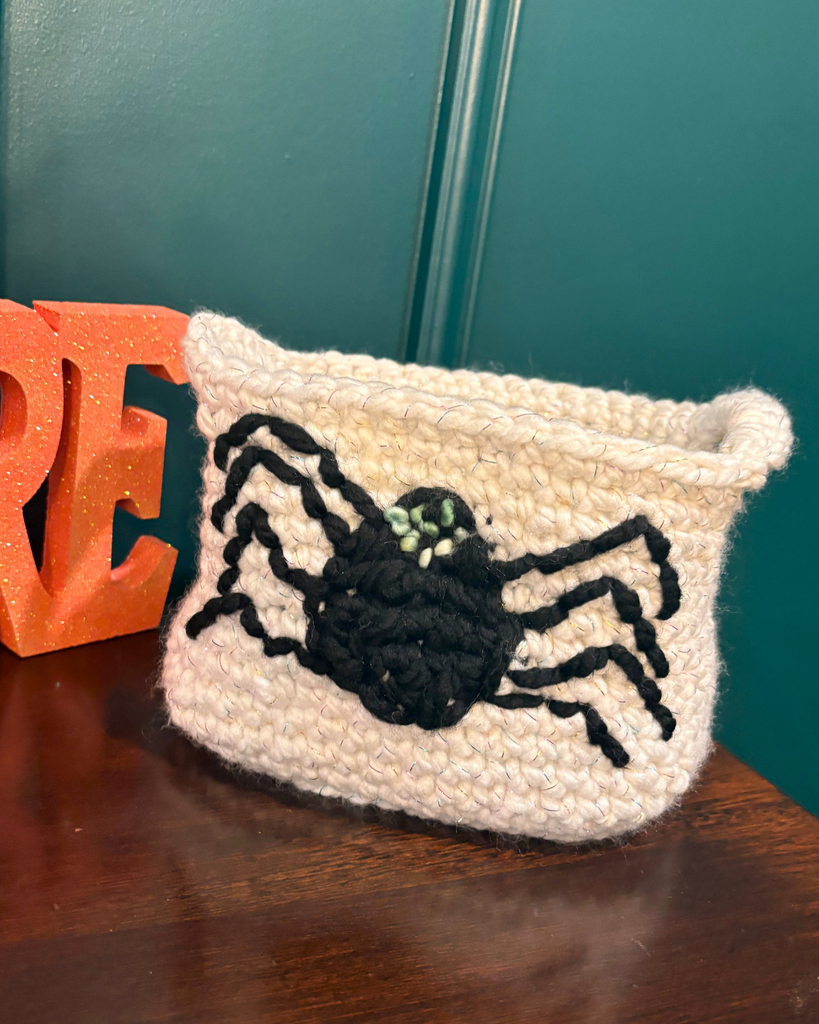
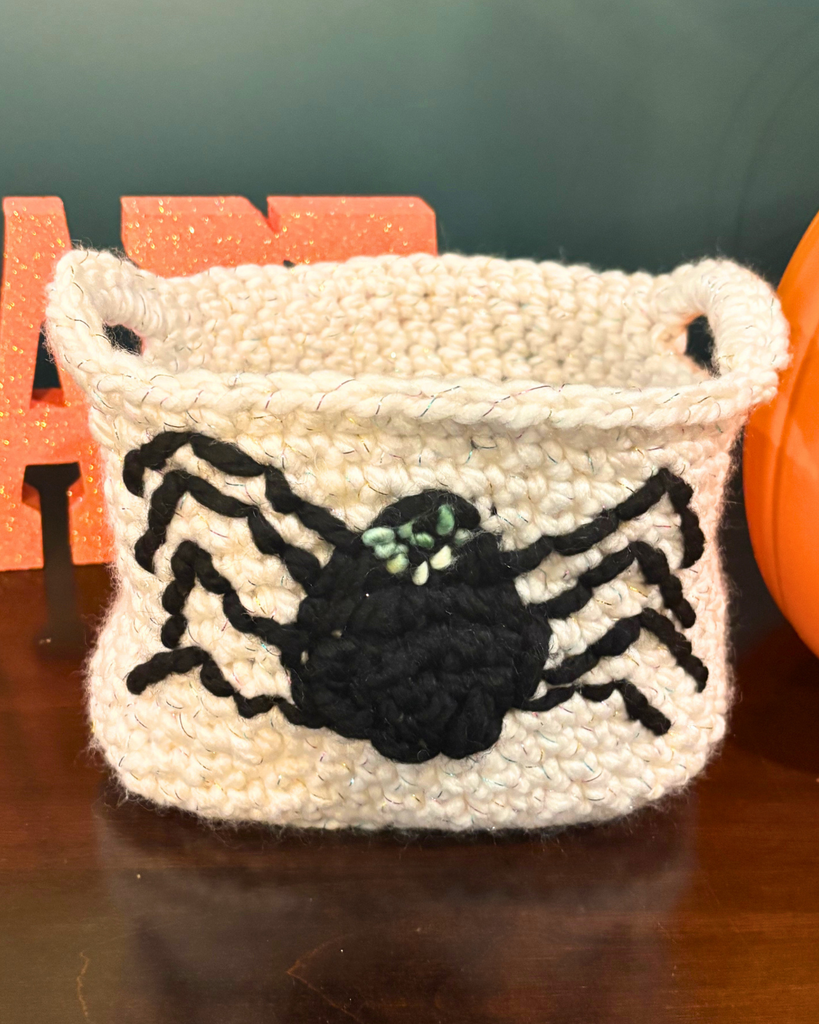
The Sparkle Spider Basket crochet pattern is ready for you to make for your spooky Halloween decor! This is really fun to make and works up quickly with some super bulky yarn! I designed this pattern specifically for the Halloween crochet-a-long from CAL Central Crochet which is a great event and you should join in the joy of making.
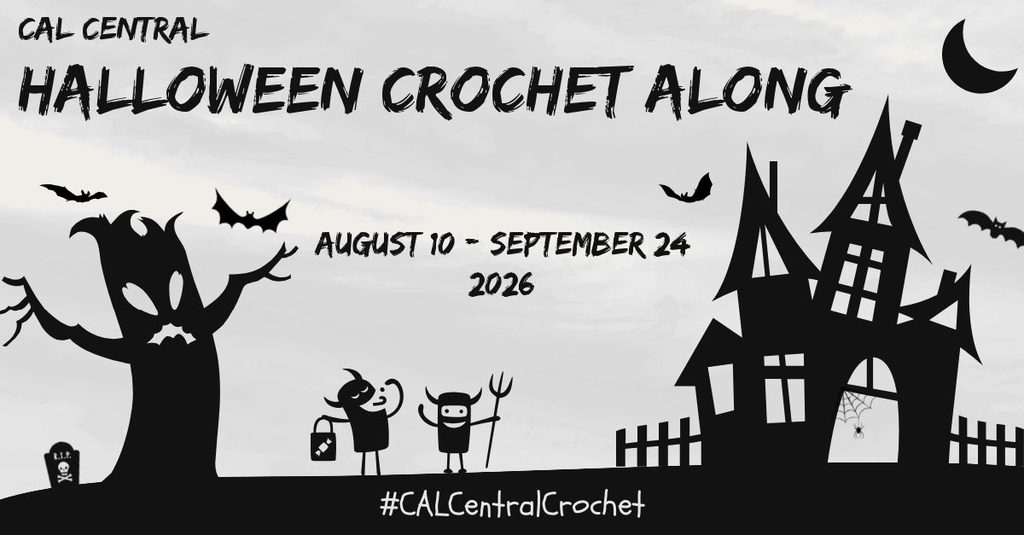
How the 2026 Halloween CAL Works

Every Monday and Thursday from August 10 through September 24, 2026, we’ll share a free crochet pattern for a Halloween-themed project. These patterns include decorations, toys, costume elements, and more.

Forbidden Fiber Co., Furls, GlassEyesOnline, Knitter’s Relief Balm, LennyMudPottery, Underground Crafter, and Unicorn have generously provided us with fabulous prizes for our end-of-CAL giveaway. Don’t forget to enter the giveaway in this post on Underground Crafter by 11:59 pm Eastern on Sunday, September 27, 2026!

How To Join the 2025 Halloween CAL

  • You can join in by crocheting the patterns as you have time.
  • Share your progress and post pictures of your finished projects. Tag your projects and posts #CALCentralCrochet on all social media.
  • If you’d like to chat with other crocheters, join the CAL Central Crochet Facebook group, or visit this thread in the CAL Central Ravelry group.
  • By the end of the CAL, you’ll have up to 14 spooky Halloween projects. 

Visit Underground Crafter to learn more about the prizes, enter the end-of-CAL giveaway, and to get links to each Halloween CAL pattern as it is released.

I hope you’ll join in this fun event, it’s really cool to see these great Halloween projects work up in different ways!
This pattern was written for one of my favorite yarns, Lion Brand Wool-Ease Thick and Quick. I think it’s a great color palette and I was pleased with how easy it was to work with the color Celebration, which is the white with a thread of rainbow stellina that I used. I was worried it might catch on the sparkle strand, but it was fine, and the result is so cute!

Supplies

  • Size 6 super bulky weight yarn, 150 yards of color A and 50 yards of color B, sample is Lion Brand Wool Ease Thick and Quick in Celebration (this adds the sparkle, as it has a strand of stellina fiber throughout) and Black
    • A different option would be some Glow in the Dark yarn such as Lion Brand DIY Glow Chenille yarn
  • scrap amount of any size 4,5, or 6 green yarn for eyes, if desired
  • Size 8 mm crochet hook
  • Large tapestry needle and scissors

Abbreviations (US Terms)

ch = chain

sl st = slip stitch

st/sts = stitch/stitches

sp = space

beg = beginning

sc = single crochet

inc = increase: 2 single crochet stitches in same space

sk st = skip stitch

sc BLO = single crochet in the back loop only

Notes

  • Pattern is worked in continuous rounds. I suggest placing a stitch marker in the first stitch of each round to help you keep track, and move it to the next round as you work.
  • Stitch counts are marked at the end of each round with [ ]
  • Finished dimensions: 5.5 in height by 7 in wide by 6 in deep
  • This pattern is a quick make, but give your hands a stretch break as you are crocheting quite tightly to make the bag stiff.

Gauge

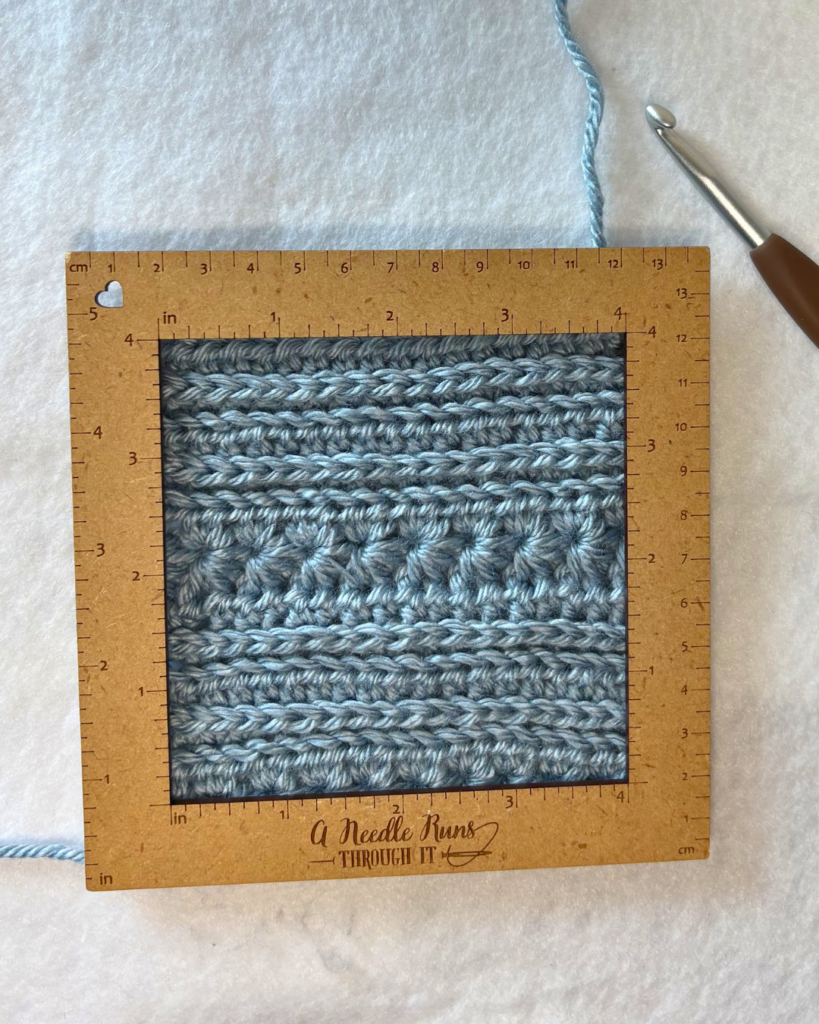
10 sts in 11 rows of single crochet = 4 inches

Follow pattern, stopping at end of round 6. This should measure 4 inches by 5 inches.

Written Instructions

Round 1: Ch 4, inc 2nd ch from hook, sc, inc, continue onto other side of beg ch, inc, sc, inc, do not join. [10 sc]

Round 2: Inc, sc next 3, inc, inc, sc next 3, inc. [14 sc]

Round 3: Inc, inc, sc next 3, inc next 4, sc next 3, inc, inc. [22 sc]

Round 4: Sc, inc next 2, sc next 5, inc next 2, sc next 2, inc next 2, sc next 5, inc next 2, sc [30 sc]

Round 5: Sc first 2, inc, inc, sc next 7, inc, inc, sc next 4, inc, inc, sc next 7, inc, inc, sc last 2. [38 sc]

Round 6: Sc first 2, inc, inc, sc next 11, inc, inc, sc next 4, inc, inc, sc next 11, inc, inc, sc last 2. [46 sc]

Round 7: Sc first 3, inc, sc, inc, sc next 11, inc, sc, inc, sc next 6, inc, sc, inc, sc next 11, inc, sc, inc, sc last 3. [54 sc]

Round 8: Sc BLO each st around. [54 sc BLO]

Round 9: Sc each st around. [54 sc]

Round 10: Sc first 5, sk st, sc next 15, sk st, sc next 10, sk st, sc next 15, sk st, sc last 5. [50 sc]

Round 11: Sc each st around. [50 sc]

Round 12 : Sc first 5, sk st, sc next 6, change to color B, sc 2, change to color A sc 6, sk st, sc next 9, sk st, sc next 14, sk st, sc last 4. [46 sc]

Round 13: Sc first 10, change to color B, sc 5, change to color A, sc around. [46 sc]

Round 14: Repeat round 13.

Round 15: Sc first 11, change to color B, sc 3, change to color A, sc around. [46 sc]

Round 16: Sc first 12, change to color B, sc 2, change to color A, sc around. [46 sc]

Rounds 17-18: Sc each st around. [46 sc]

Rounds 19-20: (continuously work from round 19 into 20 as you make the basket handles) Sc 22, ch 7, sk 5 sts, sc next 19 sts, ch 7, sk 4 sts, sc 19, sc 9 into ch-7 sp, sc next 19 sts, sc 9 into ch-7 sp, sl st next 2, fasten off. [46 sc]

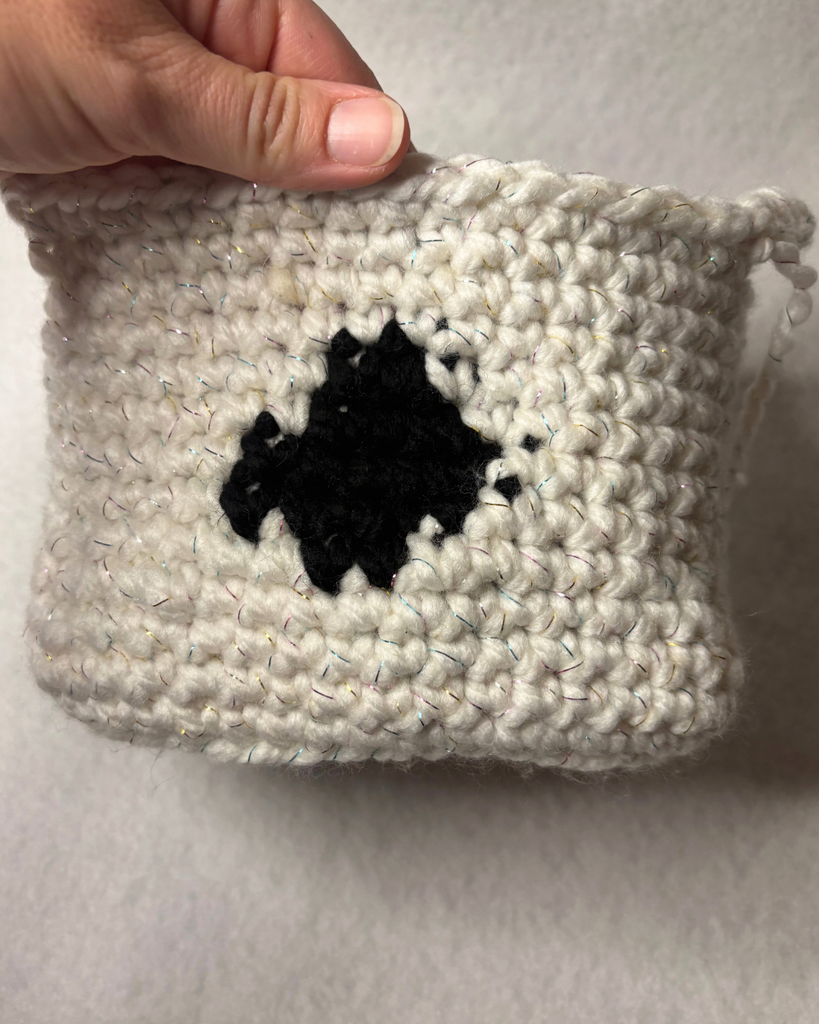
Here is what you should have now:
Finishing the Sparkle Spider Basket Crochet Pattern

Thread a long strand of color B onto a tapestry sewing needle. Use this to sew around the outside of the spider body shape as shown to make the shape more oval. Next, thread another long strand and sew legs on as desired. I also used scrap green yarn to make some spooky eyes on mine. Weave in all your remaining ends. I think this has quite a nice shape as is, but you could absolutely starch it for a bit more stiffness, or block it to a more desired shape.
If you prefer a PDF, I have that available in my ravelry shop! Here is the link to this pattern in my shop.

Thank you so much!

Don’t forget to go and join the CAL here on the Facebook page!

You can also go to this blog post from Underground Crafter to see all the patterns that have been released so far in the event!
Love it? Share it!
  • Share on X (Opens in new window) X
  • Share on Facebook (Opens in new window) Facebook
  • Share on Pinterest (Opens in new window) Pinterest
  • Print (Opens in new window) Print

August 25, 2026 by Priscilla

Lacy Edged Crochet Shawl Pattern

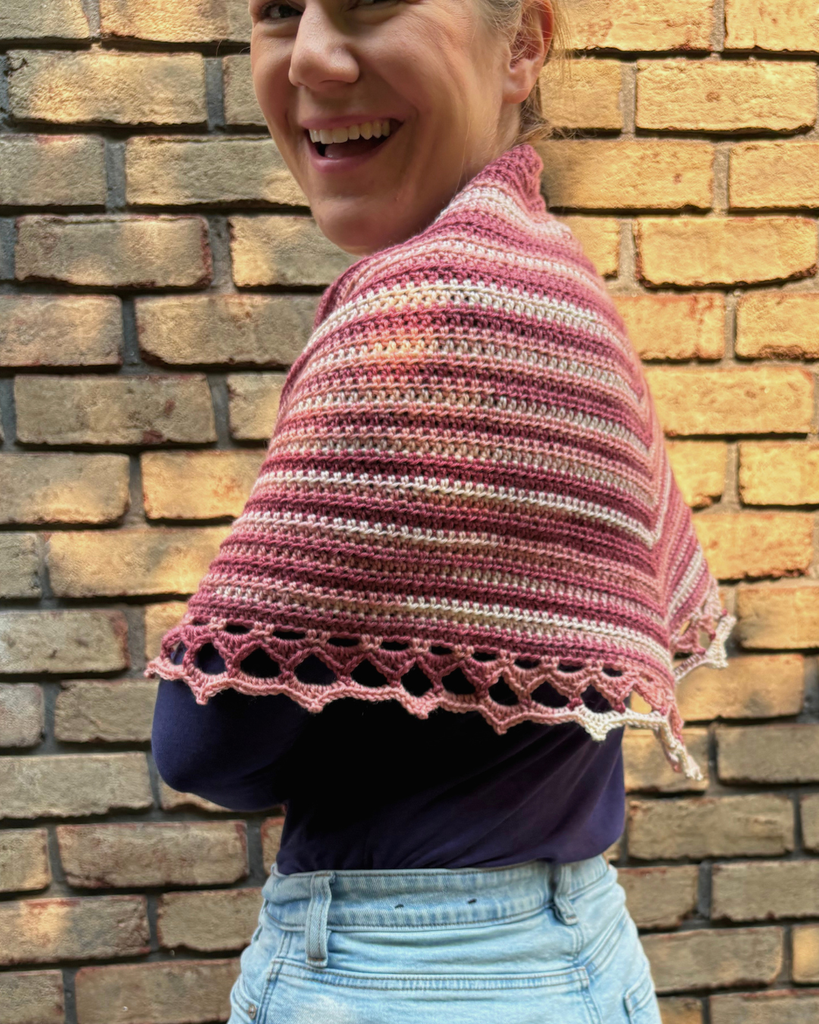
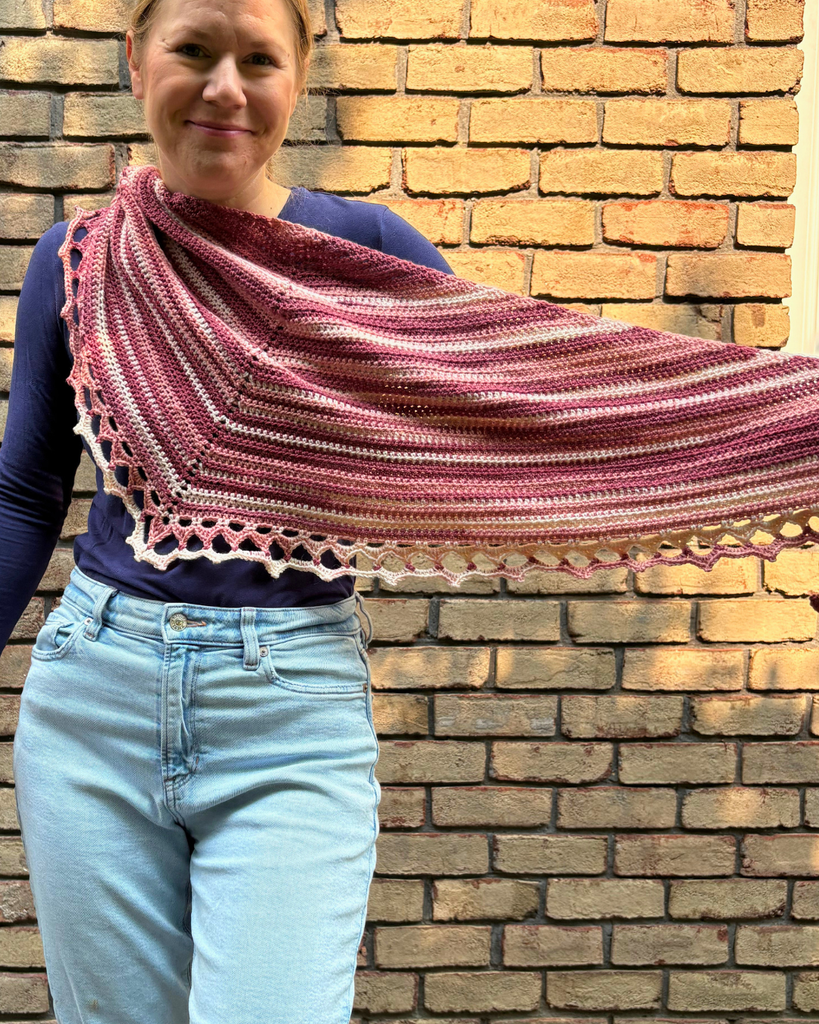
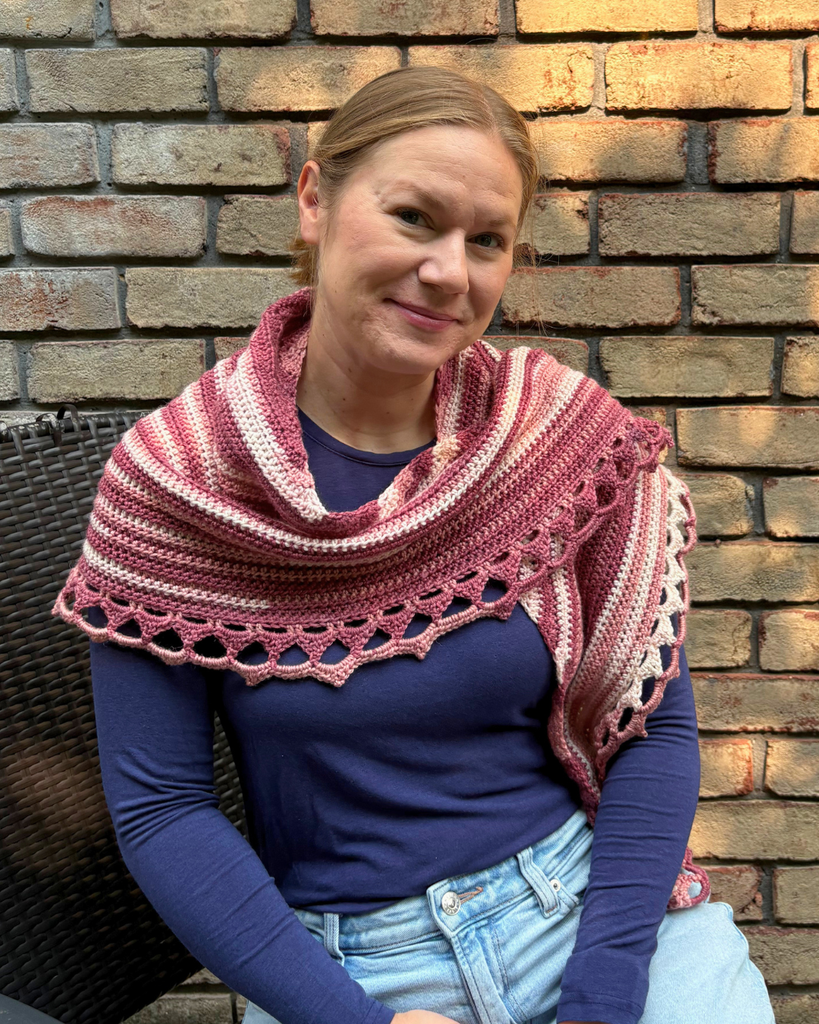
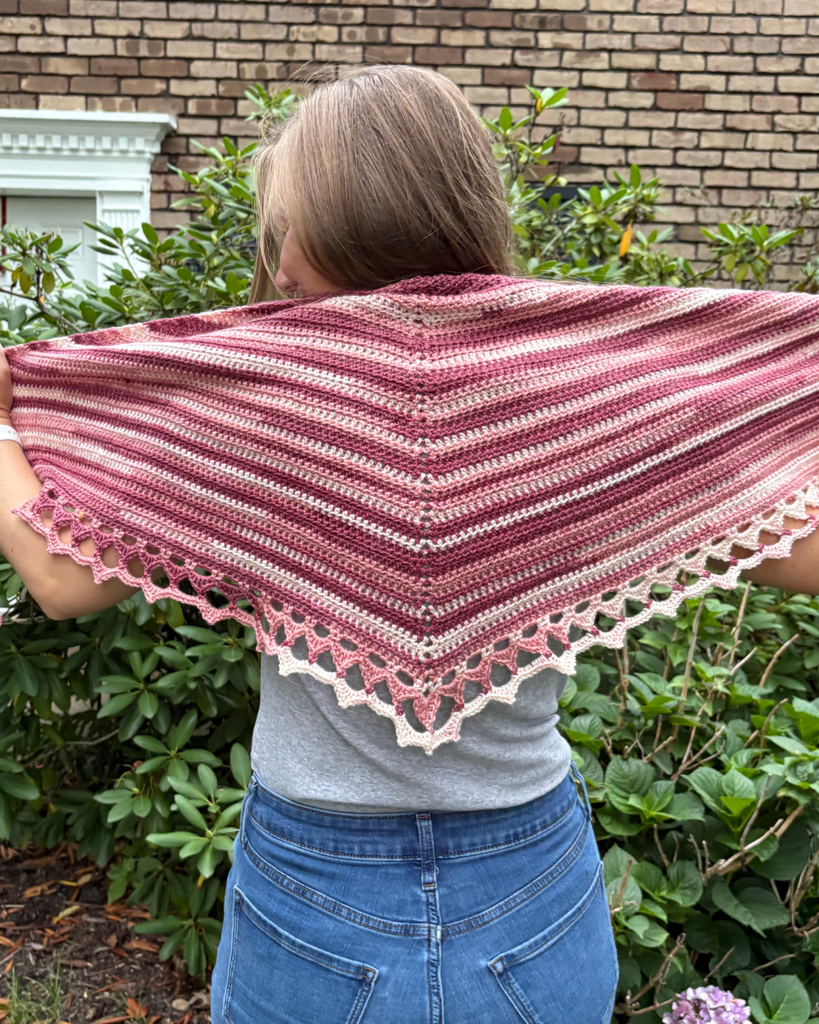
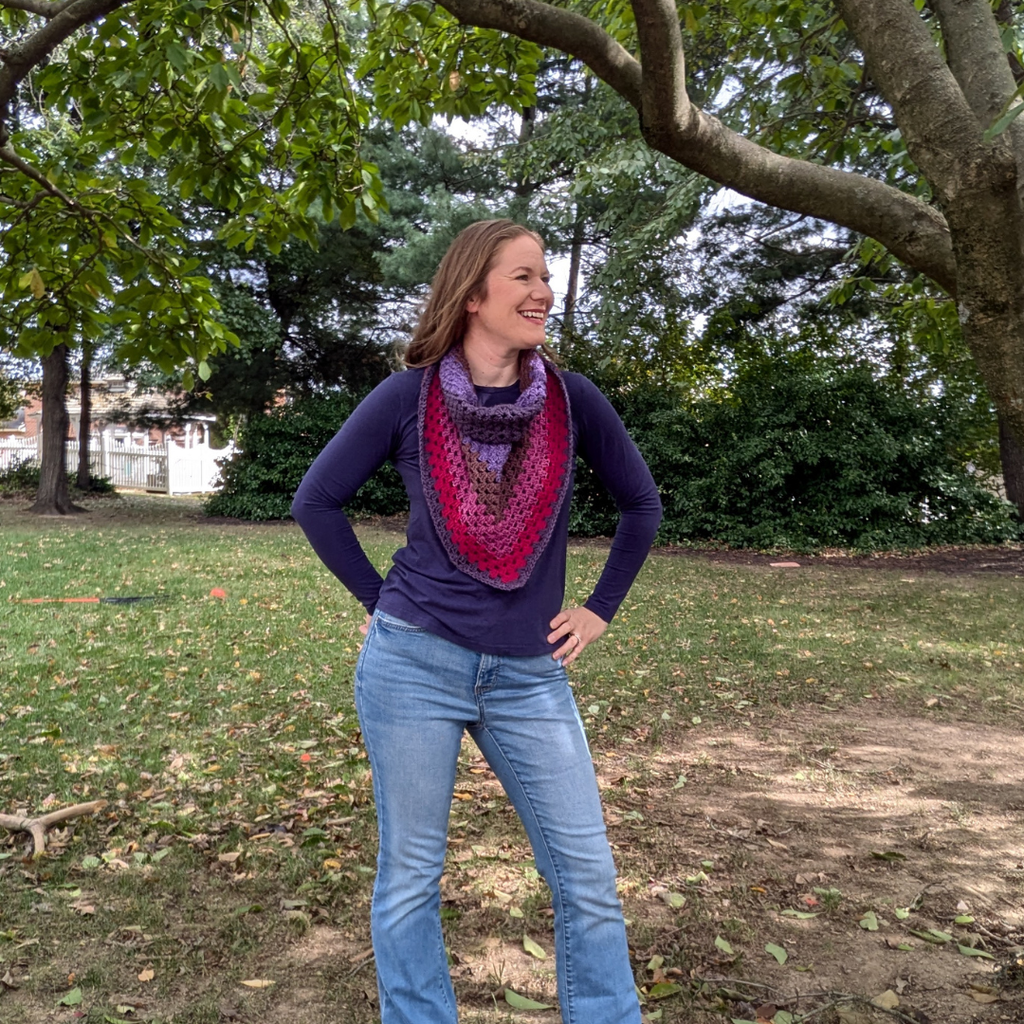
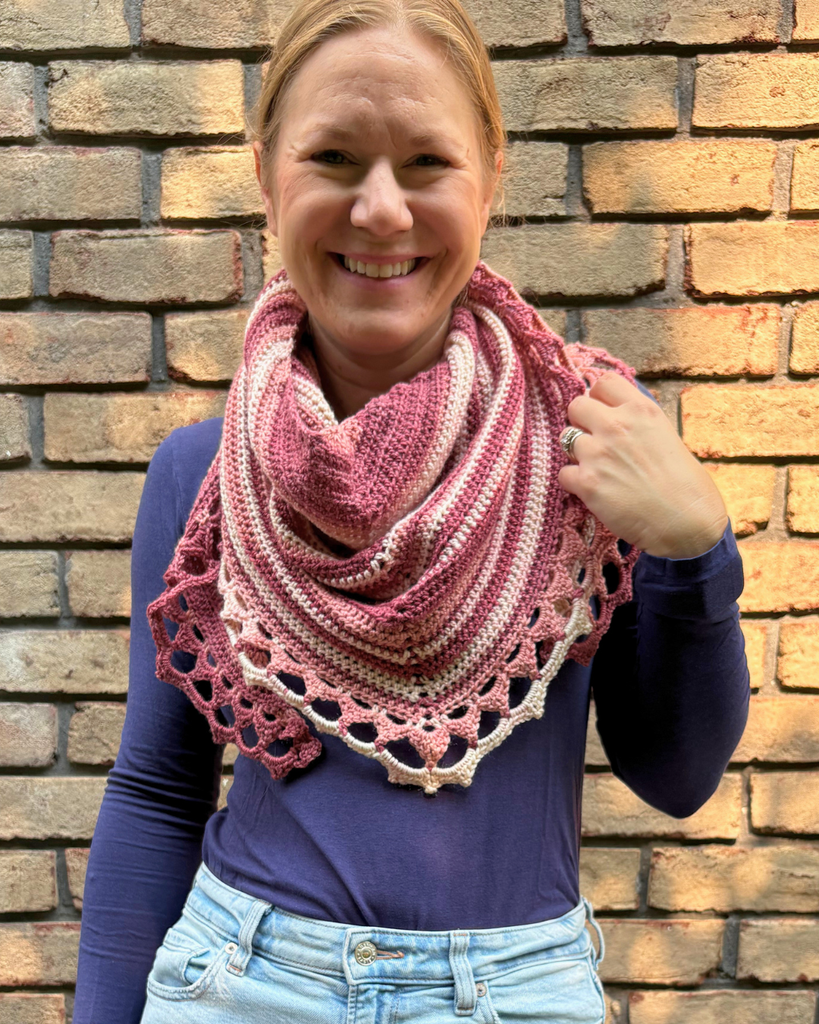
This delicate shawl design is a beautiful addition to your fall wardrobe! The Shaded Elegance Shawl is a lacy edged crochet shawl pattern designed to be quite easy to make and lovely to wear as a light layer on cool fall days. The pattern is written for DK yarn, which keeps the shawl light. I’ve used a variegated yarn for this project, which gives it the “shaded” look, however you could absolutely use one or two colors to make your project as well! I’m planning to make a worsted weight version with two colors, one for the main body and one for the edging and I think it will be gorgeous.

The main body of the project is easy half double crochet and then the lacy edge is a mixture of half double, chains, double, and picots. I love this kind of design where there are mindless rows or rounds, but there is still one aspect of the pattern to give that WOW factor.

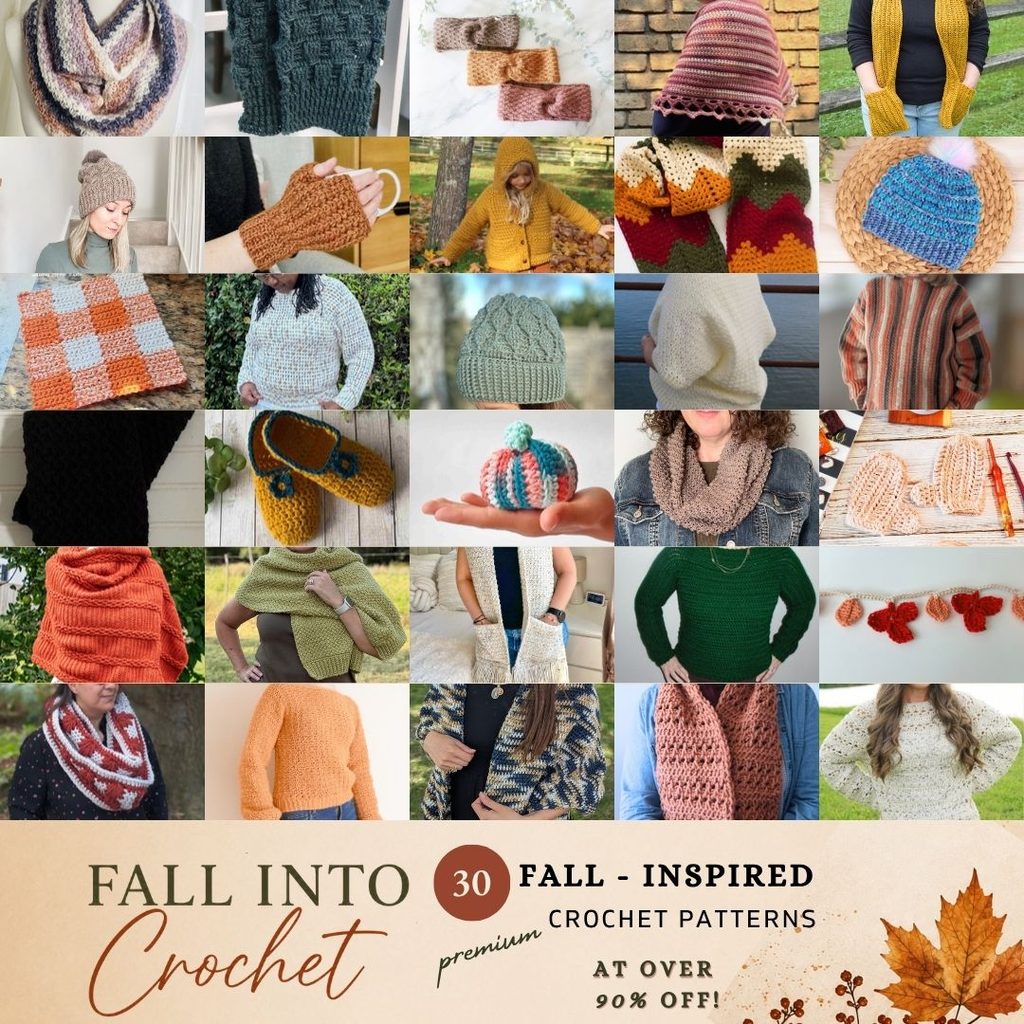
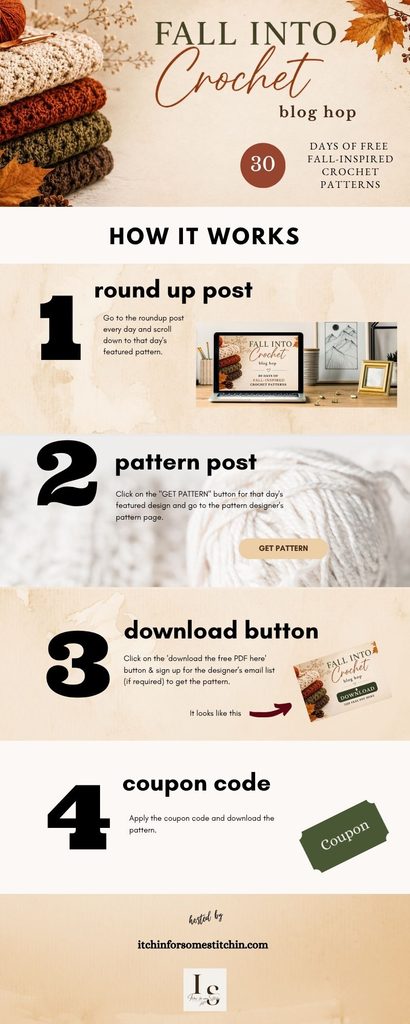
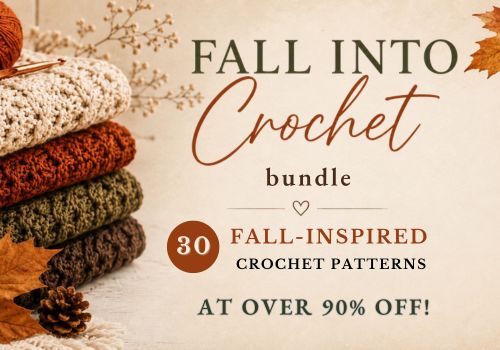
I designed this pattern for the incredible Fall into Crochet Event hosted by Raelynn from Itchin’ for Some Stitchin’ (which is maybe the cutest crochet blog name ever, by the way!) The event is full of stunning pattern for the fall season with a new free pattern each day during the month of September. From hats and scarves to sweaters, cowls, and even a dishcloth, you’ll find something amazing to make for the season. If you don’t want to come back day after day, there is a bundle available for this event where you can get all the patterns for a steep discount. The bundle comes as an e-book and it is available starting August 31st!

I mean look at all these great patterns! It really is a wonderful value! However, many of these patterns are also provided freely on crochet blogs like mine. If you miss a pattern you wanted and the e-book isn’t an option for you, feel free to go back and use the pattern directly from the website, as that also benefits the designers!

SO the first thing you should do is go to the main blog post here for every last detail and then make sure to follow along! I will share each day’s pattern on Instagram, so check now to make sure you are following me here! I like to respect email inboxes, so I typically only email on Fridays, but I’m sure there are several designers that send daily emails and if you want to get those updates so you don’t miss a pattern, check the main blog post again and I’m sure you can find one.

And now it is the time to get to this lacy edged crochet shawl pattern already! Listed below are all the instructions and information you’ll need to complete this project. Have fun crocheting and prepping for the crochet season!

Supplies

  • 680 yards DK yarn (CYC 3), sample made with 2 skeins Loops and Threads Luxe Merino Variegated in color Ruby (55 % merino superwash wool, 45% acrylic)
  • Size 5 mm crochet hook
  • Tapestry needle and scissors
  • Rust proof pins and a blocking mat

Abbreviations (US Terms)

ch = chain

hdc = half double crochet

sl st = slip stitch

st/sts = stitch/stitches

dc = double crochet

sk = skip

tr = treble crochet

MR = magic ring

sp = space

Special Stitches:

picot = ch 3, sl st into 1st ch

Notes

  • This pattern is worked in rows.
  • For the best look, block your shawl with water and rust proof pins on a blocking mat.
  • Stitch counts are marked in { } at the end of each round.
  • Finished dimensions: 60 in x 20 in
  • ( ) are used in the instructions for groups of stitches, and * are used in the pattern to help denote repetition as written.
  • If desired, this shawl can be made larger by adding extra of the repeating row 4. You need to end the half double crochet repeat on a row with a stitch count for where the number of hdc stitches is divisible by 4.

Gauge

15 rows of half double crochet with 16 sts = 4 inch square

Row 1: Ch 20, hdc 3rd ch from hook and each across, ch 2, turn. {18 hdc}

Rows 2-17: Hdc each st across, ch 2, turn. {18 hdc}

Written Instructions

Row 1: MR, hdc 5 into ring, cinch partially, ch 2, turn. {5 hdc}

Row 2: 3 dc first st, hdc next st, (dc, ch 2, dc) next st, hdc next st, 3 dc last st, ch 2, turn. {8 dc, 2 hdc}

Row 3: 3 dc first st, hdc next 3 sts, (dc, ch 2, dc) in ch-2 sp, hdc next 4 sts, 3 dc last st, ch 2, turn. {8 dc, 7 hdc}

Row 4: 3 dc first st, hdc to ch-2 sp, (dc, ch 2, dc) in ch-2 sp, hdc to last, 3 dc last st, ch 2, turn. {8 dc, 12 hdc}

Rows 5- 55: Repeat row 4.

Row 56: 3 dc first st, *hdc next st, ch 3, sk 2 sts, hdc next st, repeat from * to ch-2 sp, (hdc, ch 4, hdc) in ch-2 sp, *hdc next st, ch 3, sk 2 sts, hdc next st, repeat from * to last, 3 dc last st, ch 2, turn. {69 hdc, 6 dc}

Row 57: 3 dc first st, ch 2, *(2 hdc, dc, picot, dc, 2 hdc) next ch-3 sp, sl st next st, repeat from * to ch-4 sp, (hdc, 2 dc, tr, picot, tr, 2 dc, hdc) in ch-4 sp, sl st next st, *(2 hdc, dc, picot, dc, 2 hdc) next ch-3 sp, sl st next st, repeat from * to last 4 sts, ch 2, sk 3 sts, 3 dc last st, ch 2, turn. {35 picot, 70 hdc, 10 dc, 2 tr}

Row 58: 3 dc first st, *ch 5, sk 7 sts, sl st in top of picot, repeat from * 33 times, ch 6, sl st in top of middle picot, ch 6, repeat from * to last, 3 dc last st, ch 2, turn. {6 dc, 69 sl st}

Row 59: 3 dc first st, ch 2, *(3 hdc, dc, picot, dc, 3 hdc) next ch-5 sp, 6 hdc next ch-5 sp, repeat from * to ch-6 sp, (3 hdc, dc, picot, dc, 3 hdc, dc, picot) in ch-6 sp, (dc, 3 hdc, dc, picot, dc, 3 hdc) next ch-6 sp, hdc 6 next ch-5 sp, repeat from * to last ch-5 sp, (3 hdc, dc, picot, dc, 3 hdc) in last ch-5 sp, ch 2, 3 dc last st. {20 picot, 216 hdc, 74 dc}

Finish off and weave in ends.

Blocking

Wet block if using yarn with wool content. Once most of the water is squeezed gently out, pin to desired shape on blocking mat and let sit until dry.

Lacy Edged Crochet Shawl Pattern

I would LOVE to know when you make one of these! Please feel free to send me a message on Instagram, send me an email or Facebook message, make a project in ravelry, whatever floats your boat!

Don’t forget to check back through the entire hop to find another great pattern to make for fall!

More great projects like this lacy edged crochet shawl pattern for the fall season:

Any Yarn Granny Cowl
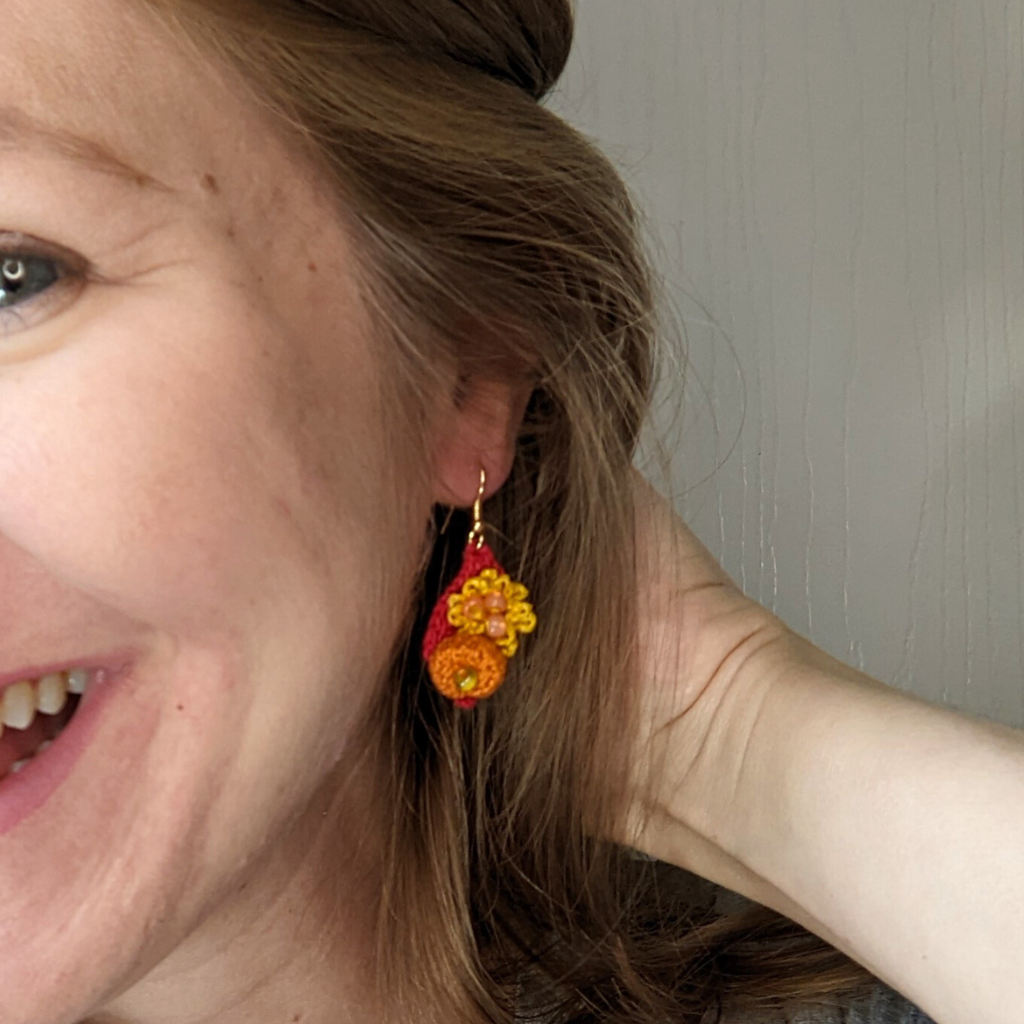
Fall Cluster Earrings

Love it? Share it!

  • Share on X (Opens in new window) X
  • Share on Facebook (Opens in new window) Facebook
  • Share on Pinterest (Opens in new window) Pinterest
  • Print (Opens in new window) Print

May 22, 2026 by Priscilla

Classic Hairbow Crochet Pattern

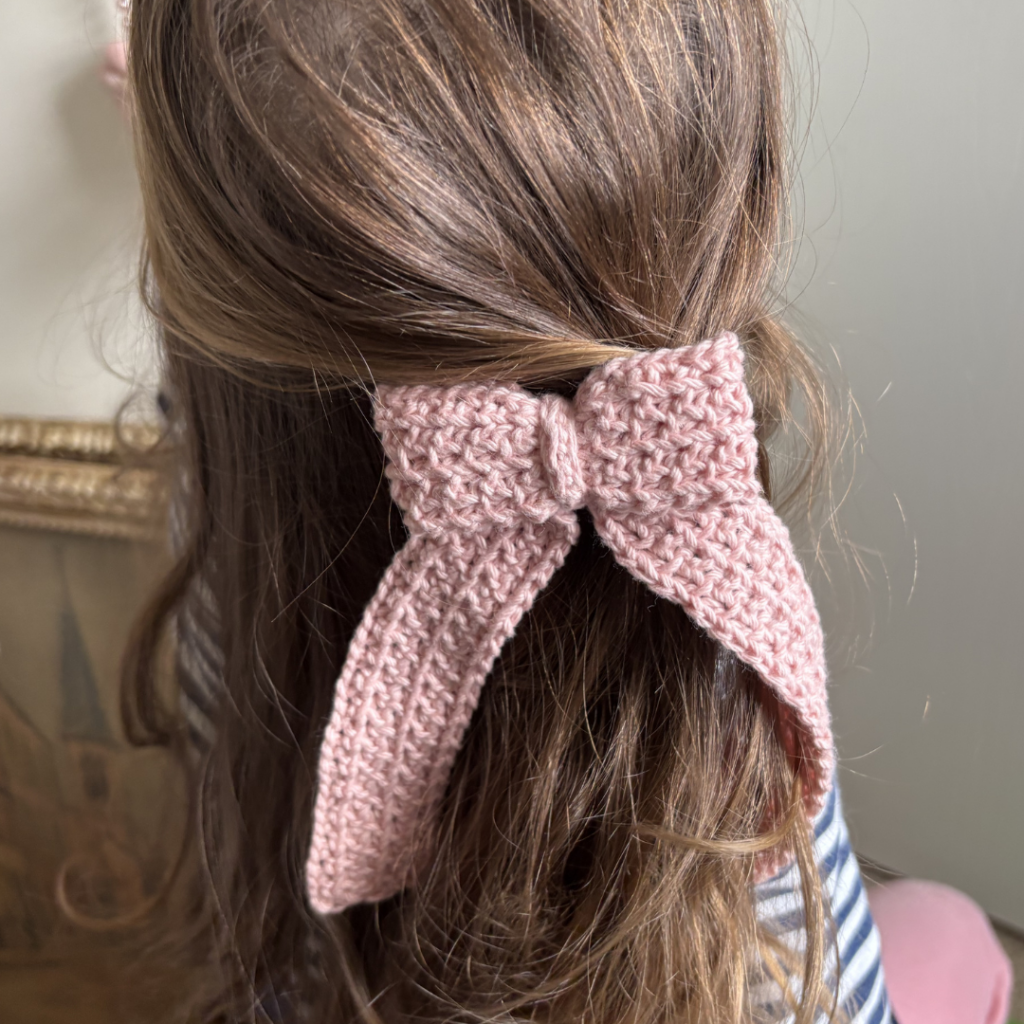
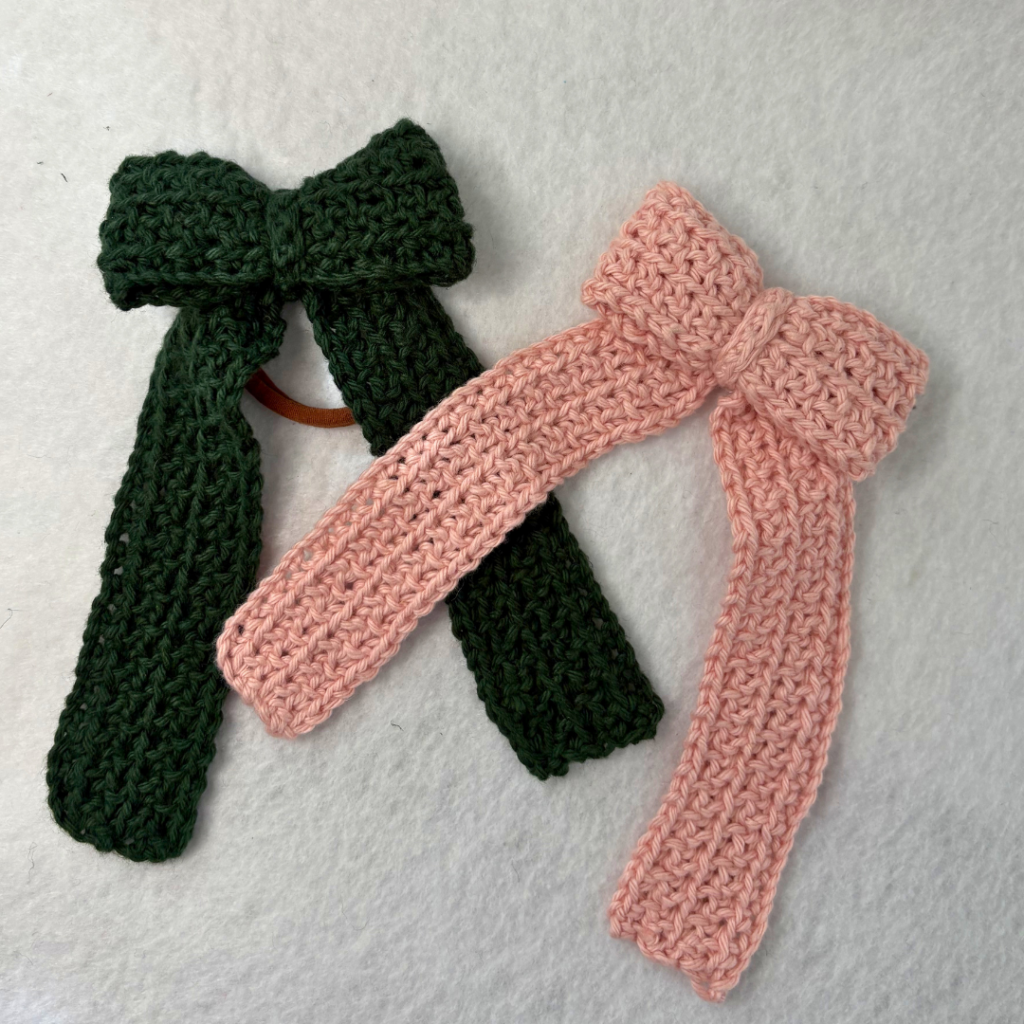
From time to time, I like to wear a fun hair accessory. This one is more of a everyday accessory, so I’m happy to introduce to you the Everyday Hairbow! You’ll make this classic hairbow crochet pattern over and over again because it is quick to make and the texture is a unique pattern. The other great thing about this pattern is that you could customize and make it versatile. I wrote the pattern with CYC 3 DK cotton yarn, but you can use lighter yarn for a little bow or thicker yarn for a big statement piece.

classic hairbow crochet pattern

I love the stitch pattern I created for this hairbow! The way you work in the front loops give it a really nice texture. You’ll work up three separate pieces and then seam them together. Then you can attach the bow to a hair tie or clip. I think these are a great little gift pattern to have in your arsenal when you want to give handmade but you are short on time.

I used Cotlin yarn from KnitPicks/Crochet.com. P.S. Weird rant: I hate that the “crochet” counterpart isn’t really WeCrochet anymore. It makes it hard to write about the company, like I can’t say oh it’s Cotlin yarn from Crochet. End rant. I like this yarn! The colors are so pretty and it is an easier cotton to work with than others.

Supplies

  • CYC 3 DK yarn: 100-125 yards (sample is KnitPicks Cotlin)
  • crochet hook US size E (3.5 mm) or size needed to obtain gauge
  • tapestry sewing needle
  • scissors and measuring tape/gauge ruler
  • hair elastic or alligator style hair clip (optional: glue)

Notes

Stitch counts are marked in ( ) at the end of each row.

Abbreviations (US Terms)

  • ch = chain
  • st/sts = stitch/stitches
  • sc = single crochet
  • sk st = skip stitch
  • FLO = front loop only

Gauge Swatch

2 in by 2 in swatch = 12 sts in 8 rows

Row 1: Ch 18, sc 2nd ch from hook, *ch 1, sk st, sc next st, repeat from * across. (9 sc)

Rows 2-9: Turn, *ch 1, sk st, sc next st, repeat from * across. (9 sc)

Finished Measurements

2.5 in by 4.5 in

Written Instructions

Bow:

Row 1: Ch 40, sc 2nd ch from hook, * ch 1, sk st, sc, repeat from * across. (20 sc, 19 ch-1 sp)

Row 2: Turn, ch 1, sk st, sc FLO, repeat from * across. (20 sc FLO, 19 ch-1 sp)

Rows 3-5: Repeat row 2.

Fasten off, use ends to sew end to end.

Ribbon:

Row 1: Ch 70, sc 2nd ch from hook, * ch 1, sk st, sc, repeat from * across. (35 sc, 34 ch-1 sp)

Row 2: Turn, ch 1, sk st, sc FLO, repeat from * across. (35 sc FLO, 34 ch-1 sp)

Rows 3-5: Repeat row 2.

Fasten off and weave in ends.

Tie:

Row 1: Ch 10, sc 2nd ch from hook, sc each st across, fasten off. (10 sc) Place the middle of the bow and the middle of the ribbon together, place the hair tie or hair clip in as well, then wrap the tie around and sew end to end around the middle of the bow. Alternatively, assemble bow and glue to desired hair clip.

I hope you loved making this pattern! Hair accessories are fun to make and perfect when you need something satisfying. Here are some other hair accessory patterns:

crochet floral festival headpiece

Love it? Share it!

  • Share on X (Opens in new window) X
  • Share on Facebook (Opens in new window) Facebook
  • Share on Pinterest (Opens in new window) Pinterest
  • Print (Opens in new window) Print

May 2, 2026 by Priscilla

Easy Crochet Baby Bonnet Pattern

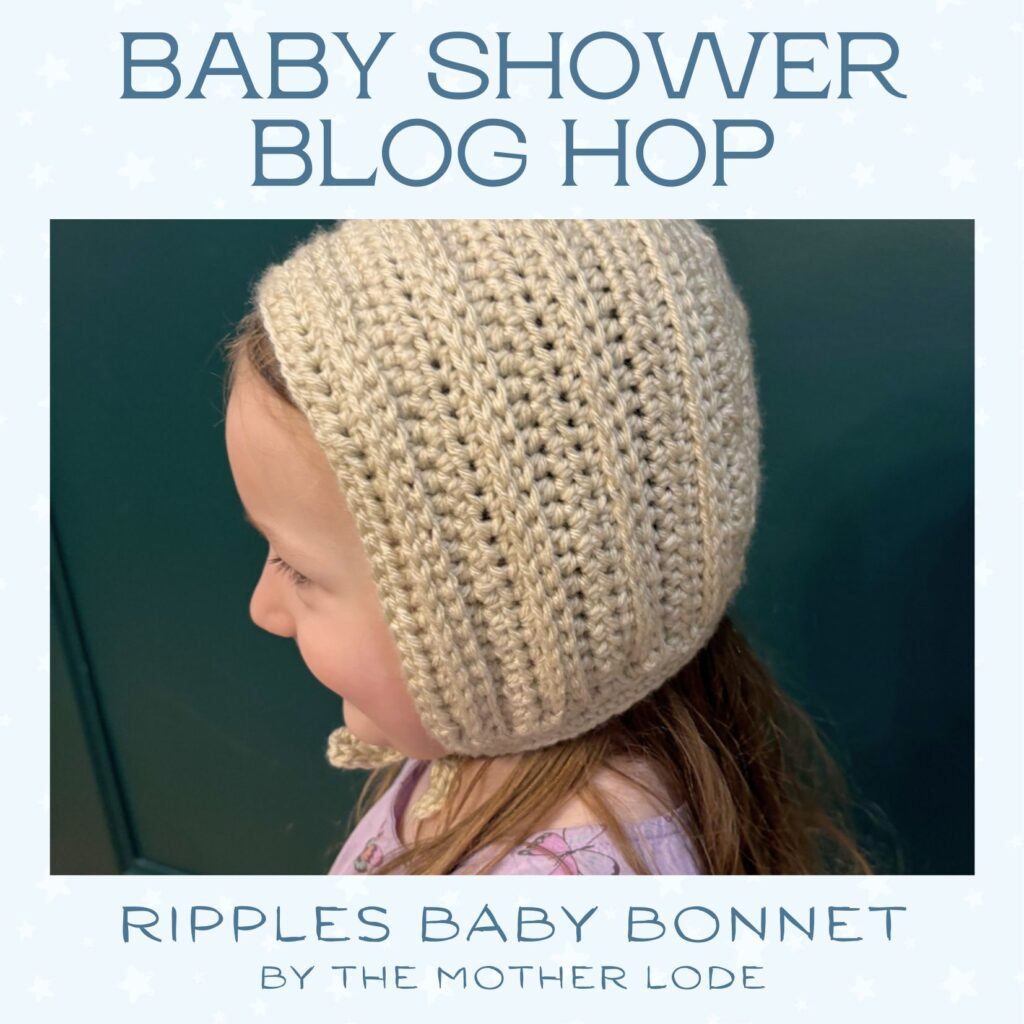
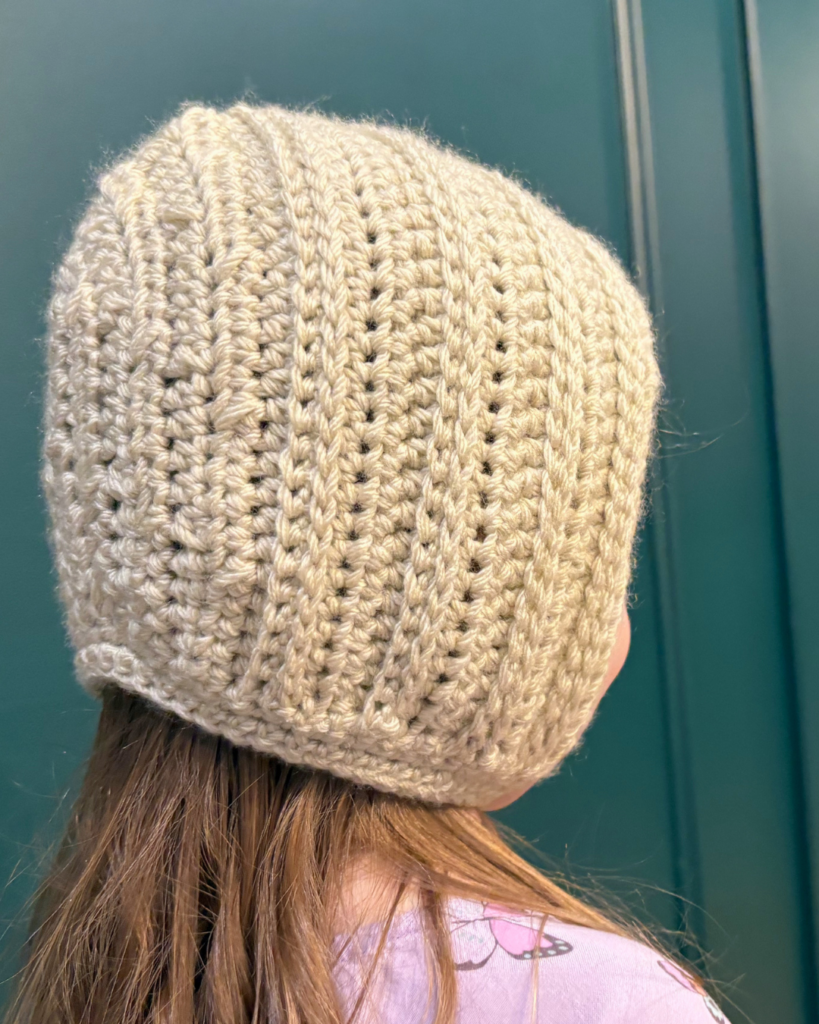
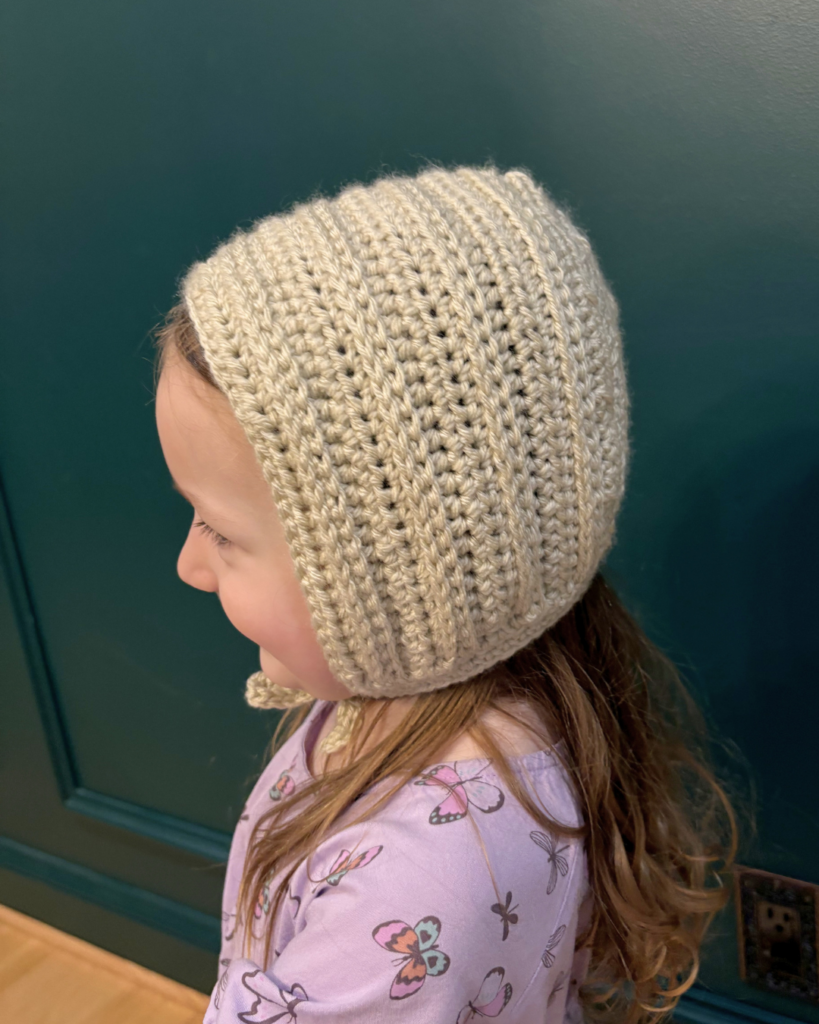
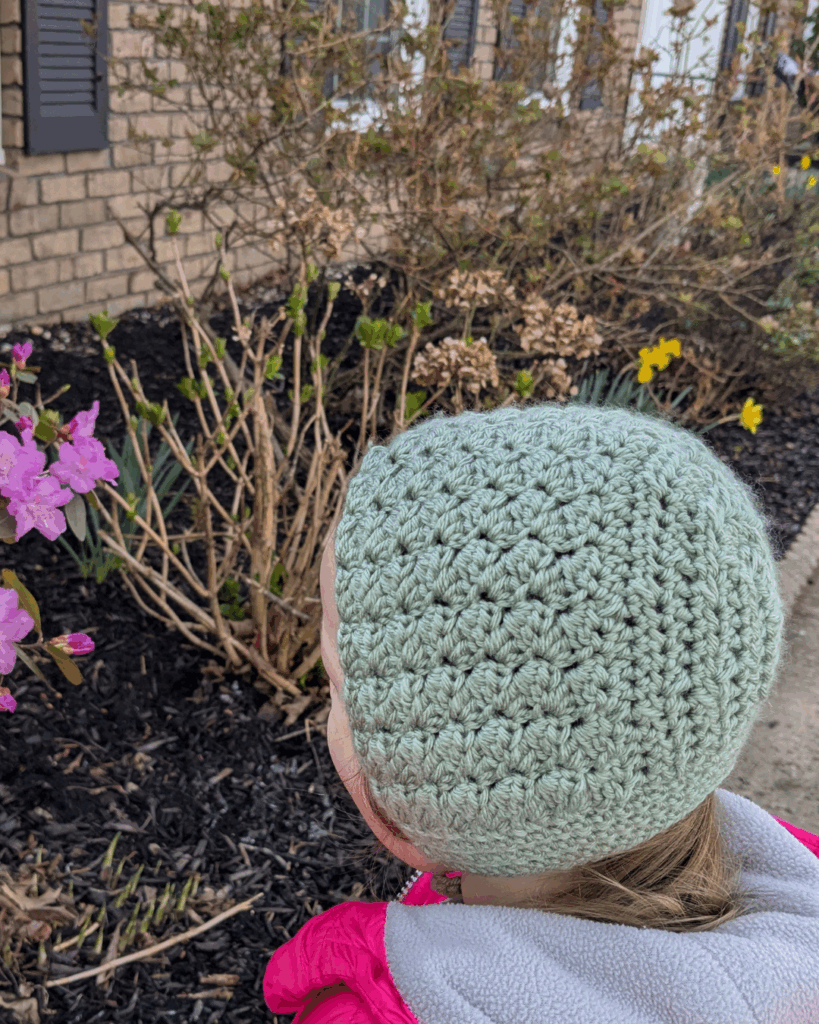
You’ll make this baby bonnet pattern over and over again! It’s such an easy pattern that works well with most yarn fibers. It’s great with a high quality acrylic which is good for a baby pattern, but you could absolutely use a soft alpaca yarn as well. This pattern just has a bit of texture in the ridged rows. I love using the back and front loop stitches to create these type of patterns. Who are you going to make this easy crochet baby bonnet pattern for?

If you don’t have someone in mind, you could make one to keep on hand for baby showers! Especially since you probably have half a skein of acrylic lying around waiting for a scrap project anyway. Make one or two of these and you’ll have them ready. I used Lion Brand Basic Stitch for this design. A good substitute for this would be some Mighty Stitch from KnitPicks. I like the color palette they have actually better than the Lion Brand.

This easy crochet baby bonnet pattern was written just for the Baby Shower Blog Hop 2026 hosted by Ambassador Crochet! This is such a great event to stock up on baby patterns! Head over to the blog post and hunt through all the amazing patterns.

You can use this free pattern right here on the blog. As part of the blog hop, you can get the PDF of this pattern for 50% off! Go to the main blog post for the event here for the code, then use the code on ravelry! Thank you so much!

Okay, let’s get to the pattern!

Supplies

  • CYC 4 worsted yarn 100-150 yards (sample is acrylic worsted yarn)
  • crochet hook US size I (5.5 mm) or size needed to obtain gauge
  • tapestry sewing needle
  • scissors and measuring tape/gauge ruler

Abbreviations (US Terms)

  • ch = chain
  • st/sts = stitch/stitches
  • sk = skip
  • sc = single crochet
  • BLO= back loop only
  • sl st = slip stitch
  • hdc = half double crochet
  • dec = yo, insert hook in next st, pull up a loop, yo, insert hook in next st, pull up a loop and pull through all 4 loops on hook
  • Fhdc= foundation half double crochet: ch 3, yo, insert hook in 3rd ch from hook, *pull up a loop, yo, pull through one loop on hook, yo, pull through three loops
  • for subsequent sts: yo, insert hook in st made by bold section above, repeat from *

Gauge Swatch

4 in by 4 in swatch = 16 sts in 12 rows

Row 1: Fhdc 18, turn. (18 hdc)

Row 2: Ch 1, hdc each st across, turn. (18 hdc)

Row 3: Ch 1, sc in the 3rd loop of prev row hdc each st across, turn. (18 sc)

Row 4: Ch 1, hdc BLO each st across, turn. (18 hdc)

Row 5: Ch 1, sc each st across, turn. (18 sc)

Rows 6-14: Repeat rows 2-5 respectively.

Notes

  • Stitch counts are marked in [ ] at the end of each row, with different sizing in parentheses as follows: Infant: 0-6 months, (Baby: 6-12 months, Toddler: 1-3 years, Child: 4-10 yrs)
  • Turning chains do not count as stitches.
easy crochet baby bonnet pattern

Written Instructions

Size: Infant: 0-6 months, (Baby: 6-12 months, Toddler: 1-3 years, Child: 4-10 yrs)

ALL SIZES

Row 1: Fhdc 38 (44, 50, 54), turn. [38 (44, 50, 54 hdc)]

Row 2: Ch 1, hdc each st across, turn. [38 (44, 50, 54 hdc)]

Row 3: Ch 1, sc in the 3rd loop of prev row hdc each st across, turn. [38 (44, 50, 54 sc)]

Row 4: Ch 1, hdc BLO each st across, turn. [38 (44, 50, 54 hdc)]

Row 5: Ch 1, sc each st across, turn. [38 (44, 50, 54 sc)]

Rows 6-10 (12, 14, 18): Repeat rows 2-5 respectively.

Continue below to appropriate size.

Infant

Row 11: Hdc first 4 sts, dec, hdc next 4 sts, dec, hdc next 4 sts, dec, hdc next 2 sts, dec, hdc next 4 sts, dec, hdc next 4 sts, dec, hdc last 4 sts. [6 dec, 26 hdc]

Row 12: Hdc first 4 sts, dec, hdc next 4 sts, dec, hdc next 8 sts, dec, hdc next 4 sts, dec, hdc last 4 sts. [4 dec, 24 hdc]

Row 13: Hdc first 3 sts, dec, hdc next 3 sts, dec, hdc next st, dec, hdc next st, dec, hdc next st, dec, hdc next 3 sts, dec, hdc last 3 sts. [6 dec, 16 hdc]

Row 14: Hdc first 3 sts, dec, hdc next 2 sts, dec, hdc next st, dec, hdc next st, dec, hdc next 2 sts, dec, hdc last 3 sts. [5 dec, 12 hdc]

Row 15: Hdc first 2 sts, dec, hdc next 2 sts, dec, hdc next st, dec, hdc next 2 sts, dec, hdc last 2 sts. [4 dec, 9 hdc]

Continue to directions below for neckband

Baby

Row 13: Hdc first 4 sts, dec, hdc next 4 sts, dec, hdc next 5 sts, dec, hdc next 5 sts, dec, hdc next 5 sts, dec, hdc next 4 sts, dec, hdc last 4 sts. [6 dec, 31 hdc]

Row 14: Hdc first 4 sts, dec, hdc next 4 sts, dec, hdc next 4 sts, dec, hdc next st, dec, hdc next 4 sts, dec, hdc next 4 sts, dec, hdc last 4 sts. [6 dec, 25 hdc]

Row 15: Hdc first 4 sts, dec, hdc next 4 sts, dec, hdc next st, dec, hdc next st, dec, hdc next st, dec, hdc next 4 sts, dec, hdc last 4 sts. [6 dec, 19 hdc]

Row 16: Hdc first 3 sts, dec, hdc next 3 sts, dec, hdc next 5 sts, dec, hdc next 3 sts, dec, hdc last 3 sts. [4 dec, 18 hdc]

Row 17: Hdc first 2 sts, dec, hdc next 2 sts, dec, dec, hdc next st, dec, dec, hdc next 2 sts, dec, hdc last 2 sts. [6 dec, 9 hdc]

Continue to directions below for neckband

Toddler

Row 15: Hdc first 4 sts, dec, hdc next 4 sts, dec, hdc next 4 sts, dec, hdc next 4 sts, dec, hdc next st, dec, hdc next 4 sts, dec, hdc next 4 sts, dec, hdc next 4 sts, dec, hdc last 4 sts. [8 dec, 33 hdc]

Row 16: Hdc first 4 sts, dec, hdc next 4 sts, dec, hdc next 4 sts, dec, hdc next 5 sts, dec, hdc next 4 sts, dec, hdc next 4 sts, dec, hdc last 4 sts. [6 dec, 31 hdc]

Row 17: Hdc first 4 sts, dec, hdc next 4 sts, dec, hdc next 3 sts, dec, hdc next st, dec, hdc next 3 sts, dec, hdc next 4 sts, dec, hdc last 4 sts. [6 dec, 22 hdc]

Row 18: Hdc first 3 sts, dec, hdc next 3 sts, dec, hdc next 2 sts, dec, hdc next st, dec, hdc next 2 sts, dec, hdc next 3 sts, dec last 3 sts. [6 dec, 17 hdc]

Row 19: Hdc first 3 sts, dec, hdc next 3 sts, dec, hdc next 3 sts, dec, hdc next 3 sts, dec, hdc last 3 sts. [4 dec, 15 hdc]

Row 20: Hdc first 2 sts, dec, hdc next 3 sts, dec, hdc next st, dec, hdc next 3 sts, dec, hdc last 2 sts. [4 dec, 11 hdc]

Continue to directions below for neckband

Child

Row 17: Hdc first 4 sts, dec, hdc next 3 sts, dec, hdc next 4 sts, dec, hdc next 4 sts, dec, hdc next 2 sts, dec, hdc next st, dec, hdc next 2 sts, dec, hdc next 3 sts, dec, hdc next 4 sts, dec, hdc next 4 sts, dec, hdc last 4 sts. [10 dec, 35 hdc]

Row 18: Hdc first 4 sts, dec, hdc next 4 sts, dec, hdc next 4 sts, dec, hdc next 2 sts, dec, hdc next st, dec, hdc next 2 sts, dec, hdc next 4 sts, dec, hdc next 4 sts, dec, hdc last 4 sts. [8 dec, 29 hdc]

Row 19: Hdc first 4 sts, dec, hdc next 4 sts, dec, hdc next 4 sts, dec, hdc next st, dec, hdc next 4 sts, dec, hdc next 4 sts, dec, hdc last 4 sts. [6 dec, 25 hdc]

Row 20: Hdc first 4 sts, dec, hdc next 4 sts, dec, hdc next 7 sts, dec,, dec, hdc next 4 sts, dec, hdc last 4 sts. [4 dec, 23 hdc]

Row 21: Hdc first 3 sts, dec, hdc next 3 sts, dec, hdc next st, dec, hdc next st, dec, hdc next st, dec, hdc next 3 sts, dec, hdc last 3 sts. [6 dec, 15 hdc]

Row 22: Hdc first 3 sts, dec, hdc next 3 sts, dec, hdc next st, dec, hdc next 3 sts, dec, hdc last 3 sts. [4 dec, 13 hdc]

Row 23: Hdc first 2 sts, dec, hdc next 2 sts, dec, hdc next st, dec, hdc next 2 sts, dec, hdc last 2 sts. [4 dec, 9 hdc]

Continue to directions below for neckband

Neckband ALL SIZES

Fold the last hdc row in half and sl st together to close the back of the bonnet, or fasten off, fold and seam together. Fasten off, turn right side out.

Reattach yarn in the bottom corner of bonnet (Row 1.) Sc 44( 48, 54, 60) evenly across the bottom of bonnet, working approximately 1 st in the end of each row, ch 1, turn. Continue for 2 rows of single crochet for Infant and Baby sizes, 4 rows for Toddler and Child. Do not fasten off.

Continuing from above to create ties: Ch 27, sl st each ch across, then sl st along bottom of bonnet (where you just completed the single crochet rows) to opposite corner. Ch 27, sl st each ch across, fasten off and weave in ends.

Thank you so much for coming by today! Here are my other easy crochet baby bonnet patterns if you’d like to explore!

Love it? Share it!

  • Share on X (Opens in new window) X
  • Share on Facebook (Opens in new window) Facebook
  • Share on Pinterest (Opens in new window) Pinterest
  • Print (Opens in new window) Print

March 19, 2026 by Priscilla

Crochet Floral Festival Headpiece

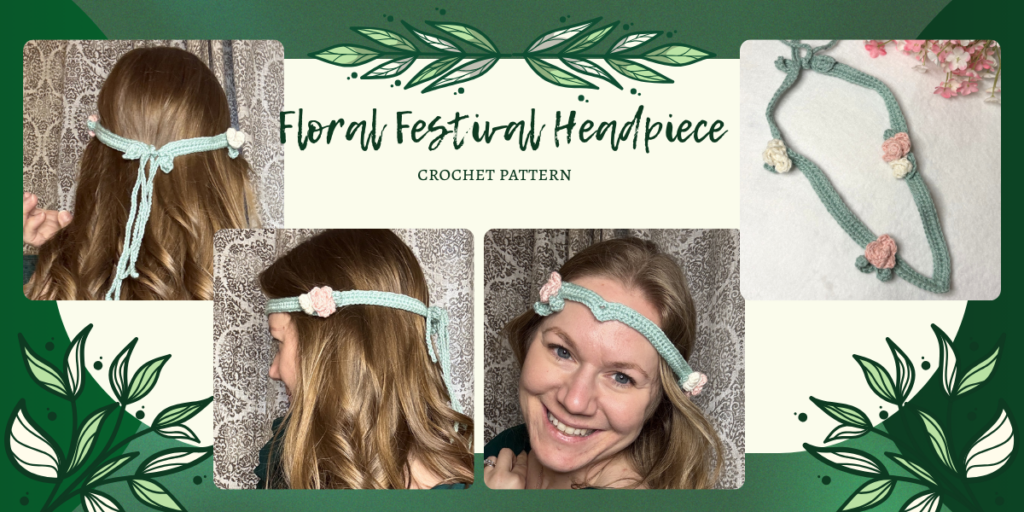
I love a good fantasy book or movie! When Lisa from Green Fox Farms was looking for submissions for her Geeks and Gamers hop, I thought that was such a fun theme and wanted to join in! This crochet Floral Festival Headpiece is perfect for Renaissance fairs, fantasy conventions, music festivals, or regular ole Halloween! Friday, March 20th, you can get the pattern free right here! Scroll down to the download button below.

crochet floral festival headpiece

Some more about the Geeks and Gamers hop: so many cute patterns for fantasy lovers and gamers! I’m really impressed by these unique patterns. Don’t miss out! You can grab them all with the low cost bundle right here!

Here is how the design comes together. Select some DK yarn. I think natural fibers are important for this pattern because it’s going to sit so close to your skin. I used cotton and bamboo both for the samples and they worked well. You could go totally minimal and pick any color for a simple headpiece. I also love the look of the flowers, though, it has more of a fantasy romantic vibe, for which you’ll need some green. There are two simple flower and leaf patterns below that you could use, so you may want two floral colors to go with your green. Let’s adventure together with the free pattern!

Supplies

  • CYC 3 DK yarn: 100-150 yards (sample is K and C Essential Cotton) preferably green and floral colors
  • crochet hook US size E (3.5 mm) or size needed to obtain gauge
  • tapestry sewing needle
  • scissors and measuring tape/gauge ruler

Abbreviations (US Terms)

ch = chain

st/sts = stitch/stitches

sc = single crochet

sl st = slip stitch

hdc = half double crochet

dc = double crochet

Special Stitches

picot = ch 3, sc in 1st ch

Gauge Swatch

2 in by .5 in swatch = 13 sts in 2 rows

Row 1: Ch 15, sc 2nd ch from hook and each ch across until last, 2 sc in last st. (15 sc)

Row 2: Working onto the other side of the chain: 2 sc in 1st ch, sc each ch until last, 2 sc last ch. (17 sc) Fasten off.

Notes

  • Stitch counts are marked in ( ) at the end of each row.
  • Assemble in your own unique way. Make a few flowers for the sides, or the very front, or make more flowers and fill the entire headpiece.

Finished Measurements

20 inches, but since you are tying it together, it’s easy to adjust for any adult head.

Written Instructions for Crochet Floral Festival Headpiece

Row 1: Ch 60, picot, ch 61.

Row 2: Sc each ch across to back of picot, sl st in back of picot, sc each remaining ch until last, 2 sc in last ch. (121 sc, 1 sl st)

Row 3: Working onto the other side of the chain: 2 sc in 1st ch, sc each ch until picot, picot in top of picot, sc each remaining ch until last, 2 sc last ch. (126 sc, 1 picot) Do not fasten off, continue to ties.

Ties:

Ch 40, fasten off. *Reattach at end of row 3, ch 40, fasten off.

Repeat from * on other end, such that there are 4 chains total, 2 on each end.

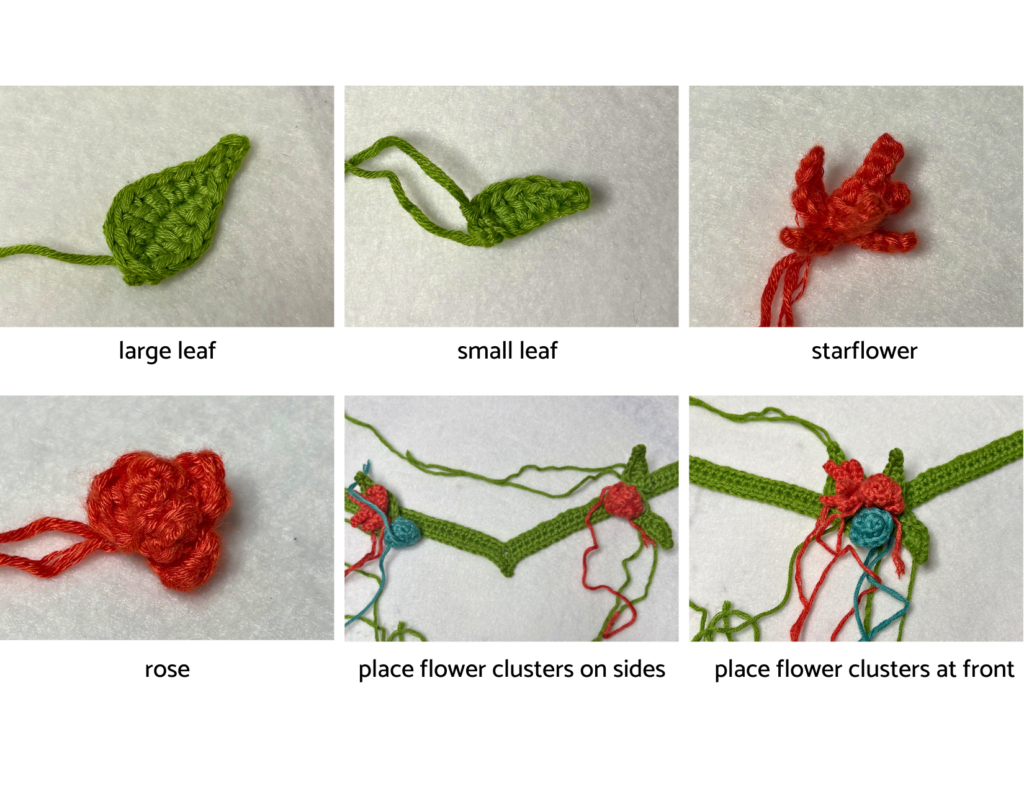
Adornments, make several of each as desired. Have fun customizing!

Small Leaf:

Ch 8, sl st in 2nd ch from hook, sl st, sc, hdc, 2 dc, hdc, sl st. Fasten off, use tail to attach as desired.

Large Leaf:

Ch 10, sl st in 2nd ch from hook, sl st, sc, hdc, 2 dc, dc, hdc, sc, continue on other side of chain: sc 1st ch, hdc, dc, dc, hdc, sc, sl st, sl st. Fasten off.

Rose:

Ch 25, hdc, in 3rd st from hook, dc, hdc, sl st next 2 ch,* ch 1, hdc, dc, hdc, sl st next 2 ch, repeat from * . Fasten off, tightly roll and stitch into rose shape.

Starflower:

Ch 6, *sl st 1st ch from hook, sl st, sc, hdc, sl st, ch 6, repeat from * 4 OR 5 more times, as desired. Turn, sl st in the bottom of each petal. Fasten off, leaving a long tail. Use tail to sew into desired flower shape.

Attach the floral pieces as desired. Weave in all the ends. Tie to fit with one set of the ties and let the others lay as the vines.

Did you like this pattern for the Crochet Floral Festival Headpiece? Check out some of my other floral patterns!

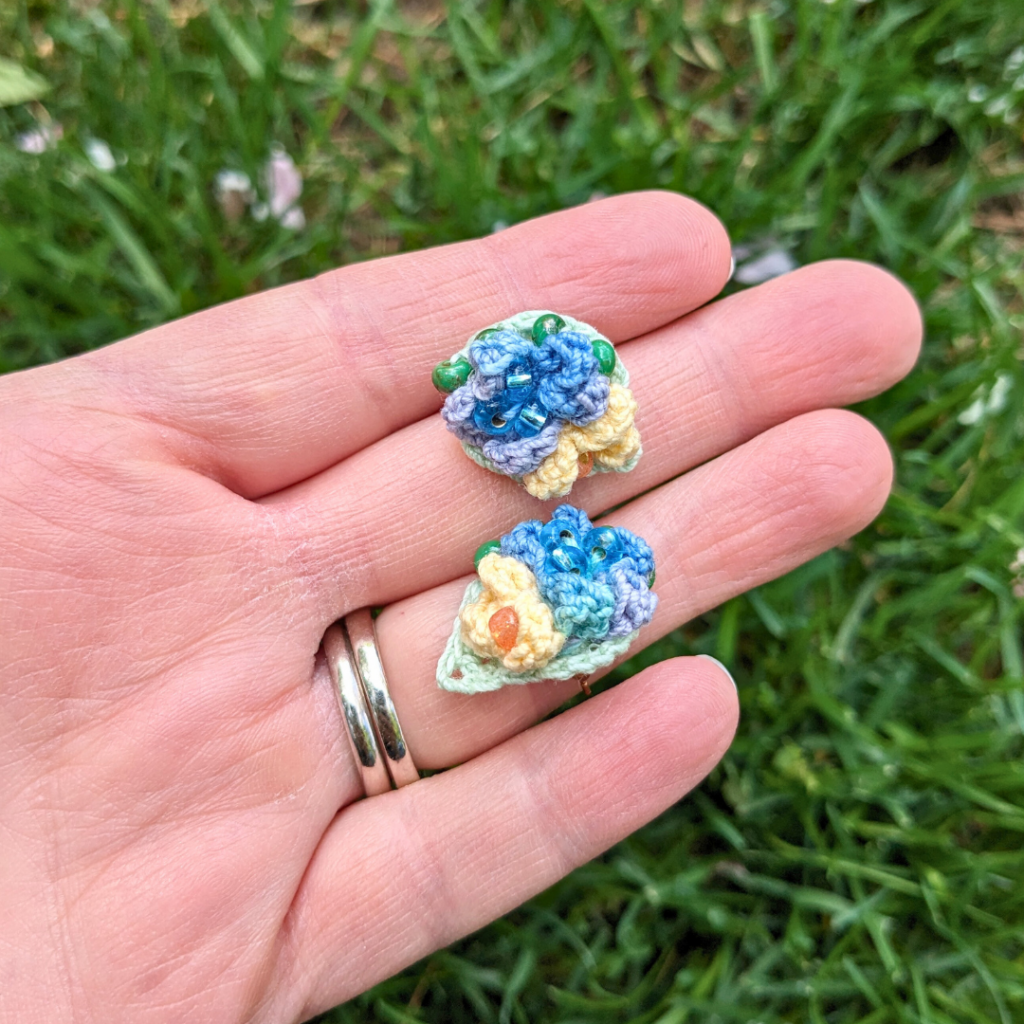
Flower Cluster Earrings

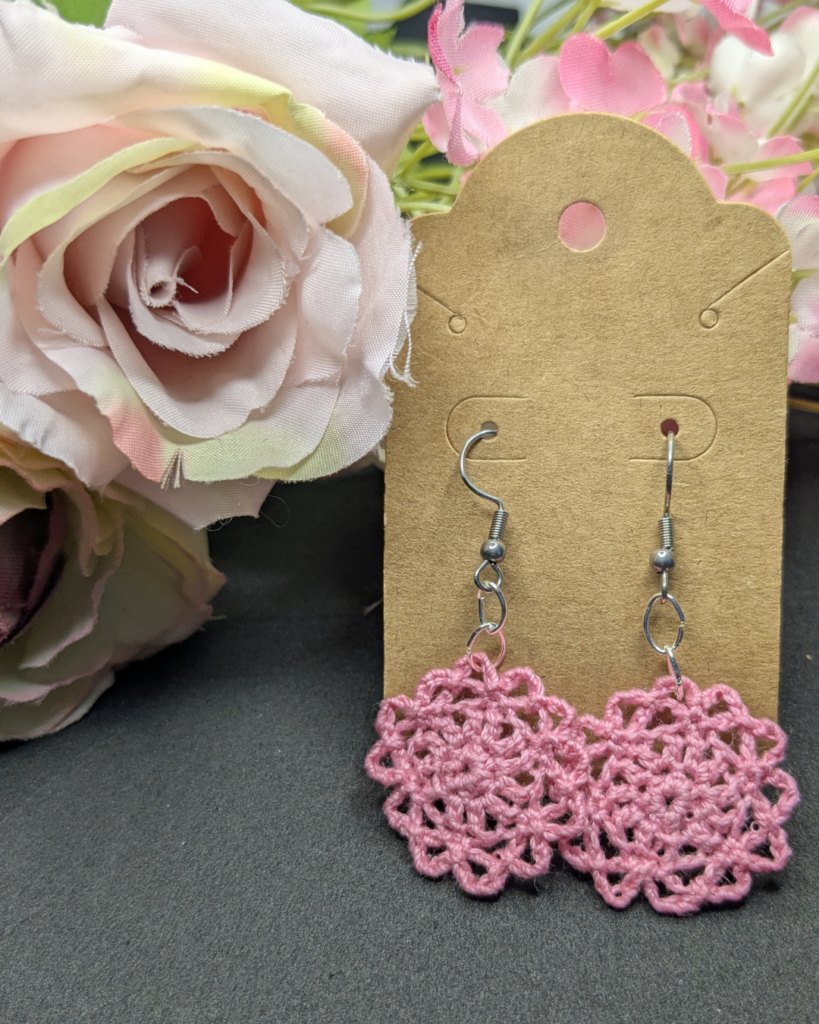
a pair of pink crocheted earrings in the shape of a flower against a black backdrop with silk flowers

Spring Posy Earrings

Marian Crown

Love it? Share it!

  • Share on X (Opens in new window) X
  • Share on Facebook (Opens in new window) Facebook
  • Share on Pinterest (Opens in new window) Pinterest
  • Print (Opens in new window) Print

February 21, 2026 by Priscilla

Star Stitch Cowl Crochet Pattern

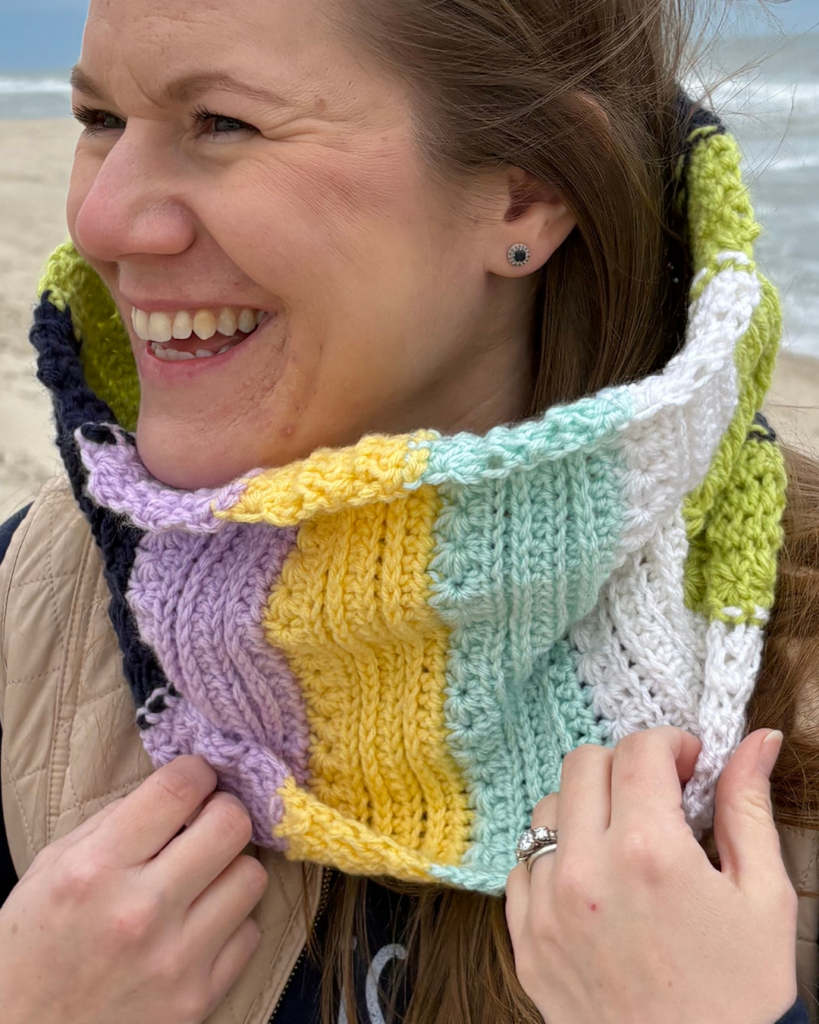
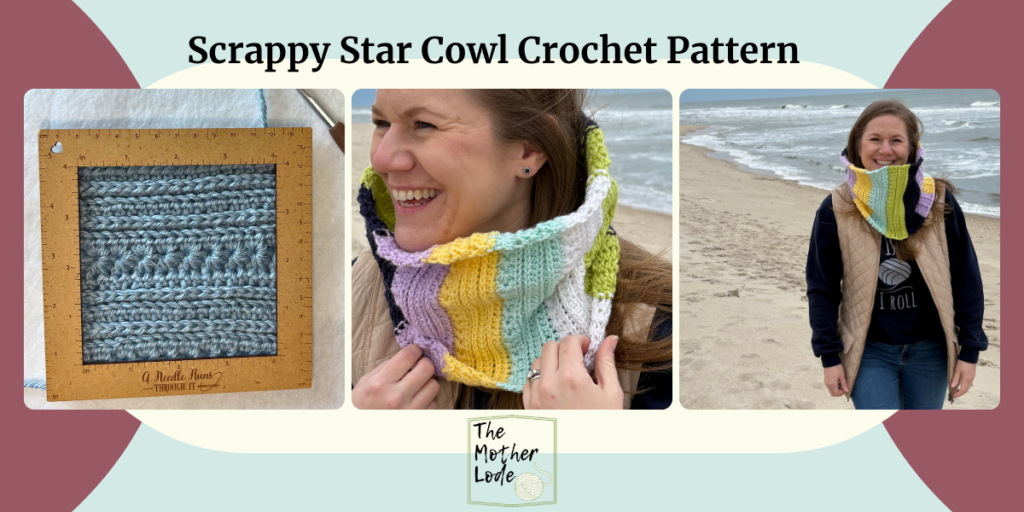
So, you have some scraps. Maybe just a few colors in partial skeins. Maybe lots of colors in itty bitty scraps. You can totally use it to make this Star Stitch Cowl crochet pattern! This pattern makes a warm cowl that is delightfully colorful. I love it for this time of year when we are craving the colors of spring but it’s still quite cold. There is even more snow coming to my area this weekend!

The Crochet Village hosted the Scrap Yarn Blog Hop this February all month long! It’s really fun to collect these scrappy patterns so you can make something out of things you already have. This event has ended, but you can still head over to the main blog post and browse through the patterns for ideas and inspiration!

Alright so let’s have some fun with this pattern! Here is all the information and directions you need for this pattern!

Supplies

  • CYC 4 worsted yarn in any colors desired, approx 250 yards total
  • crochet hook 6 mm or size needed to obtain gauge
  • tapestry sewing needle
  • scissors and measuring tape/gauge ruler

Abbreviations and Stitches (US Terms)

ch = chain

st/sts = stitch/stitches

sk = skip

hdc = half double crochet

hdc BLO = half double crochet in the back loop only

hdc in the 3rd loop = hdc in the third loop on the back

Special Stitches

beg star st = beginning star stitch: in 2nd ch from hook, pull up a loop (2 loops on hook), in each of the next 4 ch, pull up a loop (6 loops on hook), yo, pull through all 6 loops, ch 1

star st A = in top of the previous star, pull up a loop (2 loops on hook), in the ‘leg’ of the last loop you pulled up on the previous stitch, pull up a loop (3 loops on hook), in the same st as the last part of the previous star st, pull up a loop (4 loops on hook), in the next unworked st, yo pull up a loop (5 loops on hook), in next st, pull up a loop (6 loops on hook), yo, pull through all 6 loops, ch 1

end star stitch = in top of the previous star, pull up a loop (2 loops on hook), in the ‘leg’ of the last loop you pulled up on the previous stitch, pull up a loop (3 loops on hook), in the same st as the last part of the previous star st, pull up a loop (4 loops on hook), in the last unworked st, pull up a loop (5 loops on hook) pull through all 5 loops, ch 1, turn

star st B = ch 1, 1 hdc in the top of the end star st, *2 hdc in the eye of the next star st; rep from * up to (and including) the last eye, then work 1 hdc in the top of the ch of the beg star st from the previous row.

star stitch cowl crochet pattern

Finished Measurements

Narrow: 11 in across (22 in circumference)

Wide: 15 in across (30 in circumference)

Short: 9 in tall

Tall: 11 in tall

Notes

  • Stitch counts are marked in [ ] at the end of each row, with different sizing in parentheses as follows: Narrow (Wide)
  • Color changes are not noted within the pattern, since this is meant to be a scrap pattern. I used a new color starting at each star stitch row with my larger scrap yarn balls. If you have smaller scraps, you could change at each star stitch row and continue with that color for the half double crochet ribbing until you run out, then move to the next one.
  • This pattern can be made to different measurements for versatility! The pattern gives instructions for narrow, wide and short, tall.

Gauge Swatch

4 in by 4 in swatch = 12 rows of 10 star st OR 20 hdc

Row 1: Ch 23.

Row 2: In 2nd ch from hook, pull up a loop (2 loops on hook), in each of the next 4 ch, pull up a loop (6 loops on hook), yo, pull through all 6 loops, ch 1,* in top of the previous star, pull up a loop (2 loops on hook), in the ‘leg’ of the last loop you pulled up on the previous stitch, pull up a loop (3 loops on hook), in the last worked st, pull up a loop (4 loops on hook), in the next unworked st, pull up a loop (5 loops on hook), in next unworked st, pull up a loop (6 loops on hook), yo, pull through all 6 loops, ch 1, repeat from* to last st, in top of the previous star, pull up a loop (2 loops on hook), in the ‘leg’ of the last loop you pulled up on the previous stitch, pull up a loop (3 loops on hook), in the last worked st, pull up a loop (4 loops on hook), in the last unworked st, pull up a loop (5 loops on hook) yo, pull through all 5 loops, ch 1, turn. [1 beg star st, 1 end star st, 8 star st]

Row 3: Ch 1, 1 hdc in the top of the end star st, *2 hdc in the eye of the next star st; rep from * up to (and including) the last eye, then work 1 hdc in the top of the ch of the beg star st from the previous row. [20 hdc]

Row 4: Ch 1, hdc BLO each st across. [20 hdc BLO]

Row 5: Ch 1, hdc in the 3rd loop each st across. [20 hdc in the 3rd loop]

Row 6: repeat row 4

Row 7: repeat row 5

Row 8: Ch 4, in 2nd ch from hook, pull up a loop (2 loops on hook), in each of the next 2 ch, pull up a loop (4 loops on hook), in each of next 2 sts, pull up a loop, yo, pull through all 6 loops, ch 1,* in top of the previous star, pull up a loop (2 loops on hook), in the ‘leg’ of the last loop you pulled up on the previous stitch, pull up a loop (3 loops on hook), in the last worked st, pull up a loop (4 loops on hook), in the next unworked st, pull up a loop (5 loops on hook), in next unworked st, pull up a loop (6 loops on hook), yo, pull through all 6 loops, ch 1, repeat from* to last st, in top of the previous star, pull up a loop (2 loops on hook), in the ‘leg’ of the last loop you pulled up on the previous stitch, pull up a loop (3 loops on hook), in the last worked st, pull up a loop (4 loops on hook), in the last unworked st, pull up a loop (5 loops on hook) yo, pull through all 5 loops, ch 1, turn. [1 beg star st, 1 end star st, 8 star st]

Rows 9-13: Repeat rows 3-7 respectively.

Written Instructions

Size: Short (Tall)

Row 1: Ch 43 (51.) [43 (51) ch]

Row 2: In 2nd ch from hook, pull up a loop (2 loops on hook), in each of the next 4 ch, pull up a loop (6 loops on hook), yo, pull through all 6 loops, ch 1,* in top of the previous star, pull up a loop (2 loops on hook), in the ‘leg’ of the last loop you pulled up on the previous stitch, pull up a loop (3 loops on hook), in the last worked st, pull up a loop (4 loops on hook), in the next unworked st, pull up a loop (5 loops on hook), in next unworked st, pull up a loop (6 loops on hook), yo, pull through all 6 loops, ch 1, repeat from* to last st, in top of the previous star, pull up a loop (2 loops on hook), in the ‘leg’ of the last loop you pulled up on the previous stitch, pull up a loop (3 loops on hook), in the last worked st, pull up a loop (4 loops on hook), in the last unworked st, pull up a loop (5 loops on hook) yo, pull through all 5 loops, ch 1, turn. [1 beg star st, 1 end star st, 18 (22) star st]

Row 3: Ch 1, 1 hdc in the top of the end star st, *2 hdc in the eye of the next star st; rep from * up to (and including) the last eye, then work 1 hdc in the top of the ch of the beg star st from the previous row. [40 (48) hdc]

Row 4: Ch 1, hdc BLO each st across. [40 (48) hdc BLO]

Row 5: Ch 1, hdc in the 3rd loop each st across. [40 (48) hdc in the 3rd loop]

Row 6: Repeat row 4

Row 7: Repeat row 5

Row 8: Ch 4, in 2nd ch from hook, pull up a loop (2 loops on hook), in each of the next 2 ch, pull up a loop (4 loops on hook), in each of next 2 sts, pull up a loop, yo, pull through all 6 loops, ch 1,* in top of the previous star, pull up a loop (2 loops on hook), in the ‘leg’ of the last loop you pulled up on the previous stitch, pull up a loop (3 loops on hook), in the last worked st, pull up a loop (4 loops on hook), in the next unworked st, pull up a loop (5 loops on hook), in next unworked st, pull up a loop (6 loops on hook), yo, pull through all 6 loops, ch 1, repeat from* to last st, in top of the previous star, pull up a loop (2 loops on hook), in the ‘leg’ of the last loop you pulled up on the previous stitch, pull up a loop (3 loops on hook), in the last worked st, pull up a loop (4 loops on hook), in the last unworked st, pull up a loop (5 loops on hook) yo, pull through all 5 loops, ch 1, turn. [1 beg star st, 1 end star st, 18 (22) star st]

Rows 9-68: Repeat rows 3-8 respectively. (You will not do row 8 in the final repeat. Add another repeat of rows 3-8 for size Wide.)

Sl st final row to beg row, or fasten off, leaving a long tail and seam with a mattress stitch.

Abbreviated Written Instructions

Size: Short (Tall)

Row 1: Ch 43 (51.) [43 (51) ch]

Row 2: Beg star st, star st A across, end star st in last ch. [1 beg star st, 1 end star st, 18 (22) star st A]

Row 3: Star st B across. [40 (48) hdc]

Row 4: Row 4: Ch 1, hdc BLO each st across. [40 (48) hdc BLO]

Row 5: Ch 1, hdc in the 3rd loop each st across. [40 (48) hdc in the 3rd loop]

Row 6: Repeat row 4

Row 7: Repeat row 5

Row 8: Ch 4, beg star st, star st A across, end star in last ch. [1 beg star st, 1 end star st, 18 (22) star st A]

Rows 9-68: Repeat rows 3-8 respectively. (You will not do row 8 in the final repeat. Add another repeat of rows 3-8 for size Wide.)

Sl st final row to beg row, or fasten off, leaving a long tail and seam with a mattress stitch.

More cowl patterns

The Any Yarn Granny Cowl! Use any yarn weight for this made to measure cowl pattern. You can make it super warm and cozy or light and airy for whatever time of year!

The Blustery Cowl is the warmest cowl, that is fun to experiment with colors and works up fairly quickly. There is a matching beanie pattern as well!

Love it? Share it!

  • Share on X (Opens in new window) X
  • Share on Facebook (Opens in new window) Facebook
  • Share on Pinterest (Opens in new window) Pinterest
  • Print (Opens in new window) Print

February 19, 2026 by Priscilla

Sedge Stitch Crochet Headband Pattern

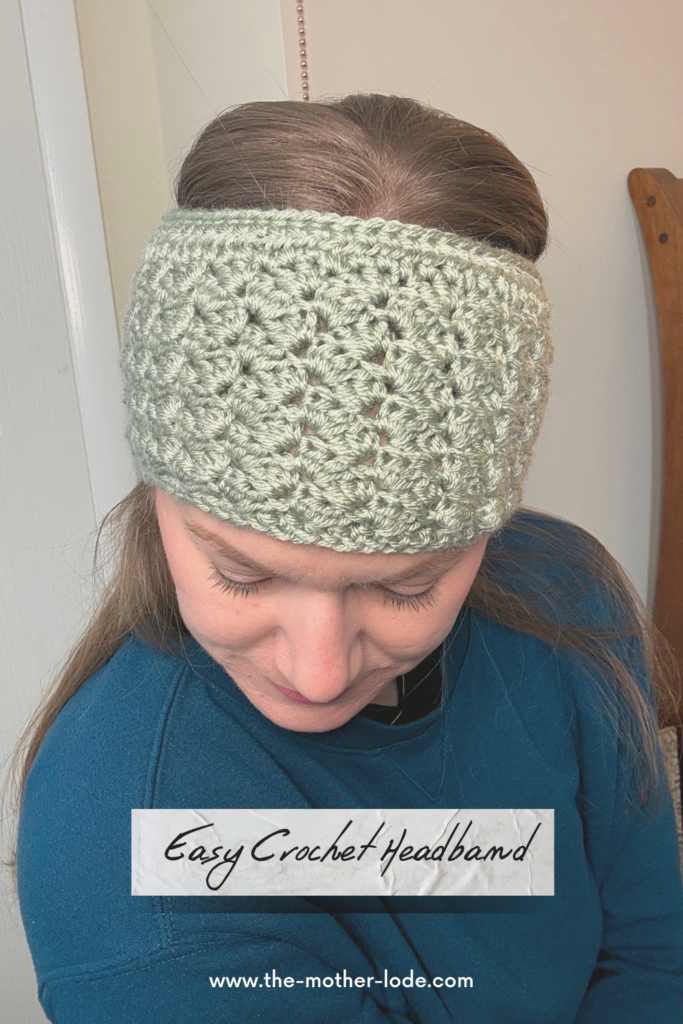
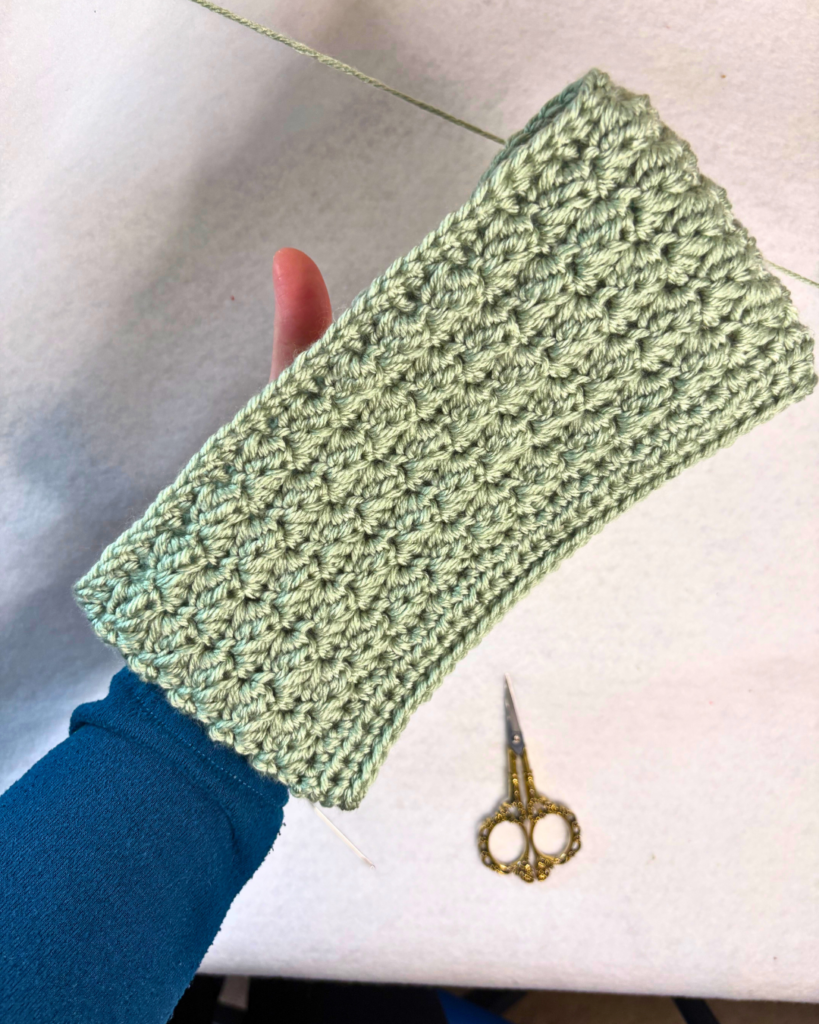
Let’s make a beautifully textured crochet headband today! If you love texture that comes together simply, this pattern is for you! I love a good pattern that you can veg out in front of a good show with at the end of a long day. The sedge stitch crochet headband pattern is easy to make and comes in several sizes. I love making designs that can be matching sets among family members. This headband called the Fields Headband has a matching bonnet pattern that is super sweet. You can read all about that pattern here!

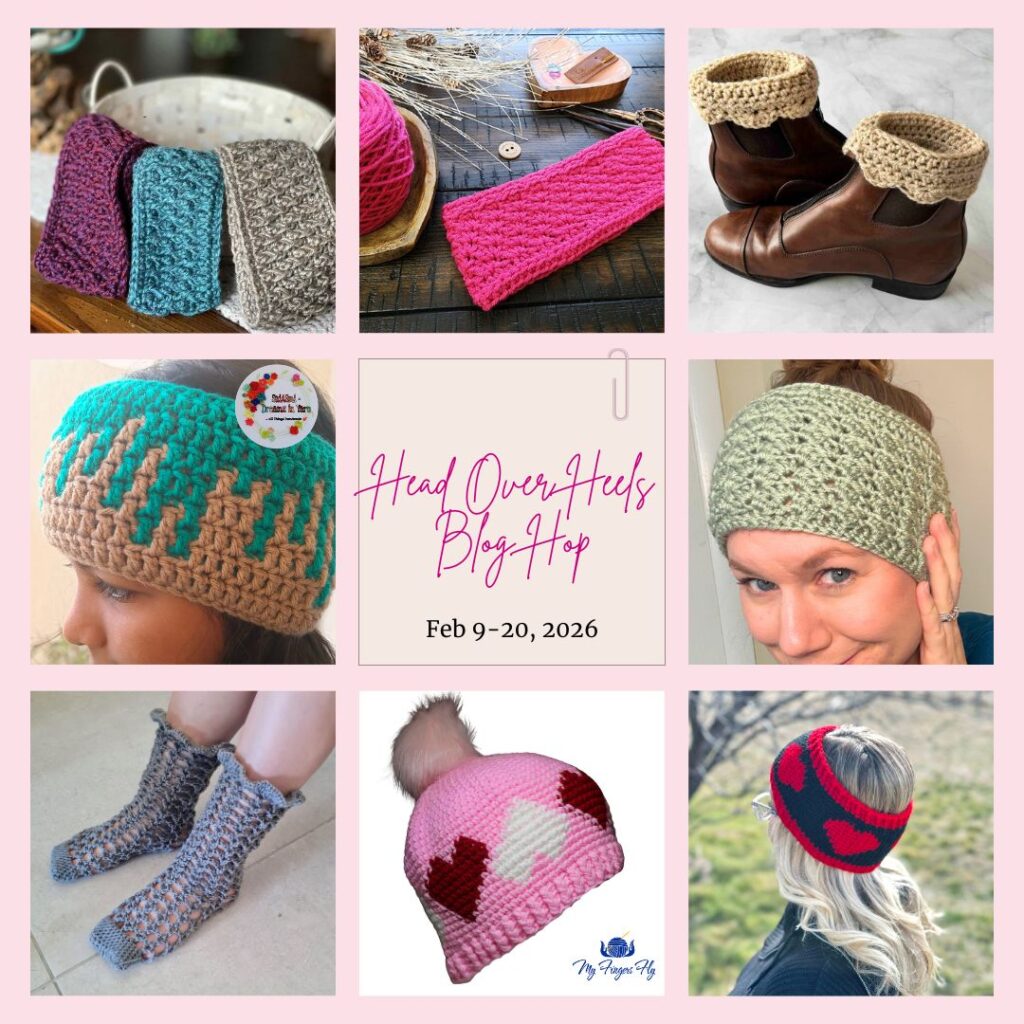
This pattern was featured in the Head over Heels Blog Hop from Madame Stitch in February 2026. This is such a neat hop with patterns for heads and feet! The event has now ended, but you can still look through the patterns, many of which are free on the designer’s blogs like mine!

I used a basic acrylic yarn for this pattern for ease. I love the Lion Brand Basic Stitch for this, I think it’s a great acrylic yarn that is soft and wears well. Here, you can see the matching Fields Bonnet Pattern on my daughter when I designed it last year! Don’t you love making things for your family to wear? Want a little chuckle? Probably about 8 years ago I made a Hokie Bird hat for my then 4 year old son. I just free-handed it and it has little ear flaps that come down and a Hokie Bird on the forehead. He loved it and wore it often until it didn’t fit anymore. My super girly daughter, now 3, LOVES it and has been wearing it everywhere for the last several weeks. You never know what they’ll love, so just make a bunch of things and then they’ll pick the most worn-out hat to wear! (P.S. A Hokie Bird is the Virginia Tech mascot, my husband went to graduate school there.)

Now, let’s make this sedge stitch crochet headband pattern!

Supplies

  • CYC 4 worsted yarn: 100-150 yards (sample is Lion Brand Yarn Basic Stitch in color Sage)
  • crochet hook US size J (6 mm) or size needed to obtain gauge
  • tapestry sewing needle
  • scissors and measuring tape/gauge ruler

Stitches and Abbreviations (US Terms)

ch = chain

st/sts = stitch/stitches

sc = single crochet

sl st = slip stitch

hdc = half double crochet

fhdc = foundation half double crochet

sedge stitch = *single crochet, half double crochet, double crochet in the same stitch, sk 2 sts, repeat from *

noted as {sc, hdc, dc} within pattern

The sedge stitch is so easy to learn and I love the texture in this stitch. It isn’t bobbly or anything, just enough to be interesting and it works up quickly. I especially love it for baby blankets and I have made several baby blankets for friends with this stitch.

Notes

  • Stitch counts are marked in [ ] at the end of each row.
  • Sizing in pattern is denoted as follows: Child, (Teen/Adult Small, Adult Medium, Adult Large)
  • Please note that the headband will stretch about 1.5 inches to fit snugly on the head. If desired, you can do the beginning row of Fhdc to desired length made to measure as long as you use a stitch count with multiples of 3.
SIZEChildteen/adult smalladult mediumadult large
circumference18 in19 in21 in22 in
width4 in4.5 in5 in5.5 in

This headband will have a slight curve. It is meant for the top to be slightly tighter to help the headband stay on. The final sl st row is what causes this. If you find that it makes the headband too tight and you prefer to wear it under your hair instead, you may want to leave that row out to loosen it.

I chose to use mattress stitch to seam. This is so seamless looking, and looks like it was crocheted in the round so much that, when I went to make my 2nd sample, I thought that’s what I had done in the first draft!

sedge stitch crochet headband pattern photo

Written Instructions

Size: Child, (Teen/Adult Small, Adult Medium, Adult Large)

Row 1: Fhdc 63 (69, 75, 81) ch 1, turn. [63 (69, 75, 81) fhdc]

Row 2: {Sc, hdc, dc} first st, sk next 2 sts, *{sc, hdc, dc} next st, sk next 2 sts, repeat from* until last st, sc last st. [21 ( 23, 25, 27) sedge sts, 1 sc]

Row 2: Ch 1, turn, *{sc, hdc, dc} first st, sk next 2 sts, repeat from* until last st, sc last st. [12 (14, 16, 18) sedge sts, 1 sc]

Rows 3-9 (11, 12, 13): Repeat Row 2.

Row 10 (12, 13, 14): Hdc each st across, turn.[63 (69, 75, 81) hdc]

Row 11 (13, 14, 15): Sc each st across, turn.[63 (69, 75, 81) sc]

Row 12 (14, 15, 16): Sl st each st across. [63 (69, 75, 81) sl st]

Fasten off, leave long tail for sewing headband together. Use a mattress stitch to sew the ends together for the most seamless look.

More free headband patterns!

The Linen Stripe Headband is stretchy and cozy! Use up a few scraps for those stripes!

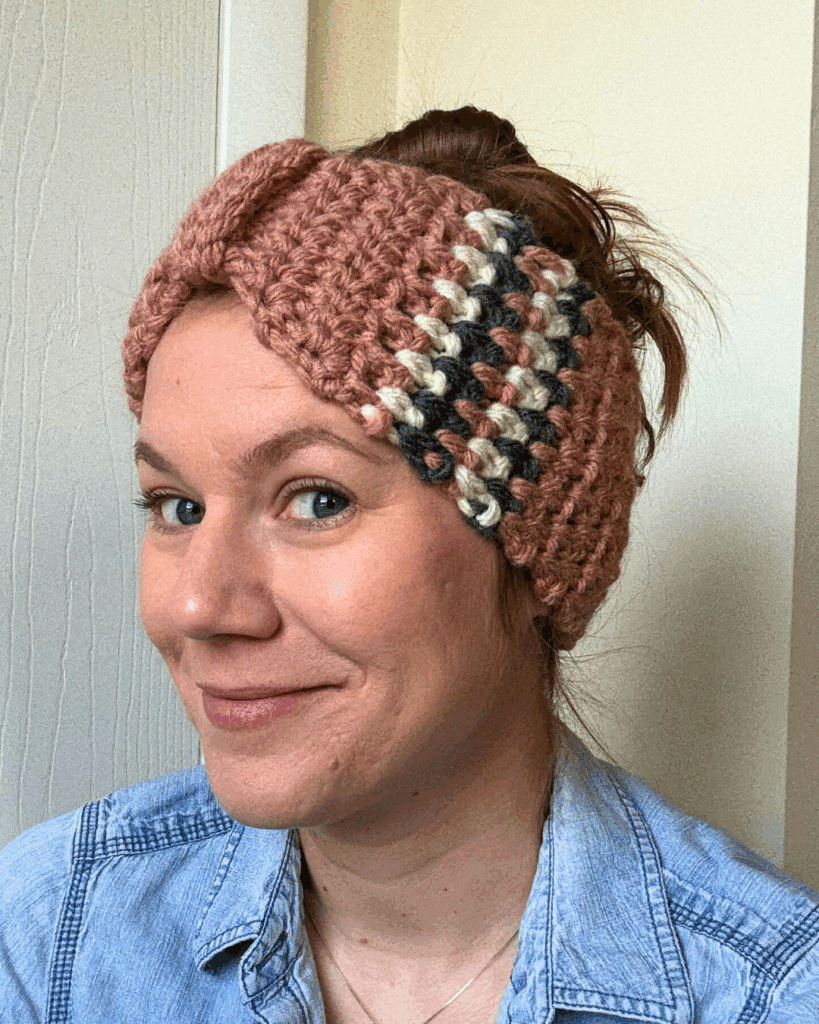
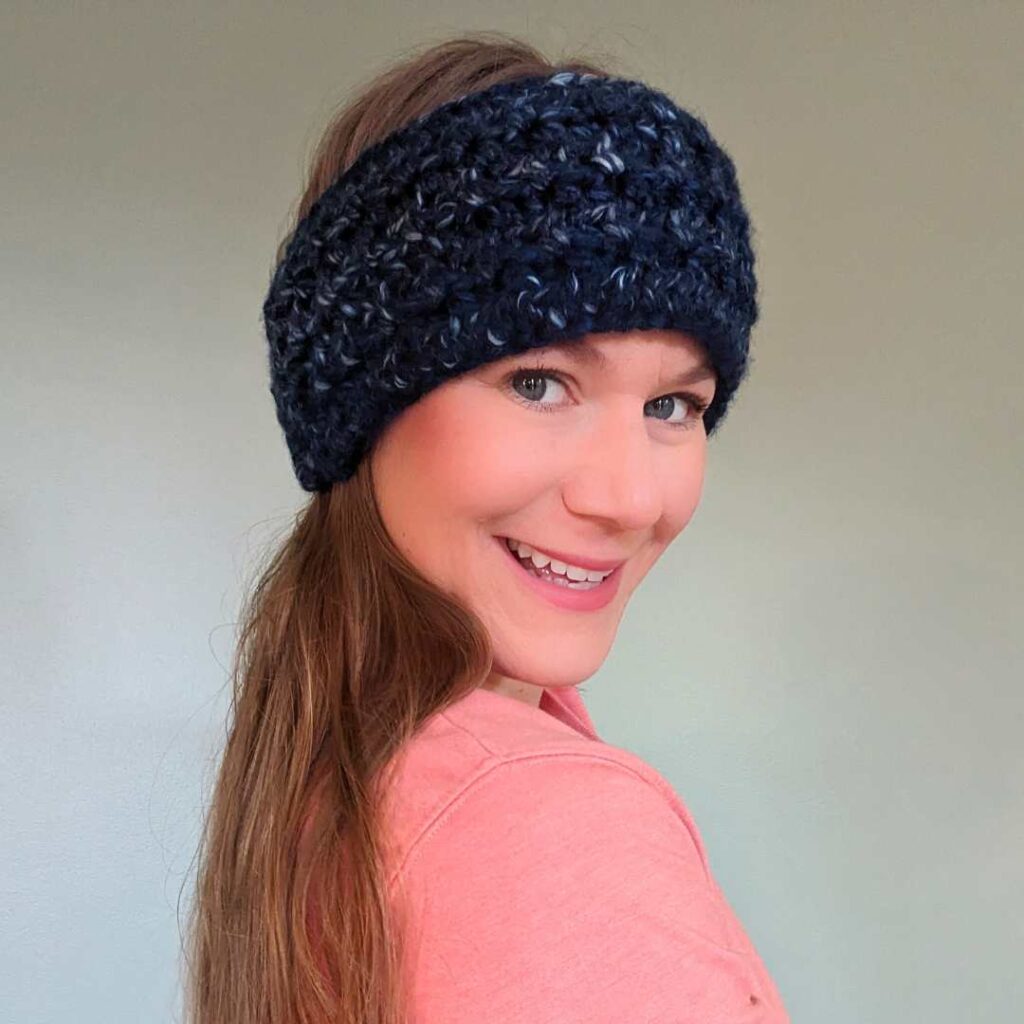
The Minimalist Headband has a cozy waffle stitch that works up fast in super bulky weight yarn.

Love it? Share it!

  • Share on X (Opens in new window) X
  • Share on Facebook (Opens in new window) Facebook
  • Share on Pinterest (Opens in new window) Pinterest
  • Print (Opens in new window) Print

January 9, 2026 by Priscilla

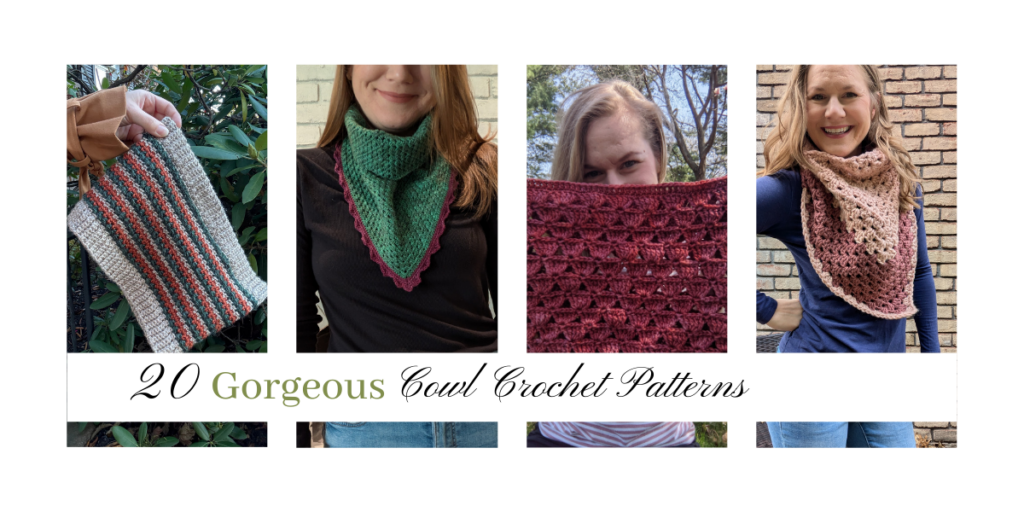
20 Gorgeous Cowl Crochet Patterns

I love to wear cowls in the winter! I used to wear scarves all the time. Oh! When I was a teenager I had an absolutely ENORMOUS black scarf that I wore all the time. It was honestly obnoxious! Now as a busy mom, I prefer a cowl, because they are easier to toss on, and as a crocheter because they (usually) take less time to make! I know you’ll find the perfect cowl crochet pattern to make among these lovely designs!

Follow Your Path Cowl by Made by Gootie

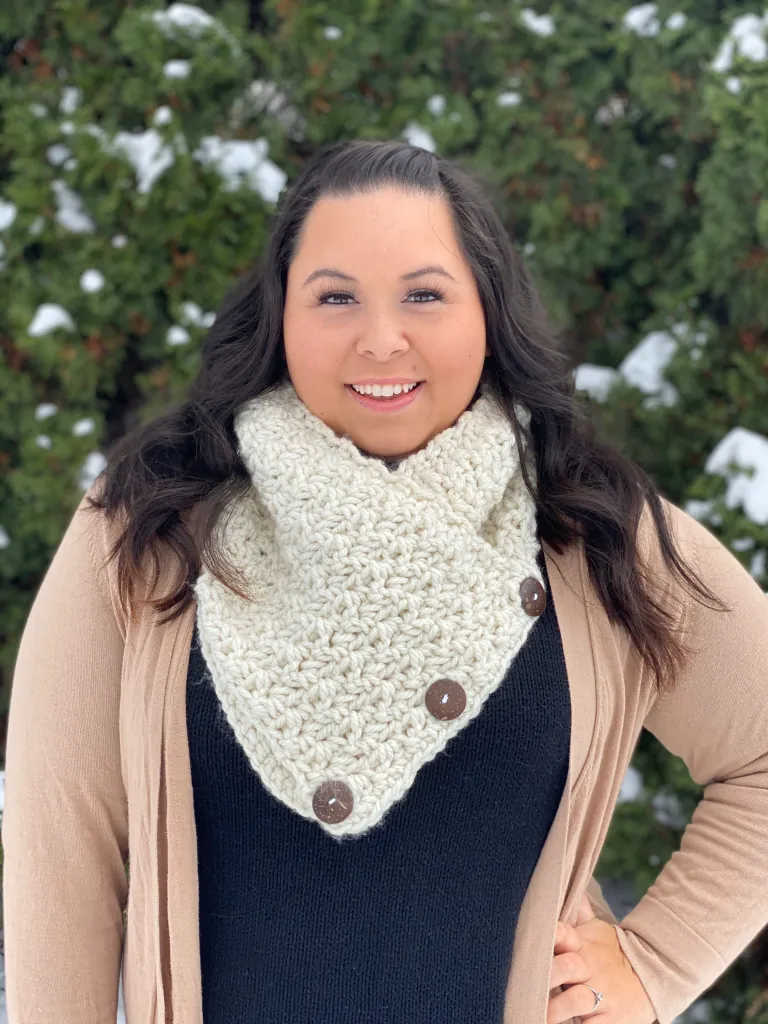
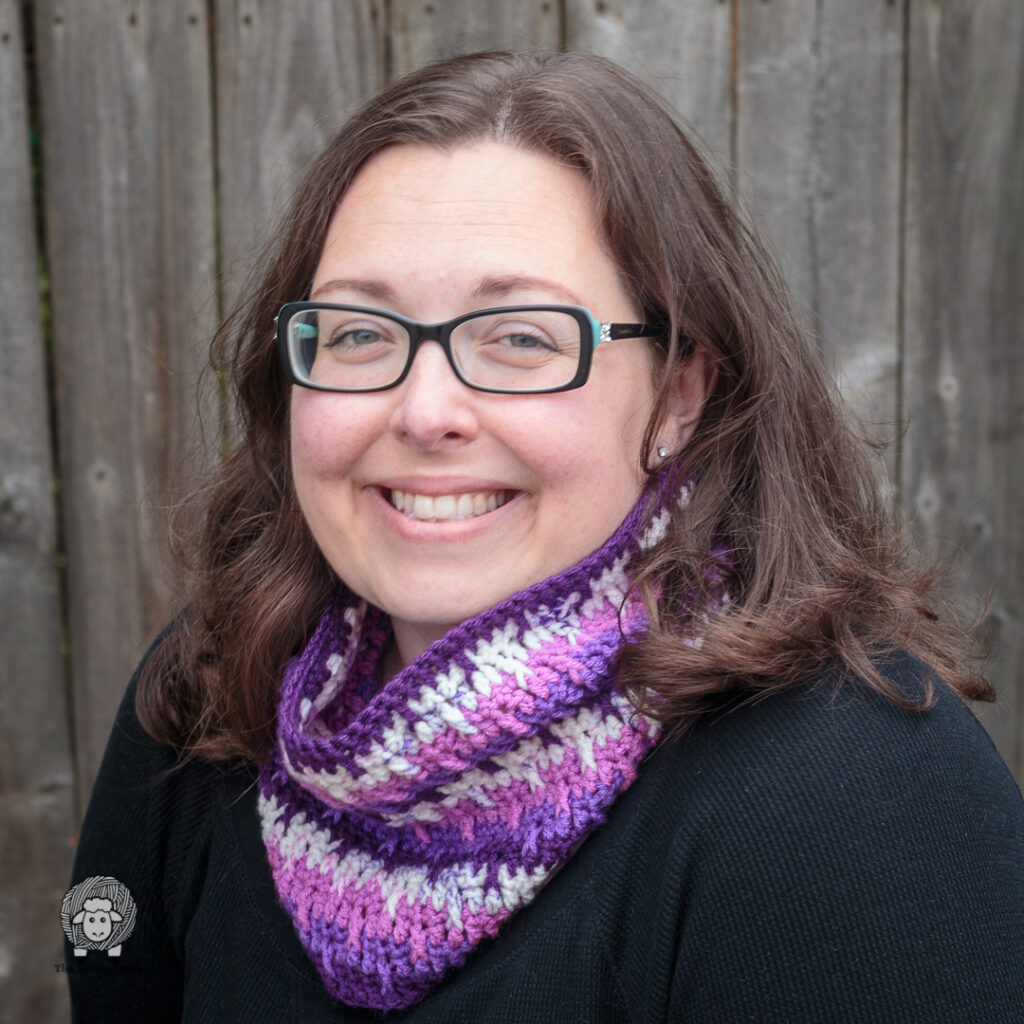
This 3 button cowl pattern is stunning! I love the design of this one, the “arrows” give it a lot of visual interest, perfect for making a cowl with only one yarn color. I don’t use a lot of sport weight yarn, but this pattern sure is tempting me to look for some in my stash!

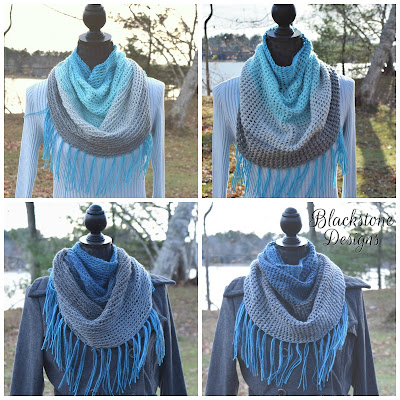
Watercolor Cowl by Blackstone Designs

This one is a more basic pattern, but it’s still beautiful. Pick an amazing yarn for this one, something with color changes like in the photo. The drape on this cowl crochet pattern is so pretty, and I have some yarn in my stash that would be great for this pattern, actually!

Crochet Button Cowl from Sierra’s Crafty Creations

I love this style of cowl! I have a design sitting here in my basket of a cowl shaped like this with a cute ruffle on it that I should really get to writing, shouldn’t I? Anyway, in the meantime if you also like this style, make this one! I like how it keeps your neck warm without being right up to the face, and you know I love a good super bulky weight yarn project like this Fluff of the Andes from WeCrochet!

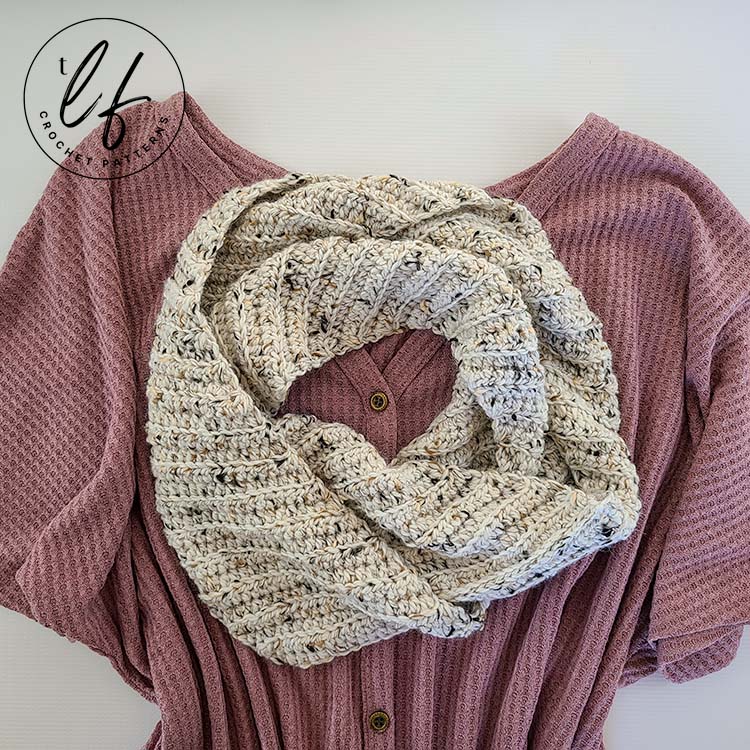
Aspen Infinity Scarf by The Loophole Fox

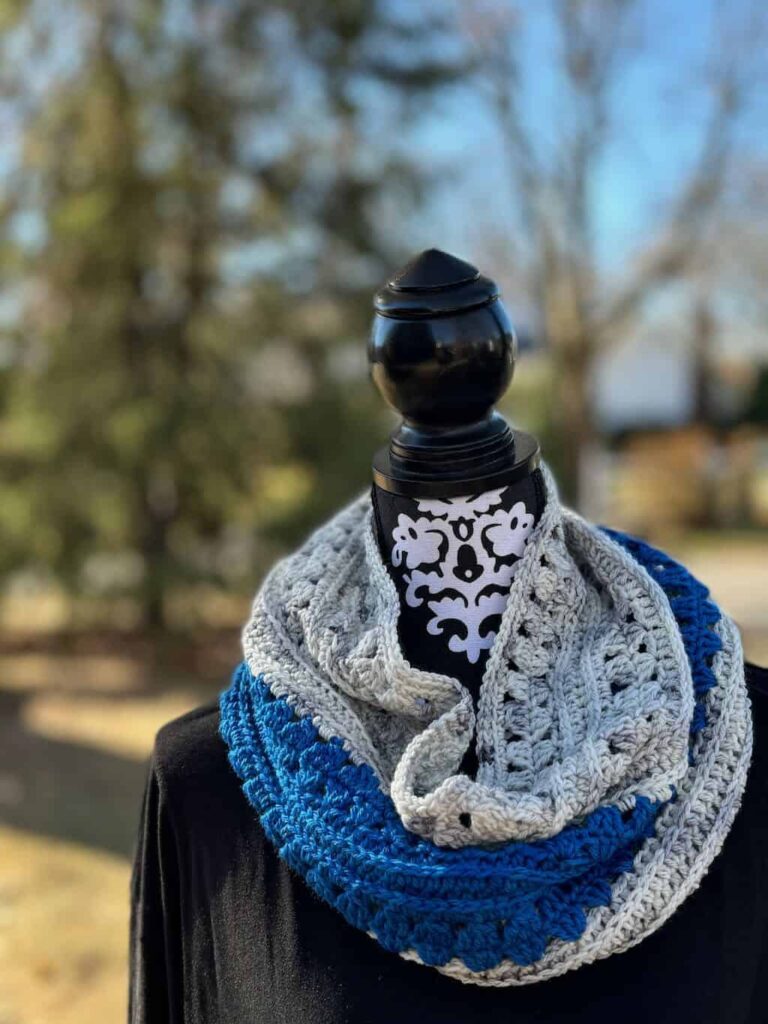
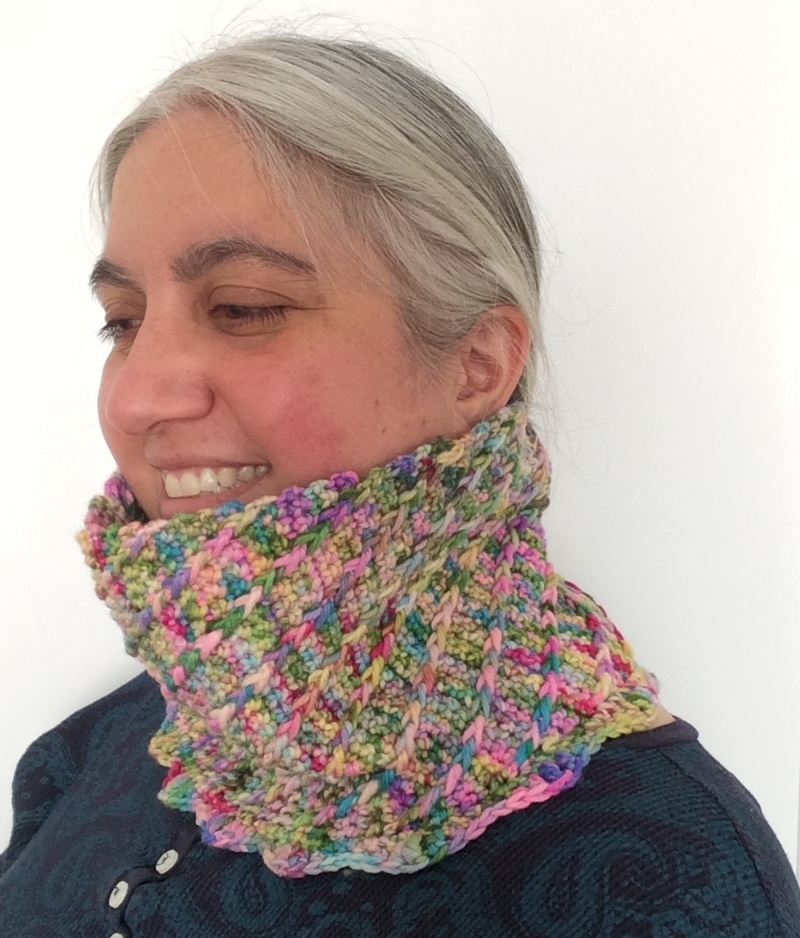
This is one of those projects you see and think OOOOOOO I would make that over and over again! The diagonal ribbing is unique and gives it almost a delicate look. This design is really timeless and could lend itself to lots of styles with the yarn choice you make for it. I really love this tweedy one she has used and coincidentally I bought a similar yarn at Michael’s today!

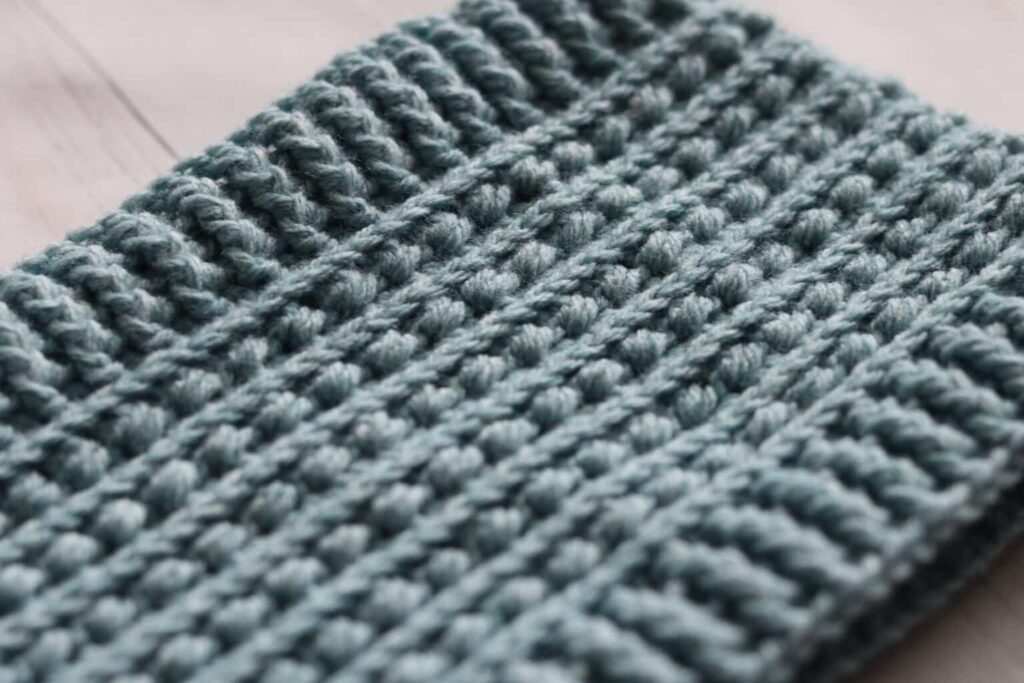
Hill Neck Warmer from Rich Textures Crochet

This is a new to me crochet designer and WOW! They are not kidding about the texture! I think this is so lovely and interesting! This is a great design to use with whatever worsted yarn is hanging around in your stash. I would make this cowl crochet pattern in a quality worsted wool yarn to really keep it cozy!

The Blustery Cowl

I’m delighted to share one of my own patterns as part of this list! The Blustery Cowl is warm and cozy and has a matching beanie. I made one with multiple colors and one with all one color when I designed it. The Lion Brand yarn Hue+Me is a great yarn for this pattern.

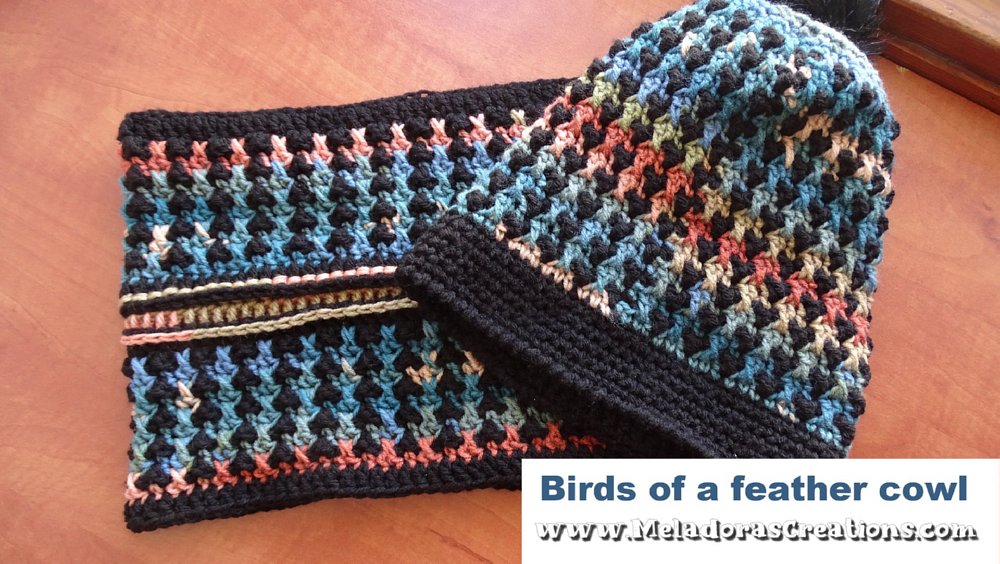
Birds of Feather Cowl by Meladora’s Creations

There is such a fun use of color in this cowl design by Meladora’s Creations! I love the use of the crossed stitches and the contrasting colors are delightful. There is a matching hat AND fingerless gloves for this cowl crochet pattern.

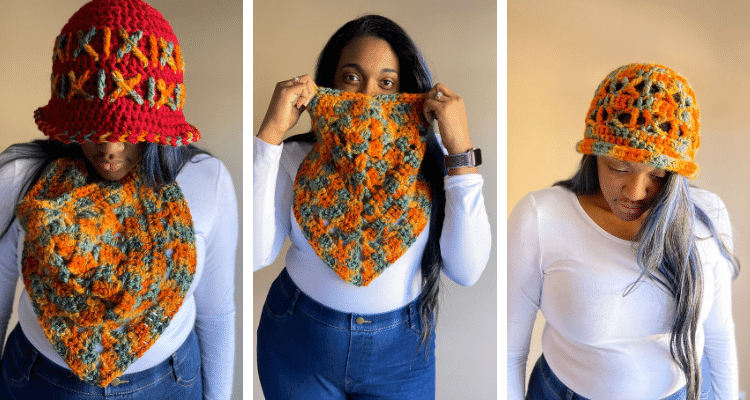
PNW Cowl by Creations by Courtney

This cowl and hat set is so unique! I love the giant X detail. The design on this is special and I think it would be a standout in a single color or using two colors to highlight the texture. I promise I didn’t go looking for matching set patterns, but I sure am finding a lot as I write this!

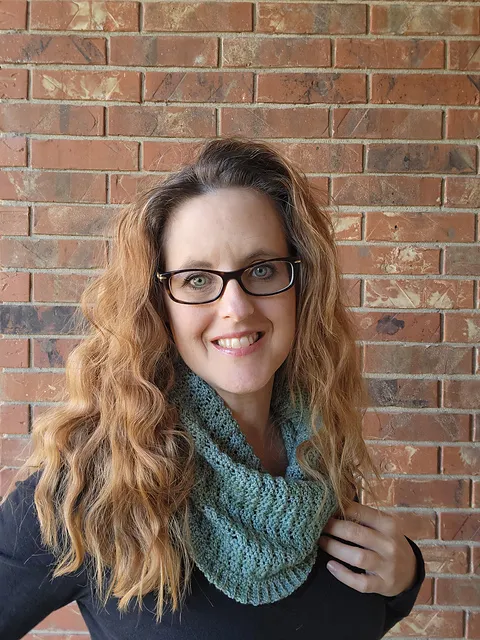
Forest Trail Cowl by Carol Hladik Designs

This is a sweet lightweight cowl design, made with fingering weight. It would be perfect for those living in a warmer place where you don’t need the bulk of some other accessories. I bet you could use that one skein of fancy hand dyed yarn that’s been hanging around on your shelves for a while to make this one! It would be so satisfying!

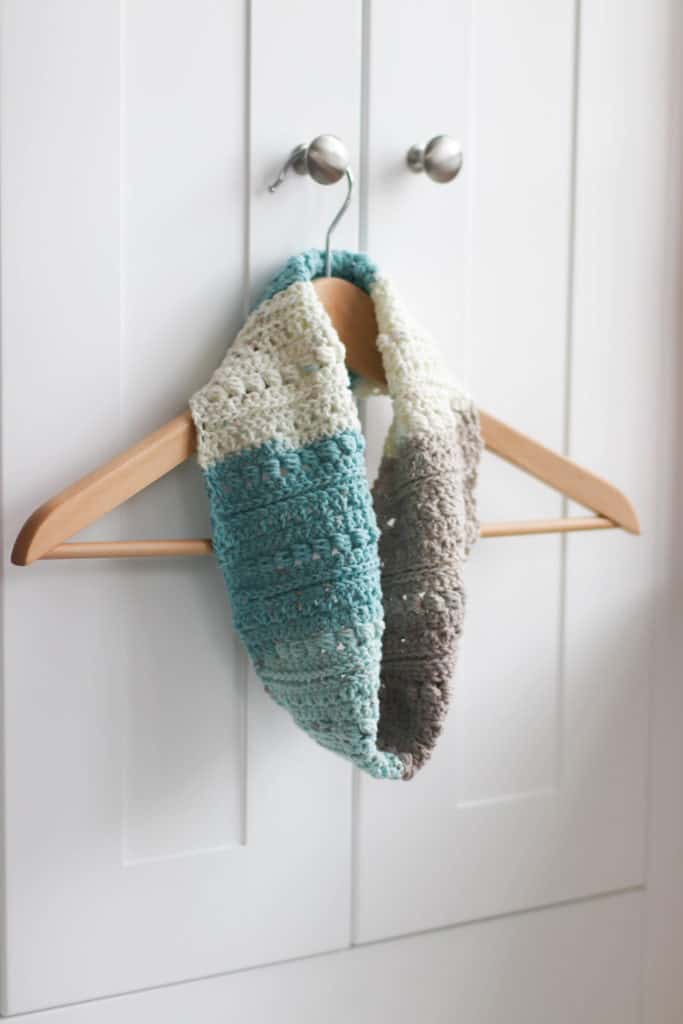
Frosted Glass Cowl by Thoresby Cottage

What a cute little cowl this is! I like the way she designed this with the bead stitches. It is meant to be made with only one skein and I think you could likely do that with a cake yarn, maybe you would need two if the worsted skein is on the smaller side.

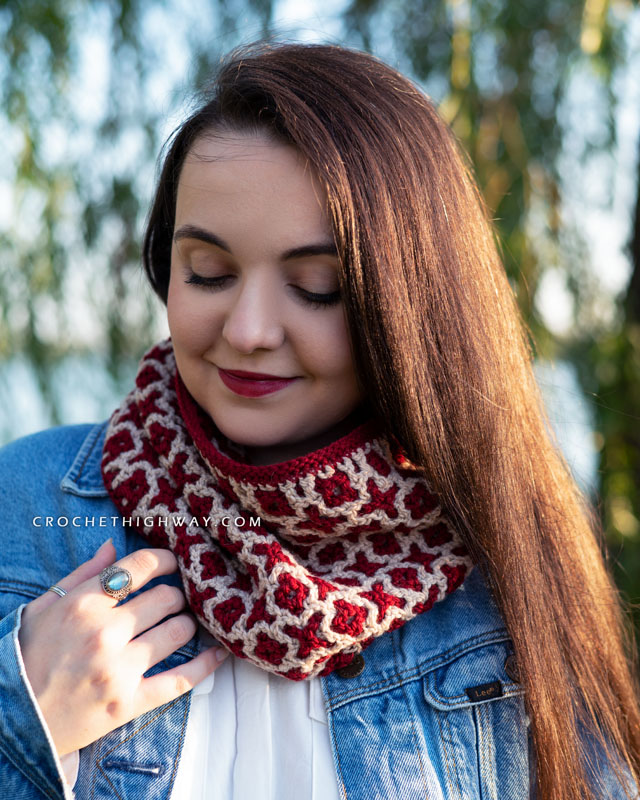
Let it Snow Cowl by Crochet Highway

I mean. Come on. Such a gorgeous pattern! An intermediate pattern, but not too intimidating as she has tons of photos to help you with the method and a video tutorial as well! I might have to come back to make this one when I have time for a project like this, it’s so striking!

Shifting Posts Cowl by the Loopy Lamb

Love the fun colorwork on this cowl crochet pattern! I think it would be fun to work up with scraps, too. This is one of those patterns that looks intricate and complicated until you start making it and see how simple it is.

Aria Cowl by Madame Stitch

I think this is a really lovely cowl pattern! I like the way she put the granny stitch with some different stitches to give it an elegant look. I would make this one in a single color to let those stitches shine! This pattern uses DK and you can customize the length as you like.

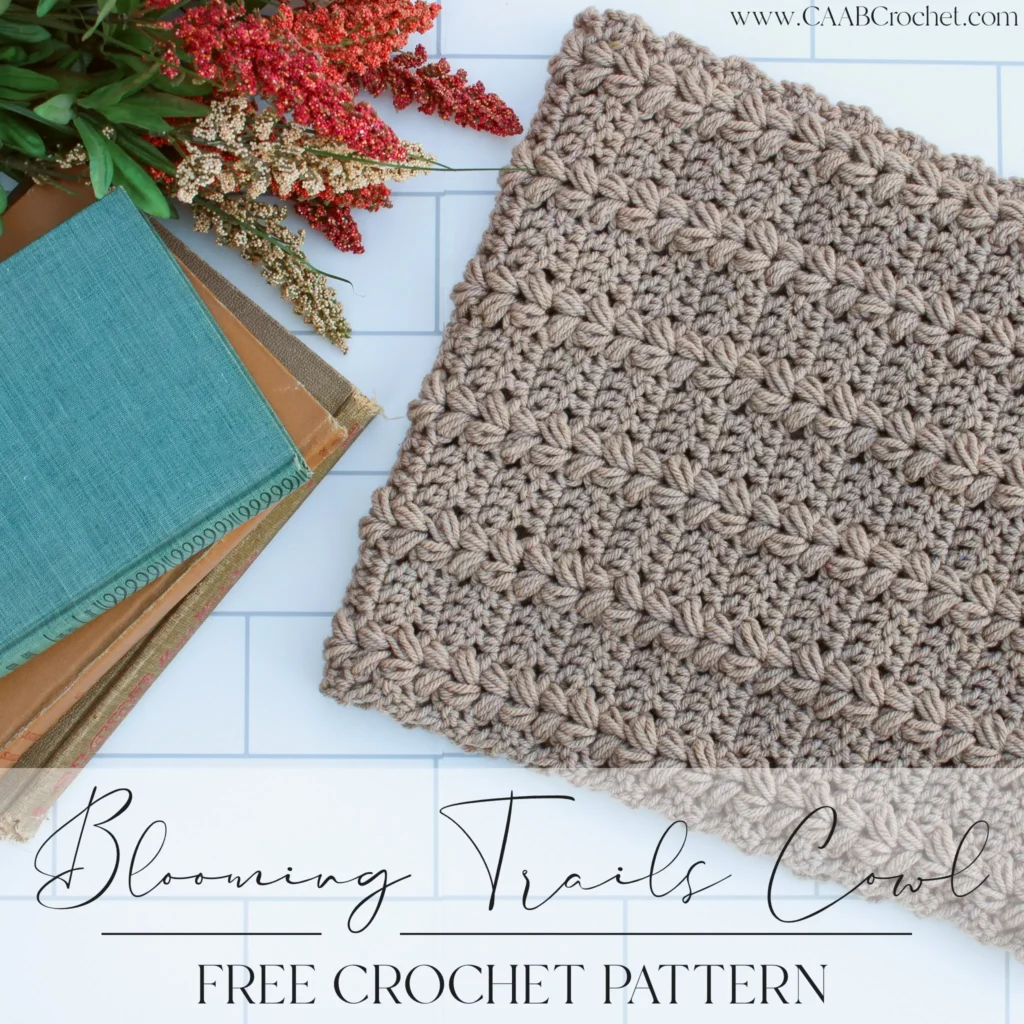
Blooming Trails Cowl by Cute as a Button Crochet

The design on this cowl is so pretty! I love projects like this where there is a texture that repeats so it is easy stitching once you learn the pattern. There is a matching hat to this one that is really great looking as well! This one you can make with worsted weight yarn, and I bet it would be stunning in a marled or variegated yarn.

Glacial Cowl by Left in Knots

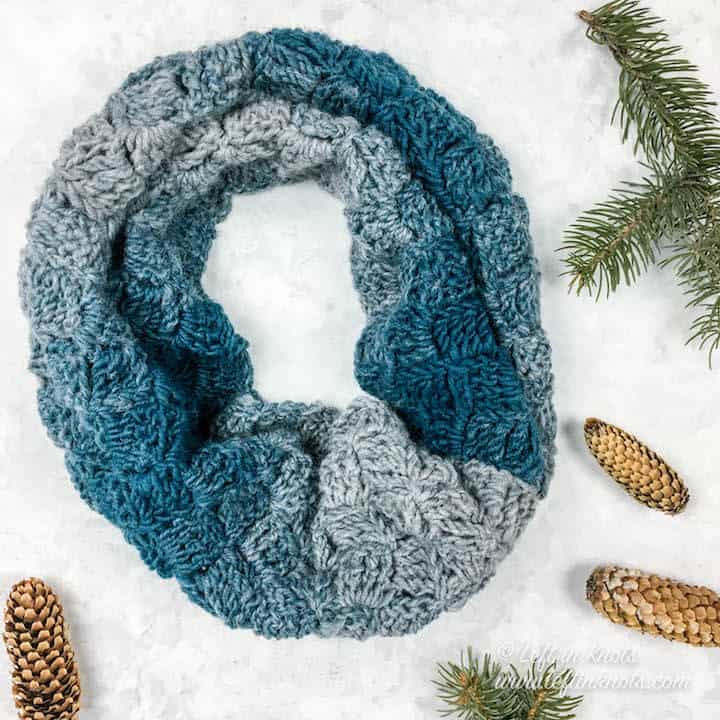
I bet this cowl works up so fast because you are using treble stitches in a C2C (corner to corner) pattern and it’s made with a category 5 yarn. Pick a really nice variegated for this pattern, it would be beautiful! Confession: I have never used Lion Brand Scarfie! This well loved yarn is what the designer used for this one and she has a ton of patterns using it as part of her Seven Days of Scarfie, so check it out if you like that!

Diagonal Swirl Cowl by Underground Crafter

This is one of those patterns that is beautiful and has a ton of visual interest, and I’d love to see one made with a single color so you can see the swirl pattern more! You’ll need some buttons for this one as it is made in one piece.

Bella Oversized Cowl by Stitch and Hustle

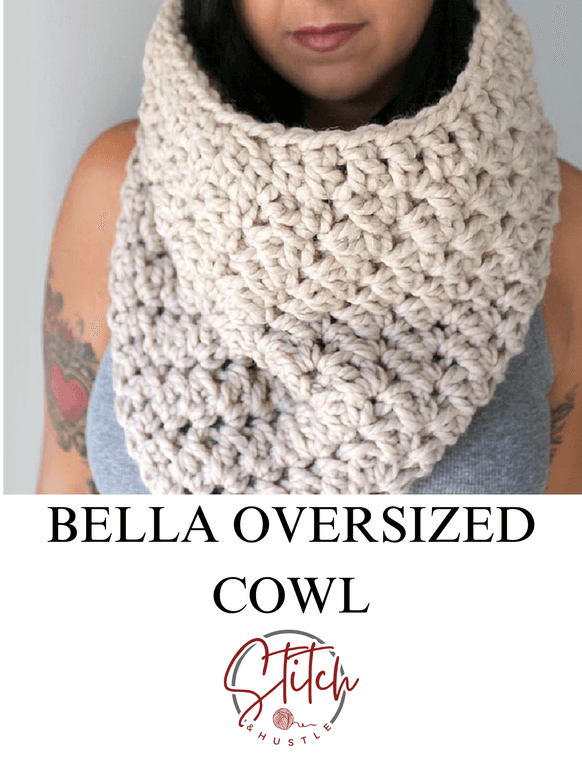
If you need a huge cowl to really keep cozy, here it is! I like an oversized accessory like this, because it is practical but makes you feel fabulous and stylish. And you know I can’t resist a super bulky weight yarn project that can work up quickly!

Keystone Cowl by Oombawka Designs

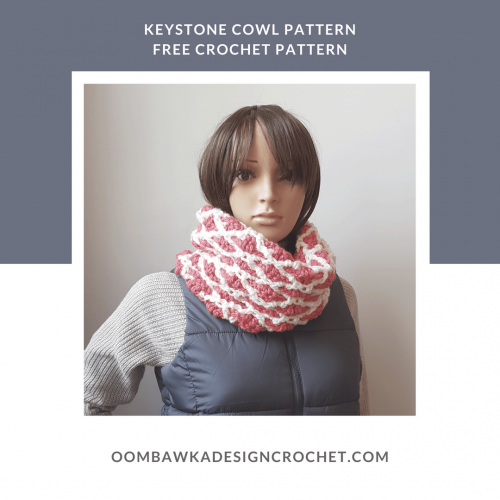
Such a pretty cowl made with the mosaic crochet technique. This is probably a great pattern to learn this technique on because it’s a smaller project and made with bulky yarn.

Busy Bee Happy Neck Warmer from Sandra Stitches

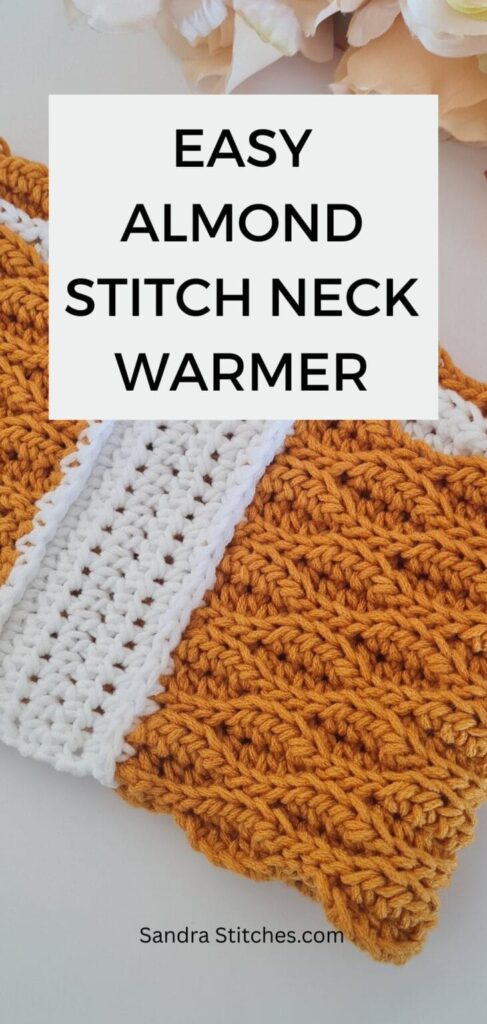
I used this almond stitch pattern on a dishcloth for my mother in law and I loved making it! It’s a cool stitch pattern, and it looks lovely on this cowl design.

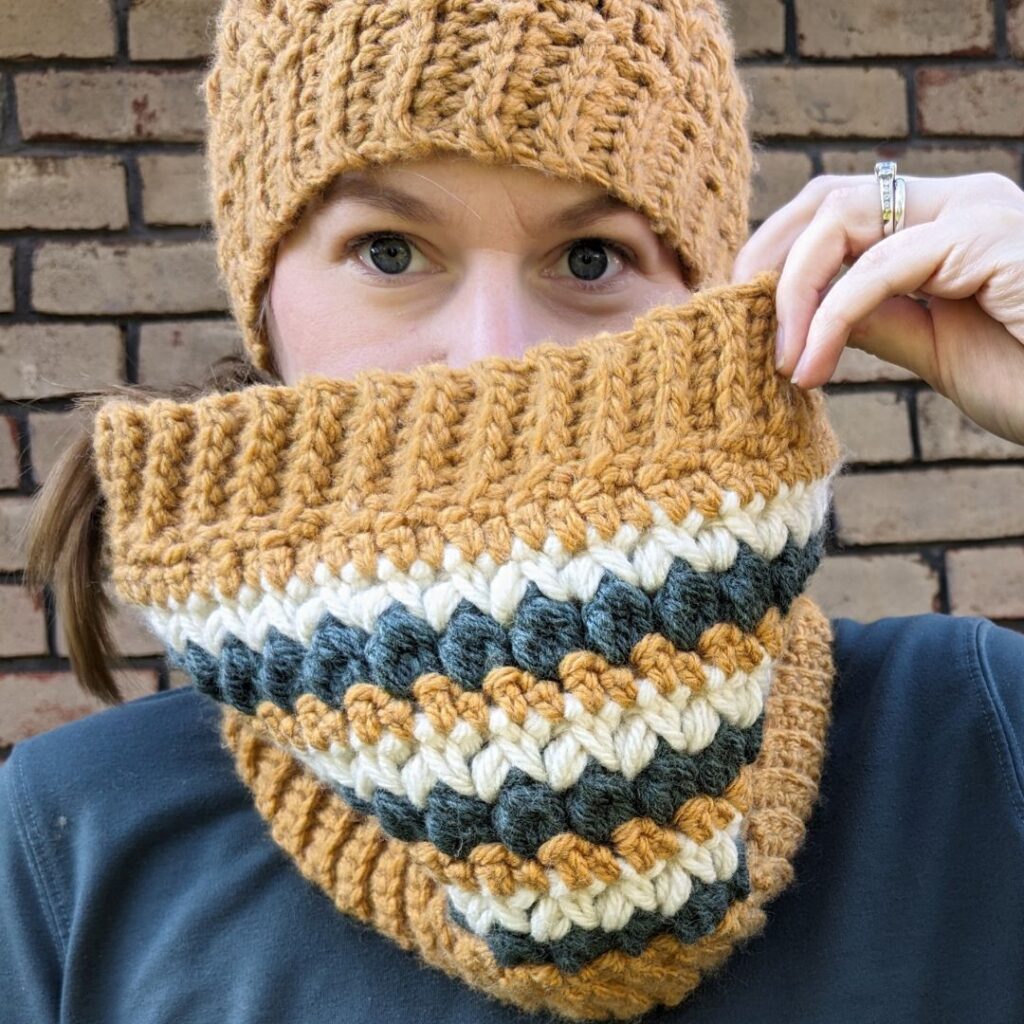
Spice Cowl

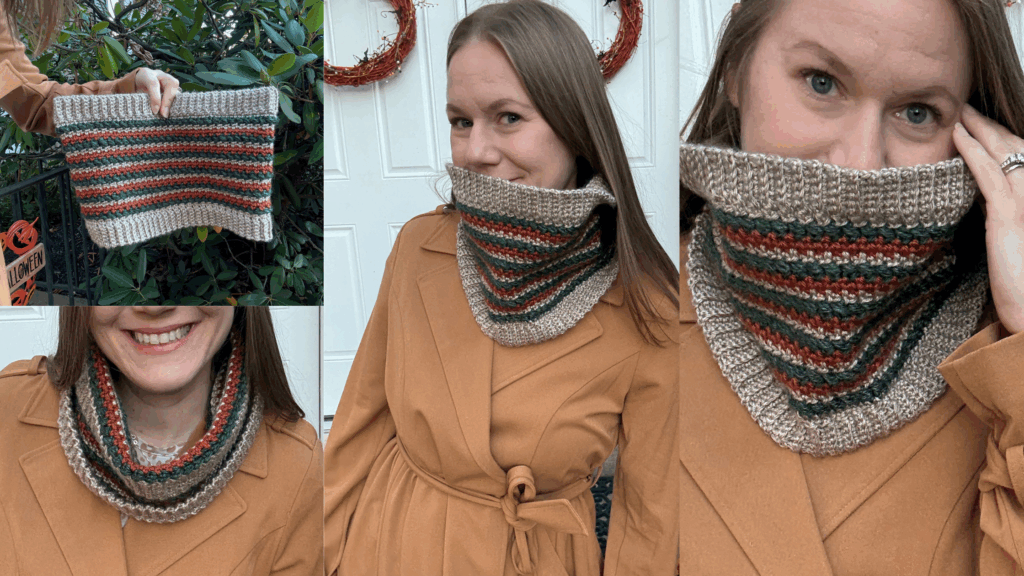
The Spice Cowl is a worsted yarn colorwork cowl that I hope you’ll love to make! The closed texture on this design makes it really cozy even though it is made with category 4 yarn. The puff stitches on it are fun to make and there is a simplicity in the pattern. I hope you love playing with the color with this one. I would love it with the Brava Tweed Yarn from WeCrochet.

Which cowl would you want to make? I think I need to go back through and narrow it down between the Let It Snow and the Aspen Infinity!

20 gorgeous cowl crochet pattern roundup post

Love it? Share it!

  • Share on X (Opens in new window) X
  • Share on Facebook (Opens in new window) Facebook
  • Share on Pinterest (Opens in new window) Pinterest
  • Print (Opens in new window) Print

December 18, 2025 by Priscilla

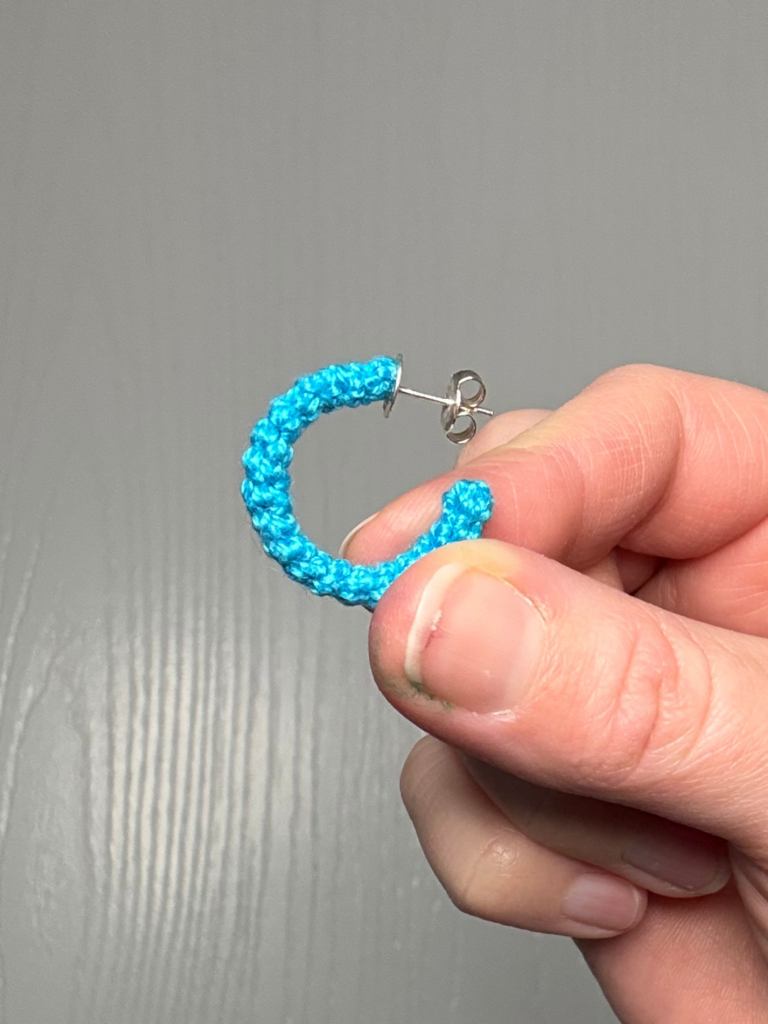
Simple Crochet Hoop Earrings Free Pattern

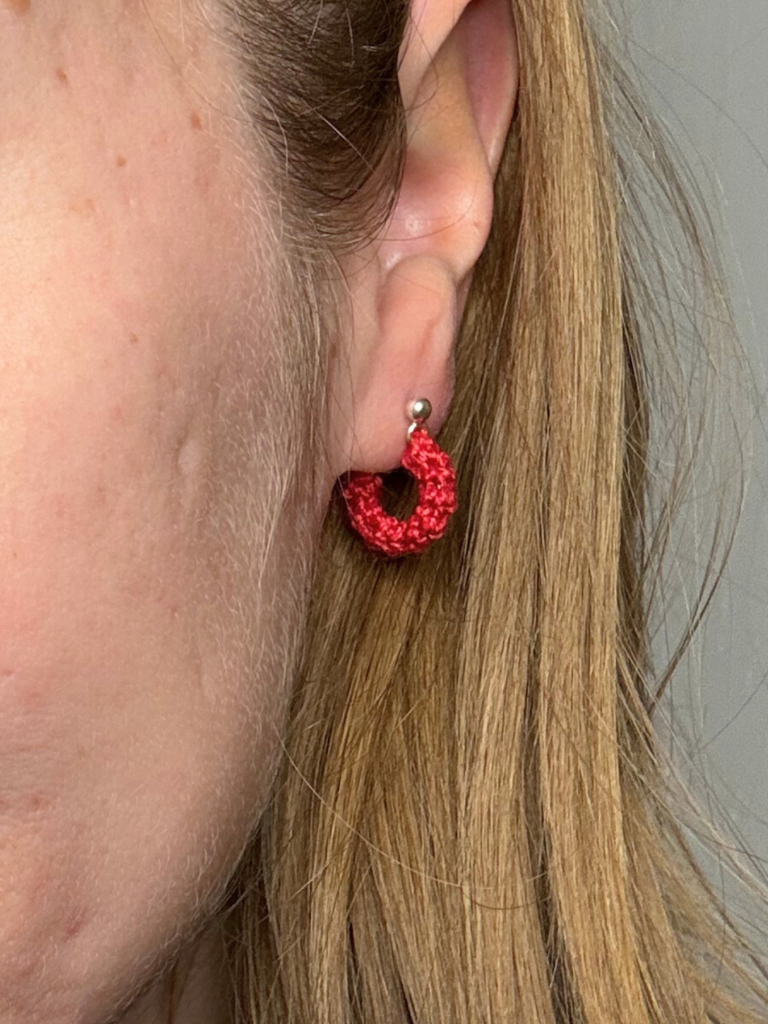
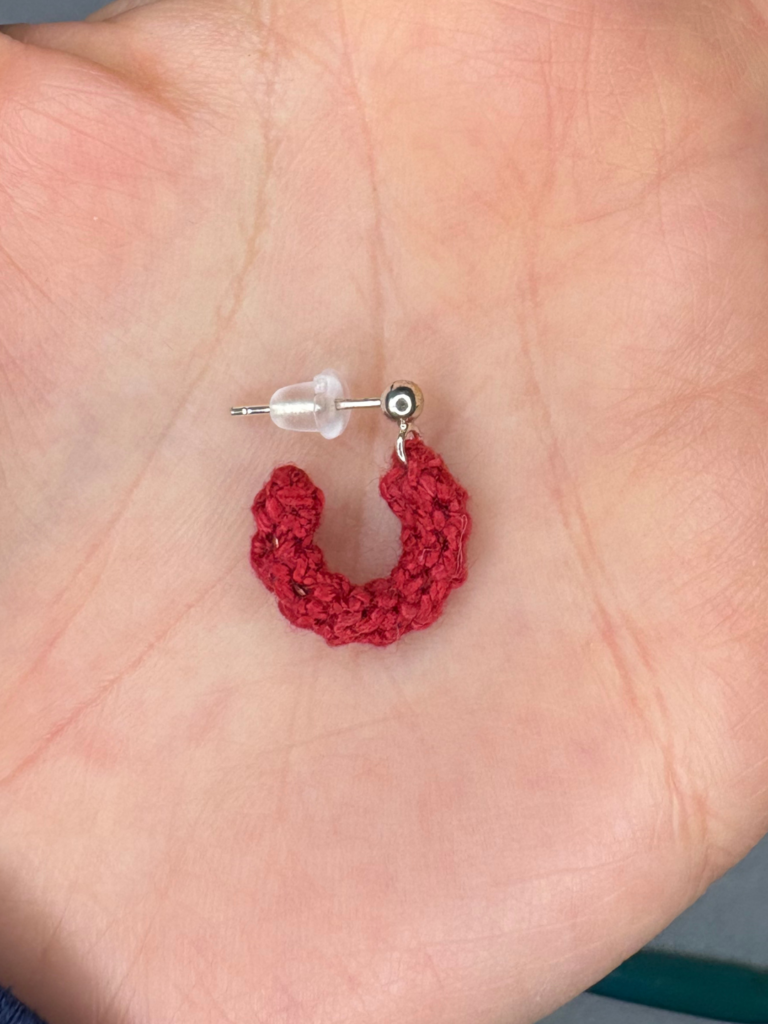
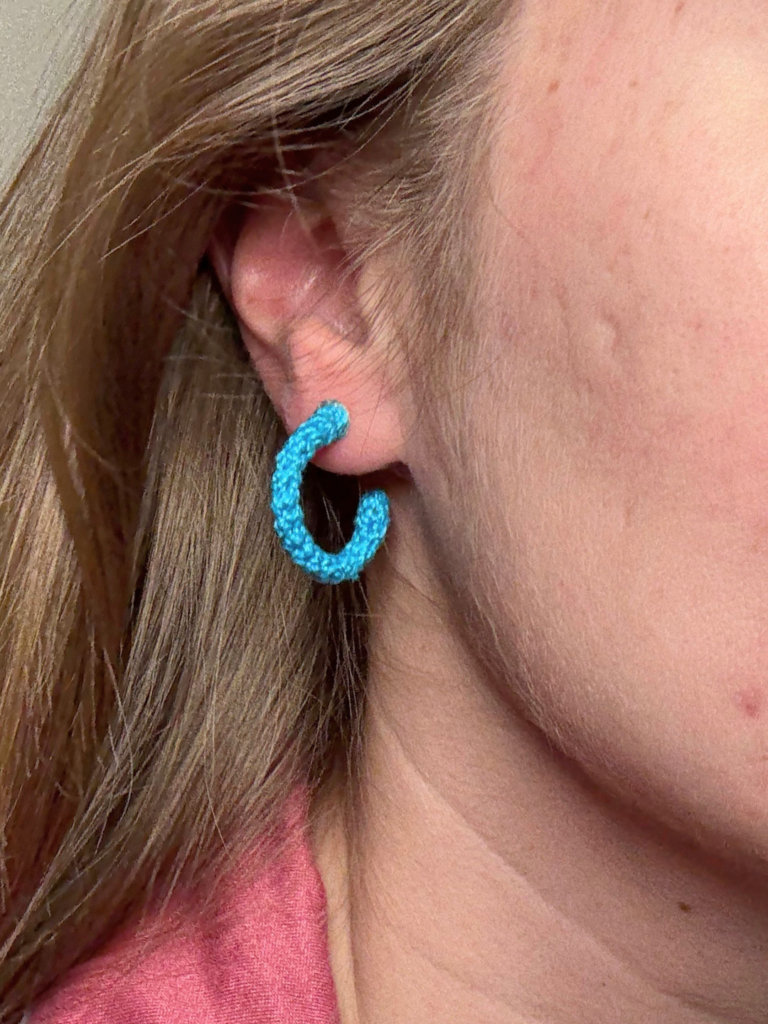
Let’s make some simple crochet hoop earrings! These are simple in style, but they are a unique pattern for making crochet hoop earrings. I have several pairs of resin hoop earrings that I bought from a beautiful shop called Fenna and Fei. They are my favorites and I wear them all the time. They inspired me to create these crochet hoops in the same shape! I thought they could offer the same timeless style, and I’m so happy my idea worked!

I’m so pleased this simple crochet hoop earrings free pattern was part of the 2 X $2 Holiday Magic Hop being hosted by Green Fox Farms!

You’ll need some extra supplies for these than most of my earring patterns. Choose some metal hoops, and use cutters to cut them. You’ll need a post style earring finding, either a ball with small ring attached or a small flat back post. I bought my ball/ring ones from Michael’s and the flat back ones from Amazon so I could get sterling silver since my ears are sensitive.

These would make really great gifts, because the style is such that anyone would wear them. You can make them in a few sizes based on the size hoops you like or can find. I bought mine from Michael’s. I like to check the clearance section every time I go to Michael’s. They often have random jewelry findings, I think that’s where I got the hoops I used on these. The small, red pair is actually a large jump ring.

I’ve got the free version of the pattern right here on the blog. These are pretty simple, but they are a bit fiddly, so getting the PDF is a great idea if you may need extra support. The PDF has two pages of step by step photos. You can purchase the PDF from any of my shops: Etsy, ravelry, or LoveCrafts. Thanks so much!

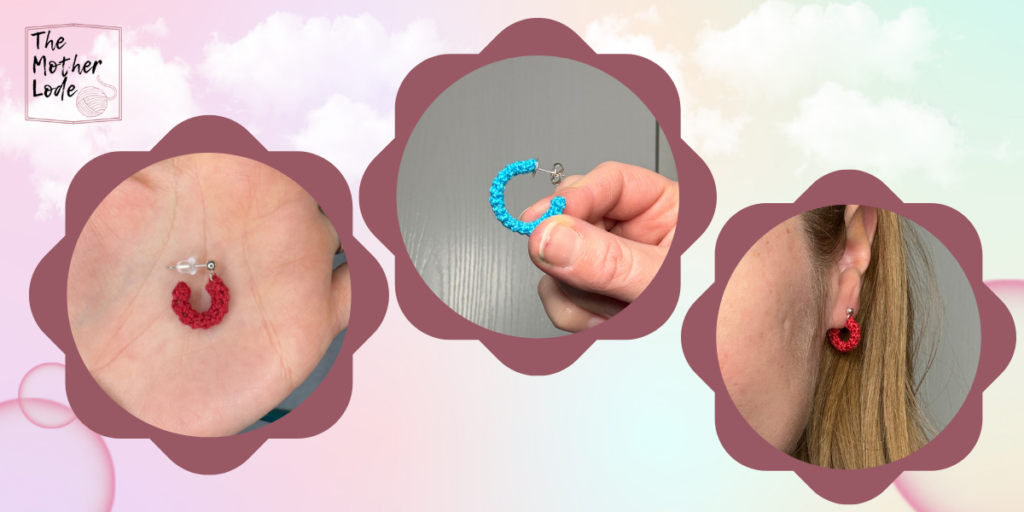
simple crochet hoop earrings free pattern
ravelry
Etsy
LoveCrafts

Making the Earrings

Supplies

  • Size 10 crochet thread, any color, approx 20 yards (I like Curio 10 from KnitPicks/WeCrochet)
  • Size 1.65 mm crochet hook
  • Tapestry needle and scissors
  • 2 flat back post earring findings, no more than 5 mm diameter, OR 2 ball with small ring post earring findings
  • Closed metal jewelry hoops, any size
  • Wire cutters to cut the hoops
  • Quality jewelry glue like E600 for flat back posts

Notes

  • You could stiffen these with starch spray but I didn’t think it was necessary for these earrings.
  • Stitch counts are marked at the end of each round with ( )
  • Finished dimensions: depends on your hoop size
  • These are quite fiddly to make. If you are struggling, try going up a hook size, or try to do 5 sts around instead of 4.
  • Cut the hoops such that you are cutting 1/4 of the hoop away. You should be able to sit the corner of a piece of paper in the hole you leave as a right angle.

Abbreviations (US Terms)

sc = single crochet

st/sts = stitch/stitches

beg = beginning

MR = magic ring

sc BLO = single crochet in the back loop only

Gauge

Gauge is not really necessary for this pattern. Personally, I find the smallest hook I can handle for the thread size (for earrings) produces the best, tightly stitched look. If you desire to gauge swatch: use single crochet in 8 rounds, 4 sts around to equal 1 inch long.

Written Instructions for these simple crochet hoop earrings free pattern

Make 2

Round 1: Form a MR, 4 sc into MR. (4 sc)

Round 2: Working in continuous rounds, sc BLO each st around. (4 sc BLO)

Use hook to pull beg tail through bottom of MR, give a gentle tug to help a cup shape form.

Rounds 3-end : Sc each st around, working in continuous rounds until you reach a long enough tube to fit around the length of your hoop. (4 sc) Fasten off and weave in ends.

Assembly

You can use two different types of posts for these earrings.

  • Use quality jewelry glue and a flat back post.
  • Use a ball stud with ring attached. Open ring and thread through the top end of the earring.

Here are some more of my free earrings patterns!

  • Christmas Wreath Earrings
    Date
    December 14, 2023
  • Fun in the Sun Earrings
    Date
    July 12, 2024
  • Spring Posy Easy Crochet Earrings Pattern
    Date
    March 12, 2025
simple crochet hoop earrings free pattern

Love it? Share it!

  • Share on X (Opens in new window) X
  • Share on Facebook (Opens in new window) Facebook
  • Share on Pinterest (Opens in new window) Pinterest
  • Print (Opens in new window) Print

November 28, 2025 by Priscilla

Easy Crochet Linen Stitch Headband Pattern

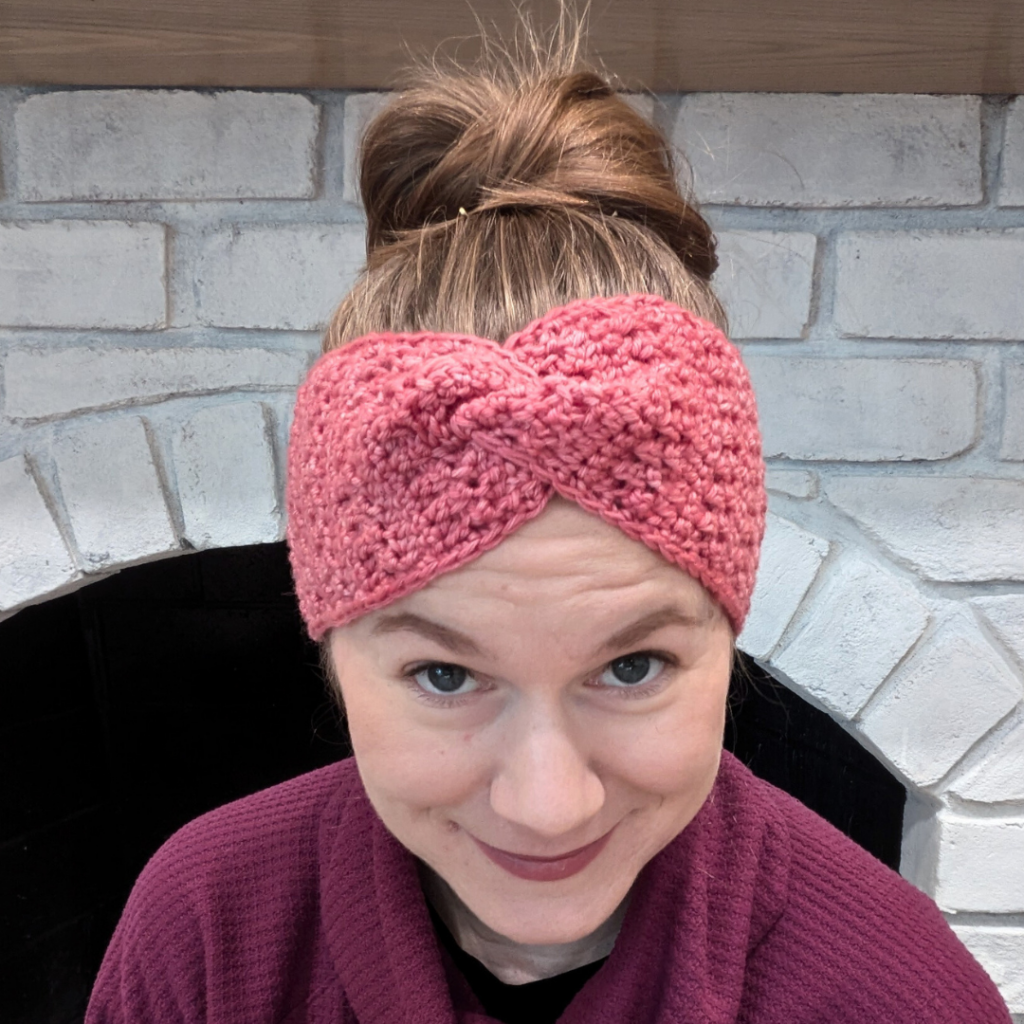
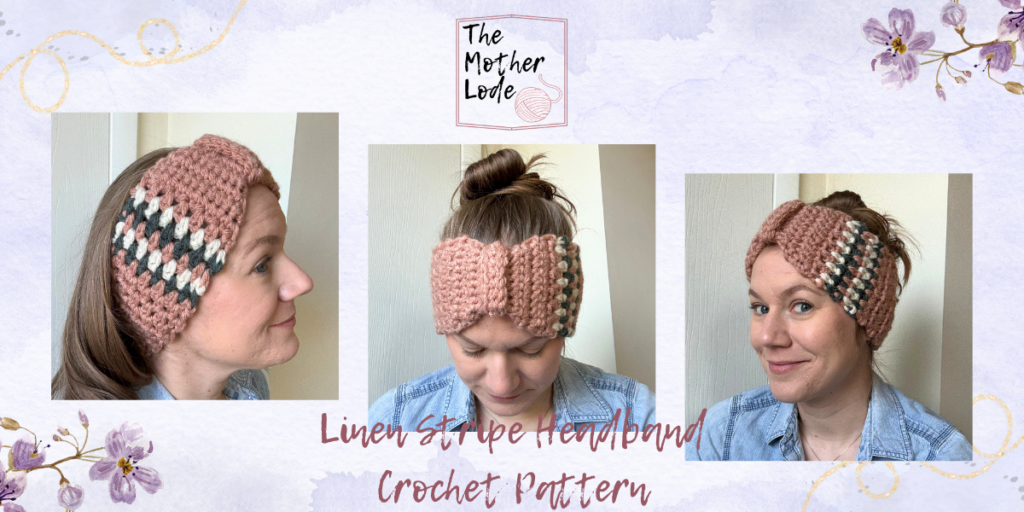
The linen stitch is one of my favorite crochet stitches. It is easy to learn and the simple texture is versatile for many projects. I also think it’s great for striped patterns, like my new pattern: the Linen Stripe Headband! I’m so happy to share this easy crochet linen stitch headband pattern with you today and I hope you enjoy making this easy pattern over and over again.

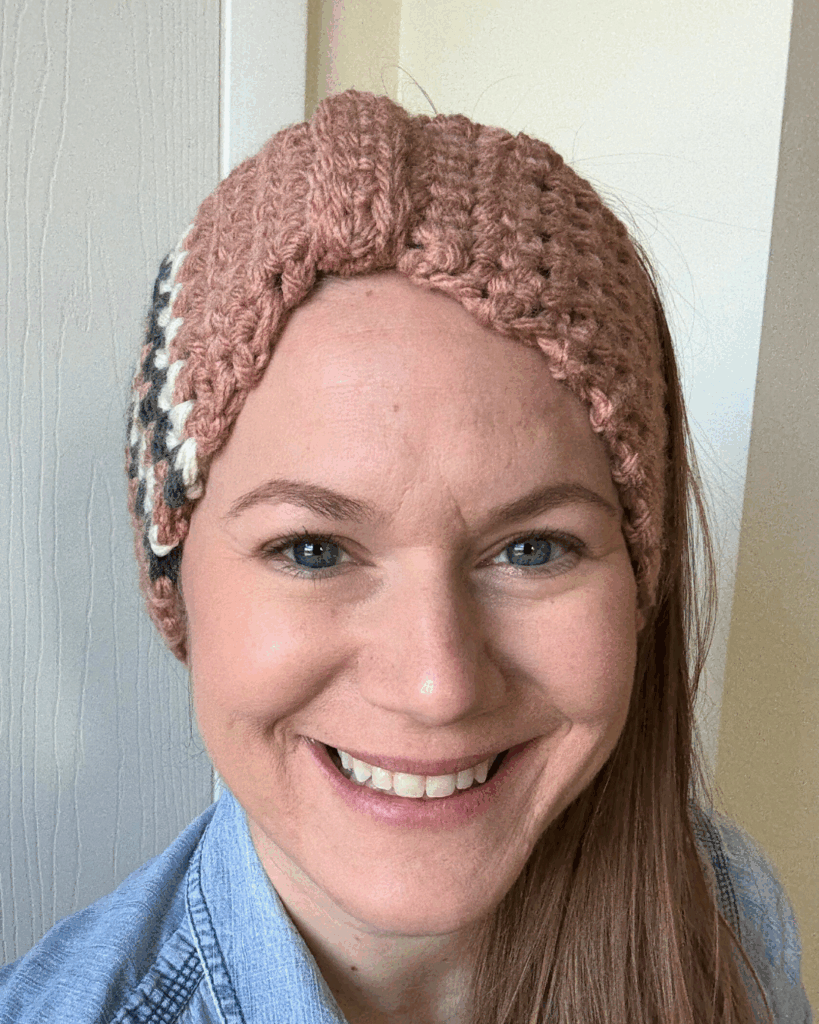
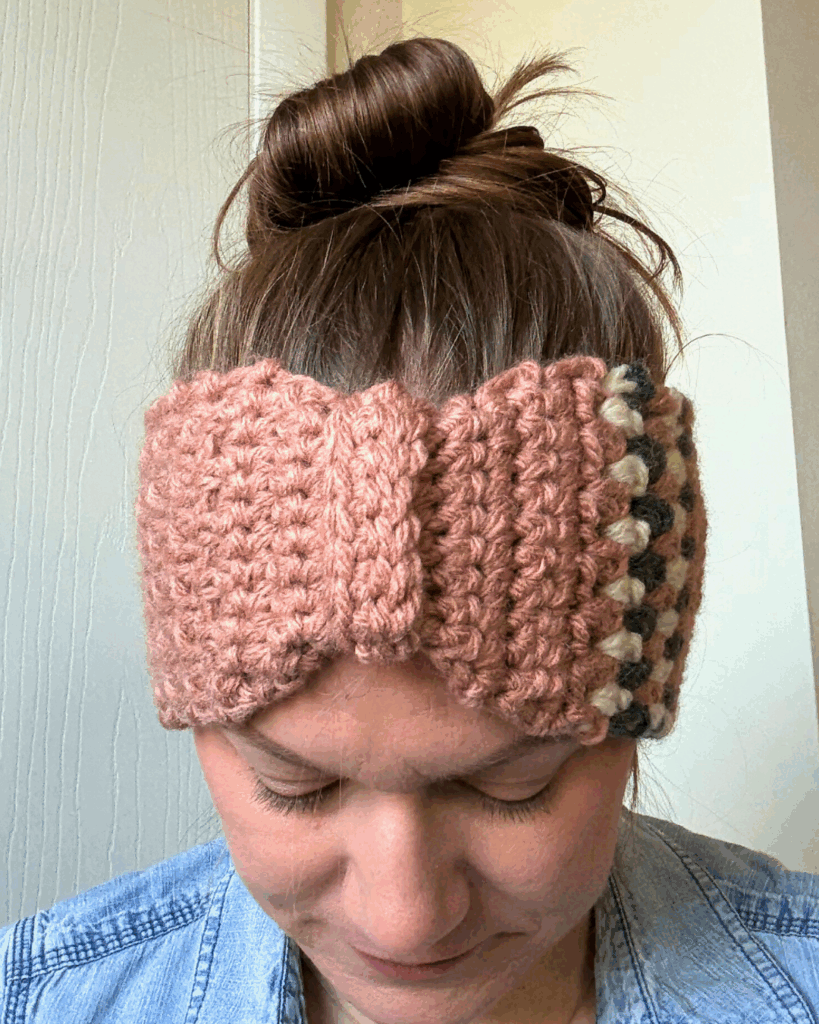
Join in this year’s Chills and Thrills Blog Hop from Stardust Gold Crochet! Scroll on to find the rest of the graphics so you can get the code for this free download available on ravelry until midnight EST on Saturday, Oct 3rd. You’ll need to get the code on the main blog hop page.

Crochet Linen Stitch Headband Pattern

This pattern is designed in four sizes, child to adult. I find that bulky headbands aren’t well suited for babies and toddlers. I was surprised with how stretchy this stitch is when used this way around the head, I’d love to design a coordinating hat, so come back and check in with me in a few weeks and I may have that available as well. Or sign up for my email list and you definitely won’t miss it then! For this pattern, you’ll need around 90 yards of Lion Brand Yarn Hue+Me or a suitable substitution. This yarn is quite a thick weight 5 bulky at 7 wraps per inch, so be sure to check the WPI for the best substitute. I used an 8 mm hook for this pattern to meet gauge.

This pattern is such a quick to make, fun, and beginner friendly pattern! You are mostly using single crochet for the entire headband in flat rows, and there are minimal decreases and increases. If you are a beginner trying out this pattern, feel free to message me on IG or email motherlodepris@gmail.com and I’m happy to help!

As always, I’m so happy to get a trickle of ad revenue and publish my patterns here on my website so anyone can use them! If you’d prefer the low cost, printable PDF, please check it out in my pattern shops below!

ravelry
Etsy
LoveCrafts

Written Instructions for making this easy crochet linen stitch headband pattern start right here:

Supplies

  • Size 5 bulky weight yarn, any colors equal to approx 90 yards total, sample is Lion Brand Yarn Hue + Me
  • Size 8 mm crochet hook
  • Tapestry needle and scissors
  • Measuring tape/gauge ruler

Abbreviations (US Terms)

  • ch = chain
  • sl st = slip stitch
  • st/sts = stitch/stitches
  • sp = space
  • sc = single crochet
  • inc = increase: 2 single crochet stitches in same space
  • dec = decrease: single crochet 2 stitches together
  • sc FLO = single crochet in the front loop only
  • linen st = single crochet, skip stitch, ch 1

Notes

  • Sizing is denoted in ( ) as follows: child (teen/adult small, adult medium, adult large)
  • Pattern is worked flat in rows. As written, there aren’t too many ends, but if you do decide to add more stripes, be prepared for the ends or float the yarn under the rows. Striping instructions are on page 3.
  • I find this particular yarn to be a quite thick bulky yarn. Keep this in mind when looking for substitutions.
  • Stitch counts are marked at the end of each round with [ ]
  • Finished dimensions: 17.5 (18.5, 19.5, 20.5) in around, 4 in wide {this pattern has a ton of stretch}
  • Note that in the abbreviation for linen st instructions, the ch-1 is at the end of the stitch instruction, meaning that in rows 7 and on, you will be chaining 1 before turning.

Gauge

7 linen sts in 11 rows = 4 inches

Striping

As designed:

Color A: Rows 1-6, 9, 12- final.

Color B: Rows 7 and 10.

Color C: Rows 8 and 11.

Variation 1:

Alternate two colors every two rows, floating through the rows for less ends to weave.

Color A: Rows 1-2.

Color B: Rows 3-4. Repeat stripe pattern through.

Variation 2:

Use one color throughout headband and additional color for the tie.

Did you miss the ravelry button above? You can download the PDF for this pattern in ravelry here!

Written Instructions:

Row 1: Ch 10, sc 2nd ch from hook, sc each st across, turn. [9 sc]

Row 2: Sc each st across, turn. [9 sc]

Row 3: Inc, sc each st until last, inc last st, turn. [11 sc]

Row 4: Sc each st across, turn. [11 sc]

Row 5: Inc, sc each st until last, inc last st, turn. [13 sc]

Row 6: Ch 1, linen st until last 2, sc last st. [6 linen st, 1 sc]

Row 7: Ch 1, linen st each ch-1 sp across, linen st last sc. [7 linen sts]

Row 8: Linen st each ch-1 sp across, linen st last sc. [7 linen sts]

Rows 9- 44 (47, 50, 53): Repeat row 8

Row 45 (48, 51, 54): Dec, sc next 9, dec. [11 sc] (working in each sc and ch-1 sp)

Row 46 (49, 52, 55): Sc each st across, turn. [11 sc]

Row 47 (50, 53, 56)Dec, sc next 7, dec. [9 sc]

Row 48 (51, 54, 57): Sc each st across, turn. [9 sc] Fasten off, leaving a tail to weave in ends and sew final row to row 1, OR sl st final row to row 1.

Tie:

Row 1: Ch 14, sl st 2nd ch from hook and each st across, turn. [13 sl st]

Row 2: Ch 1, sc FLO each st across, turn. [13 sc FLO]

Row 3: Ch 1, sl st each st across. [13 sl st] Fasten off. Wrap around seam of headband and sew together. Sew into the headband to keep in place nicely.

What did you think of the pattern?! I’d love for you to leave me a message, and definitely tag me on Instagram @motherlodecrafts with a photo of your crochet linen stitch headband!

Are you looking for more headband patterns? Here are some more of mine that are similar to this easy crochet linen stitch headband pattern!

The Secret Heart Headband

The Minimalist Headband

crochet linen stitch headband pattern

Love it? Share it!

  • Share on X (Opens in new window) X
  • Share on Facebook (Opens in new window) Facebook
  • Share on Pinterest (Opens in new window) Pinterest
  • Print (Opens in new window) Print
  • 1
  • 2
  • 3
  • …
  • 7
  • Next Page »

Welcome! My name is Priscilla and I love designing crochet patterns for your family. I live in beautiful Pennsylvania where I enjoy all sorts of crafts, but I’m most passionate about crochet! I’m a Catholic mom of 4 and I sometimes incorporate my faith into my designs. Thank you so much for supporting me by visiting my crochet website and I hope you find something here that you are excited to make.

Recent Posts

  • Cozy Fall Baby Beanie Pattern
  • Spider Basket Crochet Pattern
  • Lacy Edged Crochet Shawl Pattern
  • Crochet Gingerbread Earring Pattern
  • Classic Hairbow Crochet Pattern

Categories

Follow Me

  • Etsy
  • Facebook
  • Instagram
  • Pinterest
  • YouTube

Pretty Chic Theme By: Pretty Darn Cute Design