The Mother Lode

Crafts and Crochet

  • Home
  • Crochet Pattern Library
  • Faith Based Patterns
  • About Me
  • Privacy Policy

October 23, 2025 by Priscilla

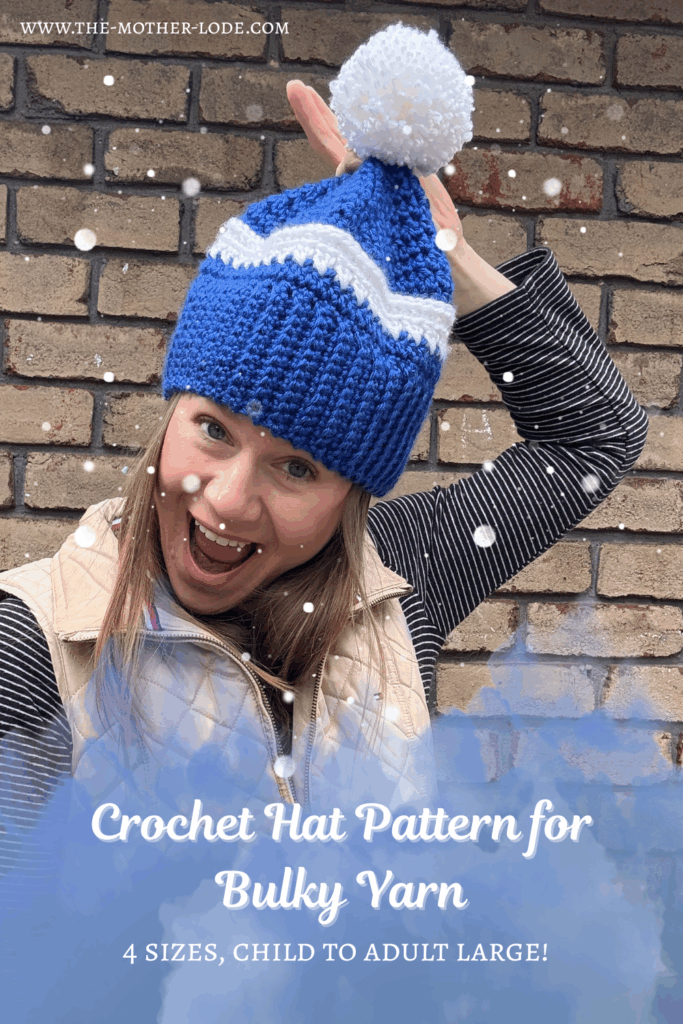
Crochet Hat Pattern for Bulky Yarn

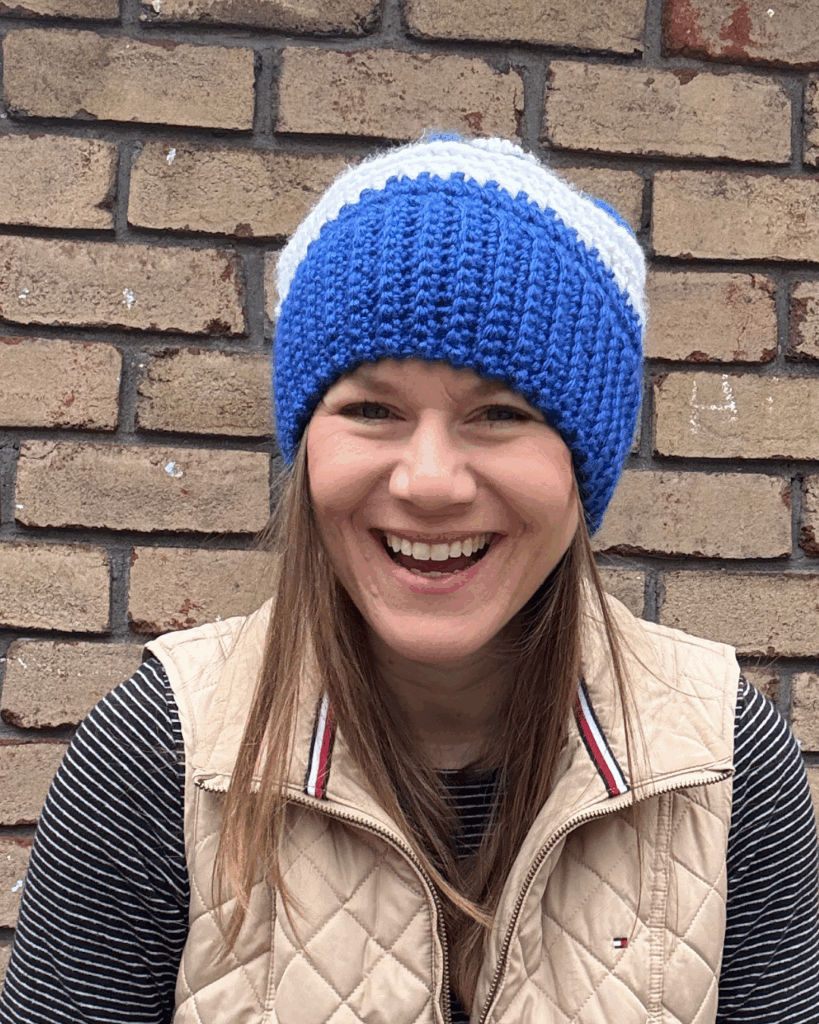
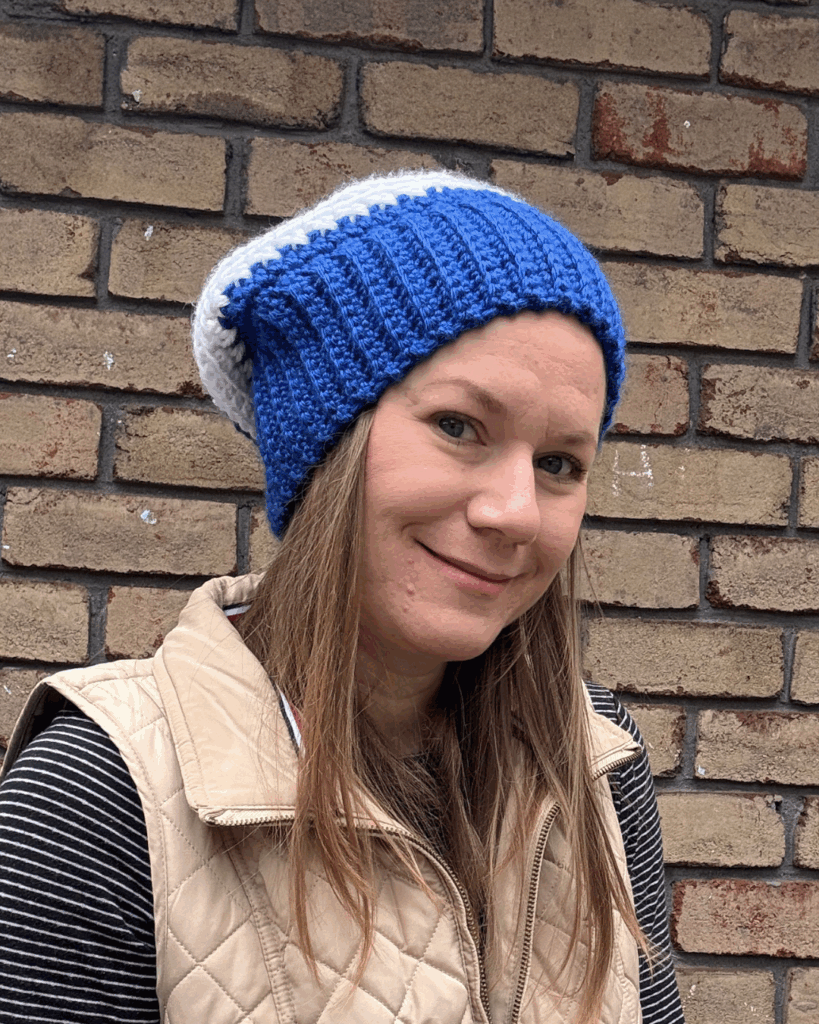
Every once in a while, even if you tend towards thinner yarn weights, you need to search for a crochet hat pattern for bulky yarn so you can make something fast for a gift or even just for the satisfaction of completing a project. Here we are with the Bulky Fan Beanie! This beanie pattern works up quickly with a classic style. Make it with your favorite team colors for those fall and winter sports so you can stay warm and cheer on your favorite team. I designed this pattern to be a quick and easy make in less than 2 hours project. It has a little bit of texture and color changing, but it’s mostly single crochet and half double crochet, so it’s really a great beginner pattern as well.
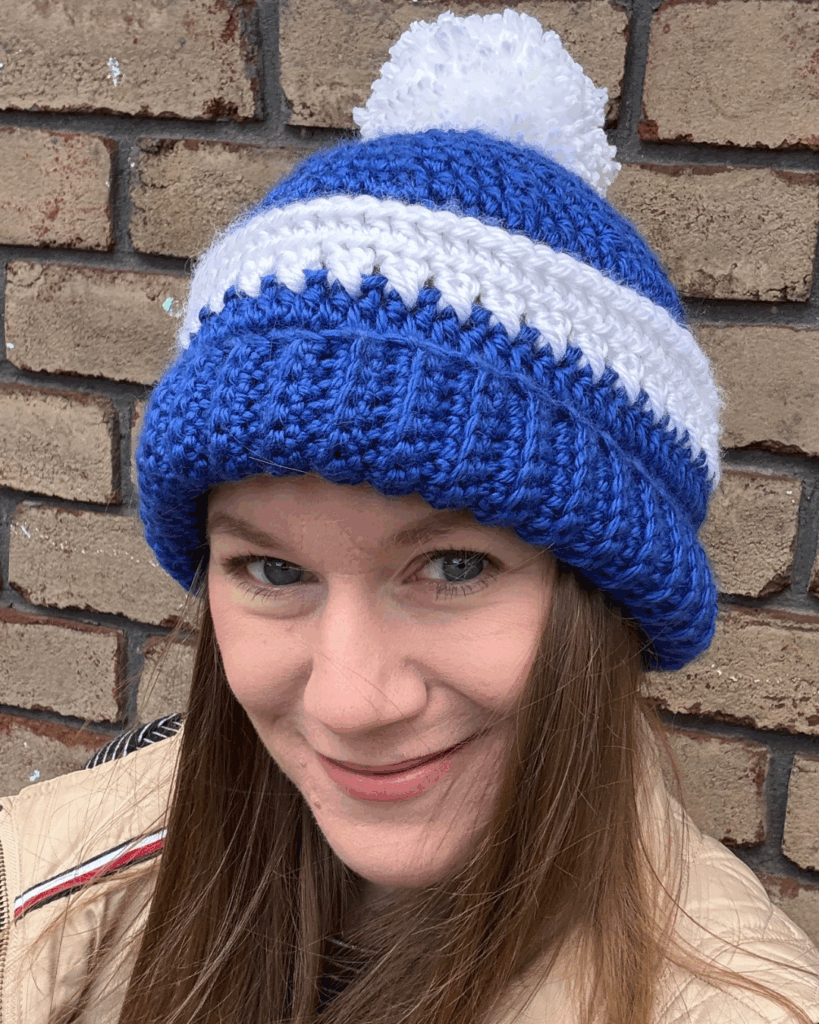
This pattern is designed with four sizes, child to adult large. I generally design for a full range of sizes from baby to adult, but with this bulky yarn, the hats for little ones tend to be harder to work with and they don’t have the same style. This pattern has a zero ease instead of negative ease, so if you wanted it to be a tighter fit, you may want to work down a size, or use a smaller hook.

The Red Heart Soft Essentials yarn I used for this design is discontinued (how rude!) but you could use some substitutes like another favorite of mine, Lion Brand Hue + Me or Caron Cinnamon Swirl Cakes. Post a comment or send me a message on social media if you know of a better substitute. I loved the color selection on the Red Heart yarn and though these substitutions are good yarns, they aren’t good for representing team colors. I was just in Michael’s yesterday looking for a good bulky acrylic yarn that isn’t blanket yarn or chenille and I was quite disappointed! I like Crochet.com’s Brava acrylic yarn and they have a bulky version. I haven’t tried it but they have some good colors! Maybe I’ll throw some in my cart and try it next time I place an order.

This is not my first crochet hat pattern for bulky yarn! I have two other beanie designs with bulky yarn and they are both on opposite ends of the design spectrum. The Blustery Beanie is a highly textured, striped pattern that I really love. The matching cowl for this one is spectacular as well, if I do say so myself! The Chill Stopper Beanie is a simple, worked flat beanie that is an even faster make than today’s design!

The Bulky Fan Beanie was designed for the Chills and Thrill Blog Hop begin hosted by Tasha at Stardust Gold Crochet! It’s a fun blog event featuring a mix of cold weather and spooky patterns! Thank you Tasha for having me!

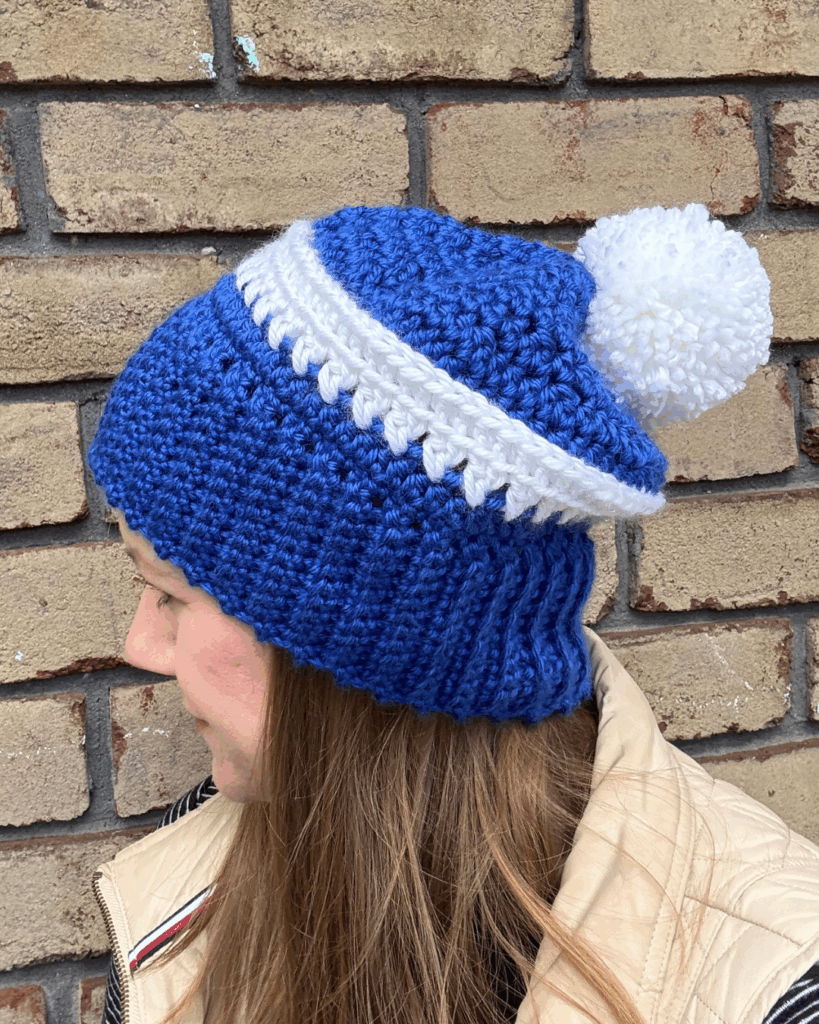
Okay! Let’s make this crochet hat pattern for bulky yarn!
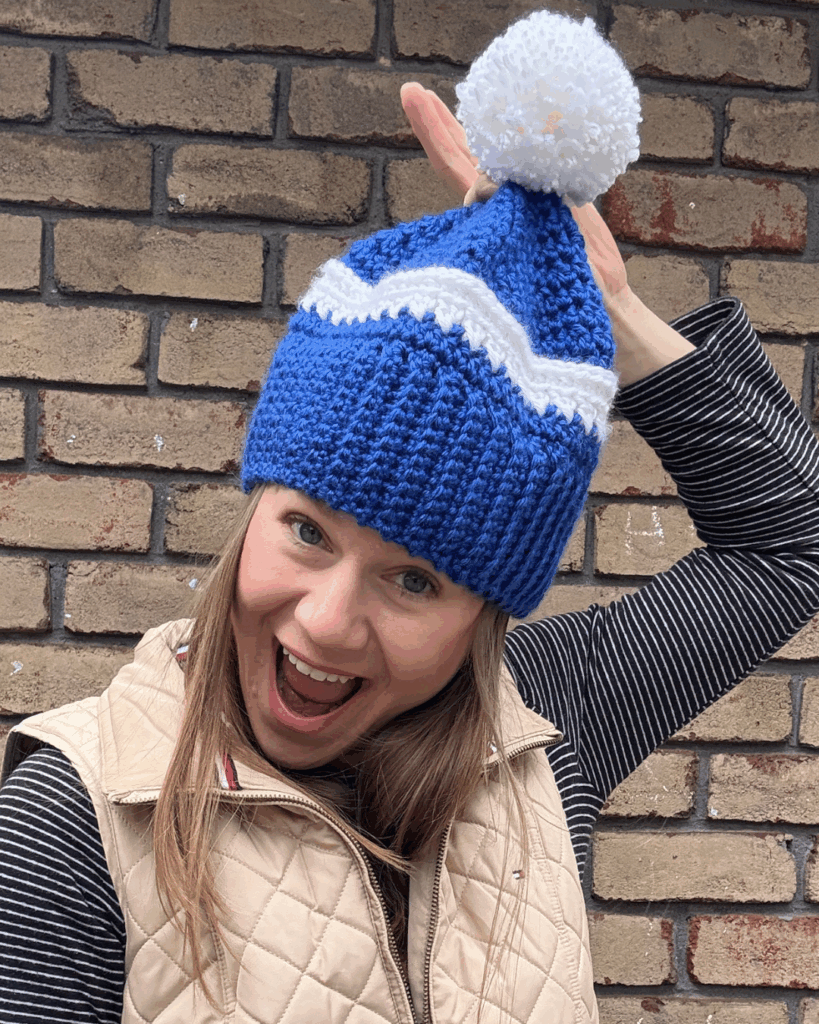
Supplies

  • 125-200 yards bulky (CYC 5) yarn, sample is Red Heart Soft Essentials
  • crochet hook US size 7 mm or size needed to obtain gauge
  • tapestry sewing needle
  • scissors and measuring tape
  • pom pom maker, if desired

Abbreviations (US Terms)

  • ch = chain
  • sc = single crochet
  • st/sts = stitch/stitches
  • BLO = back loop only
  • hdc = half double crochet
  • sl st = slip stitch
  • x-dc= sk st, dc, dc in skipped st
  • dec = yo, insert hook, pull up a loop, yo, pull through two loops, yo, insert hook in next st, pull up a loop, yo, pull though all loops on hook
  • hdc in the 3rd loop = half double crochet in the 3rd loop on the wrong side

Gauge Swatch

4 in by 4 in swatch

13 sts in 16 rows of the pattern repeat which is:

Row 1: Ch 21, sc 2nd st from hook and each across. (20 sc)

Row 2: Ch 1, turn, sc BLO each st across. ( 20 sc BLO)

Notes

  • Finished dimensions: Child: 18 in, Teen/Adult Small: 20 in, Adult Medium: 21 in, Adult Large: 22 in around.
  • Sizes are denoted by parentheses: Child (Teen/Adult Small, Adult Medium, Adult Large)
  • Stitch counts are marked at the end of each row in {brackets}.
  • Pattern is worked flat for the band, then worked in the round.

Written Instructions

Child (Teen/Adult Small, Adult Medium, Adult Large)

Row 1: Ch 11 (13, 13, 15), sc first st from hook and each st across until last, sl st last st, ch 1, turn. {1 sl st, 9 (11, 11, 13 sc) }

Row 2: Sc BLO each st across, ch 1, turn. {10 (12, 12, 14) sc BLO}

Row 3: Sc BLO each st across until last, sl st last st, ch 1, turn. {1 sl st, 9 (11, 11, 13 sc BLO)}

Rows 4-68 (72, 76, 80): Repeat rows 2 and 3.

Sl st last row to first row, turn right side out.

Round 1: Ch 1, sc end of each row, sl st to join. {68 (72, 76, 80) sc}

Round 2: Ch 1, hdc each st around, sl st to join. {68 (72, 76, 80) hdc}

Round 3: With color B, ch 1, x-dc around, sl st BLO to join. {34 (36, 38, 40) dc X sts}

Round 4: Ch 1, hdc BLO each st around, sl st to join.{68 (72, 76, 80) hdc BLO}

Round 5: With color A, ch 1, hdc in 3rd loop each st around, sl st to join. {68 (72, 76, 80) hdc in 3rd loop}

Skip to round 8 in sizes below for Child and Teen/Adult Small

Round 6: Ch 1, hdc each st around, sl st to join.{76 (80) hdc}

Round 7: Ch 1, hdc each st around, sl st to join. {76 (80) hdc}

Child:

Round 8: Ch 1, *hdc 3 sts, dec, repeat from * around until 3 sts remain, hdc last 3 sts, sl st to join.{42 hdc, 13 dec}

Round 9: Ch 1, *hdc 3 sts, dec, repeat from * around, sl st to join.{33 hdc, 11 dec}

Round 10: Ch 1, *hdc 3 sts, dec, repeat from * around, sl st to join.{27 hdc, 9 dec}

Round 11: Dec each st around. {18 dec}

Teen/Adult Small

Round 8: Ch 1, *hdc 3 sts, dec, repeat from * around until 7 sts remain, hdc next 4 sts, dec, hdc, sl st to join.{44 hdc, 14 dec}

Round 9: Ch 1, *hdc 3 sts, dec, repeat from * around, until 3 sts remain, hdc last 3 sts, sl st to join.{36 hdc, 11 dec}

Round 10: Ch 1, *hdc 3 sts, dec, repeat from * around, until 2 sts remain, hdc last 2 sts, sl st to join.{29 hdc, 9 dec}

Round 11: Dec each st around until last, hdc last st. { 1 hdc, 18 dec}

Adult Medium

Round 8: Ch 1, *hdc 3 sts, dec, repeat from * around until last, hdc last, sl st to join.{46 hdc, 15 dec}

Round 9: Ch 1, *hdc 3 sts, dec, repeat from * around, until last, hdc last st, sl st to join.{37 hdc, 12 dec}

Round 10: Ch 1, *hdc 3 sts, dec, repeat from * around, until 3 sts remain, hdc last 3 sts, sl st to join. {30 hdc, 9 dec}

Round 11: Dec each st around until last, hdc last st. { 1 hdc, 19 dec}

Adult Large

Round 8: Ch 1, *hdc 3 sts, dec, repeat from * around sl st to join. {48 hdc, 16 dec}

Round 9: Ch 1, *hdc 3 sts, dec, repeat from * around, until until 4 sts remain, hdc 2 sts, dec, sl st to join. {38 hdc, 13 dec}

Round 10: Ch 1, *hdc 3 sts, dec, repeat from * around, until 6 sts remain, hdc next 4, dec, sl st to join. {31 hdc, 10 dec}

Round 11: Ch 1, *hdc 3 sts, dec, repeat from * around, until 6 sts remain, hdc next 4, dec, sl st to join. {25 hdc, 8 dec}

Round 12: Dec each st around until last, hdc last st. {1 hdc, 16 dec}

Finish off, then leave a long tail to sew around the opening to close it. I like to then sew back and forth across the top a couple of times to make sure that seam is tight. Then, leave the rest of the tail to help attach a pom pom or cut the tail. Weave in the rest of the ends.

Pom Pom: I use the Clover Pom Pom maker to make my pom poms! I think it does a great job. I like to use dental floss to tie them at the end to make them the absolute tightest that I can. If you don’t have one, you can absolutely use some cardboard cut into two donut shapes. Follow a YouTube tutorial for that! Leave two long strands of yarn or floss to attach to the beanie.

Two tips for making poms is use nice, sharp scissors, and wrap with two strands of yarn so it takes less time to make.

I hope you loved making this crochet hat pattern for bulky yarn! It’s an easy make and so much fun to work up the different color combinations.
Love it? Share it!

  • Share on X (Opens in new window) X
  • Share on Facebook (Opens in new window) Facebook
  • Share on Pinterest (Opens in new window) Pinterest
  • Print (Opens in new window) Print

October 16, 2025 by Priscilla

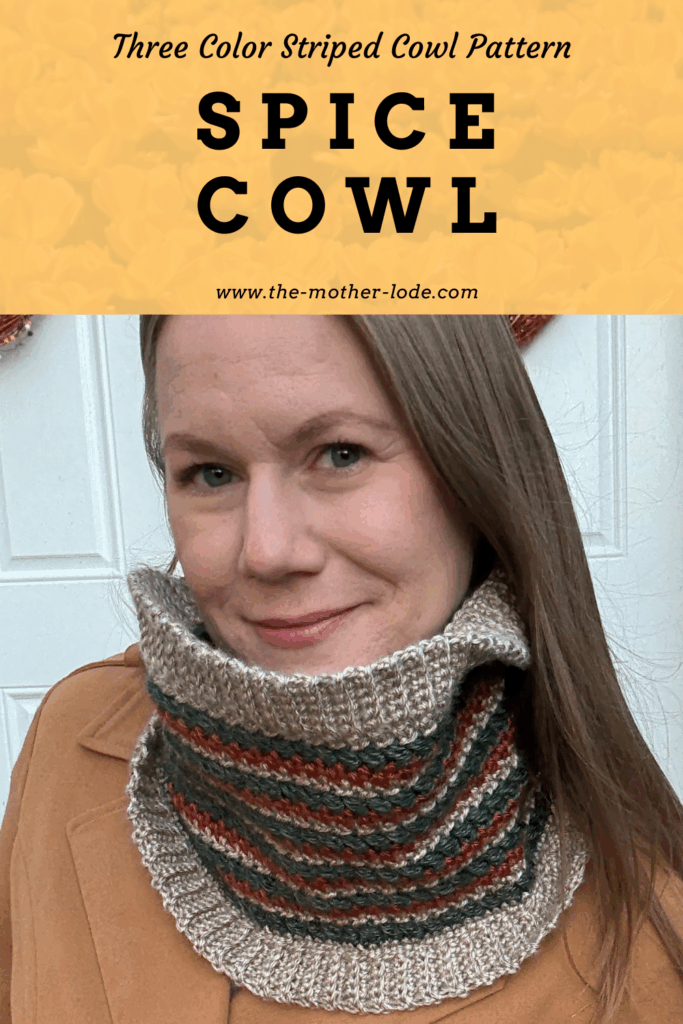
Spice Cowl

Welcome to my blog for the Bewitching Halloween Hop! Scroll down to find the event page button so you can get a code to download this pattern for free on Oct 17th, 2025!

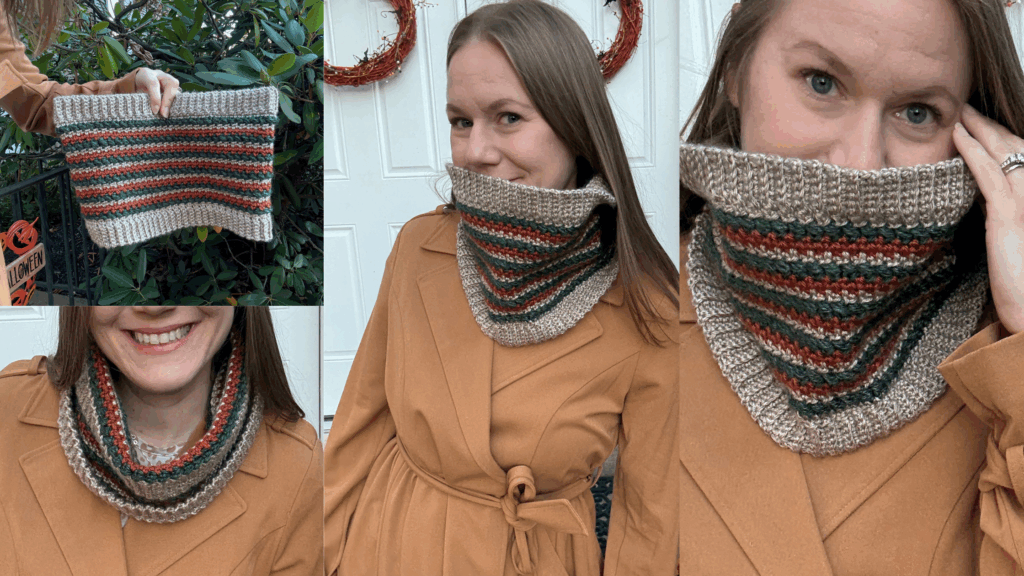
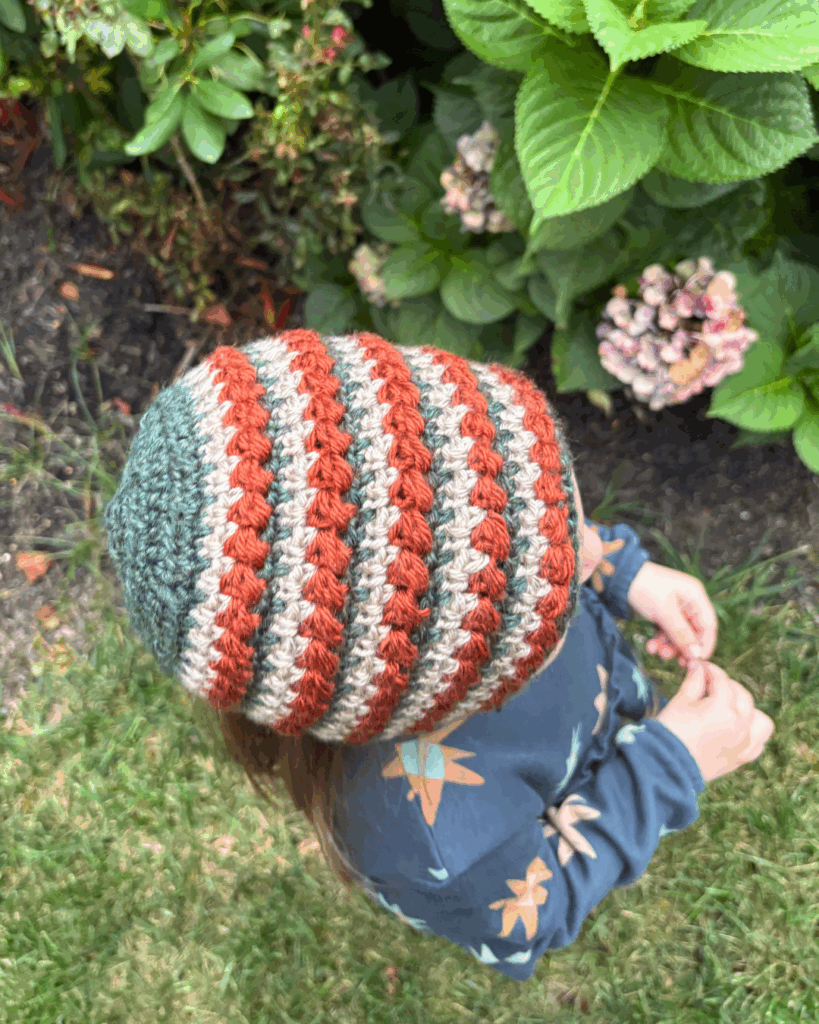
Let’s make a gorgeous cowl to wear during cold fall and winter weather! This three color striped cowl pattern features ribbing at the top and bottom with a beautiful stitch pattern in between featuring a modified bead stitch. This cowl has variations in the pattern so you can make yours narrow or wide, tall or short. There is enough texture in this pattern that you could make it in all one color if you wanted less contrast in your project.

The Spice Cowl has a matching bonnet pattern! You can make a sweet mommy and me set with the bonnet and cowl! Here is the blog post for that pattern.

I think a cowl is a great accessory for a busy mom because there is less arranging than wearing a scarf. We all know we get the kids all bundled up and might forget our own warmth before leaving the house! Toss it right over your head to keep your neck warm as the cooler temperatures hit.

Okay let’s get to making this cozy three color striped cowl pattern!

Supplies

  • CYC 4 worsted yarn: color A: green: 150 yards, color B: orange: 100 yards, color C: tan: 85 yards (sample is acrylic worsted yarn)
  • crochet hook 5 mm or size needed to obtain gauge
  • tapestry sewing needle
  • scissors and measuring tape/gauge ruler

Abbreviations

ch = chain

st/sts = stitch/stitches

sk = skip

beg = beginning

sc = single crochet

sc BLO = single crochet in the

back loop only

sl st = slip stitch

linen st = sc, sk st, ch 1

FSC = foundation single crochet

Special Stitches

bead st = skip next st, sc next st, yo, insert hook around post of the sc just made, pull up a loop, yo, insert hook around post again, pull up a loop, yo, pull through all loops on hook

Gauge

4 in by 4 in swatch = 9 bead sts in 4 row 2-5 repeats

Row 1: With color A, FSC 24. [24 sc]

Row 2: With color B, ch 2, bead st across. [12 bead sts, 1 dc]

Row 3: With color C, ch 1, linen stitch across.[14 linen sts]

Row 4: Repeat row 3.

Row 5: With color A, ch 1, *sc FLO, sc ch-1 sp, repeat from * across. [12 sc, 12 sc FLO]

Rows 6-14: Repeat rows 2-5 respectively.

Notes

  • Stitch counts are marked in [ ] at the end of each row, with different sizing in parentheses as follows: Narrow (Wide)
  • Turning chains do not count as stitches.
  • Color changes are noted as “with color x,” at the beginning of the rows. If there is not a color noted, you are continuing with the color from the previous row. I like to change colors by finishing the final stitch of the previous color with the new color.
  • This pattern will have numerous ends. If you want to minimize end weaving, you could make there be an “inside” and an “outside” and carry the yarn on the inside.
  • This pattern can be made to different measurements for versatility! The pattern gives instructions for narrow, wide and short, tall.

Okay, go get the ravelry code so you can get a free copy:

Written Instructions

PART 1:

Size: Narrow (Wide) Short {Tall}

Row 1: With color A, ch 7, sc each st across, turn. [6 sc]

Row 2: Ch 1, sc BLO each st across, turn. [6 sc BLO]

Rows 3-108 (128) repeat row 2.

Sl st final row to beg row.

PART 2:

Round 1: Turn right side out, ch 1, sc end of each row, sl st to join. [108 (128) sc]

Round 2: Change to color B, ch 2, bead st around, sl st to join. [54 (64) bead sts]

Round 3: Change to color C, linen st around, sl st to join. [54 (64) linen sts]

Round 4: Linen st around, sl st to join. [54 (64) linen sts]

Round 5: Change to color A*Sc FLO, sc in ch-1 sp, repeat from * around, sl st to join. [54 (64) sc FLO, 54 (64) sc]

Round 6-22 {26} : Repeat rounds 2-5 respectively.

Round 23 {27}: Change to color A, sc each st around, sl st to join. [108 (128) sc]

PART 3:

Row 1: With color A, ch 7, sc each st across, sl st next 2 sts of final round, turn. [6 sc, 2 sl st]

Row 2: Sk 2 sl sts, sc BLO each st across, ch 1, turn. [6 sc BLO]

Row 3: Sc BLO each st across, sl st next 2 sts of final round, turn. [6 sc BLO, 2 sl st]

Rows 4- 108 (128): repeat rows 2 and 3 respectively.

Sl st final row to beg row.

Fasten off and weave in ends.

How to pick colors for this three color striped cowl pattern:

Pick some colors that you like together! Who cares if it “works” as long as YOU like it.

Pick seasonal colors, like the fall spicy colors I used, or red, white, and green for Christmas, or cool wintry blues and white.

Choose two neutral colors, one light, one dark, then add your favorite color!

Love it? Share it!

  • Share on X (Opens in new window) X
  • Share on Facebook (Opens in new window) Facebook
  • Share on Pinterest (Opens in new window) Pinterest
  • Print (Opens in new window) Print

October 10, 2025 by Priscilla

Halloween Crochet Costumes

Let’s use our favorite craft to make amazing Halloween costume pieces! They don’t have to be enormously elaborate to be adorable or clever, and you have plenty of time to whip up some of these items before the end of the month. So dig into your stash and find some forgotten yarn, sit in a well lit spot and make the cutest costume for yourself or someone you love!

I’m going to break this post down into sections on types of items so the ideas have some organization!

Crowns

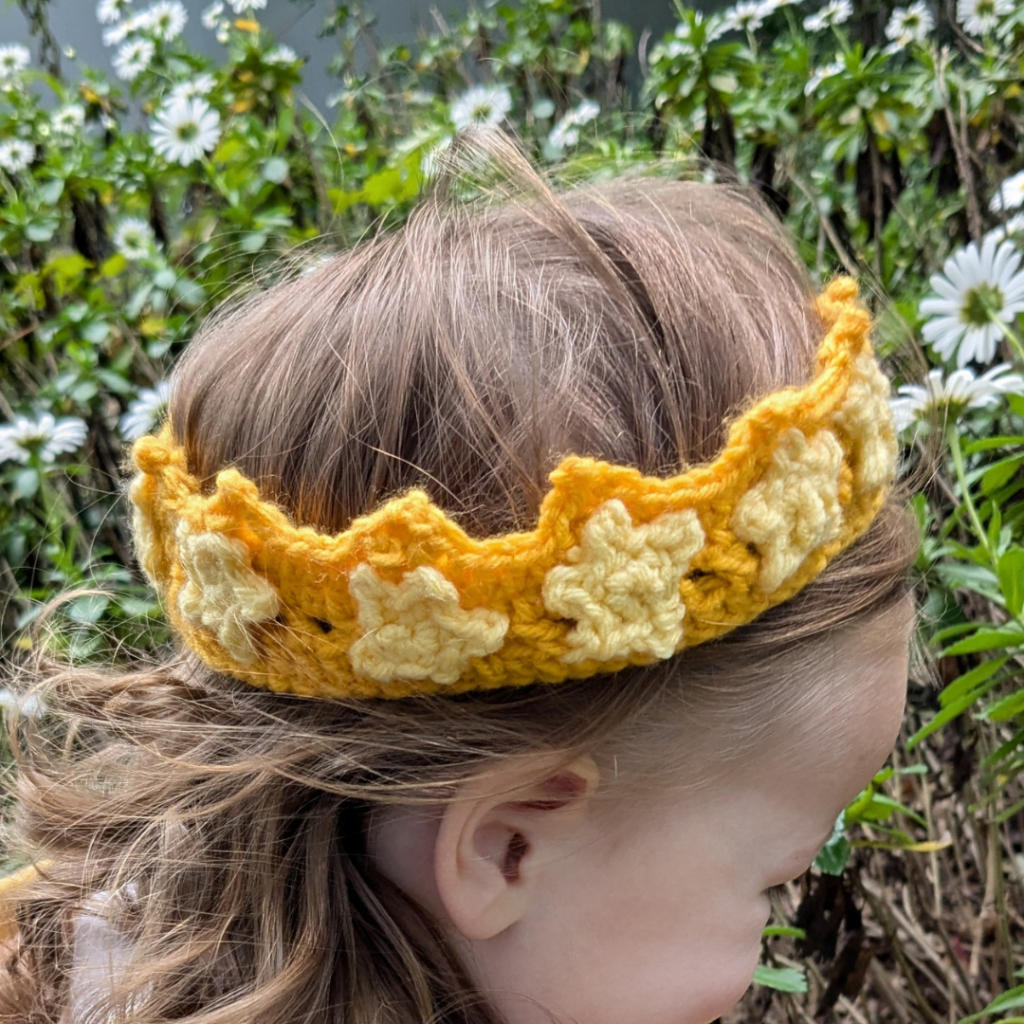
There are plenty of great patterns out there for crochet crowns. Crochet crowns are much more comfortable than any plastic one you get from the store, and you could even hot glue some sparkle on if that’s your jam.

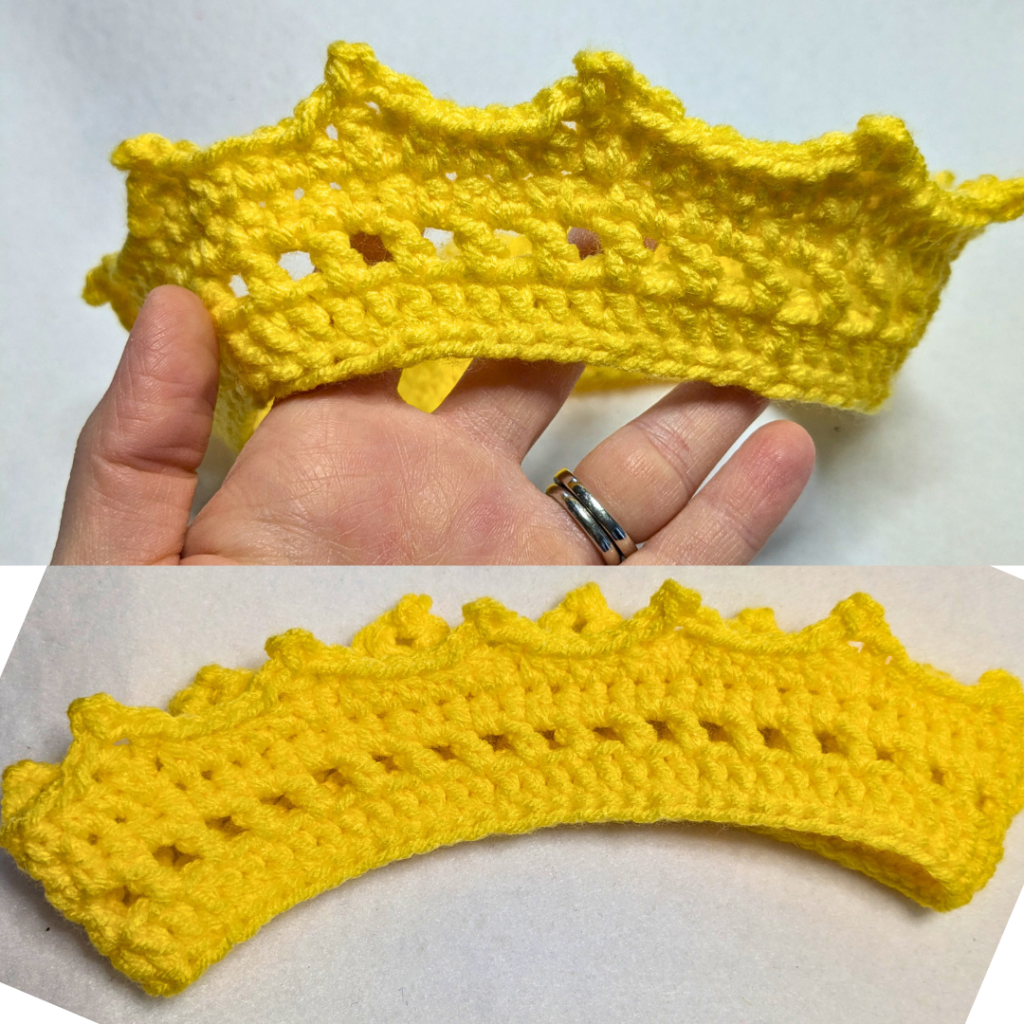
Let’s start off with one of mine: The Marian Crown! You can use this for an All Saints’ Day Blessed Mother costume, but you could absolutely make it for any princess, prince, queen, king, etc! This is particularly fast, you could make a toddler size in an hour or so.

Here is another one from Crochet365, it’s cute and has sizing from baby to adult!

Creatures

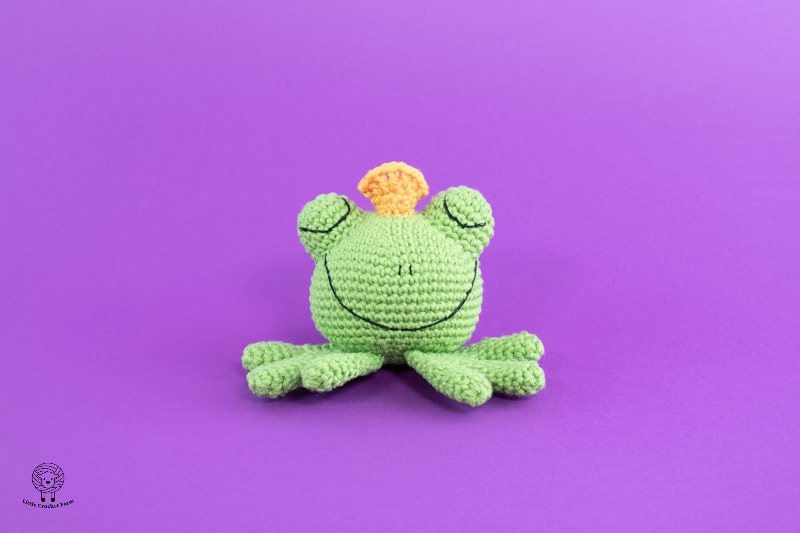
How cute would it be to make this lil frog to carry dressed as a princess for a Princess and the Frog costume? Little Crochet Farm has so many cute, small amigurumi patterns, and this one is very beginner friendly. Think about other critters you could make as an accessory to add detail to a costume.

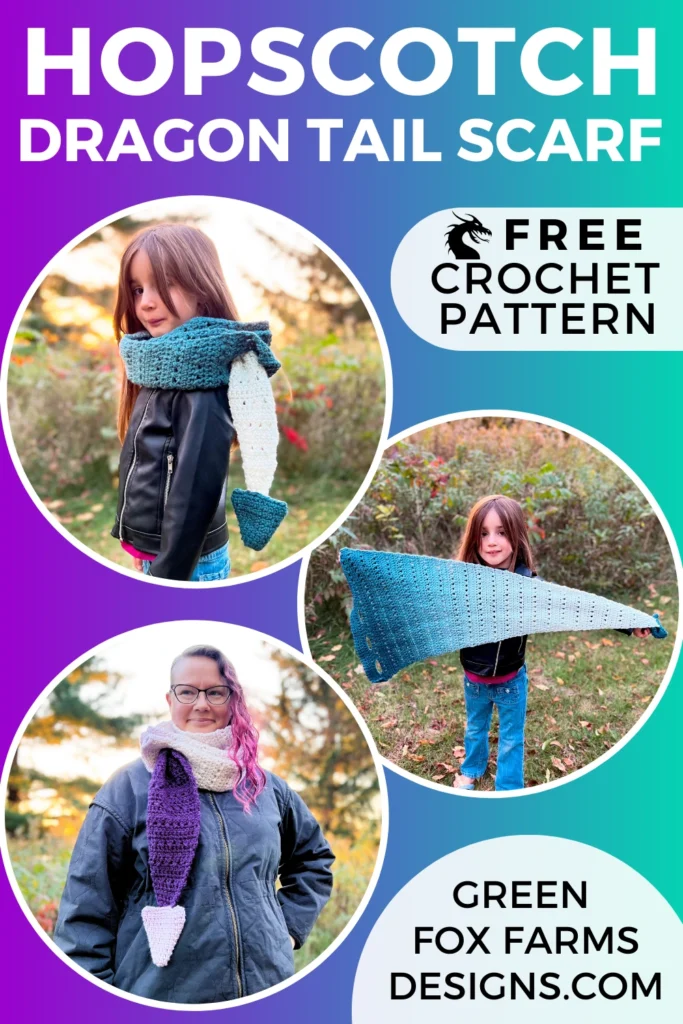
Put together two amazing crochet patterns to create a dragon costume! Green Fox Farms created this unique dragon tail keyhole scarf that is so cute! Pair it with a dragon hat like this one and you have a cozy costume.

So many animal hats! There are lots of patterns for cute animal hats! Here are some of my favorites:

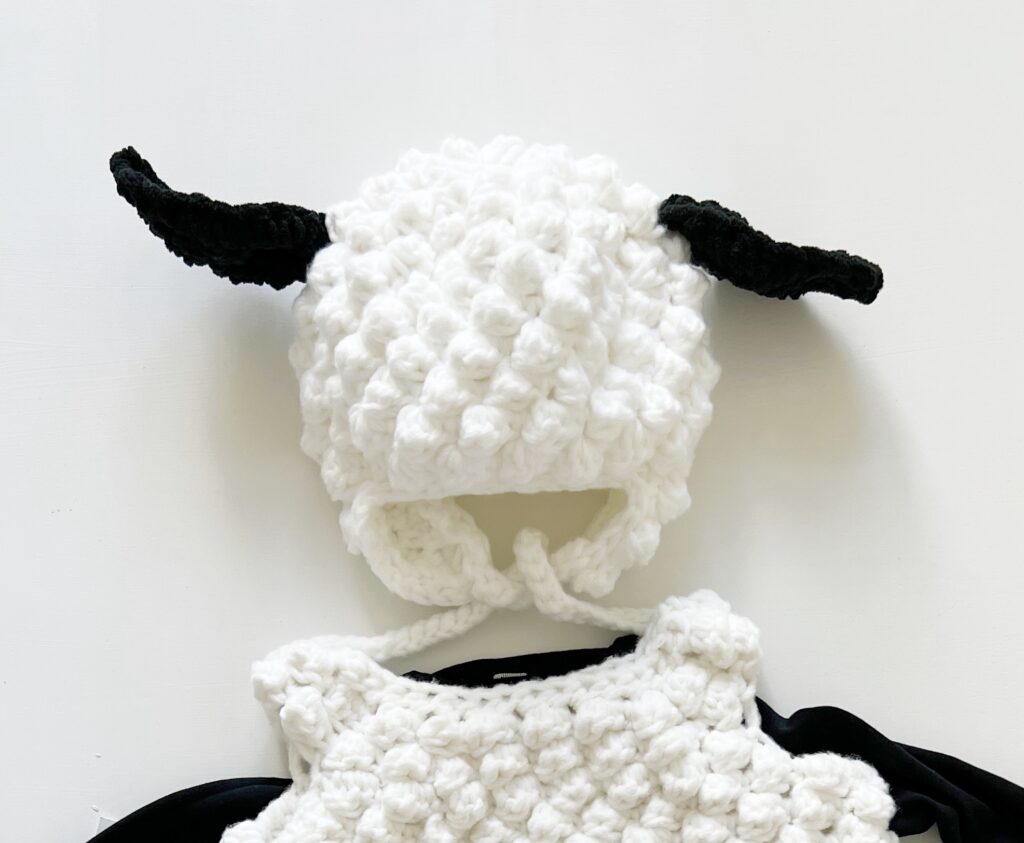
This Sheep Hat by Daisy Farm Crafts is such a sweet pattern! She actually even has a vest to go with it to make a full costume. She always has beautiful patterns.

Plenty of cat and bear hat patterns, those would whip up in a snap! I like this cat one from Nana’s Crafty Home.

This monkey hat by the Friendly Red Fox is so cute! I love the braided ties that it has. I think if you pair this with a brown sweatsuit, you could easily make a brown tail to add to the pants. This would be such a cute, comfortable monkey costume.

Another one from Daisy Farm Crafts: a cow hat! It’s so adorable and she has sizing information all the way from baby to adult. All these animals, you could have the whole family be a little farm!

Jobs/Character

Police Baby hat from Posh Patterns is a cute one! There is also a really sweet one with a diaper cover and itty bitty handcuffs on ravelry by Jessica Gammon.

There is a great Kim Guzman design for free on the Yarnspirations site for a pirate costume!

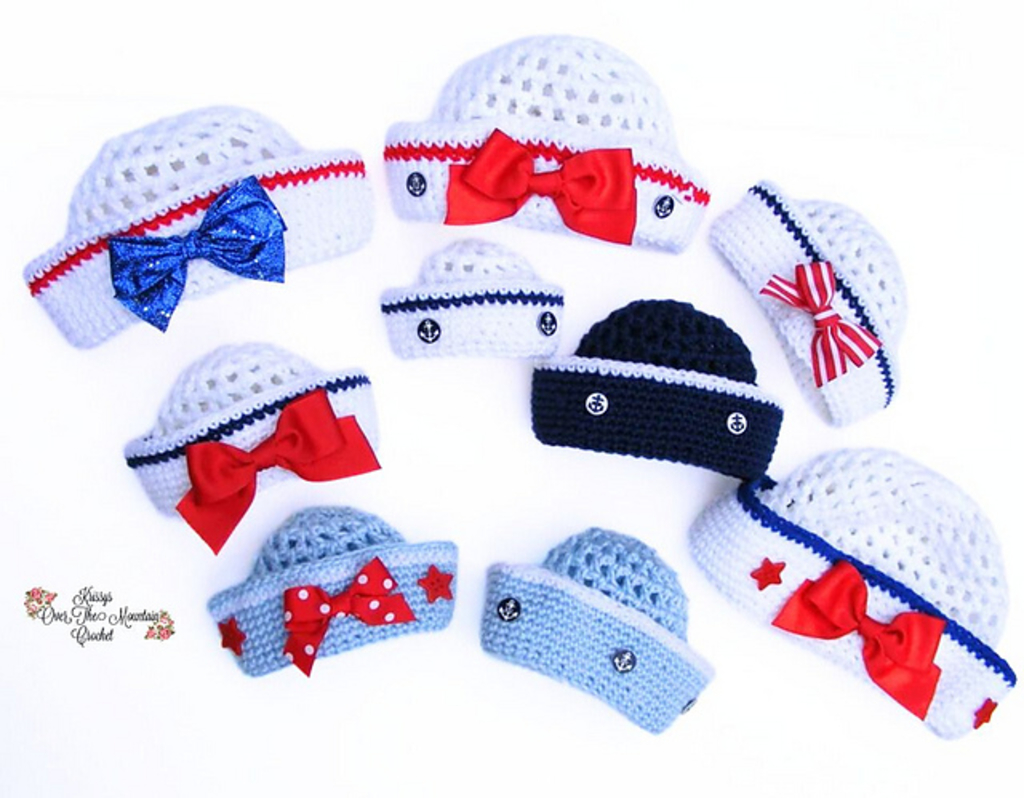
Krissy’s Over the Mountain Crochet has a sailor hat sized baby to child that I bet you could easily make an adult version, it looks pretty simple!

The Twisted Hatter has a great catalog of intricate patterns if you wanted to take on a bigger project. Large hooded characters and unique hats for things from aliens to jellyfish to plants!

Halloween Theme Costumes

There are plenty of pumpkin hats out there! When my daughter was a baby, I dressed all in green and twirled silk ivy in my hair, then carried her in a green baby wrap wearing a pumpkin hat for trick or treat at my alma mater high school! It was so sweet and easy. Did I just spend 30 minutes looking for a photo of that and come up empty handed? Yep.

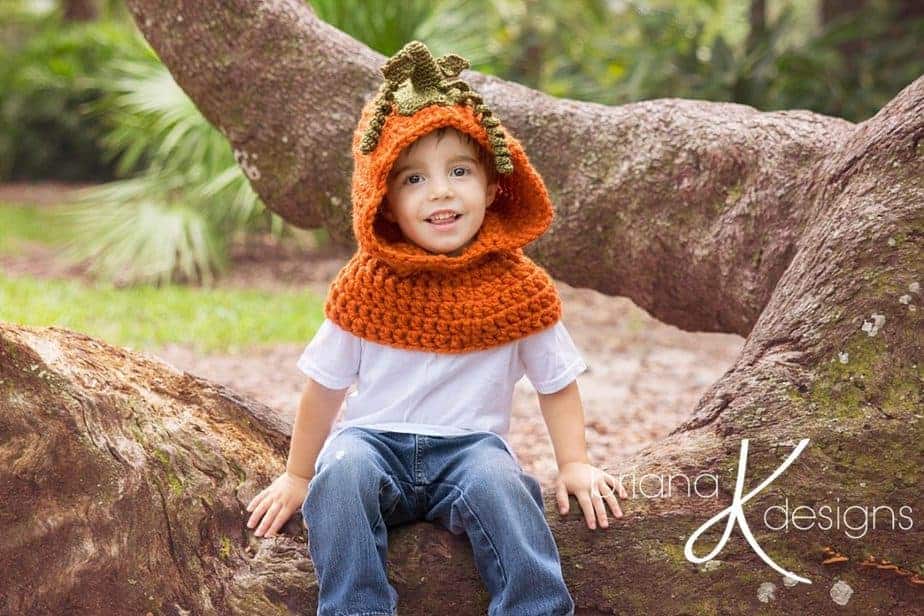
Anyways here are some great pumpkin hats: Hooded Pumpkin Cowl by Briana K Designs is a pretty pattern! I love how realistic the stem looks on this one.

Crochet 365 has their crochet pumpkin hat that is a little more basic but just as sweet and it has all sizes so you could make an entire pumpkin patch of hats!

Crochetverse also has some great costume pieces as well as full costumes. The bride of Frankenstein wig hat is my favorite here!

Witch hats are another great Halloween costume item to make! I like this velvet crochet witch hat pattern from Gleeful Things.

I hope you found something amazing to make with one of these patterns! In the past it was quite easy to run to Joann for fabrics to make a costume, this year I’m sure there are many people mourning that. Maybe crochet is the answer! (as it is for so many things, haha!)

Love it? Share it!

  • Share on X (Opens in new window) X
  • Share on Facebook (Opens in new window) Facebook
  • Share on Pinterest (Opens in new window) Pinterest
  • Print (Opens in new window) Print

September 17, 2025 by Priscilla

Textured Baby Bonnet Crochet Pattern

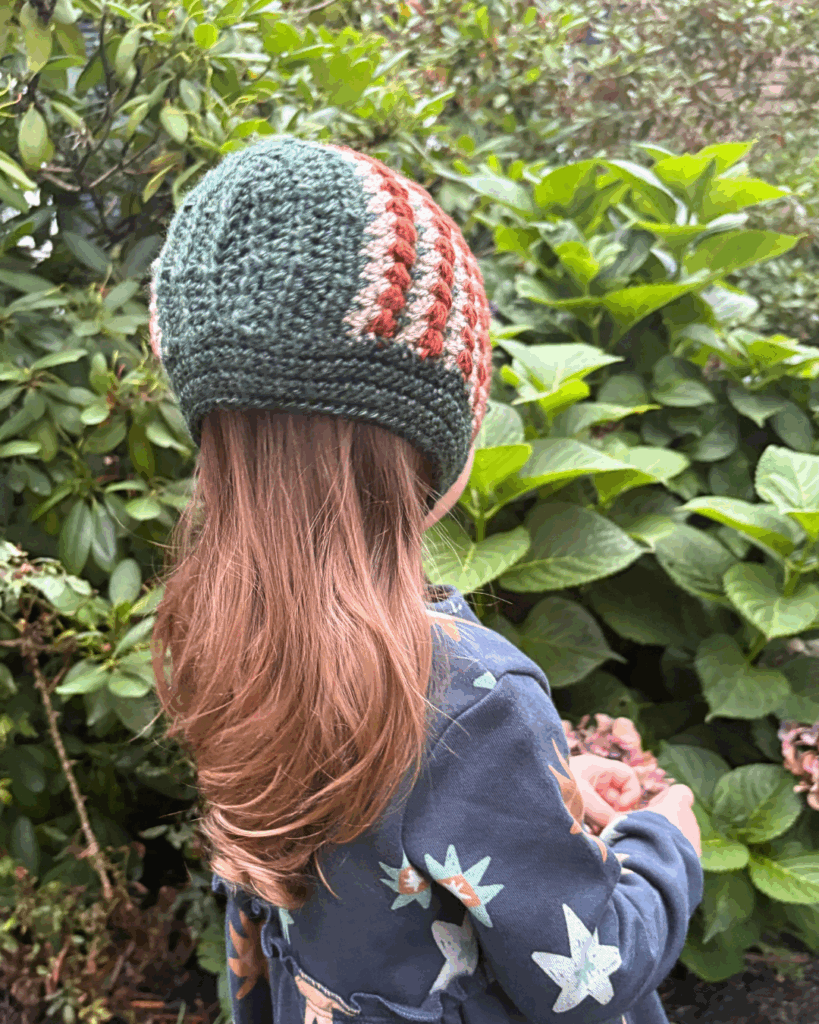
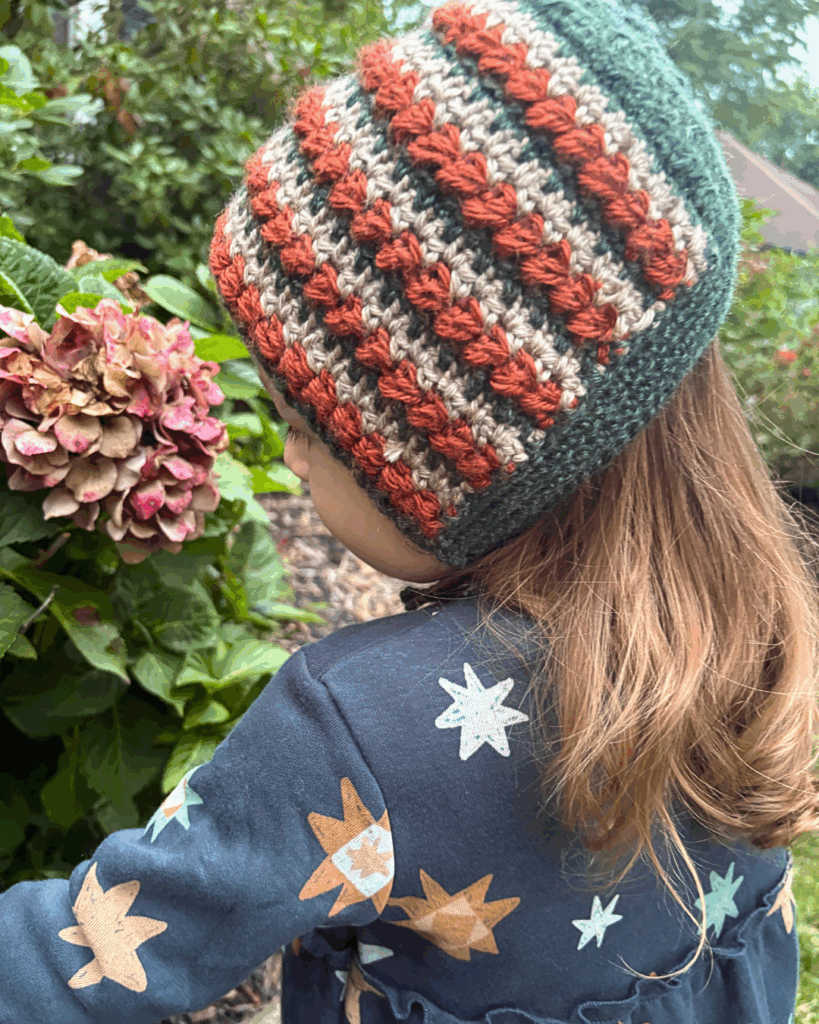
Hello! I’m so delighted to share this pattern with you today! The Spice Bonnet is a textured bonnet pattern for the little ones, from preemies all the way to children. This was designed for the Preemie Crochet Challenge that is put on by Sunflower Cottage Crochet every year. I’m so glad to be a part of it this year! For the release of this pattern it will be available as a free download from Sept 19, 2025 through the end of the month!

The Preemie Crochet Challenge is an event through the whole month of September, which is Prematurity Awareness Month! When you download one of the free patterns available through the month, you pledge to make one item to donate to your local NICU or pregnancy/baby center. It’s really a beautiful event and you should go read more about it here. Though I haven’t had a premature birth myself, my youngest son did have a short NICU stay due to fluid in his lungs and those five days were a tiny glimpse into the difficulty those families experience. Participating in this event to help raise awareness and give to those families is wonderful!

You’ll need worsted weight yarn for this pattern in three colors, though I do think the texture is lovely and you could make a one color version. A 5 mm hook met gauge for most of my testers, though I personally used 5.5 mm as I have tight tension. This pattern is an intermediate pattern, as the bead stitch may not be familiar.

I’ve used one of my favorite yarns for this one, Lion Brand Heartland. I love the slight heathered look in this yarn line and I think it’s very soft and easy to work with.

Let’s get to making it!

Supplies

  • CYC 4 worsted yarn: color A: green: 75 yards, color B: orange: 75 yards, color C: tan: 60 yards (sample is acrylic worsted yarn)
  • crochet hook 5 mm or size needed to obtain gauge
  • tapestry sewing needle
  • scissors and measuring tape/gauge ruler

Notes

  • Stitch counts are marked in [ ] at the end of each row, with different sizing in parentheses as follows: Preemie, Infant: 0-6 months, (Baby: 6-12 months, Toddler: 1-3 years, Child: 4-10 yrs)
  • Turning chains do not count as stitches.
  • There is a RS (right side) noted in Row 5.
  • Color changes are noted as “with color x,” at the beginning of the rows. If there is not a color noted, you are continuing with the color from the previous row. I like to change colors by finishing the final stitch of the previous color with the new color.
  • The striped top of the bonnet will have numerous ends. You could minimize end weaving a bit by carrying color C along the edges of the stripes. This will be hidden because you will be crocheting a neckband along those edges.

Abbreviations (US Terms)

  • ch = chain
  • st/sts = stitch/stitches
  • sk = skip
  • sc = single crochet
  • dc = double crochet
  • sl st = slip stitch
  • hdc = half double crochet
  • dec = hdc two stitches together
  • sc FLO = single crochet front loop only
  • linen st = sc, sk st, ch 1

Special Stitches

  • bead st = skip next st, sc next st, yo, insert hook around post of the sc just made, pull up a loop, yo, insert hook around post again, pull up a loop, yo, pull through all loops on hook
  • FSC= foundation single crochet: ch 3, insert hook in 3rd ch from hook, *pull up a loop, yo, pull through one loop on hook, yo, pull through two loops, insert hook in st made by bold section above, repeat from *

Gauge Swatch

4 in by 4 in swatch = 9 bead sts in 4 row 2-5 repeats

Row 1: With color A, FSC 24 [24 sc]

Row 2: With color B, ch 2, bead st across [12 bead sts, 1 dc]

Row 3: With color C, ch 1, linen stitch across.[14 linen sts]

Row 4: Repeat row 3.

Row 5: With color A, ch 1, *sc FLO, sc ch-1 sp, repeat from * across [12 sc, 12 sc FLO]

Rows 6-14: Repeat rows 2-5 respectively.

Written Instructions

Size: Preemie (Infant: 0-6 months, 17,Baby: 6-12 months, Toddler: 1-3 years, Child: 4-10 yrs)

ALL SIZES

Row 1: With color A, FSC 32 (38, 44, 50, 56). [32 (38, 44, 50, 56 sc)]

Row 2: With color B, ch 2, bead st across until last, hdc last st. [15 (18, 21, 24, 27) bead sts, 1 hdc]

Row 3: With color C, ch 1, linen st across.[15 (18, 21, 24, 27) linen sts]

Row 4: Repeat row 3.

Row 5: With color A, ch 1, *sc FLO, sc ch-1 sp, repeat from * across [15 (18, 21, 24, 27) sc, 15 (18, 21, 24, 27) sc FLO]

Row 6-13 (17, 17, 21, 21): Repeat rows 2-5 respectively.

Continue below to appropriate size.

Preemie

Row 14: With color A, hdc first 4 sts, dec, hdc next 3 sts, dec, hdc next 2 sts, dec, hdc next 2 sts, dec, hdc next 2 sts, dec, hdc next 3 sts, dec, hdc last 4 sts.

Row 15: Hdc first 3 sts, dec, hdc next 3 sts, dec, hdc next 2 sts, dec, hdc next 2 sts, dec, hdc next 3 sts, dec, hdc last 3 sts.

Row 16: Hdc first 3 sts, dec, hdc next 3 sts, dec, hdc, dec, hdc next 3 sts, dec, hdc last 3 sts.

Continue to page 8 for neckband.

Infant

Row 18: With color A, hdc first 4 sts, dec, hdc next 4 sts, dec, hdc next 4 sts, dec, hdc next st, dec, hdc next 4 sts, dec, hdc next 4 sts, dec, hdc last 4 sts. [6 dec, 25 hdc]

Row 19: Hdc first 4 sts, dec, hdc next 4 sts, dec, hdc next 7 sts, dec, hdc next 4 sts, dec, hdc last 4 sts. [4 dec, 23 hdc]

Row 20: Hdc first 3 sts, dec, hdc next 3 sts, dec, hdc next st, dec, hdc next st, dec, hdc next st, dec, hdc next 3 sts, dec, hdc last 3 sts. [6 dec, 15 hdc]

Row 21: Hdc first 3 sts, dec, hdc next 2 sts, dec, hdc next 3 sts, dec, hdc next 2 sts, dec, hdc last 3 sts. [4 dec, 13 hdc]

Row 22: Hdc first 2 sts, dec, hdc next 2 sts, dec, hdc next st, dec, hdc next 2 sts, dec, hdc last 2 sts. [4 dec, 9 hdc]

Continue to page 8 for neckband.

Baby

Row 18: With color A, hdc each st across. [44 hdc]

Row 19: Repeat row 18.

Row 20: With color A, hdc first 4 sts, dec, hdc next 4 sts, dec, hdc next 5 sts, dec, hdc next 5 sts, dec, hdc next 5 sts, dec, hdc next 4 sts, dec, hdc last 4 sts. [6 dec, 31 hdc]

Row 21: Hdc first 4 sts, dec, hdc next 4 sts, dec, hdc next 4 sts, dec, hdc next st, dec, hdc next 4 sts, dec, hdc next 4 sts, dec, hdc last 4 sts. [6 dec, 25 hdc]

Row 22: Hdc first 4 sts, dec, hdc next 4 sts, dec, hdc next st, dec, hdc next st, dec, hdc next st, dec, hdc next 4 sts, dec, hdc last 4 sts. [6 dec, 19 hdc]

Row 23: Hdc first 3 sts, dec, hdc next 3 sts, dec, hdc next 5 sts, dec, hdc next 3 sts, dec, hdc last 3 sts. [4 dec, 18 hdc]

Row 24: Hdc first 2 sts, dec, hdc next 2 sts, dec, dec, hdc next st, dec, dec, hdc next 2 sts, dec, hdc last 2 sts. [6 dec, 9 hdc]

Continue to page 8 for neckband

Toddler

Row 22: With color A, hdc first 4 sts, dec, hdc next 4 sts, dec, hdc next 4 sts, dec, hdc next 4 sts, dec, dec, hdc next 4 sts, dec, hdc next 4 sts, dec, hdc next 4 sts, dec, hdc last 4 sts. [8 dec, 32 hdc]

Row 23: Hdc first 4 sts, dec, hdc next 4 sts, dec, hdc next 4 sts, dec, hdc next 4 sts, dec, hdc next 4 sts, dec, hdc next 4 sts, dec, hdc last 4 sts. [6 dec, 30 hdc]

Row 24: Hdc first 4 sts, dec, hdc next 4 sts, dec, hdc next 3 sts, dec, dec, hdc next 3 sts, dec, hdc next 4 sts, dec, hdc last 4 sts. [6 dec, 22 hdc]

Row 25: Hdc first 3 sts, dec, hdc next 3 sts, dec, hdc next 2 sts, dec, dec, hdc next 2 sts, dec, hdc next 3 sts, dec last 3 sts. [6 dec, 16 hdc]

Row 26: Hdc first 3 sts, dec, hdc next 3 sts, dec, hdc next 2 sts, dec, hdc next 3 sts, dec, hdc last 3 sts. [4 dec, 14 hdc]

Continue to page 8 for neckband

Child

Row 22: With color A, hdc each st across. [56 hdc]

Row 23: Hdc first 4 sts, dec, hdc next 3 sts, dec, hdc next 4 sts, dec, hdc next 4 sts, dec, hdc next 2 sts, dec, hdc next st, dec, hdc next 2 sts, dec, hdc next 3 sts, dec, hdc next 4 sts, dec, hdc next 4 sts, dec, hdc last 4 sts. [10 dec, 35 hdc]

Row 24: Hdc first 4 sts, dec, hdc next 4 sts, dec, hdc next 4 sts, dec, hdc next 2 sts, dec, hdc next st, dec, hdc next 2 sts, dec, hdc next 4 sts, dec, hdc next 4 sts, dec, hdc last 4 sts. [8 dec, 29 hdc]

Row 25: Hdc first 4 sts, dec, hdc next 4 sts, dec, hdc next 4 sts, dec, hdc next st, dec, hdc next 4 sts, dec, hdc next 4 sts, dec, hdc last 4 sts. [6 dec, 25 hdc]

Row 26: Hdc first 4 sts, dec, hdc next 4 sts, dec, hdc next 7 sts, dec,, dec, hdc next 4 sts, dec, hdc last 4 sts. [4 dec, 23 hdc]

Row 27: Hdc first 3 sts, dec, hdc next 3 sts, dec, hdc next st, dec, hdc next st, dec, hdc next st, dec, hdc next 3 sts, dec, hdc last 3 sts. [6 dec, 15 hdc]

Row 28: Hdc first 3 sts, dec, hdc next 3 sts, dec, hdc next st, dec, hdc next 3 sts, dec, hdc last 3 sts. [4 dec, 13 hdc]

Row 29: Hdc first 2 sts, dec, hdc next 2 sts, dec, hdc next st, dec, hdc next 2 sts, dec, hdc last 2 sts. [4 dec, 9 hdc]

Continue to page 8 for neckband

Neckband ALL SIZES

Fold the last hdc row in half and sl st together to close the back of the bonnet, or fasten off and seam together. Fasten off, turn right side out.

Reattach color A in the bottom corner of bonnet (Row 1.) Sc 38 (44, 48, 54, 60) evenly across the bottom of bonnet, working approximately 1 st in the end of each row, ch 1, turn. Continue for 4 rows of single crochet for Preemie, Infant and Baby sizes, 6 rows for Toddler and Child. Do not fasten off.

Create ties: Ch 27, sl st each ch across, then sl st along bottom of bonnet (where you just completed the single crochet rows) to opposite corner. Ch 27, sl st each ch across, fasten off and weave in ends.

Alternatively, if you dislike the ties for practicality, make two small pom poms and attach to the corners of the bonnet, this would be equally as sweet!

I’d love to help you make this pattern! Please contact me with any questions! Send an email to motherlodepris@gmail.com for assistance. Come and see what I’m sharing on Pinterest so you can find your next project. Join my newsletter so you can get the best discounts on new pattern releases. Follow me on Instagram where I love to share funny reels about crochet!

Love it? Share it!

  • Share on X (Opens in new window) X
  • Share on Facebook (Opens in new window) Facebook
  • Share on Pinterest (Opens in new window) Pinterest
  • Print (Opens in new window) Print

August 13, 2025 by Priscilla

Scrappy Mini Tote Bag Pattern

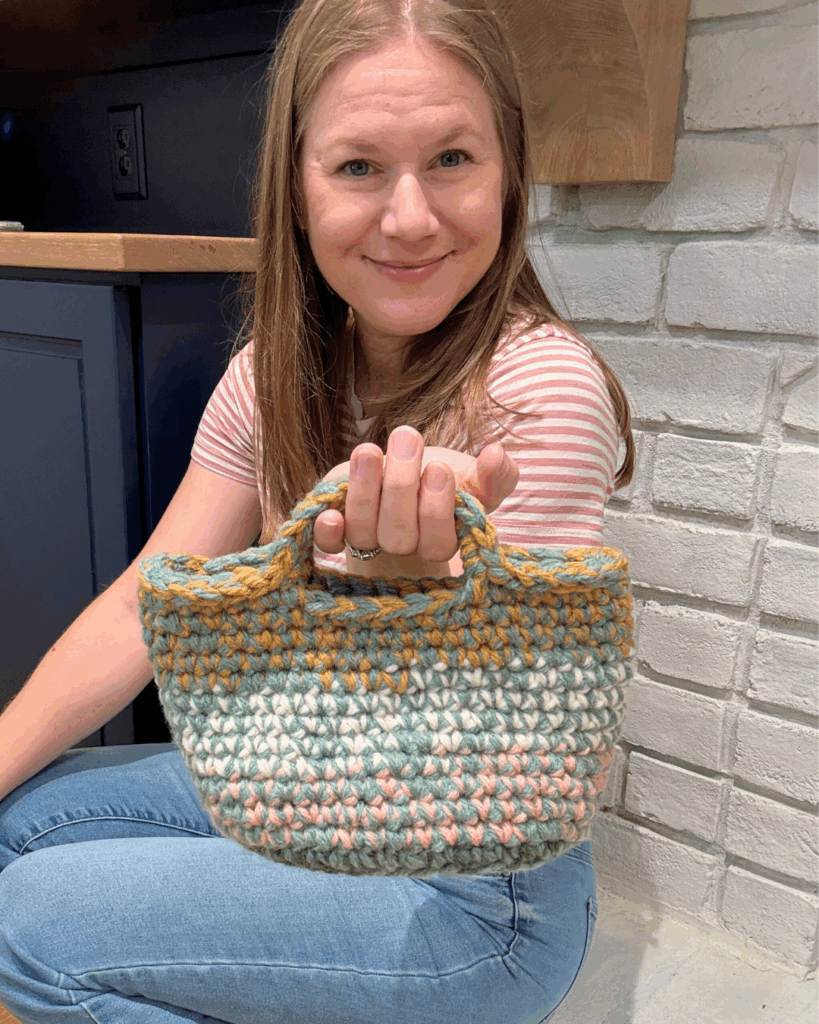
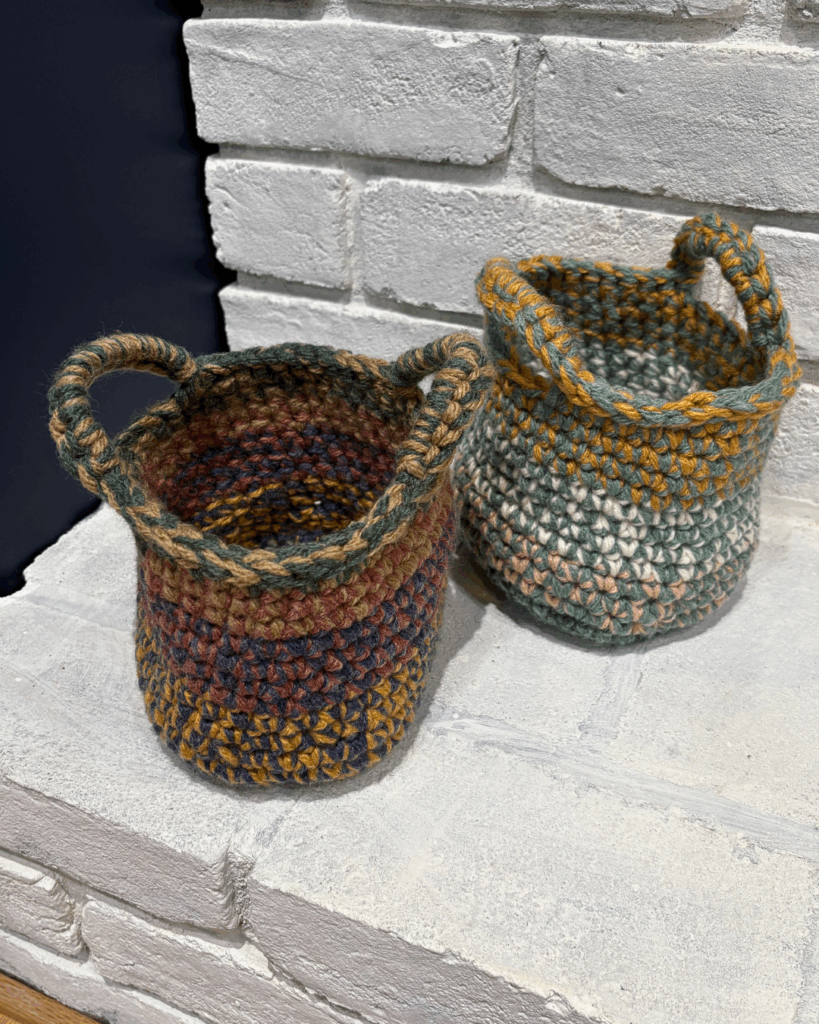
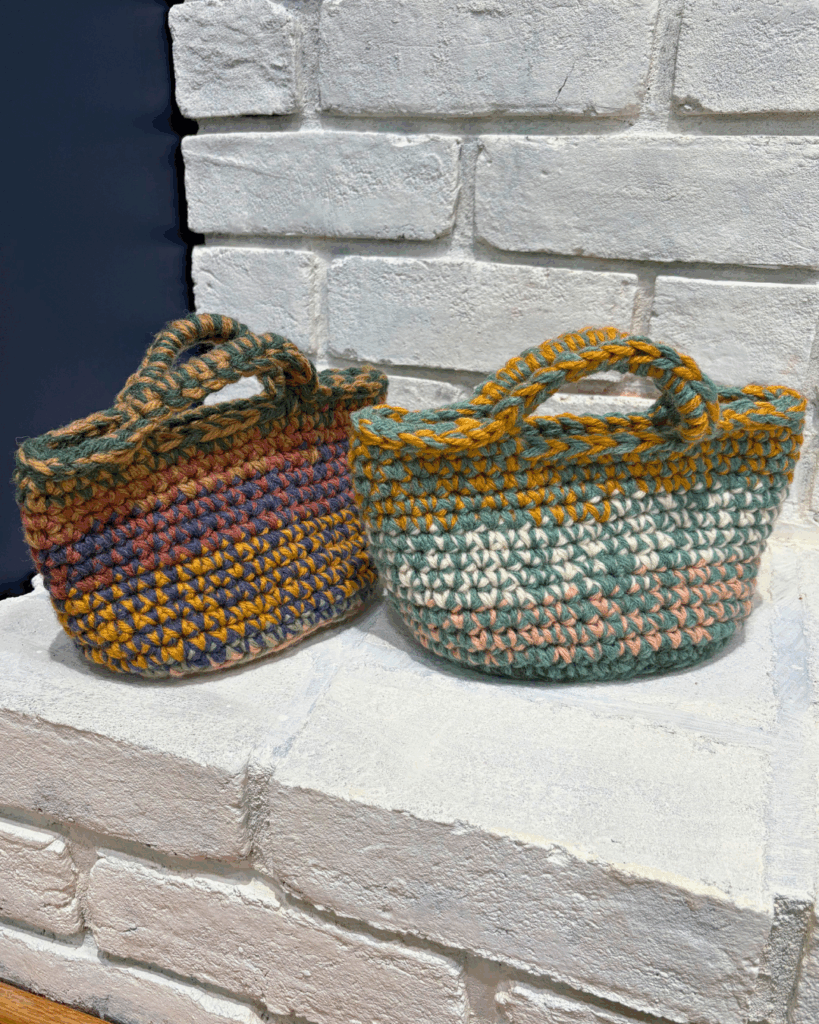
There are so many ways to use yarn scraps! I do think that there are more patterns for worsted weight yarn scraps than other yarn weights, so when I was invited to participate in the Great Stashdown event, I wanted to create a pattern to use my collection of bulky yarn scraps! Often I have several iterations of a design before I get the look I’m going for, but designing this one was actually SO much fun and it flew off the hook. I hope you find it to be a fun, useful pattern as well!

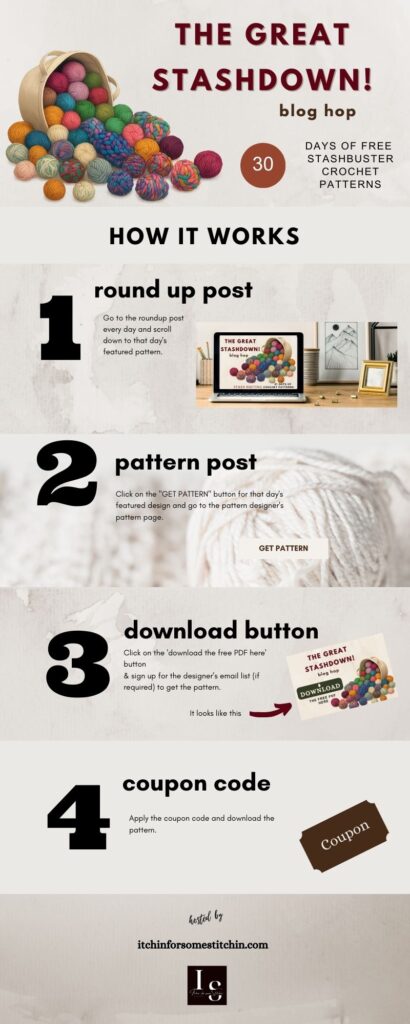
Some more about the Great Stashdown: Raelynn from Itchin’ for Some Stitchin’ is hosting this awesome event, perfect for using up some of your yarn collection before the new yarns come out for fall. Each day there is a new free pattern download available. There is a great variety from washcloths to bags, even amigurumi! Head over to the main blog post so you can check out all the patterns!

Lion Brand Hue + Me is such a fantastic yarn! I held it double in this pattern to give the bag structure and to add to the design the marled look. I don’t necessarily mind a pattern that looks like it was made with scraps but it isn’t my preference, either. This yarn line works so great for this pattern because the colors coordinate so well. I love the muted tones, personally. This pattern is meant for you to be able to use what you have! Use whatever bulky yarn you have in your stash.

Supplies

  • Size 5 bulky weight yarn, any colors equal to approx 200 yards total, samples are Lion Brand Yarn Hue + Me
  • Size 8 mm crochet hook
  • Tapestry needle and scissors
  • Bag fastener of choice, if desired, such as magnet or button.

Abbreviations (US Terms)

  • ch = chain
  • sl st = slip stitch
  • st/sts = stitch/stitches
  • sp = space
  • sc = single crochet
  • inc = increase: 2 single crochet stitches in same space
  • dec = single crochet 2 stitches together
  • sc BLO = single crochet in the back loop only

Notes

  • This pattern uses 2 yarns held together. If you are using all scrap yarns for this, I suggest planning the colors. Sort through and put all the cool colors together, warm colors together, and then make a plan. You could also pick through the colors and put together a color palette that works together. Use the internet to help if you need it. If you have 100 yards of one color, you could hold that color throughout.
  • Pattern is worked in continuous rounds. I suggest placing a stitch marker in the first stitch of each round to help you keep track, and move it to the next round as you work.
  • I find this particular yarn to be a quite thick bulky yarn. Keep this in mind when looking for substitutions.
  • Stitch counts are marked at the end of each round with [ ]
  • Finished dimensions: 6 in height by 6 in wide by 4.5 in deep
  • If desired, sew a large button on front of bag under handle. Create a loop on other side with a chain.
  • If desired, sew magnet closure inside the bag under the handle.
  • This pattern is a quick make, but give your hands breaks as you are crocheting quite tightly to make the bag stiff.

Gauge

9 sts in 10 rows of single crochet = 4 inches

Remember to use yarns held together!

Written Instructions

With yarn held together:

Round 1: Ch 4, inc 2nd ch from hook, sc, inc, continue onto other side of beg ch, inc, sc, inc, do not join. [10 sc]

Round 2: Inc, sc next 3, inc, inc, sc next 3, inc. [14 sc]

Round 3: Inc, inc, sc next 3, inc next 4, sc next 3, inc, inc. [22 sc]

Round 4: Sc, inc next 2, sc next 5, inc next 2, sc next 2, inc next 2, sc next 5, inc next 2, sc [30 sc]

Round 5: Sc first 2, inc, inc, sc next 7, inc, inc, sc next 4, inc, inc, sc next 7, inc, inc, sc last 2. [38 sc]

Round 6: Sc first 2, inc, inc, sc next 11, inc, inc, sc next 4, inc, inc, sc next 11, inc, inc, sc last 2. [46 sc]

Round 7: Sc BLO each st around. [46 sc BLO]

Round 8: Sc each st around. [46 sc]

Round 9: Repeat round 8

Round 10: Dec, sc next 19, dec, dec, sc next 19, dec. [42 sc]

Rounds 11-19: Sc each st around. [42 sc]

Round 20: Sc 12, ch 12, sk 6 sts, sc next 14 sts, ch 12, sk 6 sts, sc last 4. [42 sc]

Round 21: Sl st 12, sc 12 around the ch-12 from previous round, sl st next 14 sts, sc 12 around the ch-12 from previous round, sl st last 4 sts. [30 sl st, 24 sc] Fasten off, weave in ends. Attach closure if desired. (See notes)

Did you miss out on the event? No worries! You can absolutely get all the featured patterns in a low cost bundle!

Love it? Share it!

  • Share on X (Opens in new window) X
  • Share on Facebook (Opens in new window) Facebook
  • Share on Pinterest (Opens in new window) Pinterest
  • Print (Opens in new window) Print

May 24, 2025 by Priscilla

Father’s Day Crochet Bookmark

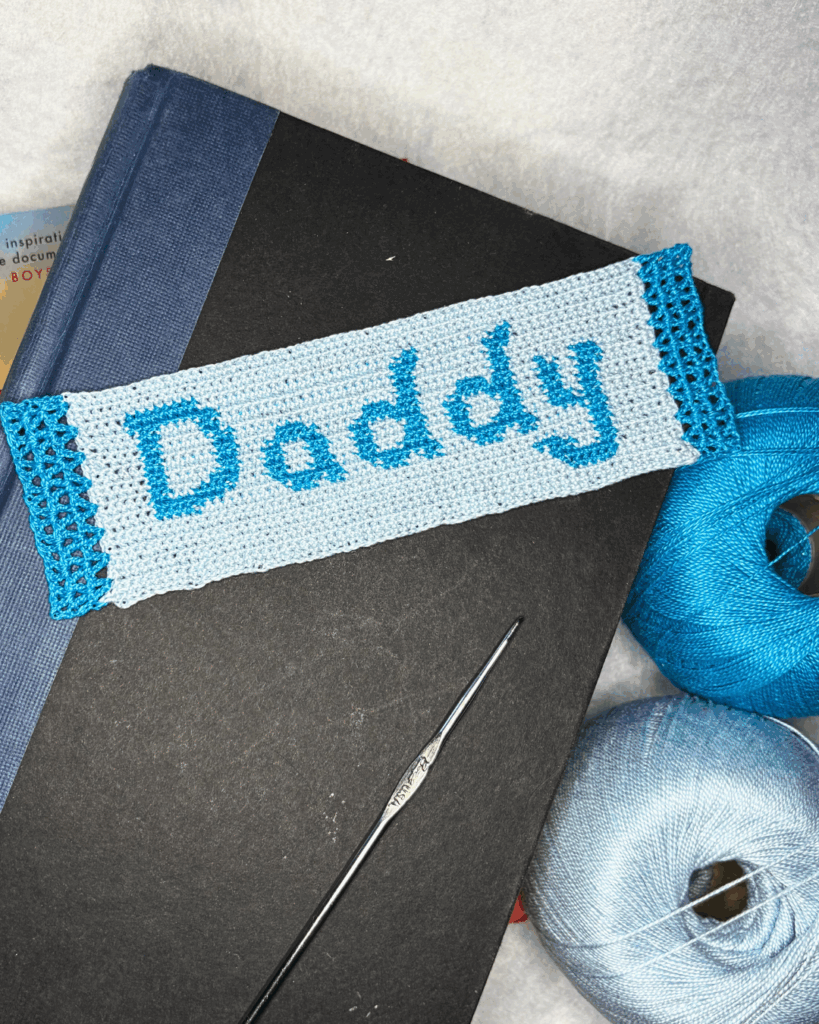
I’m thrilled to join Green Fox Farms Designs this year for her Father’s Day Blog Hop! I think it is such wonderful idea because crochet patterns to make for men aren’t as easy to find as those for women and children. It’s not so hard to find patterns for winter accessories, but, personally, I’m not gifting winter accessories in June in Pennsylvania! I wanted to go light for this project, and designing with crochet thread is one of my favorite things to do, so that led me to create this bookmark pattern! The bookmark features a tapestry crochet section that says “Daddy” and there is a variation that you could make that says “grandpa” as well!

The Father’s Day Blog Hop runs May 24th, 2025, through June 7th, 2025. There are 15 patterns and most of them are available as a free download on their feature day. You can also buy all the patterns in one convenient bundle which is only available during the blog hop.

What are you making?? I think I want to make the sunglasses case for my husband and maybe the dad cap for my dad. I also love the gamer eye mask but I don’t think my husband would use it; it’s adorable, though!

Okay, let’s get to it!

Supplies

  • Size 10 crochet thread, any 2 colors, approx 70 yards of each.
  • Size 1.65 mm crochet hook
  • Tapestry needle and scissors
  • Fabric stiffener, like Aleene’s Fabric Stiffening Spray, t-pins, and a blocking mat

I used size 10 Curio thread from Crochet.com! I love this thread, the colors are so pretty, I wish they had even more colors! I used the colors Clarity and Bahama (I think they replaced this color!)

Abbreviations (US Terms)

ch = chain

dc = double crochet

sl st = slip stitch

st/sts = stitch/stitches

sp = space

sc = single crochet

( ) = complete these instructions in one stitch

* = indicates where to begin repeat from

Notes

  • For the best look to achieve a flat bookmark, you’ll need to stiffen it. I use Aleene’s Fabric Stiffening Spray and t-pins on a blocking mat.
  • Stitch counts are marked at the end of each row with [ ] except for tapestry section where each row is 63 stitches
  • Finished dimensions: 2 in by 6.5 in
  • Beginning chains count as stitches for the stitch counts.
  • You may carry the thread behind the stitches in order to minimize end weaving. When you reach the last st of each row using color B, tuck color B onto the other side so that you may pick it back up when you reach the first st using color B on the next row.

Gauge

Gauge is not really necessary for this pattern. Personally, I find the smallest hook I can handle for the thread size produces the best, tightly stitched look. If you desire to gauge swatch: 12 sts in 13 rows of single crochet = 1 inch

ravelry
Etsy
LoveCrafts

Written Instructions

Tapestry portion Daddy

For the tapestry crochet section, there are two set up rows:

Row 1: With color A, ch 64, sc 2nd ch from hook and each ch across, ch 1, turn. [63 sc]

Row 2: Sc each st across, ch 1, turn. [63 sc]

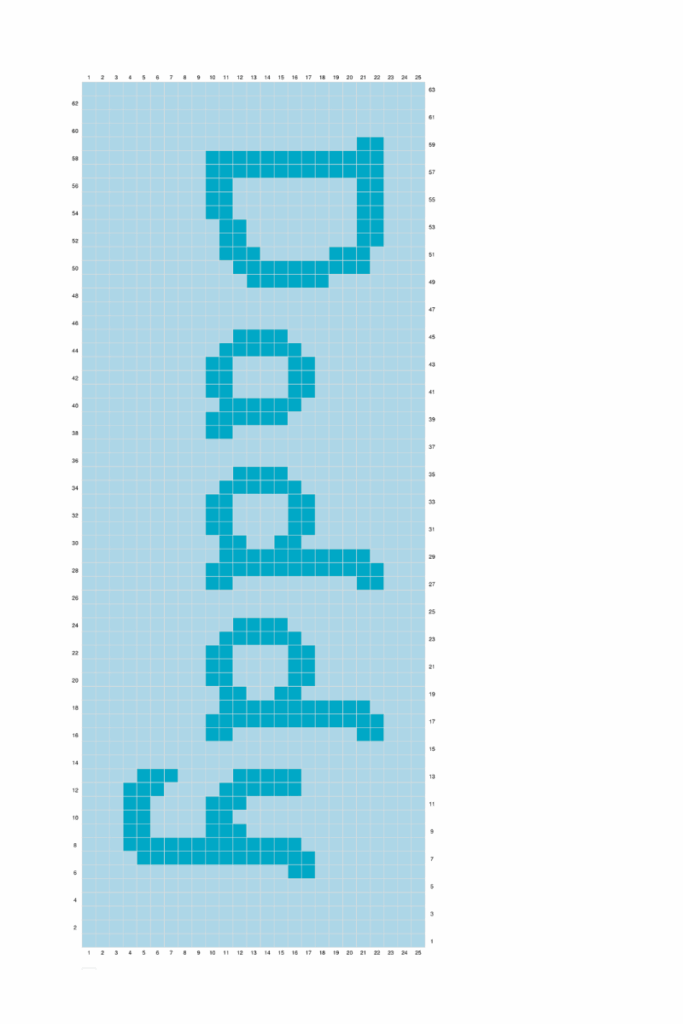
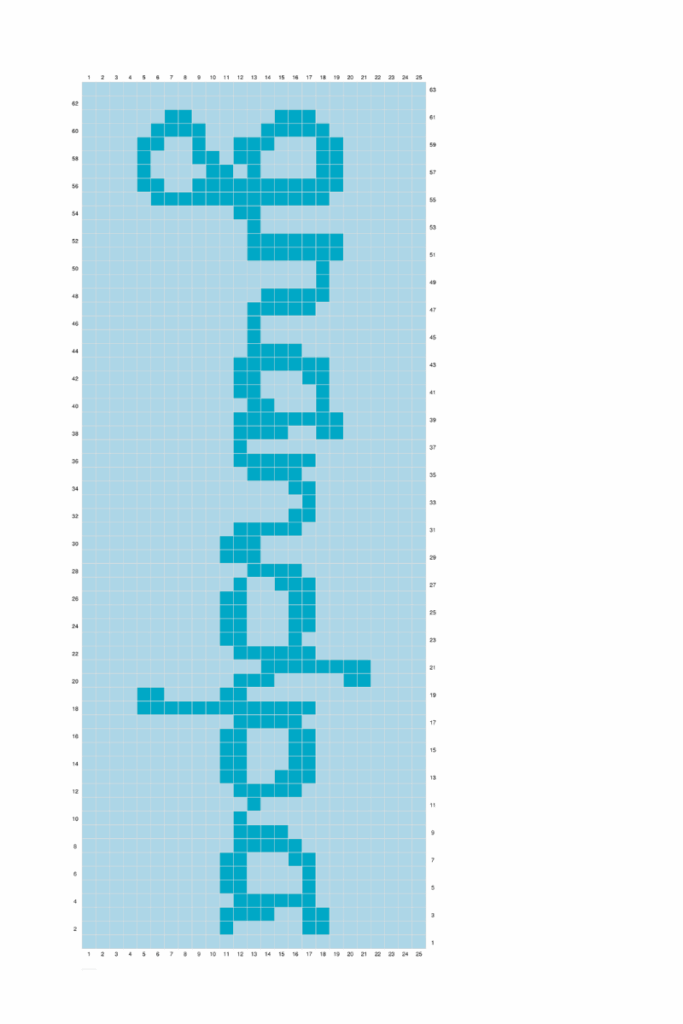
After the set up rows, you’ll be continuing in sc each st, with a ch-1 and turn at the end of each row. A represents color A and B is for color B. A 4 means crochet 1 sc in each of the next four stitches with color A. You can also use the provided chart for this part.

Row 3: A 63

Row 4: A 51, B 5, A 7

Row 5: A 6, B 7, A 50

Row 6: A 49, B 3, A 3, B 2, A 6

Row 7: A 6, B 2, A 4, B 2, A 49

Row 8: A 55, B 2, A 6

Row 9: A 6, B 2, A 55

Row 10: A 5, B 5, A 10, B 3, A 1, B 2, A 4, B 3, A 2, B 2, A 4, B 3, A 2, B 2, A 4, B 5, A 6

Row 11: A 6, B 6, A, 3, B 8, A 3, B 8, A 3, B 7, A6, B 8, A 5

Row 12: A 5, B 2, A 3, B 4, A 4, B 2, A 3, B 2, A 3, B 2, A 3, B 3, A 3, B 2, A 3, B 3, A 3, B 3, A 1, B 3, A 6

Row 13: A 6, B 2, A 3, B 2, A 3, B 2, A 4, B 2, A 3, B 2, A 4, B 2, A 3, B 2, A 3, B 2, A 3, B 3, A 5, B 2, A 5

Row 14: A 5, B 2, A 6, B 2, A 3, B 2, A 3, B 2, A 3, B 2, A 4, B 2, A 3, B 2, A 4, B 2, A 3, B 2, A 3, B 2, A 6

Row 15: A 6, B 2, A 3, B 2, A 3, B 3, A 3, B 2, A 3, B 3, A 3, B 2, A 3, B 2, A 3, B 2, A 3, B 2 A 6, B 2, A 5

Row 16: A 5, B 2, A 6, B 2, A 4, B 5, A 5, B 7, A 4, B 7, A 3, B 2, A 3, B 3, A 5

Row 17: A 5, B 2, A 9, B 2, A 1, B 3, A 5, B 2, A 1, B 3, A 7, B 3, A 5, B 2, A 6, B 2, A 5

Row 18: A 5, B 2, A 6, B 2, A 19, B 2, A 9, B 2, A 16

Row 19: A 16, B 2, A 9, B 2, A 20, B 2, A 5, B 2, A 5

Row 20: A 5, B 2, A 5, B 2, A 20, B 2, A 9, B 2, A 16

Row 21: A 15, B 3, A 8, B 3, A 20, B 10, A 4

Row 22: A 4, B 8, A 23, B 2, A 9, B 2, A 15

Row 23: A 63

Row 24: A 63

Row 25: A 63

Next, crochet the lace on the ends of the bookmark:

Row 1: With color A, sc in the end of each row, turn. Change to color B. [25 sc]

Row 2: Ch 2, sk 2 sts {(dc, ch 1, dc) next st, sk 2 sts}, repeat { } twice, then (dc, ch 1, dc) next st, sk st, repeat { } three times, (dc, ch 1, dc), sk st, dc last st, turn. [ 18 dc]

Row 3: Ch 2, (dc, ch 1, dc) in each ch -1 sp until last, dc, last st, turn. [18 dc]

Row 4: Repeat row 3, fasten off, weave in ends. [18 dc]

Repeat on other end of bookmark.

Charts

Blocking and Assembly

Pin to the blocking mat to desired shape. Spray from about 6-10 inches away with fabric stiffening spray, or pour some of the spray liquid into a small cup and paint the liquid on.

Thanks so much for coming to my blog! If you like thread crochet, check out my pattern library here! I have an awesome summer earring collection that is perfect for this time of year.

Love it? Share it!

  • Share on X (Opens in new window) X
  • Share on Facebook (Opens in new window) Facebook
  • Share on Pinterest (Opens in new window) Pinterest
  • Print (Opens in new window) Print

April 16, 2025 by Priscilla

Fields Bonnet

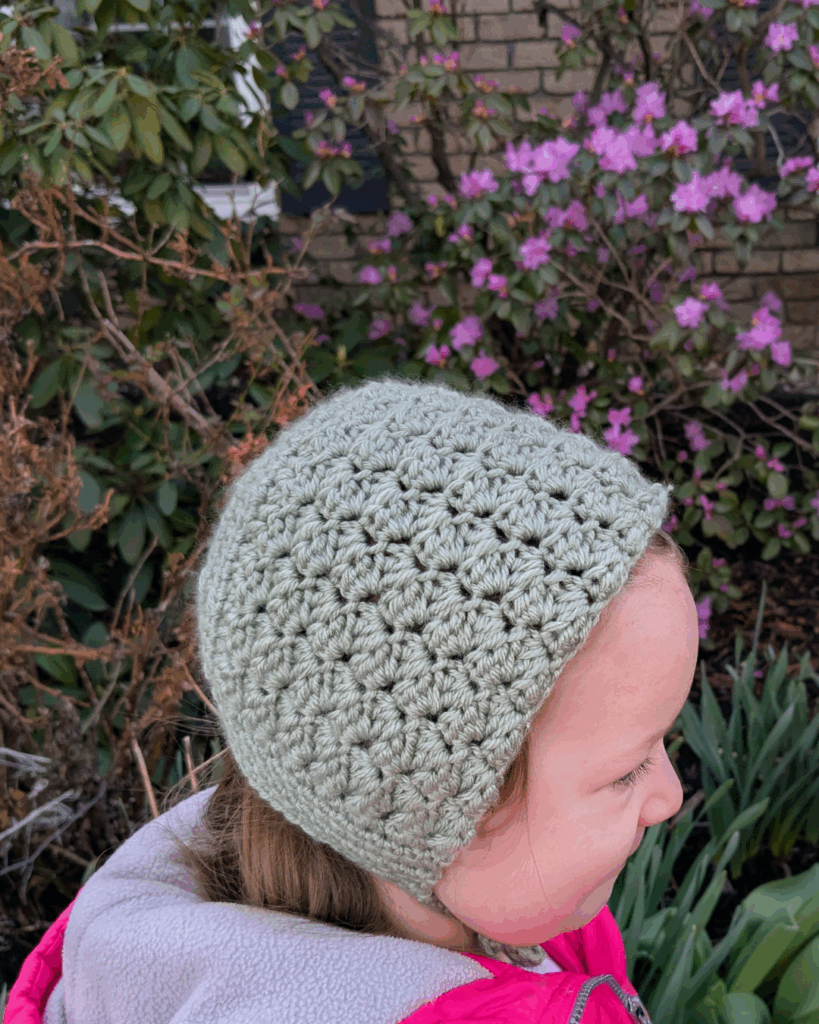
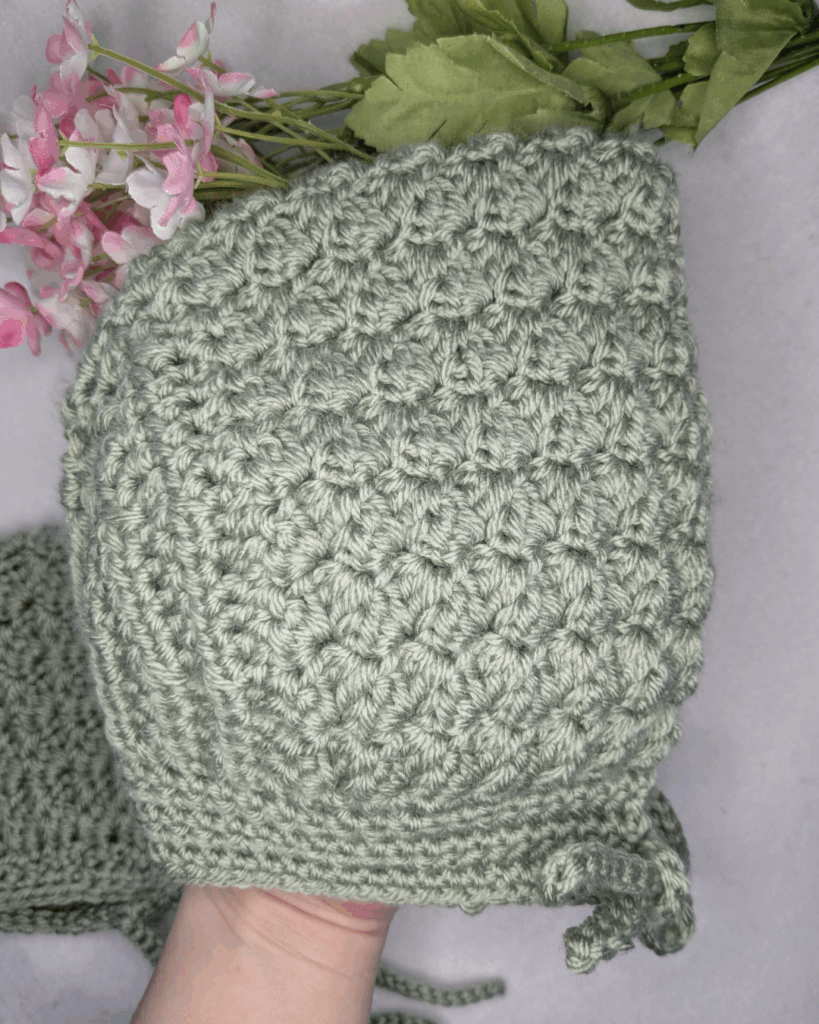
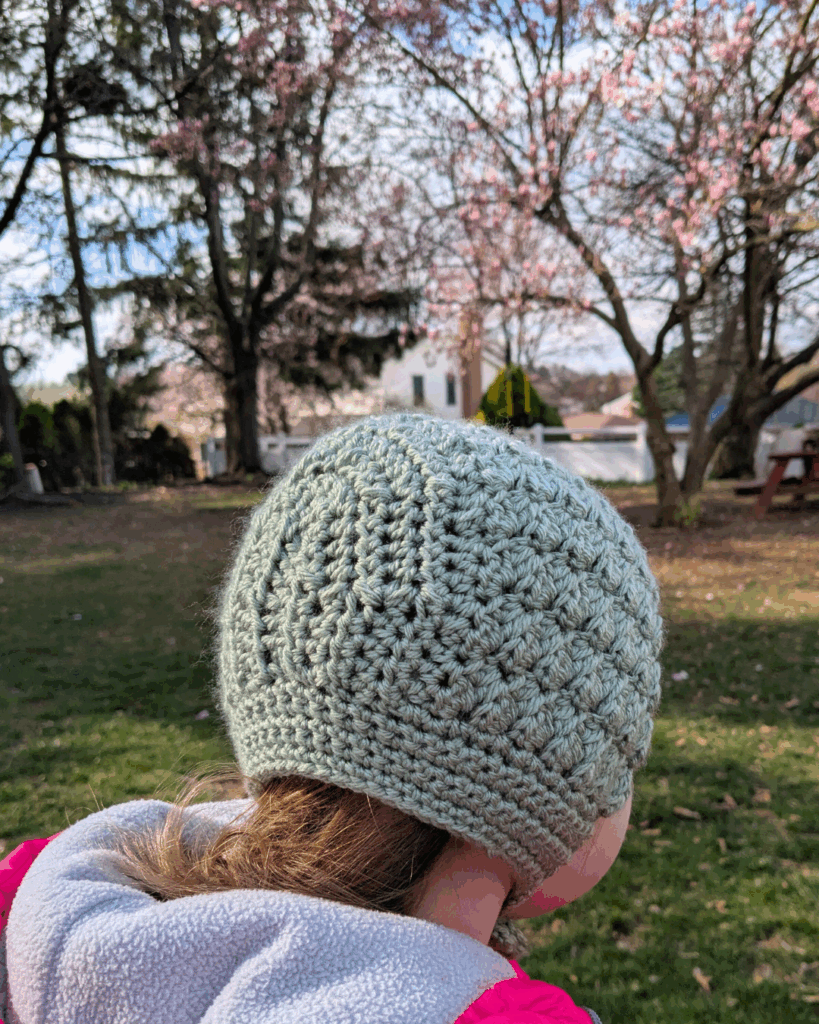
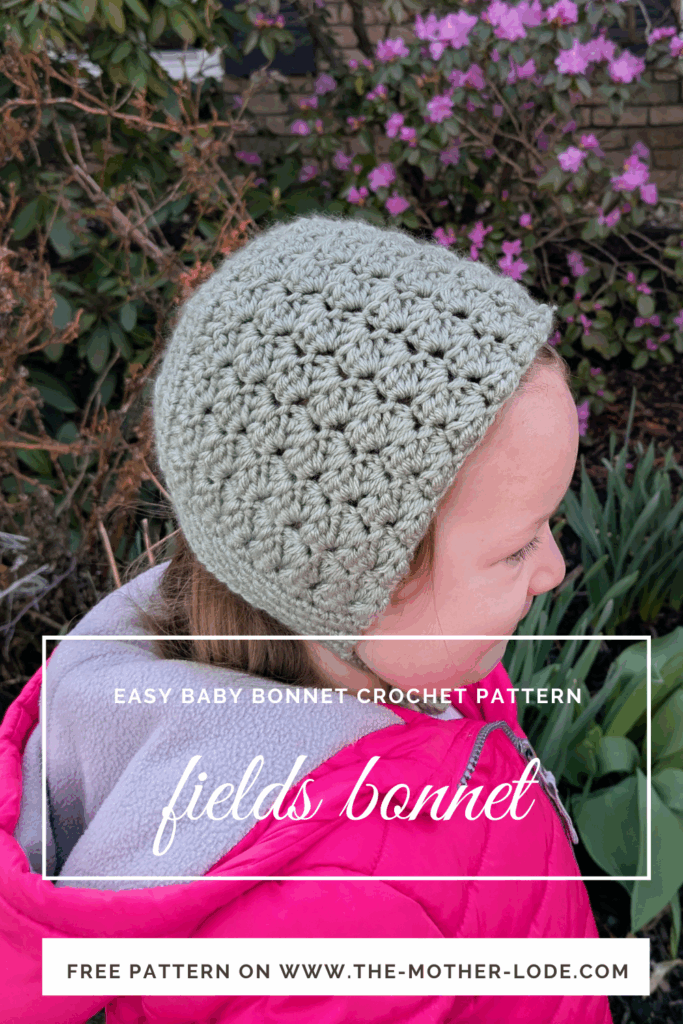
Let’s make a bonnet! I adore the look of a bonnet on a little one! They have a sweetness about them and they keep little ones’ ears warm. I also enjoy using the sedge stitch. I love the ease of this stitch, as well as the nice even texture of it. I’ve found myself gravitating to improvise baby blankets with this stitch over the years, I even did a big chunky blanket for my 8 year old this past Christmas with it. I decided to design this bonnet with it, perfect for a chilly spring day!

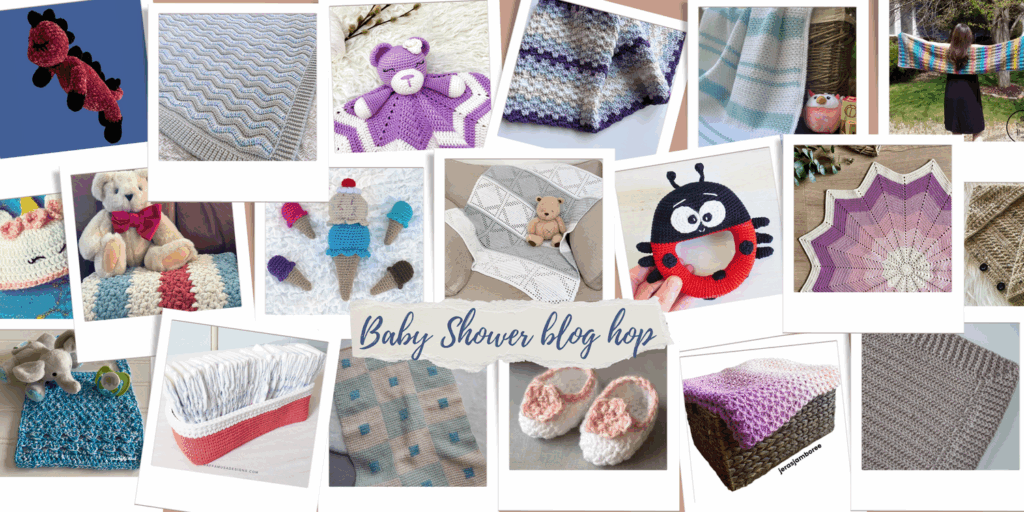
It’s time for a blog hop!!!! Kristine at Ambassador Crochet is hosting a Baby Shower Blog Hop from Sunday, April 27th to Saturday, May 24th! 4 weeks of awesome baby patterns! You can get the bundle right here! This will get you ALL the patterns for a low cost, and this is a great option specifically for this blog hop because about half the patterns are 50% off downloads and half are free. May 11th, 2025, you can get 50% off this pattern! Follow this link to the blog hop roundup where you can get the discount code!

Let’s talk some more about the sedge stitch! This stitch is very easy to learn. After you create your chain, each sedge stitch is a single crochet, half double crochet, and double crochet in the same stitch, then skip two stitches. It creates a gentle texture that I really like. The stitches end up slanting together so it is a slightly dense fabric even though you are skipping stitches.

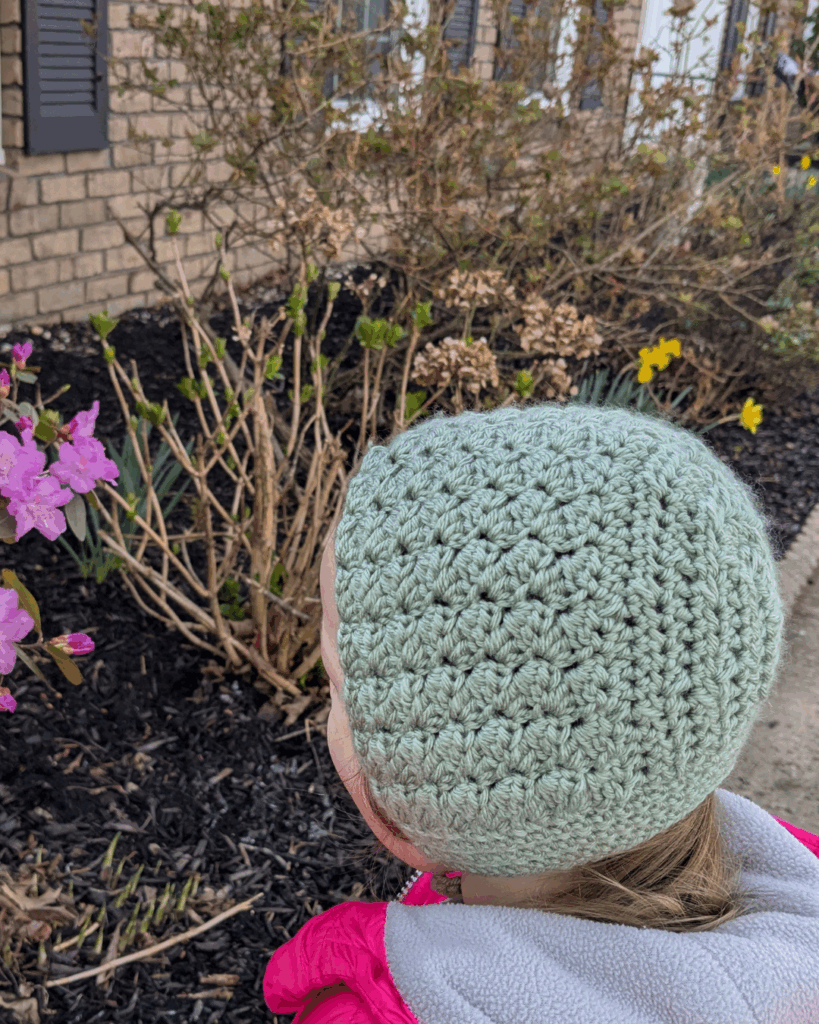
For this easy baby bonnet crochet pattern, I chose to use easy to care for acrylic yarn. I’m sure it would be lovely in a nice superwash wool, but generally for little ones I tend to go for a soft acrylic instead. I tend to buy Lion Brand’s acrylic yarn. For this I used their Basic Stitch Anti-Pilling which I think is super soft and I like the colors and the price! I also think if you used their Heartland line that would be a good match for this pattern, too.

This pattern has a PDF downloadable file available on ravelry, Etsy, and LoveCrafts. The pattern file is 7 pages and has more photos and charts than I put here in the blog post, but all the written instructions are exactly the same as below. Personally, I love to be able to print a pattern for easy couch crochet, but I know that not everyone can purchase a pattern and I’m happy to offer patterns here on my website and let the advertisers pay for them! Bookmark this page and come back over and over to complete your baby bonnet!

ravelry
Etsy
LoveCrafts

Supplies

  • CYC 4 worsted yarn: 100-150 yards (sample is Lion Brand Yarn Basic Stitch in color Sage)
  • crochet hook US size J (6 mm) or size needed to obtain gauge
  • tapestry sewing needle
  • scissors and measuring tape/gauge ruler

Abbreviations

ch = chain

st/sts = stitch/stitches

sc = single crochet

dc = double crochet

sl st = slip stitch

hdc = half double crochet

sedge stitch = *single crochet, half double crochet, double crochet in the same stitch, sk 2 sts, repeat from *

(noted as {sc, hdc, dc} within pattern)

dec = hdc two stitches together

Gauge Swatch

4 in by 4 in swatch = 6 sedge stitches in 6 rows of sedge stitch

Notes


Stitch counts are marked in [ ] at the end of each row.

ravelry
Etsy
LoveCrafts

Written Instructions

Size: Infant: 0-6 months, (Baby: 6-12 months, Toddler: 1-3 years, Child: 4-10 yrs)

ALL SIZES

Row 1: Ch 38 ( 44, 50, 56), {sc, hdc, dc} 2nd ch from hook, sk next 2 sts, *{sc, hdc, dc} next st, sk next 2 sts, repeat from* until last st, sc last st. [12( 14, 16, 18) sedge sts, 1 sc]

Row 2: Ch 1, turn, *{sc, hdc, dc} first st, sk next 2 sts, repeat from* until last st, sc last st. [12 (14, 16, 18) sedge sts, 1 sc]

Rows 3-11 (13, 15, 17): Repeat Row 2

Continue below to appropriate size.

Infant

Row 12: Hdc first 4 sts, dec, hdc next 4 sts, dec, hdc next 4 sts, dec, hdc next st, dec, hdc next 4 sts, dec, hdc next 4 sts, dec, hdc last 4 sts. [6 dec, 25 hdc]

Row 13: Hdc first 4 sts, dec, hdc next 4 sts, dec, hdc next 7 sts, dec, hdc next 4 sts, dec, hdc last 4 sts. [4 dec, 23 hdc]

Row 14: Hdc first 3 sts, dec, hdc next 3 sts, dec, hdc next st, dec, hdc next st, dec, hdc next st, dec, hdc next 3 sts, dec, hdc last 3 sts. [6 dec, 15 hdc]

Row 15: Hdc first 3 sts, dec, hdc next 2 sts, dec, hdc next 3 sts, dec, hdc next 2 sts, dec, hdc last 3 sts. [4 dec, 13 hdc]

Row 16: Hdc first 2 sts, dec, hdc next 2 sts, dec, hdc next st, dec, hdc next 2 sts, dec, hdc last 2 sts. [4 dec, 9 hdc]

Continue to neckband instructions below

Baby

Row 14: Hdc first 4 sts, dec, hdc next 4 sts, dec, hdc next 5 sts, dec, hdc next 5 sts, dec, hdc next 5 sts, dec, hdc next 4 sts, dec, hdc last 4 sts. [6 dec, 31 hdc]

Row 15: Hdc first 4 sts, dec, hdc next 4 sts, dec, hdc next 4 sts, dec, hdc next st, dec, hdc next 4 sts, dec, hdc next 4 sts, dec, hdc last 4 sts. [6 dec, 25 hdc]

Row 16: Hdc first 4 sts, dec, hdc next 4 sts, dec, hdc next st, dec, hdc next st, dec, hdc next st, dec, hdc next 4 sts, dec, hdc last 4 sts. [6 dec, 19 hdc]

Row 17: Hdc first 3 sts, dec, hdc next 3 sts, dec, hdc next 5 sts, dec, hdc next 3 sts, dec, hdc last 3 sts. [4 dec, 18 hdc]

Row 18: Hdc first 2 sts, dec, hdc next 2 sts, dec, dec, hdc next st, dec, dec, hdc next 2 sts, dec, hdc last 2 sts. [6 dec, 9 hdc]

Continue to neckband instructions below

Toddler

Row 16: Hdc first 4 sts, dec, hdc next 4 sts, dec, hdc next 4 sts, dec, hdc next 4 sts, dec, hdc next st, dec, hdc next 4 sts, dec, hdc next 4 sts, dec, hdc next 4 sts, dec, hdc last 4 sts. [8 dec, 33 hdc]

Row 17: Hdc first 4 sts, dec, hdc next 4 sts, dec, hdc next 4 sts, dec, hdc next 5 sts, dec, hdc next 4 sts, dec, hdc next 4 sts, dec, hdc last 4 sts. [6 dec, 31 hdc]

Row 18: Hdc first 4 sts, dec, hdc next 4 sts, dec, hdc next 3 sts, dec, hdc next st, dec, hdc next 3 sts, dec, hdc next 4 sts, dec, hdc last 4 sts. [6 dec, 22 hdc]

Row 19: Hdc first 3 sts, dec, hdc next 3 sts, dec, hdc next 2 sts, dec, hdc next st, dec, hdc next 2 sts, dec, hdc next 3 sts, dec last 3 sts. [6 dec, 17 hdc]

Row 20: Hdc first 3 sts, dec, hdc next 3 sts, dec, hdc next 3 sts, dec, hdc next 3 sts, dec, hdc last 3 sts. [4 dec, 15 hdc]

Row 21: Hdc first 2 sts, dec, hdc next 3 sts, dec, hdc next st, dec, hdc next 3 sts, dec, hdc last 2 sts. [4 dec, 11 hdc]

Continue to neckband instructions below

Child

Row 18: Hdc first 4 sts, dec, hdc next 3 sts, dec, hdc next 4 sts, dec, hdc next 4 sts, dec, hdc next 2 sts, dec, hdc next st, dec, hdc next 2 sts, dec, hdc next 3 sts, dec, hdc next 4 sts, dec, hdc next 4 sts, dec, hdc last 4 sts. [10 dec, 35 hdc]

Row 19: Hdc first 4 sts, dec, hdc next 4 sts, dec, hdc next 4 sts, dec, hdc next 2 sts, dec, hdc next st, dec, hdc next 2 sts, dec, hdc next 4 sts, dec, hdc next 4 sts, dec, hdc last 4 sts. [8 dec, 29 hdc]

Row 20: Hdc first 4 sts, dec, hdc next 4 sts, dec, hdc next 4 sts, dec, hdc next st, dec, hdc next 4 sts, dec, hdc next 4 sts, dec, hdc last 4 sts. [6 dec, 25 hdc]

Row 21: Hdc first 4 sts, dec, hdc next 4 sts, dec, hdc next 7 sts, dec,, dec, hdc next 4 sts, dec, hdc last 4 sts. [4 dec, 23 hdc]

Row 22: Hdc first 3 sts, dec, hdc next 3 sts, dec, hdc next st, dec, hdc next st, dec, hdc next st, dec, hdc next 3 sts, dec, hdc last 3 sts. [6 dec, 15 hdc]

Row 23: Hdc first 3 sts, dec, hdc next 3 sts, dec, hdc next st, dec, hdc next 3 sts, dec, hdc last 3 sts. [4 dec, 13 hdc]

Row 24: Hdc first 2 sts, dec, hdc next 2 sts, dec, hdc next st, dec, hdc next 2 sts, dec, hdc last 2 sts. [4 dec, 9 hdc]

Continue to neckband instructions below

How is the pattern going?

Join my subscriber list for pattern updates, discounts, and other crafty fun!

Thank you!

You have successfully joined our subscriber list.

Neckband ALL SIZES

Fold the last hdc row in half and sl st together to close the back of the bonnet. Fasten off, turn right side out.

Reattach the yarn in the bottom corner of bonnet (Row 1.) Sc evenly across the bottom of bonnet, ch 1, turn. Continue for 4 rows of single crochet for Infant and baby sizes, 6 rows for toddler and child. Do not fasten off.

Create ties: Ch 27, sl st each ch across, then sl st along bottom of bonnet (where you just completed the single crochet rows) to opposite corner. Ch 27, sl st each ch across, fasten off and weave in ends.

I hope you loved making this easy baby bonnet crochet pattern. It’s perfect for keeping a little one warm on a cool spring day. Please reach out to me if you have any struggles with the pattern! My social links are listed below so you can contact me. I’d love to see your finished bonnet, so tag me on Instagram!

Love it? Share it!

  • Share on X (Opens in new window) X
  • Share on Facebook (Opens in new window) Facebook
  • Share on Pinterest (Opens in new window) Pinterest
  • Print (Opens in new window) Print

March 12, 2025 by Priscilla

Spring Posy Easy Crochet Earrings Pattern

Spring is coming! It has been a cold, snowy winter and, though I don’t want to give up my cozy hats and cowls, I am happy for the warmer weather and sunny skies of Spring. This is the time of year for lightweight crochet projects, and my favorites are crochet thread earrings! They work up so quickly with endless possibilities.

When Marie at Underground Crafter announced her annual International Crochet Month Blog Hop, I knew I wanted to highlight crochet thread earrings! This blog hop aims to highlight what each designer loves about crochet, from different stitches to project types. I opted for crochet earrings because I love to showcase crochet thread patterns in blog hops. They are viewed as difficult and I want to provide a free way for crocheters to try them out! It can be intimidating to work with such small hooks and thread, but I love sharing about it and teaching others how! I designed this pattern to be fairly easy. It is worked in four rounds with basic stitches: chains, sl st, dc, and hdc. Let’s get to it and use this cute and easy crochet earrings pattern to make posies.

All of the patterns from this event are permanently free crochet patterns on the designers’ blogs! So even though the event is past, you can still use all of these patterns free!

How To Join the 2025 International Crochet Month Blog Hop

  • Join in by crocheting the patterns as you have time.
  • Share your progress and post pictures of your finished projects. Tag your projects and posts #undergroundcrafter on all social media. 
  • If you’d like to chat with other crocheters, join the Underground Crafters Facebook group.
  • By the end of the Blog Hop, you’ll have up to 31 awesome projects. 

Visit Underground Crafter to check out all the patterns that were included in this event!

Supplies

  • Size 10 crochet thread, any color, approx 20 yards
  • Size 1.65 mm crochet hook
  • Tapestry needle and scissors
  • Earring findings: 2 fish hook style earrings, 4 jump rings
  • Fabric stiffener, like Aleene’s Fabric Stiffening Spray, t-pins, and a blocking mat

If you ARE new to crochet thread, you might be wondering, “Where do I even buy this stuff?” It is readily available; I have 4 different brands in my stash! The two that I recommend and use most often are Curio 10 from WeCrochet and Aunt Lydia’s Crochet Thread from Yarnspirations. Aunt Lydia’s is available online from Yarnspirations, or at craft stores like Michael’s. There are a whopping 56 colors available and this thread is very sturdy and easy to use. Curio 10 has a smaller color palette of 25 colors, but they are stunning! In my opinion the colors are more modern and the thread itself has more shine to it than the Aunt Lydia’s. I have my eye on the color Heliotrope as the next one I need to add to my stash!
Abbreviations (US Terms)

ch = chain

hdc = half double crochet

sl st = slip stitch

st/sts = stitch/stitches

dc = double crochet

sp = space

beg = beginning

MR = magic ring

( ) = complete these instructions in one stitch

* = indicates where to begin repeat from

ch-4 = a completed chain of 4

I publish my patterns here on the blog for anyone to use free to view! I learned crochet initially from my mom, but I really learned much more when I discovered crochet blogs. It’s so great to now provide that myself! This pattern does use beginner stitches, but crochet thread is delicate and having some experience is important. I offer a photo tutorial in my earring patterns, and this pattern also features a crochet chart! It was pretty fun to make the chart and I can see myself making more of them in the future. To make this easy crochet earrings pattern even simpler for yourself, consider buying the PDF from one of my pattern shops. It’s low cost and I’m sure you will make more than one pair!

Ravelry
Etsy
LoveCrafts

Gauge

Gauge is not really necessary for this pattern. Personally, I find the smallest hook I can handle for the thread size (for earrings) produces the best, tightly stitched look. If you desire to gauge swatch: after round 2, your work should measure 15 mm across.

Notes

  • For the best look to achieve the open stitchwork of these earrings, you’ll need to stiffen them. I use Aleene’s Fabric Stiffening Spray and t-pins on a blocking mat.
  • Stitch counts are marked at the end of each round with ( )
  • Finished dimensions: 1 in diameter
  • Beginning chains count as stitches for the stitch counts.

Written Instructions

Make 2

Round 1: Make MR, 6 hdc into MR, sl st to join. (6 hdc)

Round 2: Ch 3, dc first st, (dc, ch 1, dc) each st around, sl st to beg ch-3 to join. (12 dc)

Round 3: Ch 4,*sl st next dc, sl st next dc, ch 4, repeat from *around. (12 sl st, 6 ch-4)

Round 4: *Ch 4, sl st next ch-4 sp, ch 4, sk st, sl st next st, repeat from * around. (12 sl st, 12 ch-4)

Fasten off and weave in ends.

Blocking and Assembly

Pin to the blocking mat to desired shape. Spray from about 6-10 inches away with fabric stiffening spray, or pour some of the spray liquid into a small cup and paint the liquid on. Once dry, attach jump rings and fish hook style earring as pictured.

How did you like making these? Here are some of my other earring patterns:

Love it? Share it!

  • Share on X (Opens in new window) X
  • Share on Facebook (Opens in new window) Facebook
  • Share on Pinterest (Opens in new window) Pinterest
  • Print (Opens in new window) Print

February 12, 2025 by Priscilla

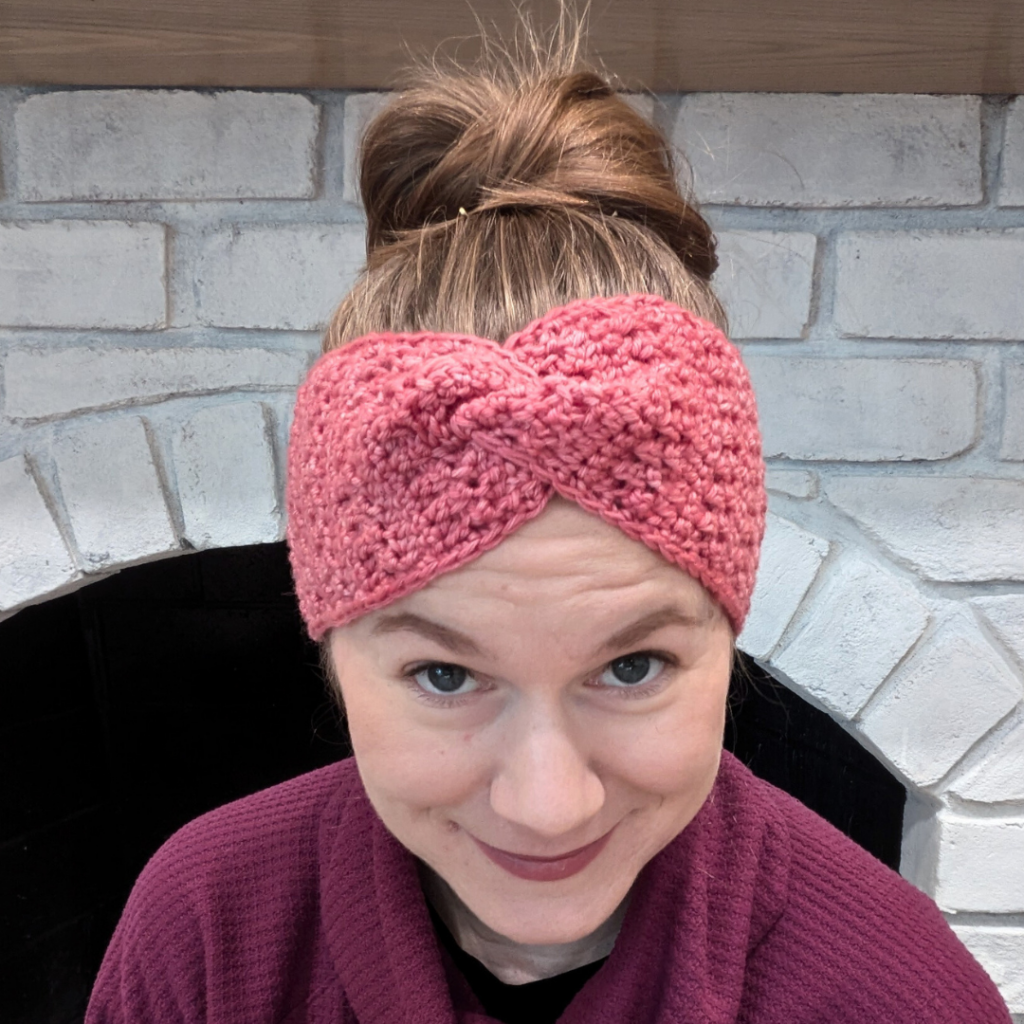
Secret Heart Headband Crochet Pattern

Hearts are everywhere this time of year and I’m okay with it! I understand Valentine’s Day isn’t popular with everyone, but I really enjoy that, culturally, it’s like a reminder to show your love to someone. St. Valentine’s Feast Day is the origin of this holiday, but there have certainly been influences over the years to turn it into what we celebrate in 2025! When my oldest was a baby, I did a Valentine’s photo shoot in our guest bedroom and sent out cute Valentines to our family! (Did I do that for any of my other babies? Nope, that’s how life is lol!) Some years, if time allows, we do enjoy making Valentines together and sending them out!

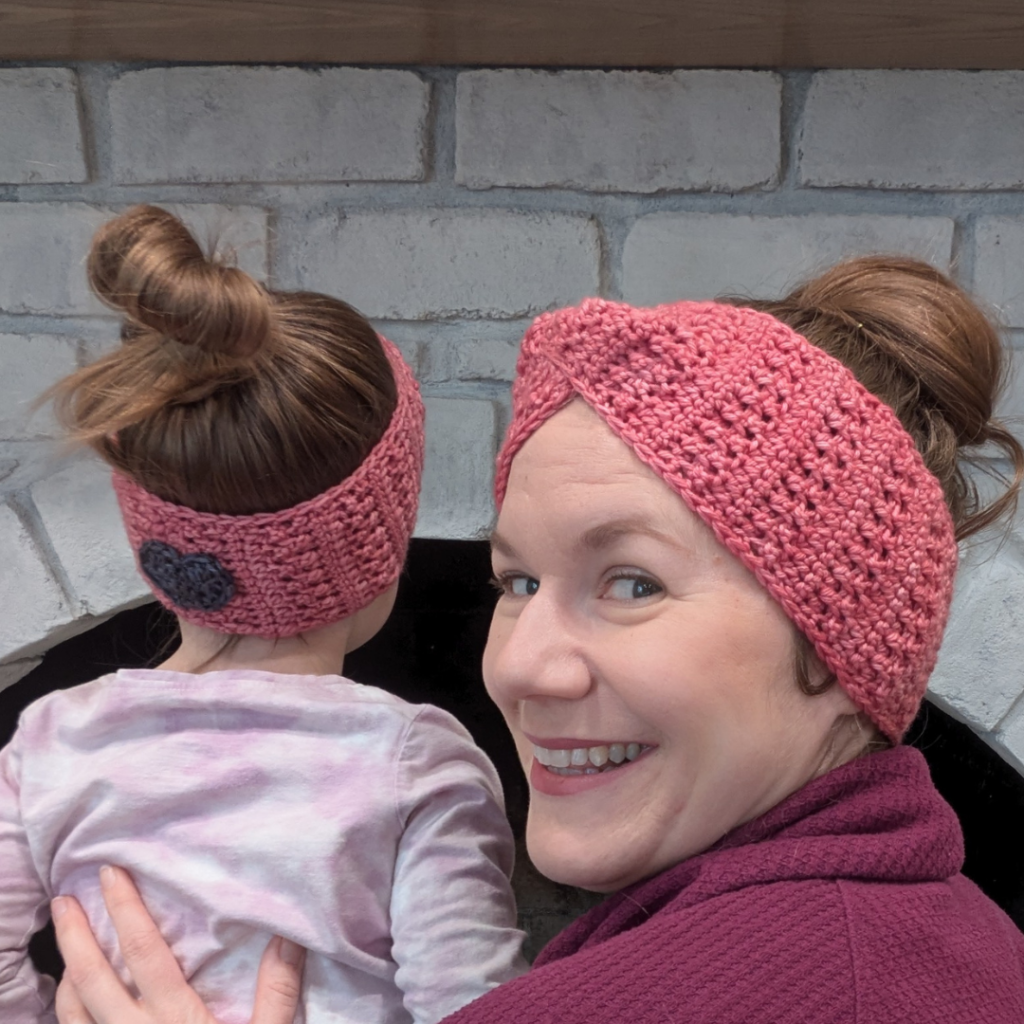
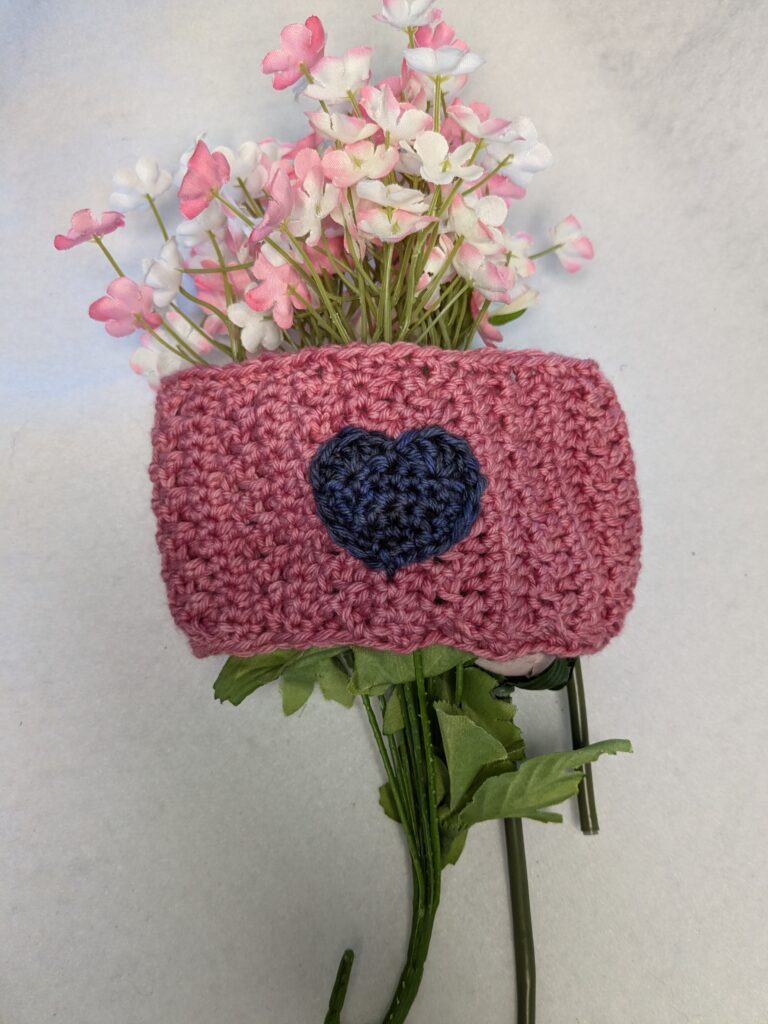
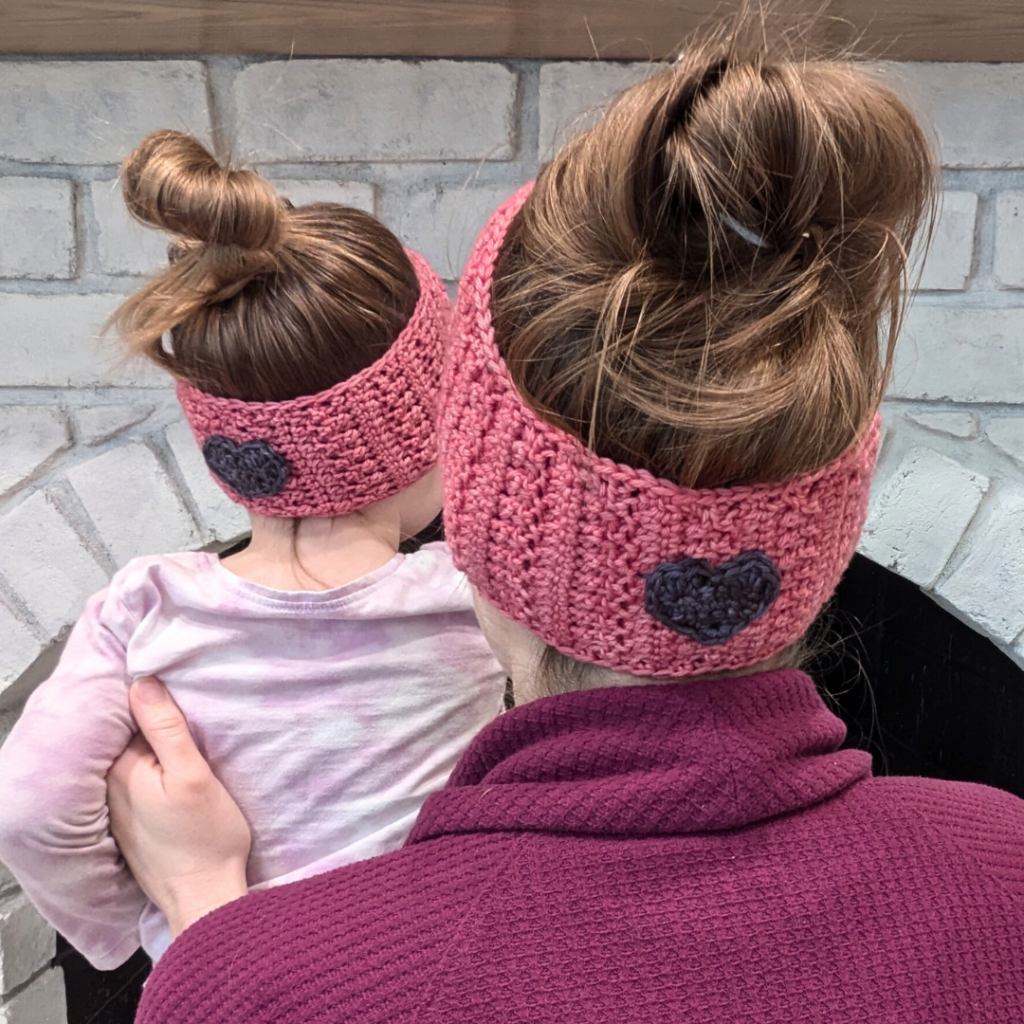
The Secret Heart Headband has a tiny heart hidden in the back of the headband! I did this so you could absolutely make plain headbands, or add this sweet heart to the back, or really anywhere you like.

The texture on this headband crochet pattern is my favorite part. I used hdc in the 3rd loop and hdc BLO to create it. I’ll probably use it in another design soon, because it was easy and fun!

Worsted weight yarn and a 5 mm hook were my choice for this headband. I think it has great stretch and is going to be awesome to wear as the weather starts to warm up soon (I hope!) for Spring. I’ll probably still be wearing one of my bulky hats for a few more weeks like the Blustery Beanie or the Chill Stopper Beanie. Those are also available in many sizes so you can make matching sets.

Supplies

  • worsted (CYC 4) yarn: Color A: 100- 150 yards, Color B: 15 yards
  • crochet hook US size H (5 mm) or size needed to obtain gauge
  • tapestry sewing needle
  • scissors and measuring tape

Abbreviations (US Terms)

  • ch = chain
  • sc = single crochet
  • st/sts = stitch/stitches
  • BLO = back loop only
  • hdc = half double crochet
  • sl st = slip stitch
  • dc = double crochet
  • hdc2tog = half double crochet two stitches together
  • hdc in the 3rd loop = half double crochet in the 3rd loop on the working side
  • FHDC = foundation half double crochet

Notes

  • Finished dimensions: baby: 14 in, toddler: 16 in, child: 18 in, teen/adult sm: 20 in, adult med: 21 in, adult lg: 22 in around. Feel free to use measurements to make this headband: repeat the rows as written to about 1 inch less than the measured head circumference.
  • Sizes are denoted by parentheses: baby (toddler, child) teen/adult sm, (adult med, adult lg.)
  • Stitch counts are marked at the end of each row in {brackets}.
  • Pattern is worked flat and seamed at the end.

Gauge

4 in by 4 in swatch = 18 sts in 15 rows of stitch repeat

Row 1: FHDC 20, ch 1, turn.

Row 2-3: Hdc BLO first st,* hdc in the 3rd loop next st, hdc BLO next st, repeat from * to last st, hdc in the 3rd loop final st, ch 1, turn.

Row 4: Sc each st across, ch 1, turn.

Row 5: Hdc each st across, ch 1, turn.

Repeat rows 2-5 respectively to row 16

Written Instructions: Baby, Toddler, Child

Baby (toddler, child) with Color A

Row 1: FHDC 12 (14, 14), ch 1, turn. {12 (14, 14) FHDC}

Row 2-3: Hdc BLO first st,* hdc in the 3rd loop next st, hdc BLO next st, repeat from * to last st, hdc in the 3rd loop final st, ch 1, turn. {6 (7, 7) hdc BLO, 6 (7, 7) hdc in the 3rd loop}

Row 4: Sc each st across, ch 1, turn. {12 (14, 14) sc}

Row 5: Hdc each st across, ch 1, turn. {12 (14, 14) hdc}

Repeat rows 2-5 respectively 12 (13, 14) times.

Finishing: Sc evenly along the following three edges of the band until you reach the beginning of the final row. Fasten off, leaving a long tail to seam the headband.

Written Instructions: Adult sizes

Teen/adult sm (adult med, adult lg) with Color A

Row 1: FHDC 16 (18, 20), ch 1, turn. {16 (18, 20) FHDC}

Row 2-3: Hdc BLO first st,* hdc in the 3rd loop next st, hdc BLO next st, repeat from * to last st, hdc in the 3rd loop final st, ch 1, turn. {8 (9, 10) hdc BLO, {8 (9, 10) hdc in the 3rd loop}

Row 4: Sc each st across, ch 1, turn. {16 (18, 20) sc}

Row 5: Hdc each st across, ch 1, turn. {16 (18, 20) hdc}

Repeat rows 2-5 respectively 16 (17, 18) times.

Finishing: Sc evenly along the following three edges of the band until you reach the beginning of the final row. Fasten off, leaving a long tail to seam the headband.

Written Instructions: Heart

with Color B

Row 1: Ch 2, sc 2nd st from hook, ch 1, turn. {1 sc}

Row 2: 3 sc, ch 1, turn. {3 sc}

Row 3: 2 sc, sc, 2 sc, ch 1, turn. {5 sc}

Row 4: 2 sc, sc next 3, 2 sc, ch 1, turn. {7 sc}

Row 5: Sc each st across, ch 1, turn. {7 sc}

Row 6: Sk 1st st, 4 dc next st, sk next st, sl st, ch 1, sk next st, 4 dc next st, sl st last st of row. {8 dc, 2 sl st}

Round 1: Sc 11 evenly around the bottom of the heart, placing a ch 1 at the bottom point of the heart, finish with sl st in the 1st dc at the top of the heart. {11 sc, 1 ch, 1 sl st} (This round only goes around the bottom of the heart, not the top part.) Fasten off and leave a long tail to sew onto the band.

Assembly

Lay the band flat in front of you with the sc border facing you. Sew the heart onto the middle of the band with tail. Secure ends and cut tail. Next, put right sides together of band. Fold each right side end and sandwich together into four layers and sew together through all four layers. Turn right side out.

Love it? Share it!

  • Share on X (Opens in new window) X
  • Share on Facebook (Opens in new window) Facebook
  • Share on Pinterest (Opens in new window) Pinterest
  • Print (Opens in new window) Print

February 7, 2025 by Priscilla

Quick Heart Patterns for Valentine’s Day

Valentine’s Day is one week away, so we need QUICK patterns to make! These patterns are all fast makes that would make sweet little Valentine’s trinkets for your loved ones or additions to larger projects.

Some of these I think would even be pretty cute classroom Valentine gifts, if you have a smaller class. I’m pretty sure a few years ago my mom made little crochet hearts for my niece’s class for Valentine’s Day. I’ve searched around a bit for a little variety, but these are all small items you can definitely accomplish in about an hour or less.

Okay let’s see what I’ve found!

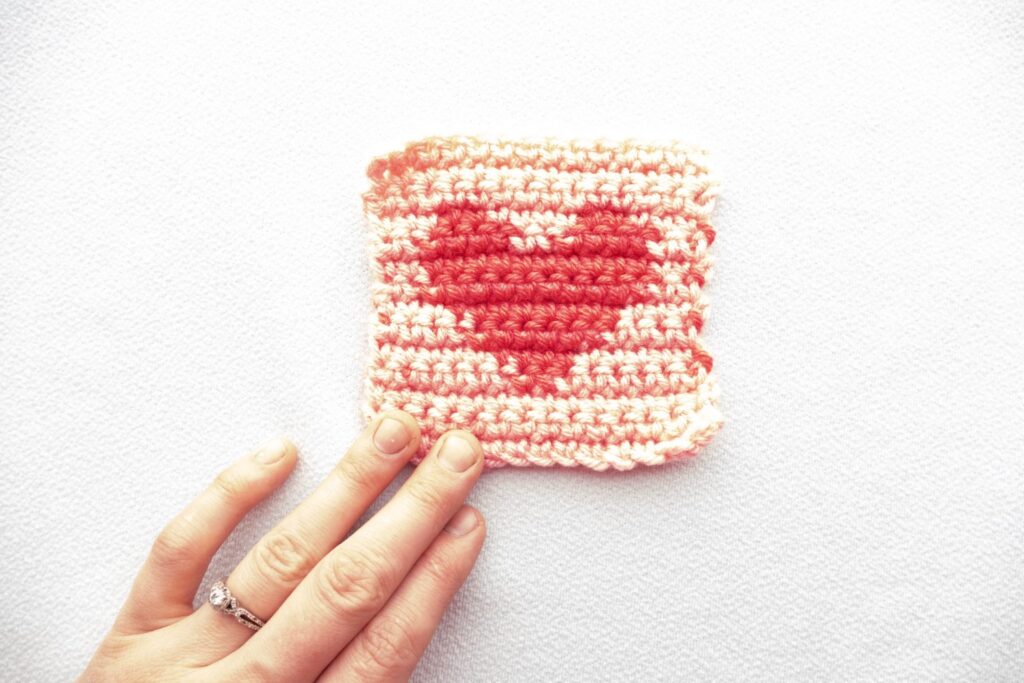
Tapestry Heart Square by Amelia Makes

This little square is so cute and can be many things! A tiny wall hanging, a coaster, or add border rounds to make a dishcloth. You could even make several squares to create a small bag.

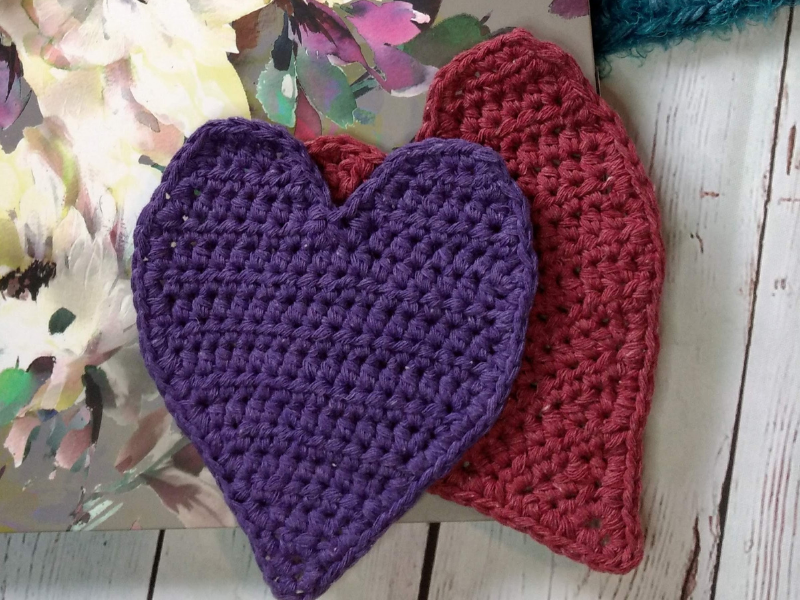
Crochet Heart Home Decor Pattern by Amber Bliss This

Amber’s patterns are always great, and this one fits right in with her collection. The smallest size of this heart is a free pattern on her blog, and I think you could use it for so many things!

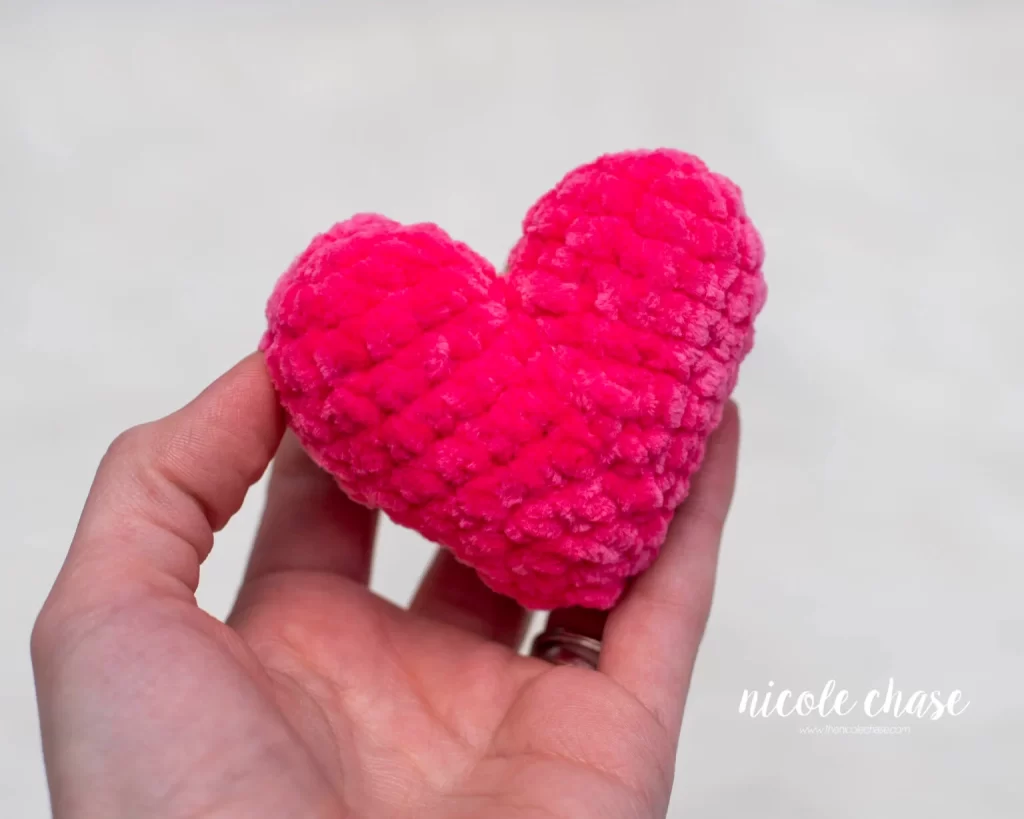
Heart Crochet Pattern by Nicole Chase

I’m not a big amigurumi person, but this is definitely a cute pattern for a plushie heart! You could make this into a cute keychain with a tassel, too.

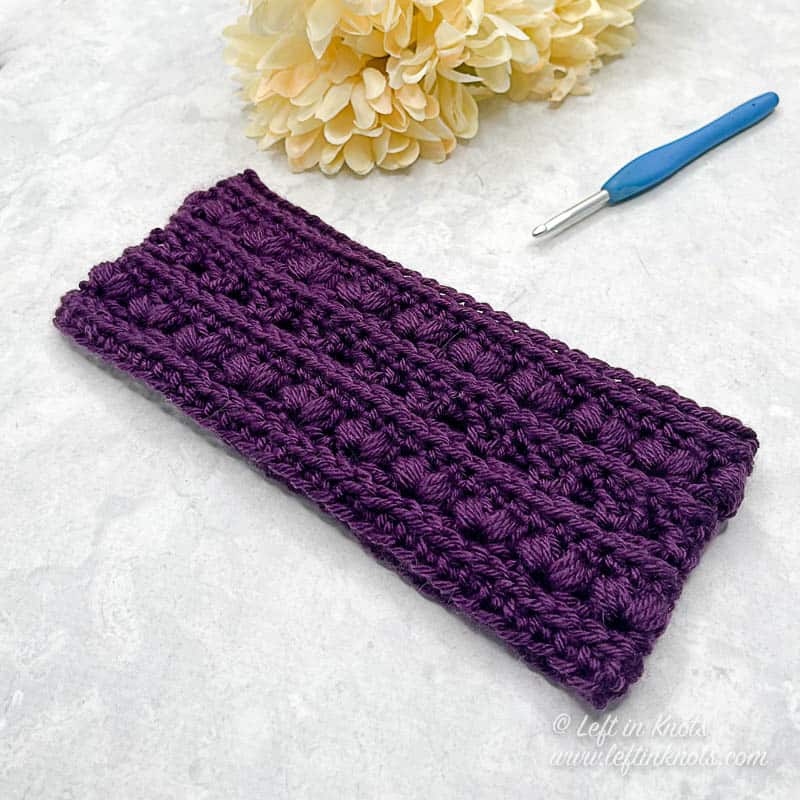
Crochet Heart Stitch Ear Warmer by Left in Knots

This ear warmer pattern is so pretty! The puff stitches make little hearts and I bet they keep your ears nice and warm, too.

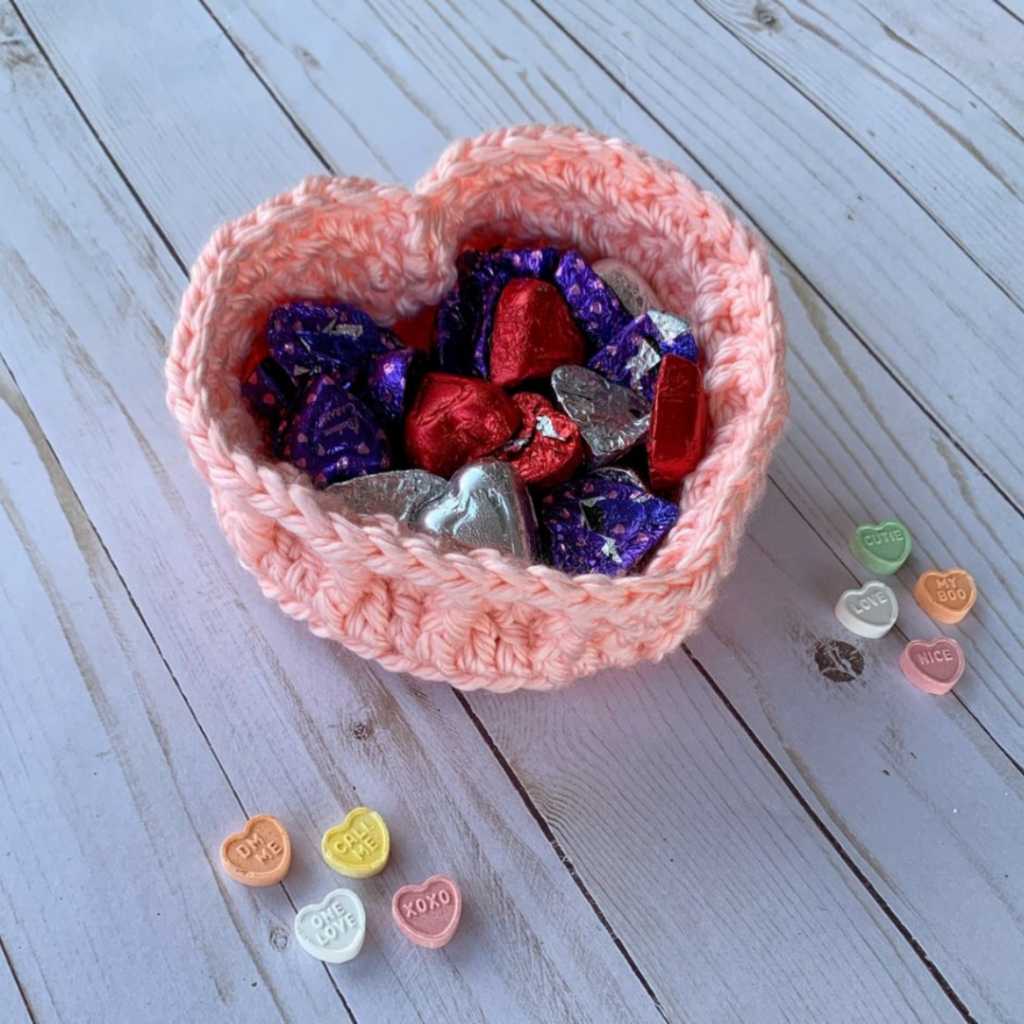
Crochet Heart Basket by Simply Melanie Jane

I think this little basket is SO adorable. I would make this with a strong cotton yarn and keep it out all year on my dresser. Oh, I also think this would be great to adapt to a chunky yarn or even a t-shirt yarn for a larger basket.

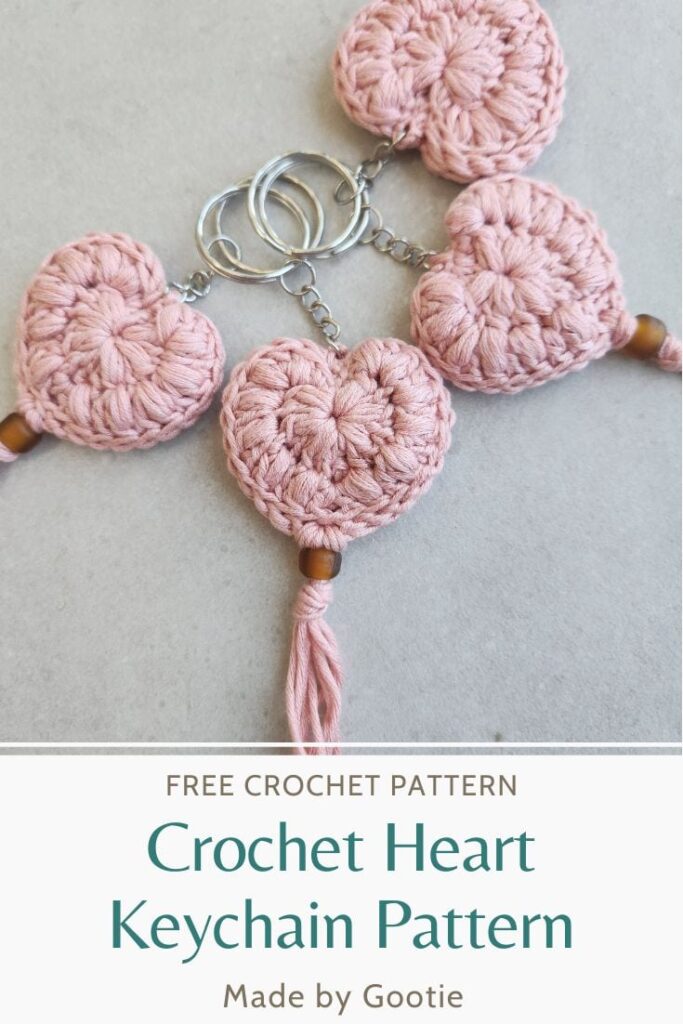
Crochet Heart Keychain Pattern by Made by Gootie

These keychains are sweet! I might be planning on checking through my craft supplies for some keychains tonight!

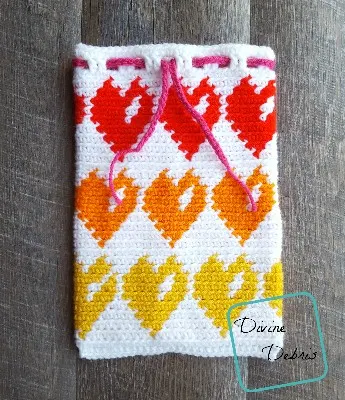
Valentine’s Heart Bag by Divine Debris

I love Amber’s tapestry crochet patterns. She is so talented and I’ve pattern tested for her a few times and always been impressed by her work. This little bag might take more than an hour but it’s so special I had to put it in this round-up anyway!
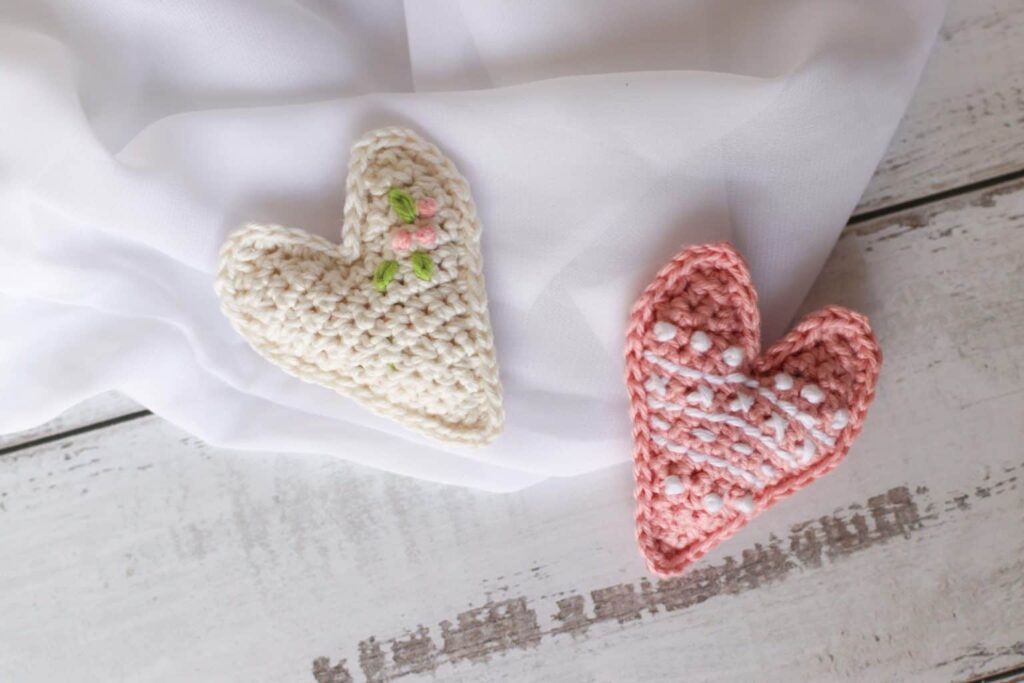
Embroidered Crochet Heart by Thoresby Cottage

GORGEOUS! This is such a smart idea to really elevate these little hearts! I’m not skilled in embroidery but I have some basic abilities. These would be a great little practice project!
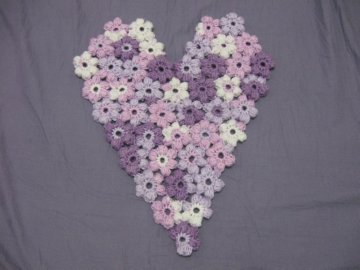
Puff Flower Heart by Meladora’s Creations

I think this puff flower heart is so creative! This would be a lovely decor piece, even hanging it on the wall would be pretty!

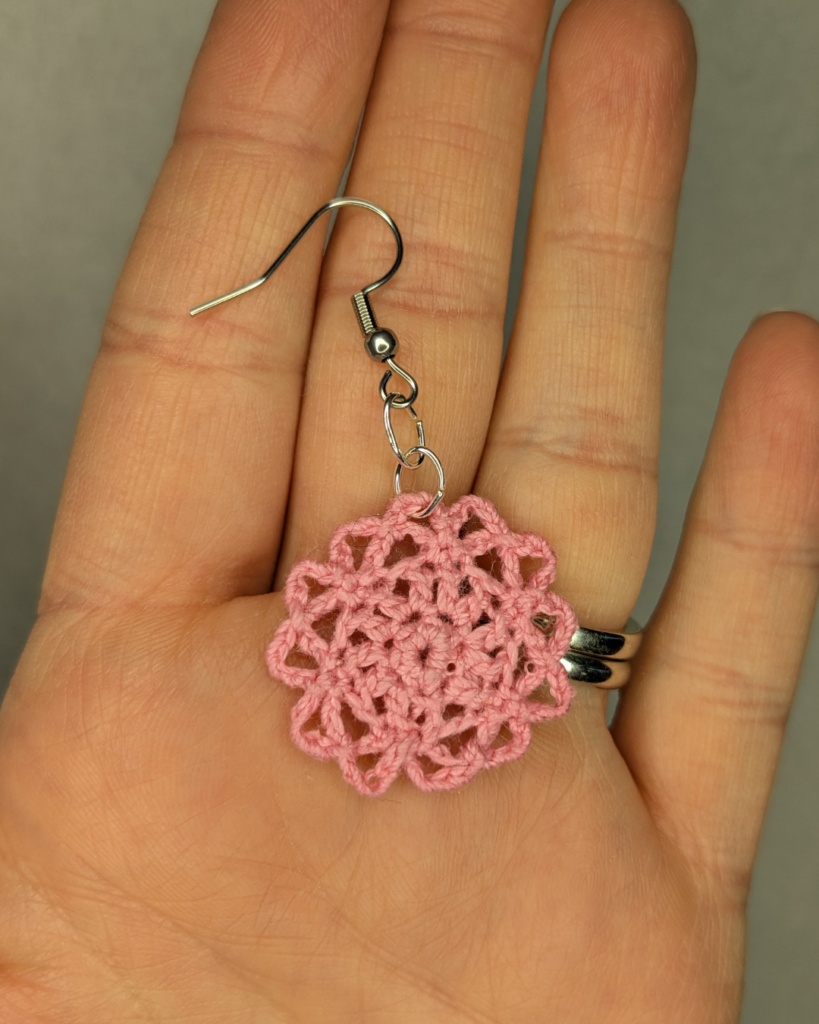
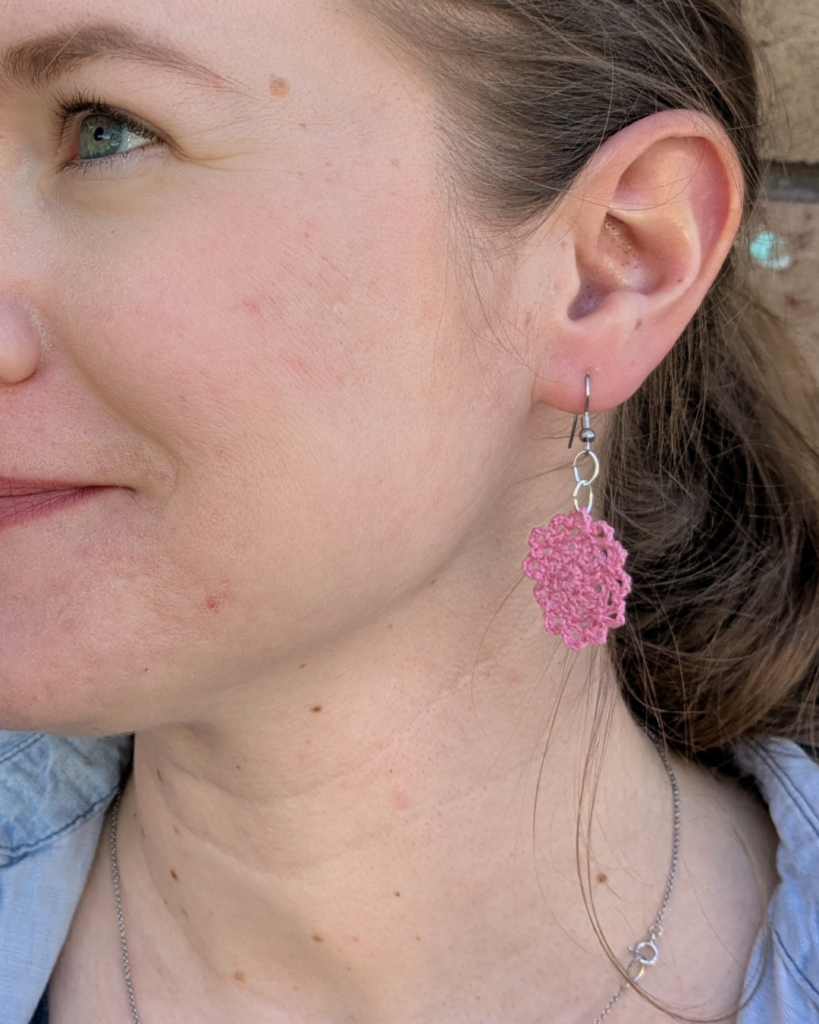
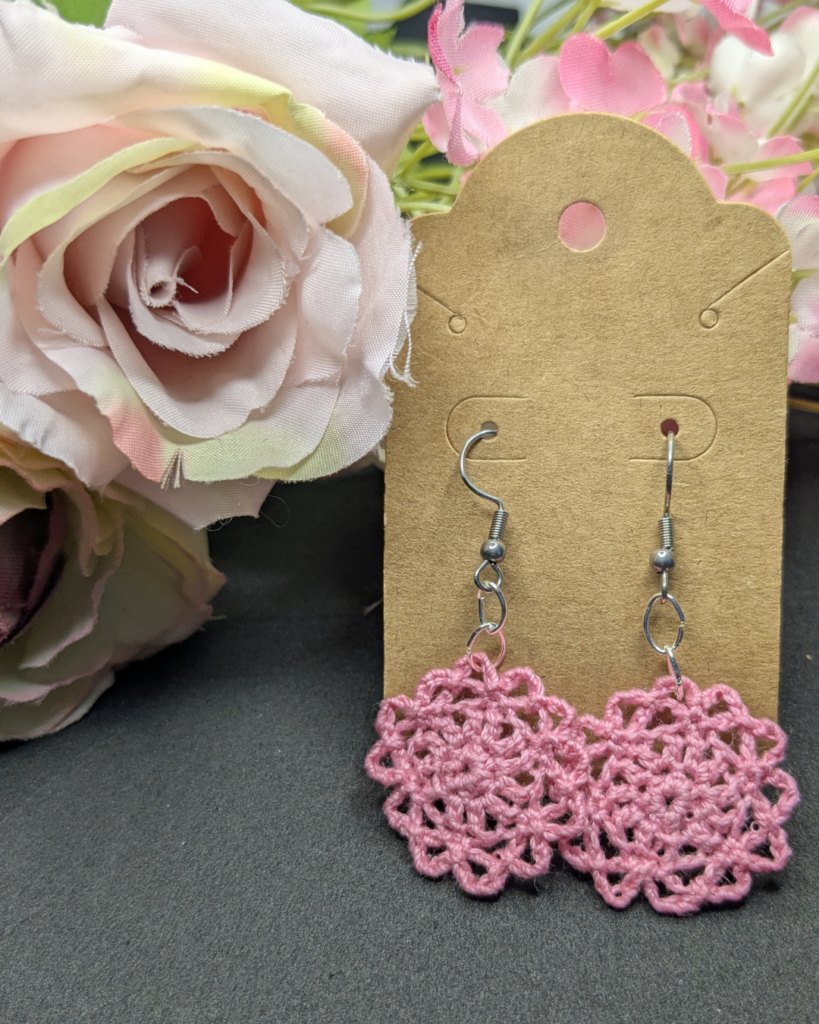
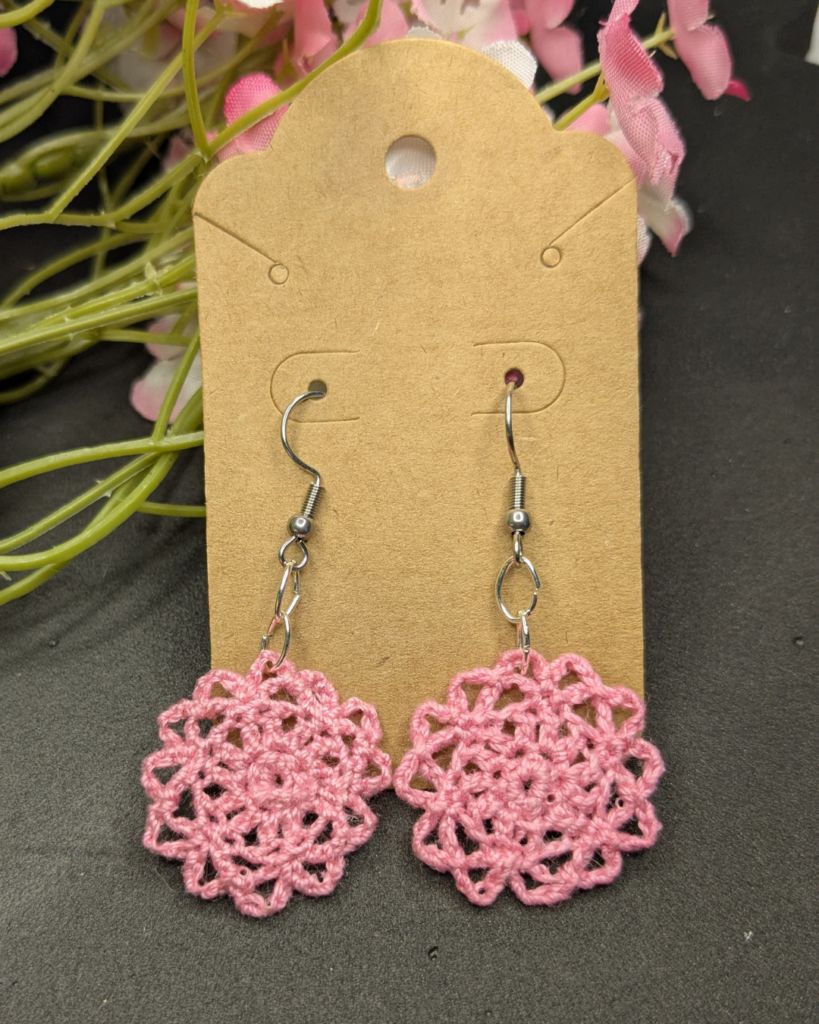
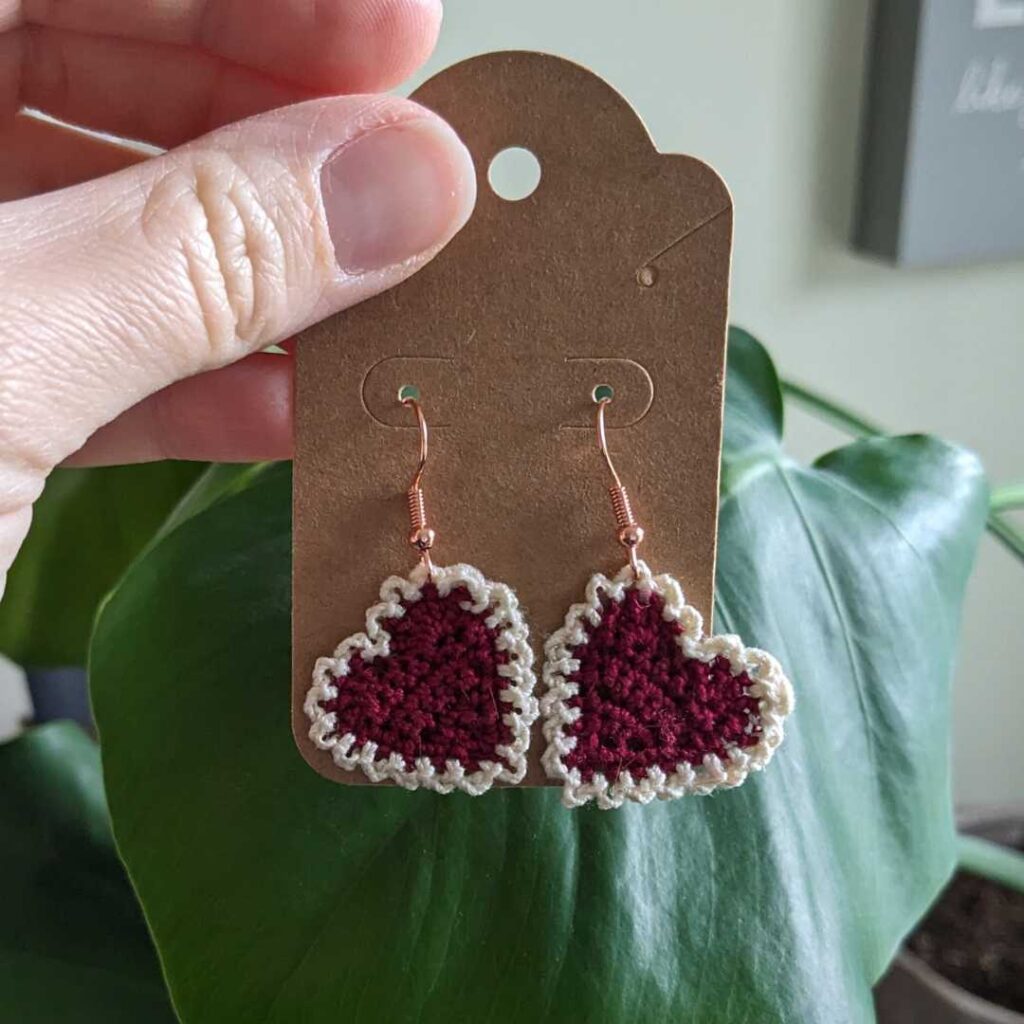
For the Love Earrings by me!

For the Love Earrings

These are one of my favorite earring patterns I’ve ever designed! It’s pretty tricky to get just the right heart shape and I think these turned out with a good one. If you aren’t into thread crochet, you could make these with worsted yarn as a cute keychain or applique. If you want to try thread crochet earrings, these are one of my easiest earring patterns.
I hope you found a pattern or two in this round-up to make this week. Thanks for reading and show me what you made! You can tag me on Instagram or Facebook. Save this Pin on your Pinterest board to come back to whenever you need it!

Love it? Share it!

  • Share on X (Opens in new window) X
  • Share on Facebook (Opens in new window) Facebook
  • Share on Pinterest (Opens in new window) Pinterest
  • Print (Opens in new window) Print
  • « Previous Page
  • 1
  • 2
  • 3
  • 4
  • …
  • 7
  • Next Page »

Welcome! My name is Priscilla and I love designing crochet patterns for your family. I live in beautiful Pennsylvania where I enjoy all sorts of crafts, but I’m most passionate about crochet! I’m a Catholic mom of 4 and I sometimes incorporate my faith into my designs. Thank you so much for supporting me by visiting my crochet website and I hope you find something here that you are excited to make.

Recent Posts

  • Cozy Fall Baby Beanie Pattern
  • Spider Basket Crochet Pattern
  • Lacy Edged Crochet Shawl Pattern
  • Crochet Gingerbread Earring Pattern
  • Classic Hairbow Crochet Pattern

Categories

Follow Me

  • Etsy
  • Facebook
  • Instagram
  • Pinterest
  • YouTube

Pretty Chic Theme By: Pretty Darn Cute Design