The Mother Lode

Crafts and Crochet

  • Home
  • Crochet Pattern Library
  • Faith Based Patterns
  • About Me
  • Privacy Policy

January 16, 2025 by Priscilla

Chunky Fingerless Mittens

If you need to keep your fingers busy and your hands warm, make these chunky fingerless mittens! This pattern is called the Minimalist Mitts. I made a small size in a little over an hour! These would make a great gift set paired with the matching Minimalist Headband!
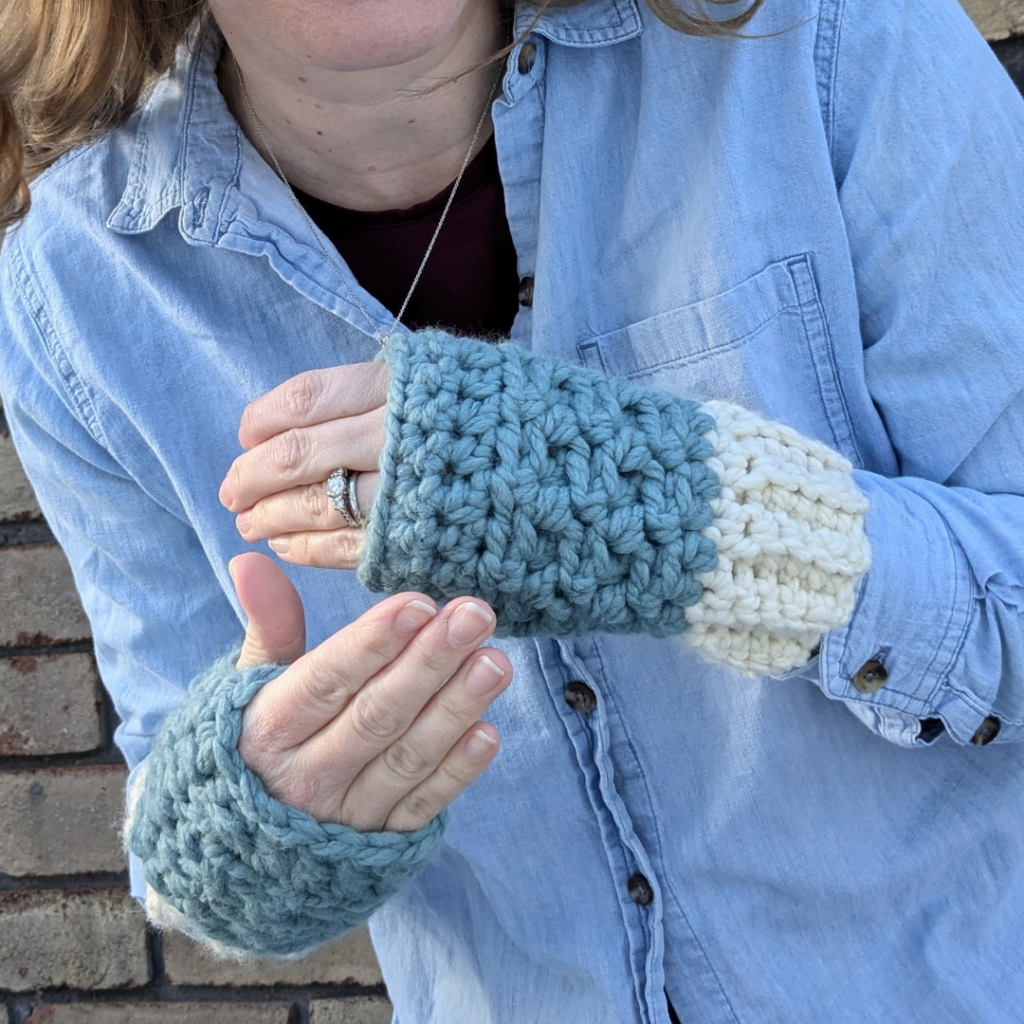
The set together was available in the Winter Sets Blog Hop hosted by Sandra Stitches in January 2025. You can still head to the blog round up to find a great selection of winter sets.

Some more pattern details! The pattern is written for 3 adult sizes, small, medium, and large. You’ll be working tight stitches with the thick yarn to keep it nice and warm! The pattern details call for an 8 and 9 mm hook, but definitely plan that you may need to go down to a 7 and 8 instead. You’ll need one skein of Lion Brand Yarn Wool Ease Thick and Quick. Several testers also had nice results with Bernat Blanket yarn. I also used the Bernat when I was testing the sizing and when I put that on my husband’s large hand he thought it felt so nice. Making these chunky fingerless mittens is a fun and fast project, I hope you love them!
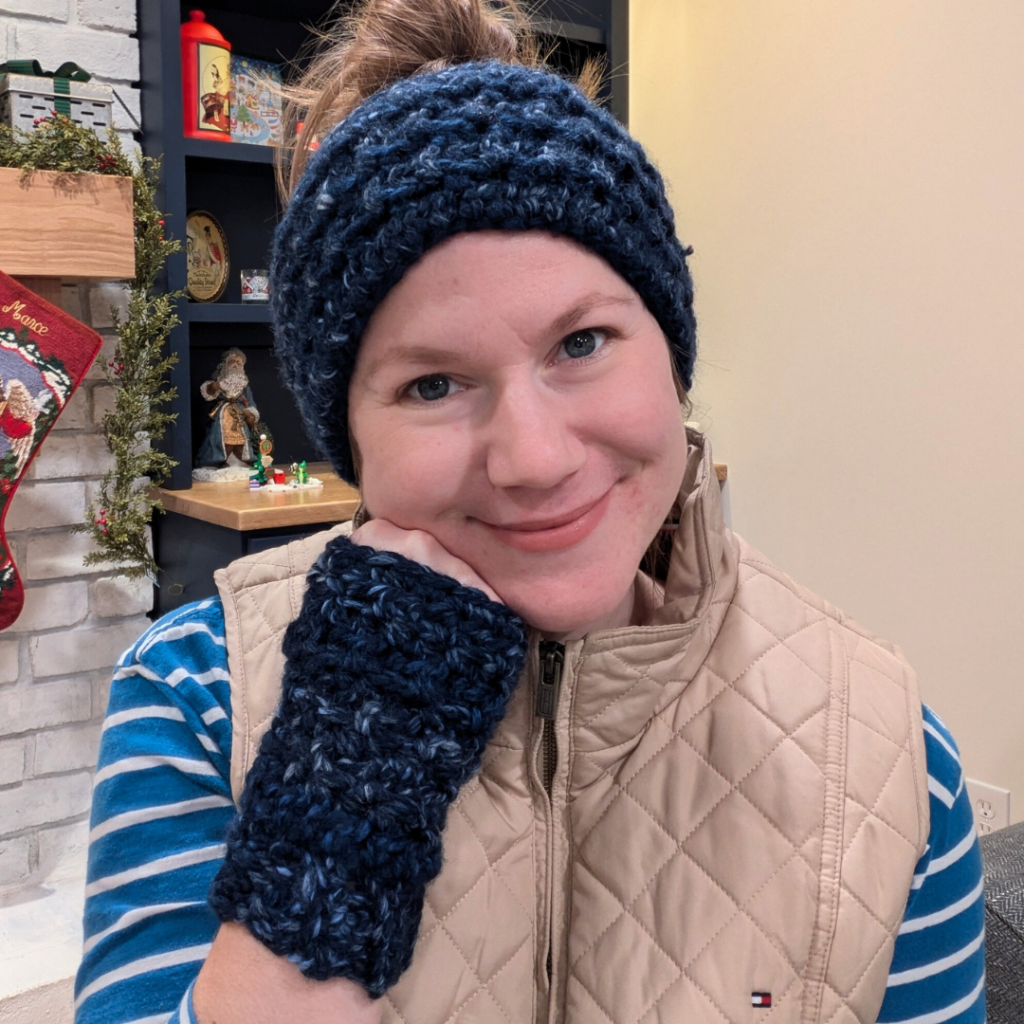
The pattern for the mitts is below, free to use on the blog, and you can also zip here to the blog post containing the free matching headband I also offer the premium PDF in my pattern shops. This one includes 2 pages of photo tutorial to help with the half double crochet 3rd loop stitches, and of course, makes for easier offline crochet sessions.

ravelry
Etsy
Lovecrafts

Supplies

  • 100 yards super bulky (CYC 6) yarn, sample set is Lion Brand Yarn Wool Ease Thick-n-Quick
  • crochet hook size 8 mm AND 9 mm or sizes needed to obtain gauge
  • tapestry sewing needle
  • scissors and measuring tape

Abbreviations (US Terms)

  • ch = chain
  • sc = single crochet
  • st/sts = stitch/stitches
  • BLO = back loop only
  • hdc = half double crochet
  • sl st = slip stitch
  • hdc in the 3rd loop = half double crochet in the 3rd loop on the working side
  • hdc 2 tog = half double crochet 2 sts together

Gauge Swatch

4 in by 4 in swatch, with 9 mm hook

10 sts in 8 rows of the pattern repeat which is:

*hdc, hdc in the third loop, repeat from * across

Notes

  • Finished dimensions: small 6.5 in tall, 4 in wide, medium: 7.5 in tall, 5 in wide, large 8 in tall, 5.5 in wide
  • Sizes are denoted by parentheses: small (medium/large.)
  • Stitch counts are marked at the end of each row in {brackets}.
  • Pattern is worked flat at the wrist, then seamed and finished in the round.
  • Do not turn after the first round, turn after all other rounds.
  • Ch 1 counts as a hdc in all hdc rounds.

Written Instructions

Small (medium, large)

with 8mm hook

Row 1: Ch 7 (8, 9), sc second ch from hook and each st until last, sl st last st, ch 1, turn. {5 (6, 7) sc, 1 sl st}

Row 2: Sl st BLO first st, sc BLO each st across, ch 1, turn. {5 (6, 7) sc BLO, 1 sl st BLO}

Row 3: Sc BLO each st across until last, sl st BLO last st, ch 1, turn. {5 (6, 7) sc BLO, 1 sl st BLO}

Rows 4-17 (19, 21): Repeat rows 2 and 3 respectively.

Sl st BLO of row 17 (19, 21) to row 1, switch to 9mm hook and turn right side out.

Round 1: Ch 1, sc 18 (20, 22) sts in the end of each row (placing 1 in the seam), sl st to beg sc, do not turn. {sc 18 (20, 22)}

Round 2: Ch 1, hdc each st around, sl st to beg hdc to join, ch 1, turn. {hdc 18 (20, 22)}

Round 3-6 (7, 8): Hdc in the 3rd loop first st, *hdc next st, hdc in the 3rd loop next st, repeat from * around, sl st to join, ch 1, turn. {hdc 9 (10, 11), hdc in the 3rd loop 9 (10, 11)}

Round 7 (8, 9): Hdc in the 3rd loop and hdc next st together, *hdc in the 3rd loop next st, hdc next st repeat from * around until last st, hdc in the 3rd loop last st, sl st to join, ch 1, turn. {hdc 8 (9, 10), hdc in the 3rd loop 8 (9, 10), 1 hdc 2 tog}

Continue for left mitten:

Round 8 (9, 10): Hdc first 3 sts, ch 3, sk 2 sts, hdc each st around, sl st to join, ch 1, turn. {hdc 15 (17, 19)}

Round 9 (10, 11): Sc each st around [sc 3 in ch-3 space], sl st to join, ch 1, turn. {sc 18 (20, 22)}

Round 10 (11, 12): Sc 2 tog, sc each st around, sl st to join, fasten off, weave in ends. {sc 17 (19, 21)}
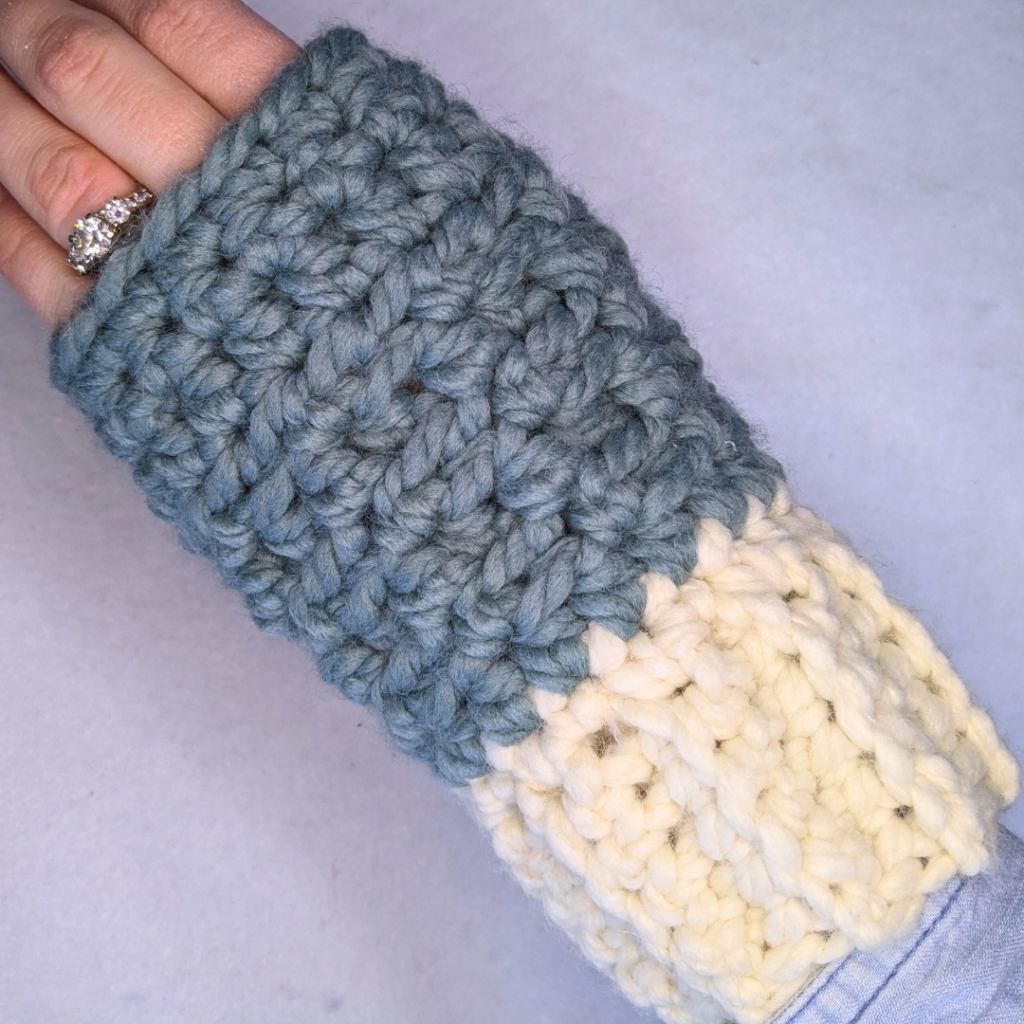
Continue for right mitten:

Round 8 (9, 10): Hdc first 12 sts, ch 3, sk 2 sts, hdc each st around, sl st to join, ch 1, turn. {hdc 15 (17, 19)}

Round 9 (10, 11): Sc each st around [sc 3 in ch-3 space], sl st to join, ch 1, turn. {sc 18 (20, 22)}

Round 10 (11, 12): Sc 2 tog, sc each st around, sl st to join, fasten off, weave in ends. {sc 17 (19, 21)}

Okay, now go make a matching headband! I wear this headband often because it is so comfortable. I designed it so that it tapers at the neck and isn’t bulky back there, but the thick yarn is still very warm on your head and ears!

Love it? Share it!

  • Share on X (Opens in new window) X
  • Share on Facebook (Opens in new window) Facebook
  • Share on Pinterest (Opens in new window) Pinterest
  • Print (Opens in new window) Print

December 13, 2024 by Priscilla

Easy Granny Stitch Cowl Pattern

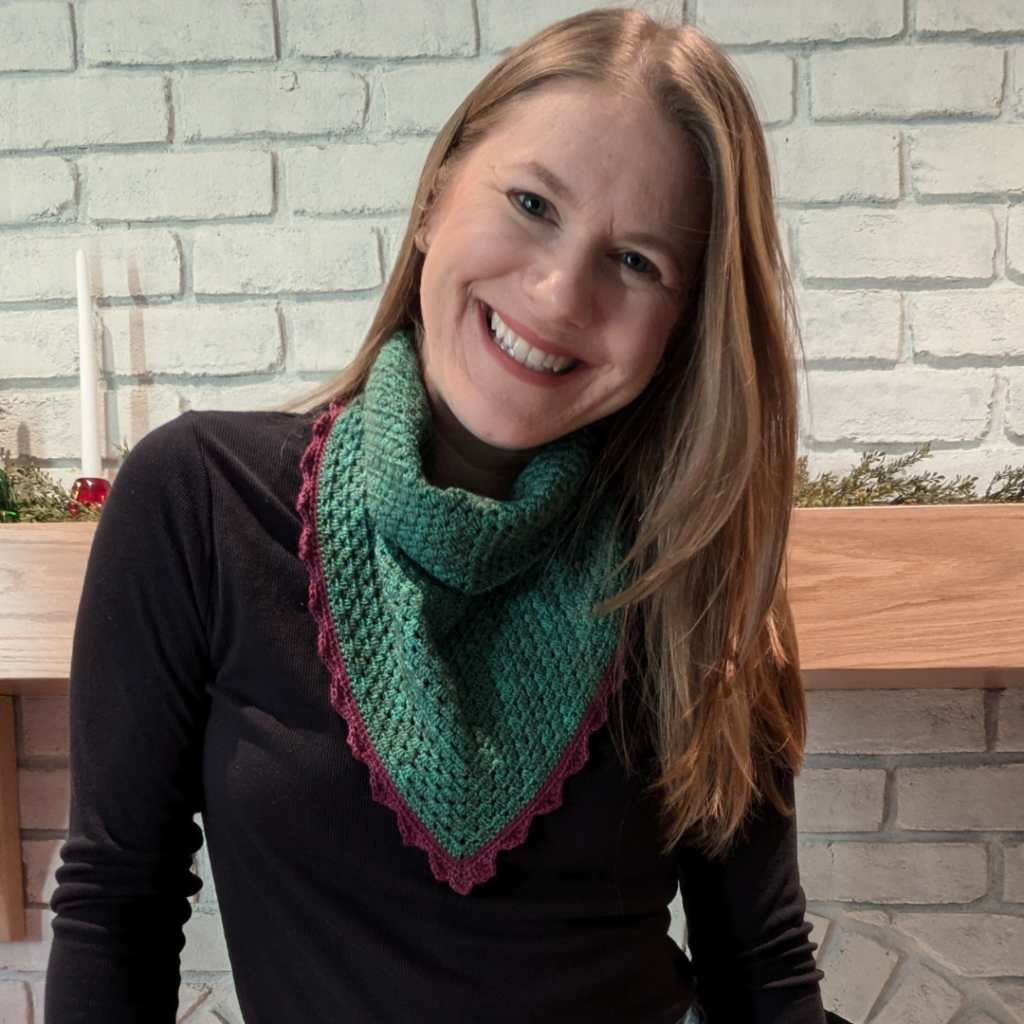
Oh the drama when you see a great pattern and realize none of the yarns you have on hand will work for it! Should you look for a new pattern? Buy yarn? Use yarns held together? You won’t have any drama with this granny stitch cowl pattern! You can use ANY yarn for it! It’s made using measurements and relative gauge, so you can truly use whatever you like for this versatile project. I’m updating this post and I just made another cowl for a little girl, because I wanted it to be finished quickly and I knew I could use the bulky yarn I had on hand!

I like using the granny stitch, though I don’t often make granny squares. I think I dislike that you get all the squares finished and then have to block and sew them. I have TWO garments that I made all the squares for and then just left them in a project bag. Are you like me? Anyone?! Well, we can still use the quick and versatile granny stitch. In this cowl, you’ll use the granny stitch in turned rounds to make a cowl! I created this pattern so you can have it in your library and whip one of these up with whatever yarn you’ve got. Scraps? Perfect. Self-striping? Awesome. Saturated tonal? Stunning. Variegated? Delightful. You can use CYC weights 1 through 6 to create this cowl, they’ll just lay differently based on what the fiber content and weight is, but the pattern design will create the appropriate shape.

When I started really diving into crochet and developing a style and growing a yarn stash, I made a granny triangle scarf that turned out so pretty. I ended up joining it together on the ends to make a cowl. This was after making a triangle, I just sewed it together kind of higgledy-piggledy. It looked great in the front but not so much around the back of the neck. I think that was 4 years ago, and here I am finally making that concept a reality with this granny stitch cowl pattern. This, however, looks lovely in the back as well!

Let’s dive in for some of the particulars for this design. You really do not need to gauge swatch to try to meet a particular gauge, since we are using measurements as we go in this pattern. However, you may want to make a swatch to test the drape with your selected yarn and hook size, to get the desired drape. You’ll be using granny stitch, so make your gauge swatch in granny stitch. There is a different gauge swatch for each yarn weight. Use the hook size to get your desired look and drape. If you want to have a relaxed cowl that drapes daintily, you’ll want a larger hook size. If you want the cowl to sit up more stiffly next to the face to keep warm, use a smaller hook size. You need a tape measure to make this pattern, because you’ll be measuring as you go to get the appropriate sizing.

You can use the pattern here on the blog anytime for free! Bookmark the page and come back each time you pick up your work. If that doesn’t work for you, consider purchasing the PDF. I truly think this is one of those basic patterns you come back to again and again, and it’s versatile for style and yarn choice. Add it to your library in ravelry or purchase on Etsy. Okay, let’s get to it!

Abbreviations (US Terms):

  • ch = chain stitch
  • st/sts = stitch/stitches
  • sk = skip
  • dc = double crochet
  • sl st = slip stitch
  • sp = space
  • MR = magic ring
  • beg = beginning
  • granny sp = space between each granny cluster
  • granny cluster = 3 dc

Special Stitches:

  • beg dec = ch 3, dc next granny sp
  • dec = dc each of next two granny sp

Supplies:

  • 100-450 yards yarn in desired size (samples as follows)
  • crochet hook sized to desired drape of yarn selected (samples as follows, see notes for details)
    • CYC 1: 3.25mm hook
    • CYC 2: 4mm hook
    • CYC 3: 5mm hook
    • CYC 4: 6mm hook
    • CYC 5: 9mm hook
    • CYC 6: 11mm hook
  • tapestry sewing needle
  • scissors and measuring tape

Gauge Swatch:

CYC 1: 4 in by 4 in swatch = 8.5 granny clusters in 17 granny rows

CYC 2: 4 in by 4 in swatch = 7 granny clusters in 14 granny rows

CYC 3: 4 in by 4 in swatch = 5 granny clusters in 10 rows

CYC 4: 4 in by 4 in swatch = 4 granny clusters in 9 granny rows

CYC 5: 4 in by 4 in swatch = 3 granny clusters in 6 granny rows

CYC 6: 4 in by 4 in swatch = 2.5 granny clusters in 4 granny rows

Notes:

  • Pattern is written to be made using measurements at certain points in the pattern to determine how many stitches, there are no stitch counts for this pattern.
  • Pattern is worked flat and in the round.
  • Finished dimensions: 20-22 in around, 15-17 in tall
  • I prefer a cowl to be a warm winter accessory. If this is being worn more as a fashion accessory, you may add an inch or two to either or both measurements to achieve a roomier cowl that doesn’t sit as close to the neck and face.
  • Think about the type of drape and warmth you want to achieve with your cowl and how the fiber choice affects that. Cotton, for example, is notoriously stiff. A cotton blend yarn, crocheted with a bit tighter hook for the yarn weight would provide a cowl that stays upright easily to cover your face. If you used a larger hook, however, with an acrylic fiber of the same weight yarn, it would drape beautifully but would not stand up in quite the same way.
  • Modification for a children’s size: 14 inches for the triangle measurement and 3 inches for the chain measurement.
  • Beg dec and dec each count as a granny cluster, so in rounds 3 and 5- end you’ll be working in the granny sp between the decreases.

Written Instructions for the Granny Stitch Cowl Pattern:

Granny Triangle:

Row 1: MR, ch 3, 2 dc into ring, ch 2, 3 dc into ring, pull ring closed, turn.

Row 2: Ch 3, 2 dc in same st, sk 2 sts, (3 dc, ch 2, 3 dc) in ch 2-sp, sk 2 sts, 3 dc in last st, turn.

Row 3: Ch 3, 2 dc in same st, 3 dc in each granny sp until ch-2 sp (3 dc, ch 2, 3 dc) in ch 2-sp, 3 dc in each granny sp until last st, 3 dc in last st, turn.

Repeat row 3 until long edge of triangle reaches approximately 16 inches.

Do not fasten off. Ch approximately 4 inches in multiples of 3. For example, fingering (CYC 1) sample was 30 chains = 4 in.

Sl st to opposite corner of triangle, turn.

Round 1: Ch 3, 2 dc in same st, *sk 3 sts, 3 dc next st, repeat from * until end of chain, continue around granny triangle as above, sl st to top of beg ch 3, turn.

Round 2: Beg dec, 3 dc in each granny sp around granny triangle as above, dec at other end of triangle, 3 dc in each granny sp to end of straight row part, sl st to top of beg ch 3, turn.

Round 3: Ch 3, 2 dc in same st, 3 dc each granny sp around and continue around granny triangle as above, sl st to top of beg ch 3, turn.

Round 4: Beg dec, 3 dc in each granny sp around granny triangle as above, dec at other end of triangle, 3 dc in each granny sp to end of straight row part, sl st to top of beg ch 3, turn.

Round 5-end: Repeat round 3 until desired length.

So what did you think? I thought this was so fun to make and I actually made FIVE (let’s update this to about 8!) of them! Here are the links again to my pattern shops if you need them!

ravelry
Etsy

Welcome! Are you new here!? I’m Priscilla and I like to design patterns for families to coordinate and match! Most of my accessory designs have sizes baby to adult. I also enjoy designing earrings with crochet thread. I offer 30+ patterns freely here on the blog as well as premium PDFs in my pattern shops. Sign up for my email newsletter! I typically send an email every Friday and I share news about crochet events and patterns, yarn sales, etc.

A discounted pattern? Sure!

Sign-up here for my weekly email newsletter! This will give you the coupon code for 40% off the Any Yarn Granny Cowl pattern straight to your inbox!


Thank you!

You have successfully joined our subscriber list.

Love it? Share it!

  • Share on X (Opens in new window) X
  • Share on Facebook (Opens in new window) Facebook
  • Share on Pinterest (Opens in new window) Pinterest
  • Print (Opens in new window) Print

November 29, 2024 by Priscilla

Martha Christmas Bauble

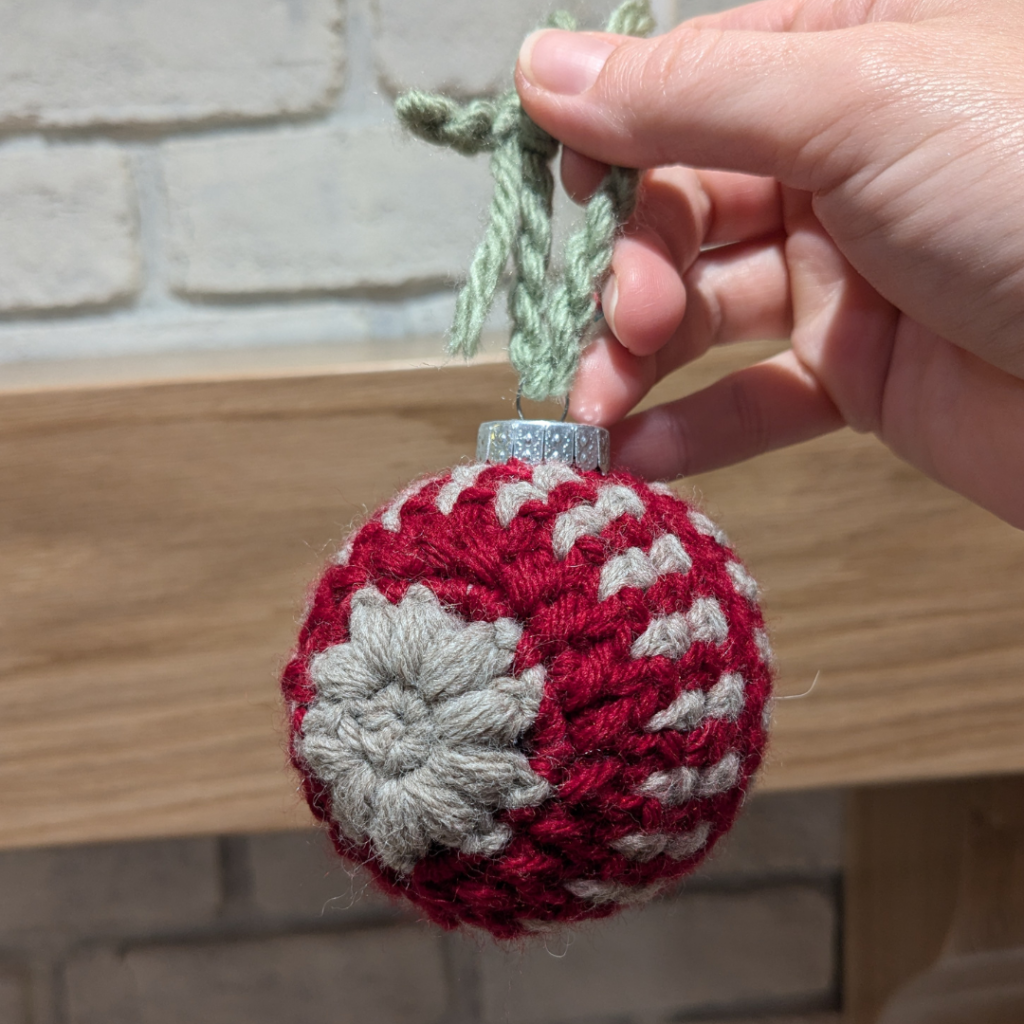
I enjoyed creating this Christmas Bauble pattern so much! I’m thinking I will want to keep designing them and thought it would be fun to give them all names of my favorite people. I’m starting with the Martha Christmas Bauble, for my sister, who is a wonderful person and I’m so lucky to be her sister! She is fun and practical and beautiful and just plain good. <3

This design starts with some cute puff stitches, changes to a crossed stitch and finally ends with a linen stitch. It’s made in 2 pieces and written for two colors. You could absolutely change it up to one color or several colors. I made one with a pretty, deep red and tan which will be gifted to my sister. She loves neutral colors and I think this will fit her style. The other sample I made is a bright green and white and that will go great with a lot of the bright red and green ornaments on one of my trees. (We are Christmas crazy and put up three trees.) I know, I KNOW. It’s excessive but I love it.

I hope you love making these! I used Lion Brand yarns for my samples. I used Basic Stitch and Wool Ease. I like the Wool Ease one better, I think the wool texture adds a good element to it. The Basic Stitch is smoother to work with, though, so think about that as well when choosing your worsted yarn.

You can use the free, written instructions right here on the blog to make this pattern, or head to one of my pattern shops and purchase the low-cost PDF. The PDF includes a photo tutorial pages to guide you through the rounds with ease.

ravelry
Etsy

Supplies

  • 30 yards each worsted yarn in 2 colors as desired (CYC 4) Color A: Tan, Color B: Red
  • crochet hook size 4.5 mm or size needed to obtain gauge
  • tapestry sewing needle
  • scissors and measuring tape
  • plastic craft ornament 80 mm size

Stitches (US Terms)

  • ch = chain
  • sc = single crochet
  • st/sts = stitch/stitches
  • sl st = slip stitch
  • sp = space
  • WS = wrong side
  • BLO = back loop only
  • dc = double crochet
  • MR = magic ring
  • puff = (yo, insert hook, pull up a loop) 3 times, yo, pull through all loops on hook
  • FLO = front loop only

Gauge

after completion of round 2 = 1.5 in diameter

Notes

  • Photo tutorial follows the written instructions.
  • Finished Dimensions: 9 in around
  • Stitch counts are marked at the end of each round in parentheses.
  • Pattern is worked in 2 pieces, then seamed together.
  • If using larger bauble, for example 100 mm, you could add one or two rounds of rounds 7 and 8
  • Ch 2 in round 4 counts as a stitch

Written Instructions

Make 2

Round 1: With color A, MR, 5 sc into MR, sl st to join. (5 sc)

Round 2: Ch 1, (puff, ch 2, puff, ch 1) each st around, sl st to top of first puff to join. Switch to color B. (10 puff)

Round 3: Ch 1, (3 sc in ch-2 sp, sc in ch-1 sp) around, sl st to join. (20 sc)

Round 4: Ch 2, dc in last sc from round 3, (dc next unworked st, dc prev worked st) around, sl st to join with color A. (40 dc)

Round 5: (Ch 1, sc in between crossed dc sts from round 4) around, do not join, pull through final sc with color B. (20 sc)

Round 6: (Ch 1, sc in ch-1 sp) around, do not join, pull through final sc with color A.(20 sc)

Round 7: Sc in first ch-1 sp, ch 1, (sc next ch-1 sp, ch 1) around, do not join, pull through final ch with color B. (20 sc)

Round 8: Sc in sc from round 6, ch 1, (sc next ch-1 sp, ch 1) around, sl st to join.(20 sc)

Fasten off, may weave in ends or leave to tuck into ornament.

Place WS together and sl st the pieces together in the BLO side close to you and FLO other side around an 80 mm plastic Christmas bauble.

Thanks so much for visiting my blog today! I hope you had fun crocheting and getting ready for the season!

Love it? Share it!

  • Share on X (Opens in new window) X
  • Share on Facebook (Opens in new window) Facebook
  • Share on Pinterest (Opens in new window) Pinterest
  • Print (Opens in new window) Print

November 20, 2024 by Priscilla

Sassy Snowflake Earrings

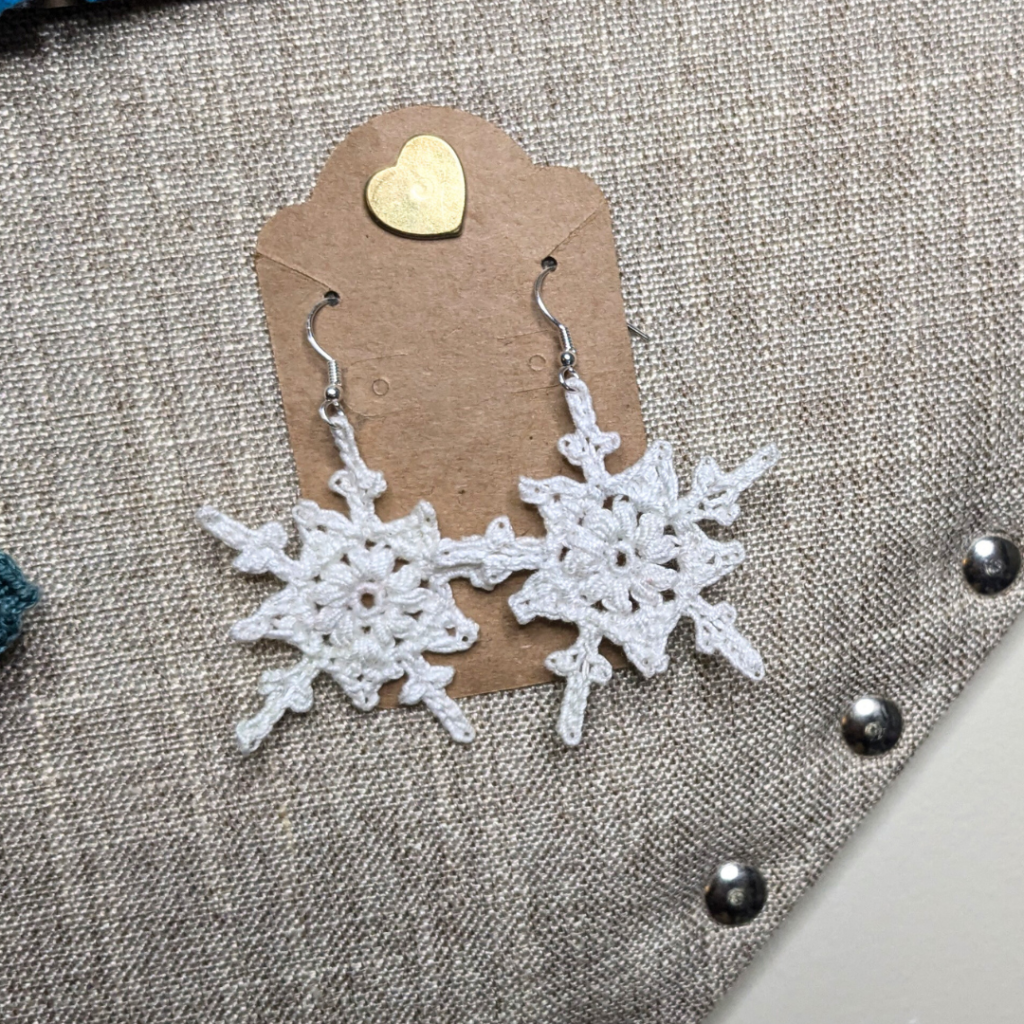
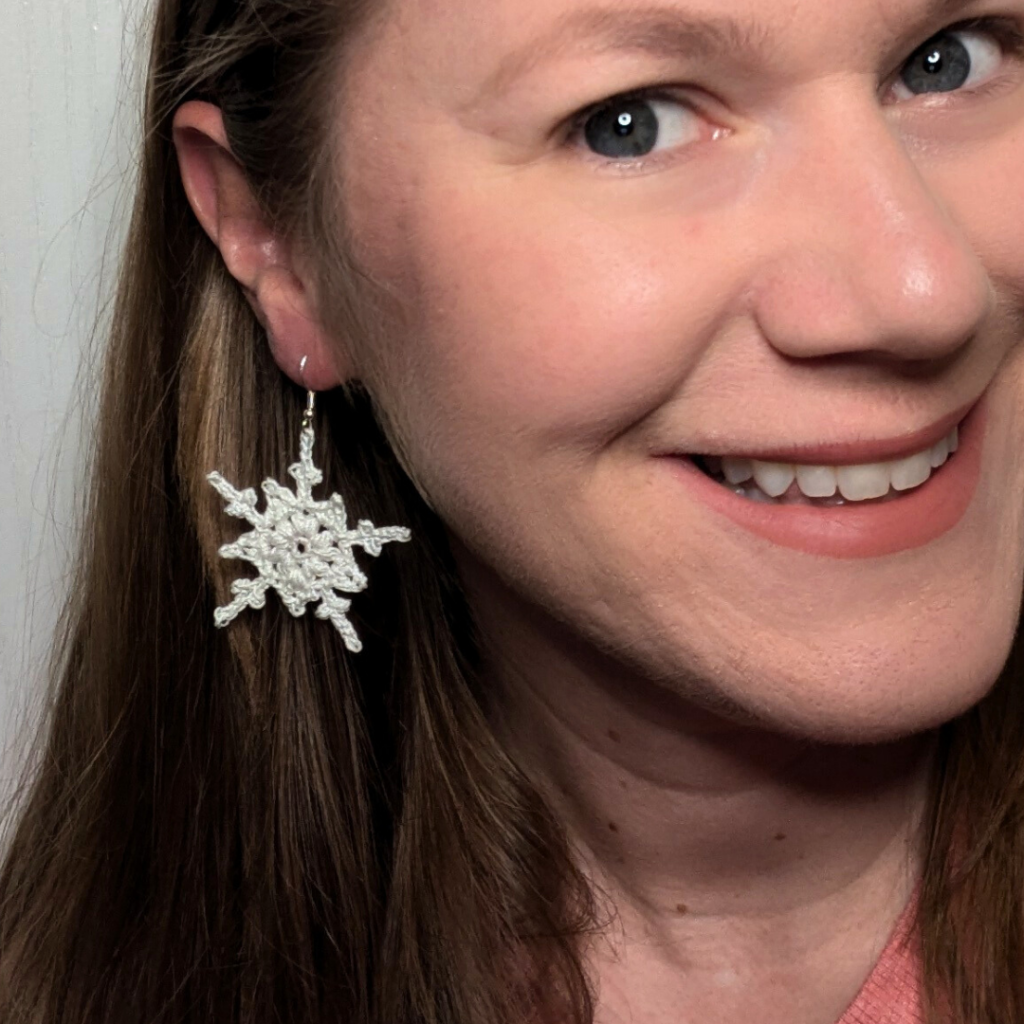
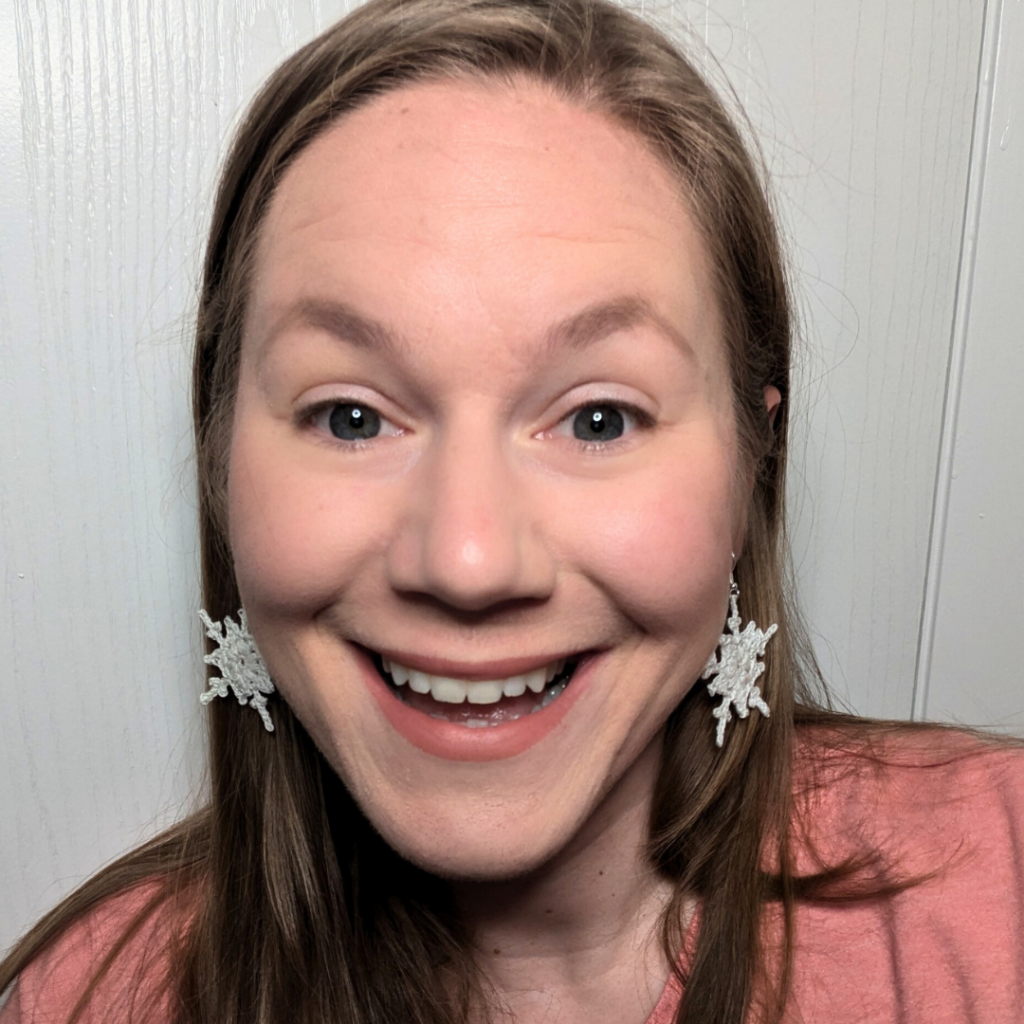
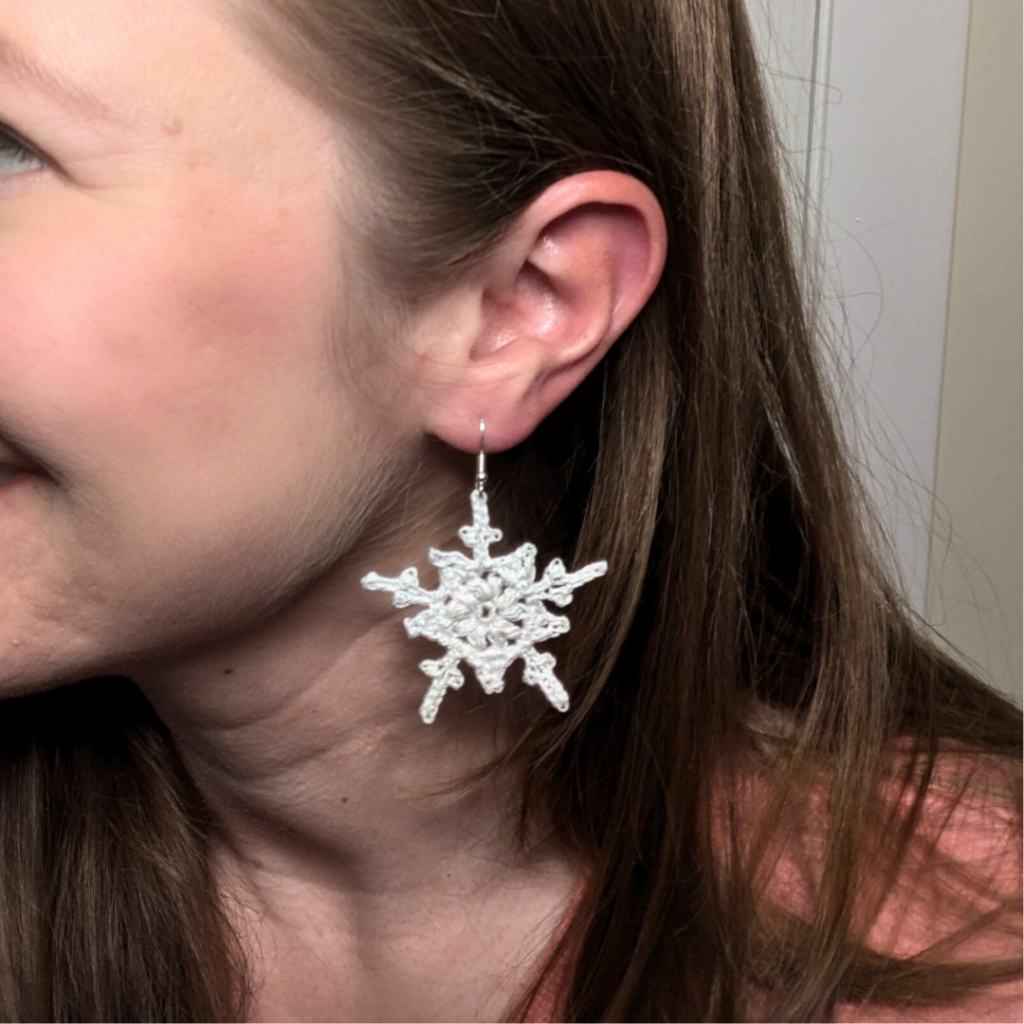
Here we are with the Sassy Snowflake Earrings! I’ve been planning these since the summertime when I designed my summer earring collection! They turned out just as I wanted, delicate little snowflakes to wear all winter long. I hope you enjoy making and wearing them!

These come together in just three rounds of crochet thread. Yes, the final round is a little tricky with all those picot stitches, but I believe in you! I used two brands of thread when making my samples. These white ones are made with Aunt Lydia’s Crochet Thread size 10. The light blue samples in my pattern photos are WeCrochet Curio size 10 crochet thread in the color Clarity. Several of my testers used metallic thread for theirs and they turned out BEAUTIFUL. I have some of this type of thread but haven’t found time to make them yet!

If you have experience with crochet thread, you can absolutely make these with the written instructions provided for free on the blog. I think a crocheter with experience with larger yarns could also likely handle these with just the written instructions. If you still consider yourself a beginner in any way, you’ll probably need the PDF. It has 2 pages of photo tutorial so you see each step, particularly of that last round. Either way, please contact me if you have any struggles with the pattern! I’d love to help. You can leave a comment or find me on social media!

Get the PDF in ravelry

Additionally, grab some light colored worsted cotton yarn and make an ornament to get a feel for the pattern first! I made two with WeCrochet Dishie yarn and 4.5mm hook and they are quite pretty! These could be a tree ornament, a garland, or a gift decoration. You could even make one and sew it onto a simple beanie pattern.

Supplies

  • Size 10 crochet thread, preferably white or other light colors, approx 20 yards
  • Size 1.65 mm crochet hook
  • Tapestry needle and scissors
  • Earring findings: 2 fishhook style earrings
  • Fabric stiffener, like Aleene’s Fabric Stiffening Spray, t-pins, and a blocking mat
  • Optional: size 6/0 seed beads and beading needle

Stitches (US Terms)

  • ch = chain
  • sc = single crochet
  • sl st = slip stitch
  • st/sts = stitch/stitches
  • dc = double crochet
  • sp = space
  • beg = beginning
  • MR = magic ring
  • picot = ch 3, sl st in 3rd ch from hook
  • puff = (yo, insert hook, pull up a loop) 3 times, yo, pull through all loops on hook

Gauge

Gauge is not really necessary for this pattern. Personally, I find the smallest hook I can handle for the thread size (for earrings) produces the best, tightly stitched look. If you desire to gauge swatch: use double crochet in 5 rows with 11 sts to equal a 1 inch square.

Notes

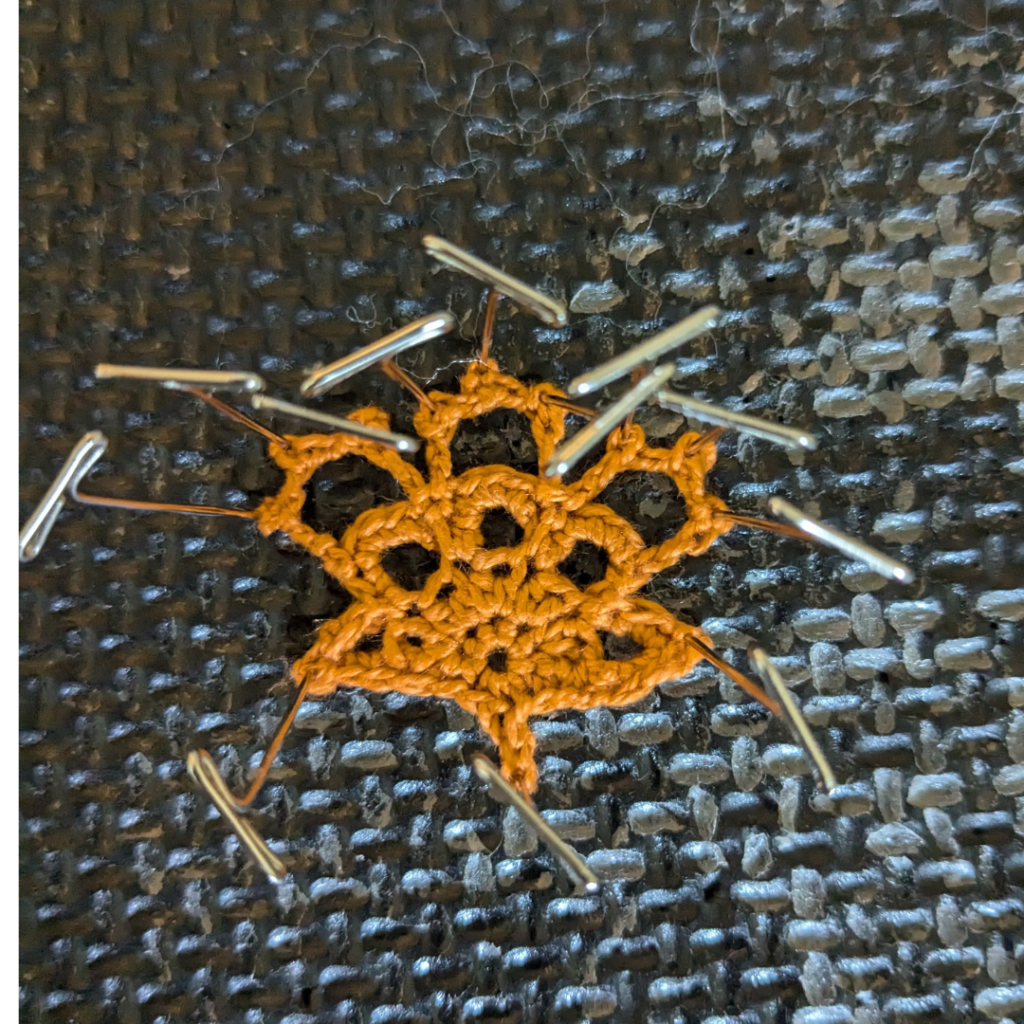
  • For the best look, stiffen the earrings. I use Aleene’s Fabric Stiffening Spray and t-pins on a blocking mat.
  • May use beading needle and beads to add some sparkle as desired. Do this before blocking.
  • Stitch counts are marked at the end of each round with ( )
  • Finished dimensions: 1.75 in diameter
  • For additional use of pattern, this makes a great ornament! Use some cotton worsted yarn and a 4.5 mm hook. Use starch or fabric stiffener as above.

Written Instructions

Make 2

Round 1: Form a MR, 5 sc into MR, sl st to join. (5 sc)

Round 2: Ch 1, (puff, ch 2, puff, ch 1) each st around, sl st to top of first puff to join. (10 puff)

Round 3: *Sl st into next ch-2 sp, ch 2, picot, ch 2, picot, turn, sl st next 2 sts, picot, sl st next 2 sts, sl st in ch-2 sp, (sc, dc, picot, dc, sc) in next ch-1 sp, repeat from * around. (20 picot, 30 sl st, 10 sc, 10 dc) Fasten off and weave in ends.

Blocking and Assembly

Pin to the blocking mat to desired shape. Spray from about 6-10 inches away with fabric stiffening spray, or pour some of the spray liquid into a small cup and paint the liquid on. Once dry, attach fish hook style earring to top of snowflake.

Love it? Share it!

  • Share on X (Opens in new window) X
  • Share on Facebook (Opens in new window) Facebook
  • Share on Pinterest (Opens in new window) Pinterest
  • Print (Opens in new window) Print

November 8, 2024 by Priscilla

Among the Pines Beanie

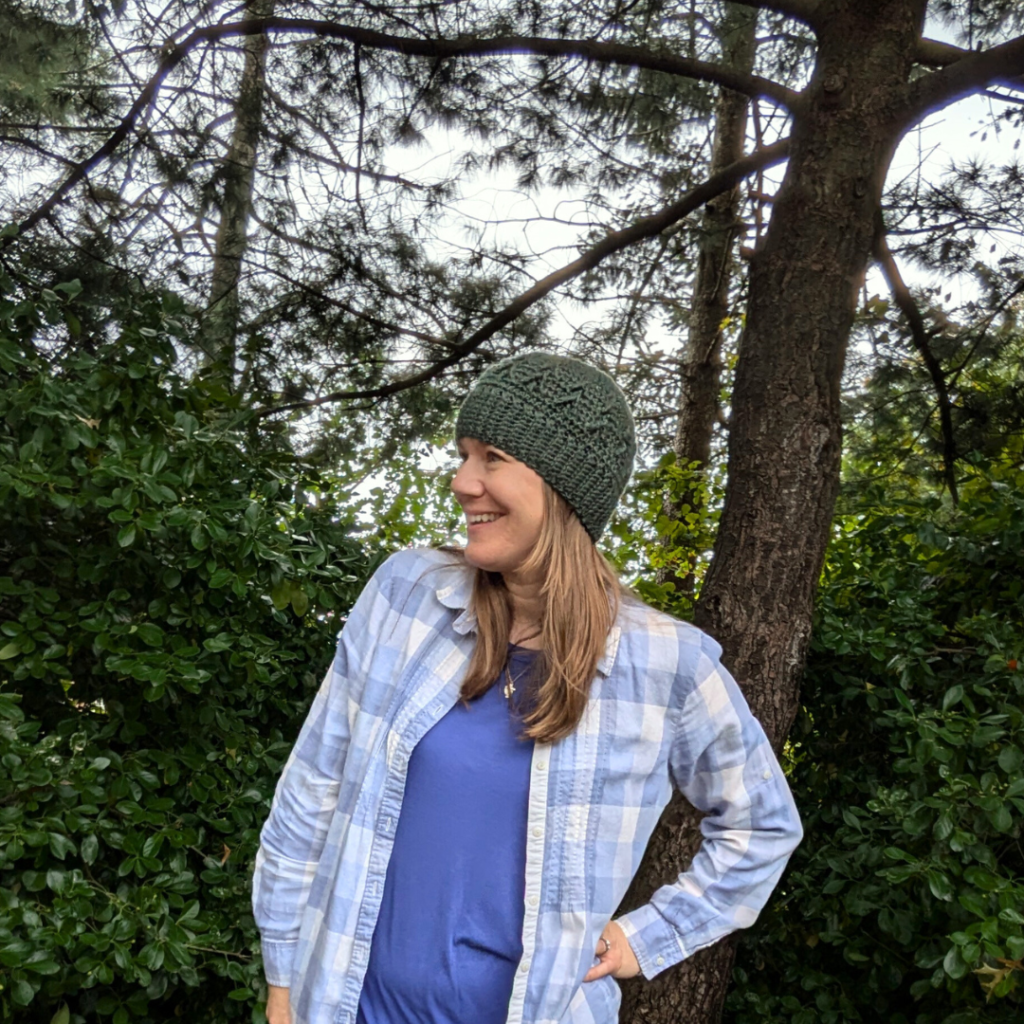
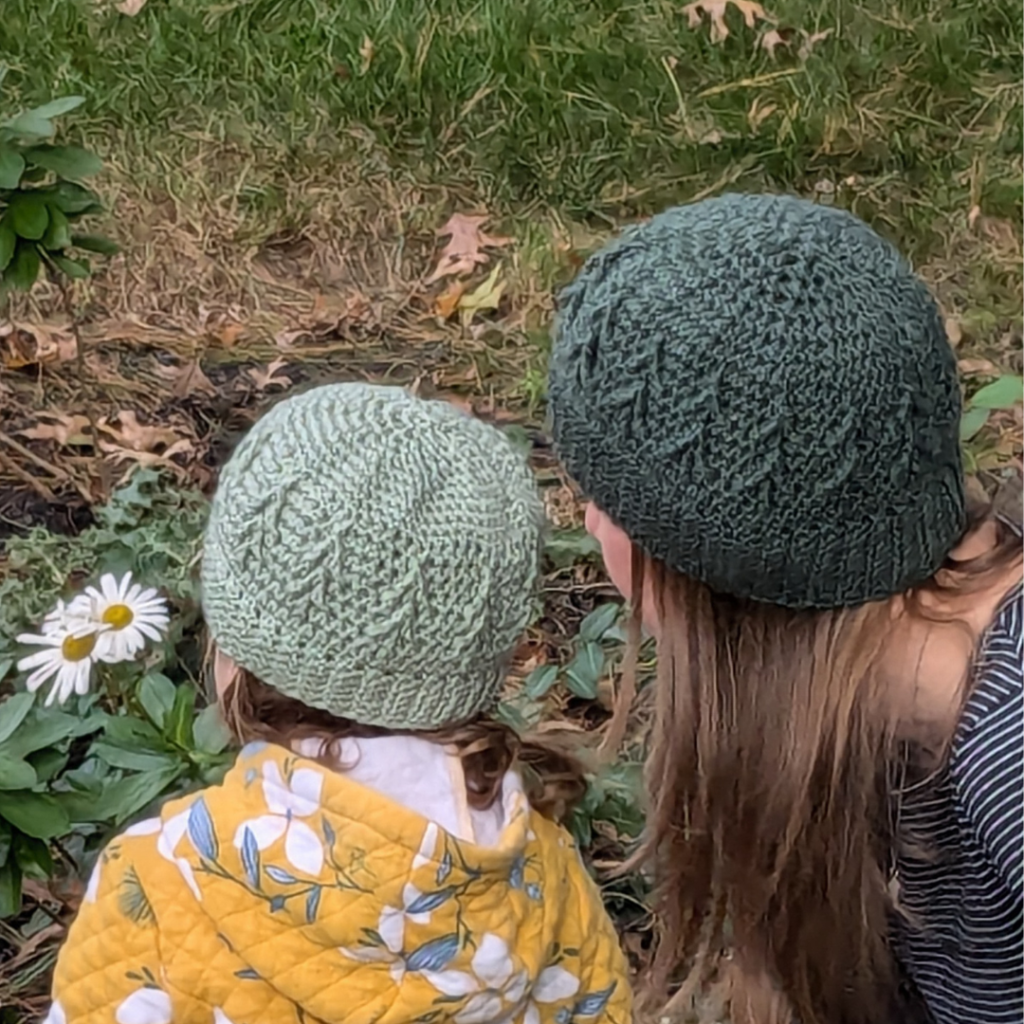
Grab your favorite worsted yarn and 6mm hook and make stunning beanies for the whole family! This pine tree beanie comes in 7 sizes so you can really customize them. It is a fitted beanie and I think you’ll really love the stitch pattern. I had more testers for this pattern than ever before and it was great to have so much support for the pattern right out of the gate!

I made a dishcloth for my mother-in-law this summer using a new to me stitch method and it was so fun! I knew I wanted to use the method for a design this season and the Among the Pines Beanie came to fruition! My first design idea had a really cute leaf pattern on it, but the lighter yarn made it look to springtime, so I scratched that and started over with some little pine trees. I chose Lion Brand Yarn Basic Stitch in two colors for my beanies. I love making hats to match with my kids. This yarn is a great basic acrylic and I like the colors available at my local Joann’s.

Let’s dive in a bit: you’ll need between 125 and 200 yards of worsted weight yarn. I find the Lion Brand Basic Stitch that I used to be a true worsted, not too thick or thin. Hook size ranges from 5mm to 6mm. I tend to tight tension and many of my testers met gauge with smaller hooks. You need other basic supplies like a measuring tape, tapestry needle, and scissors.

This pine tree beanie is an intermediate pattern. The cable stitches require some experience, but the PDF in my pattern shops has 3 pages of photo tutorial to help you along as well as a chart if you need more help. Look through the full written pattern below and see how that looks to you, then head over and get the PDF if you need it!

ravelry
Etsy
LoveCrafts

Okay let’s get to it!

Supplies

  • 125-175 yards worsted (CYC 4) yarn, samples: Lion Brand Basic Stitch
  • crochet hook US size J (6 mm) or size needed to obtain gauge, most testers used 5 mm
  • tapestry sewing needle
  • scissors and measuring tape/gauge ruler
  • pom and button to make the pom removable (optional)

Stitches (US Terms)

ch = chain

st/sts = stitch/stitches

BLO = back loop only

sk = skip

sc = single crochet

sl st = slip stitch

hdc = half double crochet

sc 2 tog = single crochet two stitches together

Special Stitches

FPtr = Front Post treble crochet:

yo twice, insert hook right to left around the post of the indicated stitch, pull up a loop, yo, pull through two loops on hook, yo, pull through two loops on hook, yo, pull through two remaining loops on hook

FPhdc = Front Post half-double crochet:

yo, insert hook right to left around the post of the indicated stitch, pull up a loop, yo, pull through all three loops on hook

FPtr 2 tog = Front Post treble crochet two together:

yo twice, insert hook right to left around the post of the indicated stitch, pull up a loop, yo, pull through two loops on hook, yo, pull through two loops on hook, yo twice, insert hook right to left around the post of the next indicated stitch, pull up a loop, yo, pull through two loops on hook, yo, pull through two loops on hook, yo, pull through 3 remaining loops on hook

When making each of these stitches, you will be leaving a stitch unworked behind.

Gauge

The gauge instructions for this pattern are created to help you practice the stitches in addition to selecting the right hook size. If you have experience with this type of post stitch, you could find the right hook size with the 1 in swatch.

1 in by 1 in swatch = 4 rows and 4 sts of sc BLO

4 in by 4 in swatch = 12 rows and 13 sts

Row 1: Ch 20, hdc 3rd st from hook and each across, turn.[18 hdc]

Row 2: Ch 1, hdc each st across, turn.[18 hdc]

Row 3: Ch 1, hdc first 3 sts, *FPtr next st 2 rows below, hdc next 4 sts, repeat from * across, turn.[15 hdc, 3 FPtr]

Row 4: Repeat row 2

Row 5: Repeat row 3

Row 6: Repeat row 2

Row 7: Ch 1, hdc first 3 sts, *FPtr 2 tog 3 rows below, 2 sts back and 2 sts forward, hdc next 4 sts, repeat from * across, turn.[15 hdc, 3 FPtr]

Row 8: Repeat row 2

Row 9: Repeat row 3

Row 10: Repeat row 2

Row 11: Repeat row 7

Row 12: Repeat row 2

Notes

  • Sizes are marked with commas, and stitch counts are marked at the end of each row in brackets [infant, baby, toddler, child ] / [teen, adult med, adult large]
  • Hat brim is worked in rows, body and top are worked in the round.
  • It may be helpful to mark the stitches where you will be working the FPtr 2 tog stitch. Use the chart on page 10 and mark the hdc stitches as you go.
  • Finished hat circumference: approximately infant 11 in, baby 14 inches, toddler 17 inches, child 18 inches, teen 19 inches, medium 21 inches, large 22 inches

Written Instructions

Infant, Baby (6-12 months), Toddler (1-3 yrs), Child

Hat Brim:

Row 1: Ch 7, turn. Sc 2nd st from hook and each st, turn. [6 sc]

Row 2: Ch 1, sc BLO each st until last, sc last, turn. [5 sc BLO, 1 sc]

Row 3: Ch 1, sc first st, sc BLO each remaining st, turn. [1 sc, 5 sc BLO]

Rows 4-42, 54, 66, 72 : Repeat rows 2 and 3 respectively. Sl st the last row to the first row. Turn seam inwards to complete hat body.

Hat Body

Round 1: Ch 1, sc in the end of each row around, sl st to join. [42, 54, 66, 72 sc]

Round 2: Ch 1, hdc each st around, sl st to join. [42, 54, 66, 72 hdc]

Round 3: Repeat Round 2

Round 4: Ch 1, hdc first 2 sts, *FPtr next st two rows below, hdc next 5 sts, repeat from *around until last 4, FPtr next st two rows below, hdc remaining 3 sts, sl st to first hdc to join. [7, 9, 11, 12 FPtr, 35, 45, 55, 60 hdc]

Round 5: Ch 1, hdc first 2 sts, *FPhdc next st, hdc next 5 sts, repeat from * around until last 4 sts, FPhdc next st, hdc remaining 3 sts, sl st to first hdc to join. [ 7, 9, 11, 12 FPhdc, 35, 45, 55, 60 hdc]

Round 6: Ch 1, hdc first 2 sts, *FPtr 2 tog 3 rows below two sts back and two sts forward, hdc next 5 sts, repeat from * until last 4 sts, FPtr 2 tog 3 rows below two sts back and two sts forward, hdc last 3 sts, sl st to first hdc to join. [ 7, 9, 11, 12 FPtr 2 tog, 35, 45, 55, 60 hdc]

Round 7: Ch 1, hdc first 2 sts, *FPhdc next st, hdc next 5 sts, repeat from * around until last 4 sts, FPhdc next st, hdc remaining 3 sts, sl st to first hdc to join. [ 7, 9, 11, 12 FPhdc, 35, 45, 55, 60 hdc]

Round 8: Repeat round 6

Round 9: Repeat round 7

Infant:

Round 10: Ch 1, sc first 4 sts, *sc 2 tog, sc next 4 sts, repeat from *around until last 2 sts, sc 2 tog, sl st to join. [28 sc, 7 sc 2 tog]

Round 11: Ch 1, sc first 3 sts, *sc 2 tog, sc next 3 sts, repeat from *around until last 2 sts, sc 2 tog, sl st to join. [21 sc, 7 sc 2 tog]

Round 12: Ch 1, sc first 2 sts, *sc 2 tog, sc next 2 sts, repeat from *around until last 2 sts, sc 2 tog, sl st to join. [14 sc, 7,sc 2 tog]

Round 13: Ch 1, sc first st, *sc 2 tog, sc next st, repeat from *around until last 2 sts, sc 2 tog, sl st to join. [7 sc, 7 sc 2 tog]

Round 14: Ch 1, sc 2 tog around, sl st to join.[ 7 sc 2 tog] Fasten off. Use tapestry needle to weave through stitches of Round 14 to close hat top. If desired, use end at top to attach button inside the hat, then attach removable pom to button on the top.

Baby:

Round 10: Ch 1, sc each st around, sl st to first sc to join.

Round 11: Repeat round 10

Round 12: Ch 1, sc first 4 sts, *sc 2 tog, sc next 4 sts, repeat from *around until last 2 sts, sc 2 tog, sl st to join.[ 36 sc, 9 sc 2 tog]

Round 13: Ch 1, sc first 3 sts, *sc 2 tog, sc next 3 sts, repeat from *around until last 2 sts, sc 2 tog, sl st to join.[27 sc, 9 sc 2 tog]

Round 14: Ch 1, sc first 2 sts, *sc 2 tog, sc next 2 sts, repeat from *around until last 2 sts, sc 2 tog, sl st to join.[18 sc, 9 sc 2 tog]

Round 15: Ch 1, sc first st, *sc 2 tog, sc next st, repeat from *around until last 2 sts, sc 2 tog, sl st to join.[9 sc, 9 sc 2 tog]

Round 16: Ch 1, sc 2 tog around, sl st to join. [9 sc 2 tog] Fasten off. Use tapestry needle to weave through stitches of Round 16 to close hat top. If desired, use end at top to attach button inside the hat, then attach removable pom to button on the top.

How is the pattern going?

Join my subscriber list for pattern updates, discounts, and other crafty fun!

Thank you!

You have successfully joined our subscriber list.

Toddler:

Round 10: Ch 1, sc each st around, sl st to first sc to join.

Round 11-12: Repeat round 10

Round 13: Ch 1, sc first 4 sts, *sc 2 tog, sc next 4 sts, repeat from *around until last 2 sts, sc 2 tog, sl st to join.[44 sc, 11 sc 2 tog]

Round 14: Ch 1, sc first 3 sts, *sc 2 tog, sc next 3 sts, repeat from *around until last 2 sts, sc 2 tog, sl st to join. [33 sc, 11 sc 2 tog]

Round 15: Ch 1, sc first 2 sts, *sc 2 tog, sc next 2 sts, repeat from *around until last 2 sts, sc 2 tog, sl st to join. [22 sc, 11 sc 2 tog]

Round 16: Ch 1, sc first st, *sc 2 tog, sc next st, repeat from *around, sl st to join. [12 sc, 11 sc 2 tog]

Round 17: Ch 1, *sc 2 tog, sc next st, repeat from *around until last 2 sts, sc 2 tog. [7 sc, 8 sc 2 tog]

Round 18: Ch 1, sc 2 tog around, sk last st, sl st to join. [7 sc 2 tog] Fasten off. Use tapestry needle to weave through stitches of Round 18 to close hat top. If desired, use end at top to attach button inside the hat, then attach removable pom to button on the top.

Child:

Round 10: Ch 1, sc each st around, sl st to first sc to join.

Round 11-13: Repeat round 10

Round 14: Ch 1, sc first 4 sts, *sc 2 tog, sc next 4 sts, repeat from *around until last 2 sts, sc 2 tog, sl st to join. [48 sc, 12 sc 2 tog]

Round 15: Ch 1, sc first 3 sts, *sc 2 tog, sc next 3 sts, repeat from *around until last 2 sts, sc 2 tog, sl st to join. [36 sc, 12 sc 2 tog]

Round 16: Ch 1, sc first 2 sts, *sc 2 tog, sc next 2 sts, repeat from *around until last 2 sts, sc 2 tog, sl st to join. [24 sc, 12 sc 2 tog]

Round 17: Ch 1, sc first st, *sc 2 tog, sc next st, repeat from *around until last 2 sts, sc 2 tog, sl st to join. [12 sc, 12 sc 2 tog]

Round 18: Ch 1, sc first st, *sc 2 tog, sc next st, repeat from *around until last 2 sts, sc 2 tog, sl st to join. [8 sc, 8 sc 2 tog]

Round 19: Ch 1, sc 2 tog around, sl st to join. [8 sc 2 tog] Fasten off. Use tapestry needle to weave through stitches of Round 19 to close hat top. If desired, use end at top to attach button inside the hat, then attach removable pom to button on the top.

I like the Lion Brand Basic Stitch for this pattern. It has great stitch definition which you really want for this pattern. I think it’s very comfortable to wear as well and has decent stretch for an acrylic yarn. Go check out the colors they have right now!

Basic Stitch

Teen/Adult Small, Adult Medium, Adult Large

Hat Brim:

Row 1: Ch 11, turn. Sc 2nd st from hook and each st, turn. [10 sc]

Row 2: Ch 1, sc BLO each st until last, sc last, turn. [9 sc BLO, 1 sc]

Row 3: Ch 1, sc first st, sc BLO each remaining st, turn. [1 sc, 9 sc BLO]

Rows 4-78 (84, 90) : Repeat rows 2 and 3 respectively. Sl st the last row to the first row. Turn seam inwards to complete hat body.

Hat Body:

Round 1: Ch 1, sc in the end of each row around, sl st to join. [78, 84, 90 sc]

Rounds 2-4: Ch 1, hdc each st around, sl st to join. [78, 84, 90 hdc]

Repeat Round 2

Round 5: Ch 1, hdc first 2 sts, *FPtr next st two rows below, hdc next 5 sts, repeat from *around until last 4, FPtr next st two rows below, hdc remaining 3 sts, sl st to first hdc to join. [13, 14, 15 FPtr, 65, 70, 75 hdc]

Round 6: Ch 1, hdc first 2 sts, *FPhdc next st, hdc next 5 sts, repeat from * around until last 4 sts, FPhdc next st, hdc remaining 3 sts, sl st to first hdc to join. [13, 14, 15 FPhdc, 65, 70, 75 hdc]

Round 7: Ch 1, hdc first 2 sts, *FPtr 2 tog 3 rows below two sts back and two sts forward, hdc next 5 sts, repeat from * around. [13, 14, 15 FPtr 2 tog, 65, 70, 75 hdc]

Round 8: Ch 1, hdc first 2 sts, *FPhdc next st, hdc next 5 sts, repeat from * around until last 4 sts, FPhdc next st, hdc remaining 3 sts, sl st to first hdc join. [13, 14, 15 FPhdc, 65, 70, 75 hdc]

Round 9: Repeat round 7

Round 10: Repeat round 8

Round 11: Ch 1, sc each st around, sl st to first sc to join.

Rounds 12-14: Repeat round 11

Teen/Adult small

Round 15: Ch 1, sc first 11 sts, *sc 2 tog, sc next 11 sts, repeat from *around until last 2 sts, sc 2 tog, sl st to join. [66 sc, 6 sc 2 tog]

Round 16: Ch 1, sc first 4 sts, *sc 2 tog, sc next 4 sts, repeat from *around until last 2 sts, sc 2 tog, sl st to join. [48 sc, 12 sc 2 tog]

Round 17: Ch 1, sc first 3 sts, *sc 2 tog, sc next 3 sts, repeat from *around until last 2 sts, sc 2 tog, sl st to join. [36 sc, 12 sc 2 tog]

Round 18: Ch 1, sc first 2 sts, *sc 2 tog, sc next 2 sts, repeat from *around until last 2 sts, sc 2 tog, sl st to join. [24 sc, 12 sc 2 tog]

Round 19: Ch 1, sc first st, *sc 2 tog, sc next st, repeat from *around until last 2 sts, sc 2 tog, sl st to join. [12 sc, 12 sc 2 tog]

Round 20: Ch 1, sc first st, *sc 2 tog, sc next st, repeat from *around until last 2 sts, sc 2 tog, sl st to join. [8 sc, 8 sc 2 tog]

Round 21: Ch 1, sc 2 tog around, sl st to join. [8 sc 2 tog] Fasten off. Use tapestry needle to weave through stitches of Round 21 to close hat top. If desired, use end at top to attach button inside the hat, then attach removable pom to button on the top.

Adult Medium

Round 15: Repeat round 11

Round 16: Ch 1, sc first 10 sts, *sc 2 tog, sc next 10 sts, repeat from *around until last 2 sts, sc 2 tog, sl st to join. [70 sc, 7 sc 2 tog]

Round 17: Ch 1, sc first 5 sts, *sc 2 tog, sc next 5 sts, repeat from *around until last 2 sts, sc 2 tog, sl st to join.[55 sc, 11 sc 2 tog]

Round 18: Ch 1, sc first 4 sts, *sc 2 tog, sc next 4 sts, repeat from *around until last 2 sts, sc 2 tog, sl st to join.[44 sc, 11 sc 2 tog]

Round 19: Ch 1, sc first 3 sts, *sc 2 tog, sc next 3 sts, repeat from *around until last 2 sts, sc 2 tog, sl st to join. [33 sc, 11 sc 2 tog]

Round 20: Ch 1, sc first 2 sts, *sc 2 tog, sc next 2 sts, repeat from *around until last 2 sts, sc 2 tog, sl st to join. [22 sc, 11 sc 2 tog]

Round 21: Ch 1, sc first st, *sc 2 tog, sc next st, repeat from *around until last 2 sts, sc 2 tog, sl st to join. [11 sc, 11 sc 2 tog]

Round 22: Ch 1, sc first st, *sc 2 tog, sc next st, repeat from *around until last 2 sts, sc 2 tog, sl st to join. [8 sc, 7 sc 2 tog]

Round 23: Ch 1, sc 2 tog around, until last, sk last st, sl st to join. [7 sc 2 tog] Fasten off. Use tapestry needle to weave through stitches of Round 23 to close hat top. If desired, use end at top to attach button inside the hat, then attach removable pom to button on the top.

Adult Large

Rounds 15-16: Repeat round 11

Round 17: Ch 1, sc first 8 sts, *sc 2 tog, sc next 8 sts, repeat from *around until last 2 sts, sc 2 tog, sl st to join. [72 sc, 9 sc 2 tog]

Round 18: Ch 1, sc first 7 sts, *sc 2 tog, sc next 7 sts, repeat from *around until last 2 sts, sc 2 tog, sl st to join. [63 sc, 9 sc 2 tog]

Round 19: Ch 1, sc first 4 sts, *sc 2 tog, sc next 4 sts, repeat from *around until last 2 sts, sc 2 tog, sl st to join. [48 sc, 12 sc 2 tog]

Round 20: Ch 1, sc first 3 sts, *sc 2 tog, sc next 3 sts, repeat from *around until last 2 sts, sc 2 tog, sl st to join. [36 sc, 12 sc 2 tog]

Round 21: Ch 1, sc first 2 sts, *sc 2 tog, sc next 2 sts, repeat from *around until last 2 sts, sc 2 tog, sl st to join. [24 sc, 12 sc 2 tog]

Round 22: Ch 1, sc first st, *sc 2 tog, sc next st, repeat from *around until last 2 sts, sc 2 tog, sl st to join. [12 sc, 12 sc 2 tog]

Round 23: Ch 1, sc first st, *sc 2 tog, sc next st, repeat from *around until last 2 sts, sc 2 tog, sl st to join. [8 sc, 8 sc 2 tog]

Round 24: Ch 1, sc 2 tog around, sl st to join. [8 sc 2 tog] Fasten off. Use tapestry needle to weave through stitches of Round 24 to close hat top. If desired, use end at top to attach button inside the hat, then attach removable pom to button on the top.

Love it? Share it!

  • Share on X (Opens in new window) X
  • Share on Facebook (Opens in new window) Facebook
  • Share on Pinterest (Opens in new window) Pinterest
  • Print (Opens in new window) Print

October 26, 2024 by Priscilla

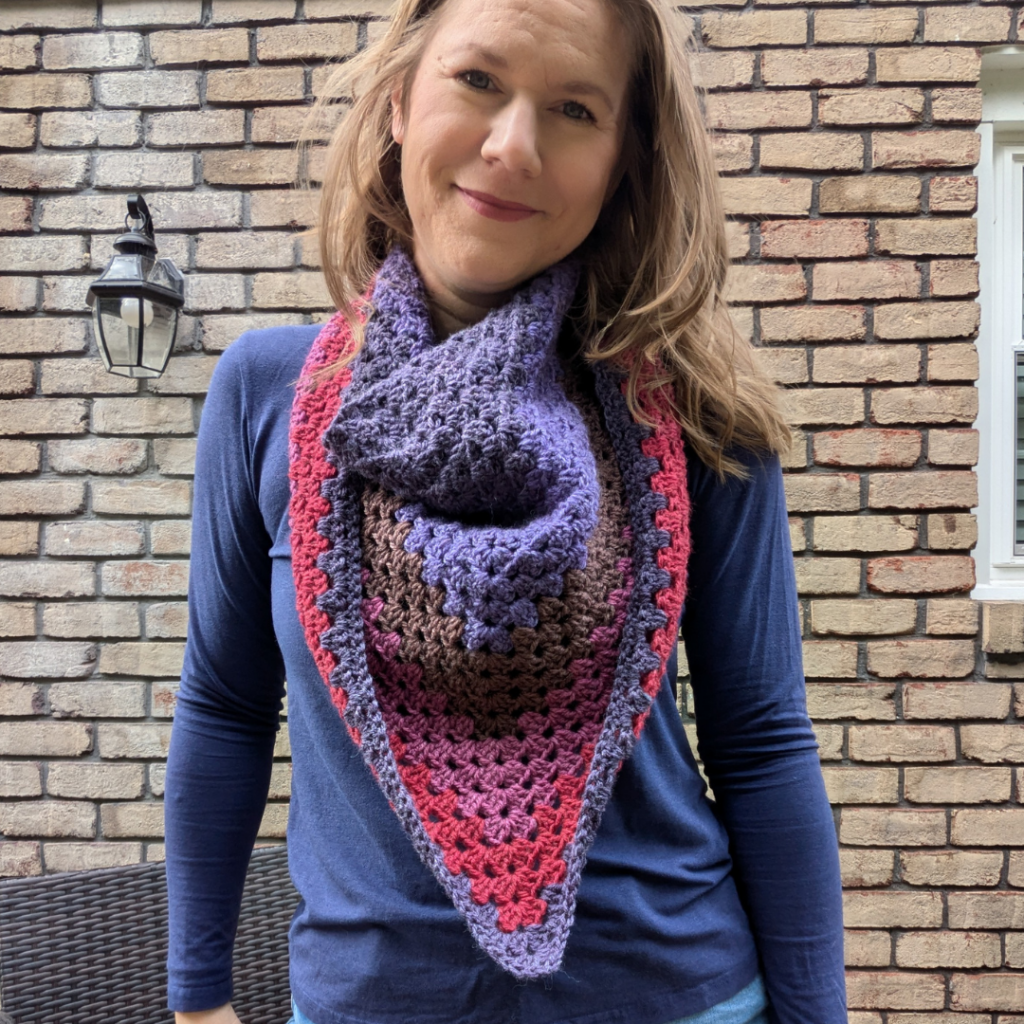
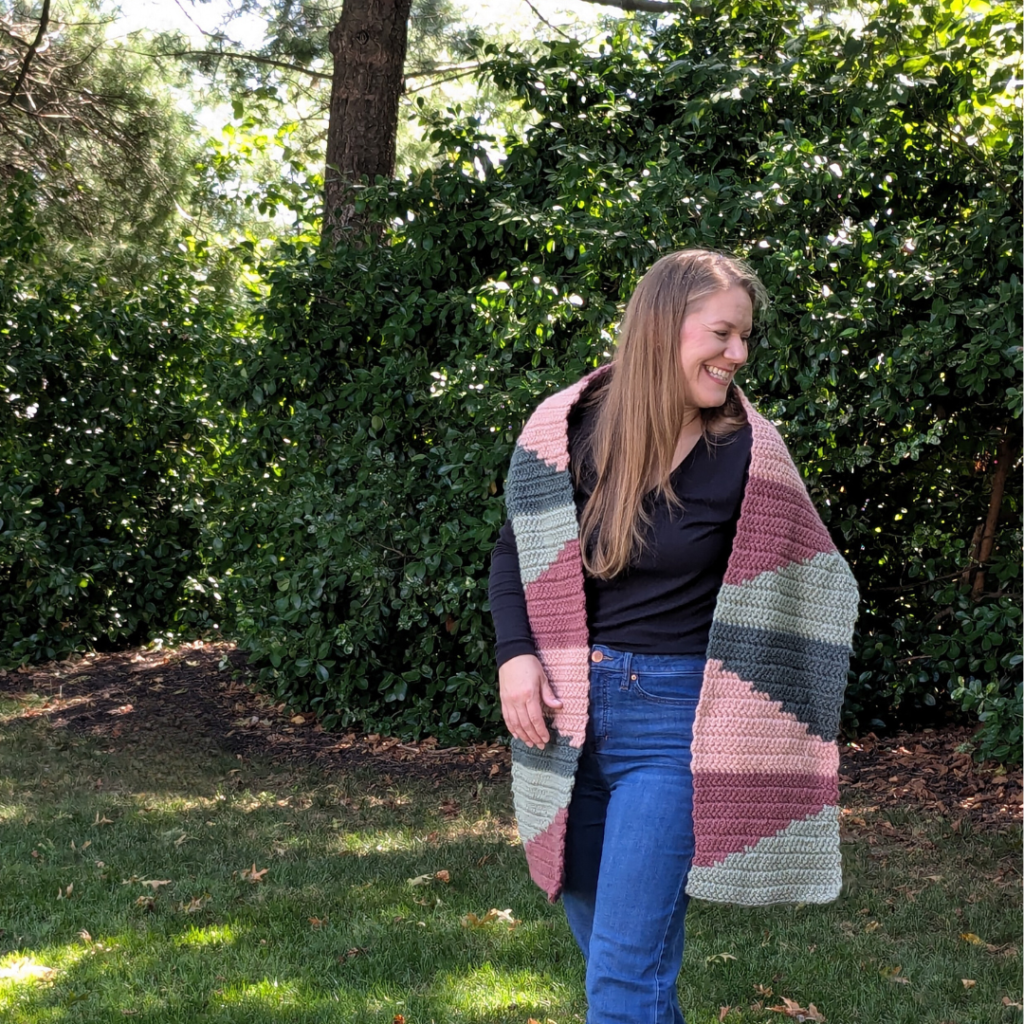
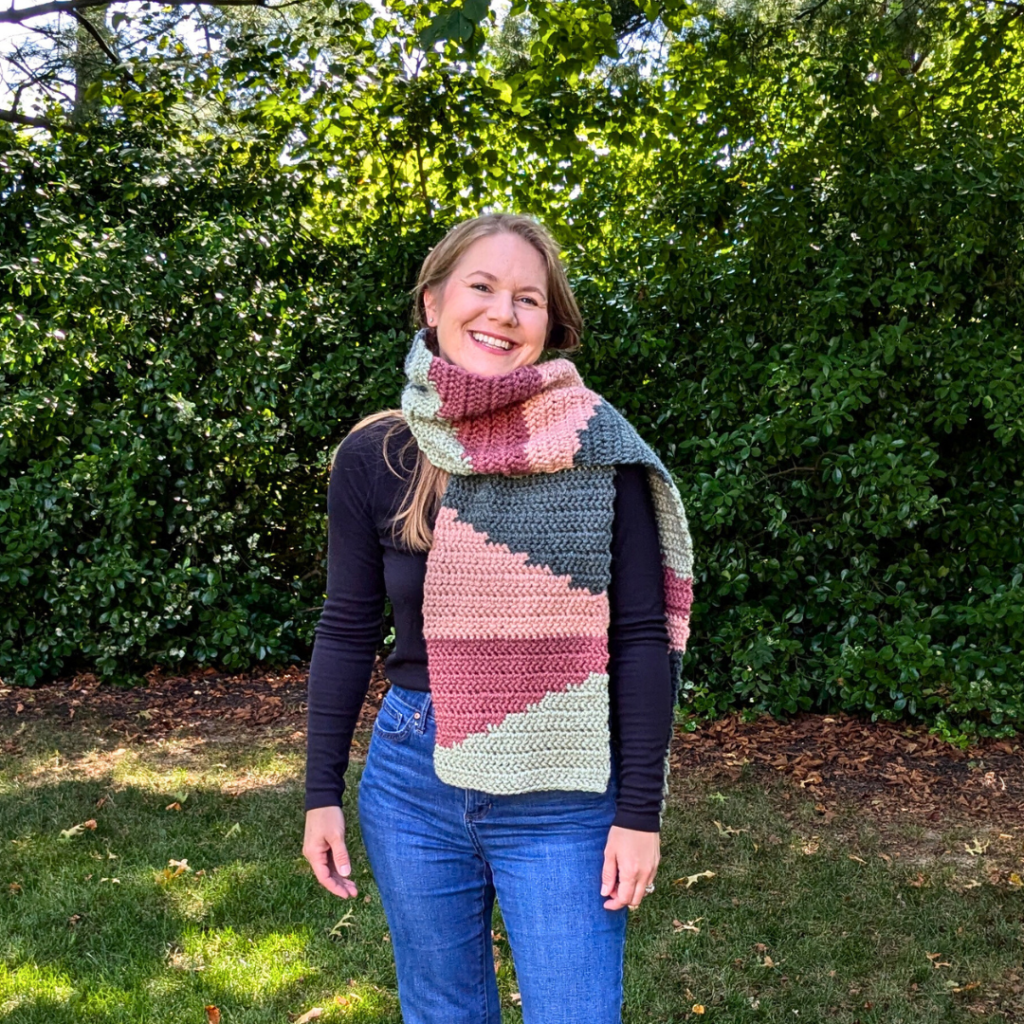
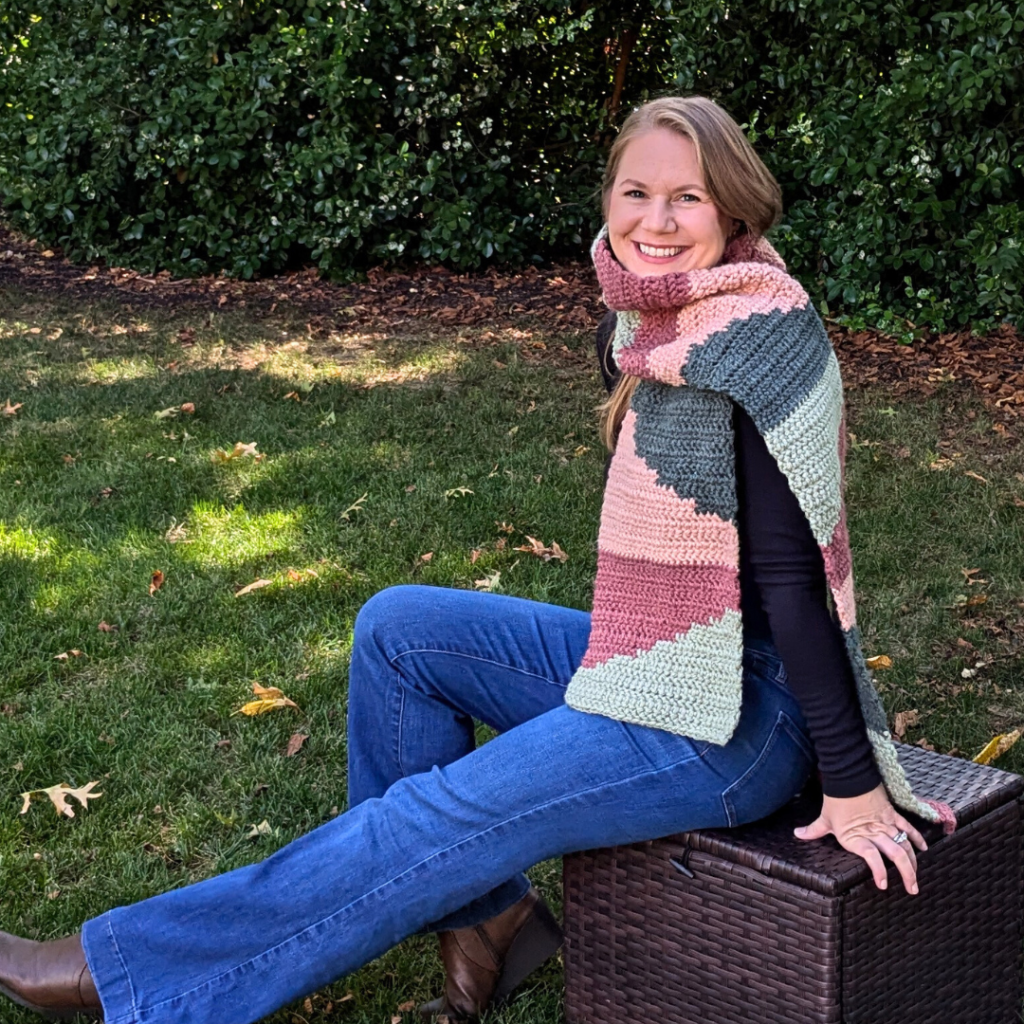
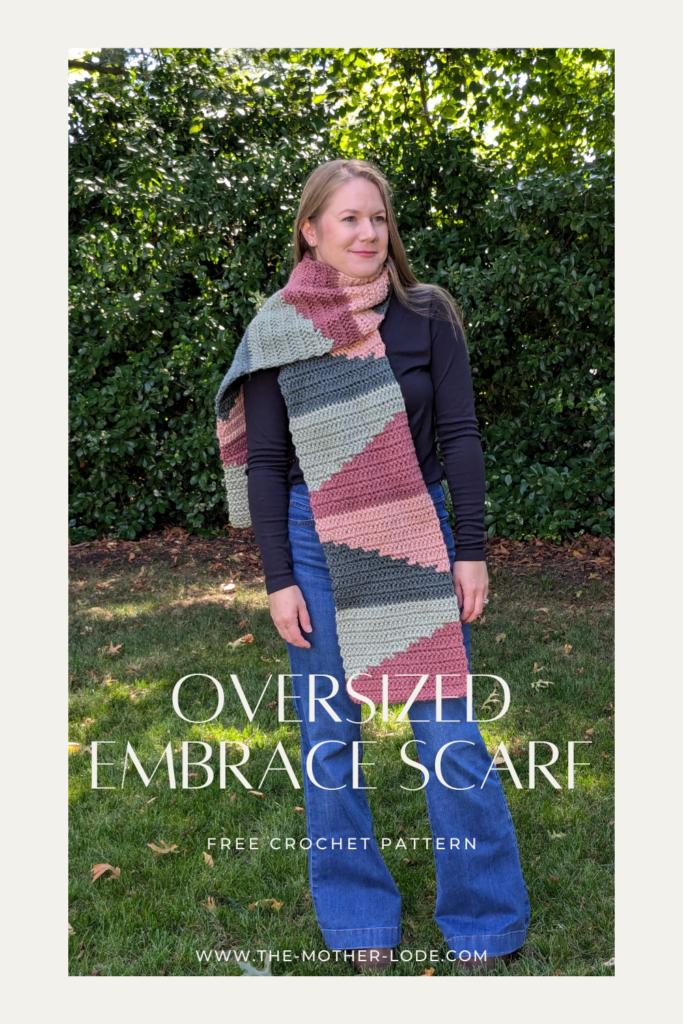
Oversized Embrace Scarf

EEEEEEEEEE that’s a squeal of excitement for the release of this pattern! This was seriously SO fun to make. The stitches are very easy but the color changes keep it interesting and fun to see the pattern take shape as you work the rows. The Oversized Embrace Scarf is meant to be a giant, chunky scarf to keep warm on cold days in style. You could almost call her a shawl but she’s just a smidge narrow for that. Each color embraces the next one and the color possibilities are endless.

My original plan for this oversized crochet scarf pattern was to create it with three colors of worsted weight yarn. I stitched up about two and a half sections of it and, though it looked pretty good, it just wasn’t right. I think it needed the bulky weight yarn to let it shine, and the modern color palette of Lion Brand Hue + Me was perfect for the style of it as well. An oversized crochet scarf pattern needs to have easy stitching so you can zip through such a big project. I also think it needs something fabulous to make it standout for more than its size. The herringbone half double crochet stitch is great in this pattern. It’s an easy stitch but not too plain, and with the bulky yarn it’s a small enough stitch to hide color changes easily. The way the sections are angled and straight provides the design in this pattern.

Ok, I hooked you, so now what colors are you going to use? You could absolutely just pick and choose from the Lion Brand Hue + Me collection, because the colors are all made to coordinate. I picked four of my favorites and alternated a lighter hue with a darker hue to help with the contrast. It would be so fun to make one with each section a different color, two alternating colors, or alternate a neutral color with a variety of colors. If you’re using a different category 5 yarn, I’d suggest similar to the intended pattern design, choose two shades of the same color, then two shades of another color and see how they look together.

Supplies

  • 650 yards total bulky (CYC 5) yarn, sample: Lion Brand Hue and Me color A Love Song (175 yards), color B Artichoke (175 yards), color C Rose Water (150 yards), color D Juniper (150 yards)
  • crochet hook US size 9 mm or size needed to obtain gauge
  • tapestry sewing needle
  • scissors and measuring tape

Stitches (US Terms)

ch = chain

st/sts = stitch/stitches

hhdc = herringbone half double crochet

yarn over, insert hook, yarn over, pull directly through first loop on the hook, yarn over, pull through remaining two loops on hook

Notes

  • Photo tutorial follows the written instructions.
  • Finished dimensions after seaming: 74 inches by 9.5 inches
  • Stitch counts are marked at the end of each row in brackets { }.
  • Pattern is worked flat.
  • There are many color changes in this pattern. I chose to cut and weave ends, but you could choose to use tapestry crochet techniques to hide ends instead.
  • For color changes, complete invisible change by pulling through final loop of previous stitch with the next color.

Gauge

4 in by 4 in swatch = 11 sts in 8 rows of the pattern repeat

Row 1: Ch 14, hhdc second st from hook and each st across, turn. [12 hhdc]

Row 2: Ch 1, hhdc each st across, turn.

Rows 3-9: repeat row 2

Written Instructions

with color A ch 29

Row 1: with color A: hhdc third ch from hook and each across, turn. {27 hhdc}

Rows 2-4: Ch 1, hhdc each st across, turn. {27 hhdc}

Row 5: switch to color B, ch 1, hhdc first 3 sts, switch to color A, hhdc last 24 sts, turn.{27 hhdc}

Row 6: Ch 1, hhdc first 21 sts, switch to color B, hhdc last 6 sts, turn.{27 hhdc}

Row 7: Ch 1, hhdc first 9 sts, switch to color A, hhdc last 18 sts, turn.{27 hhdc}

Row 8: Ch 1, hhdc first 15 sts, switch to color A, hhdc last 12 sts, turn.{27 hhdc}

Row 9: Ch 1, hhdc first 15 sts, switch to color A, hhdc last 12 sts, turn.{27 hhdc}

Row 10: Ch 1, hhdc first 9 sts, switch to color B, hhdc last 18 sts, turn. {27 hhdc}

Row 11: Ch 1, hhdc first 21 sts, switch to color B, hhdc 6 remaining sts, turn.{27 hhdc}

Row 12: Ch 1, hhdc first 3 sts, switch to color B, hhdc 24 remaining sts, turn.{27 hhdc}

Row 13-16: Ch 1, hhdc each st across, turn.{27 hhdc}

Row 17: Switch to color C, hhdc each st across, turn.{27 hhdc}

Row 18-20: Ch 1, hhdc each st across, turn.{27 hhdc}

Join my email list!

Email subscribers get the best pattern discounts and don’t miss out on new releases!

Yay!

You are on my email list! See you next Friday!

Row 21: Ch 1, hhdc first 24 sts, switch to color D, hhdc last 3 sts, turn.{27 hhdc}

Row 22: Ch 1, hhdc first 6 sts, switch to color C, hhdc last 21 sts, turn.{27 hhdc}

Row 23: Ch 1, hhdc first 18 sts, switch to color D, hhdc last 9 sts, turn.{27 hhdc}

Row 24: Ch 1, hhdc first 12 sts, switch to color C, hhdc last 15 sts, turn.{27 hhdc}

Row 25: Ch 1, hhdc first 12 sts, switch to color D, hhdc last 15 sts, turn.{27 hhdc}

Row 26: Ch 1, hhdc first 18 sts, switch to color C, hhdc last 9 sts, turn. {27 hhdc}

Row 27: Ch 1 hhdc first 6 sts, switch to color D, hhdc last 21 sts, turn.{27 hhdc}

Row 28: Ch 1, hhdc first 24 sts, switch to color C, hhdc last 3 sts, turn.{27 hhdc}

Rows 29-32: Ch 1, hhdc each st across, turn.{27 hhdc}

Repeat rows 1- 32 three times, then repeat rows 1-16 once.

Fasten off and weave in ends.

I hope you loved making this oversized crochet scarf pattern! I have another chunky scarf pattern coming this winter that’s a little more gender neutral. If you have scraps leftover from using Hue + Me for this pattern, I’m also releasing a Granny Cowl next month that you can use it for!

Love it? Share it!

  • Share on X (Opens in new window) X
  • Share on Facebook (Opens in new window) Facebook
  • Share on Pinterest (Opens in new window) Pinterest
  • Print (Opens in new window) Print

October 18, 2024 by Priscilla

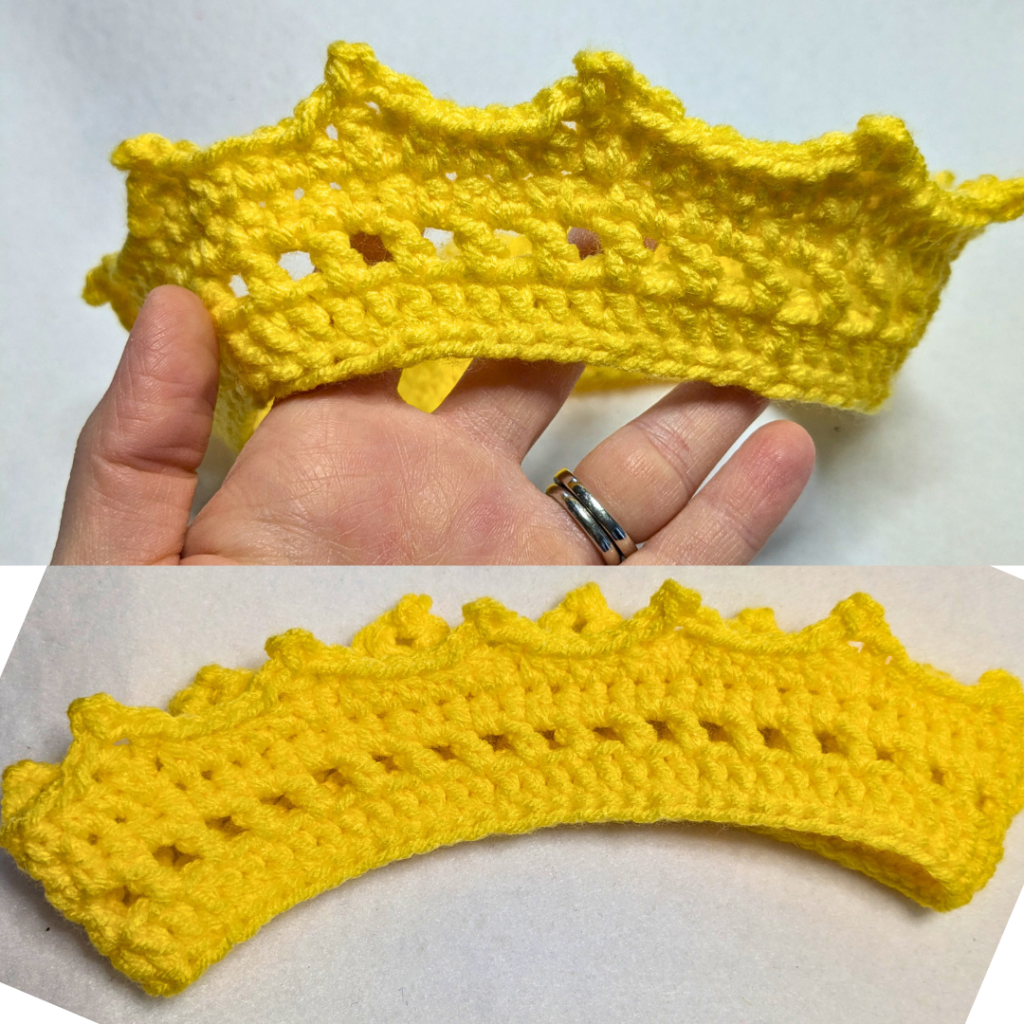
Marian Crown

There are several lovely Marian devotions to choose as a Saint costume! I’m not sure I could choose a favorite! I did some research about Marian crowns to write this crochet pattern. Often she is described as wearing a crown of roses or flowers. In May, churches all over the world crown statues of Mary, Mother of God with flowers. Some apparitions do not have her crowned like Our Lady of Guadalupe, but many others are: Our Lady of Fatima, Our Lady of Lourdes, and Our Lady of Knock. It is generally accepted, even in Protestant faiths that she is described in Revelations as wearing a crown of 12 stars. This design aims to allow you to make a crown for dress up for any of these Marian devotions for All Saints’ Day celebrations!

You can make a simple gold crown, or adorn with flowers or stars to fit the chosen devotion! This crown would also be suitable for dress up as St. Elizabeth of Hungary, Saint Hedwig of Poland, or Saint Margaret of Scotland. The basic crown is even simple enough for your son! Make it for a little Saint Salomon or Saint Leopold.

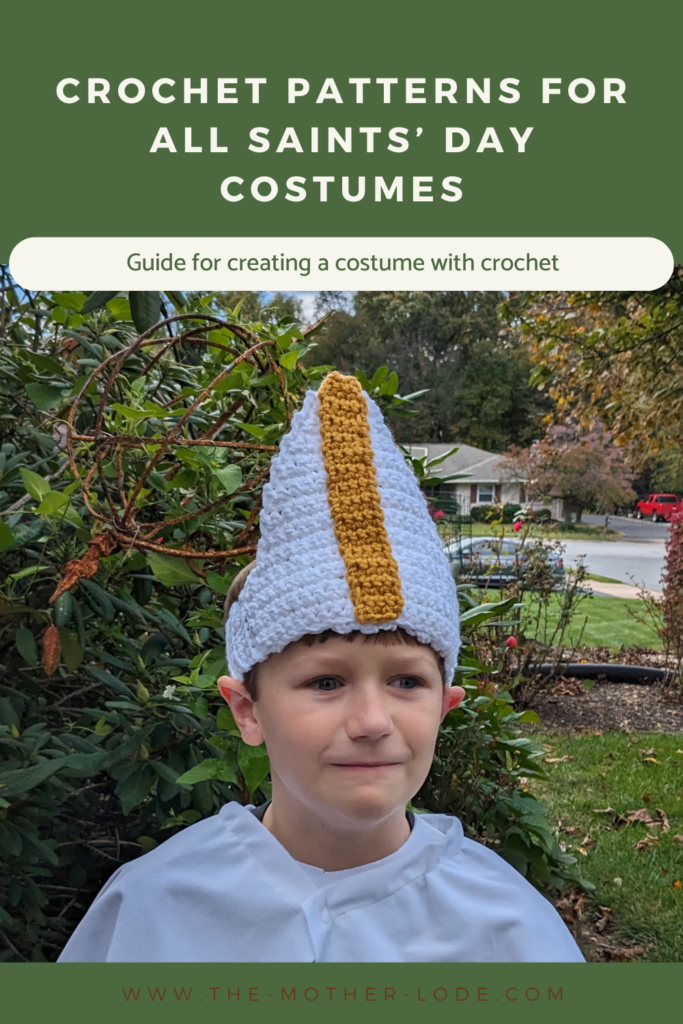
My long term goal is a whole collection of patterns for crochet Saint costumes! I’ll write at least one new one each year. Last year I created the Papal Mitre pattern. Head over to that blog post here. I love learning about Saints. I find their stories helpful in my faith journey. Often we think of Saints as being simply “holy people” but the reality is that they were human and had real struggles just like we do. It’s wonderful to know we have wonderful examples of how to follow Christ to help us do the same!

You can download this pattern totally free! I suggest you read through the pattern here, then download below. It helps my blog and you can get a feel for the pattern, thank you so much!

Materials

  • 75 yards CYC 4 worsted yarn, preferably gold, plus additional scrap yarn in colors as desired for stars and flowers (optional)
  • crochet hook size 4.5 mm or size needed to obtain gauge
  • tapestry sewing needle
  • scissors and measuring tape/gauge ruler
  • Aleene’s fabric stiffening spray (optional)

Stitches (US Terms)

ch = chain stitch

st/sts = stitch/stitches

FDC = foundation double crochet

sc = single crochet

sl st = slip stitch

sk = skip

hdc = half double crochet

picot = picot: ch 3, sl st third st from hook

MR = magic ring

dc = double crochet

tr = treble crochet

Notes

  • I’m suggesting this pattern as an intermediate pattern. The foundation round is tricky if you don’t have experience with it, however, you could absolutely chain and double crochet instead. It just won’t have quite the same stretch as the foundation double crochet.
  • SIZING: this pattern is sized for toddler and child, but you could adapt to any size using the stitch multiple of 6. Adjust the beginning FDC row smaller or larger in increments of 6. Generally recommended sizes: baby 15 inches, toddler 16 inches, child 18 inches, teen 19 inches, medium 20 inches, large 21 inches (These are about an inch less the head circumference measurement, to ensure that the crown stays on.)
  • Pattern for crown, leaves, and stars are worked in the round, flowers are worked flat, then sewn together.
  • Optional: spray the top with some fabric stiffening spray and shape as desired.

Gauge

2 in by 2 in swatch = 8 stitches in 4 rows of dc

How is the pattern going?

Join my subscriber list for pattern updates, discounts, and other crafty fun!

Thank you!

You have successfully joined our subscriber list.

Written Instructions

Crown

toddler (child)

Round 1: FDC 72 (78) sl st to join. [72 (78) FDC]

Round 2: Ch 3, *sk st, dc next st, ch 1, repeat from *around, sl st to join. [36 dc, 36 ch-1 (39 dc, 39 ch-1)]

Round 3: Ch 2, hdc each st and each ch-1 space around, sl st to join. [ 72 (78) hdc]

Round 4: Ch 2, hdc next 3 sts, {tr, picot, tr} next st, *hdc next 5 sts, {tr, picot, tr} next st, repeat from * until last 2, hdc last 2 sts, sl st to join. [60 hdc, 24 tr, 12 picot (65 hdc, 26 tr, 13 picot)]

Fasten off and weave in ends. Depending which way you worked the FDC, you may need to stitch the bottom edge of the crown together.

Stars: (make 12)

Round 1: MR, sc 5 into MR, sl st to join. [5 sc]

Round 2: *picot, sl st next st, repeat from * around. [5 picot, 5 sl st]

Fasten off, weave in one end, leave the other end long to sew onto crown.

Leaves: (make 2)

Round 1: MR, sc 5 into MR, sl st to join. [5 sc]

Round 2: Ch 3, sl st second and third ch from hook, sl st first st, 2 sc next st, {sc, picot, sc} next st, 2 sc next st, sl st last st. [2 sl st, 6 sc, 1 picot] Fasten off, weave in one end, leave the other end long to sew onto crown.

Flowers: (make 3)

Row 1: Ch 16, sc second st from hook and each st across, turn. [15 sc]

Row 2: Ch 1, sk st *{hdc, dc, hdc} next st, sl st next st, repeat from * across. [7 hdc/dc/hdc, 7 sl st] Fasten off, leave the ends long: one to roll the flower and sew into shape, and the other to sew onto crown.

Assembly:

To finish this crown, you could spray with some stiffening spray on the top rounds to give it more definition. I wouldn’t spray the first round so it’s able to stretch and be comfortable to wear.

Sew the stars onto the crown as desired. They could also be sewn on the peaks and stiffened them as well for a more pronounced star effect, or placed on the crown entirely as pictured. Note that only the toddler size will have the exact 12 peaks.

The sample has 3 flowers and 2 leaves. An additional style could be to add flowers all around the crown one leaf and one flower below each point.

I hope you enjoy making a crown or two! They are soft and easy to wear, especially for little ones. Okay now that you’ve read through the instructions, download the pattern below!

Marian Crown PatternDownload

Feel free to add to your ravelry library. I understand it’s convenient to have it there as well!

Other posts for All Saints’ Day

Love it? Share it!

  • Share on X (Opens in new window) X
  • Share on Facebook (Opens in new window) Facebook
  • Share on Pinterest (Opens in new window) Pinterest
  • Print (Opens in new window) Print

October 12, 2024 by Priscilla

10 Stunning Crochet Patterns to make for Fall

The chilly temps have arrived in Pennsylvania and I’m loving it! I want to share some FREE patterns with you today from amazing crochet designers that are stunning for fall! We’ve got shawls, blankets, hats, scarves, all the cozy things that are also beautiful! I’ve joined a lovely facebook group this year full of talented, hard-working designers. It’s been so nice for us to share each other’s work through events like blog hops and roundups such as this.

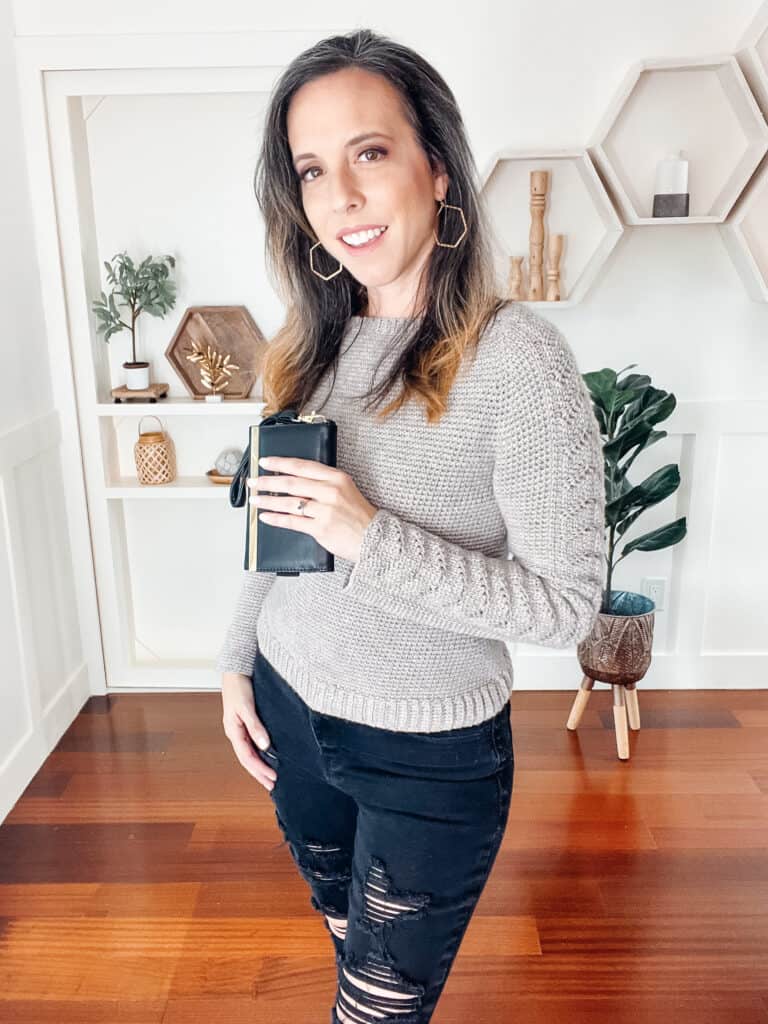
Lace Sleeve Pullover by Briana K Designs

Truly, Briana is one of the most talented designers! I dare anyone to browse her patterns without finding 10 things you want to make! This Lace Sleeve Pullover is so pretty and stunning for fall!
Tulip Square Scarf by Wilmade

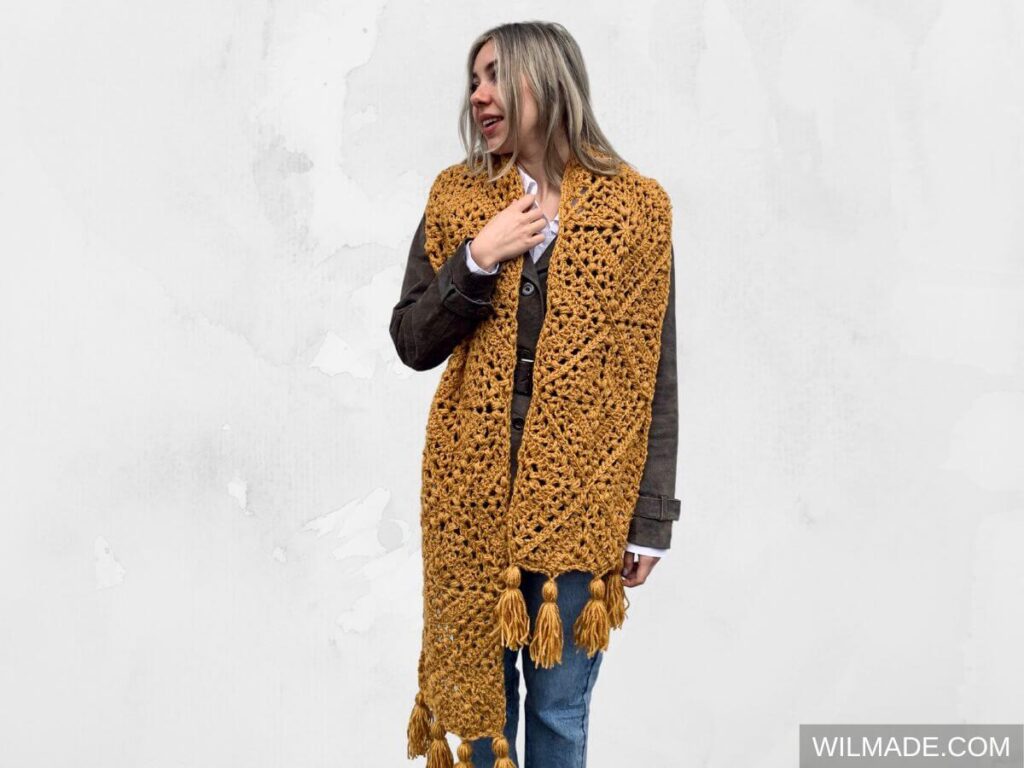
Wilma creates beautiful patterns! I particularly like her granny squares. This Tulip Square Scarf uses granny squares to form this lovely scarf. I love the balance of the oversize plus the lacy squares, it’s magnificent!
Cable Stitch Hat by Banana Moon Studio

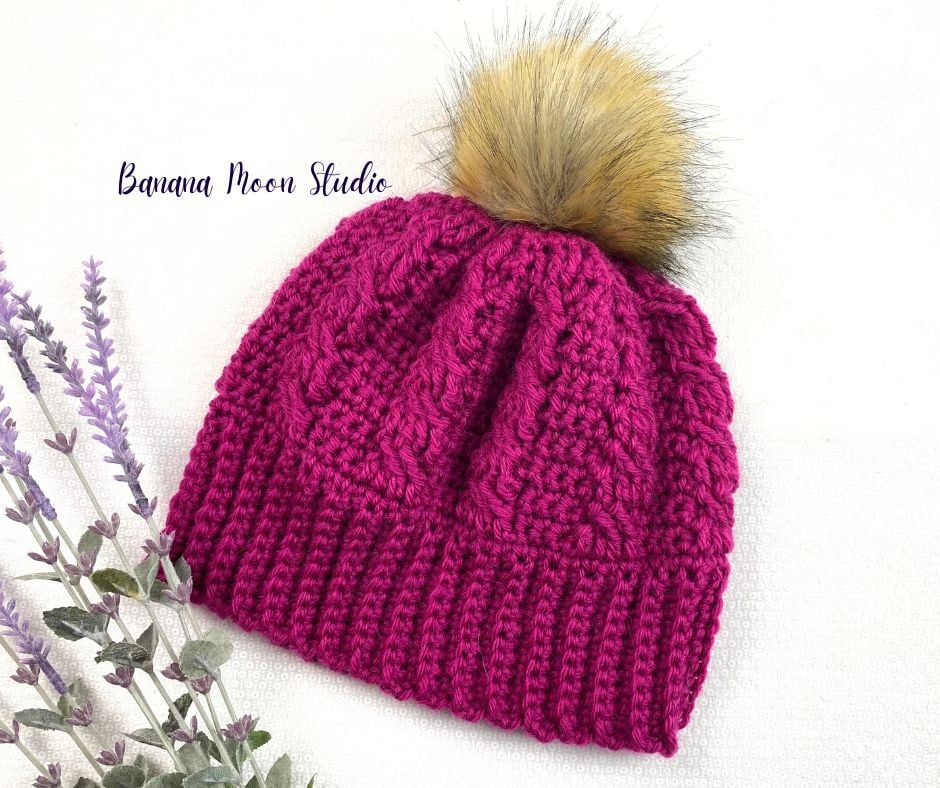
This hat is so pretty! I love the texture of the cables, and it looks warm and cozy for fall! The Blair Beanie has 4 sizes, so you could make one for everyone in the family.

Harvest Fields Wrap from Made by Gootie

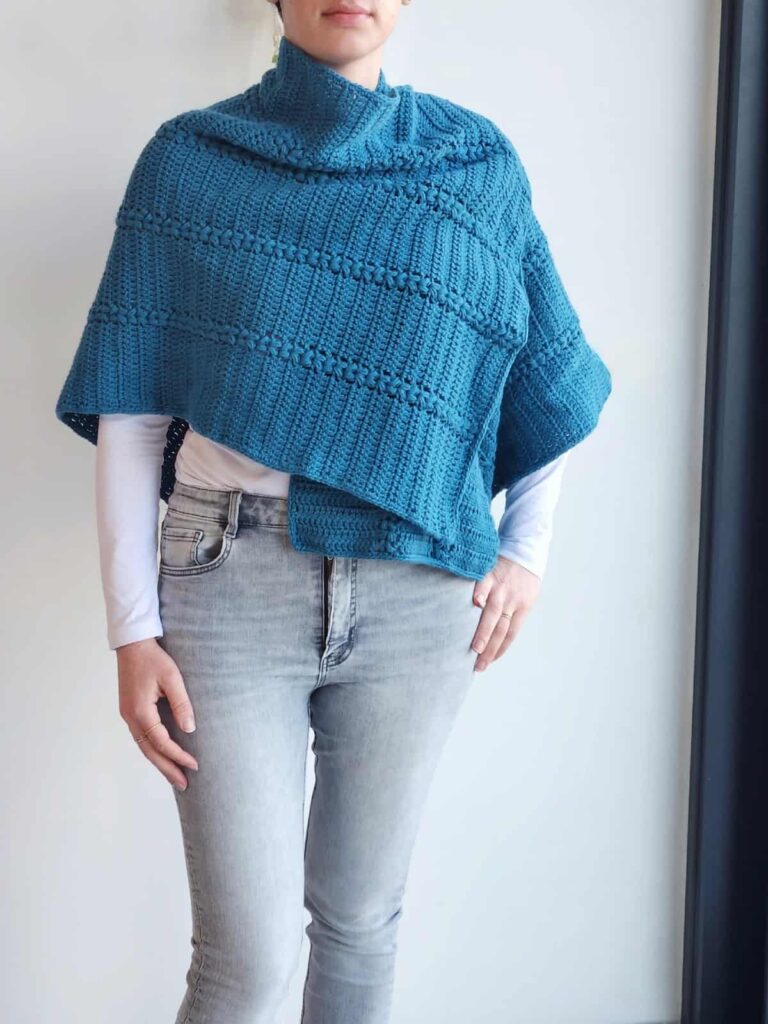
This wrap is GORGEOUS and it’s unique construction gives is some extra oomph and versatility. The little bit of texture there is pretty and it looks quite cozy. What color would you choose for the Harvest Fields Wrap?

Rainbow Granny Square Blanket by Raffamusa Designs

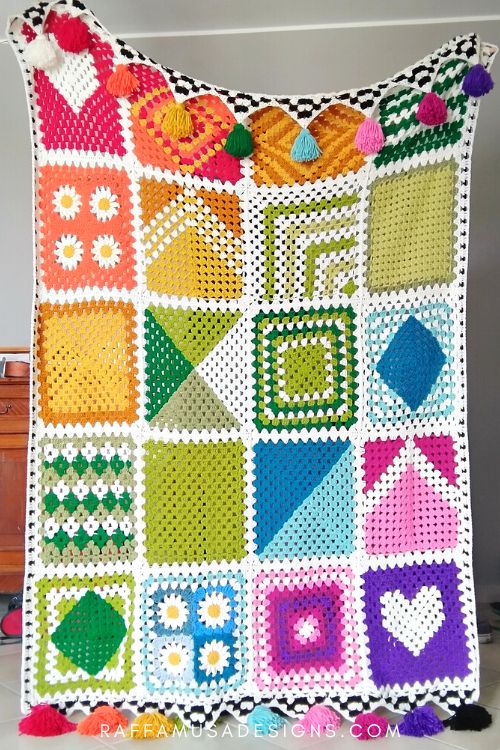
I mean. Come on. This design is so fun! Stunning in it’s bright colors and unique granny squares. How can you keep from cracking a smile over this pattern!? The Rainbow Granny Square Blanket began as a crochet-a-long, and now you can head to the blog post and make all the pieces!

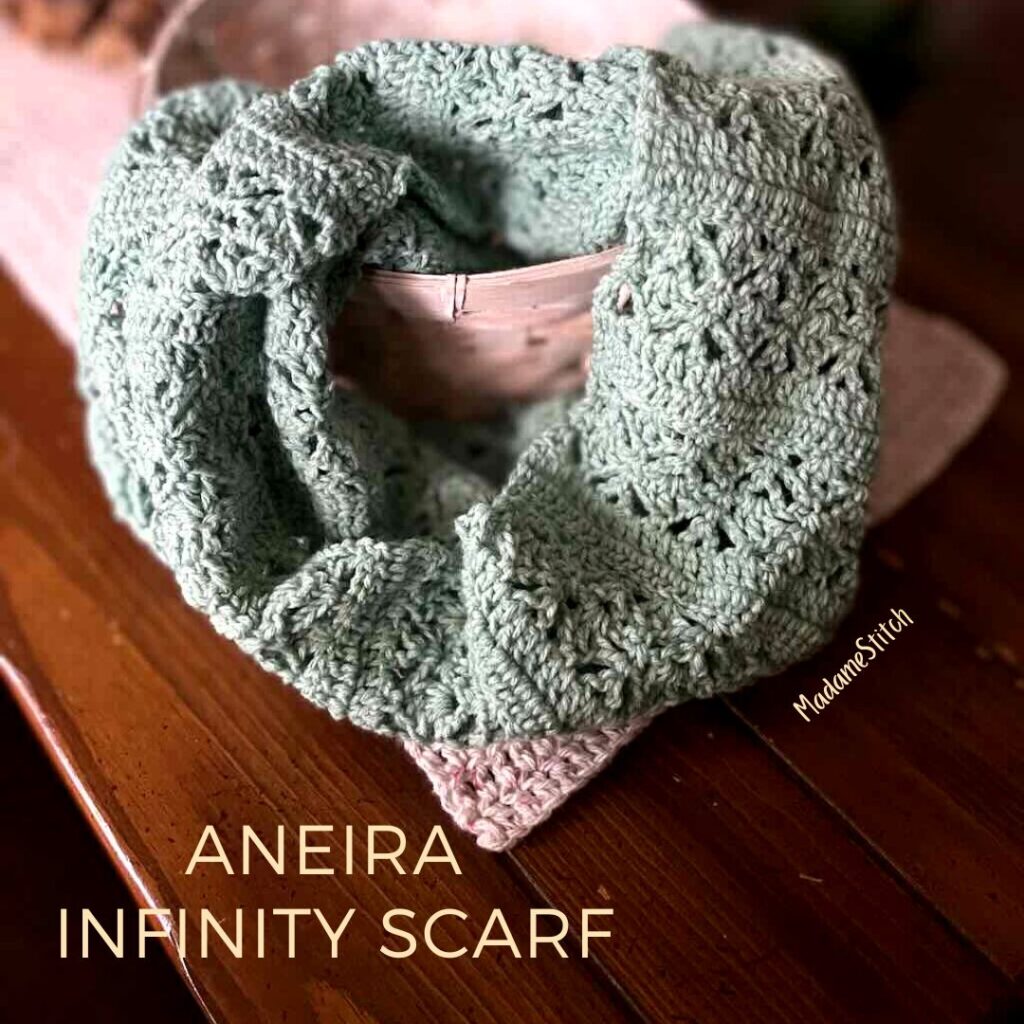
Aneira Infinity Scarf by Madame Stitch

This is such a lovely infinity scarf pattern! The lacy part is so pretty, I can imagine it being perfect for fall when you might be sweating by the middle of the afternoon! The Aneira Infinity Scarf could even be a hit as a gift this season!

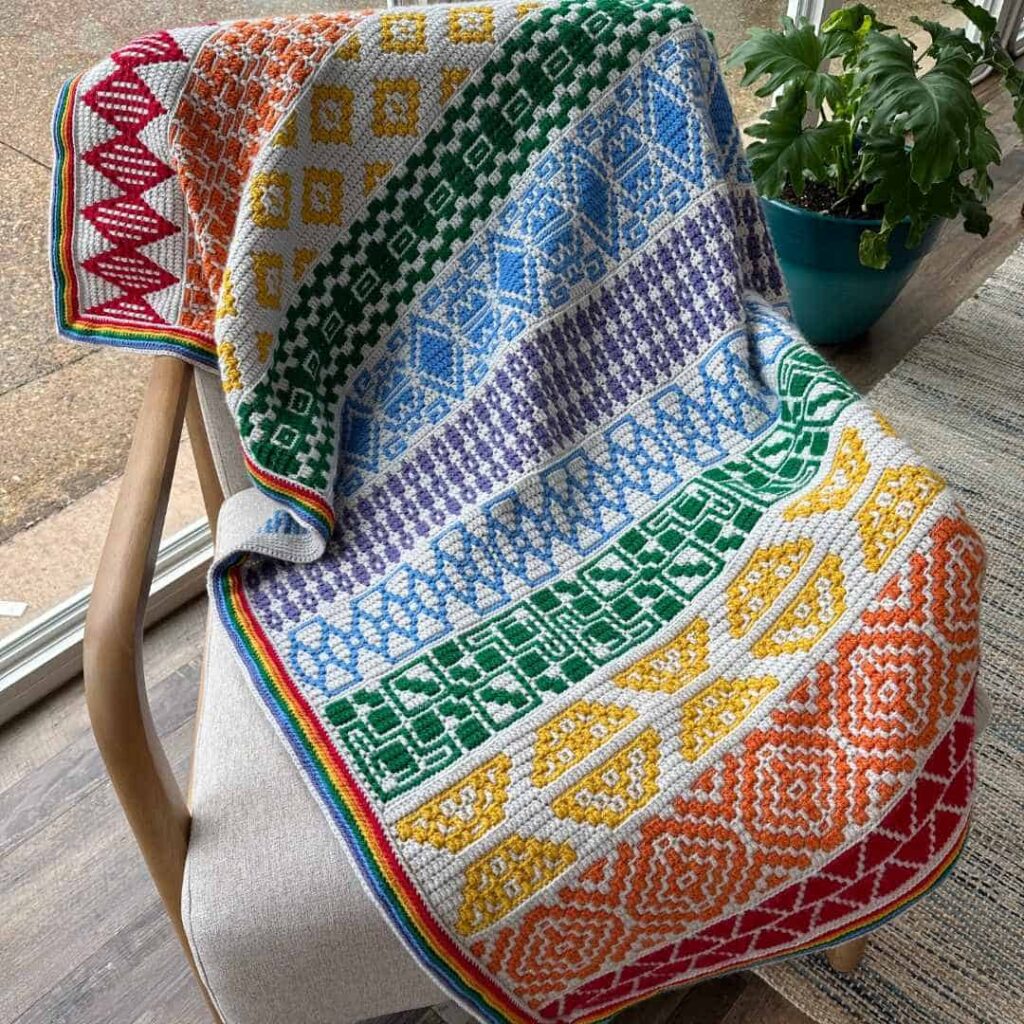
Mosaic in a Month Blanket by Juniper and Oakes

This blanket was a collaborative effort for the design and it is a masterpiece! You’ll have to jump around a bit to each section to make this blanket, but I’m sure it’s worth the effort because it is SO gorgeous. The Mosaic in a Month blanket would be a great challenge to make this “crochet season.”

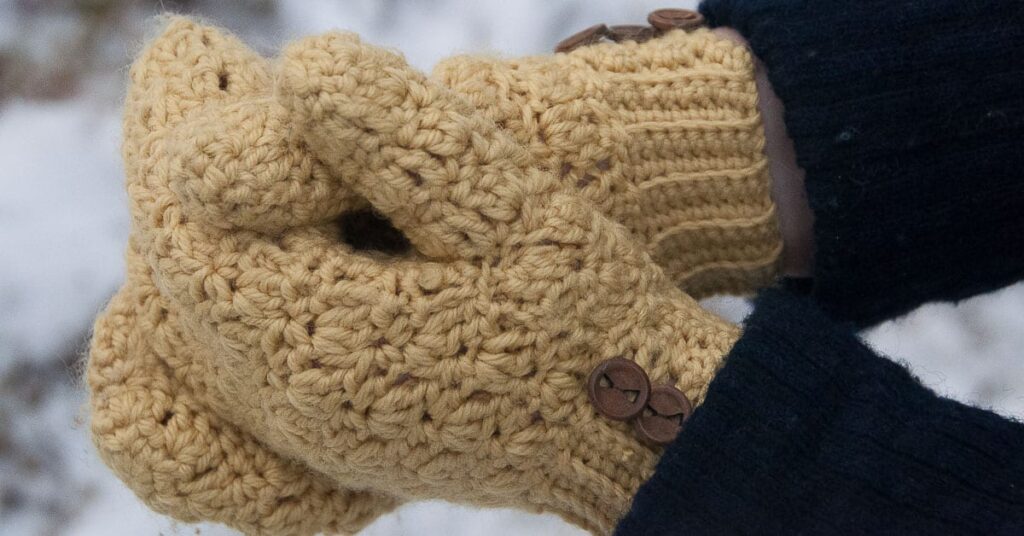
Bellus Mittens by Joy of Motion Crochet

These are lovely! The texture is pretty, but they still look very warm! These would make a great gift if you don’t need a pair of mittens yourself! I would make the Bellus Mittens in a pretty dark pink.

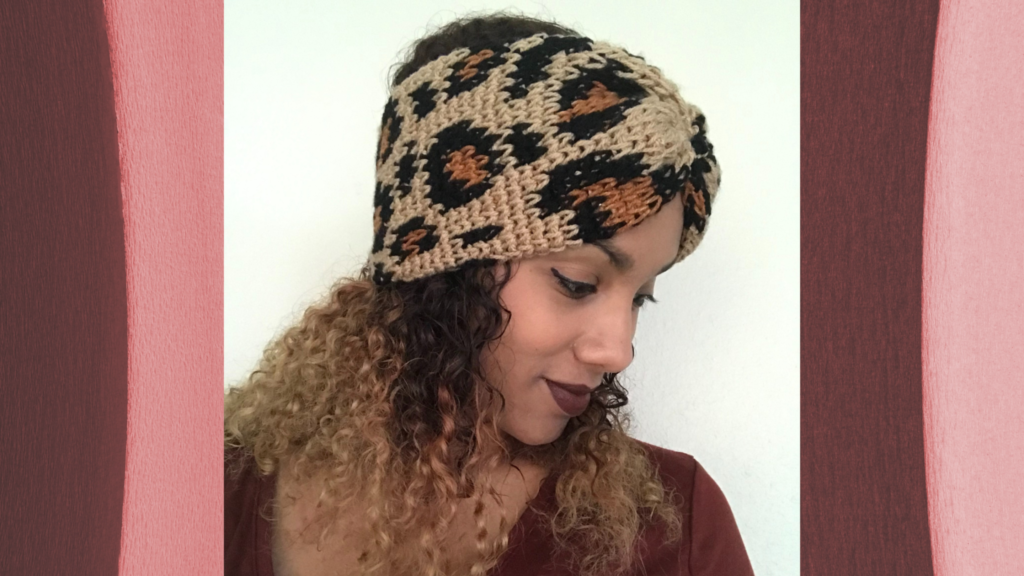
Luxe Leopard Headband by Crafting for Weeks

I see this every fall and I always think I’m going to make one, and I still have yet to! Maybe this fall is the time! It’s such a beautiful pattern. The Luxe Leopard pattern has all the sizes you could possibly need, go check it out!

Simple Ridges Beanie by me!

This is one of my favorite designs! Use some of that fancy hand dyed fingering weight someday yarn for this light beanie! Hold the fingering yarn double to make this pretty hat. The Simple Ridges Beanie is perfect for fall when you might not need that thick hat yet.

Which one will you make?!!? If only my fingers could fly so I could make them all in my limited mom time! I’ve been eyeing the Luxe Leopard Headband ever since Kelsie published it, though, so I think that’s going to be the one that I make. Ooooo you know what? I’m going to make that my car project for the foreseeable future. Follow me on Instagram, I’ll share about it there! @motherlodecrafts

Love it? Share it!

  • Share on X (Opens in new window) X
  • Share on Facebook (Opens in new window) Facebook
  • Share on Pinterest (Opens in new window) Pinterest
  • Print (Opens in new window) Print

September 4, 2024 by Priscilla

Maple Earrings

You are sure to fall in love with these Maple Earrings! Yep, I did write that silly pun to start off this blog post! My kiddos went back to school the week I’m writing this and they love a good joke like that! We went to a local ball game this summer and on the shuttle to the parking lot and an older gentleman told them a joke, which they answered with a joke of their own, and they went back and forth the whole way to the parking lot. It was such a sweet moment of connection! I think that is part of the fun of events and vacations and such in the summertime, those moments of interaction with strangers that remind us that, yes, humans are wildly different and varied, but we can almost always find common ground! I hope you had some moments like that as well this summer.

Okay back to fall and crochet and the reason you’re here!

Here are the links to my pattern shops so you can get the PDF where you prefer to shop! Please note that the code for today’s hop will only be valid on ravelry!

ravelry
Etsy
Lovecrafts

These Maple Earrings were so fun to design. The lacy, open design of the leaves makes them lighter and they have a very feminine look.

If PDFs aren’t for you, feel free to use the free version of the Maple Earrings pattern. I love to have free patterns here on my website for you! So let’s get to it!

Supplies

  • Size 10 crochet thread, colors as desired, approx 10 yards each set, sample is WeCrochet Curio size 10 Canary
  • Size 1.65 mm crochet hook
  • Tapestry needle and scissors
  • Earring findings: 2 fishhook style earrings per set
  • Jewelry pliers, or other small pliers
  • Fabric stiffener, like Aleene’s Fabric Stiffening Spray, t-pins, and a blocking mat

Stitches (US Terms)

ch = chain

hdc = half double crochet

sl st = slip stitch

st/sts = stitch/stitches

sc = single crochet

sk = skip

MR = magic ring

prev = prev

beg = beginning

sp = space

Special Stitches:

picot = ch 3, sl st into 1st ch

Notes

  • This pattern is worked in rows and rounds.
  • For the best look, stiffen the earrings. I use Aleene’s Fabric Stiffening Spray and t-pins on a blocking mat.
  • Stitch counts are marked in { } at the end of each round.
  • Finished dimensions: 1.75 in x 1.5 in
  • ( ) are used in the instructions for groups of stitches, and * are used in the pattern to help denote repetition as written.

Gauge

12 rows of single crochet with 13 sts = 1 inch square

Personally, I find the smallest hook I can handle for the thread size (for earrings) produces the best, tightly stitched look. As long as the stitches are small enough for the result to look nice, if it is a little bigger or smaller, there isn’t a “fit issue.”

Instructions

Make 2)

Row 1: MR, sc 5 into ring, cinch partially, ch 1, turn. {5 sc}

Row 2: 2 hdc in each of first 2 sts, 3 hdc in next st, 2 hdc in each of last 2 sts, turn. {11 hdc}

Row 3:*Ch 5, sk st, sl st next st; repeat from * across, turn. {5 ch-5, 5 sl st}

Round 4: (2 sc, picot, 2 sc) into ch-5 sp, sl st into corresponding hdc two rows down, *5 sc into next ch-5 sp, sl st into corresponding hdc two rows down, repeat from * 2 times; (2 sc, picot, 2 sc) into ch-5 sp.

Continuing along bottom of leaf: sc evenly 2 until MR, sc in MR, ch 4, sl st 2nd ch from hook and next 2 chs, sc in MR, sc evenly 2 until beg of Round 4, sl st to beg sc of Round 4 to join, fasten off. {2 picot, 1 ch-4, 8 sl st, 28 sc}

Row 5: Attach thread in 1st sc of 5 sc series from Round 4, then *ch 2, picot, ch 1, picot, ch 1, picot, ch 2, sk 3 sts, sl st, sk st, sl st, repeat from * 2 times. {6 ch-2, 6 ch-1, 9 picot, 6 sl st}

Finish off and weave in ends.

Blocking and Assembly

Pin earring to blocking mat. Spray from about 6-10 inches away with fabric stiffening spray, or pour some of the spray liquid into a small cup and paint the liquid on. Once dry, use the jewelry pliers to attach fish hook style earring to a stitch in last row. Make sure to mirror the earrings

Thank you so much for joining me for this blog hop! This is a fun event and I’m really enjoying it. Head back to the hop and bookmark it so you don’t miss any of the great patterns! There are some you do not want to miss!

Love it? Share it!

  • Share on X (Opens in new window) X
  • Share on Facebook (Opens in new window) Facebook
  • Share on Pinterest (Opens in new window) Pinterest
  • Print (Opens in new window) Print

July 12, 2024 by Priscilla

Fun in the Sun Earrings

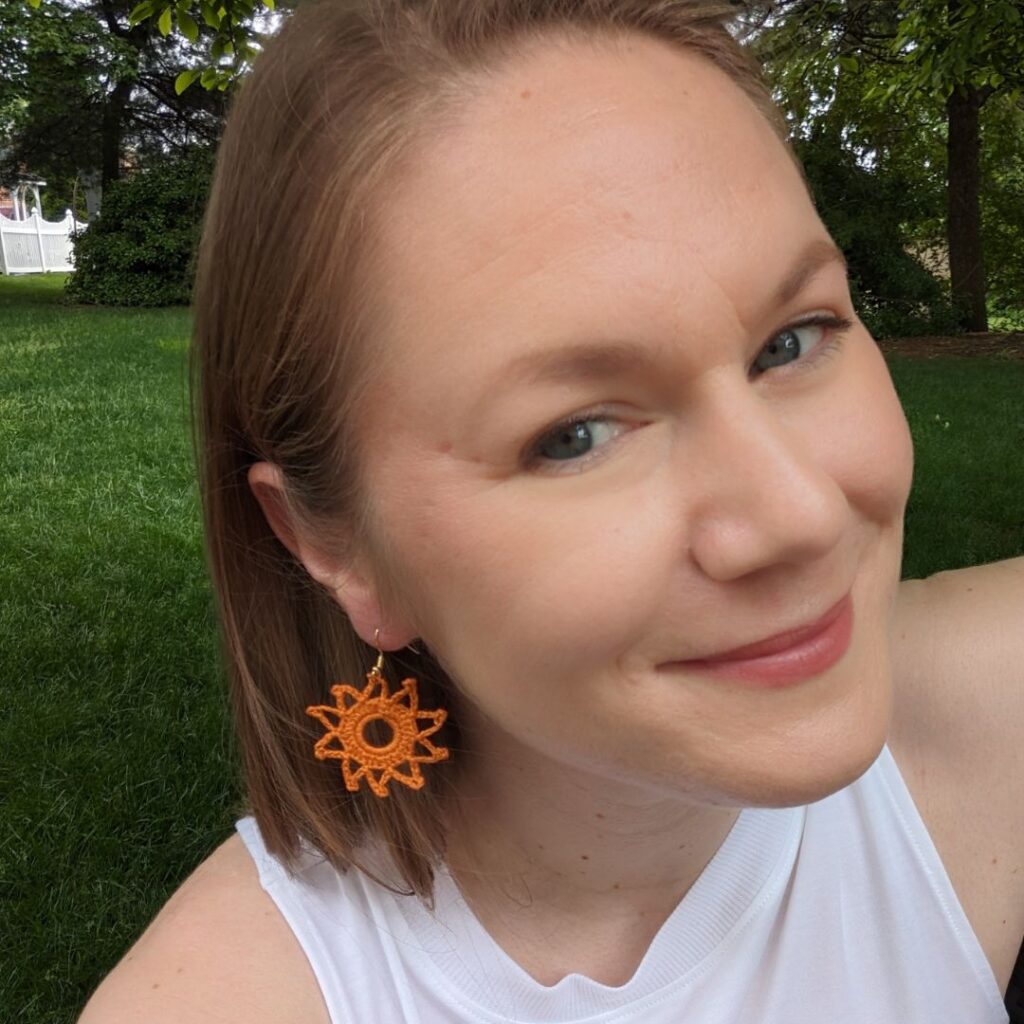
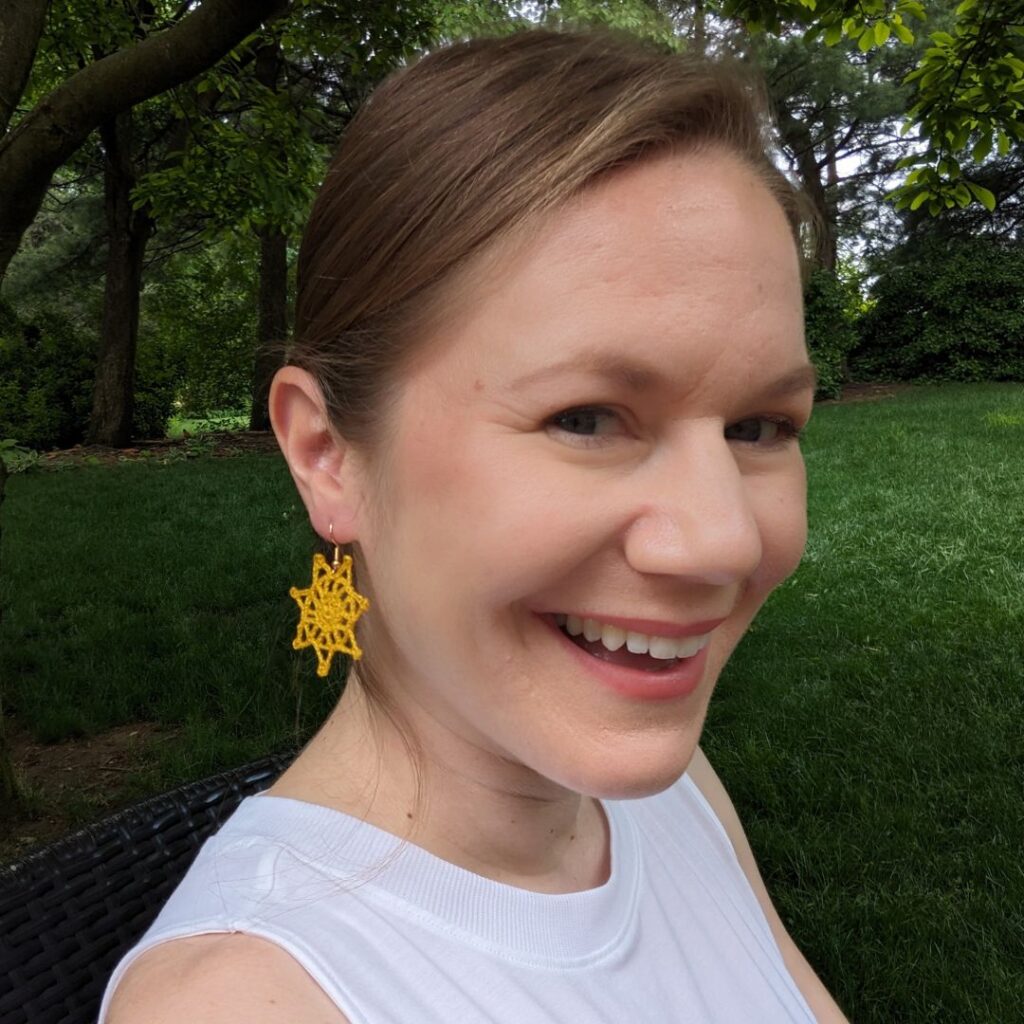
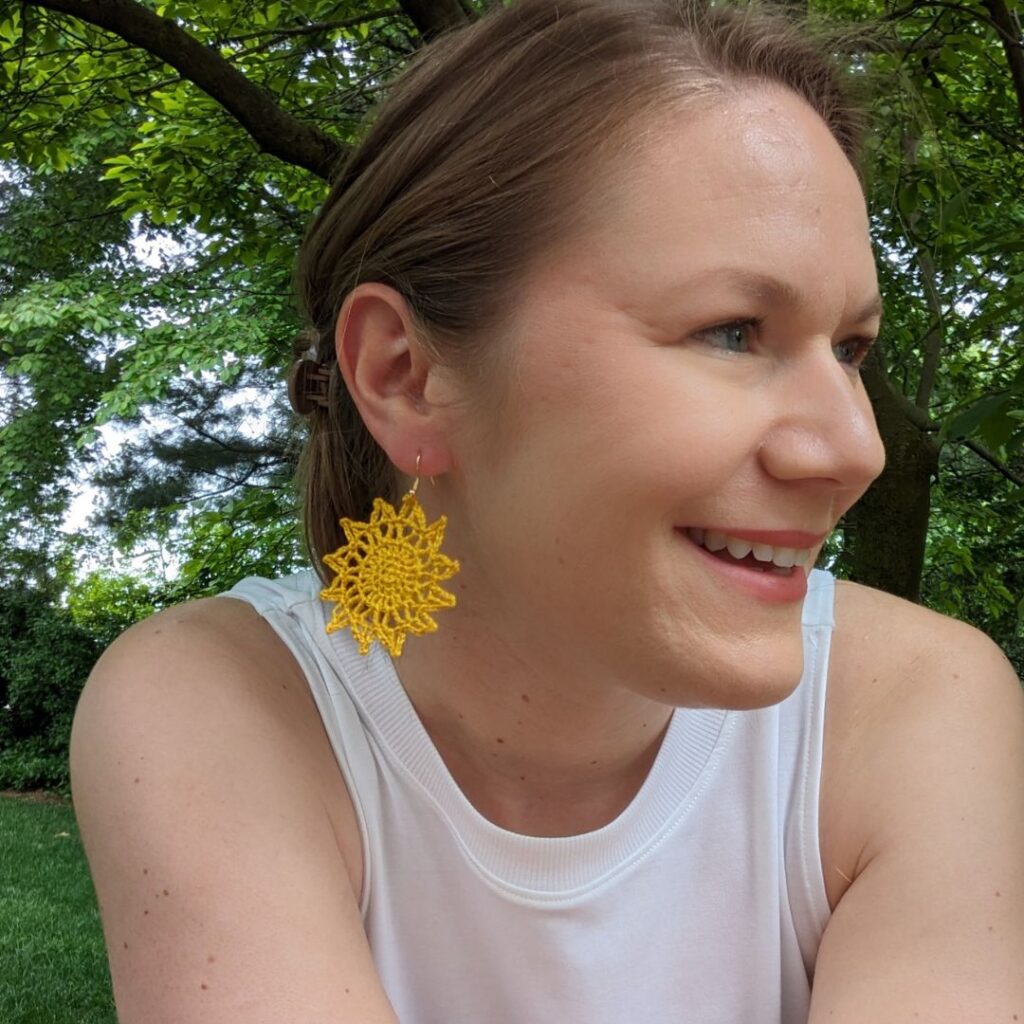
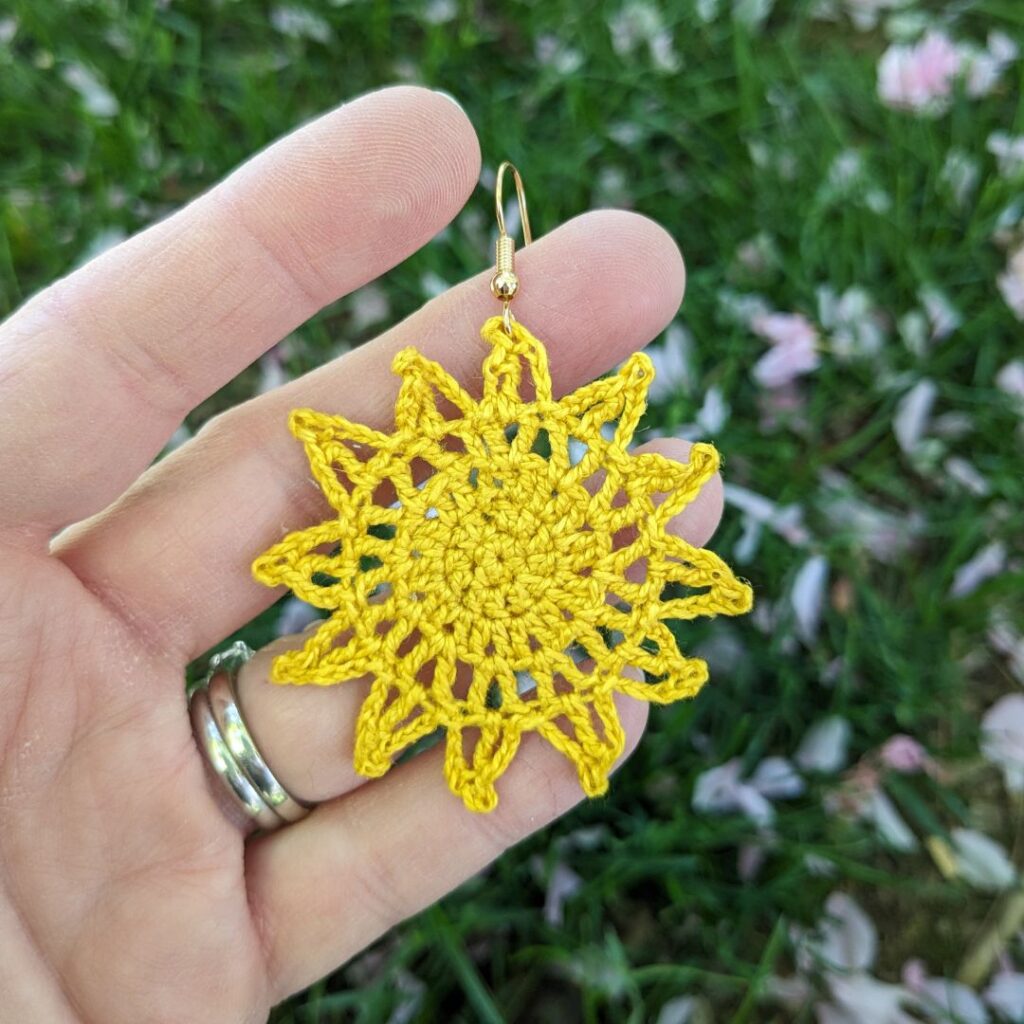
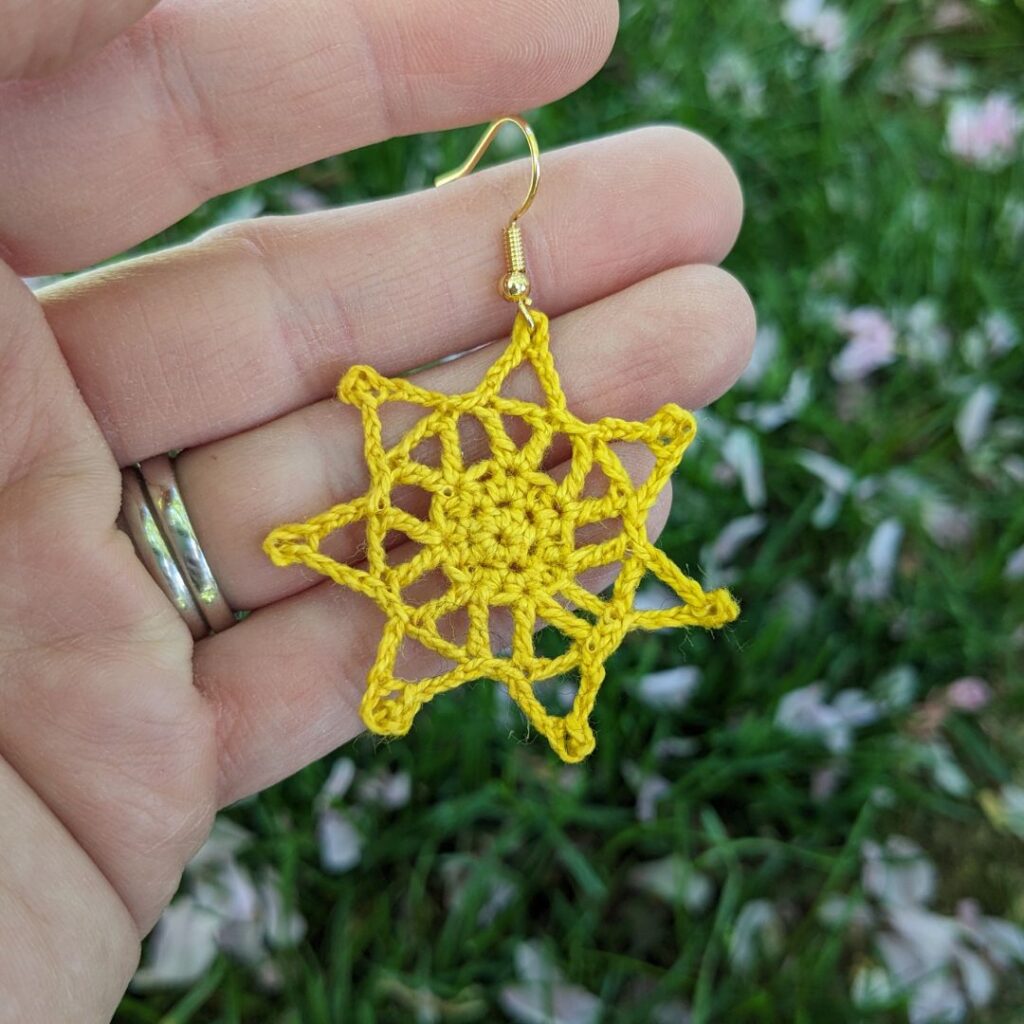
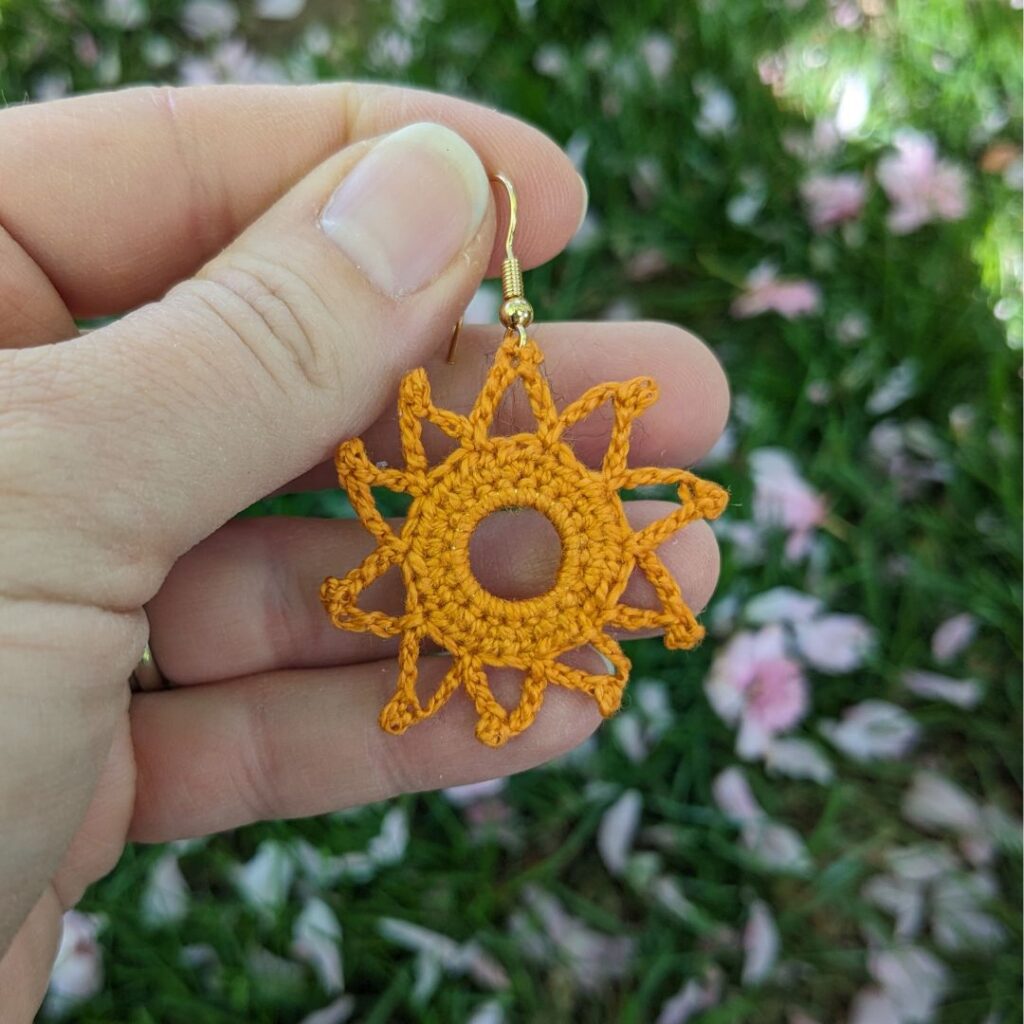
I agonized over the naming of these earrings! I hope the name makes you think of sunny beach days, family barbeques, and summer road trips; basically some of the highlights of summer! I enjoyed making these suns so much, I ended up making several versions! This pattern has three different sun crochet earrings, but I kept them as one pattern as they have so many similarities.

Thanks for joining me for the March Maker Madness event! You can get this pattern free as part of this event on Friday, March 27th, 2026! Pam from Carroway Crochet is hosting this great event with tons of great seasonal patterns. Find the download button below! As part of this event, you can get a low cost bundle with all of the patterns in the blog event! This is a great way to add to your pattern stash, especially for spring patterns.

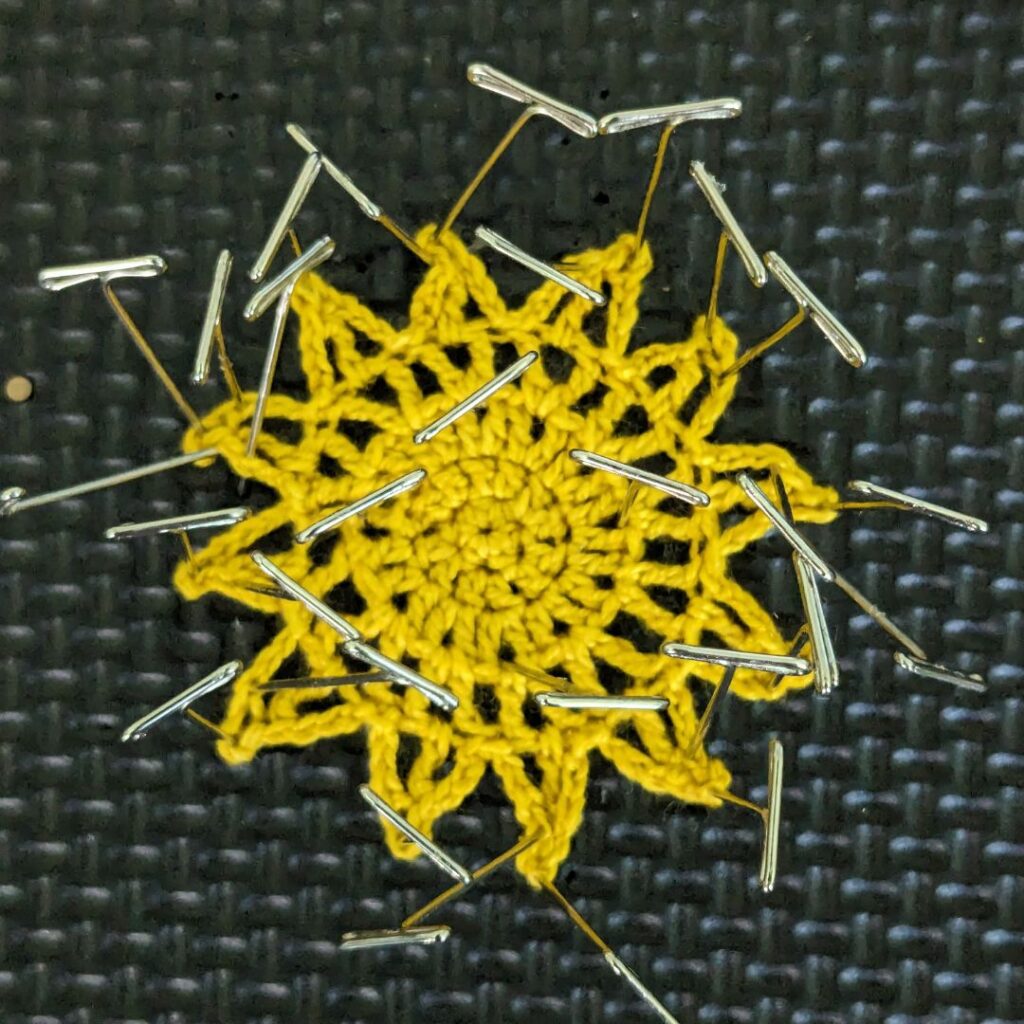
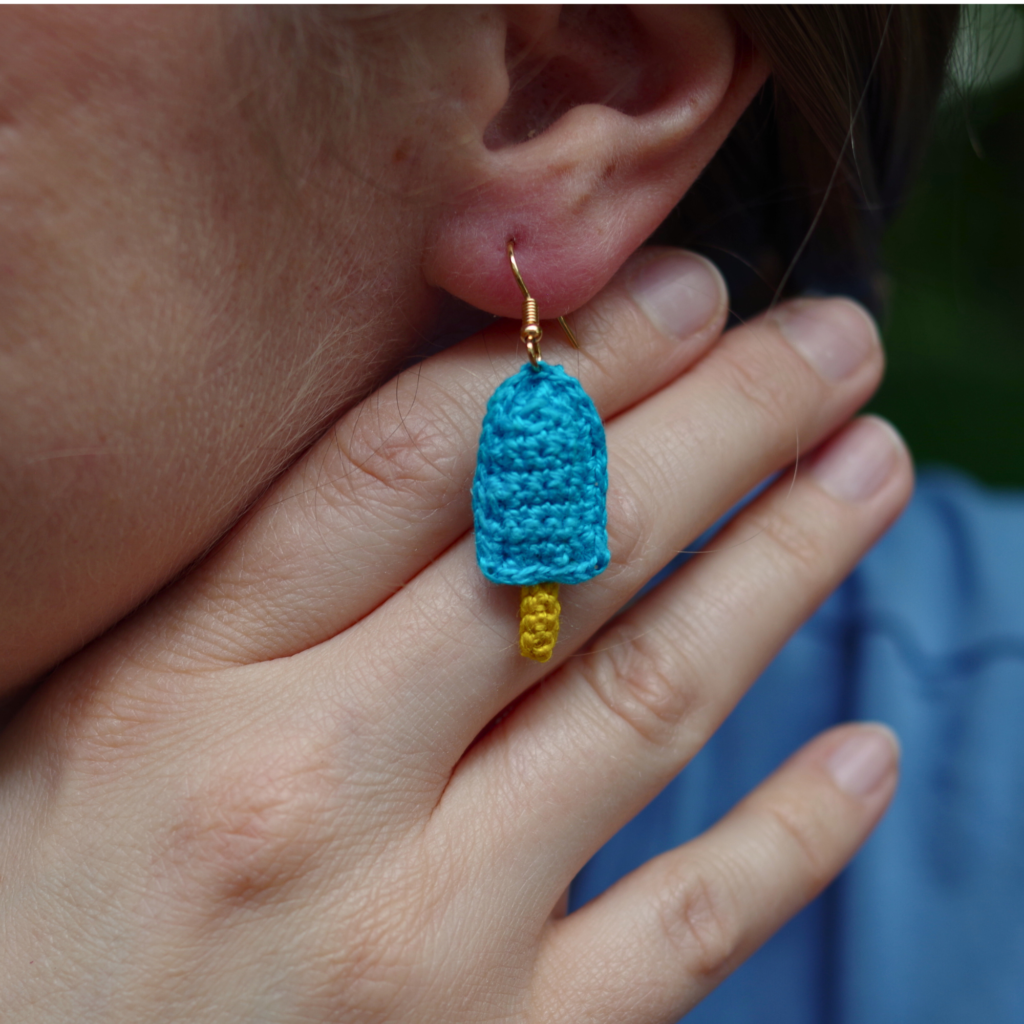
These are being released as part of the Summer Earring COLLECTION! The first pattern released in this collection was the Popsicle Earrings, which you can find right here. The Popsicle Earrings are the easiest to make in the collection, so if you are new to thread crochet earrings, start there! This collection was created with gorgeous crochet thread from WeCrochet, Curio size 10. I love the sheen their thread has and I think the color palette is superior in its modernity.

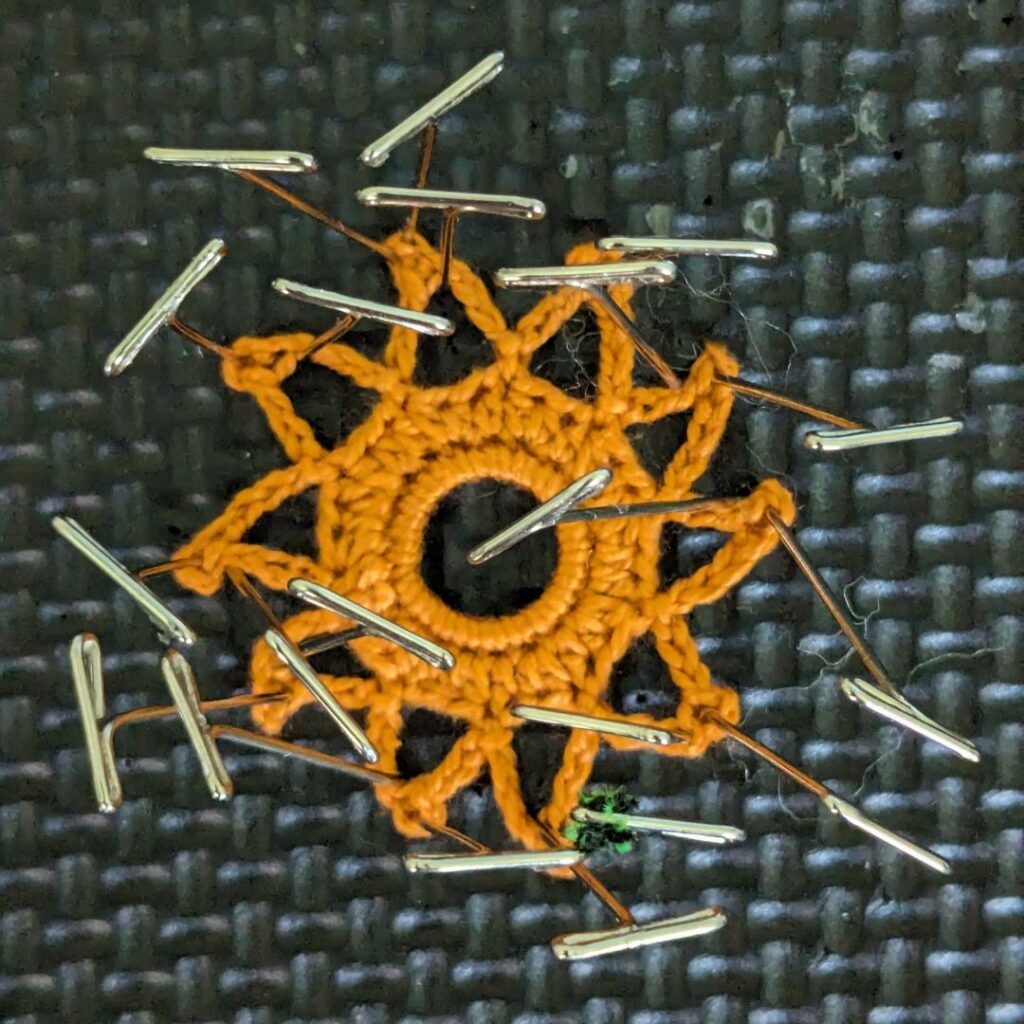
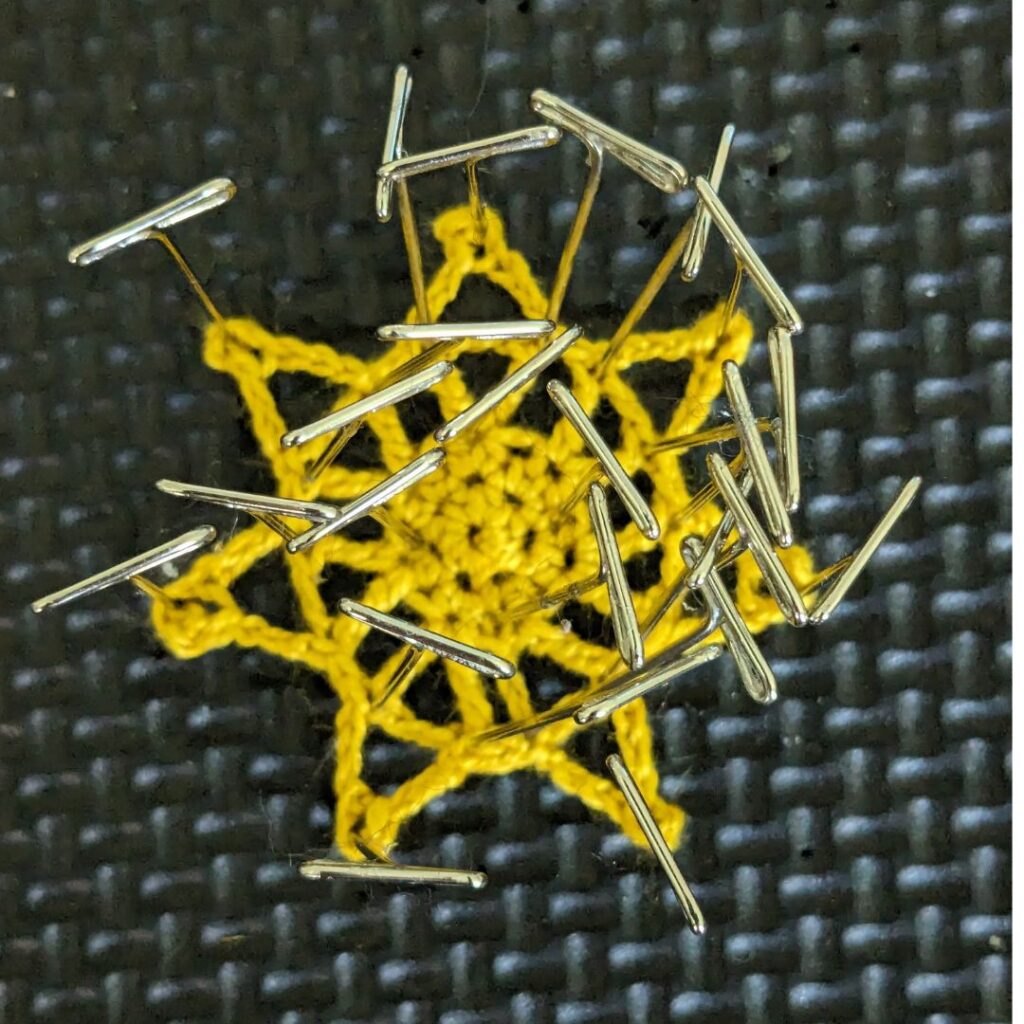
These solar dangles definitely look best when they are blocked. I use Aleene’s stiffening spray and that’s what I recommend. There are other options like regular fabric starch or a mixture of glue and water. Whatever gets them to hold their shape best for you!

As I typically do, I created the PDF for this pattern so you can download and use it easily on your device or print it out. Here are the links to my pattern shops! (Psssst, if you aren’t subscribed to my newsletter, you are missing out on the best discounts for my PDF patterns!)

ravelry
lovecrafts
etsy

All right, enough jabbering, I know you’re here for the pattern, so let’s get to it!

Supplies

  • Size 10 crochet thread, colors as desired, approx 10 yards each set, samples are WeCrochet Curio size 10 Canary and Clementine
  • Size 1.5 mm crochet hook
  • Tapestry needle and scissors
  • Earring findings: 2 fishhook style earrings per set, 2 12 mm hoops for variation Sunny Day
  • Jewelry pliers, or other small pliers
  • Fabric stiffener, like Aleene’s Fabric Stiffening Spray, t-pins, and a blocking mat

Stitches (US terms)

  • ch = chain
  • hdc = half double crochet
  • sl st = slip stitch
  • st/sts = stitch/stitches
  • tr = treble crochet
  • dc = double crochet
  • sk = skip
  • MR = magic ring
  • sc = single crochet
  • prev = prev
  • beg = beginning
  • Special Stitches:
  • picot = ch 3, sl st into 1st ch
  • inc = increase (2 hdc in same stitch)

Gauge

2 rows of single crochet with 13 sts = 1 inch square

Personally, I find the smallest hook I can handle for the thread size (for earrings) produces the best, tightly stitched look for these sun crochet earrings. As long as the stitches are small enough for the result to look nice, if it is a little bigger or smaller, there isn’t a “fit issue.”

Notes

  • Patterns worked in joined rounds, except Sunny Day which is partly continuous rounds as noted below.
  • For the best look, stiffen the earrings. I use Aleene’s Fabric Stiffening Spray and t-pins on a blocking mat.
  • Stitch counts are marked in { } at the end of each round.
  • Finished dimensions: Solar Flare: 2 in diameter, Sunshine and Sunny Day: 1.5 in diameter
  • The stitch multiple for the Sunny Day earring is 4 + 2. Use this multiple to use any size hoop.
  • If you have trouble getting the sl st into the first ch for the picot, try going into just one bar of the st. It won’t change the finished piece more than just a smidgen.

Written Instructions

Solar Flare (Make 2)

Round 1: MR, hdc 6 into ring, sl st to 1st hdc to join. {6 hdc}

Round 2: Ch 2, inc each st around, sl st to beg ch-2 to join. {12 hdc}

Round 3: Ch 3, dc 1st st, then (dc, ch 1, dc) each st around, sl st to beg ch-3 join. {23 dc}

Round 4: Sl st into sp between next 2 sts, then ch 5, tr in same space, then tr, ch 2, tr in each ch 1-sp around, sl st to 3rd ch of ch-5 to join. {23 tr}

Round 5: (Ch 3, dc in ch-2 sp, picot, ch 3, sl st next 2 tr) repeat around, sl st to ch-3 to join. {12 picot}

Finish off and weave in ends.

If you are struggling at all with the pattern, reach out to me on Instagram @motherlodecrafts, or head over to my pattern shops for the PDF, which contains 2 pages of photo tutorial.

ravelry
lovecrafts
etsy

Sunshine (Make 2)

Round 1: MR, hdc 6 into ring, sl st to 1st hdc to join. {6 hdc}

Round 2: Ch 2, 2 hdc each st around, sl st to beg ch-2 to join. {12 hdc}

Round 3: Ch 5, tr prev st, ch 1, sk st *(tr, ch 2, tr) next st, ch 1, sk st, repeat from * around, sl st to 3rd ch of beg ch-5 to join. {13 tr}

Round 4: (Ch 3, picot, ch 3, sl st next tr, sl st ch 1-sp, sl st next tr) repeat around, sl st to beg ch-3 to join. {7 picot}

Finish off and weave in ends.

sun crochet earrings

Sunny Day (Make 2) Continuous rounds, do not sl st to join, except last round.

Round 1: Sc 22 sts around 12 mm hoop. {22 sc}

Round 2: *Hdc, inc, repeat from * around. {33 hdc}

Round 3: *Ch 3, picot, ch 3, sk 2 sts, sl st next st, repeat from * around, sl st to join. {11 picot}

Finish off and weave in ends.

Blocking and Assembly

Pin earring to blocking mat. Spray from about 6-10 inches away with fabric stiffening spray, or pour some of the spray liquid into a small cup and paint the liquid on. Once dry, use the jewelry pliers to attach fish hook style earring to a stitch in 2nd to last round, in between one of the rays or through top of one of the rays.

Don’t forget to go check out the first pattern in this summer earrings collection. The Popsicle Earrings are so easy and you can really play around with the colors!

Love it? Share it!

  • Share on X (Opens in new window) X
  • Share on Facebook (Opens in new window) Facebook
  • Share on Pinterest (Opens in new window) Pinterest
  • Print (Opens in new window) Print
  • « Previous Page
  • 1
  • 2
  • 3
  • 4
  • 5
  • …
  • 7
  • Next Page »

Welcome! My name is Priscilla and I love designing crochet patterns for your family. I live in beautiful Pennsylvania where I enjoy all sorts of crafts, but I’m most passionate about crochet! I’m a Catholic mom of 4 and I sometimes incorporate my faith into my designs. Thank you so much for supporting me by visiting my crochet website and I hope you find something here that you are excited to make.

Recent Posts

  • Cozy Fall Baby Beanie Pattern
  • Spider Basket Crochet Pattern
  • Lacy Edged Crochet Shawl Pattern
  • Crochet Gingerbread Earring Pattern
  • Classic Hairbow Crochet Pattern

Categories

Follow Me

  • Etsy
  • Facebook
  • Instagram
  • Pinterest
  • YouTube

Pretty Chic Theme By: Pretty Darn Cute Design