The Mother Lode

Crafts and Crochet

  • Home
  • Crochet Pattern Library
  • Faith Based Patterns
  • About Me
  • Privacy Policy

February 4, 2022 by Priscilla

Chill Stopper Cowl

It has been a WEEK here! Do you ever feel like that? You get to Friday and think “what did I even do this week?” Thank goodness this cowl pattern is SO easy that I only had a few simple corrections after my testers finished up! If it had been more complicated, it would have needed pushed back!
I’m working on a colorwork hat design, it was going well until I tried it on and realized I had made the brim FAR too large and ended up frogging the whole thing. I still have a plan for it and I think it’s going to turn out wonderful, but it is going to be a couple of weeks until I’m able to publish it. Next week I’m planning instead to share a tutorial video! It was just my birthday and my husband got me an amazing light so that I can film tutorials! I’m thrilled to be able to do that moving forward.

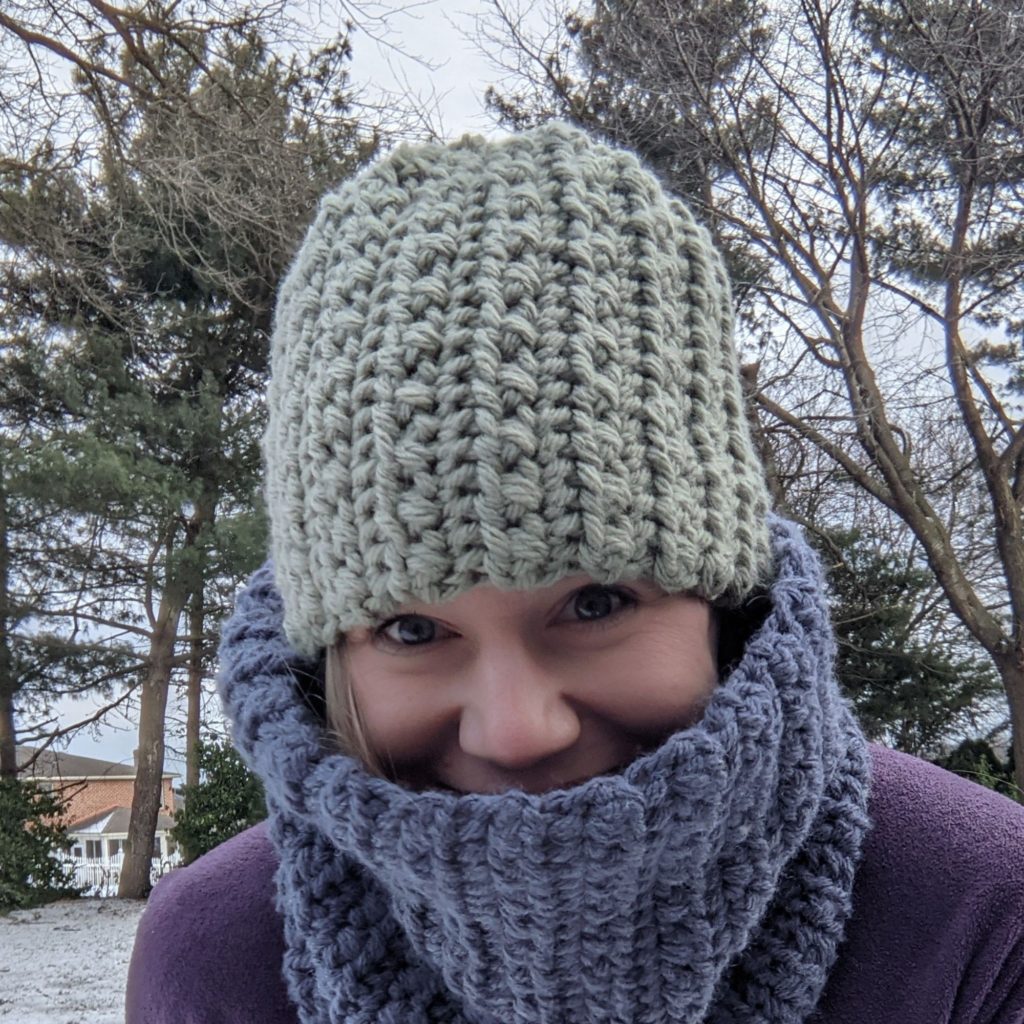
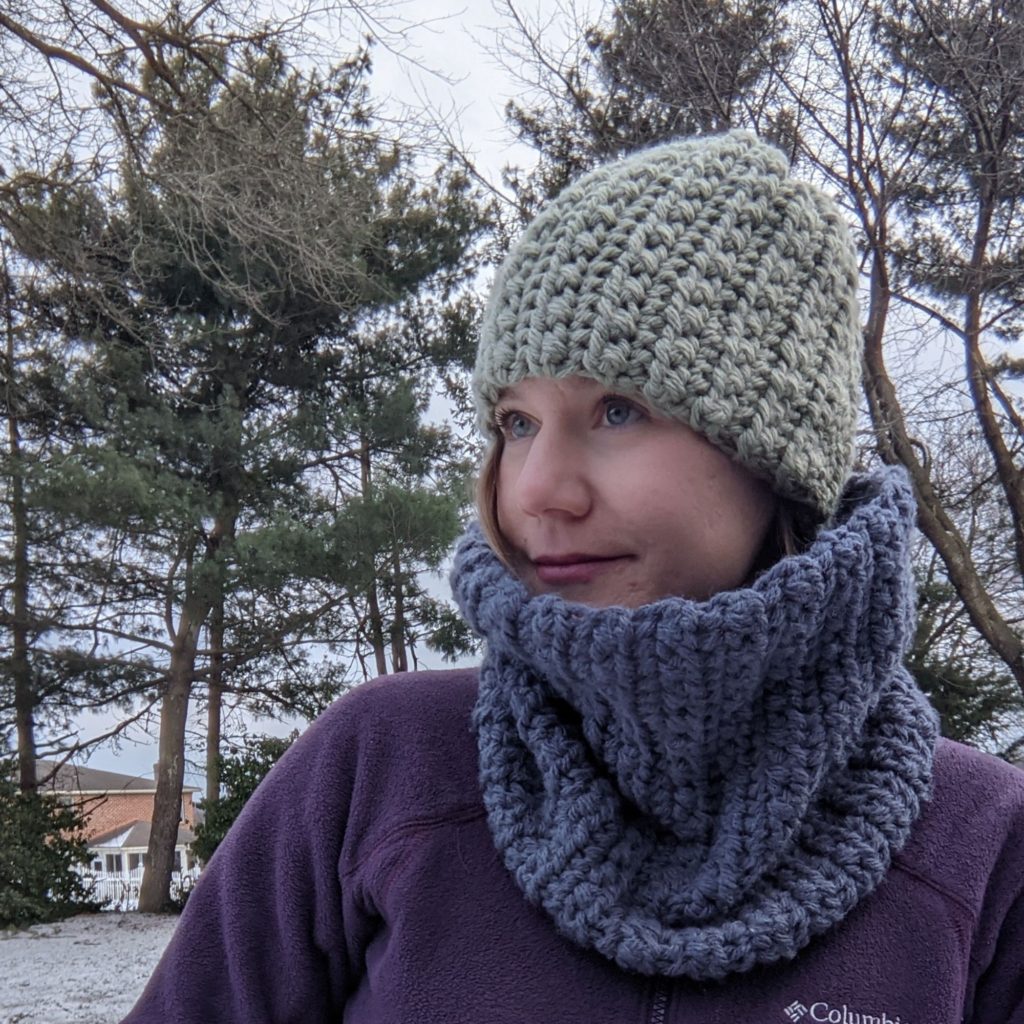
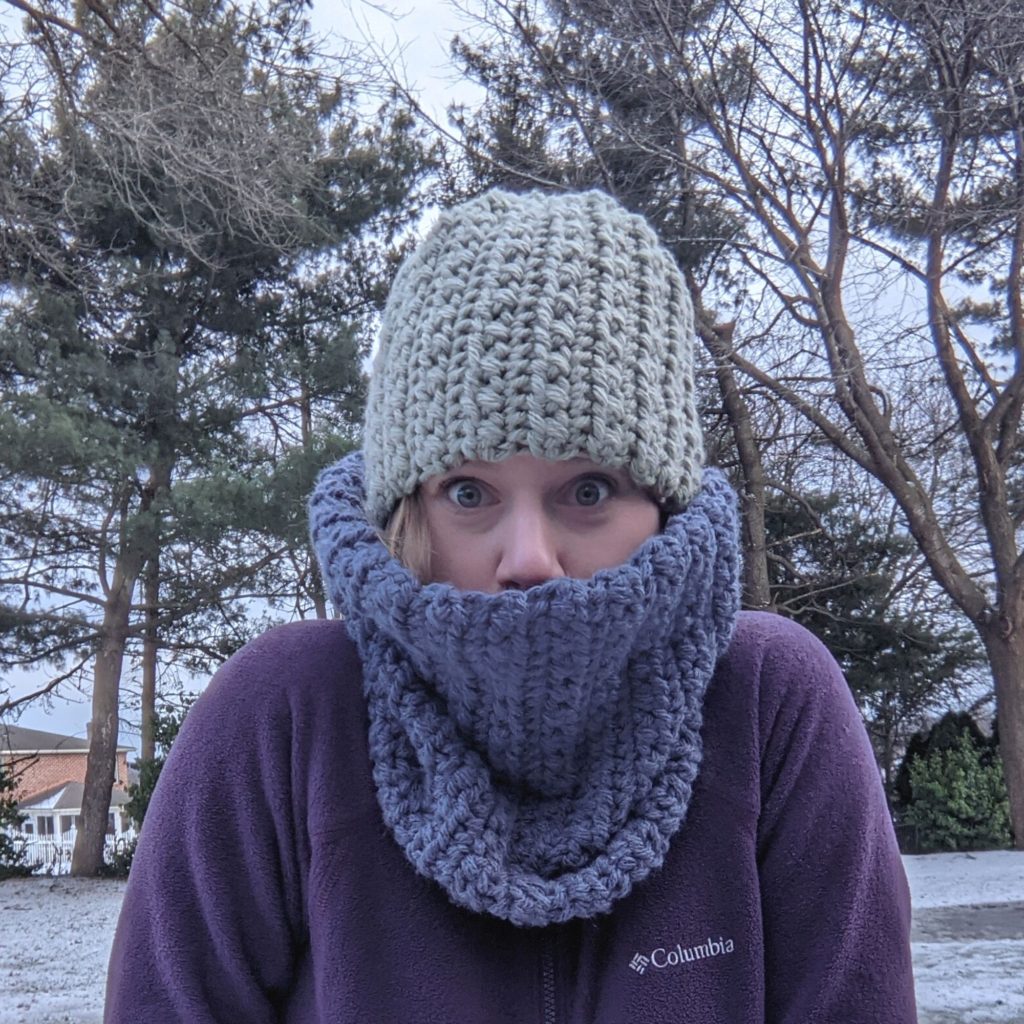
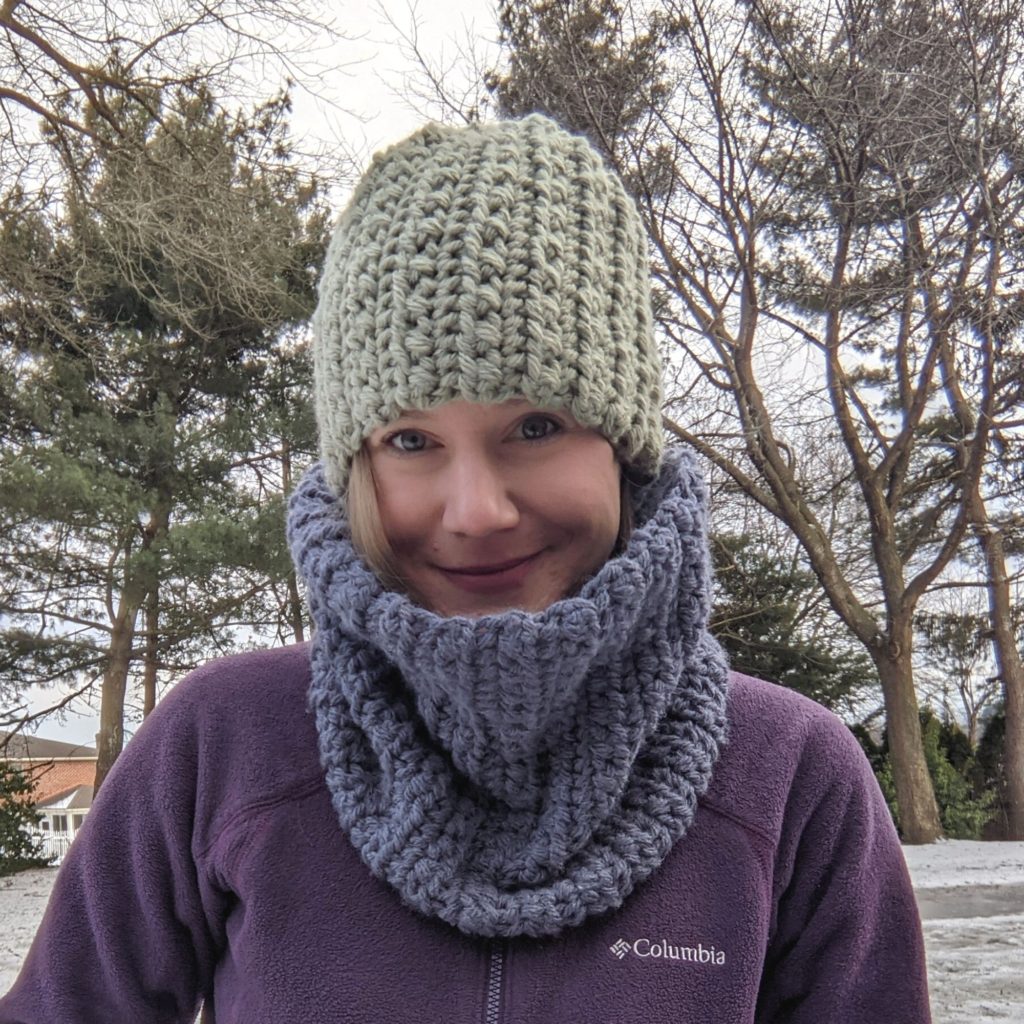
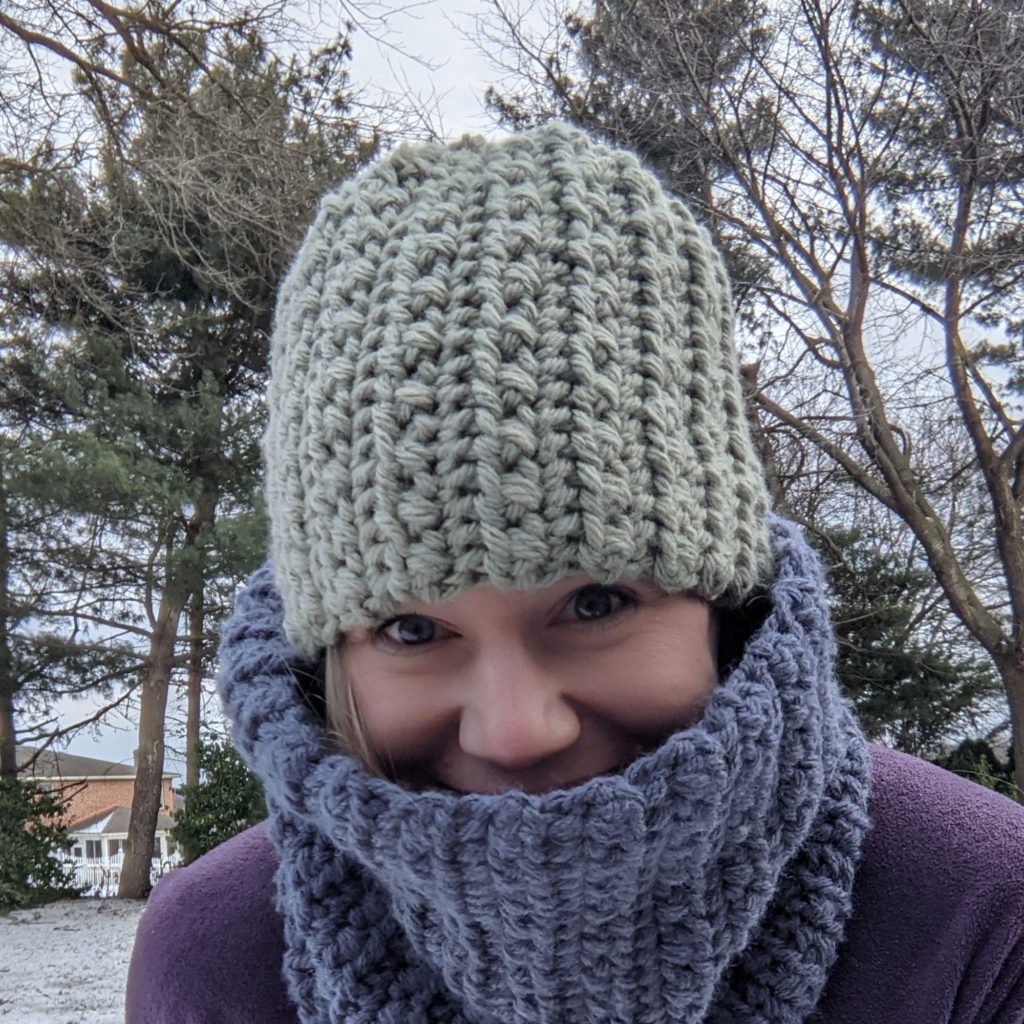
On to today’s pattern! You’ll need two skeins of Lion Brand Hue + Me or similar weight 5 yarn. It is a simple two row repeat with an easy seam to make this slightly textured chunky cowl! It really keeps your neck warm, and even your face. My little 5 year old asked me to make him “a circle for my neck like you” after I had been wearing another cowl all winter, so this pattern includes a child size! For the low cost PDF, head over to my pattern shops! The PDF has a photo tutorial page in addition to the instructions provided here.

Ravelry
Etsy
Lovecrafts

Supplies

  • 250 yards bulky (CYC 5) yarn, samples: Lion Brand Hue and Me, Red Heart Yarns Soft Essentials
  • crochet hook US size L (8 mm) or size needed to obtain gauge
  • tapestry sewing needle
  • scissors and measuring tape

Stitches

ch = chain

sc = single crochet

st/sts = stitch/stitches

FLO = front loop only

sk = skip

hdc = half double crochet

Notes

  • Finished dimensions after seaming: child size 6.5 in by 10.5 in /adult size 10.5 in by 13 in
  • Sizes are marked with parentheses ( ) and stitch counts are marked at the end of each row in brackets [ ].
  • Pattern is worked flat and seamed at the end.
  • The right side is the side where the hdc stitches puff out more, pictured below.
  • The crossed hdc will be made by working in front of the previous stitch, not behind. Front is always the side of the work closest to you.
  • This is a beginner pattern, and all of the instructions are available here. However, there is a PDF available in my pattern shops that includes a photo tutorial page: Ravelry Etsy Lovecrafts

If you’d like to modify this pattern to get the exact fit that you want, the stitch multiple for this cowl is 2. That means you can add or subtract stitches to the beginning chain in multiples of 2 to make your cowl taller or shorter.

The pattern repeat is in rows of 2. For the best look at the seam, you want the final row to be the hdc row. If you want your cowl to be a tighter fit to the neck, you could subtract 2 rows at a time or add 2 rows to make the cowl more loose.

Gauge

4 in by 4 in swatch = 12 sts in 8 rows of the pattern repeat which is:

Row 1: Ch 15, sc each st across, ch 1, turn.

Row 2: *Sk st, hdc, hdc in skipped st, repeat from * to end, ch 1, turn.

Row 3: Sc FLO each st across, ch 1, turn.

Repeat rows 2 and 3, respectively.
Written Instructions

Child (Adult)

Row 1: Ch 25 (31), sc in 2nd ch from hook and each st across, ch 1, turn. [24 (30) sc]

Row 2: Sk first st, hdc next st, hdc in previously skipped st, *sk next st, hdc, hdc in skipped st, repeat from * across, ch 1, turn. [ 24 (30) hdc]

How is the pattern going?

Join my subscriber list for pattern updates, discounts, and other crafty fun!

Thank you!

You have successfully joined our subscriber list.

.

Row 3: Sc FLO each st across, ch 1, turn. [24 (30) sc FLO]

Row 4- 43(47): Repeat rows 2 and 3 respectively.

Row 44 (48): Repeat row 2. Fasten off, leaving about 12 inches for seaming.

Fold right sides together and seam using the remaining end with a tapestry needle. Use whipstitch to sew together the chain row from the beginning to the the back loop of the last row. Weave in remaining ends.
Love it? Share it!

  • Share on X (Opens in new window) X
  • Share on Facebook (Opens in new window) Facebook
  • Share on Pinterest (Opens in new window) Pinterest
  • Print (Opens in new window) Print

January 28, 2022 by Priscilla

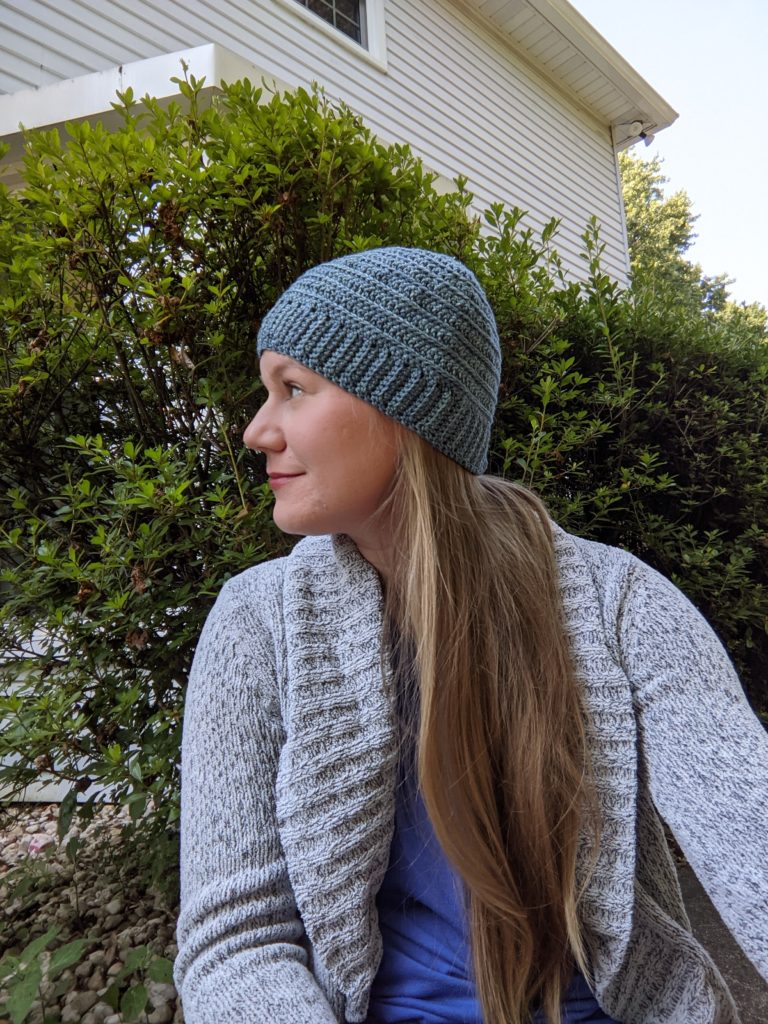
Chill Stopper Beanie

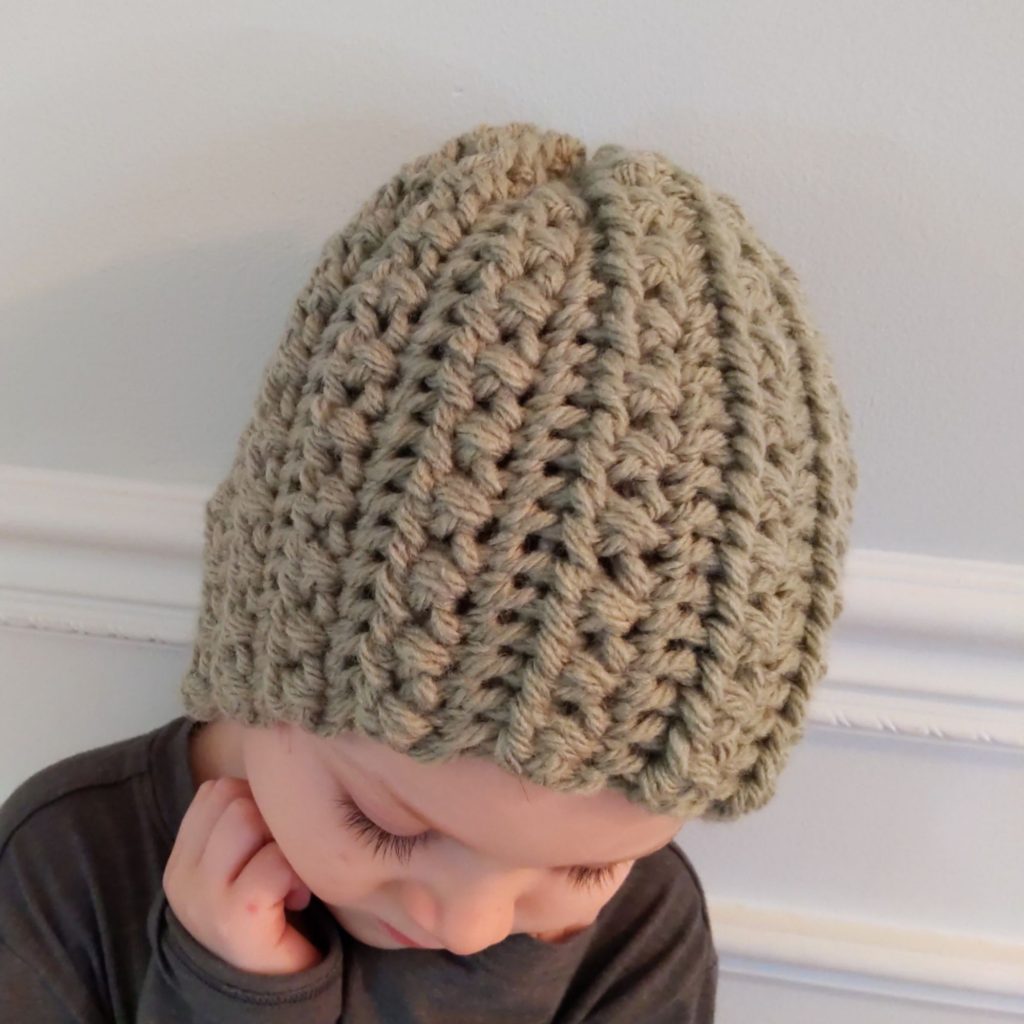
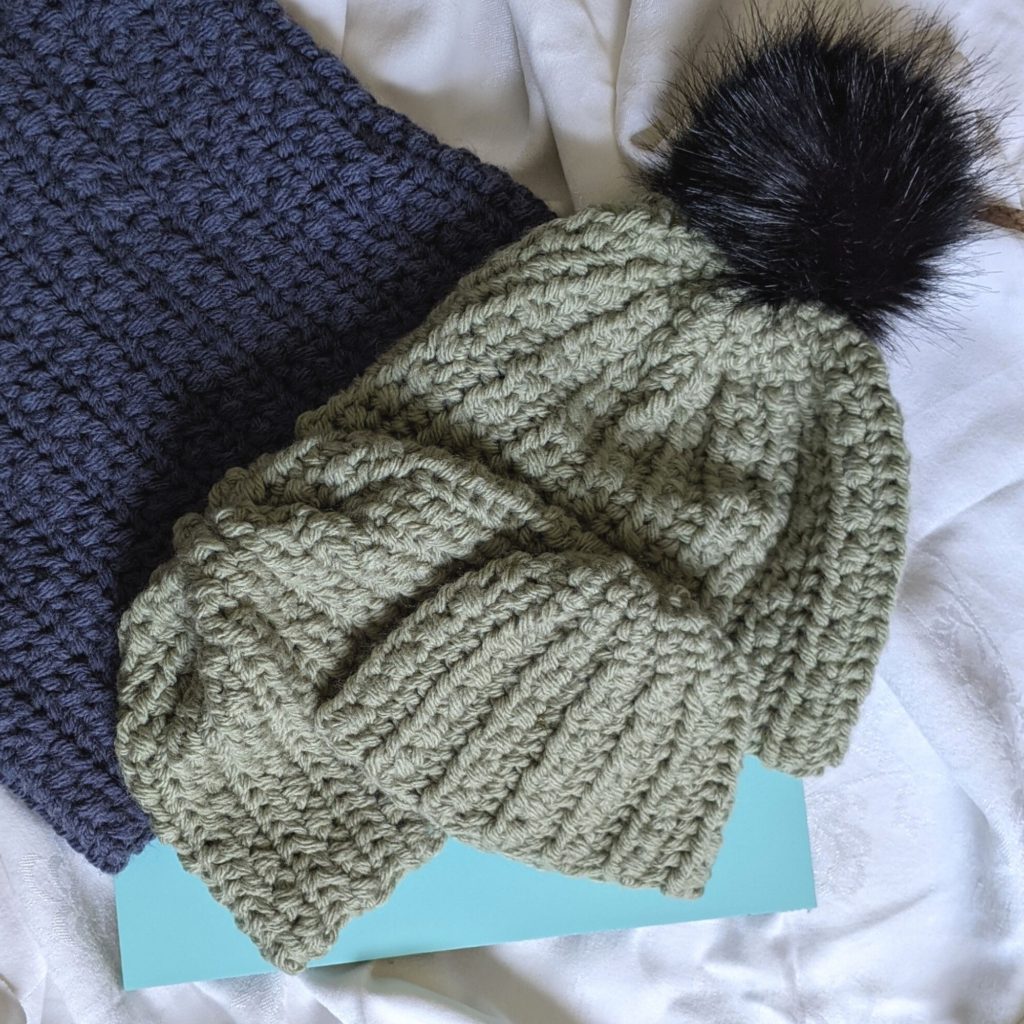
As a mom of three boys, it’s hard to “twin.” There aren’t many options for matching outfits! BUT I’ve enjoyed making us a few matching hats. I’m working towards creating more patterns for wearables for the family. Items where you can buy one or two patterns, a few colors of the same yarn, and make coordinating outfits for the whole family! Sounds great, right??!! I’m starting with this Chill Stopper set! There is a matching headband pattern here. The matching cowl comes out next week!

The Lion Brand Hue + Me is my new favorite bulky yarn! I still have a few skeins of my old favorite, Red Heart Soft Essentials, but I think it is discontinued. Two great things about this yarn: it’s super warm since it is a wool/acrylic blend, and the colors are AMAZING. Seriously you could pick a bunch of them randomly and they would look great together. I don’t know how they did it, some kind of color wizardry.

On to the pattern: you’ll need one skein of Lion Brand Hue + Me. From one skein I made an adult medium, child, and baby size, so even for a slouchy style adult size, I think one skein is enough. This beanie is easy! It’s a two row repeat that uses “crossed” half double crochet and single crochet in the FLO. You’ll need an 8mm crochet hook and scissors, tapestry needle, measuring tape. I added a removeable pom to mine and I’ve been wearing it everyday!

The PDF has a photo guide page to show the steps of the half double crochet row, as well as instructions to assemble the beanie. It’s available on ravelry and Etsy! You can work from the free version below, and if you need more help, head over and grab the PDF. It’s on sale through Feb 3rd! No code needed.

Supplies

  • 125-200 yards bulky (CYC 5) yarn, samples: Lion Brand Hue + Me, substitute: Red Heart Yarns Soft Essentials
  • crochet hook US size L (8 mm) or size needed to obtain gauge
  • tapestry sewing needle
  • scissors and measuring tape
  • optional: pom/decorative buttons

Stitches

ch = chain

sc = single crochet

st/sts = stitch/stitches

FLO = front loop only

sk = skip

hdc = half double crochet

sl st = slipstitch

Notes

  • Finished dimensions: baby: 14 x 6.5 in, toddler: 16 x 7 in, child: 18 x 7 in, teen/adult sm: 20 x 8 in, adult med: 21 x 8.5 in, adult lg: 22 x 9 in, adult xl: 23 x 9 in
  • Sizes are marked with parentheses ( ) and stitch counts are marked at the end of each row in brackets [ ].
  • Pattern is worked flat and seamed at the end.
  • Work the slipstitches loosely. The slipstitch/single crochet portion will be the top of the hat.
  • The hdc row will be made by working in front of the previous stitch, not behind. Front is always the side of the work closest to you.

Gauge

4 in by 4 in swatch

12 sts in 8 rows of the pattern repeat which is:

Row 1: sc FLO

Row 2: (sk st, hdc, hdc in skipped st) repeat

Size Modification

Hats can be made in all sizes, and I want you to be able to modify this pattern to get the exact fit that you want! The stitch multiple for this hat is 2. That means you can add or subtract stitches to the beginning chain in multiples of 2 to make your hat taller or shorter. To get a slouchy fit to your hat, I suggest an extra 4 beginning chain stitches on the smaller sizes, and an extra 6 beginning chain stitches on the adult sizes.

The hat pattern repeat is in rows of 2. For the best look at the seam, you want the final row to be the hdc row. A great way to fit your hat is to have the person you are making the hat for give you a measurement around their head (go above the ears and across the eyebrows.) You want the hat to be about an inch smaller than that measurement (called head circumference.) This will ensure the hat fits without falling off! There are finished hat size measurements in the notes section. Use these to help you decide which size to make, and add or subtract rows in multiples of 2, according to your measurements for the best fit!

Baby (Toddler, Child) Leave 10 in tail at beginning for seaming

Row 1: Ch 17 (19, 21), sl st second st from hook and next three, sc each st across, ch 1, turn. [4 sl st, 12, (14, 16) sc]

Row 2: Sk first st, hdc next st, hdc in previously skipped st, *sk next st, hdc, hdc in skipped st, repeat from * to last 4 sts, sc last 4 sts, ch 1, turn. [12 (14, 16) hdc, 4 sc]

Row 3: Sl st FLO each of first 4 sts, then sc FLO each st across, ch 1, turn. [4 sl st, 12, (14, 16) sc FLO]

Row 4- 25 (29, 33): Repeat rows 2 and 3 respectively.

Row 26 (30, 34): Repeat row 2. Fasten off, leaving about 8 inches for cinching the top.

How is the pattern going?

Join my subscriber list for pattern updates, discounts, and other crafty fun!

Thank you!

You have successfully joined our subscriber list.

.

Teen/adult small (medium, large, extra large) Leave 12 in tail at beginning for seam

Row 1: Ch 23 (25, 27, 27), sl st second st from hook and next three, sc each st across, ch 1, turn. [4 sl st, 18, (20, 22, 22) sc]

Row 2: Sk first st, hdc next st, hdc in previously skipped st, *sk next st, hdc, hdc in skipped st, repeat from * to last 4 sts, sc last 4 sts, ch 1, turn. [18 (20, 22, 22) hdc, 4 sc]

Row 3: Sl st FLO each of first 4 sts, then sc FLO each st across, ch 1, turn. [4 sl st, 18, (20, 22, 22) sc FLO]

Row 4- 35 (37, 39, 41): Repeat rows 2 and 3 respectively.

Row 36 (38, 40, 42): Repeat row 2. Fasten off, leaving about 8 inches for seaming.

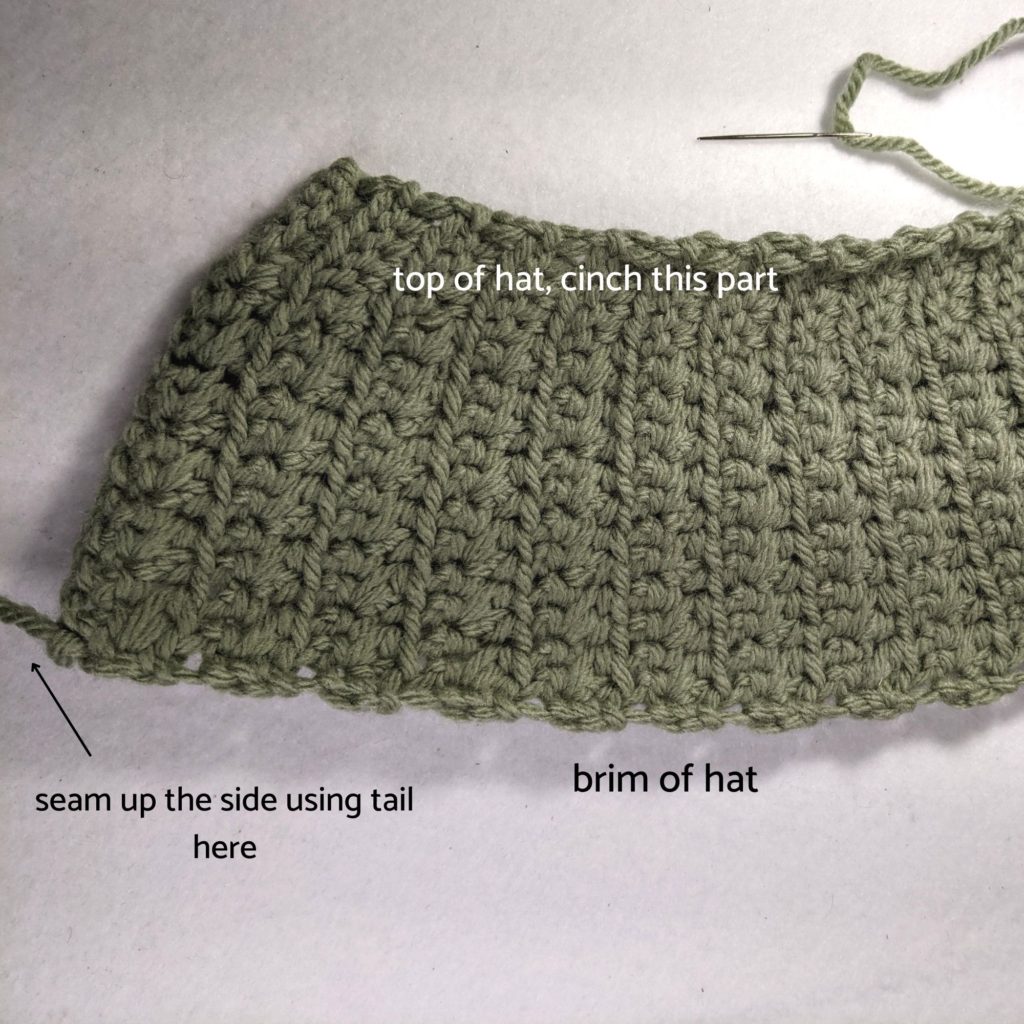
Fold hat and seam the back together using the beginning tail with a tapestry needle and mattress stitch or whipstitch, whichever you prefer. Use end tail to cinch top of hat. Weave through the top of every other row, then pull tightly to cinch. You may then sew back and forth over the hole at the top to close it better, if necessary.

Again the premium version PDF in my pattern shops has tutorial photos like the one below, easy printing/digital viewing, and no ads! Check it out here on ravelry, or on Etsy.

Love it? Share it!

  • Share on X (Opens in new window) X
  • Share on Facebook (Opens in new window) Facebook
  • Share on Pinterest (Opens in new window) Pinterest
  • Print (Opens in new window) Print

December 10, 2021 by Priscilla

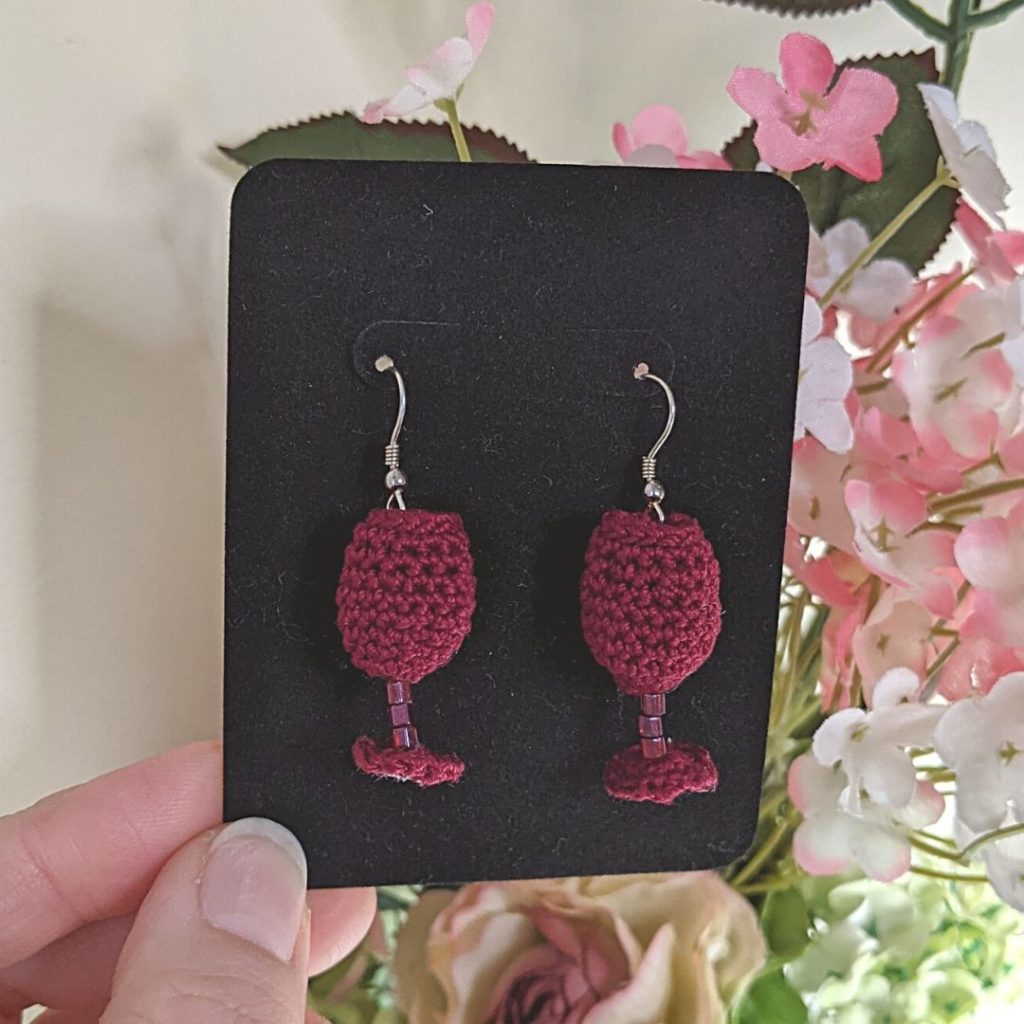
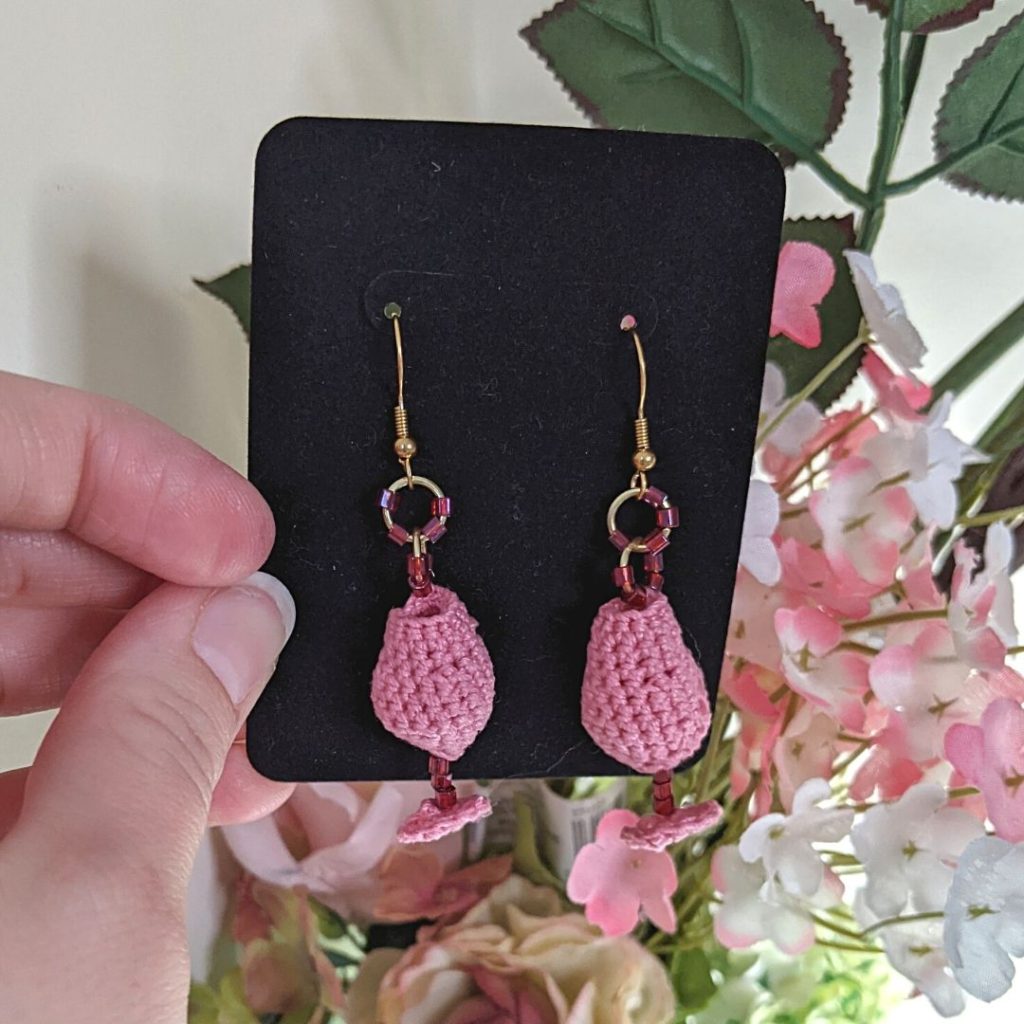
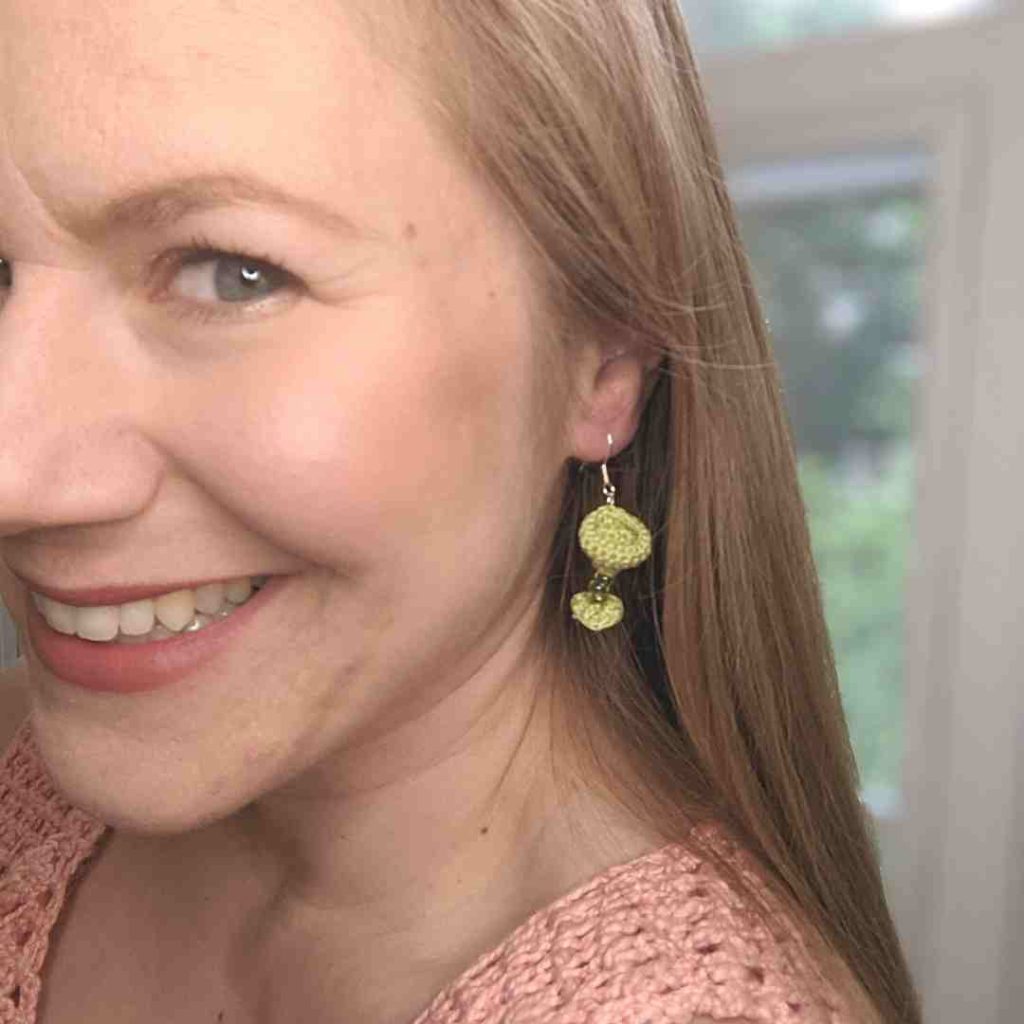
Wineglass Earrings

Do you set projects aside for the future? I think there are times to power through the struggle, and other times to set it aside and come back with a clear mind later. I want to create a whole library of libations themed crochet earring patterns. I have a daquiri glass written, but I had lost the crojo for it back in the summer, so it’s on hold until next summer. I’m not sure what cocktail will be coming next, but for now, enjoy these beautiful wineglass earrings!

You know I love a fun crochet earring! They come together quickly for gifts, the styles you could make are endless, so you get to be creative, and they are just so darn cute. I ended up buying a bunch more colors of Aunt Lydia’s Crochet Thread this year. They have such a beautiful wine color, I just HAD to create these wineglass crochet earrings! I love how the beads give it some good sparkle. You’ll need a 1.5 mm hook, 25 yards of size 10 thread, earring findings, beads, and stiffening spray to make these earrings.

I think if you are a beginner crocheter, these might be pretty tricky. It is a fairly easy pattern if you have even stitch tension that comes with crochet practice and muscle memory. The premium version of the pattern is available here on ravelry and Etsy. It has two full pages of photo tutorial to walk you through all the steps. Below you’ll find the free version that has all the information and written instructions. I’m the most active on Instagram, so if you run into any issues, feel free to message me there @motherlodecrafts I’d love to help you make these.

Supplies

  • Aunt Lydia’s Crochet Thread, size 10 in color Burgundy, approx 25 yds
  • Size 1.50 mm crochet hook
  • Tapestry needle and scissors
  • Earring findings: 2 fishhook style earrings
  • 6 size 6/0 beads, preferably wine colored to match your glass
  • Fabric stiffener, like Aleene’s Fabric Stiffening Spray, t-pins, and a blocking mat
  • optional: more jump rings and beads to add extra sparkle, glue for added stability

Stitches (US terms)

ch = chain

sc = single crochet

sl st = slip stitch

st/sts = stitch/stitches

MC = magic circle

sc2tog = single crochet two together

( ) = work instructions within parentheses as many times as directed

Notes

  • Photo tutorial follows the written instructions.
  • Pattern is worked in two pieces and sewn together.
  • Pattern is worked in joined rounds.
  • Top of glass is formed with wrong side facing out.
  • For the best look, stiffen these once they’ve been assembled. I use Aleene’s Fabric Stiffening Spray and t-pins on a blocking mat.

Gauge

Gauge is not really necessary for this pattern. Personally, I find the smallest hook I can handle for the thread size (for earrings) produces the best, tightly stitched look. If you desire to gauge swatch: use double crochet in 5 rows with 11 sts to equal a 1 inch square.

Written Instructions

Make two

To make the bottom of the glass:

Round 1: MC, sc 4 in MC and sl st to join. (4 sc)

Round 2: Ch 1, 2 sc in each st around, sl st to join. (8 sc)

Round 3: Ch 1, (sc in first st, 2 sc in next st,) repeat ( ) 3 more times, sl st to join, fasten off. (12 sc)

Weave in remaining ends.
How is the pattern going?

Join my subscriber list for pattern updates, discounts, and other crafty fun!

Thank you!

You have successfully joined our subscriber list.

.

To make the top of the glass:

Round 1: Leave an 8 inch tail, then MC, sc 4 in MC and sl st to join. (4 sc)

Round 2: Ch 1, 2 sc in each st around, sl st to join. (8 sc)

Round 3: Ch 1, (sc, 2 sc) repeat ( ) 3 more times, sl st to join. (12 sc)

Round 4: Ch 1, (sc, 2 sc) repeat ( ) 5 more times, sl st to join. (18 sc)

Round 5: Ch 1, sc in each st around, sl st to join. (18 sc)

Rounds 6-7: Repeat round 5.

Round 8: Ch 1, sc2tog, (sc next 2, sc2tog) repeat ( ) 4 more times, sl st to join. (13 sc)

Round 9: Ch 1, sc in each st around, sl st to join. (13 sc)

Rounds 10-11: Repeat round 9.

Round 12: Ch 1, sl st in each st around, do not join, fasten off. (13 sl st)

If you feel stuck, think about purchasing the premium version. The photos can really help you as they go step by step through the rounds and show how to put the pieces together. It is available on ravelry and Etsy.

Weave in end at top of glass. Use end from bottom of cup part for the stem. Thread 3 beads onto the stem, then sew tightly through the bottom of the glass. (You can also choose to put a bit of glue on the thread, then add your beads for added stability.) Pin the bottom to blocking mat in a circle shape. Then use pins to prop up the top of the glass. Finally, spray from about 6-10 inches away with fabric stiffening spray. Let dry. Finish by attaching the fish hook style earring finding at the top edge of the glass. You can add additional beads and jump rings if you like for extra swing and sparkle!

Don’t forget to subscribe to my newsletter! I send out an email every Friday with new pattern releases and other yarnie info! I sometimes put coupon codes in there for pattern discounts, as well as where you can get free patterns during blog hops!

Love it? Share it!

  • Share on X (Opens in new window) X
  • Share on Facebook (Opens in new window) Facebook
  • Share on Pinterest (Opens in new window) Pinterest
  • Print (Opens in new window) Print

October 29, 2021 by Priscilla

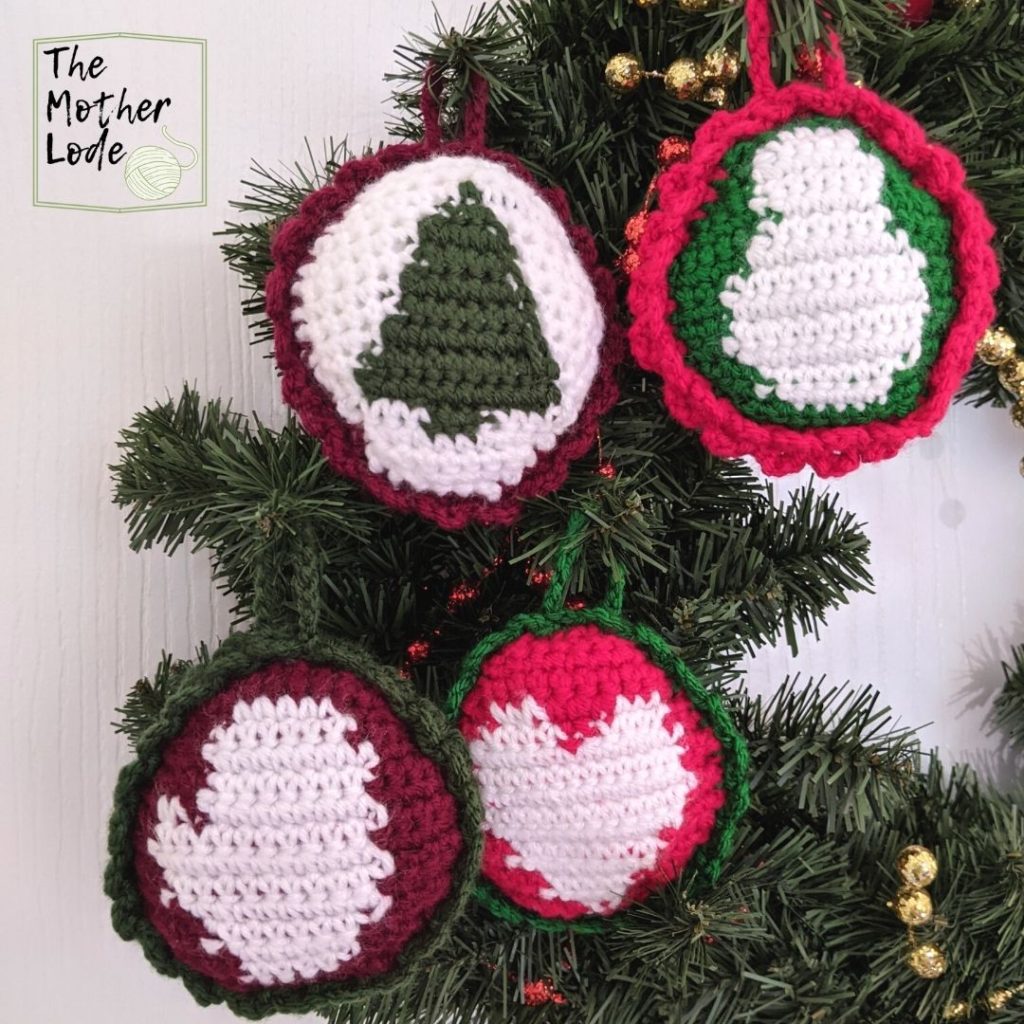
Double Christmas Bauble

Woo-hoo!!! The big day is coming and I am READY! Well, emotionally ready for good times spent with family and friends and the beauty of the joyous season. Physically there are gifts to purchase, plans to be made, and yummy food to be cooked, but that is part of the fun, as well!

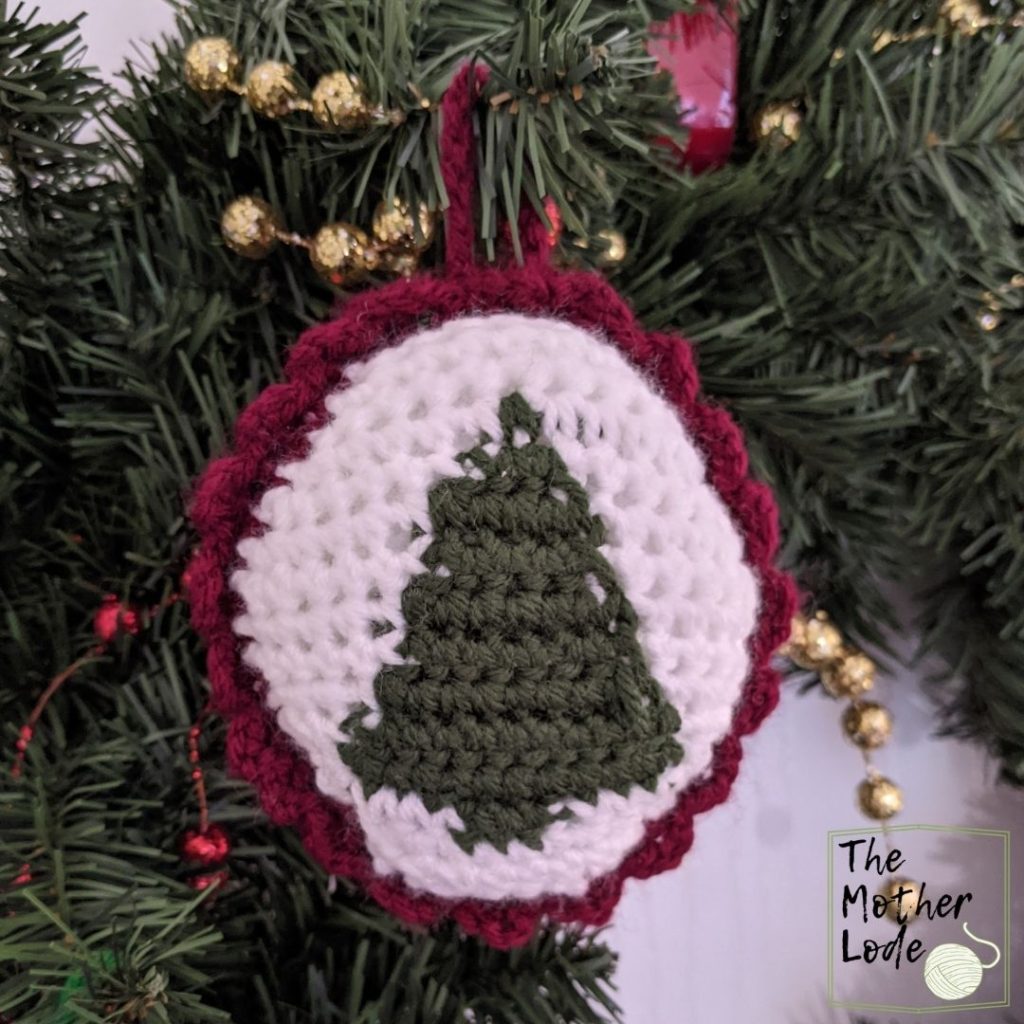
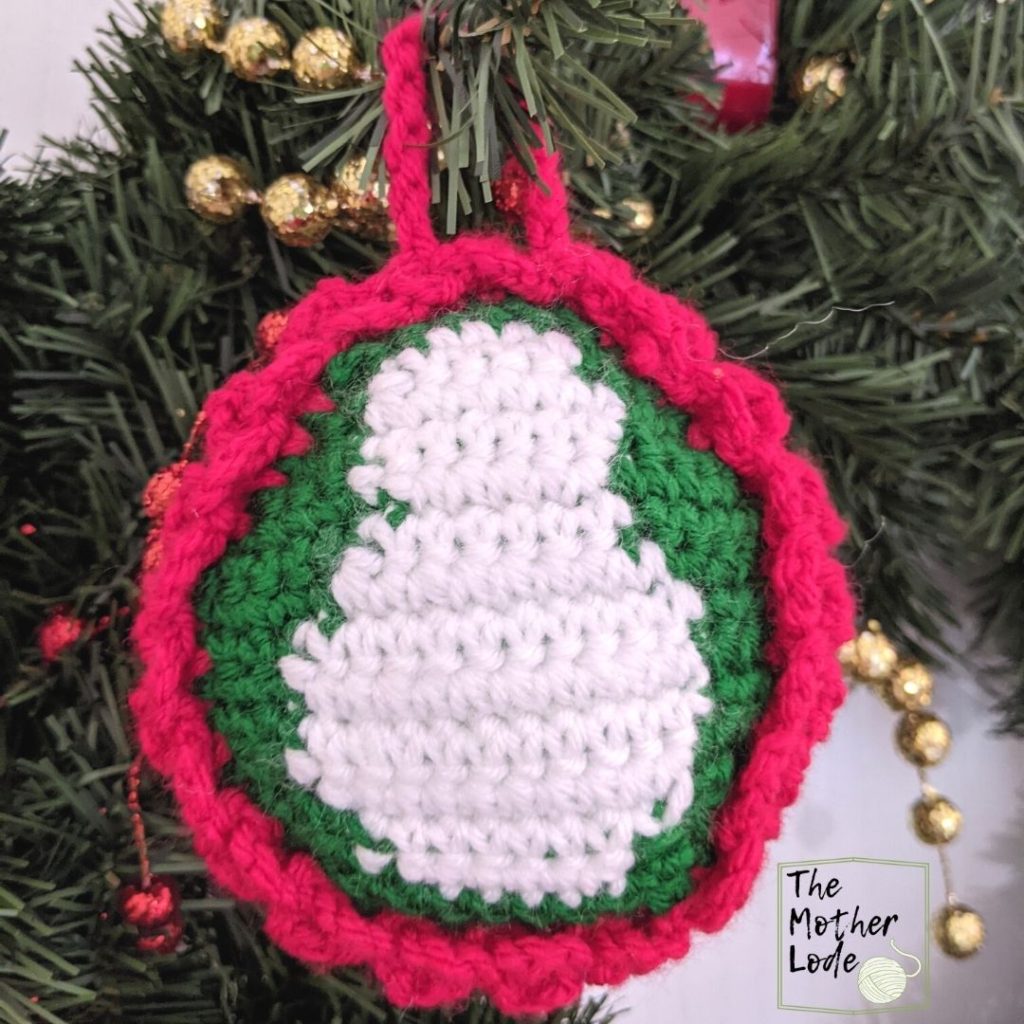
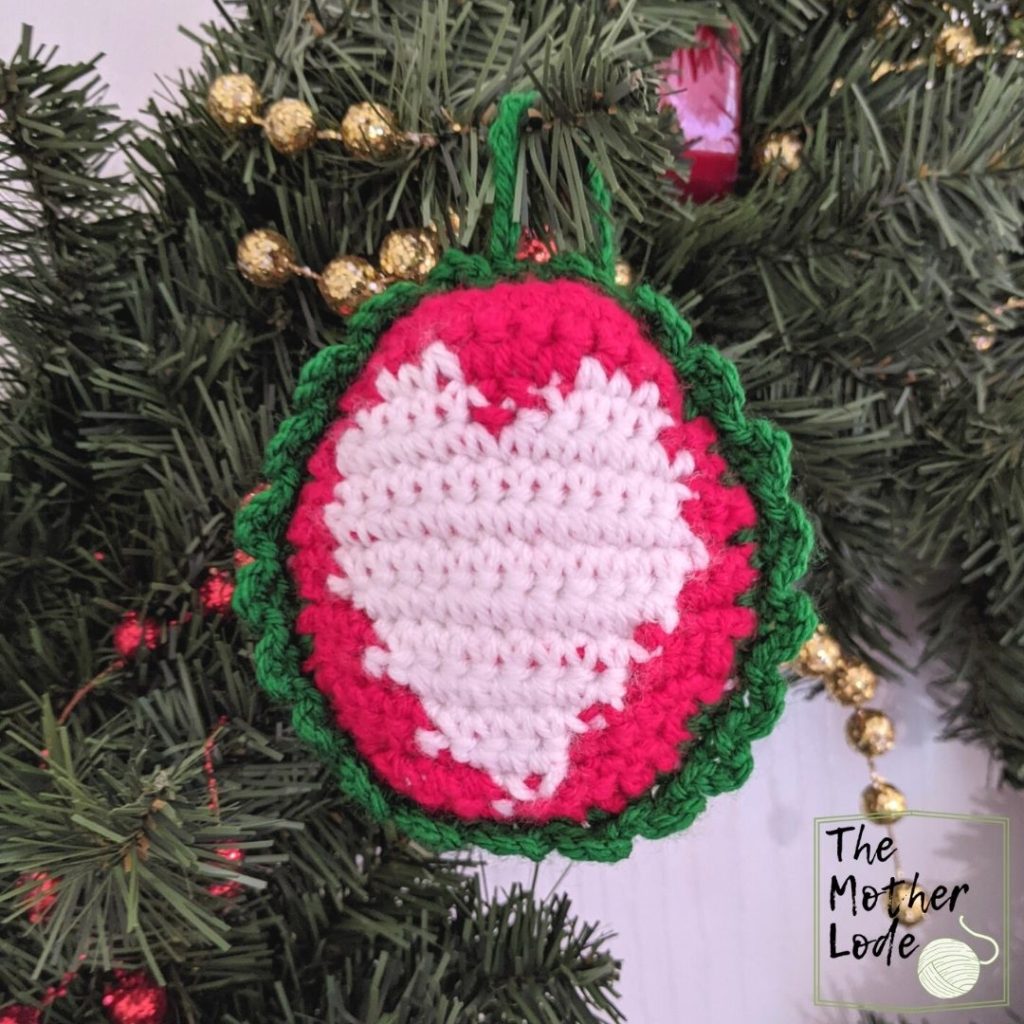
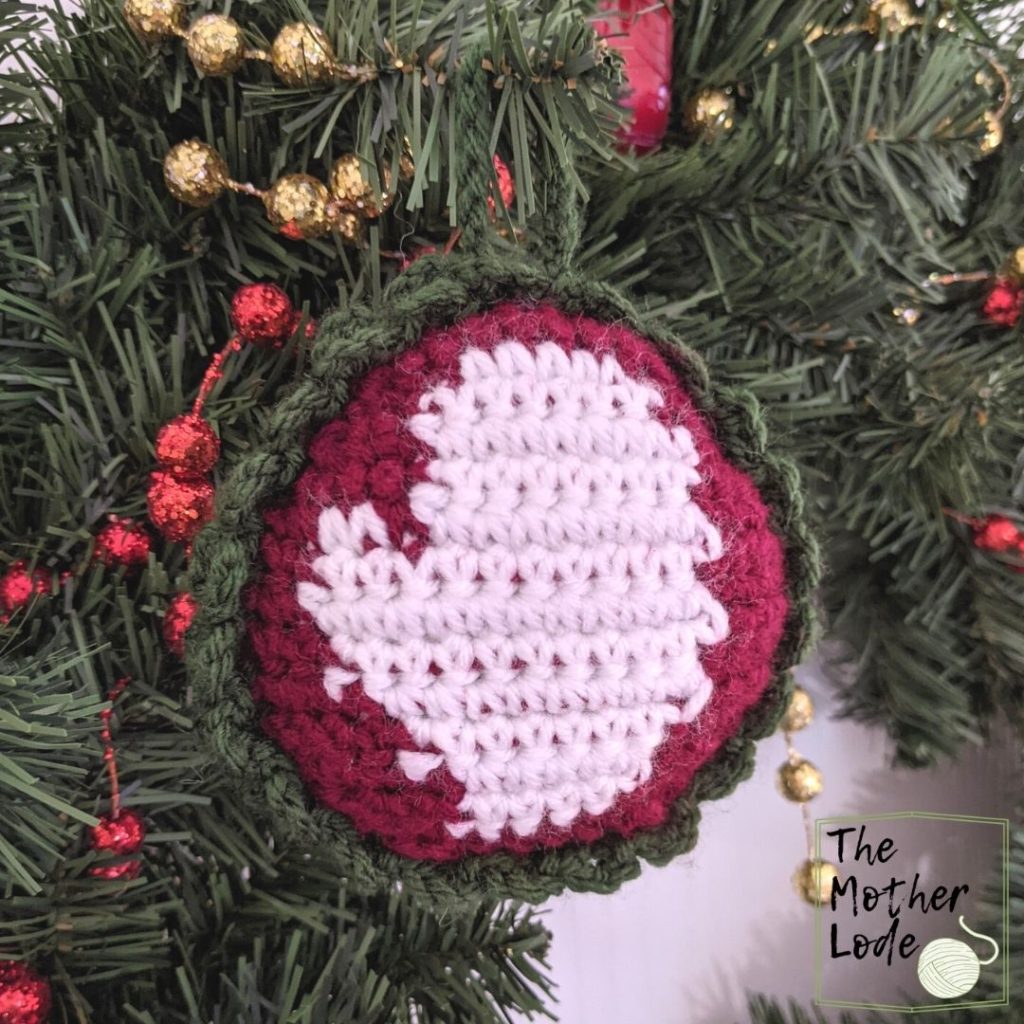
I’ve loved designing these fun little Christmas ornaments. They are pretty versatile! Use funky colors for a cool look, make a whole set of 4 in your favorite holiday colors, or make two double sided! Tapestry crochet can be intimidating, but these only use two colors for that part, and the PDF includes some photos to help you minimize weaving in ends.

WeCrochet generously provided the yarn for this project! I loved working with the reds and greens. The Brava Worsted yarn was awesome for these ornaments, and pretty soft for an acrylic. I would definitely order some the next time I have a design in mind, particularly for the tapestry crochet. You could use any worsted weight yarn for this pattern, or you could size down a few hook sizes and make some smaller versions if you’re feeling extra!

HERE IS THE EXCITING PART, EVERYONE!

This pattern is the most complicated pattern I’ve ever designed. I’m thrilled to share it with you, but it will be pretty tricky to get the WHOLE spiel here on this blog post. (It’s 10 pages!) Below, you’ll find all the written instructions for this pattern. If you have any experience with tapestry crochet, that is likely all you will need to get started now. If you are a newbie, though: wait and GET THE PDF FOR FREEEEEEEE! During the 12 Days of Christmas Blog Hop sponsored by WeCrochet hosted on Crochet Fosbas! On November 3rd is the day for Christmas ornaments! Click below to go to the round up for the free pattern code, and to see what other awesome Christmas Ornament patterns are available free today!

More things to consider: there is a BUNDLE available for this blog hop. You would get all 47 patterns from the blog hop for $12.99! There is such an awesome variety among these patterns, you’ll find several perfect for gifting to your family or friends this year.

I love a discount! Let’s see the bundle!

The PDF is available in all of my pattern shops now! It is live on ravelry, Etsy, and LoveCrafts. Once you have the free download code from the blog hop click below to download for free!

Okay, let’s get to the free version of this pattern!

Supplies

  • 100 yards each worsted yarn in 3 colors (CYC 4) sample is Brava Worsted from We Crochet
  • crochet hook US size G (4.25 mm) or size needed to obtain gauge
  • tapestry sewing needle
  • scissors and measuring tape
  • polyfill stuffing

Stitches

ch = chain

sc = single crochet

st/sts = stitch/stitches

sl st = slip stitch

Inc = 2 sc in same st

Dec = sc 2 tog

COLORS:

Color A: Red

Color B: White

Color C : Green

Gauge

5 sts of sc in 4 rows = 1 in x 1 in

Though gauge is not that important for the pattern, you just want to work fairly tight for a nice even ornament that holds the stuffing.

Notes

  • Finished Dimensions: 4 in x 4 in
  • Stitch counts are marked at the end of each round in parentheses.
  • Pattern is worked in 2 flat pieces, then seamed together.
  • This pattern uses tapestry crochet. Each stitch of the main portion will be a sc, and the colors are listed above. Use whichever colors you like! Chain 1 and turn at the end of each row.
  • The numbers on the charts provided are bottom up and the written instructions are top down. Work whichever way is easier for you. (Charts are in the premium PDF.)

Written Instructions

Tree side

Row 1: B ch 8, sc in second st from hook and each st across. (7 sc)

Row 2: B Inc, B 5, B Inc. (9 sc)

Row 3: B Inc, B 7, B Inc. (11 sc)

Row 4: B Inc, B 4, C 1, B 4, B Inc. (13 sc)

Row 5: B Inc, B 4, C 3, B 4, B Inc. (15 sc)

Row 6: B Inc, B 4, C5, B 4, B Inc. (17 sc)

Row 7: B 6, C 5, B 6. (17 sc)

Row 8: B 5, C7, B5. (17 sc)

Row 9: B 5,C 7, B 5. (17 sc)

Row 10: B 4, C9, B4. (17 sc)

Row 11: B 4, C9, B4. (17 sc)

Row 12: B Dec, B 1, C 11, B 1, B Dec. (15 sc)

Row 13: B Dec, C 11, B Dec. (13 sc)

Row 14: B Dec B 3, C 3, B 3, B Dec. (11 sc)

Row 15: B Dec, B 7, B Dec. (9 sc)

Row 16: B Dec, B 5, B Dec. (7 sc)

Fasten off.

Snowman side

Row 1: C ch 8, sc in second st from hook and each st across. (7 sc)

Row 2: C Inc, C 1, B 3, C 1, C Inc. (9 sc)

Row 3: C Inc, C 1, B 5, C 1, C Inc. (11 sc)

Row 4: C Inc, C 1, B 7, C 1, C Inc. (13 sc)

Row 5: C Inc, C2, B 7, C 2, C Inc. (15 sc)

Row 6: C Inc, C 4, B 5, C 4, C Inc. (17 sc)

Row 7: C 5, B 7, C 5.(17 sc)

Row 8: C 4, B 9, C 4.(17 sc)

Row 9: C 3, B 11, C 3.(17 sc)

Row 10: C 3, B 11, C 3.(17 sc)

Row 11: C 3, B 11, C 3. (17 sc)

Row 12: C Dec, C 2, B 9, C 2, C Dec. (15 sc)

Row 13: C Dec, C 2, B 7, C 2, C Dec. (13 sc)

Row 14: C Dec, C 2, B 5, C 2, C Dec. (11 sc)

Row 15: C Dec, C 7 , C Dec. (9 sc)

Row 16: C Dec, C 5, C Dec. (7 sc)

Fasten off.

Mitten side

Row 1: B ch 8, sc in second st from hook and each st across. (7 sc)

Row 2: B Inc, B 5, B Inc. (9 sc)

Row 3: B Inc, B 1, A5, B 1, B Inc. (11 sc)

Row 4: B Inc, B 1, A 7 , B 1, B Inc. (13 sc)

Row 5: B Inc, B 2, A 8, B 1, B Inc. (15 sc)

Row 6: B Inc, B 2, A 8, B 3, B Inc. (17 sc)

Row 7: B 2, A 2, B 1, A 8, B 4. (17 sc)

Row 8: B 4, A 11, B 2. (17 sc)

Row 9: B 2, A 11, B 4. (17 sc)

Row 10: B 4, A 10, B 3. (17 sc)

Row 11: B 4, A 9, B 4. (17 sc)

Row 12: B Dec, B 3, A 7, B 3, B Dec. (15 sc)

Row 13: B Dec, B 3, A 5, B 3, B Dec. (13 sc)

Row 14: B Dec B 2, A 5, B 2, B Dec. (11 sc)

Row 15: B Dec, B 7, B Dec. (9 sc)

Row 16: B Dec, B 5, B Dec. (7 sc)

Fasten off.

Heart side

Row 1: A ch 8, sc in second st from hook and each st across. (7 sc)

Row 2: A Inc, A 5, A Inc. (9 sc)

Row 3: A Inc, A 7, A Inc. (11 sc)

Row 4: A Inc, B 3, A 3 , B 3, A Inc. (13 sc)

Row 5: A Inc, B 5, A 1, B 5, A Inc. (15 sc)

Row 6: A Inc, B 13, A Inc. (17 sc)

Row 7: A 2, B 13, A 2. (17 sc)

Row 8: A 2, B 13, A 2. (17 sc)

Row 9: A 2, B 13, A 2. (17 sc)

Row 10: A 3, B 11, A 3. (17 sc)

Row 11: A 4, B 9, A 4. (17 sc)

Row 12: A Dec, A3, B 7, A 3, A Dec. (15 sc)

Row 13: A Dec, A 3, B 5, A 3, A Dec. (13 sc)

Row 14: A Dec , A 3, B 3, A 3, A Dec. (11 sc)

Row 15: A Dec, A 3, B 1, A 3, A Dec. (9 sc)

Row 16: A Dec, A 5, A Dec. (7 sc)

Fasten off.

Blank side

Row 1: B ch 8, sc in second st from hook and each st across. (7 sc)

Row 2: B Inc, B 5, B Inc. (9 sc)

Row 3: B Inc, B 7, B Inc. (11 sc)

Row 4: B Inc, B 9, B Inc. (13 sc)

Row 5: B Inc, B 11, B Inc. (15 sc)

Row 6: B Inc, B 13, B Inc. (17 sc)

Row 7: B 17. (17 sc)

Row 8: B 17. (17 sc)

Row 9: B 17. (17 sc)

Row 10: B 17. (17 sc)

Row 11: B 17. (17 sc)

Row 12: B Dec, B 13, B Dec. (15 sc)

Row 13: B Dec, B 11, B Dec. (13 sc)

Row 14: B Dec, B 9, B Dec. (11 sc)

Row 15: B Dec, B 7, B Dec. (9 sc)

Row 16: B Dec, B 5, B Dec. (7 sc)

Fasten off.

Assembly

Weave in all ends, place circles together, right side facing out. Attach border color yarn in middle of top of circle.

Round 1: sc around the circles evenly, seaming them together, stop when you have at least an inch opening, and stuff gently with polyfill to desired fullness. If you stuff too firmly, it will show through the stitches. Finish the seam and sl st to beg sc to join.

Round 2: (ch 3, sl st next st FLO, sl st next st FLO) repeat ( ) around, sl st to join behind the first ch 3 made.

Round 3: Turn your work, (sl st FLO into next st, ch 3, sl st FLO into next st) repeat ( ) around, sl st to beg sl st to join.

HANGER: sl st in between the ruffles, ch 14, sl st in between the ruffles. Fasten off and weave in tail.

I hope you enjoyed this pattern. It was fun to design and I hope it will bring your loved ones joy! Think about joining my subscriber list. I send out coupon codes for newly released sales and other crochet content! Usually I send 1 email each week, so I won’t be invading your inbox.

Love it? Share it!

  • Share on X (Opens in new window) X
  • Share on Facebook (Opens in new window) Facebook
  • Share on Pinterest (Opens in new window) Pinterest
  • Print (Opens in new window) Print

October 22, 2021 by Priscilla

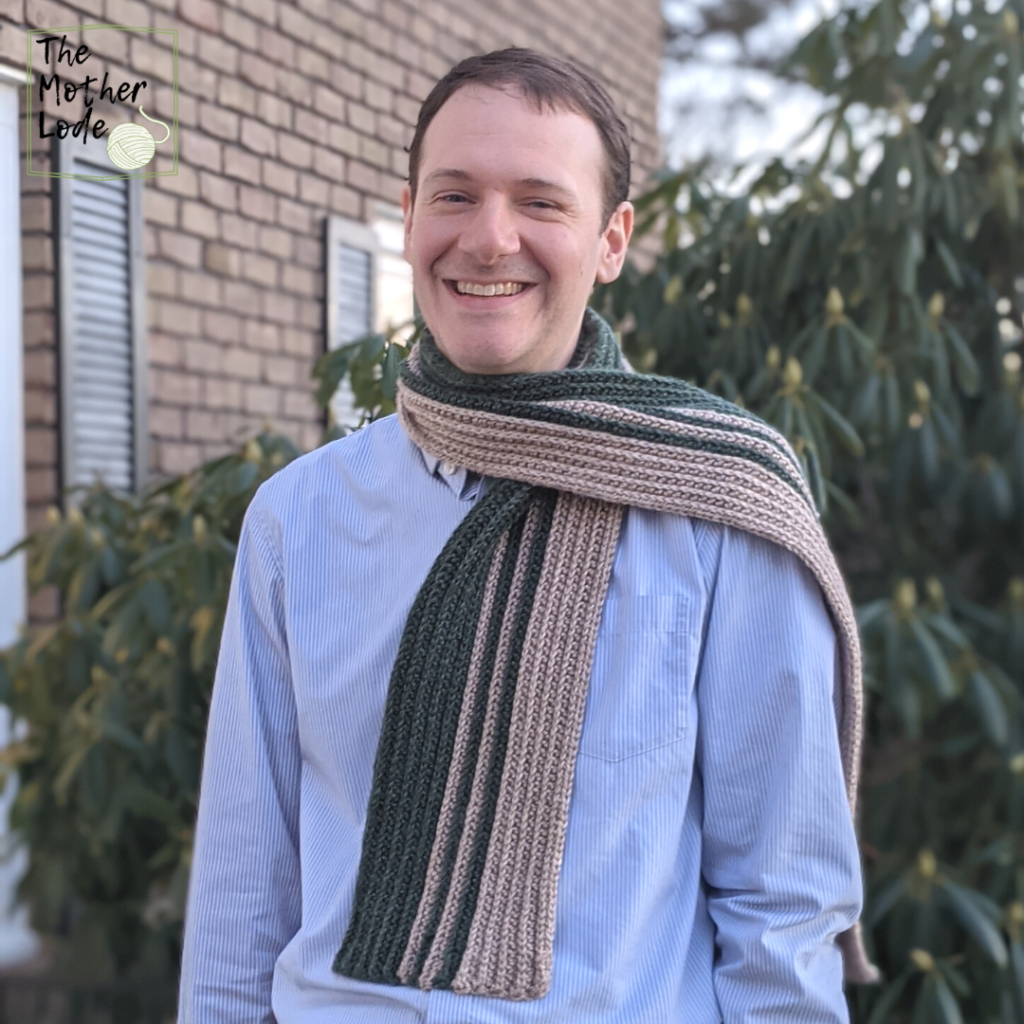
The Double Stripe Scarf

Part of the joy of making is giving that which you’ve made with your own hands to others! Of course, thoughtfully choosing a gift from a store is a beautiful thing. I don’t know anyone who gives exclusively handmade gifts; there simply isn’t time in our modern society, and that’s okay. BUT when you do have time and desire, it is almost magical to gift someone a handmade item. There aren’t too many feelings better than when the recipient loves it and uses it! Maybe holding newborn babies, birthdays for a beloved grandparent, and trips with best friends are better. Maybe.

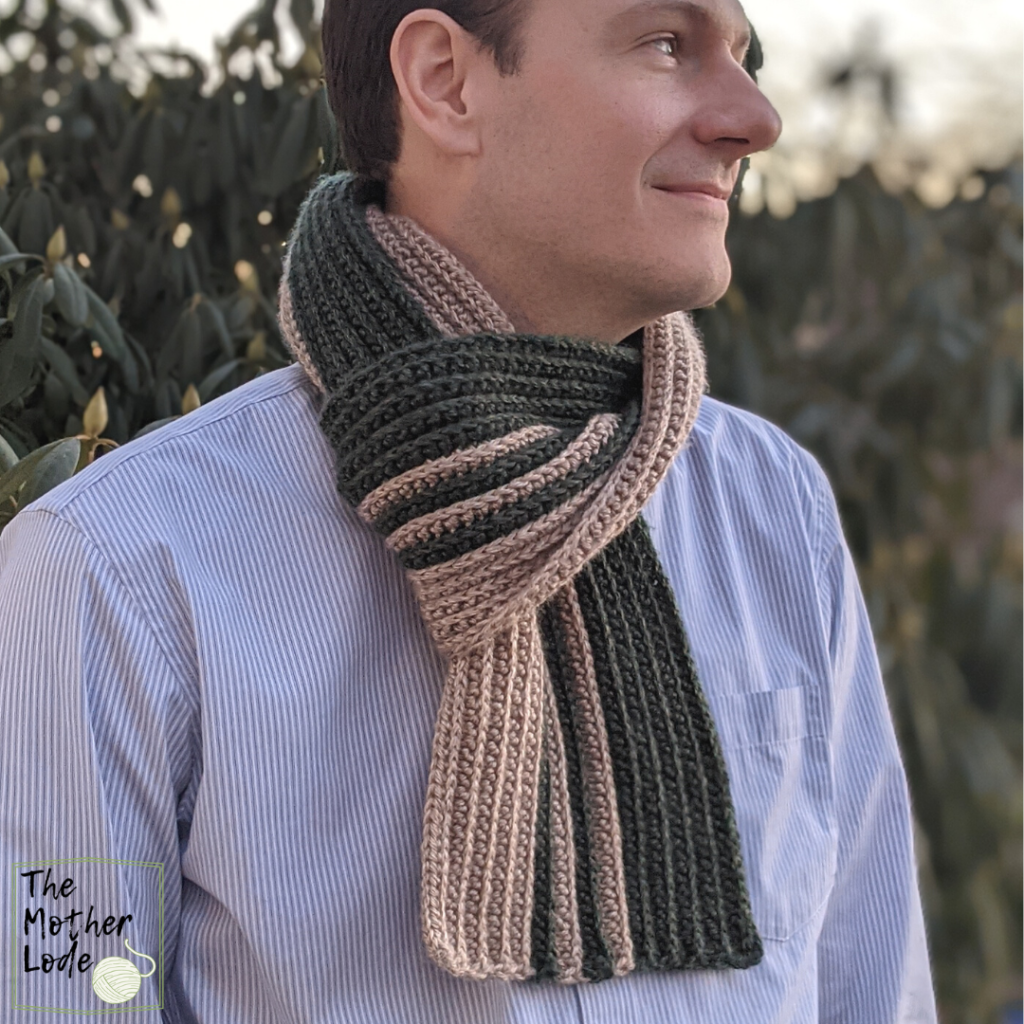
At the start of this year, my husband ASKED me to make him a scarf. I immediately and excitedly took him to my craft room (yarn bomb hazard area.) We chose two colors from my stash and I thought deeply about how to design something he would wear that wasn’t boring. My husband’s taste in clothing is complicated. If he could, he would wear Virginia Tech/ Philadelphia Eagles sportswear 24/7. When that’s not appropriate, he likes clothing that isn’t too loud but still uses color. Every now and then he’ll like a wacky print just to keep me on my toes. So I took a classic ribbed look scarf and added the stripes in a unique way to create this scarf just for him, and he wore it every day for the rest of winter!

I am calling this primarily a men’s scarf because that’s who I designed it for, but it could really be made to please anyone! Add a few stitches at the end of the foundation row and make it a bit longer, use two super vibrant colors with wild fringe. Make the entire scarf in one color, gather the two short ends, and attach pom poms for a fun young feel. Anything goes with this EASY pattern. Several of my testers for this pattern created projects on ravelry if you want to check their ideas! I can’t wait to see what you create!

The free version of this beginner pattern is right here for you! There is also a 6 page PDF available in all of my pattern shops if you would like to print it out for easy couch crochet time: ravelry, LoveCrafts, and NEW Etsy! Then you can mark your rows easily and use the 3 photo tutorial pages.

Supplies

  • 2 colors of worsted weight yarn, 275-300 yds each (sample uses Lion Brand Heartland in colors Grand Canyon and King’s Canyon
  • crochet hook US size H (5mm) or size needed to obtain gauge
  • tapestry sewing needle
  • scissors and measuring tape

Stitches

ch = chain

sl st = slipstitch

st/sts = stitch/stitches

hdc = half double crochet

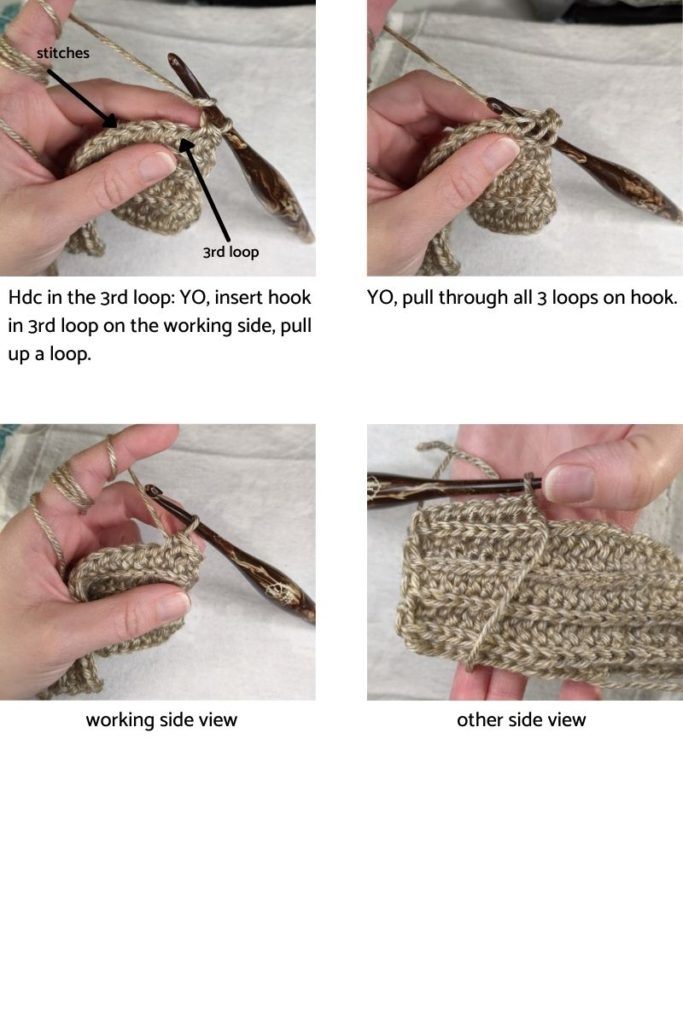
hdc in 3rd loop (see notes)

fhdc = foundation half double crochet

sc = single crochet

hdc sl st = half double slipstitch

Notes

  • Finished Dimensions: 65 in by 9 in
  • Stitch counts are marked at the end of each row in parentheses.
  • Pattern is worked in rows.
  • The turning chain does not count as a stitch.
  • Color changes are made at the beginning of rows as indicated by the letters A or B.
  • Each stitch in this pattern (except the foundation row) is worked in the 3rd loop, meaning you will not work in the top of the stitch as usual. Instead you will work in a spot unique to the half double crochet. See the photo tutorial below.
  • Don’t forget! You can purchase the easy to use PDF from my pattern shops! It’s available on ravelry, LoveCrafts, and

    How is the pattern going?

    Join my subscriber list for pattern updates, discounts, and other crafty fun!


    Loading…

    Thank you!

    You have successfully joined our subscriber list.

    "." “>Etsy

    !

Gauge

4x4in = 19 st 13 rows hdc in the 3rd loop

Instructions

Row 1: (A) Fhdc 230. (The PDF includes a full tutorial for this stitch.)

Row 2: (A) Ch 1, turn, hdc in the 3rd loop of the first st, hdc in the 3rd loop each st. (230 hdc)

Row 3-10 (A) Ch 1, turn, hdc in the 3rd loop of the first st, hdc in the 3rd loop each st across until last st, hdc into turning ch. (230 hdc)

Row 11-12 (B) Ch 1, turn, hdc in the 3rd loop of the first st, hdc in the 3rd loop each st across until last st, hdc into turning ch. (230 hdc)

Row 13-14 (A) Ch 1, turn, hdc in the 3rd loop of the first st, hdc in the 3rd loop each st across until last st, hdc into turning ch. (230 hdc)

How is the pattern going?

Join my subscriber list for pattern updates, discounts, and other crafty fun!


Loading…

Thank you!

You have successfully joined our subscriber list.


.

Row 15-16 (B) Ch 1, turn, hdc in the 3rd loop of the first st, hdc in the 3rd loop each st across until last st, hdc into turning ch. (230 hdc)

Row 17-18 (A) Ch 1, turn, hdc in the 3rd loop of the first st, hdc in the 3rd loop each st across until last st, hdc into turning ch. (230 hdc)

Row 19-27 (B) Ch 1, turn, hdc in the 3rd loop of the first st, hdc in the 3rd loop each st across until last st, hdc into turning ch. (230 hdc)

Row 28 (B) Ch 1 turn, hdc sl st in the 3rd loop of the first st, hdc sl st each st across. (230 hdc sl st) Fasten off.

I hope you loved making this scarf! I can see this as a staple I-want-to-make-something-for-someone-but-I-don’t-know-their-style because it is so versatile, and works up pretty fast, too. Tag me on Instagram @motherlodecrafts ! I would love to see your work!

Love it? Share it!

  • Share on X (Opens in new window) X
  • Share on Facebook (Opens in new window) Facebook
  • Share on Pinterest (Opens in new window) Pinterest
  • Print (Opens in new window) Print

September 13, 2021 by Priscilla

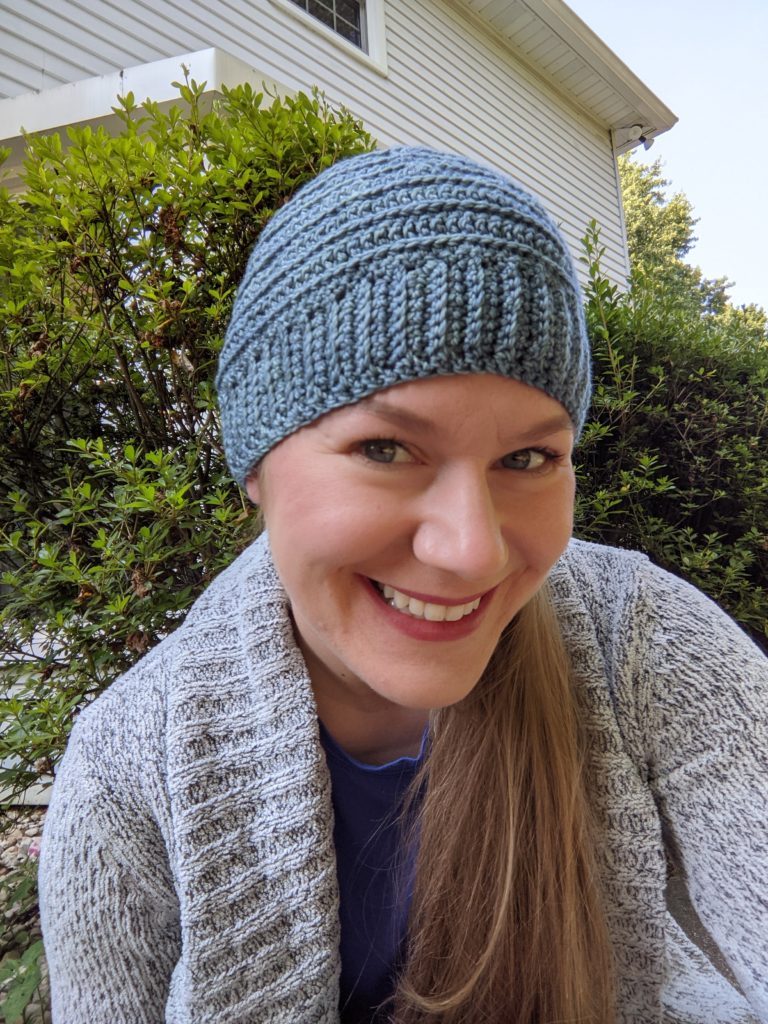
Simple Ridges Beanie

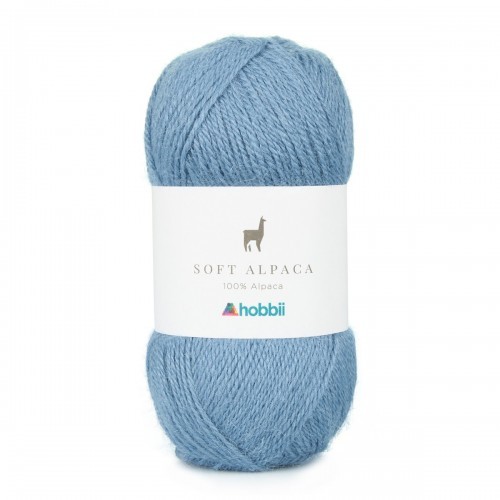
I truly love making cozy hats and ear warmers! Most of my first projects were actually hats, and I’ve been hooked ever since! (wink wink, hooked, get it?) Budget friendly yarn at Michael’s or Joann Fabrics make up most of my yarn stash, but I also sometimes indulge in what I like to call fancy yarn. The good stuff like: extra warm wool that makes your stitches look amazing, super soft alpaca for cuddling, and mohair for a beautiful yarn halo. However, when I do buy “fancy yarn” it can be daunting to choose a project, because I want to really love and cherish the item (or gift it to someone amazing who will love it.) For this project, I used some beautiful hand dyed yarn, but ALAS the dyer has taken a different route with her business and is focusing on wholesale, right now. SO instead I am recommending some fancy yarn from Hobbii! You can find so many amazing options from Hobbii. I bet their Soft Alpaca yarn would be a good fit for this project.

SO.

I’ve started to use some of the fancy yarn in designs! I know I’ll love it because it’s a design from my own mind, and it will work with the yarn since it’s designed with it in the first place. If you’ve been hunting down a crochet project for your first ever fancy yarn, this is it! This beanie was designed for hand dyed sock yarn. I’ve noticed in the world of hand dyed yarn, most dyers stock more of the fingering weight yarns, which aren’t used in crochet design quite as much as knitting. Consequently, there aren’t as many crochet designs available for this type of yarn. Well this is my 3rd crochet design using it and I’m not stopping!

Grab your beautiful yarn, and make this beanie! You’ll love the simple texture and the snug fit. As always, I’ve got the free version here for you! If you are struggling with the instructions below, think about snagging the premium, low cost version on ravelry or lovecrafts.

Hobbii - Soft Alpaca - Cold Water (35)

Supplies

  • 350-380 yards fingering weight yarn (CYC 1) yarn HELD DOUBLE, sample is Rita Mae Yarns Sweet Pea Sock in color Blue Suede Shoes ALSO suggest Hobbii Soft Alpaca as above
  • crochet hook US size G (4.25 mm) or size needed to obtain gauge. I typically use aluminum hooks like these from Annie’s

Aluminum Crochet Hook Set, Sizes D-K

  • tapestry sewing needle
  • scissors and measuring tape
  • stitch marker

Stitches (US Terms)

ch = chain

sc = single crochet

sl st = slipstitch

st/sts = stitch/stitches

BLO = back loop only

hdc = half double crochet

esc = extended single crochet

WS/RS = wrong side/right side

edc = extended double crochet: yo, insert hook, pull up a loop, yo, pull through one loop, yo, pull through 2 loops, yo, pull through last 2 loops.

in the 3rd loop = the hdc st creates a “3rd loop” on the WS this is where you will insert the hook on the edc sts (photo pg 9)

hdc2tog = half double crochet 2 sts together: yo, insert hook, pull up a loop, yo in next st, pull up a loop, yo, pull through all loops on hook

Notes

  • Finished Dimensions are: child: 17-18 in around, adult sm/med: 19-20 in around, adult lg/xl: 21-22 in around for a snug cozy fit.
  • Stitch counts are marked at the end of each round in parentheses.
  • The brim of the pattern is worked in rows and the rest of the pattern is worked in turned rounds.

Gauge

alternating rows of hdc and edc in the 3rd loop of the hdc

Suggest ch 25, hdc 1st st from hook and each st across. Next row edc in the 3rd loop of the hdc. Continue alternating rows and check gauge which should be 21 sts by 11 rows = 4 inches

Written Instructions

Child Size

Brim, with yarn held double:

Row 1: ch 9, turn, sc in the 2nd ch from hook and each st across, ch 1, turn. (8 sc)

Row 2: sc each st across BLO, ch 1, turn. (8 sc)

Row 3: esc each st across BLO. ch 1, turn. (8 esc)

Repeat rows 2-3 until brim reaches 17-18 inches.

Fold in half and sl st edges together using the BLO of the last row made.

Ch 1, sc 75 evenly around the brim. Fasten off. Reattach yarn on other side of brim on the WS (seam side).

Body, with yarn held double:

Round 1 : sc 95 evenly around the brim, sl st to join the round, ch 1, turn. (95 sc)

Round 2: hdc each st around, sl st to join round, ch 2, turn. (95 hdc)

Round 3: edc each st around in the 3rd loop, sl st to join round, ch 1, turn. (95 edc)

Round 4: repeat row 2 (95 hdc)

Round 5: repeat row 3 (95 edc)

Round 6: repeat row 2 (95 hdc)

Round 7: repeat row 3 (95 edc)

Round 8: hdc in each of 1st 4 sts, hdc 2 tog, *hdc next 4 sts, hdc 2tog repeat from * to end of round, sl st to join, ch 2, turn. (64 hdc, 16 hdc2tog)

Feeling stuck? The low cost PDF is available on ravelry or lovecrafts! It has 4 pages of photos to help you out!

Round 9: repeat row 3 (80 edc)

Round 10: repeat row 8 (54 hdc, 13 hdc2tog)

Round 11: repeat row 3 (67 edc)

Round 12: hdc 1st 3 sts, *hdc 2 tog. hdc next 3 sts repeat from * to end of round, sl st to join, ch 2, turn. (41 hdc, 13 hdc2tog)

Round 13: repeat row 3 (54 edc)

Round 14: repeat row 12 (34 hdc, 10 hdc2tog)

Round 15: repeat row 12 (28 hdc, 8 hdc2tog)

Round 16: hdc 1st 2 sts, *hdc2tog, hdc next 2 sts repeat from * to end of round, sl st to join, ch 1, turn. (18 hdc, 9 hdc2tog)

Round 17: repeat round 16 (15 hdc, 6 hdc2tog)

Round 18: repeat round 16 (11 hdc, 5 hdc2tog)

Round 19: hdc2tog around. Fasten off. (8 hdc2tog)

Teen/Adult Small

Brim, with yarn held double:

Row 1: ch 9, turn, sc in the 2nd ch from hook and in each st across, ch 1, turn. (8 sc)

Row 2: sc each st across BLO, ch 1, turn. (8 sc)

Row 3: esc each st across BLO. ch 1, turn. (8 esc)

Repeat rows 2-3 until brim reaches 19-20 inches.

Fold in half and sl st edges together using the BLO of the last row made.

Ch 1, sc 85 evenly around the brim. Fasten off. Reattach yarn on other side of brim on the WS (seam side).

Body, with yarn held double:

Round 1 : sc 105 evenly around the brim, sl st to join the round, ch 1, turn. (105 sc)

Round 2: hdc each st around, sl st to join round, ch 2, turn. (105 hdc)

Round 3: edc each st around in the 3rd loop, sl st to join round, ch 1, turn. (105 edc)

Round 4: repeat row 2 (105 hdc)

Round 5: repeat row 3 (105 edc)

Round 6: repeat row 2 (105 hdc)

Round 7: repeat row 3 (105 edc)

Round 8: hdc in each of 1st 4 sts, *hdc 2 tog, hdc next 4 sts repeat from * to end of round, sl st to join, ch 2, turn. (71 hdc, 17 hdc2tog)

Round 9: repeat row 3 (88 edc)

Round 10: repeat row 8 (60 hdc, 14 hdc2tog)

Round 11: repeat row 3 (74 edc)

Round 12: hdc 1st 3 sts, *hdc 2 tog. hdc next 3 sts repeat from * to end of round, sl st to join, ch 2, turn. (45 hdc, 14 hdc2tog)

Round 13: repeat row 3 (59 edc)

Round 14: repeat row 12 (36 hdc, 12 hdc2tog)

Round 15: repeat row 12 30hdc, 9 hdc2tog)

Round 16: repeat row 12 (25 hdc, 7 hdc2tog)

Round 17: hdc 1st 2 sts, *hdc2tog, hdc next 2 sts repeat from * to end of round, sl st to join, ch 1, turn. (16 hdc, 8 hdc2tog)

Round 18: repeat round 17 (12 hdc, 6 hdc2tog)

Round 19: repeat round 17 (10 hdc, 4 hdc2tog)

Round 20: hdc2tog around. Fasten off. (7 hdc2tog)

Adult Large

Brim, with yarn held double:

Row 1: ch 9, turn, sc in the 2nd ch from hook and in each st across, ch 1, turn. (8 sc)

Row 2: sc each st across BLO, ch 1, turn. (8 sc)

Row 3: esc each st across BLO. ch 1, turn. (8 esc)

Repeat rows 2-3 until brim reaches 21-22 inches.

Fold in half and sl st edges together using the BLO of the last row made.

Ch 1, sc 95 evenly around the brim. Fasten off. Reattach yarn on other side of brim on the WS (seam side).

Body, with yarn held double:

Round 1 : sc 115 evenly around the brim, sl st to join the round, ch 1, turn. (115 sc)

Round 2: hdc each st around, sl st to join round, ch 2, turn. (115 hdc)

Round 3: edc each st around in the 3rd loop, sl st to join round, ch 1, turn. (115 edc)

Round 4: repeat round 2 (115 hdc)

Round 5: repeat round 3(115 edc)

Round 6: repeat round 2 (115 hdc)

Round 7: repeat round 3 (115 edc)

Round 8: repeat round 2 (115 hdc)

Round 9: repeat round 3 (115 edc)

Round 10: hdc in each of 1st 4 sts, *hdc 2 tog, hdc next 4 sts repeat from * to end of round, sl st to join, ch 2, turn. (77 hdc, 19 hdc2tog)

Round 11: repeat row 3 (86 edc)

Round 12: repeat row 10 (54 hdc, 16 hdc2tog)

Round 13: repeat row 3 (70 edc)

Round 14: hdc 1st 3 sts, *hdc 2 tog. hdc next 3 sts repeat from * to end of round, sl st to join, ch 2, turn. (48 hdc, 16 hdc2tog)

Round 15: repeat row 3 (54 edc)

Round 16: repeat row 14 (40 hdc, 12 hdc2tog)

Round 17: repeat row 14 (32 hdc, 10 hdc2tog)

Round 18: repeat row 14 (26 hdc, 8 hdc2tog)

Round 19: hdc 1st 2 sts, *hdc2tog, hdc next 2 sts repeat from * to end of round, sl st to join, ch 1, turn. (18 hdc, 8 hdc2tog)

Round 20: repeat round 19 (14 hdc, 6 hdc2tog)

Round 21: repeat round 19 (10 hdc, 5 hdc2tog)

Round 22: hdc in 1st st, then hdc2tog remaining sts around. Fasten off. (7hdc2tog)

Don’t forget to head over to ravelry or lovecrafts if you need more help!

Love it? Share it!

  • Share on X (Opens in new window) X
  • Share on Facebook (Opens in new window) Facebook
  • Share on Pinterest (Opens in new window) Pinterest
  • Print (Opens in new window) Print

August 30, 2021 by Priscilla

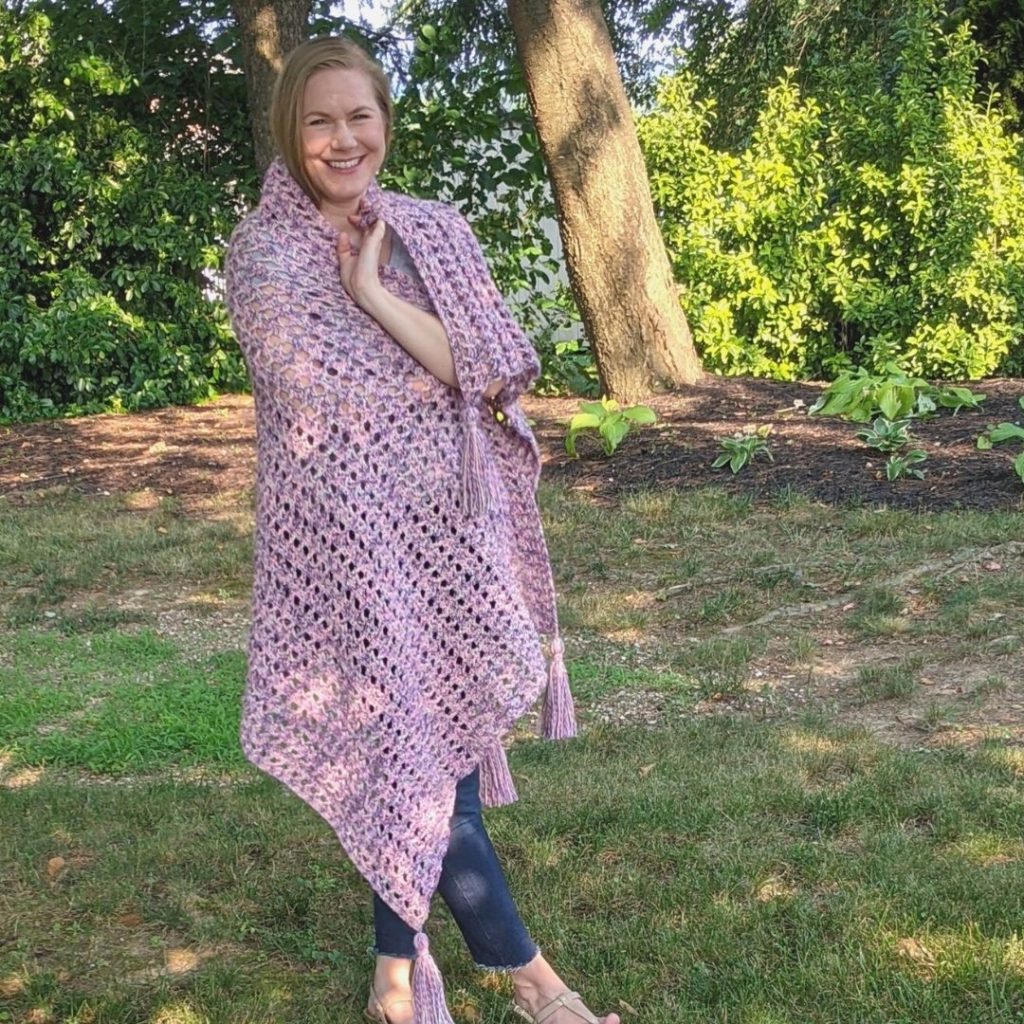
Summer Blanket Wrap

The scenario: it’s vacation! You’re loving hot beach days and all sorts of fun. You sit down in the evening with your crochet project, spending time with your friends or family, and BAM! You’re cold.

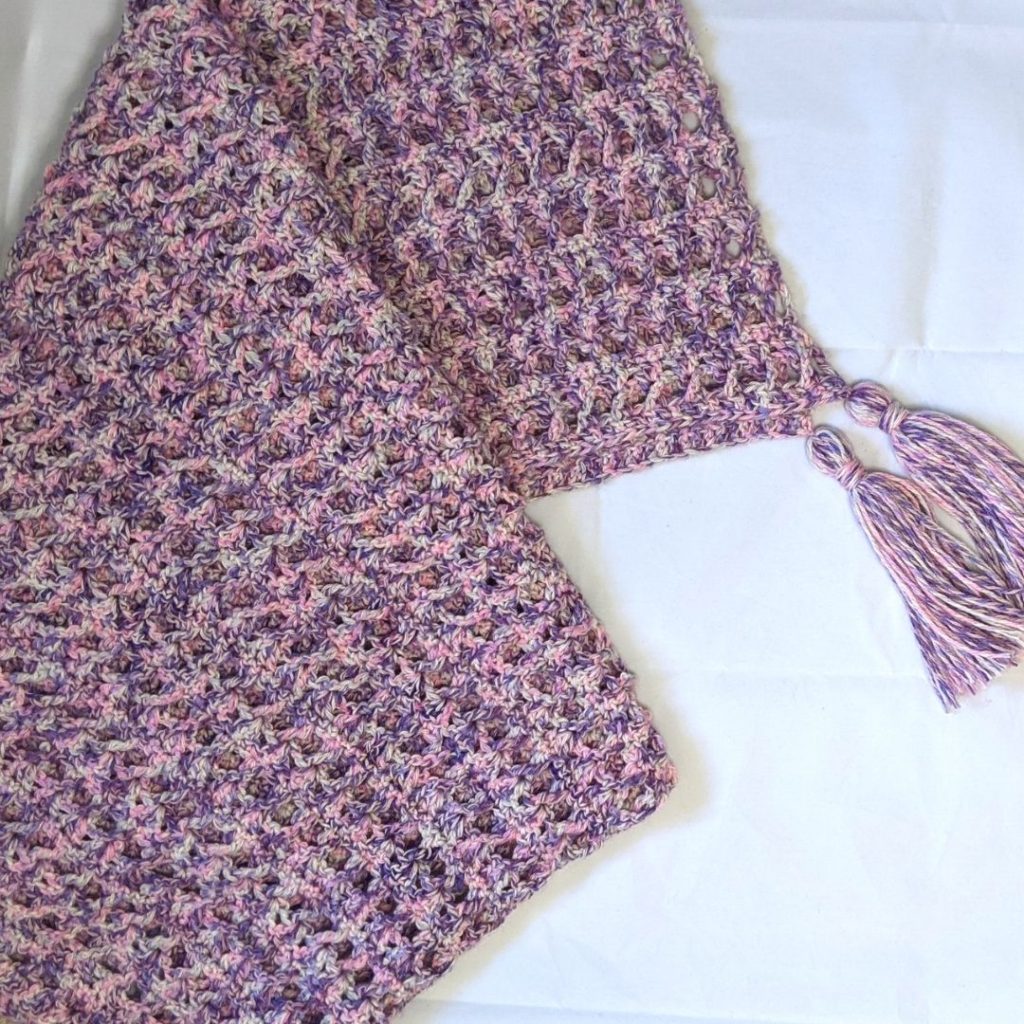
I swear, no matter if it’s a beach house or even a little hotel room, I always get chilly in the summer! So: if you still get a little cool in the air conditioning like me, this blanket wrap is for you! The summer is winding down, but there will still be plenty of warm days with cooler evenings. This wrap is perfect for snuggling without getting too warm. I loved designing the stitch pattern on it, and my testers liked the easy repeat of it!

This is definitely a pattern beginners can tackle, because it’s worked flat, the repeat is easy to remember and the open stitch work allows for tension issues to not be as noticeable. If you are trying out a larger project like this for the first time, head over to Ravelry or Lovecrafts for the PDF! It has 3 pages of photo help so you can make this project without frogging and frogging and frogging.

On to the reason you are here: the pattern!!!!!

Supplies

  • 1600 yards DK yarn (CYC 3) sample is Lion Brand Yarn Comfy Cotton Blend in colorway Soothing Lavender
  • crochet hook US size J (6 mm) or size needed to obtain gauge
  • tapestry sewing needle
  • scissors and measuring tape

Stitches

ch = chain

sc = single crochet

st/sts = stitch/stitches

tr = treble crochet

dc = double crochet

fdc = foundation double crochet

Notes

  • Photo tutorial follows the written instructions. Get the PDF with the photos here.
  • Finished Dimensions: 35 in x 60 in
  • Stitch counts are marked at the end of each round in parentheses.
  • Pattern is worked flat.
  • Turning chains count as stitches.

Gauge

13 sts of dc in 7 rows = 4in x 4in

Instructions

Row 1: Fdc 215, ch 4, turn. (215 fdc)

Row 2: Sk 2 sts, tr in next st, tr behind in previous skipped st, ch 1, (sk next 2 sts, tr next st, tr behind in previous skipped st, ch 1) repeat ( ) until two sts remain, sk st, tr in final st of row, ch 2, turn. (144 tr)

Row 3: 3 dc in each space in middle of each x of the treble stitches in previous row, dc in last st, ch 1, turn. (215 dc)

Row 4: Sc each st across, ch 4, turn. (215 sc)

Row 5-73 : Repeat rows 2-4.

Row 74: Repeat row 2.

Row 75: Dc in each st across. Fasten off. (215 dc)

If desired, create 4, 6 inch tassels (tutorial included in PDF pattern here) and attach at corners. You could choose to add fringe to the short edges instead.

Love it? Share it!

  • Share on X (Opens in new window) X
  • Share on Facebook (Opens in new window) Facebook
  • Share on Pinterest (Opens in new window) Pinterest
  • Print (Opens in new window) Print

July 2, 2021 by Priscilla

Margarita Earrings

I think I learned to like margaritas at El Rodeo in Blacksburg, VA. My husband was in graduate school at Virginia Tech and El Rod’s had delicious food and frosty margaritas! I’m not a huge drinker: beer is gross, wine gives me a headache, and hard seltzer is just seltzer that is even worse than regular seltzer. BUT I can down a margarita like a college kid on spring break! A few months ago, my forever friends group text was giggling over one of those funny memes that said “What actually runs in the veins of the 16 personality types” and mine was margarita mix.

Anyway, I had the idea that some margarita earrings would be fun! I had to search FAR and WIDE for the color I wanted of crochet thread, though. My husband found it on Etsy. So if you are looking for that Wasabi color in Aunt Lydia’s Crochet thread and can’t find it in store, check there! I also think the WeCrochet’s Curio thread in color Jalapeño would work. You could also opt for a strawberry marg! Some of my testers made those and they were cute!

I would call this pattern intermediate since crochet thread takes some experience, but it is actually pretty simple if you are familiar with crocheting in the round. You will basically be crocheting a tiny circle for the bottom of the glass and then a small cup shape for the top, then attaching the beads and sewing the parts together. I put 2 full pages of photos in the premium version of the pattern, which you can snag for a low cost on Ravelry or LoveCrafts!

Okay, let’s get to it!

Supplies

  • Aunt Lydia’s Crochet Thread, size 10 in color Wasabi, approx 20 yds
  • Size 1.50 mm crochet hook
  • Tapestry needle and scissors
  • Earring findings: 2 fishhook style earrings
  • 6 size 6/0 beads, preferably green to match your glass
  • Fabric stiffener, like Aleene’s Fabric Stiffening Spray

Stitches (US Terms)

  • ch = chain
  • sc = single crochet
  • sl st = slip stitch
  • st/sts = stitch/stitches
  • MC = magic circle
  • dc = double crochet

Notes

  • Photo tutorial available in low cost PDF: Ravelry or LoveCrafts
  • You should block these in order to make the stems of the “glass” straight. I use Aleene’s Fabric Stiffening Spray and t-pins on a blocking mat.
  • Pattern is worked in two pieces and sewn together.
  • Pattern is worked in joined rounds.

Gauge

Gauge is not really necessary for this pattern. Personally, I find the smallest hook I can handle for the thread size (for earrings) produces the best, tightly stitched look. If you desire to gauge swatch: use double crochet in 5 rows with 11 sts to equal a 1 inch square.

Instructions

To make the bottom of the glass:

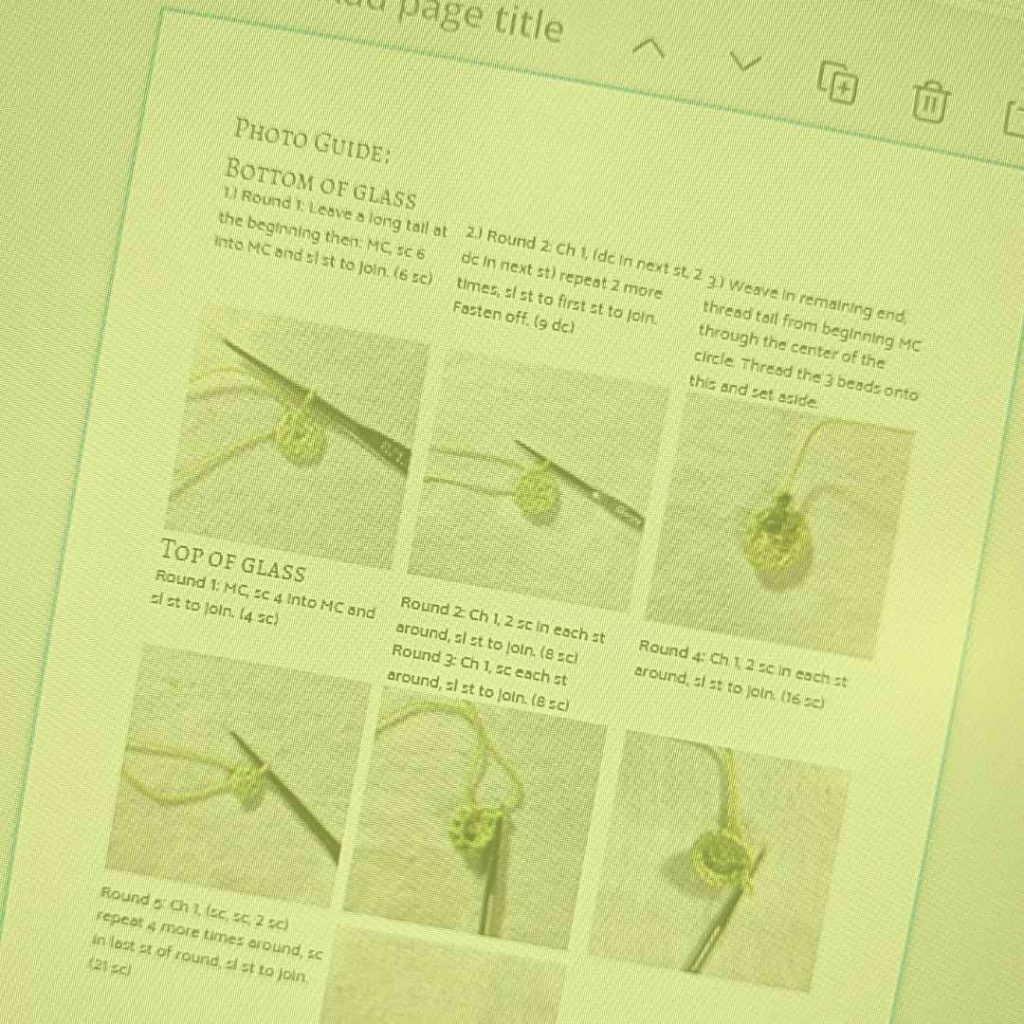
Round 1: Leave a long tail at the beginning then: MC, sc 6 into MC and sl st to join. (6 sc)

Round 2: Ch 1, (dc in next st, 2 dc in next st) repeat 2 more times, sl st to first st to join. Fasten off. (9 dc)

Weave in remaining end, thread tail from beginning MC through the center of the circle. Thread the 3 beads onto this and set aside.

To make the top of the glass:

Round 1: MC, sc 4 into MC and sl st to join. (4 sc)

Round 2: Ch 1, 2 sc in each st around, sl st to join. (8 sc)

Round 3: Ch 1, sc each st around, sl st to join. (8 sc)

Round 4: Ch 1, 2 sc in each st around, sl st to join. (16 sc)

Round 5: Ch 1, (sc, sc, 2 sc) repeat 4 more times around, sc in last st of round, sl st to join. (21 sc)

Round 6-7: Ch 1, sc in each st around. (21 sc) Fasten off after round 7. Weave in end.

If they aren’t turning out as you like, remember that the premium version on Ravelry and LoveCrafts has photos with step by step instructions! Or feel free to send me an email motherlodepris@gmail.com and I’ll try my best to help you out!

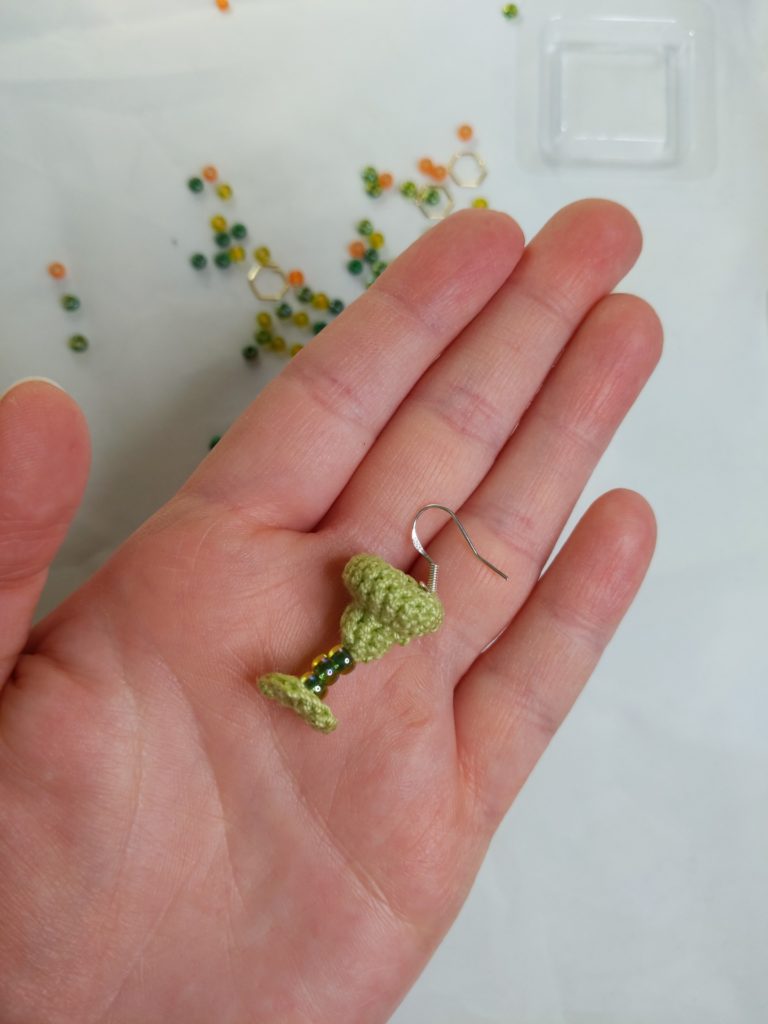
Use tail with beads on it to sew to the bottom of the upper glass part. Pull firmly to set it in place as straight as possible. Pin to blocking mat, and spray generously with fabric stiffening spray to stiffen your earring.

When the earrings are dry, finish by attaching first a jump ring, then a fish hook style earring finding.

I would love to see your hard work!!!! Share with me on Instagram! You can use the hashtags #margaritaearrings or #motherlodecrafts

Here are some of my other crochet patterns:

  • Cozy Fall Baby Beanie Pattern
  • Spider Basket Crochet Pattern
  • Lacy Edged Crochet Shawl Pattern
  • Crochet Gingerbread Earring Pattern
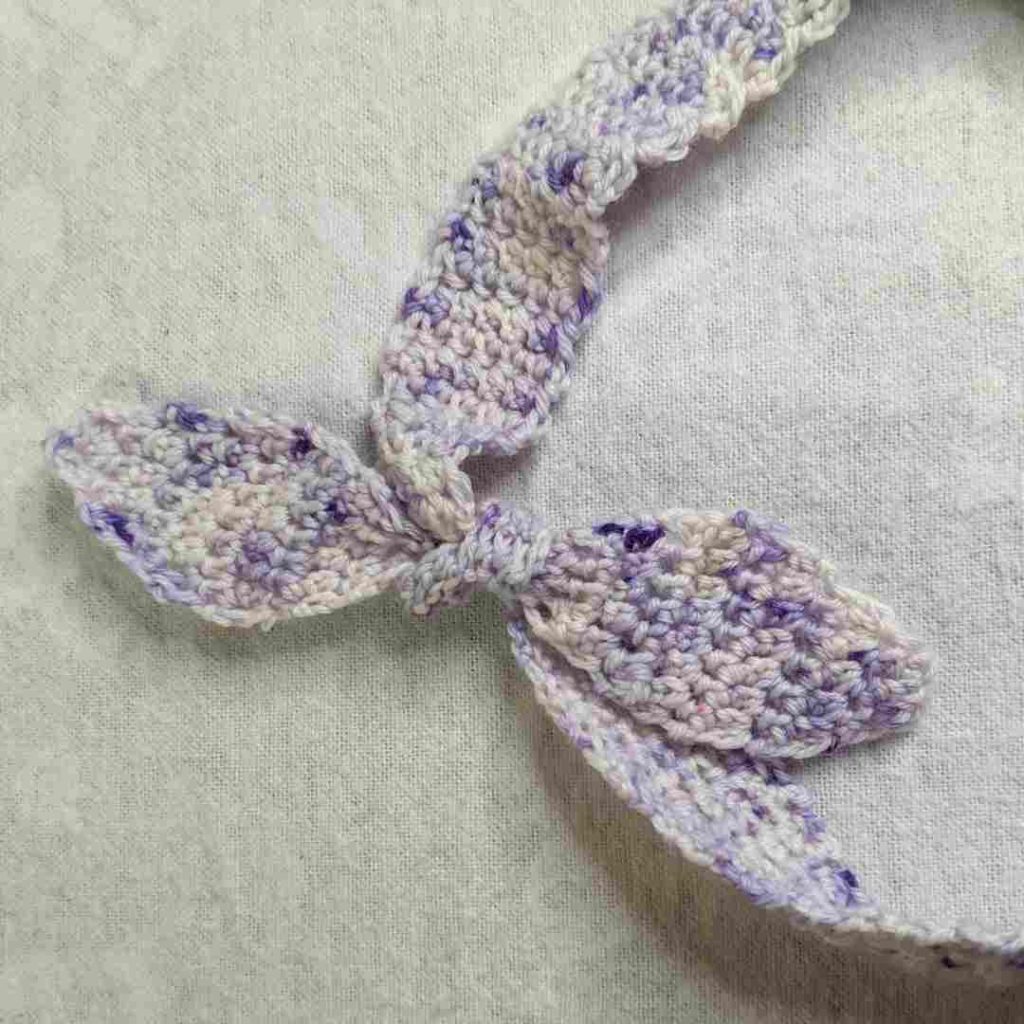
  • Classic Hairbow Crochet Pattern

Love it? Share it!

  • Share on X (Opens in new window) X
  • Share on Facebook (Opens in new window) Facebook
  • Share on Pinterest (Opens in new window) Pinterest
  • Print (Opens in new window) Print

May 28, 2021 by Priscilla

Simple Summer Headband

Hi! I have a fun and simple headband pattern for you today! I designed this for two purposes/reasons. First of all, I love hand-dyed yarn because, well, there is no denying its beauty and quality! It is costly because of this though, so I want to use up every scrap. I have some yarn leftover from my advent calendar from the fantastic Rita Mae Yarns and wanted to use it for another hair accessory for summer. Secondly, I have been enjoying making yarn music videos on my Instagram account, and I wanted to do Meghan Trainor’s All About That Bass which I turned into All About Crochet. (I crack myself up, clearly.) Anyway, she wears headbands all throughout that music video so this was born of that!

I can’t say what my next design will be because I’m working on a few things and I’m not sure what will be ready for testers yet, but I have earrings planned and hopefully some kitchen items I’m working on the design for with one of my new favorite yarns: Caron Cotton Ripple Cakes. I just finished a tank top with it and it was really fun to work with. My mom used it for some beautiful trivets for wedding shower gifts a few weeks ago, and I think the texture will be just right for a handy kitchen wipe. If only I could crochet as fast as I think!

Alright enough rambling about crochet and on to the pattern! This pattern is a nice beginner pattern, but you still might want the PDF because there are quite a few rows and it will be easier to check off as you work. It’s only $2, less than a fancy coffee! Available on Ravelry and LoveCrafts.

Summer Vibes Blog Hop!

If you missed snagging the free PDF as part of the Summer Vibes Blog Hop, you can still get it at a HUGE discount by purchasing the Blog Hop Bundle! This Bundle has ALL the patterns from the blog hop: 39 patterns! For less than $13! Here is the link to purchase! Go to the pattern round up below if you want to see all the patterns. Then “hop” back here and use the link above to get it for yourself! Think of the pattern stockpile you’ll have!

You’ll need 100 yards of that fabulous hand-dyed yarn from your stash, or any fingering weight yarn you want to use up! I’m working on my third headband now (I want to film a cool time-lapse video for Instagram.) So don’t get mad if you end up making more than one! You’ll also need a 3.25 mm crochet hook, or whatever helps you meet gauge.

Additional Materials

  • 100 yds/10g Sock/fingering/baby/sport yarn super fine CYC weight 1 OR 2 to meet gauge (Samples are Rita Mae Yarns in Berries N’ Cream and Universal Yarn Finn in Rose Quartz)
  • crochet hook US size D (3.25mm) or size needed to obtain gauge
  • tapestry sewing needle
  • scissors and measuring tape

Stitches (US Terms)

  • ch = chain
  • esc = extended single crochet: insert hook into st, yo, draw through the st, yo and pull through one loop on hook, yo, pull through both loops on hook.
  • sl st = slipstitch
  • BLO = back loop only
  • st/sts = stitch/stitches
  • dec = 1 esc in 2 sts: insert hook into st, yo, draw through the st, yo and pull through one loop, insert hook in next st, yo draw through st, yo and pull through one loop on hook, yo pull through all 3 loops on hook.
  • sk = skip

Notes

  • Finished Dimensions: Approx 26 in X 1 in
  • I suggest blocking this headband to get it very straight and make sure the ends don’t curl.
  • Photo guide pages 5 and 6 will help you check your work.
  • Stitch counts are marked with parentheses ( ) at the end of each row. Repeating rows also have a number of rows marked at the end with { }

Gauge Swatch

Chain 10, esc in 2nd ch from hook and each remaining st. (9 esc) Ch 1 and turn. *Esc each st across. Repeat from * for 6 more rows. Square should be 1 inch by 1 inch. (9 esc sts in 8 rows)

Instructions

Ch 3.

Row 1: 2 esc in 2nd chain from hook, 2 esc in next st. Ch 1, turn. (4 esc)

Row 2: Esc in each st across. Ch 1, turn. (4 esc)

Row 3: 2 esc in first st, esc until last st, 2 esc in last st. Ch 1, turn. (6 esc)

Row 4: Esc in each st across. Ch 1, turn. (6 esc)

Row 5: 2 esc in first st, esc until last st, 2 esc in last st. Ch 1, turn. (8 esc)

Row 6-7: Esc in each st across. Ch 1, turn. (8 esc)

Row 8: Dec, esc in each st until last two, dec in last two sts. Ch 1, turn. (6 esc)

Row 9: Esc in each st across. Ch 1, turn. (6 esc)

Row 10: Dec, esc in each st until last two, dec in last two sts. Ch 1, turn. (4 esc)

Row 11-19: Esc in each st across. Ch 1, turn. (4 esc) {9 rows}

Row 20: 2 esc in first st, esc until last st, 2 esc in last st. Ch 1, turn. (6 esc)

Row 21-47: Esc in each st across. Ch 1, turn. (6 esc) {27 rows}

Row 48-78: Esc BLO in eash st across. Ch 1, turn. (6 esc BLO) {30 rows}

Row 79-111: Esc in each st across. Ch 1, turn. (6 esc) {32 rows}

Row 112: Dec, esc in each st until last two, dec in last two sts. Ch 1, turn. (4 esc)

Row 113-122: Esc in each st across. Ch 1, turn. (4 esc) {9 rows}

Row 123: 2 esc in first st, esc until last st, 2 esc in last st. Ch 1, turn. (6 esc)

Row 124: Esc in each st across. Ch 1, turn. (6 esc)

Row 125: 2 esc in first st, esc until last st, 2 esc in last st. Ch 1, turn. (8 esc)

Row 126-127: Esc in each st across. Ch 1, turn. (8 esc)

Row 128: Dec, esc in each st until last two, dec in last two sts. Ch 1, turn. (6 esc)

Row 129: Esc in each st across. Ch 1, turn. (6 esc)

Row 130: Dec, esc in each st until last two, dec in last two sts. Ch 1, turn. (4 esc)

Row 131: Esc in each st across. Ch 1, turn. (4 esc)

Row 132: Dec twice. Ch 1, turn. (2 esc)

Row 133: sk first st, sl st in 2nd st. Fasten off and weave in ends. Tie with a square knot at the two thinner areas near each end of the band.
Love it? Share it!

  • Share on X (Opens in new window) X
  • Share on Facebook (Opens in new window) Facebook
  • Share on Pinterest (Opens in new window) Pinterest
  • Print (Opens in new window) Print

May 21, 2021 by Priscilla

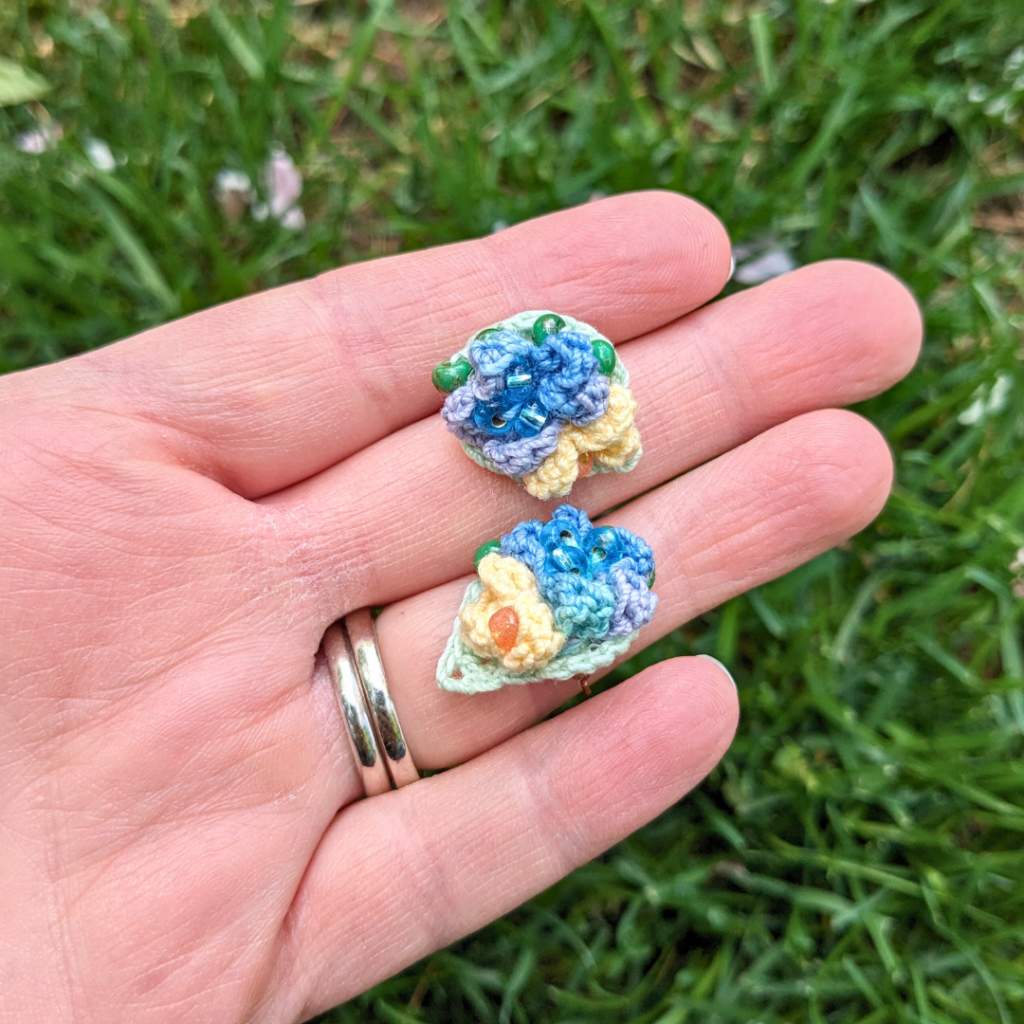
Flower Cluster Stud Crochet Earrings

Well summer is knocking on the door here in Pennsylvania and I am glad for it! I will be making earrings all summer long! They are such fun, quick projects. I love to make them for myself and they make great gifts, because they always fit.
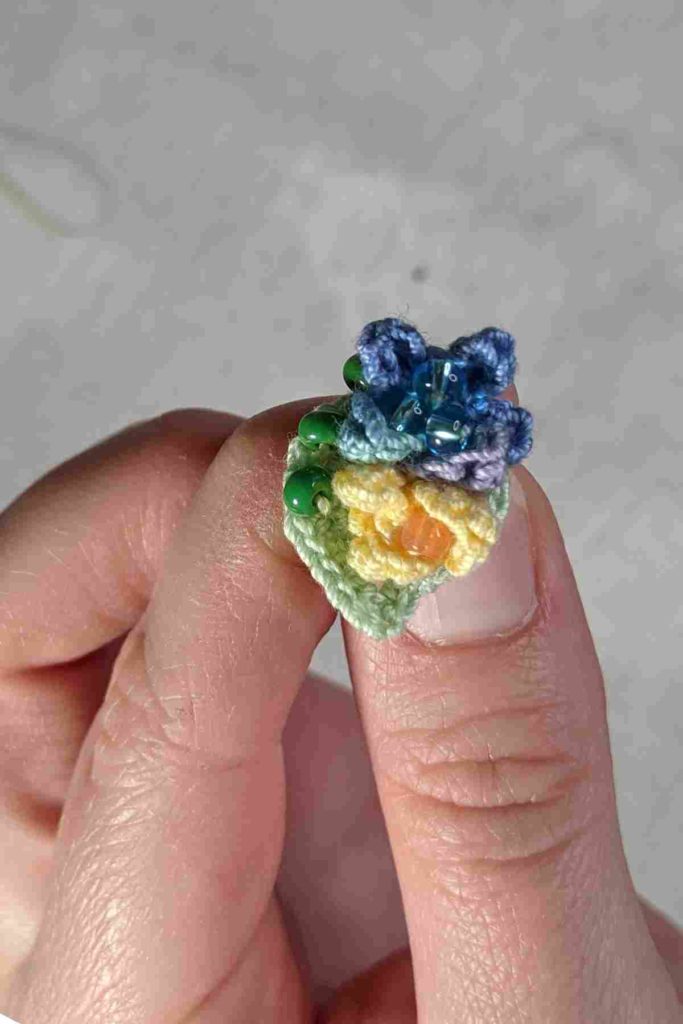

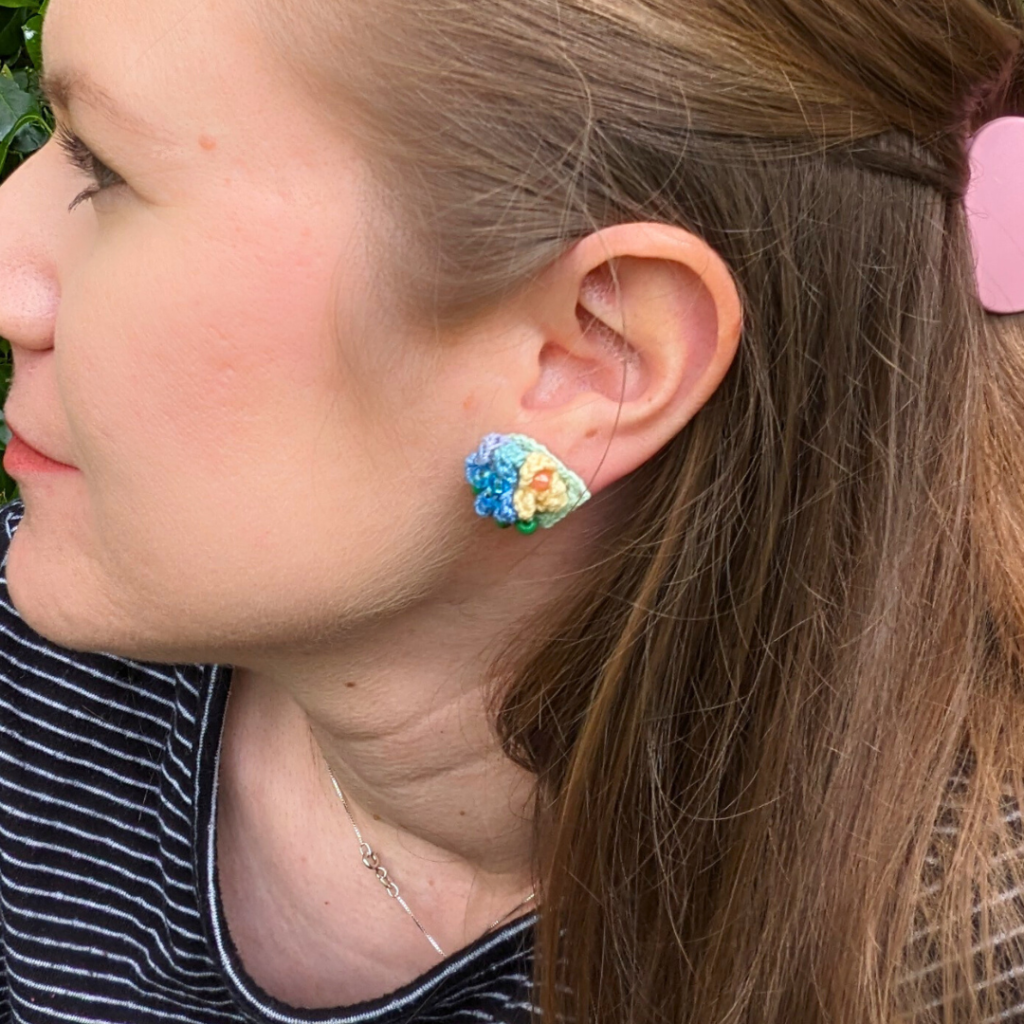
Aren’t these fun?! I gave this pair to my mom for Mother’s Day! Now I’m making another pair for myself.

I like flowers! I am always cutting flowers from our yard and bringing them inside to put in vases. It’s one of my favorite things to bring the outside in. I just started planting flowers this week as we had to wait until the tree stumps were ground out (if you didn’t read my last post, we had several trees taken out.) I can’t wait for them to fill in and sit on my back patio, drinking my fave diet Pepsi, watching the kids play, and crocheting!

These flower cluster stud earrings turned out so fun! I like to wear stud earrings because I have long hair and sometimes big dangly ones get caught in my hair. BUT I still want the studs to stand out, so here you go with these big beauties! You’ll need three colors of Aunt Lydia’s Crochet Thread, size 6/0 beads, and flat back stud earring findings. I used a 1.4 mm size hook, but you could use a little bigger or smaller. As long as you stitch tightly they’ll look great!

This pair is made with Aunt Lydia’s Crochet Thread size 10 in colors Maize, Mint, and Ocean. What colors would you use?

As usual, I like to offer the pattern for free here on the blog! You can read all the instructions and necessary information below. However, I also created a PDF version of the pattern! The PDF is available for a low cost on Ravelry and LoveCrafts. It is 9 pages long and includes 5 pages of photo tutorial. This pattern is an intermediate pattern, but the photo tutorial is pretty extensive so if you are a confident beginner I think you could manage.

I’m having such fun participating in the May Flowers Blog Hop being hosted by Stardust Crochet! Head over to her blog to check out all the amazing flower themed patterns! As part of the event I’m offering a discount on ANY of my earring patterns in my ravelry shop. Through the end of May 2024, use the code EARS40 to take 40% off any of my earring patterns like these:

For the Love Earrings
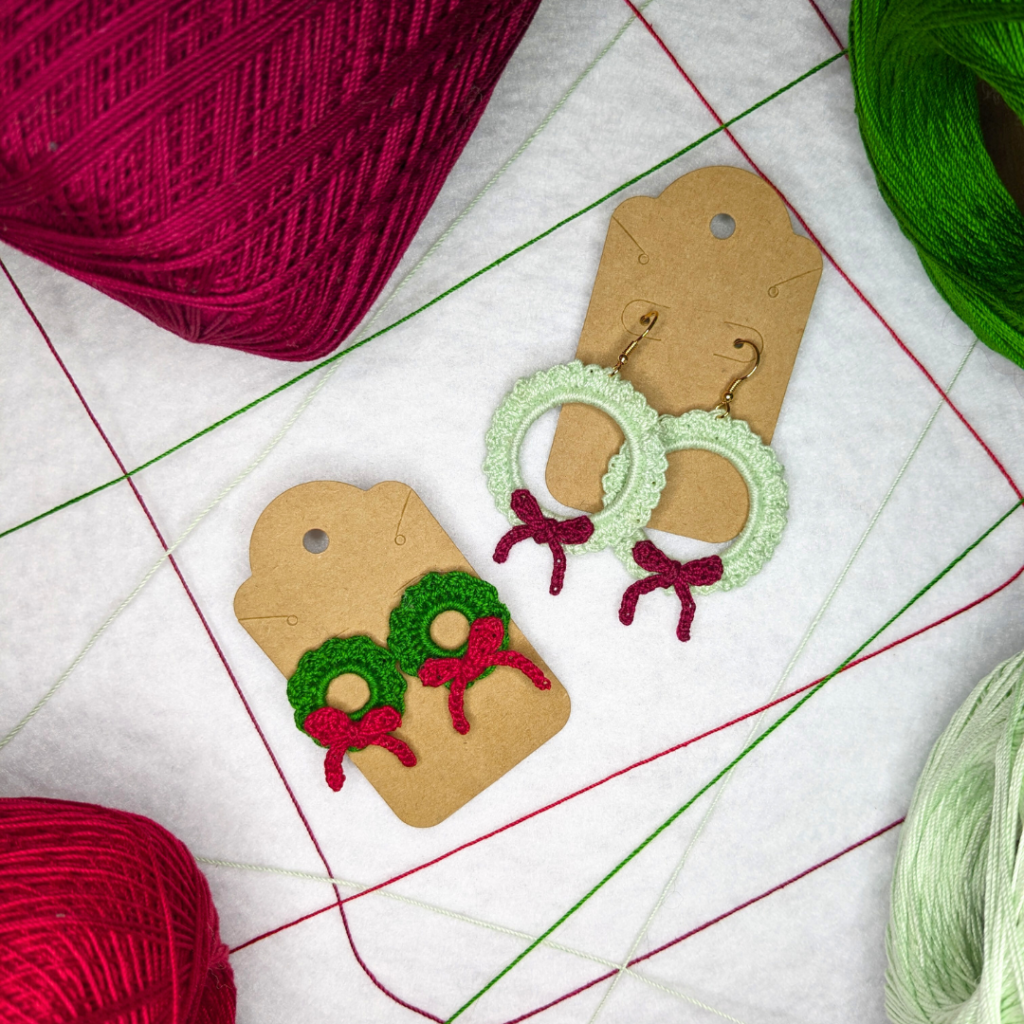
Christmas Wreath Earrings
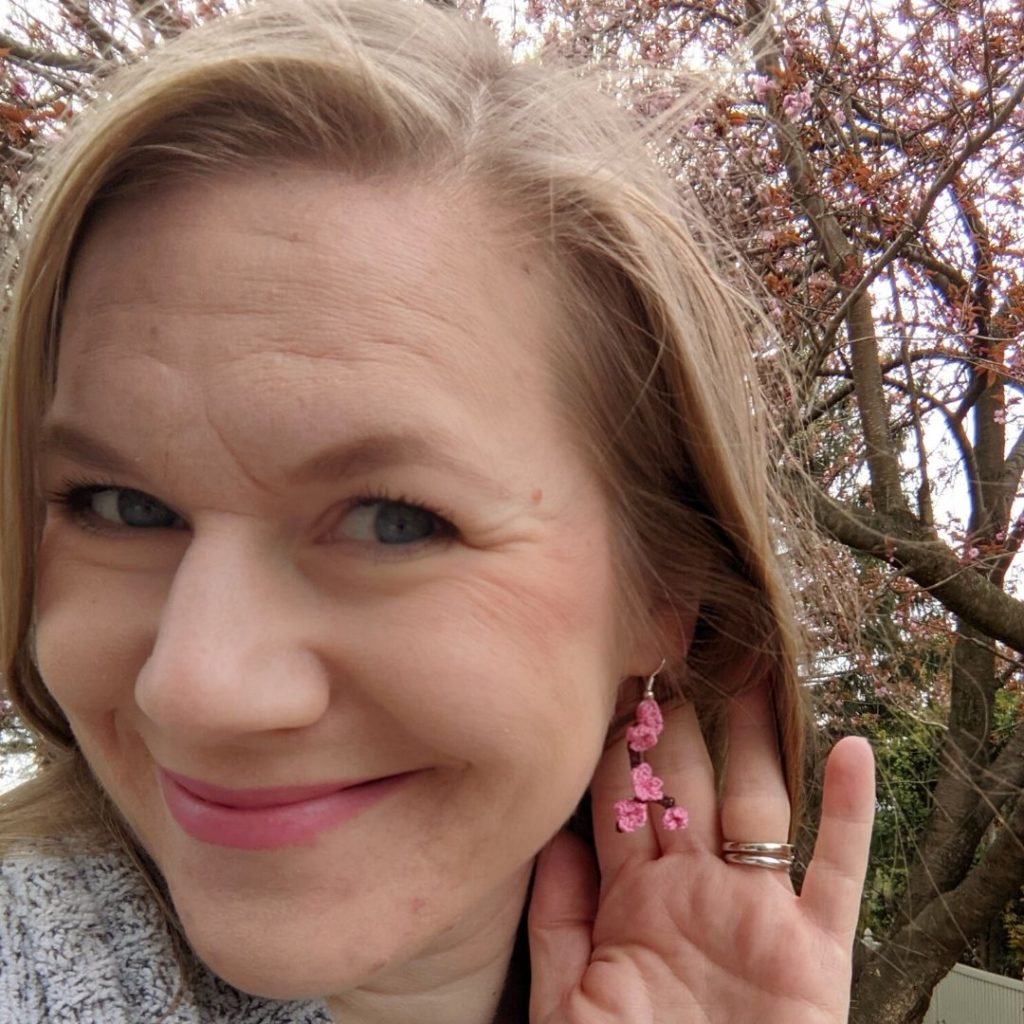
Cherry Blossom Earrings

But no worries if you want to use the free version here on the blog! Sometimes I like to use the blog version of a pattern, then if I need more help or think I’m going to make something over and over, I purchase the PDF. So here you go:

Supplies

  • Aunt Lydia’s Crochet Thread, size 10 in three colors, one preferably green for the leaf 10 yards each color
  • Size 1.40 mm crochet hook
  • Tapestry needle and scissors
  • Earring findings: 2 posts/stud earring findings
  • E600 jewelry glue or Gorilla glue
  • 16 size 6/0 beads, preferably 8 green ones for the leaf

Stitches (US Terms)

  • ch=chain
  • sc=single crochet
  • sl st= slip stitch
  • st/sts=stitch/stitches
  • MC=magic circle
  • dc=double crochet
  • tr=treble crochet
  • sc w/bead= single crochet with bead: insert hook into st, yarn over, pull through. Push bead down next to hook, push towards Right Side with finger from behind. Yarn over and pull through both loops on hook.

Notes

  • You can choose to block these if you would like them to keep shape better. I use Aleene’s Fabric Stiffening Spray and t-pins on a blocking mat.
  • At end of round 3 of leaf, do not join, continue in the round.

Gauge

Gauge is not really necessary for this pattern. If you want it: swatch of double crochet should be 5 rows of 11 sts to equal 1 inch. Personally, I find the smallest hook I can handle for the yarn (for earrings) produces the best, tightly stitched look.

I used Aunt Lydia’s thread for these, because that is what I had at the time, BUT I’ve been making all my earrings with WeCrochet’s Curio 10 recently! The color selections are lovely and they have a nice sheen to them that Aunt Lydia’s doesn’t. If you’ve never tried it before, I highly recommend it. They even have a multipack so you can experiment with color!


Complete Curio #10 Value Pack

Instructions

To make the 1st leaf:

First, thread 4 green beads onto your green thread.

Round 1: MC, sc 6 into MC and sl st to join. (6 sc)

Round 2: 2 sc in each st around, sl st to first st to join. (12 sc)

Round 3: Ch 3, sk 1st st, sl st next st, *sc next st, 2 sc next st, repeat from*. (15 sc, 1 ch-3 space, 1 sl st)

Round 4: (sc, ch 3, sc) into ch-3 space, (sc, 2 sc) 3 times, [sc w/bead, 2 sc] 4 times, sc next 2, (sc, ch 3, sc) into ch-3 space, sl st next 2 sts, fasten off. (23 sc, 4 sc w/bead, 2 sl sts, 2 ch-3 spaces)

Use invisible finish method to finish off. (After last st, cut yarn and thread though tapestry needle. Insert under next st, then into the middle of last st and pull to create invisible finish.)

Weave in end and trim.

For the 2nd leaf:

First, thread 4 green beads onto your green thread.

Round 1: MC, sc 6 into MC and sl st to join. (6 sc)

Round 2: 2 sc in each st around, sl st to first st to join. (12 sc)

Round 3: Ch 3, sk 1st st, sl st next st, *sc next st, 2 sc next st, repeat from*. (15 sc, 1 ch-3 space, 1 sl st)

Round 4: (sc, ch 3, sc) into ch-3 space, sc, 2 sc, [sc w/bead, 2 sc] 4 times, (sc, 2 sc) 3 times, (sc, ch 3, sc) into ch-3 space, sl st next 2 sts, fasten off. (23 sc, 4 sc w/bead, 2 sl sts, 2 ch-3 spaces)

To make the large flower: (5 petals)

Round 1: Make MC, sc 7 into MC. (7 sc)

Round 2: Sl st to join, ch 2, (dc,tr,dc) in next st, ch 2, sl st in next st, *ch 2 (dc, tr, dc) in same as sl st, ch 2, sl st in next st repeat from * three times, sl st in remaining st. (6 sl st, 10 dc, 5 tr)

Fasten off, leaving an 8 in strand of thread. Fold the petals inwards to create a partially closed flower. Clasp closed petals with fingers and use tail to sew tightly into place, criss-crossing through the bottom ball of the flower. (See photos pg 8.) Weave thread up through the middle, remove needle and thread one bead. Reattach needle and sew tightly into middle of flower. Repeat for the other two beads, then weave end through bottom of flower and cut thread.

To make the small flower: (3 petals)

Round 1: Make MC, sc 4 into MC. (4 sc)

Round 2: Sl st to join, ch 2, (dc,tr,dc) in next st, ch 2,* sl st in next st, ch 2 (dc, tr, dc) in same as sl st, ch 2, repeat from *, sl st in remaining st. (6 dc, 3 tr, 4 sl st)

Fasten off, leaving an 8 in strand of thread. Fold the petals inwards to create more of a closed flower. Clasp closed petals with fingers and use tail to sew into place as desired, criss-crossing through the bottom ball of the flower. (See photos pg 8.) Weave thread up through the middle, remove needle and thread one bead. Reattach needle and sew tightly into middle of flower. Weave end into bottom of flower and cut thread.

Attach flowers tightly to the leaf close together for the clustered look.

Block your pieces using pins and stiffening spray if you’d like. You may block each piece individually, then glue together, or attach with yarn, then block the entire piece.

Use Gorilla glue or E600 jewelry glue to attach flat back posts to middle of the leaf.

Some of my earring patterns are a little easier, this one is definitely a bit fiddly. If you think you need more guidance, the PDF has a full photo tutorial. Remember it’s 40% off through end of May! Code is EARS40

Ravelry

Love it? Share it!

  • Share on X (Opens in new window) X
  • Share on Facebook (Opens in new window) Facebook
  • Share on Pinterest (Opens in new window) Pinterest
  • Print (Opens in new window) Print
  • « Previous Page
  • 1
  • …
  • 3
  • 4
  • 5
  • 6
  • 7
  • Next Page »

Welcome! My name is Priscilla and I love designing crochet patterns for your family. I live in beautiful Pennsylvania where I enjoy all sorts of crafts, but I’m most passionate about crochet! I’m a Catholic mom of 4 and I sometimes incorporate my faith into my designs. Thank you so much for supporting me by visiting my crochet website and I hope you find something here that you are excited to make.

Recent Posts

  • Cozy Fall Baby Beanie Pattern
  • Spider Basket Crochet Pattern
  • Lacy Edged Crochet Shawl Pattern
  • Crochet Gingerbread Earring Pattern
  • Classic Hairbow Crochet Pattern

Categories

Follow Me

  • Etsy
  • Facebook
  • Instagram
  • Pinterest
  • YouTube

Pretty Chic Theme By: Pretty Darn Cute Design