The Mother Lode

Crafts and Crochet

  • Home
  • Crochet Pattern Library
  • Faith Based Patterns
  • About Me
  • Privacy Policy

April 23, 2021 by Priscilla

Spring Triangles Cowl

Happy Spring! We’ve started this spring with a giant overhaul of our lawn and garden. We love having a vegetable patch, but the space that was here when we bought our house doesn’t actually get enough sun AND it’s in the middle of the backyard. SO my sweet husband built a little raised garden bed and we are going to put it on the side of our house where the sun shines. Then we decided we needed more rock and mulch. We cut a large flower bed out in the front yard where the grass is spotty because it is so shady. We’ve been wanting to take down some trees (they were unhealthy hemlocks that were crowded together,) and we’re in the middle of that right now! This week they got the trees down, next week they’ll take the stumps out. Fingers crossed in a few weeks I will be planting ALL the flowers and veggies and then crocheting on my back patio while my boys play soccer, climb trees, and dig in the dirt.
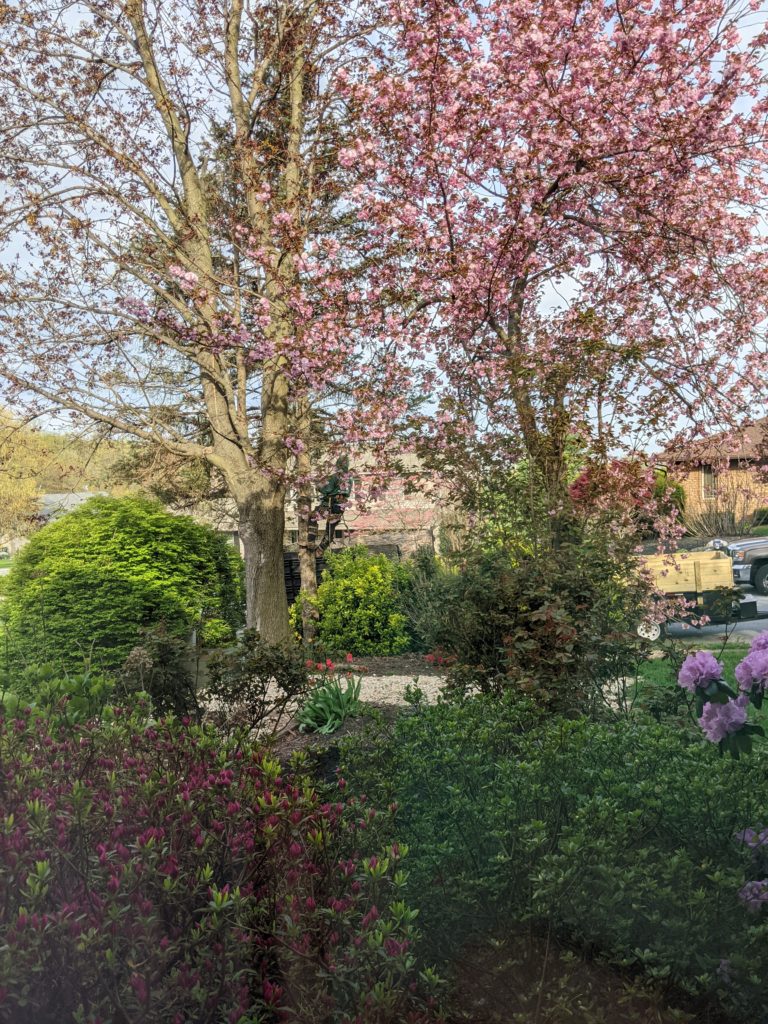
Can you spot “the tree guy?” He told us he loves climbing trees!

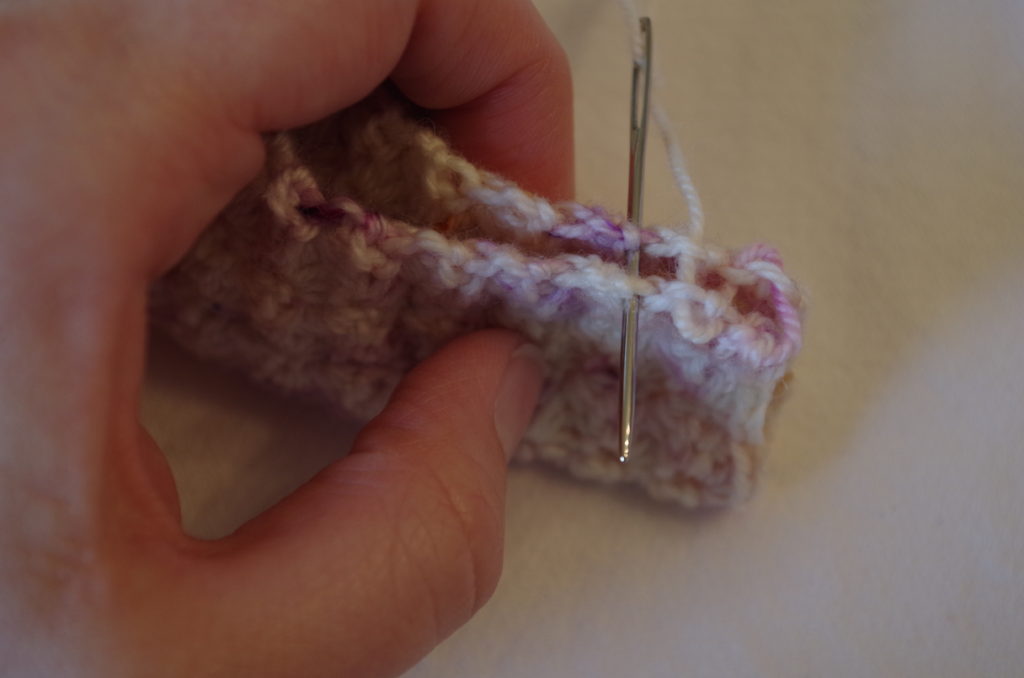
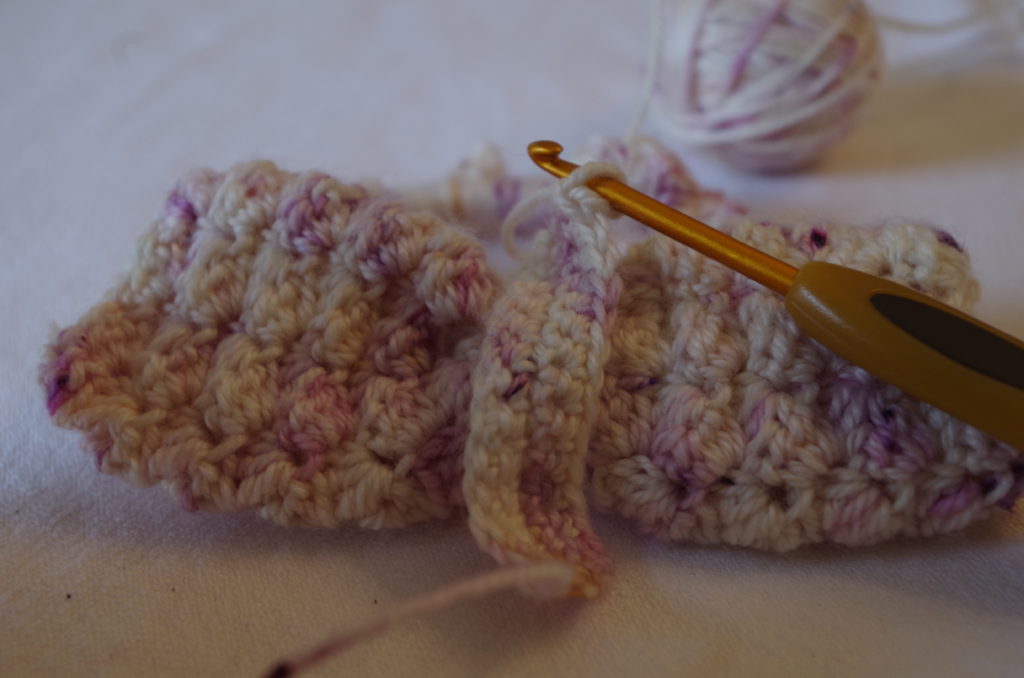
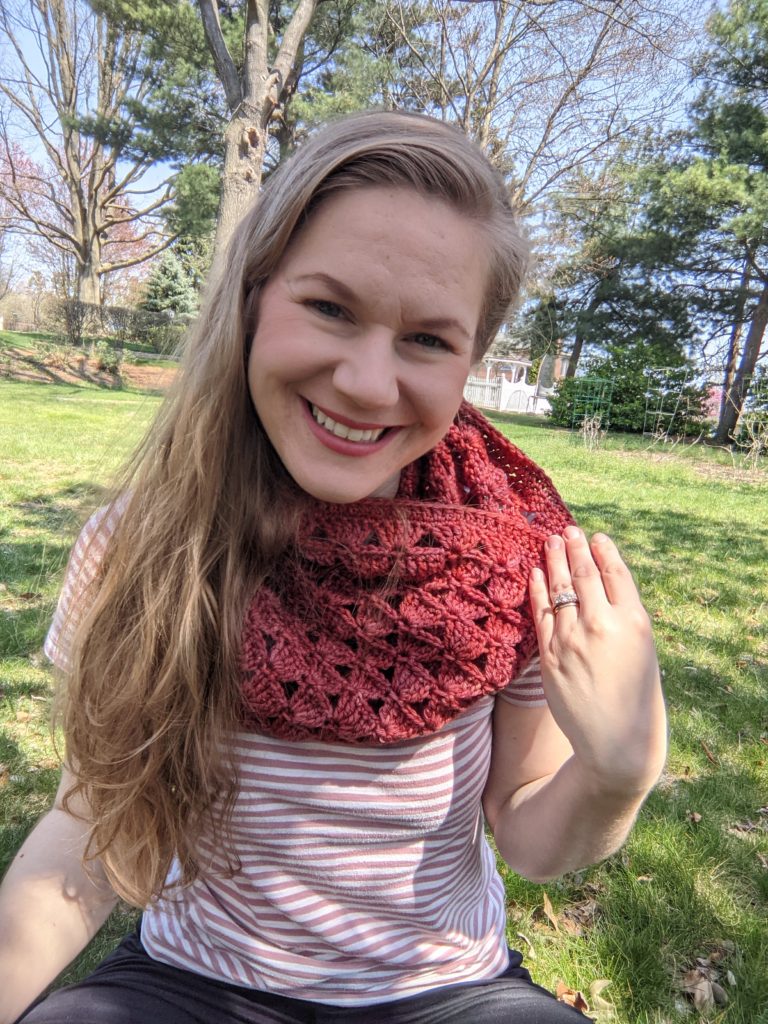
I’m sure we are in for a few more chilly days to wear this cowl! It actually was very wintery here today, we even had snow flurries! You’ll need some worsted weight yarn: about 315 yards (one of my testers used Caron Simply Soft and one skein was the perfect amount!) I used some gorgeous merino worsted yarn from my favorite yarn dyer Rita Mae Yarns. She has such wonderful colors! A size J hook should work for you, but check the gauge below just in case. I hope you love this cowl, I’m really proud of the stitch pattern and I’m working on a shawl with it!
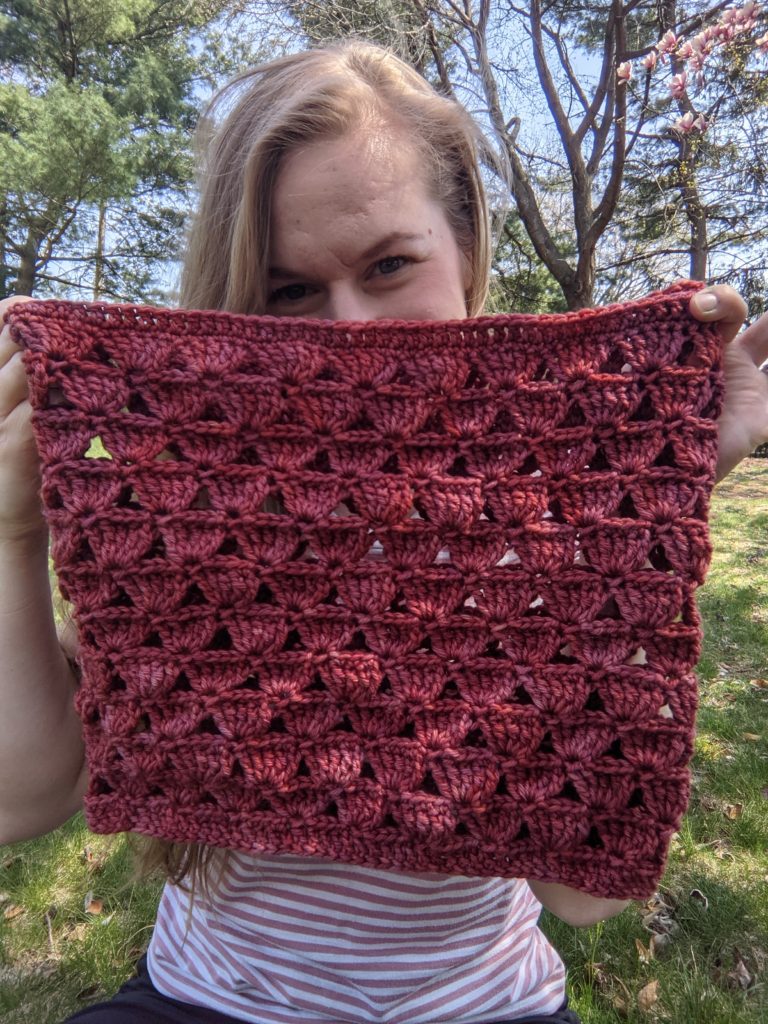
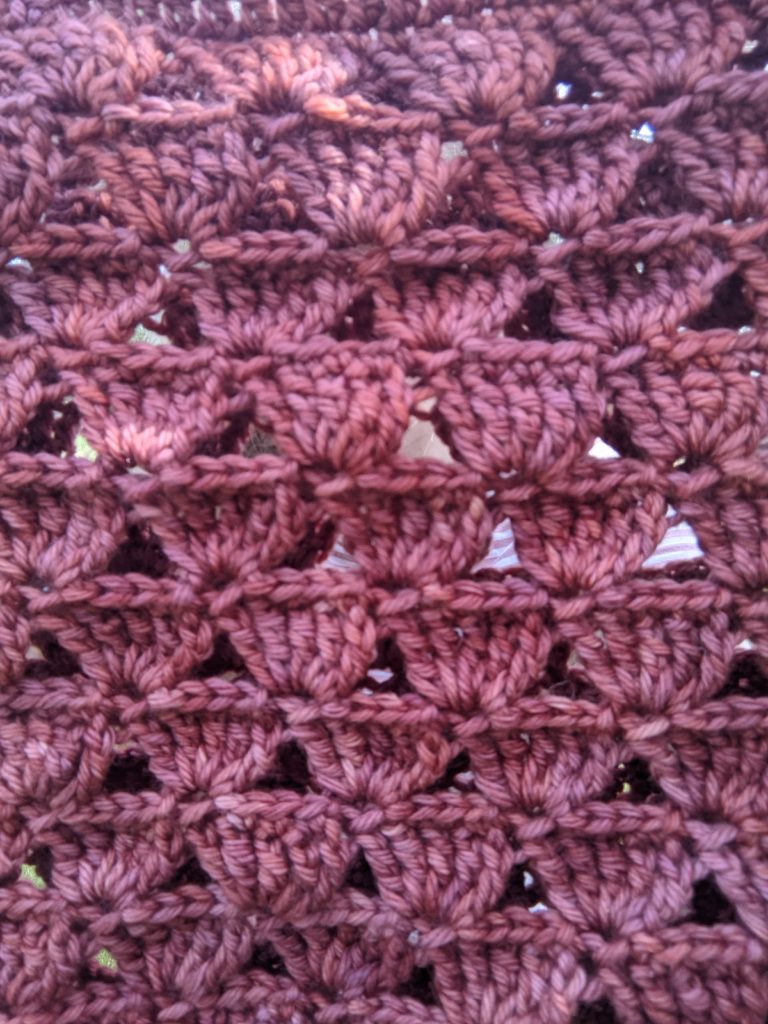
I’ve got the free version of the pattern right here for you, with written instructions and a few photos. A PDF is also available for $3 on Ravelry and Lovecrafts! The PDF includes everything below ready to print as well as photo tutorial pages for the stitches. It’s especially helpful if you need to learn the foundation chain.
Supplies

  • 315 yards worsted weight yarn (CYC 4) samples used Rita Mae
  • Yarns Worsted Merino in colorway Hey Mrs. Robinson OR Caron
  • Simply Soft in colorway Orchid
  • crochet hook US size J (6 mm) or size needed to obtain gauge
  • tapestry sewing needle
  • scissors and measuring tape

Stitches (US terms)

  • ch = chain
  • sl st = slipstitch
  • st/sts = stitch/stitches
  • tr = treble crochet
  • dc = double crochet
  • sc = single crochet
  • fdc = foundation double crochet

Notes

  • Photo tutorial follows the written instructions.
  • Finished Dimensions: 26 in around, 13 in wide, 11 in tall
  • Stitch counts are marked at the end of each round in parentheses.
  • Pattern is worked in the round without turning.
  • In round 1, the ch-3 does not count as a stitch. Join to the 1st fdc st.
  • In round 3, the first ch-3 will end up as the last tr of the round and counts as a stitch.

Gauge

14 sts of dc in 7 rows = 4in x 4in

Written Instructions

Round 1: Fdc 100, sl st to beg fdc to form a circle, being careful not to twist the chain. Ch 1, do not turn. (100 fdc)
Round 2: *Sc next 3 sts, sl st in next st, ch 3, sl st in next st, repeat from * to end of round, with final sl st in the first sc from the round. (60 sc, 40 sl st)
Round 3: Ch 3, sk 5 sts, then 5 trin the first ch-3 space, *sk 5 sts, 5 tr in next ch-3 space, repeat from *, ending with 4 tr in the last ch-3 space of round, join with sl st to the first tr from last round. (99 tr, 1 ch-3 which counts as the last tr of the round)
Rounds 4-23: Repeat rounds 2 and 3, alternating. End with a repeat of round 3 on round 23.
Round 24: Sc in each st around. (100 sc)
Round 25: Ch 1, dc in each st around, sl st to beg dc to join. Fasten off.
(100 dc)
Love it? Share it!

  • Share on X (Opens in new window) X
  • Share on Facebook (Opens in new window) Facebook
  • Share on Pinterest (Opens in new window) Pinterest
  • Print (Opens in new window) Print

November 2, 2020 by Priscilla

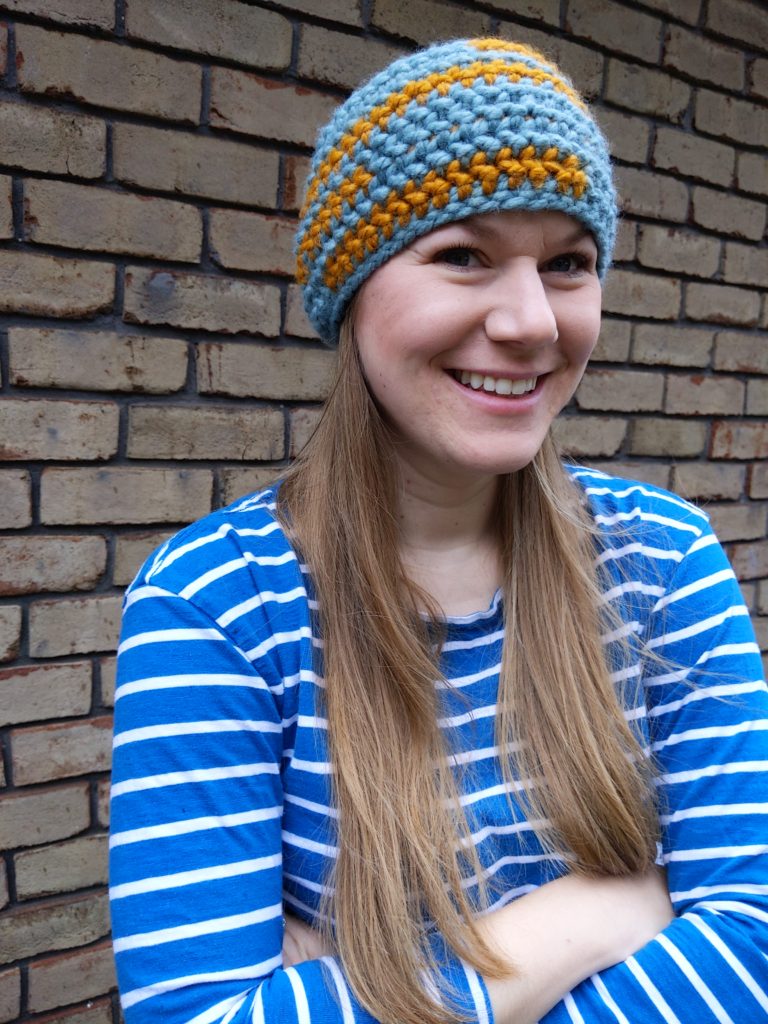
Funky Chunky Headband

November is here! I’ll decorate for Christmas in the coming weeks, work on some crochet Christmas gifts for my family, and maybe even publish a couple of patterns. Last week, I got caught up in finishing Halloween things and on Friday I called it at 4pm and said, “Priscilla, you do not have time to publish this pattern today properly. Postpone it until Monday and enjoy Trunk or Treat with your kids.” So, I did. Anyone else have to do some serious self-talk from time to time? I’m just such an idea person and get all frazzled that I need to talk myself out of (or sometimes into) certain things.

A few months ago, I was enjoying my second favorite hobby: yarn shopping. Two beautiful colors of Wool Ease Thick and Quick yarn by Lion Brand Yarn jumped out at me! I just loved the colors and had been wearing an outfit all summer that matched. SO I snatched them up and brought them home and they sat all pretty in my craft yarn room for a month.

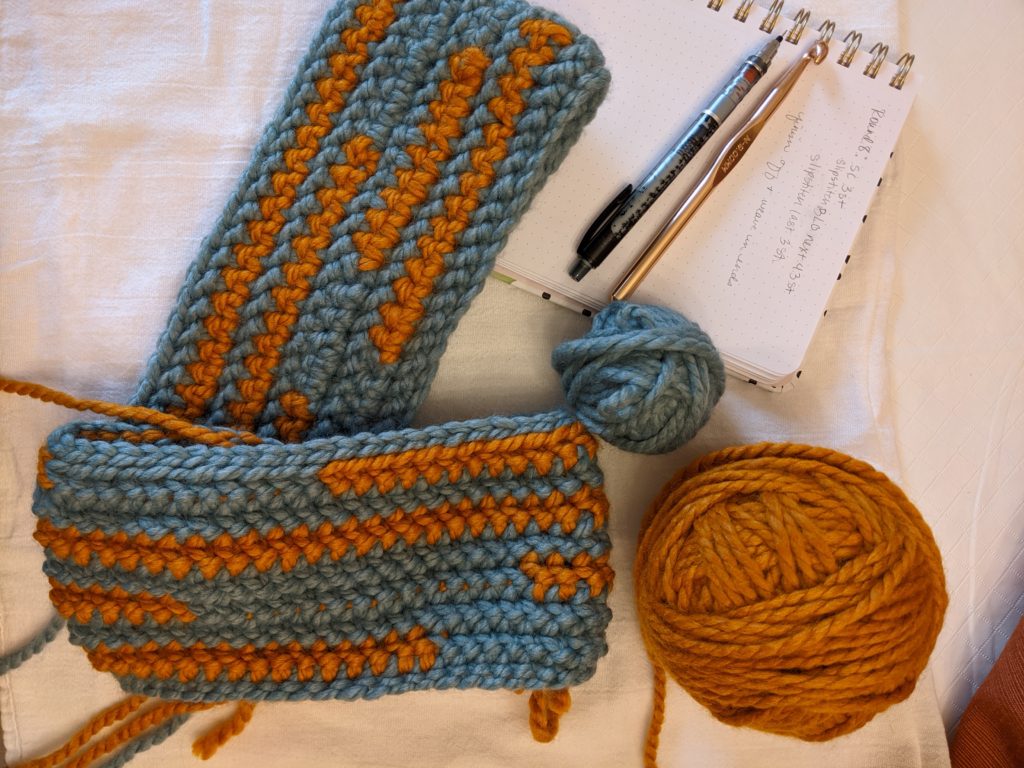
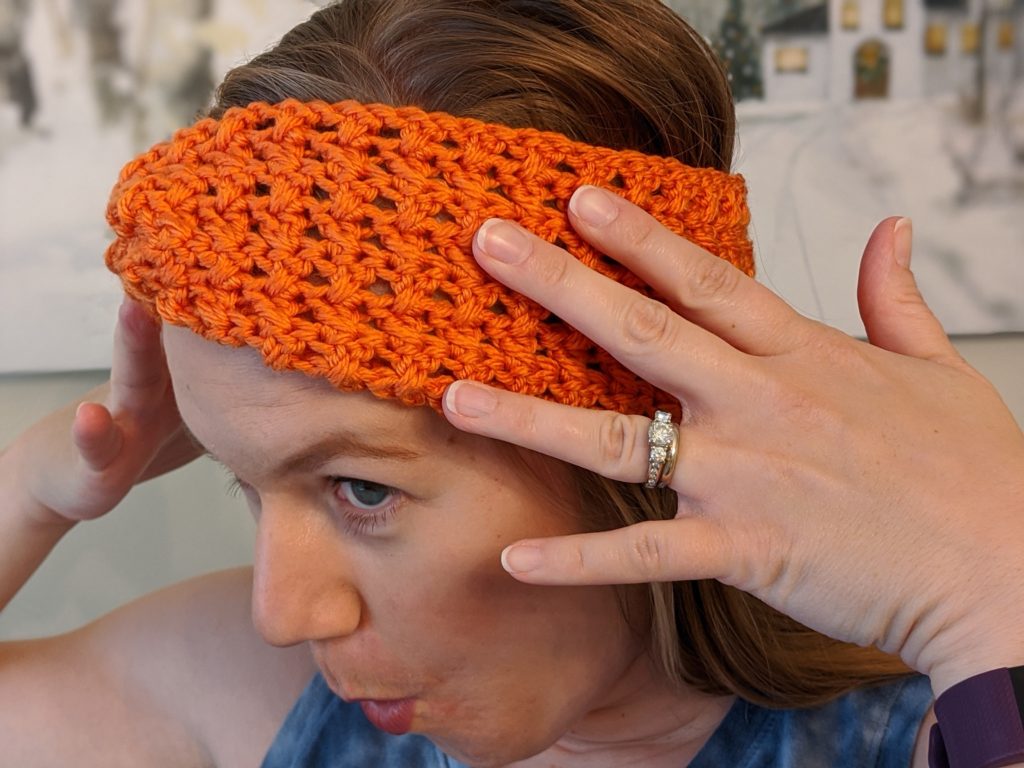
I got the pretties out and designed a funky, modern crochet headband that will keep the chill away from your ears all winter long! I hate having cold ears. I love all the cozy hats and headbands. Sometimes, though, they get all stretched out easily and/or don’t really keep ALL the wind out. Let me tell you, friends, no wind is getting through this headband and it is staying nicely snug on your head!

Funky Chunky Headband Pattern

Alright here it is! As usual, you can use the pattern here for free, but the low-cost PDF includes photo tutorials to show you how to change colors and use the herringbone half-double crochet stitch (which I’m in love with right now. Don’t tell my husband.) It has each of the three sizes on its own page, so you can pick and choose which ones you need to print to save on ink and paper! It’s available here on Ravelry or here on Lovecrafts.

Supplies

  • 100 yards super bulky (CYC 6) yarn in two colors, sample is Lion Brand Wool Ease Thick and Quick in Succulent (70 yds) and Butterscotch (30 yds)
  • crochet hook US size N (9 mm) or size needed to obtain gauge
  • tapestry sewing needle
  • scissors and measuring tape
  • stitch marker

Notes

  • Photo tutorial follows the written instructions.
  • Finished Dimensions: child: 17-18 in around, teen/adult sm: 18-19 in around, adult med/lg: 20-21 in around for a snug cozy fit.
  • Stitch counts are marked at the end of each round in parentheses.
  • Pattern is worked in the round without turning.
  • Some of the rounds state to carry the yarn. If it does not say to carry, then leave a tail and cut the yarn to be woven in later. As written, there are 10 ends to weave in. You may choose not to carry the yarn and have more ends to weave.
  • If you get confused with the color changes, look back to the last bold color and that is what color you should be working with.
  • Round 1 and 2 can be substituted with foundation sc if you find it difficult to sl st into a chain. This will also help make the brim a bit wider if you prefer.

Stitches

  • ch = chain
  • sl st = slip stitch
  • st/sts = stitch/es
  • BLO = back loop only
  • hhdc = herringbone half-double crochet: yo, insert hook, yo, pull through one loop, yo, pull through two loops.

Gauge

10 sts of hhdc in 7 rows = 4in x 4in

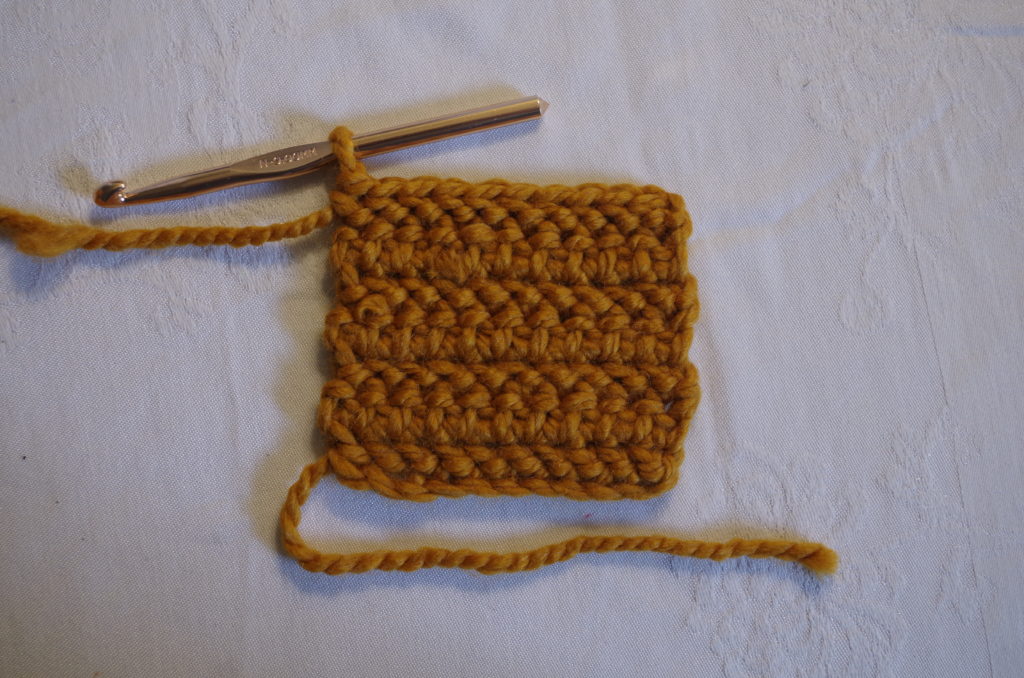
Ch 11, hhdc in 2nd ch from hook. Hhdc to end, ch 1, turn, *hhdc 10 sts, ch 1, turn. Repeat from * to make 7 rows. This is meant to be fairly tight, so you may need to go down a hook size to obtain gauge.

Child Size

Round 1: with color A ch 44, sl st to beg ch to form a circle, being careful not to twist the chain.

Round 2: sl st in each st around, placing a stitch marker in the first st to mark your beginning. (44 sl st)

Round 3: sl st in first 3 sts. hhdc in 16 sts, switch to color B, carrying color A behind. hhdc 14 sts, switch to color A, hhdc 8 sts, sl st next 3 sts. (6 sl st, 38 hhdc)

Round 4: sl st in first 3 sts, hhdc each st around until last 3 sts, sl st in last 3 sts.(6 sl st, 38 hhdc)

Round 5: sl st in first 2 sts, switch to color B, carrying color A behind, sl st, hhdc next 11 sts, switch to color A, carrying color B behind, hhdc in next 12 sts, switch to color B, carrying color A, hhdc 12, switch to color A, hhdc 3 sts, sl st 3 sts.(6 sl st, 38 hhdc)

Round 6: repeat round 4

Round 7: sl st in first 3 sts, hhdc 8, switch to color B, carrying color A behind, hhdc 23, switch to color A, hhdc 8, sl st in last 3 sts.(6 sl st, 38 hhdc)

Round 8: sl st 3 sts, sl st BLO in each st around until 3 remaining sts, sl st last 3 sts. Fasten off and weave in ends.(6 sl st, 38 sl st BLO)

Teen/adult small Size

Round 1: With color A ch 48,sl st to beg ch to form a circle, being careful not to twist the chain.

Round 2: sl st in each st around, placing a stitch marker in the first st to mark your beginning. (48 sl st)

Round 3: sl st in first 3 sts. hhdc in 17 sts, switch to color B, carrying color A behind. hhdc 15 sts, switch to color A, hhdc 10 sts, sl st next 3 sts.(6 sl st, 42 hhdc)

Round 4: sl st in first 3 sts, hhdc each st around until last 3 sts, sl st in last 3 sts.(6 sl st, 42 hhdc)

Round 5: sl st in first 2 sts, switch to color B, carrying color A behind, sl st, hhdc next 13 sts, switch to color A, carrying color B behind, hhdc in next 14 sts, switch to color B, carrying color A behind, hhdc in next 13 sts, switch to color A, hhdc 2 sts, sl st 3 sts.(6 sl st, 42 hhdc)

Round 6: repeat round 4

Round 7: sl st in first 3 sts, hhdc 9, switch to color B, carrying color A behind, hhdc 25, switch to color A, hhdc 8, sl st in last 3 sts.(6 sl st, 42 hhdc)

Round 8: repeat round 4

Round 9: sl st in first 3 sts, hhdc 3 sts, switch to color B, carrying color A behind, hhdc 19 sts, switch to color A, carrying color B behind, hhdc 11 sts, switch to color B, carrying color A behind, hhdc 9 sts, switch to color A,sl st 3 sts.(6 sl st, 42 hhdc)

Round 10: sl st 3 sts, sl st BLO in each st around until 3 remaining sts, sl st last 3 sts. Fasten off and weave in ends.(6 sl st, 42 sl st BLO)

Adult medium/large Size

Round 1: With color A ch 52, sl st to beg ch to form a circle, being careful not to twist the chain.

Round 2: sl st in each st around, placing a stitch marker in the first st to mark your beginning. (52 sl st)

Round 3: sl st in first 3 sts. hhdc in 19 sts, switch to color B, carrying color A behind, hhdc 17 sts, switch to color A, hhdc 10 sts, sl st next 3 sts.(6 sl st, 46 hhdc)

Round 4: sl st in first 3 sts, hhdc each st around until last 3 sts, sl st in last 3 sts.(6 sl st, 46 hhdc)

Round 5: sl st in first 2 sts, switch to color B, carrying color A behind, sl st, hhdc next 15 sts, switch to color A, carrying color B behind, hhdc in next 14 sts, switch to color B, carrying color A behind, hhdc in next 13 sts switch to color A, hhdc 4 sts, sl st 3 sts.(6 sl st, 46 hhdc)

Round 6: repeat round 4

Round 7: sl st in first 3 sts, hhdc 11, switch to color B, carrying color A behind, hhdc 26, switch to color A, hhdc 9, sl st in last 3 sts.(6 sl st, 46 hhdc)

Round 8: repeat round 4

Round 9: sl st in first 3 sts, hhdc 4 sts, switch to color B, carrying color A behind, hhdc 20 sts, switch to color A, carrying color B behind, hhdc 12 sts, switch to color B, carrying color A behind, hhdc 10 sts, switch to color A, sl st 3 sts.(6 sl st, 46 hhdc)

Round 10: sl st 3 sts, sl st BLO in each st around until 3 remaining sts, sl st last 3 sts. Fasten off and weave in ends.(6 sl st, 46 sl st BLO)

Love it? Share it!

  • Share on X (Opens in new window) X
  • Share on Facebook (Opens in new window) Facebook
  • Share on Pinterest (Opens in new window) Pinterest
  • Print (Opens in new window) Print

October 16, 2020 by Priscilla

Hair Bow Scrunchie

Are you a do-your-hair-everyday sort of person or a whatever-it’s-just-hair sort of person? Or maybe you’re a fabulous in between sort of person. The sort of person who sometimes likes to primp and fuss with hair, and sometimes just twists it into a bun and runs out the door. Maybe you often put it in a ponytail without even combing it to take your 1st grader to school in the morning. Just me?

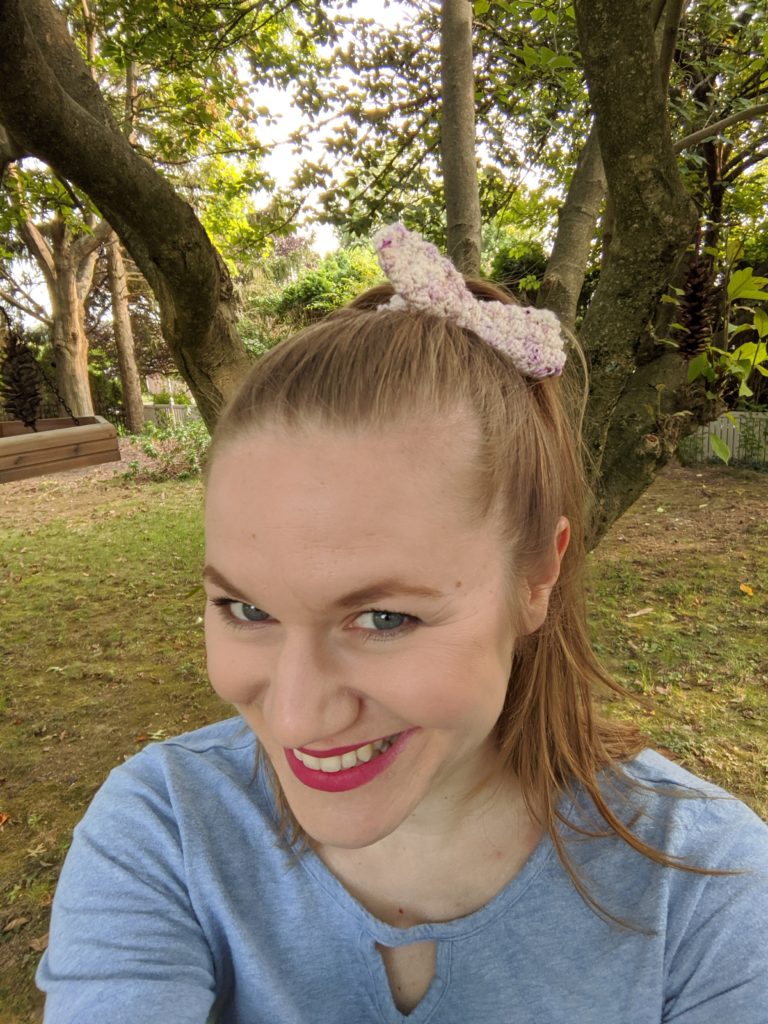
I have three basic hairstyles: down, ponytail, bun. My new crochet hair bow scrunchie is for those days when I don’t have time for hair nonsense, but I want a little extra something. It’s actually really comfortable in my hair, and I feel more like pre-covid life when people used to leave their houses and dress up and all that? Remember that, guys? Good times.

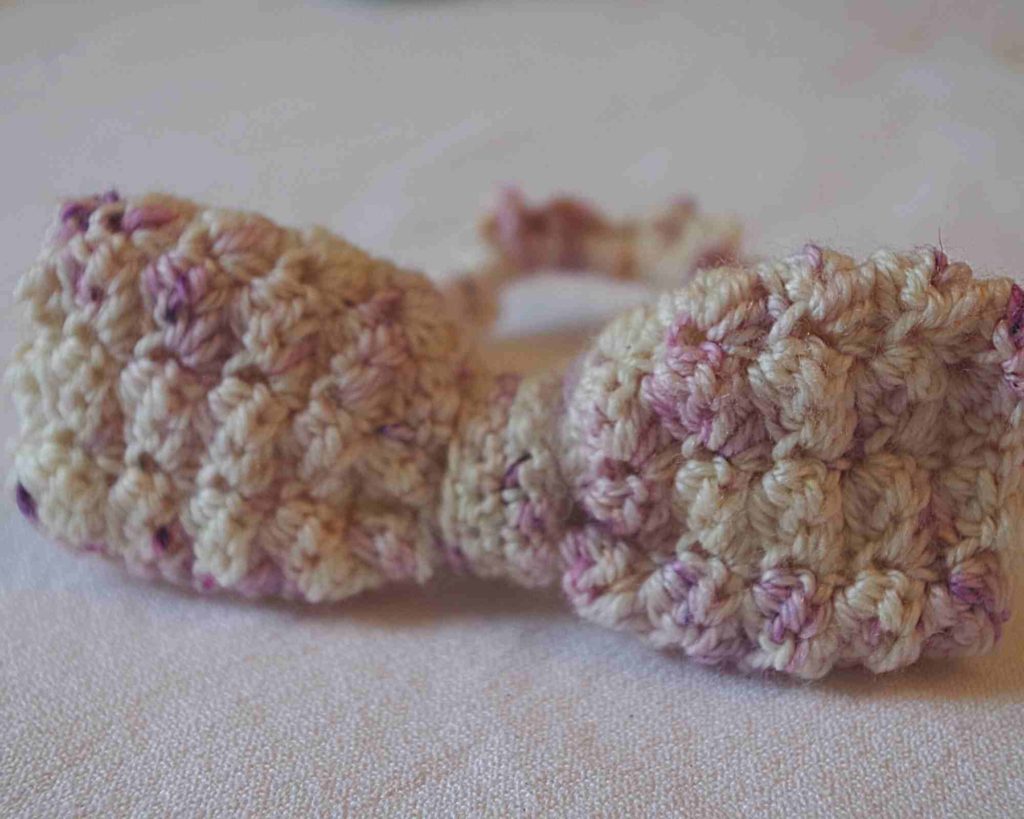
You may be thinking: Is she really serious? What 33 year old wears a bow in her hair? Aren’t they for little girls? Probably, but I’m fun and it’s comfy so I’m wearing it. You should, too. It’s a super quick pattern, it uses a neat stitch called the Sedge Stitch, and it’s pretty versatile. Once you make one following my pattern, you could easily change yarn and hooks and make one smaller or larger. I’m working on a tiny red one for Christmastime right now! And, yes, it’s a great little quick gift pattern to make for the adorable little girls in your life. Alright, on with the pattern!

I had a large scrap of beautiful hand dyed sock yarn from Rita Mae
Yarns
and I couldn’t let it go to waste! Instead of leaving it to sit
pretty in my yarn stash, I designed this hair bow scrunchie with it. It
works up pretty quickly and uses a beautiful sedge stitch for a really
great texture. This bow is perfect for ponies, but I also love it with a
big hairbun, too!
You’ll need about 75 yards of sock /fingering weight yarn for this
pattern and a thick ponytail holder.

As usual, I’ve got the written pattern below for free, and the PDF with a full photo tutorial here on Ravelry or on LoveCrafts!

Supplies

  • 75 yds/15g Sock/fingering/baby yarn, superfine CYC weight 1 yarn
  • Sample uses Rita Mae Yarns Sweet Pea Sock in Berries N’ Cream
  • crochet hook US size D (3.25mm) or size needed to obtain gauge
  • tapestry sewing needle
  • scissors
  • measuring tape
  • pony tail holder

Stitches

  • Ch = chain
  • Sc = single crochet
  • HDC = half double crochet
  • DC = double crochet
  • ss = slipstitch
  • sk = skip
  • st/sts = stitch/stitches

Gauge

Chain 11. Sc, HDC, DC in 2nd st from
hook. Sk 2 sts. Sc, HDC, DC next st. Sk
2 sts. Sc, HDC, DC next st. Sk 2 sts. Sc
last st ofrow. Ch 1, turn. Continue for
6 more rows. Square should be 1 1/2
inches by 1 1/2 inches.

Notes

  • Sc/HDC/DC is also called Sedge Stitch.
  • Within the rows, you will be working in the single crochet stitches from the previous row.
  • At the end of each row it can be very difficult to stitch into the very final stitch. You may instead work into the 2nd to last stitch, and remain consistent throughout the pattern.

Written Instructions

Body of Bow
Ch 23.
Row 1: In 2nd chain from hook, Sc, HDC, DC in same st. Sk next 2 sts.
[Sc, HDC, DC next st, sk 2 sts]repeat [ ] until last 3 sts. End row with
a Sc in the last st. Ch 1, Turn. ( 8 Sc, 7 HDC, 7 DC)
Row 2: HDC, DC into 1st Sc in the row below. Sk next 2 sts. [Sc, HDC,
DC next st, sk 2 sts]repeat [ ] until last 3 sts. End row with a Sc in the
last st. Ch 1, Turn. (7 Sc, 7 HDC, 7 DC)
Rows 3-12: Repeat Row 2. Fasten off. Leave long tail to create bow.
Rectangle should be approx 4 in by 3 in. With tail in bottom right
corner, fold rectangle up and use a tapestry needle to sew together
two sides. Turn right side out, then use mattress stitch to sew the
remaining side together. Tie off any remaining tail and cut.
Cut a length of yarn at least 12 inches. Wrap tightly around middle of
rectangle to create the bow shape. Tie a tight knot or sew the end in
firmly.

Tie around Bow
Ch 13. Sc in 2nd ch from hook and each st remaining. Turn. (12 sc)
Row 2: Ch 1, Sc in each st across. Turn.
Rows 3-4: Repeatrow 2. Fasten off.
Cut a length of yarn about 12 inches. Wrap tightly around middle of bow to
create bow shape and tie firmly.

There are now two options for attaching your bow:
1.) You can simply use the tie, wrap it tightly around the bow and a plain
ponytail holder, and sew it into place with a tapestry needle.
2.) Or you can make the pony tail holder into a scrunchie as follows:
Begin by working a HDC around the ponytail holder. Continuing to work
around the ponytail holder, HDC 4 more times, Ch 3, [5 HDC, Ch 3]
Repeat [ ] until desired fullness. Fasten off. Wrap the tie you made
around the bow and the scrunchie and attach firmly by sewing into place
with a tapestry needle.

There ya go! Fabulous, handmade, fun. Come back soon, I’ve got a chunky ear warmer pattern coming in a couple of weeks!

Love it? Share it!

  • Share on X (Opens in new window) X
  • Share on Facebook (Opens in new window) Facebook
  • Share on Pinterest (Opens in new window) Pinterest
  • Print (Opens in new window) Print

October 6, 2020 by Priscilla

All Saints’ Day Activity Pages

I’ve got some other crochet and crafty things coming soon, but for now, one more thing about All Saints’ Day!

My son’s preschool teacher asked the families for ideas to celebrate All Saints’ Day with the children. Of course, I headed to Pinterest as I knew I could find some good saint coloring pages there. I found some to represent the classroom’s patron saint for this year. There are many different saint coloring pages, but not many that are more interactive than coloring, especially not for preschoolers.

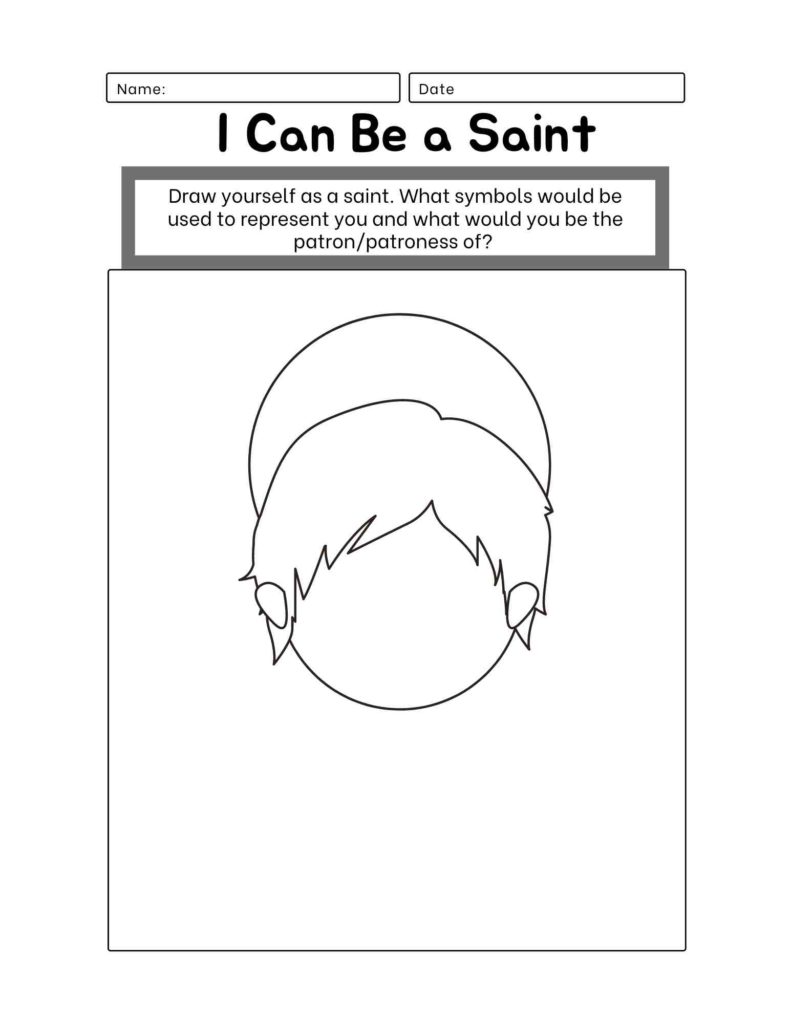
So I decided to fire up Canva (the program I use for graphics, printables, and photo tutorials.) I ended up making two similar activity sheets. One is for the children to plan their saint costume. They can add the things they are planning to wear to represent the saint to a plain, haloed face. The second sheet is to imagine what they could do to become a saint. What kinds of things would represent their good works? What would they become a patron of?

All Saints’ Day is a beautiful opportunity to enrich our children’s lives with stories of the saints. Often, though, there are parts of those saints’ lives that are difficult to convey to little children. There are some great books out there to help you, though! Our favorite is Saints on the Go by Chantal Baros. I can’t find it in print anywhere, but you can check the author’s website for other saint books, saint dolls, and coloring pages. Another popular saint book is Saintly Rhymes for Modern Times. I’m debating ordering it myself right now! It has mostly modern saints like Padre Pio, St. Teresa of Calcutta, and St. Gianna Molla. Two other good ones are Girl Saints for Little Ones and Boy Saints for Little Ones by Kimberly Fries.

These two printables have been added to my printable library! Sign up for my email list below to access my library!

Welcome!

My name is Priscilla and I primarily write crochet patterns here on my blog called The Mother Lode. I’m also a Catholic mom, and I like to create Catholic printables and crochet patterns as well! Sign up here for access to my printables library and for future Catholic crafty patterns, ideas, and printables.

Thank you!

You have successfully joined our subscriber list.

I love making my kid’s All Saints’ Day costumes! Do you? Head over to my Costume Guide for All Saints’ Day! It has ideas and tips for DIY and store bought.

Love it? Share it!

  • Share on X (Opens in new window) X
  • Share on Facebook (Opens in new window) Facebook
  • Share on Pinterest (Opens in new window) Pinterest
  • Print (Opens in new window) Print

October 2, 2020 by Priscilla

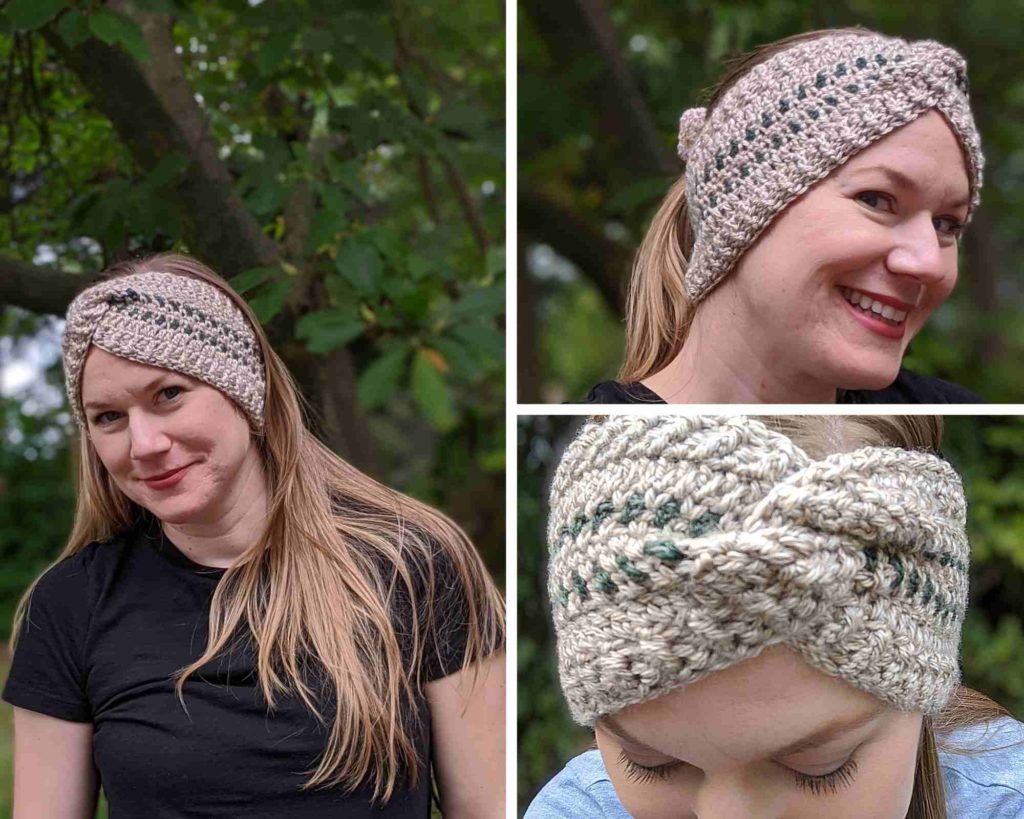
Almost Stripes Ear Warmer

So here’s a question: are you an idea person or an execution person?

I’m totally an idea person. This doesn’t mean I can’t or don’t execute my goals, it just means that I find it easy to create, to think of something new to do, or to figure out something. My strength does NOT lie in prioritizing which ideas will be most fruitful or which things I can actually accomplish in any given time. Some people thrive on planning and organizing and I absolutely have to work at it. My closets are always a mess. My craft room is tidy only for photographs and my yarn, well, it is partially sorted. But I have a wealth of ideas for things to make and different stitches to try, so I think if I keep pushing myself, I can keep going with my little crochet design business and make it work! If I continue to get out of my comfort zone of chaos, I will be able to share some really wonderful things with you over the next few months.

I’m just about to listen in on a webinar by the amazing Crochetpreneur and I even have a folder for Instagram hashtags so I can use them to my advantage. I looked at 2021 planners today at Michael’s. It’s October and I’m thinking ahead to 2021? Who even am I? I’m going to keep holding myself accountable for doing things like that instead of staying up til 1am reading Nora Roberts.

Well, if you aren’t one of my best pals reading this just to check in and you are actually here for a pattern, let’s get to it!!!!!! (And if you are one of my best pals, thanks for the support!)

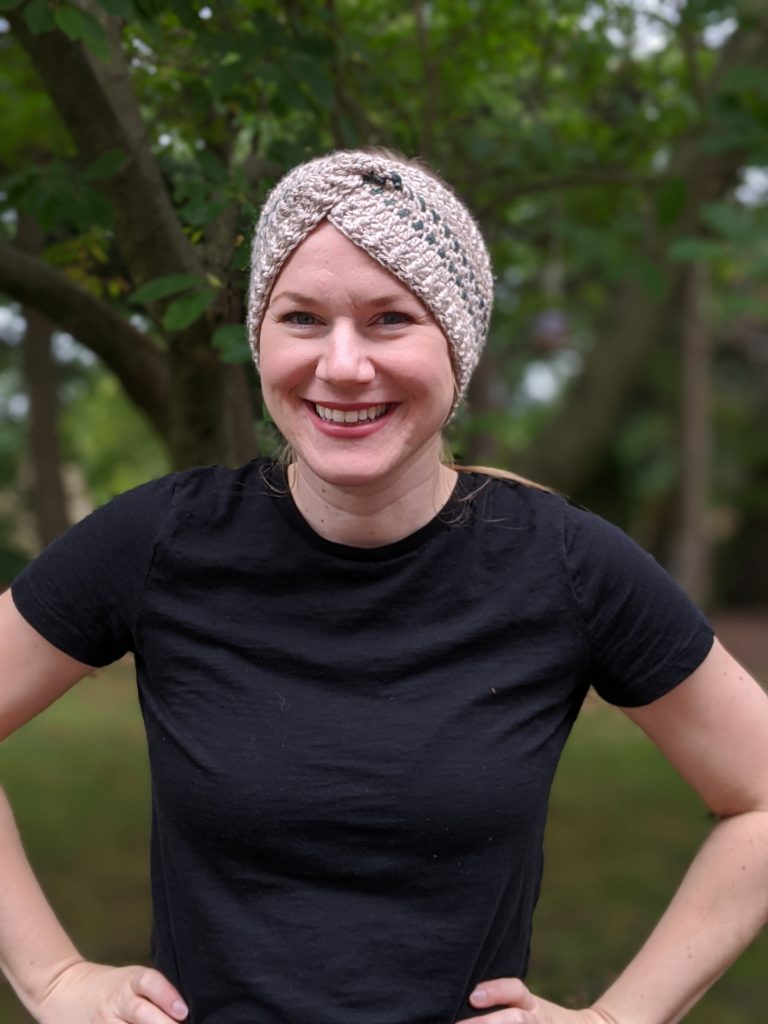
The Almost Stripes Ear Warmer is a sibling of the Almost Stripes Beanie! It’s a little easier and works up more quickly. There are 7 sizes from newborn to adult large. You’ll need two colors of worsted weight (4) yarn and two crochet hooks, (5.5mm and 6mm.) You could likely use a scrap of yarn for the accent color. I really like the way this pattern turned out and I hope you like it, too!

You can purchase a low cost PDF of this pattern here through Ravelry! It has photo guides to help with some of the stitches if you haven’t done them before.

Materials

  • Worsted weight (4) yarn (samples are Lion Brand Heartland and Basic Stitch) may use two colors for stripes as written if desired. Color A approx 150-200 yds, Color B approx 20 yds
  • Crochet hooks: 5.5 mm and 6 mm or two hooks needed to meet gauge
  • Scissors
  • Tapestry needle
  • Measuring tape

Gauge

7 rows of 15 DC stitches = 4 in x 4 in with 5.5 mm hook (If you go up a hook size to meet gauge, you would use a 6 mm hook for the gauge swatch, if you need to go down you will use a 5 mm hook for the gauge swatch.) Alternatively, the length of the brim per size is listed in the notes section. You may complete the first three rows and check for length to match the desired size.

Abbreviations

  • Ch = Chain
  • DC = Double Crochet
  • HDC = Half-Double Crochet
  • Sc = Single Crochet
  • LS = Linen Stitch (Ch 1, sk st, Sc)
  • FPHDC = Front Post Half-double Crochet
  • BPHDC = Back Post Half-double Crochet
  • DC BLO = Double Crochet Back Loop Only (the loop farthest from you)
  • DC FLO = Double Crochet Front Loop Only (the loop closest to you)
  • st = stitch
  • sk = skip 
  • FHDC = Foundation Half Double Crochet

Notes

  • The first section has the pattern for the baby/toddler sizes, the second section is the child/adult sizes. 
  • Parentheses indicate different stitch counts for different sizes: {newborn (3-6 months, 6-12 months, toddler)} and {child (teen/adult small, adult medium/large)}  
  • Instructions between [ ] are repeated
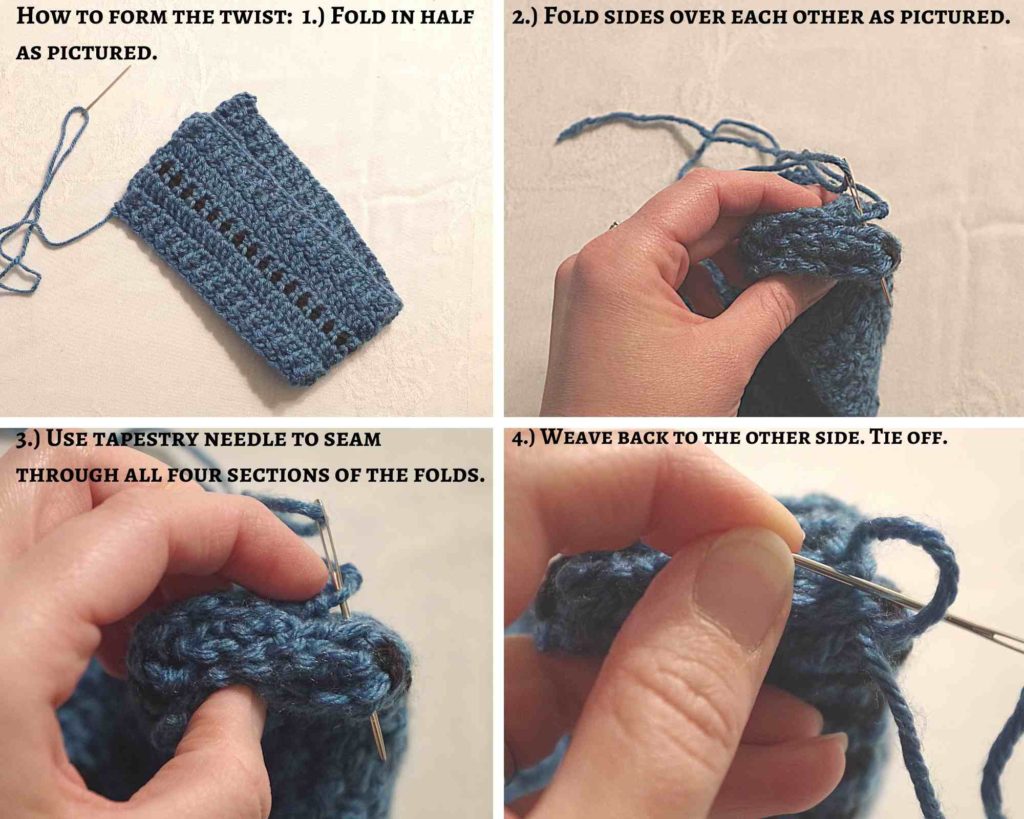
  • This hat is constructed as a rectangle, then seamed to make a twist finish. 
  • The brim of the hat should be approximately the following in length:
    • Newborn: 11-12 inches
    • 3-6 months: 12-14 inches
    • 6-12 months: 14-16 inches
    • Toddler: 16-17 inches
    • Child: 18 inches
    • Teen/Adult small: 20 inches
    • Adult medium/large: 22 inches
  • Size adjustments should be made in multiples of 2. 
  • Where LS is used, you’ll stitch into the chain spaces from the previous LS row. 
  • Turning chain counts as a stitch.
  • Do not carry color A and B throughout. Fasten off and weave in ends. 

Instructions

Newborn (3-6 months, 6-12 months, toddler) 

Row 1: With 5.5 mm hook and color A:  Foundation Half Double Crochet 54 (60, 64, 70.) Turn upside down, Ch 1. (This will have you working in the wider stitches you’ve made in the foundation.) 

Row 2: [FPHDC in 1st st. BPHDC in next st.] Repeat until one stitch left. HDC in last st. Turn, Ch 1. {27 FPHDC, 26 BPHDC, 1 HDC (30/29/1, 32/31/1, 35/34/1)}

Row 3: [BPHDC in 1st st. FPHDC in next st.] Repeat until one stitch left. HDC in last st. Turn, Ch 1. {27 BPHDC, 26 FPHDC, 1 HDC (30/29/1, 32/31/1, 35/34/1)}

Row 4: Switch to 6 mm (larger) hook. DC in 1st st. DC in each st to end of row. Turn. {54 DC (60, 64, 70)}

Row 5: LS across row, ending with Sc in the turning chain. Turn. Change to color B. {27 Sc, 26 Ch (30/29, 32/31, 35/34)}

Row 6: LS across row, ending with Sc in the last st. Turn. Change to color A. {27 Sc, 26 Ch (30/29, 32/31, 35/34)}

Row 7: LS across row, ending with Sc in the turning chain. Turn. {27 Sc, 26 Ch (30/29, 32/31, 35/34)}

Row 8: Ch 1. DC in each st to end. Change back to 5.5 mm hook. Turn. {54 DC (60, 64, 70)}

Row 9: Ch 1. HDC each st to end. Turn. Ch 1. {54 HDC (60, 64, 70)}

Row 10:  [FPHDC in 1st st. BPHDC in next st.] Repeat until one stitch left. HDC in last st. Turn, Ch 1. {27 FPHDC, 26 BPHDC, 1 HDC (30/29/1, 32/31/1, 35/34/1)}

Row 11: [BPHDC in 1st st. FPHDC in next st.] Repeat until one stitch left. HDC in last st.  Fasten off, leaving a long tail for sewing. {27 BPHDC, 26 FPHDC, 1 HDC (30/29/1, 32/31/1, 35/34/1)}Weave ends except for fastening off tail.

See photo tutorial below for sewing to make the twist.  

Child (teen/adult small, adult medium/large)

Row 1: With 5.5 mm hook and color A:  Foundation Half Double Crochet 80 (84, 90.) Turn upside down, Ch 1. (This will have you working in the wider stitches you’ve made in the foundation.) 

Row 2: [FPHDC in 1st st. BPHDC in next st.] Repeat until one stitch left. HDC in last st. Turn, Ch 1. {40 FPHDC, 39 BPHDC, 1 HDC (42/41/1, 45/44/1)}

Row 3: [BPHDC in 1st st. FPHDC in next st.] Repeat until one stitch left. HDC in last st. Turn, Ch 1.{40 BPHDC, 39 FPHDC, 1 HDC (42/41/1, 45/44/1)}

Row 4: Switch to 6 mm (larger) hook. DC in 1st st. DC in each st to end of row. Turn. {80 DC (84, 90)}

Row 5: LS across row, ending with Sc in the turning chain. Turn. Change to color B. {40 Sc, 39 Ch (42/41, 45/44)} 

Row 6: LS across row, ending with Sc in the last st. Turn. Change to color A. {40 Sc, 39 Ch (42/41, 45/44)}

Row 7: LS across row, ending with Sc in the turning chain. Turn. {40 Sc, 39 Ch (42/41, 45/44)}

Row 8-9 : Repeat row 7. 

Row 10: Change to color B. LS across row, ending with Sc in the last st. Turn. 

Row 11: Change to color A. LS across row, ending with Sc in the last st. Turn.  

Row 12: Ch 1. DC in each st to end. Change back to 5.5 mm hook. Turn. {80 DC (84, 90)}

Row 13: Ch 1. HDC each st to end. Turn. Ch 1. {80 HDC (84, 90)}

Row 14:  [FPHDC in 1st st. BPHDC in next st.] Repeat until one stitch left. HDC in last st. Turn, Ch 1. {40 FPHDC, 39 BPHDC, 1 HDC (42/41/1, 45/44/1)}

Row 15: [BPHDC in 1st st. FPHDC in next st.] Repeat until one stitch left. HDC in last st. Fasten off, leaving a long tail for sewing. {40 FPHDC, 39 BPHDC, 1 HDC (42/41/1, 45/44/1)} Weave ends except for fastening off tail.

Let’s form the twist! It’s easier than you think, I promise:

Don’t hesitate to contact me if you need any help with this ear warmer pattern! Find me on Instagram @motherlodecrafts or send a message in Ravelry!

Love it? Share it!

  • Share on X (Opens in new window) X
  • Share on Facebook (Opens in new window) Facebook
  • Share on Pinterest (Opens in new window) Pinterest
  • Print (Opens in new window) Print

September 18, 2020 by Priscilla

The Flower of the Sun Earrings

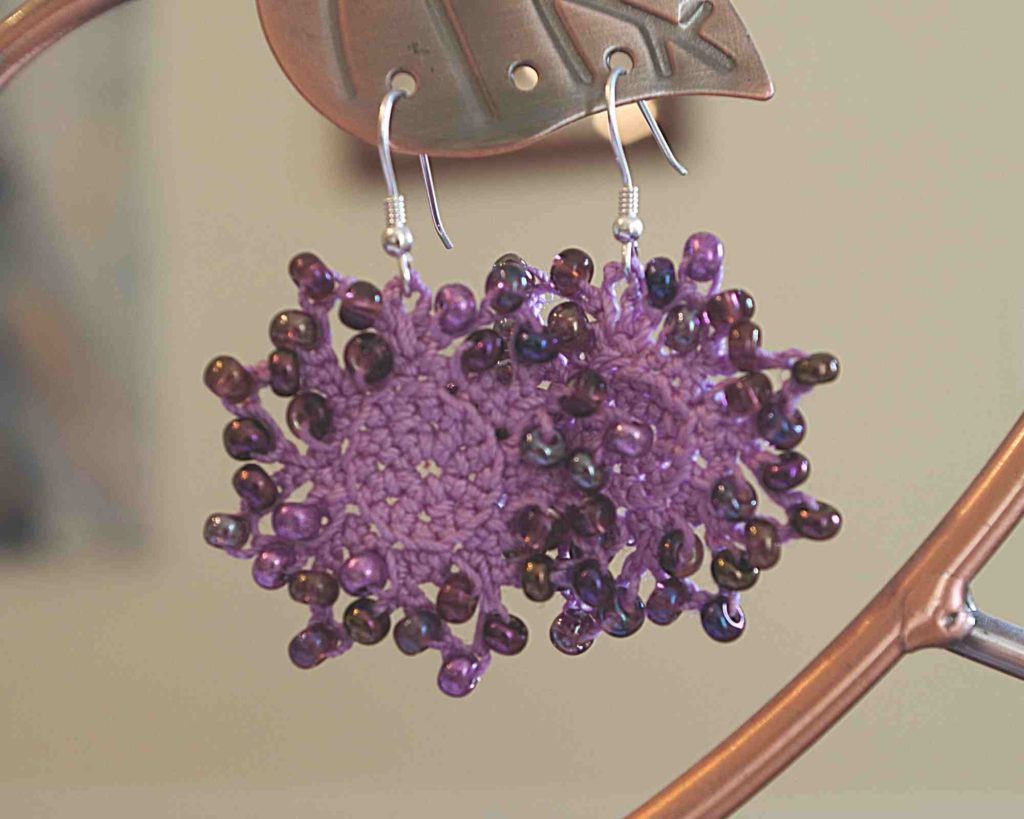
Get it?! Like the “power” of the sun? I’m too much, sometimes, I know. Anywayyyyyyyyyy this past Spring, E’Claire Makery had a cool blog hop with a free crochet pattern everyday. One of the days was the Spring Rain Earrings by Amber Bliss Calderon and I thought how fun it would be to make them for my mom for Mother’s Day! I ordered the supplies for them, but of course they didn’t have everything at Joann Fabrics due to Covid (it ruins everything.) I eventually got all the materials and now I can’t stop making crochet earrings! They are so quick and satisfying which is perfect for me. I’ve been testing earring patterns for the absolutely fabulous Chalia’s Craft and let me tell you, some friends of mine are getting some pretty earrings this Christmas!

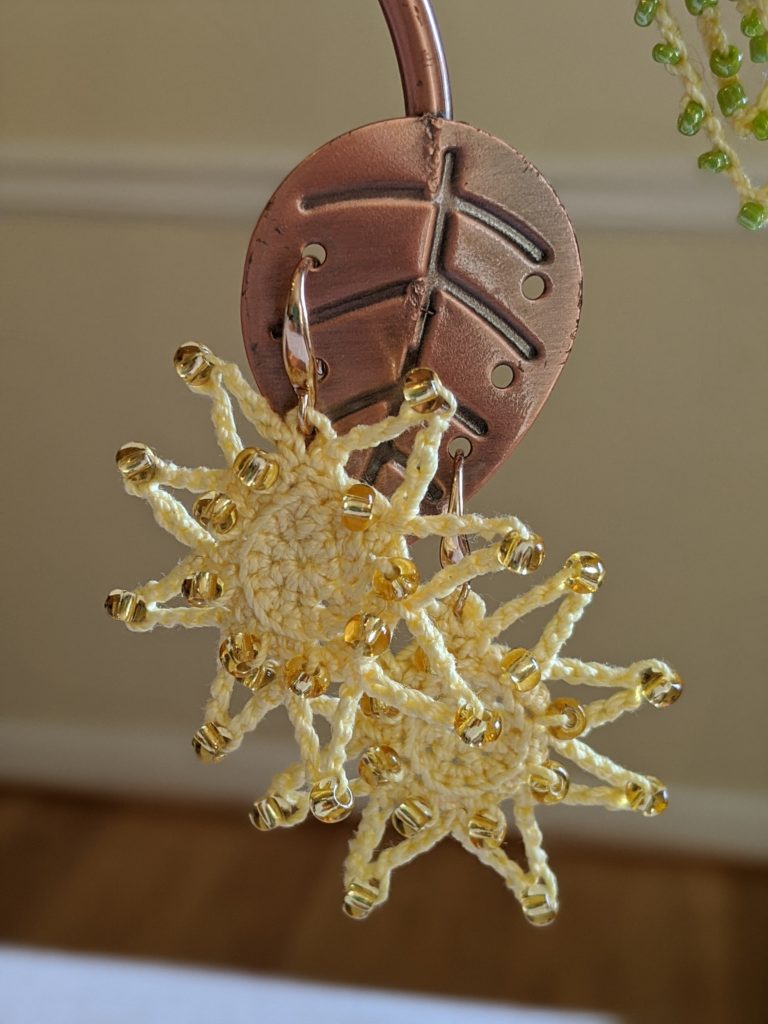
Since I was making all these earrings this summer, I decided to design my own pattern! Originally I designed a flower with smaller beads, but because those beads were actually too small for the thread, I had to change my plan. In working with my materials, I ended up with this sun pattern that is so happy and pretty! I fixed the flower to work with the correct size beads, but I’m not blind, I know the sun is what shines in these two earring patterns!

The free pattern is below, and I’ve got a few pictures here in the blog post, but if you’d like the full photo tutorial, you can purchase the PDF here on Ravelry or LoveCrafts for $3! If you add that to the cost of some crochet thread and earring findings, you can make these earrings for only a few dollars a pair! (For the first pair I ever made, I was able to use the earring wire from an old pair of earrings that I don’t wear anymore to see if I actually liked doing it before I bought a pack of findings. Just a thought if you’ve got beads and crochet thread but no earring wires!)

Materials 

  • Aunt Lydia’s size 10 Crochet Thread (samples are color Maize and Wood Violet)
  • Fabric stiffener or starch spray
  • 1.5 mm steel crochet hook
  • Tapestry needle 
  • Scissors
  • Fish Hook earring findings
  • Small craft/ jewelry pliers
  • Pins and a blocking mat
  • 6/0 glass seed beads 
    • 64 for 2 flower earrings
    • 32 for 2 sun earrings

Abbreviations

  • Ch = Chain
  • Sc = Single crochet
  • sl st = slipstitch
  • st = stitch
  • sk = skip
  • Sc FLO = Single crochet, front loop only
  • Sc w/bead = Single crochet with bead
  • Ch w/bead = Chain with bead

Notes

  • There is no gauge necessary for this pattern, basically: crochet as tightly as you can to achieve the best look. 
  • Fabric stiffener and pins will really help the finish of crochet earrings.
  • There are a few ways to chain and single crochet with beads. For this pattern, you will use the back facing method, where you do not push the bead through the chain or slide the bead to the front, it simply stays on the back. When you finish the earrings, what is typically the wrong side (facing away from you) is actually the finished right side of these earrings. 
  • If you need help figuring out the beaded stitches, there are some great tutorials on YouTube. This one from Interweave Craft is helpful, and check out the tutorials by Chalia’s Craft.

Instructions

Before you begin, thread all the beads you will need onto the crochet thread. I like to thread 2 earrings worth at a time and put a few extra beads on just in case I counted wrong. If you don’t have a bead threader, you can moisten the end of the thread. You can also spray with some of the fabric stiffener, allow to dry, and then slide the beads on easily.

(Make 2)

Make a magic ring. Ch 1.

Round 1: 8 Sc into magic ring. Pull to close the ring and sl st to the 1st Sc. (8 Sc)

Round 2: Ch 1. 2 Sc in each Sc around. Sl st to the 1st Sc. (16 Sc)

Round 3: Ch 1. *Sc FLO in 1st st, Sc w/bead FLO in same st, Sc FLO next st. Repeat from * 7 times. Sl st to 1st Sc. (8 Sc with bead, 16 Sc)

Do not fasten off, continue with round 4 in either Sun or Flower below:

Flower:

Round 4: *Ch 1, Ch w/bead 3 times, Ch 1. Sk 2 st, sl st next st. Repeat from *7 times. Ch 4 and sl st in same st as last sl st. (20 ch, 24 Ch w/bead, 9 sl st) 

Sun:

Round 4: *Ch 4, Ch w/bead, Ch 4. Sk 2 st, sl st next st. Repeat from * 7 times. Ch 4 and sl st in same st as last sl st. (68 Ch, 8 Ch w/bead, 9 sl st)

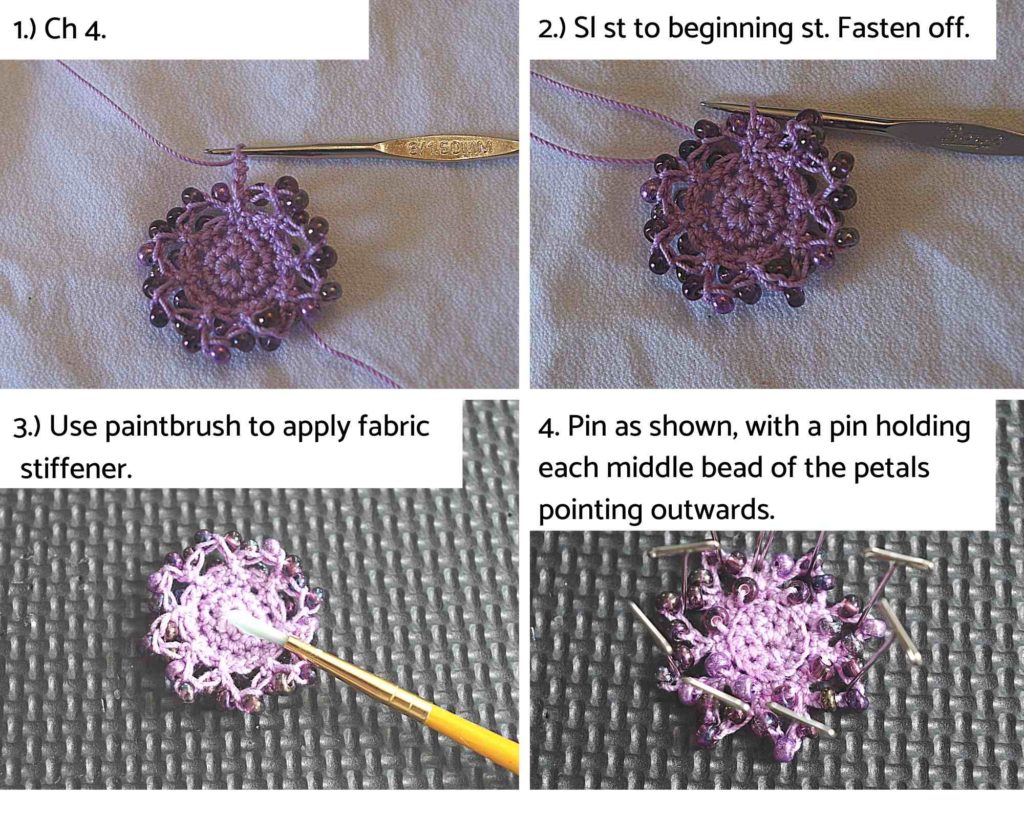
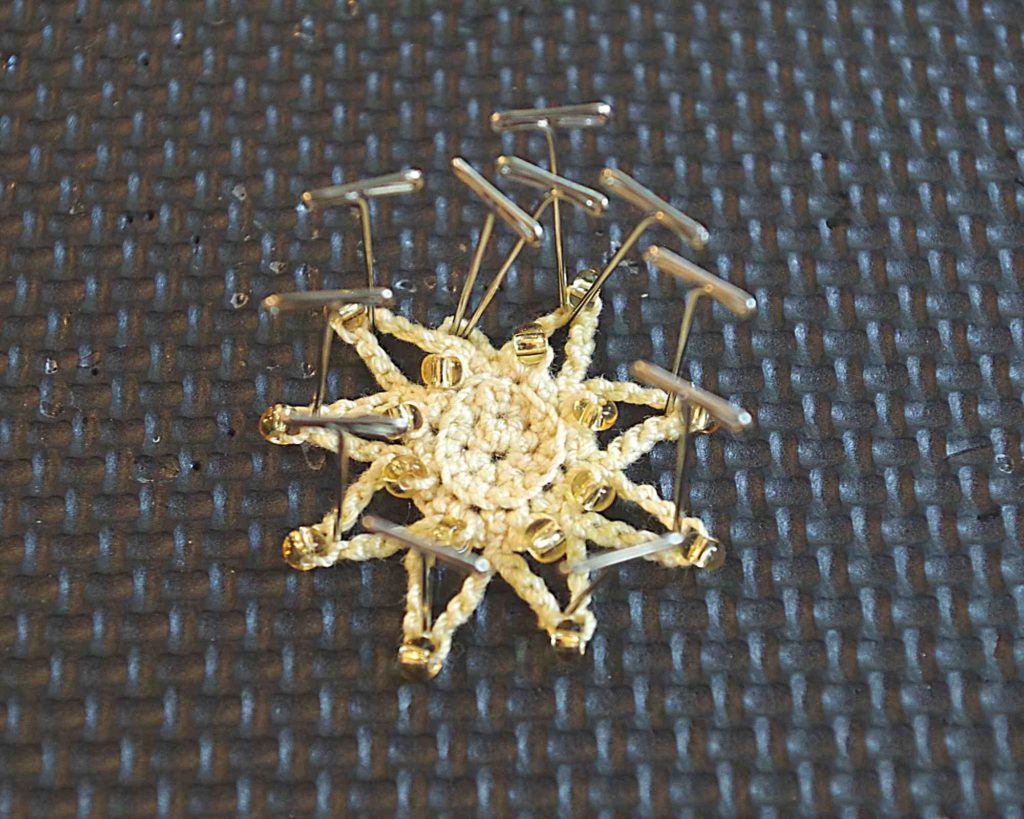
Finish off and weave in ends on the back of the earring with a tapestry needle. Put some fabric stiffener in a paint cup and use a small paintbrush to apply to the back side of the earring. Pin in place as pictured.. Put two pins inside the little loop you made with the Ch-4 and sl st at the end of the last round. This will be where you attach the earring finding. Use paintbrush to apply the liquid to the front of the earring, going in between beads to reach as much of the crochet thread as you can to achieve the most structure for your earring. Allow to dry at least two hours. Attach earring finding to the little loop at the top. Wear your new crochet jewelry proudly!


The last few steps of making the Flower version. The PDF has photos like this of every step!
How to pin the sun in place to form the shape! So cute!

If you need any help with the pattern, feel free to leave a comment here or message me on Instagram: motherlodecrafts

I’d love to help you bring these earrings to your life!

Love it? Share it!

  • Share on X (Opens in new window) X
  • Share on Facebook (Opens in new window) Facebook
  • Share on Pinterest (Opens in new window) Pinterest
  • Print (Opens in new window) Print

August 18, 2020 by Priscilla

Almost Stripes Beanie

I’m still here making all the hats! I just love a quick project, because, as a stay at home mom, so much of my “work” is stuff that never feels completed: laundry, dishes, weeding the garden, etc. Crochet is something I can do in the evenings or during play time and get a sense of accomplishment from. I like expressing creativity through it, but the completion of it is something that really fuels me. So I am a big fan of hats and ear warmers that I can finish in a couple of days. One of my new favorites is crochet earrings, which are even faster! Make sure you sign up for my email list, because a pattern for those will be coming in the future, too! It’s so cute, you don’t want to miss it!

Back to today: I’ve got the Almost Stripes Beanie crochet pattern for you! This one is a little more complicated than my first pattern, because there are color changes and a few different stitches. I created it to be another rectangle that is seamed and constructed, though, so if you are not ready for crochet in the round, you can tackle this hat! I graded this hat to include 7 sizes, which was a challenge! I am not a fan of math in any way, but I managed. I know often people tease about the necessity of math in high school. I’m sure I said probably several times: “When am I ever going to need to know this?!” Well, the answer to 15 year old me was, “When you grow up and want to design your own crochet patterns and you have to multiply and divide and do percentages to figure out the stitch counts and yardage.” I didn’t even beg help from my scientist husband for the stitch counts. How about that?! 


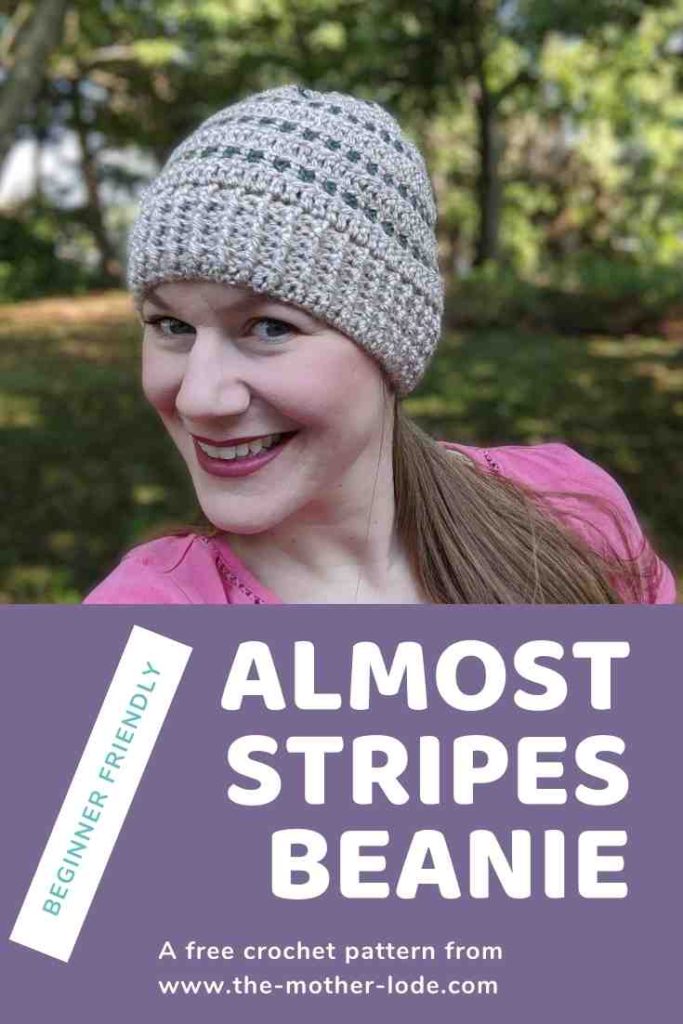
almost stripes beanie pin

Alrighty, keep on scrolling for the pattern! I did make the pattern available for purchase here on Ravelry. You can get the PDF filled with photos and clear guides on each section of the hat for $4. I love being able to print out the pattern so it’s easy to use from the couch! 

Materials

  • Worsted weight (4) yarn (samples are Lion Brand Heartland and Basic Stitch) may use two colors for stripes as written if desired. Color A approx 200-250 yds, Color B approx 30 yds
  • Crochet hooks: 5.5 mm and 6 mm or two hooks needed to meet gauge
  • Scissors
  • Tapestry needle
  • Measuring tape


Gauge: 7 rows of 15 DC stitches = 4 in x 4 in with 5.5 mm hook (If you go up a hook size to meet gauge, you would use a 6 mm hook for the gauge swatch, if you need to go down you will use a 5 mm hook for the gauge swatch.) Alternatively, the length of the brim per size is listed in the notes section. You may complete the first three rows and check for length to match the desired size. 


Abbreviations

  • Ch = Chain
  • DC = Double Crochet
  • HDC = Half-Double Crochet
  • Sc = Single Crochet
  • LS = Linen Stitch (Ch 1, sk st, Sc)
  • FPHDC = Front Post Half-double Crochet
  • BPHDC = Back Post Half-double Crochet
  • DC BLO = Double Crochet Back Loop Only (the loop farthest from you)
  • DC FLO = Double Crochet Front Loop Only (the loop closest to you)
  • st = stitch
  • sk = skip 

Notes

  • The first section has the pattern for the baby/toddler sizes, the second section is the child/adult sizes. 
  • Parentheses indicate different stitch counts for different sizes: {newborn (3-6 months, 6-12 months, toddler)} and {child (teen/adult small, adult medium/large)} These stitch counts do not include the turning chain. 
  • Instructions between * are repeated
  • This hat is constructed by the brim first, the body of the hat is crocheted onto it, then the top of the body has decreases to allow for some shaping at the top. This will create a sort of rectangle-trapezoid shape which will turn into a hat with seaming and gathering.
  • The brim of the hat should be approximately the following in length:
    • Newborn: 11-12 inches
    • 3-6 months: 12-14 inches
    • 6-12 months: 14-16 inches
    • Toddler: 16-17 inches
    • Child: 18 inches
    • Teen/Adult small: 20 inches
    • Adult medium/large: 22 inches

Newborn (3-6 months, 6-12 months, toddler) 

With 5.5 mm hook and color A Ch 55 (61, 65, 71.). 

Row 1: HDC in 2nd st from hook. HDC in each st to end of row. Turn, Ch 1. {54 HDC (60, 64, 70)} 

Row 2: *FPHDC in 1st st. BPHDC in next st.* Repeat * to end. HDC in the turning chain. Turn, Ch 1. {27 FPHDC, 26 BPHDC, 1 HDC (30/29/1, 32/31/1, 35/34/1)}

Row 3: *BPHDC in 1st st. FPHDC in next st.* Repeat * to end. HDC in the turning chain. Turn, Ch 1. {27 BPHDC, 26 FPHDC, 1 HDC (30/29/1, 32/31/1, 35/34/1)}

Row 4: Repeat row 2.

Row 5: Repeat row 3.

Row 6: Switch to 6 mm (larger) hook. DC FLO in 1st st. DC FLO in each st to end of row. Turn, Ch 1. {54 DC (60, 64, 70)}

Row 7: sk 1st st, Sc in 2nd st. *Ch 1, sk next st, Sc* Repeat * to end, with the last Sc in the turning chain. Turn, change to color B, Ch 1. {27 Sc, 26 Ch (30/29, 32/31, 35/34)}

Row 8: sk 1st st, Sc in next Ch 1 space. *Ch 1, sk next st, Sc in next Ch 1 space* Repeat * to end, ending with Sc in turning Ch. Turn, change to color A, Ch 1.{27 Sc, 26 Ch (30/29, 32/31, 35/34)}

Row 9: Repeat row 8, without changing colors. {27 Sc, 26 Ch (30/29, 32/31, 35/34)}

Row 10: DC BLO in 1st st. DC BLO each st to end of row. Turn, Ch 1. {54 DC (60, 64, 70)}

Row 11: Repeat row 7.

Row 12: Repeat row 8.

Row 13: Repeat row 9. 

Row 14: Repeat row 10. (NOTE: For newborn size, skip to row 19 after completing row 14.)

Row 15: Repeat row 7.

Row 16: Repeat row 8.

Row 17: Repeat row 9.

Row 18: Repeat row 10.

Row 19: Switch to 5.5 mm (smaller) hook. Sc in 1st 3 stitches. *Sc 2 tog. Sc next 3 st.* Repeat * to end of row. {44 Sc (48, 52, 56)}


(NOTE: for toddler size, repeat row 19 for a row 20 and 21.) Leave a long tail, fasten off. Weave in the ends of the stripes that are hanging on the sides. Fold hat together with the wrong side facing out (wrong side has the DC near the brim in the back loop away from you.) Use the long tail you left to seam the hat from the top to the bottom with an invisible mattress stitch.  


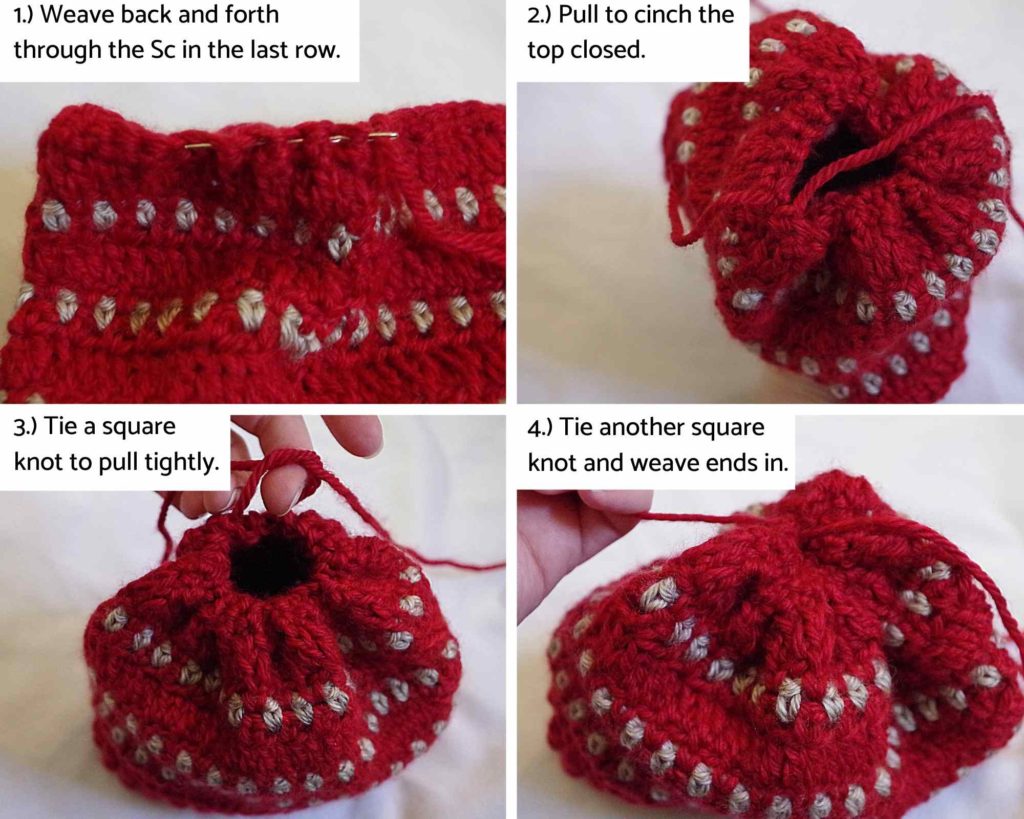
Cut a length of yarn about 10 inches. Weave back and forth through the single crochet at the top of the hat. Pull tightly to cinch the hat together. Tie two or three knots. Put the remaining tails through your tapestry needle and criss cross over the hole a few times if necessary to cover the top. Weave the ends in and cut remaining. Turn right side out.

Child (teen/adult small, adult medium/large)

With 5.5 mm hook, and color A Ch 81 (85, 91) 

Row 1: HDC in 2nd st from hook. HDC in each st to end of row. Turn, Ch 1. {80 HDC (84, 90)}

Row 2: *FPHDC in 1st st. BPHDC in next st.* Repeat * to end. HDC in the turning chain. Turn, Ch 1. {40 FPHDC, 39 BPHDC, 1 HDC (42/41/1, 45/44/1)}

Row 3: *BPHDC in 1st st. FPHDC in next st.* Repeat * to end. HDC in the turning chain. Turn, Ch 1. {40 BPHDC, 39 FPHDC, 1 HDC (42/41/1, 45/44/1)}

Row 4-9: Repeat Row 2 and 3, alternately.

Row 10: Switch to 6 mm (larger) hook. DC BLO in 1st st. DC BLO in each st to end of row. Turn, Ch 1.  {80 DC (84, 90)}

Row 11: sk 1st st, Sc in 2nd st. *Ch 1, sk next st, Sc* Repeat * to end of row. Turn, change to color B, Ch 1. {40 Sc, 39 Ch (42/41, 45/44)}

Row 12: sk 1st st, Sc in next Ch 1 space. *Ch 1, sk next st, Sc in next Ch 1 space* Repeat * to end, ending with Sc in turning Ch. Turn, change to color A, Ch 1. {40 Sc, 39 Ch (42/41, 45/44)}

Row 13: Repeat row 12, without changing colors.

Row 14: DC FLO in 1st st. DC FLO in each st to end of row. Turn, Ch 1. {80 DC (84, 90)} 

Rows 15-22: Repeat rows 11-14 twice.

Row 23: Repeat row 11.

Row 24: Repeat row 12.

Row 25: Repeat row 13. (NOTE: To add extra slouch, repeat row 14 again, followed by 11, 12, and 13.)

Row 26: Switch to 5.5 mm (smaller) hook. Sc in each stitch to end of row. Turn, Ch 1. {80 Sc (84, 90)}

Row 27: Sc in 1st 3 stitches. *Sc 2 tog. Sc in next 3 st.* Repeat * to end of row. {64 Sc (68, 72)}

Row 28: Repeat Row 27. {52 Sc (55, 58)}  

Row 29: Sc in 1st st. *Sc2tog. Sc.* Repeat * to end of row. {35 Sc (37, 39)} 

Row 30: Repeat Row 29. {24 Sc (25, 26)}

 Leave a long tail, fasten off. Weave in the ends of the stripes that are hanging on the sides. Fold hat together with the wrong side facing out (wrong side has the DC near the brim in the back loop away from you.) Use the long tail you left to seam the hat from the top to the bottom using an invisible mattress stitch. 


Cut a length of yarn about 10 inches. Weave back and forth through the single crochet at the top of the hat. Pull tightly to cinch the hat together. Tie two or three knots. Put the remaining tails through your tapestry needle and criss cross over the hole a few times if necessary to cover the top. Weave the ends in and cut remaining. Turn right side out. 


Ok, that’s all I’ve got today! Whew, I’m tired. I think I’ll be happy when my next pattern is a quick little pair of earrings with only ONE size! 

Love it? Share it!

  • Share on X (Opens in new window) X
  • Share on Facebook (Opens in new window) Facebook
  • Share on Pinterest (Opens in new window) Pinterest
  • Print (Opens in new window) Print

August 9, 2020 by Priscilla

5 Perfect Ear Warmer Crochet Patterns

One of the best beginner crochet items to make is ear warmers! Crochet a small, simple rectangle, and easily seam it together to make a cozy headband that keeps your ears toasty warm in the chilly weather. The first one I ever made was for my mom, who taught me to crochet in the first place. Worsted weight or bulky weight yarn is nice for keeping the cold out. My new favorite yarn for ear warmers and hats is Red Heart Soft: it’s a worsted weight that is true to its name and has a good squish to it.

This Twisted Step-Sister Headband from Yarnspirations is that first one I ever made for my mom. The twist is a little tricky, but once you get it the first time, it’s not hard. The body of it is all double crochet, so it’s fast and easy.

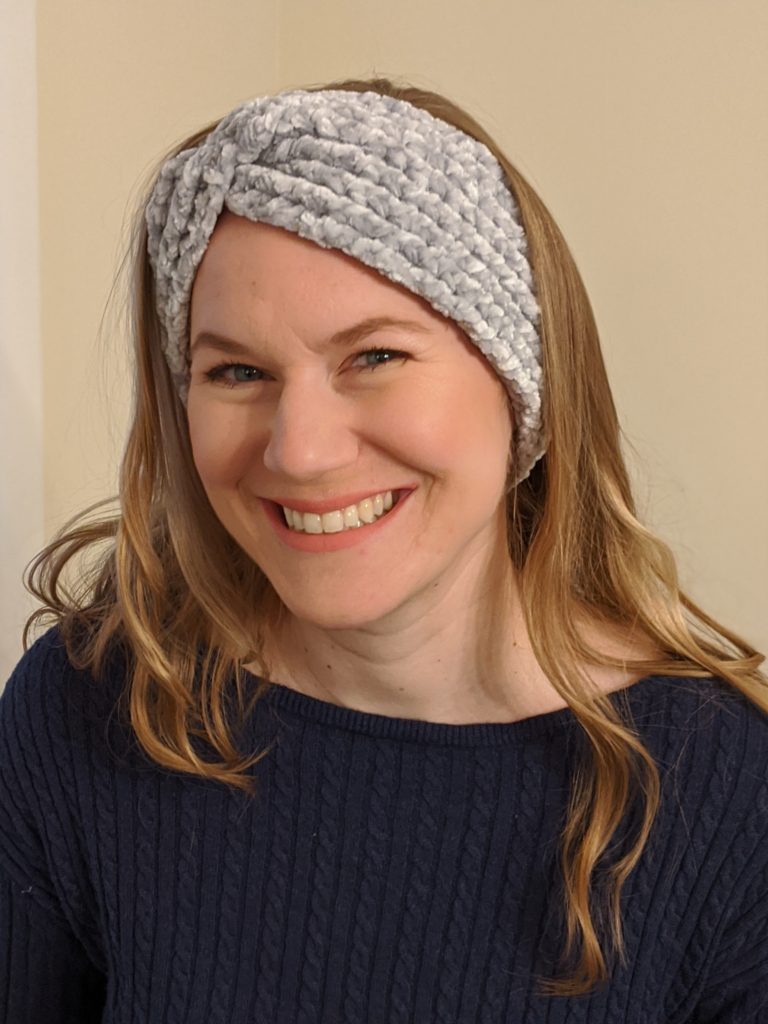
This Ribbed Velvet Twist pattern by Daisy Farm Crafts is so amazing! Truthfully, the velvet yarn is tricky to work with, so it’s not exactly easy, but the stitches are not complicated, it just takes a little extra hand strength. It’s so beautiful and soft, though, it’s totally worth the effort. I think I made at least 3 of these last winter as gifts. They have a BEAUTIFUL velvet hat pattern, too, that you should check out.

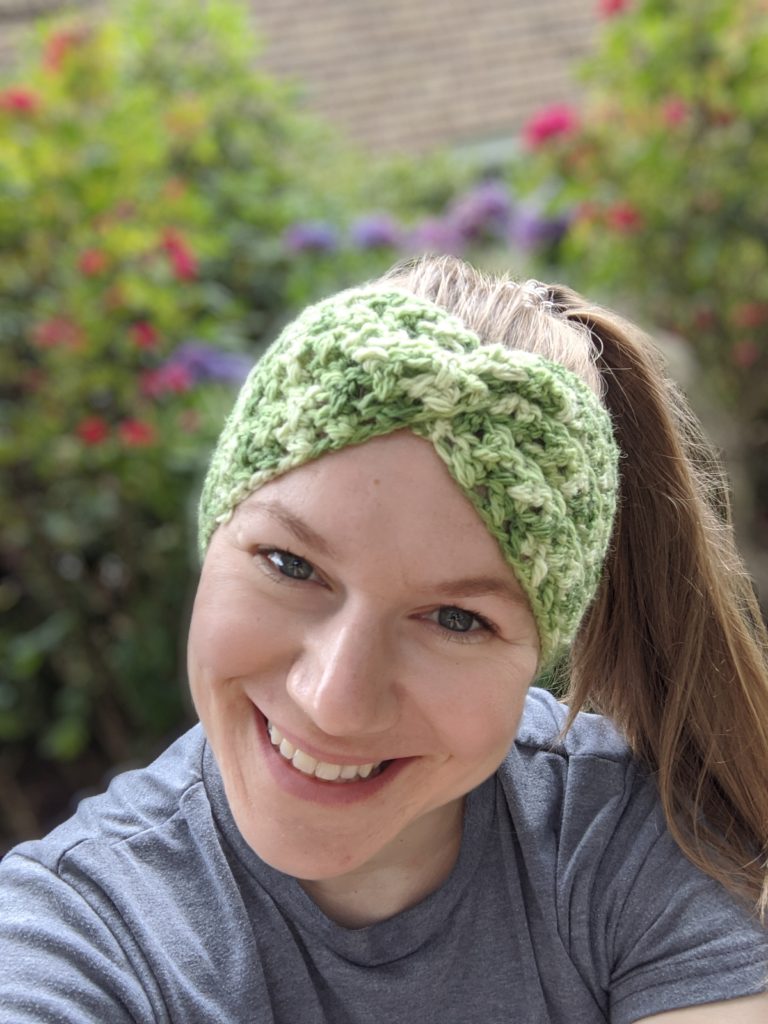
I recently tested the Grace Ear Warmer pattern for Amy at Another Mum Fights the Dust and I fell in love. It is so dang easy and quick. The texture is awesome and the twist is so on point. Amy has bunches of other great patterns, too, you should definitely check her site! I made two of these in July and it’s my new go-to pattern when I’m not ready to start a big project but I need something in my hands.

So cute, right?!
No doubt about it, I am a HAM in front of a camera.

Here are a two more beautiful ear warmer patterns that are on my “to make” list!

  • Faux-Bow Headband Pattern by Mama in a Stitch: I love her patterns! I made one of her sweaters in January and it turned out so great. This ear warmer is crocheted by creating a tube, then cinching the ends of the tubes and attaching them together to create the “bow.” It’s so cute! I think the double fabric on it would make it extra warm!
  • Charleigh Twist Headband Pattern by Crochetastic Boutique: The texture on this one is great! This is one that I would love in a few bright colors. This beginner pattern uses simple stitches to create a unique texture. This talented designer has a variety of lovely designs, so far from her collection I’ve made mug rugs and a cute purse!

Now I think I need to design my own headband for the fall! Maybe something in a bulky yarn that is a quick make…… or maybe a stripey one…..

Love it? Share it!

  • Share on X (Opens in new window) X
  • Share on Facebook (Opens in new window) Facebook
  • Share on Pinterest (Opens in new window) Pinterest
  • Print (Opens in new window) Print

May 1, 2020 by Priscilla

Simple Ripples Baby Hat

I’m so thrilled to offer to you my first crochet pattern! I’ve been crocheting almost 7 years. On and off at first and now I am definitely a yarn hoarder. I just kept coming back to it as my craft of choice!

You know, it’s funny, I’m in my 30’s and really just now starting to dream of what I want to be when I grow up. Meaning, I never had much of a career aspiration. I liked French class in high school, so I decided to major in French in college. In college, I planned on getting married and starting a family, so I studied education as well, because I thought it would be a less difficult career to raise a family while doing (haha, oh young Priscilla, who knew nothing.) I intended to teach high school French. That never happened and I ended up teaching preschool, which I loved, but admittedly, wasn’t interested in doing long-term. I’ve now been a stay at home mom for almost 7 years. My little ones are getting older and I’m looking to the future. What am I going to do when they are all at school!?

Now don’t get me wrong, my buddy, laundry will always be around and the little boy pee around the toilets won’t clean itself, but, in between that stuff, I want some kind of creative outlet and some kind of part-time work. As I have grown my crochet skills in the last few years, I am seeing the potential as a career for myself that allows me to hop over to school for volunteering and throw dinner in the crock-pot while I’m at home testing patterns, creating my own, and sharing them on my blog!

I started testing patterns for other designers in January to get some practice. I needed to start understanding how pattern design works on the paperwork end. It’s been such fun being part of a community of crocheters and I’m loving it!

Okay, hold your horses, I’m getting to the pattern! One thing I’ve always made is hats. My boys all wear mommy-made hats, my nieces and nephews, etc. I like making them because there is SO much you can do from the very simple to the very complicated. They are generally a smaller project, too, so you get that feeling of accomplishment sooner. If you’ve ever crocheted and thought hats were hard, you’ve got to make this one! It’s crocheted as a rectangle, then stitched to form a tube, then cinched at the top to make a hat! No tricky rounds to count here! I hope you love this hat and I plan to make it in adult sizes in the fall if you haven’t little ones in your life to make for. The PDF is available for $2 on Ravelry! If you’ve never made this kind of hat before, it is helpful to be able to print the pattern. It has 12 progress photos and more detailed explanations to help you!

Supplies

  • Lion Brand Feels Like Butta yarn in color of choice (samples: Charcoal, Sage, Ice Blue) 2 oz; 130 yds (1 skein) 
  • crochet hook US size I /9 (5.5mm) or size needed to obtain gauge
  • pom-pom maker (optional)
  • tapestry sewing needle
  • scissors

Stitches

  • Ch= Chain
  • HDC= Half Double Crochet
  • DC= Double Crochet
  • SS= Slipstitch
  • BLO= Back Loop Only

Sizing in the pattern is marked as follows:

Newborn (0-6 month, 6-12 month, 1-3 years) Stitch counts marked as { } at the end of the row. Turning chain does not count towards stitch count.

Gauge: 16 HDC in 11 rows= 4″ (10cm) OR 15 DC in 8 rows = 4″ (10cm)

Instructions

Ch 26 (30, 34, 38).

Row 1: HDC in 3rd chain from hook. HDC in each stitch across. Turn. {24 (28, 32, 36) HDC}

Row 2: Ch 2, DC in BLO in each stitch across. Turn.

{24 (28, 32, 36) DC}

Row 3: Ch 2, HDC in each stitch across. Turn. {24 (28, 32, 36) HDC}

Rows 4- 24 (28, 32, 36): Repeat Rows 2 and 3.

(Final row should be a row of double crochet BLO.)

At end of last row, turn and SS to seam the short sides of the rectangle with the wrong side (flat side) facing out. Finish off, leaving a tail of at least 12 inches. Use this long tail to sew with a tapestry needle every few stitches around the top, pulling tightly to cinch the top of the hat closed. Stitch back and forth across the top of the hat a few times to be sure the top is tightly closed. Weave in the remaining tail, or use it to attach a pom. Weave in any remaining ends.

Well that’s all she wrote! It’s been a crazy past few weeks getting this together, but I’m so happy I made the jump to do it! What is something new you are going to challenge yourself with?

Love it? Share it!

  • Share on X (Opens in new window) X
  • Share on Facebook (Opens in new window) Facebook
  • Share on Pinterest (Opens in new window) Pinterest
  • Print (Opens in new window) Print

March 17, 2020 by Priscilla

DIY Crochet Flower Wreath

The very first crochet item I ever made was a wonky scarf for my mom. It was uneven FOR SURE. I ended up crocheting a flower to add to it, and it did help it look a little better. It was still bad, though, haha. With practice comes consistency, and the last several larger projects I’ve made have really shown me how much muscle memory my hands have gained in keeping stitches even in size. So, if you are just starting out, or creating a project here and there, know that with practice and time comes consistency to make a beautiful piece!

In the meantime, there are many crochet flower patterns that are easy to follow and require only a few simple stitches. They are very forgiving since they are attempting to mimic real flowers, which aren’t uniform anyway. You can easily master a few different flower designs and work them up in your favorite colors to adorn anything! They are popular on headbands, pillows, and occasionally garments. I’ve seen a few wreaths out there that are entirely made from crocheted flowers. I wanted to mimic that but with a little less time and a little more simplicity.

Read on for how I created this Crochet Flower wreath!

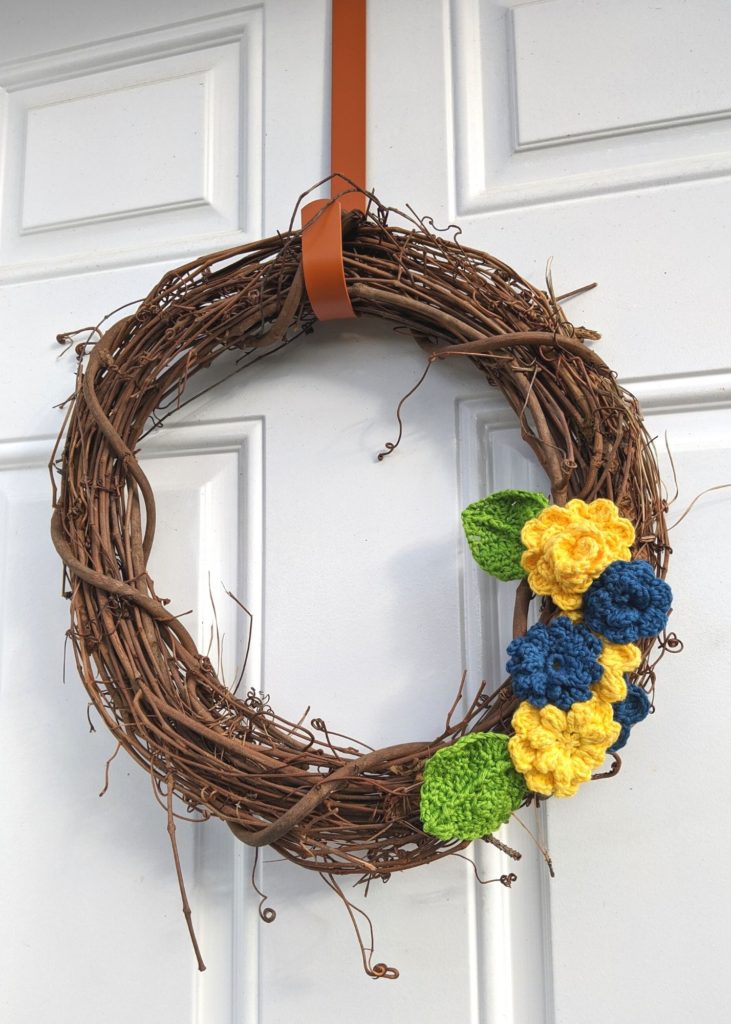
stick wreath with crocheted flowers

I bought this gorgeous Lion Brand Yarn called Coboo made from cotton and bamboo. The colors are so pretty and it’s very silky soft. I bought three colors from JoAnn Fabrics to create this bold spring wreath and I’m so happy with how it turned out. The stick wreath form I got at Michael’s for like 5 bucks, and since I just attached the flowers with wire, I can use the wreath form again if I want to create something else!

Step One: Choose your yarn. Any yarn will do for making flowers. For these, I wanted smaller, tightly stitched flowers, so I used the Coboo yarn which is a weight 3 yarn. Coordinate your hook with your chosen yarn. Again, I was going for smaller with mine, so I went down a hook size from the recommendation on the yarn package. (I used an E hook.)

Step Two: Crochet flowers in varying sizes, about 6. Here is an easy pattern by Crochet 365. This tutorial from Love Life Yarn I used for the larger carnation flowers. Then crochet two leaves to go with the flowers. You can find a simple leaf pattern from MamaChee. Weave in the ends of everything and cut the excess yarn.

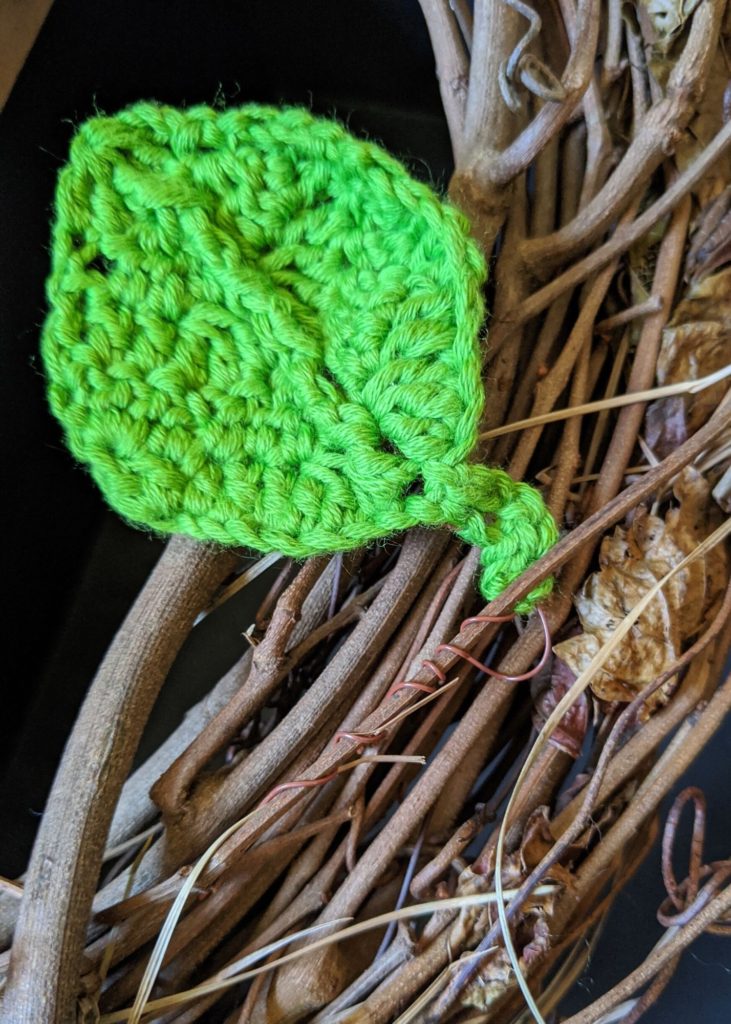
crochet leaf

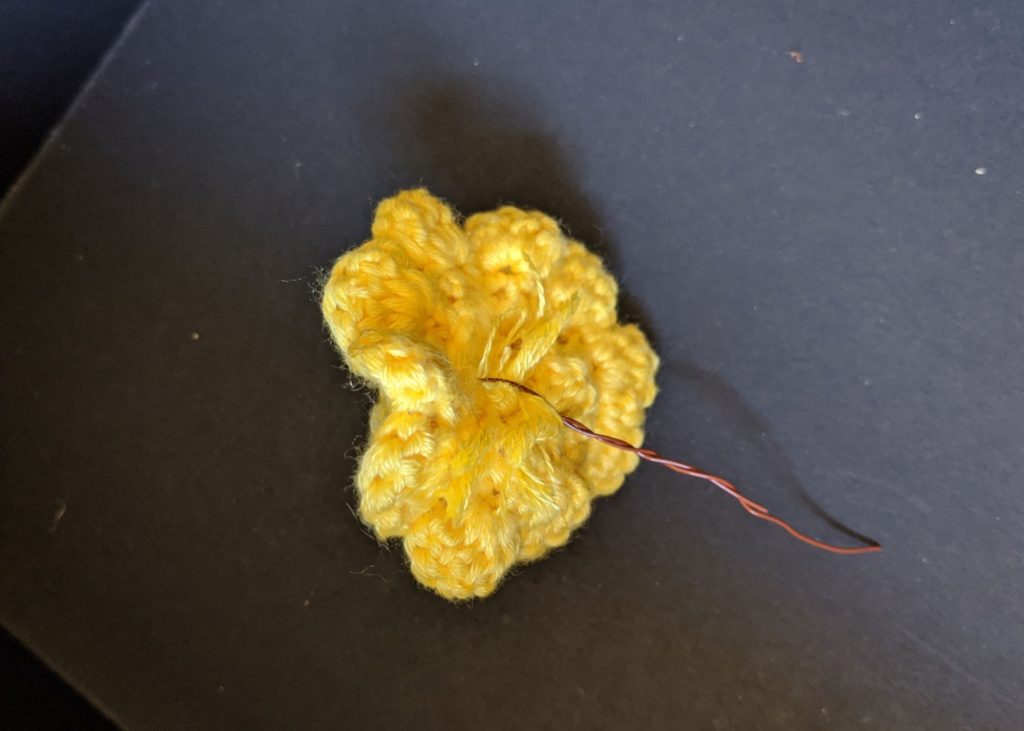
Step Three: Arrange the flowers and leaves on the wreath so you can plan which shall go on first and which shall overlap on top. Attach the leaf at the top using floral wire. Cut a length of floral wire of about 8 inches. Bend in half and feed part of it through the back of your leaf. Once it feels securely part of the leaf, weave the wire onto the sticks of the wreath as you would a Christmas pick. For the flowers, I bent a bit of the length of wire at the top, then I stuck it through the center of the flower at the back sideways and bent it in the center of the flower, so as to have two lengths of wire coming from the center. These lengths I wound together and then placed into the wreath and wove a bit around the sticks. Continue attaching each element until your desired effect is achieved!

back of crochet flower

I hope you liked this project! I’m already envisioning a sunflower one in the height of summer, wouldn’t that be lovely!?

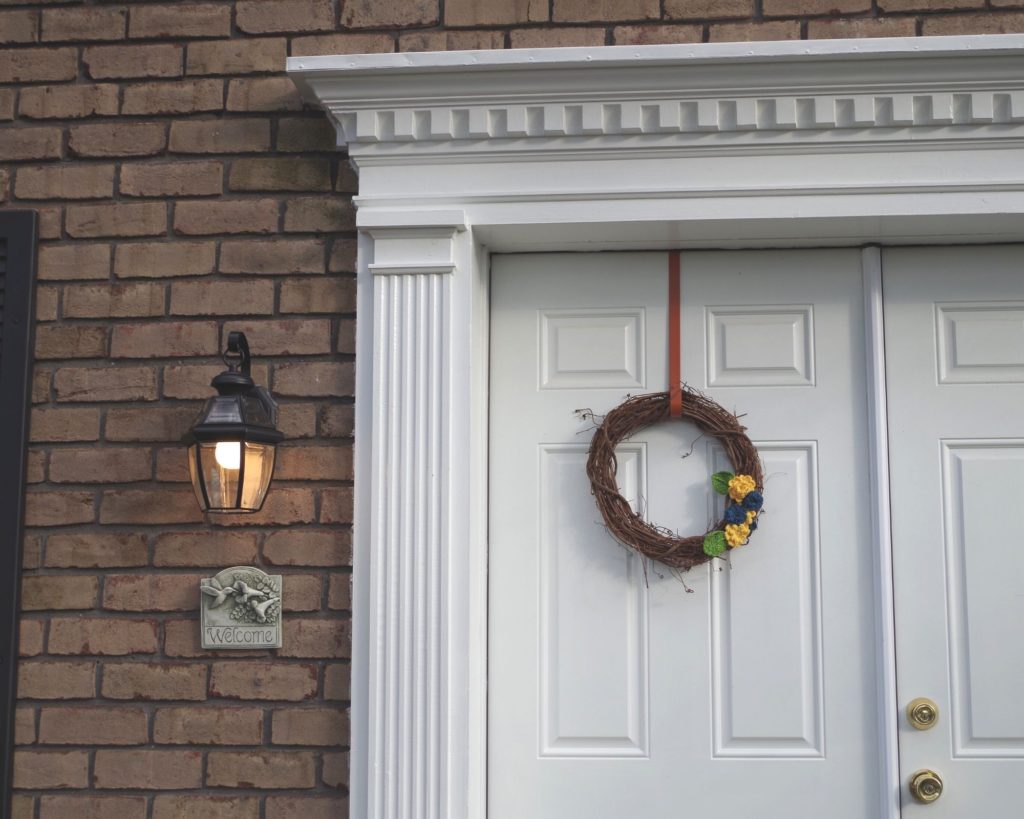
Front door wreath

Love it? Share it!

  • Share on X (Opens in new window) X
  • Share on Facebook (Opens in new window) Facebook
  • Share on Pinterest (Opens in new window) Pinterest
  • Print (Opens in new window) Print
  • « Previous Page
  • 1
  • …
  • 4
  • 5
  • 6
  • 7
  • Next Page »

Welcome! My name is Priscilla and I love designing crochet patterns for your family. I live in beautiful Pennsylvania where I enjoy all sorts of crafts, but I’m most passionate about crochet! I’m a Catholic mom of 4 and I sometimes incorporate my faith into my designs. Thank you so much for supporting me by visiting my crochet website and I hope you find something here that you are excited to make.

Recent Posts

  • Cozy Fall Baby Beanie Pattern
  • Spider Basket Crochet Pattern
  • Lacy Edged Crochet Shawl Pattern
  • Crochet Gingerbread Earring Pattern
  • Classic Hairbow Crochet Pattern

Categories

Follow Me

  • Etsy
  • Facebook
  • Instagram
  • Pinterest
  • YouTube

Pretty Chic Theme By: Pretty Darn Cute Design