The Mother Lode

Crafts and Crochet

  • Home
  • Crochet Pattern Library
  • Faith Based Patterns
  • About Me
  • Privacy Policy

April 19, 2024 by Priscilla

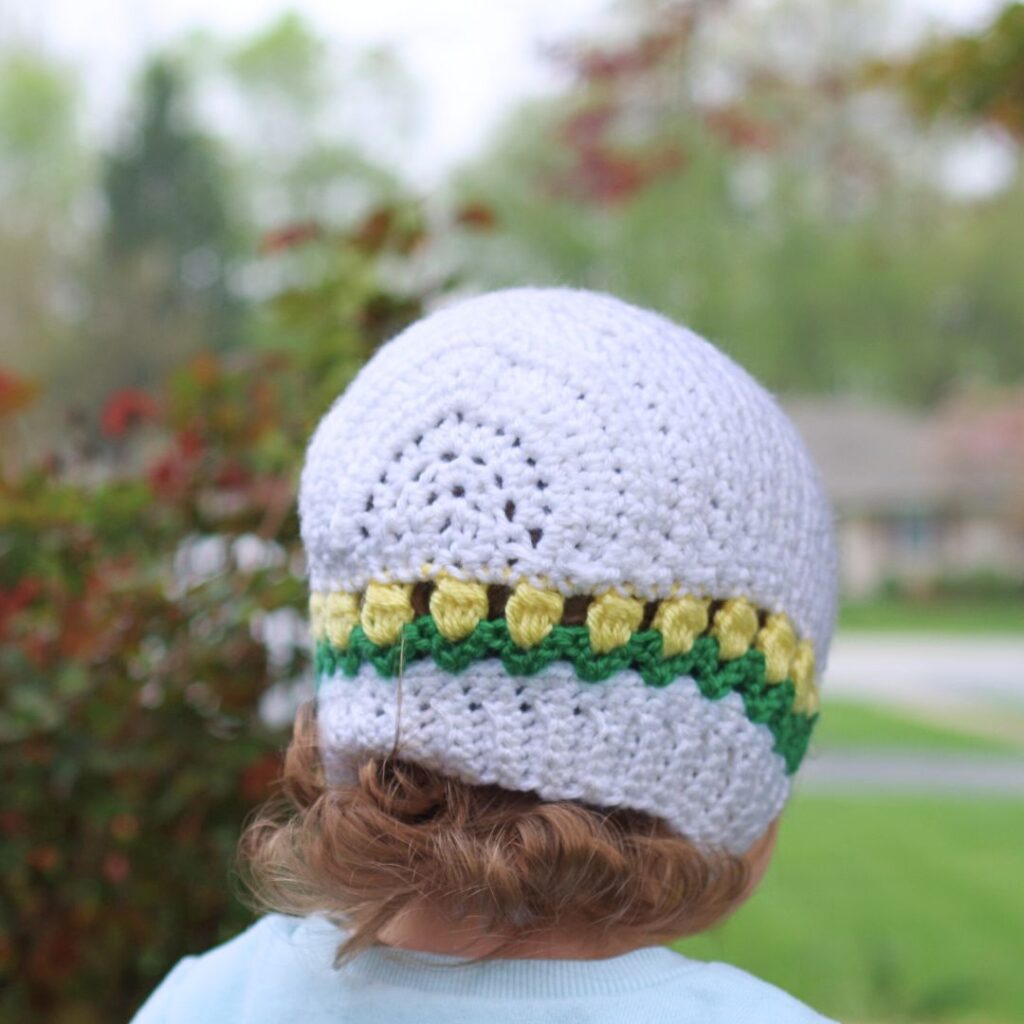
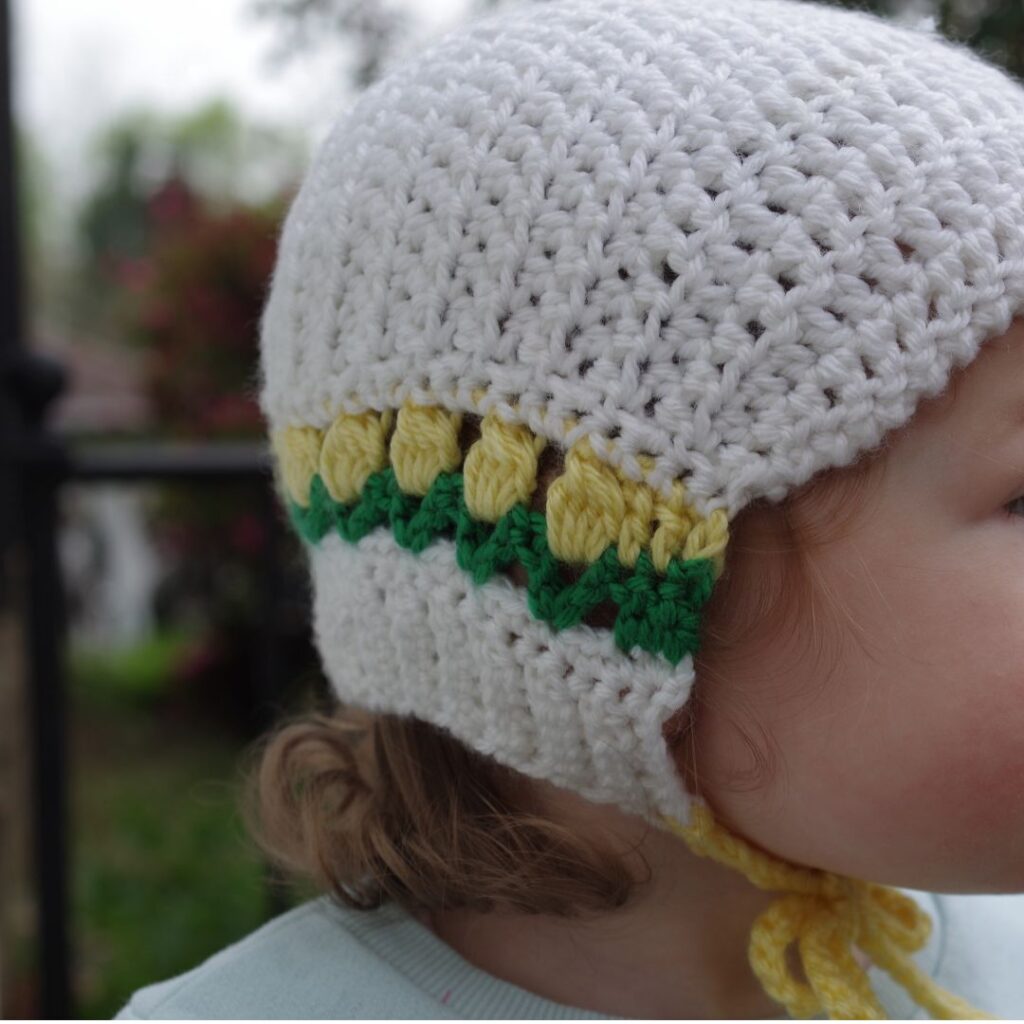
First Tulips Bonnet

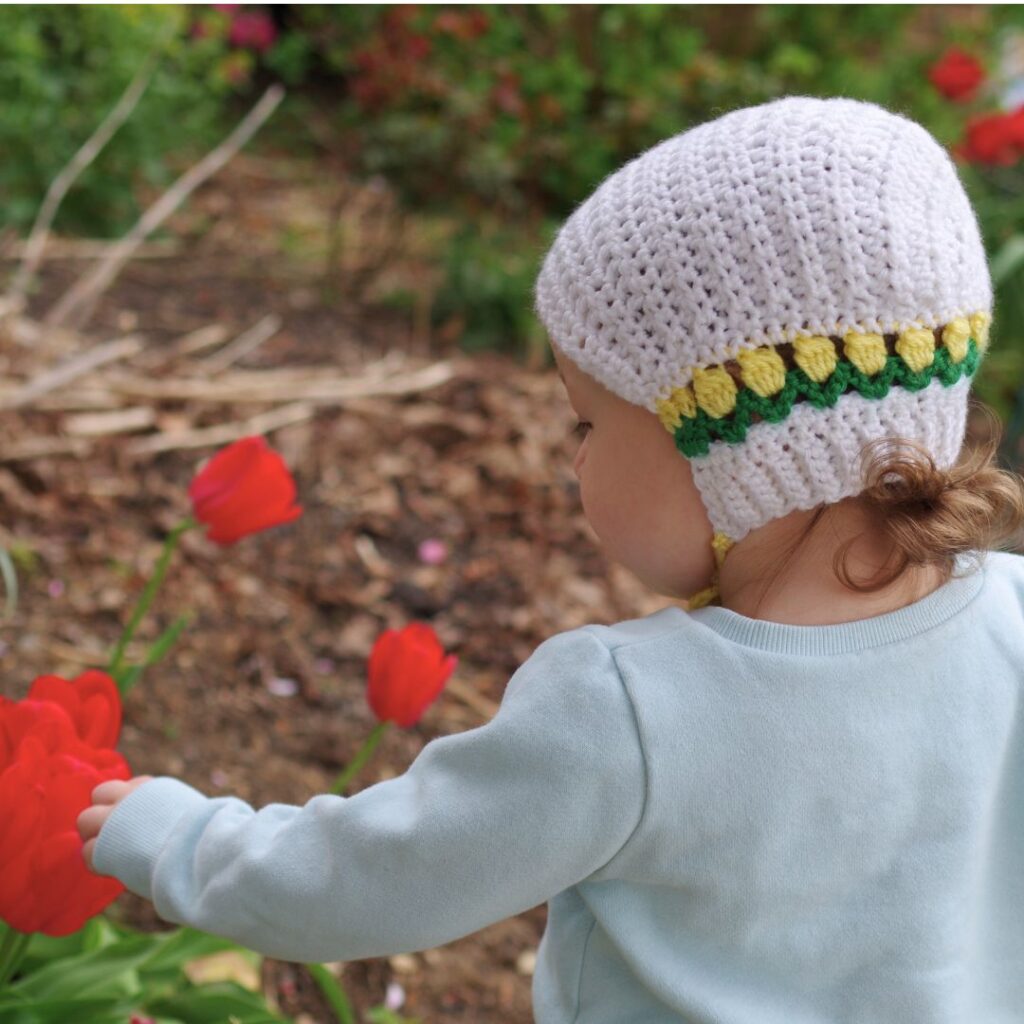
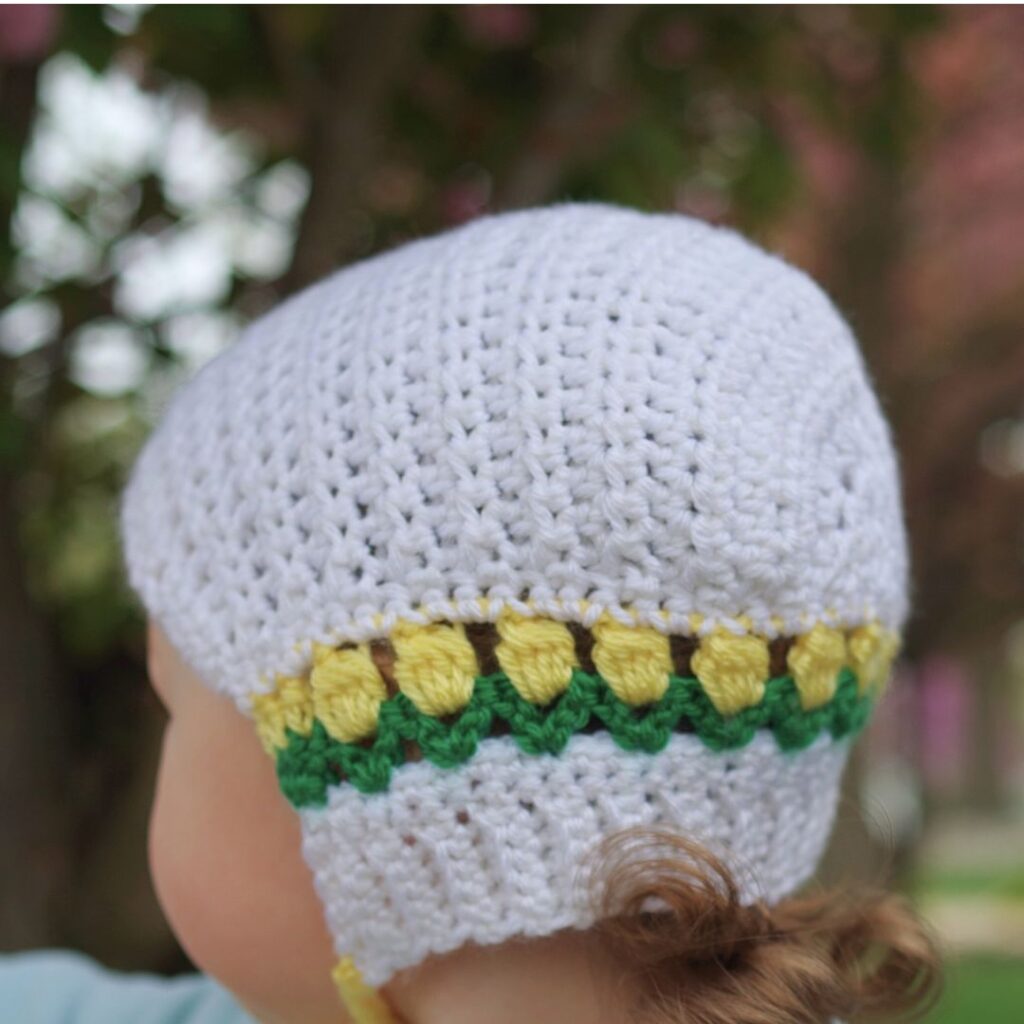
Bonnets are such a great accessory for those tricky toddlers who pull hats right off! I think they aren’t much more work than making a hat and I think I’ll have to design another bonnet this fall for my toddler. This design was inspired by happy spring tulips. I love those first spring bulbs that emerge year after year. This year I replanted so many bulbs from another flower bed in my yard and they all survived and bloomed beautifully!
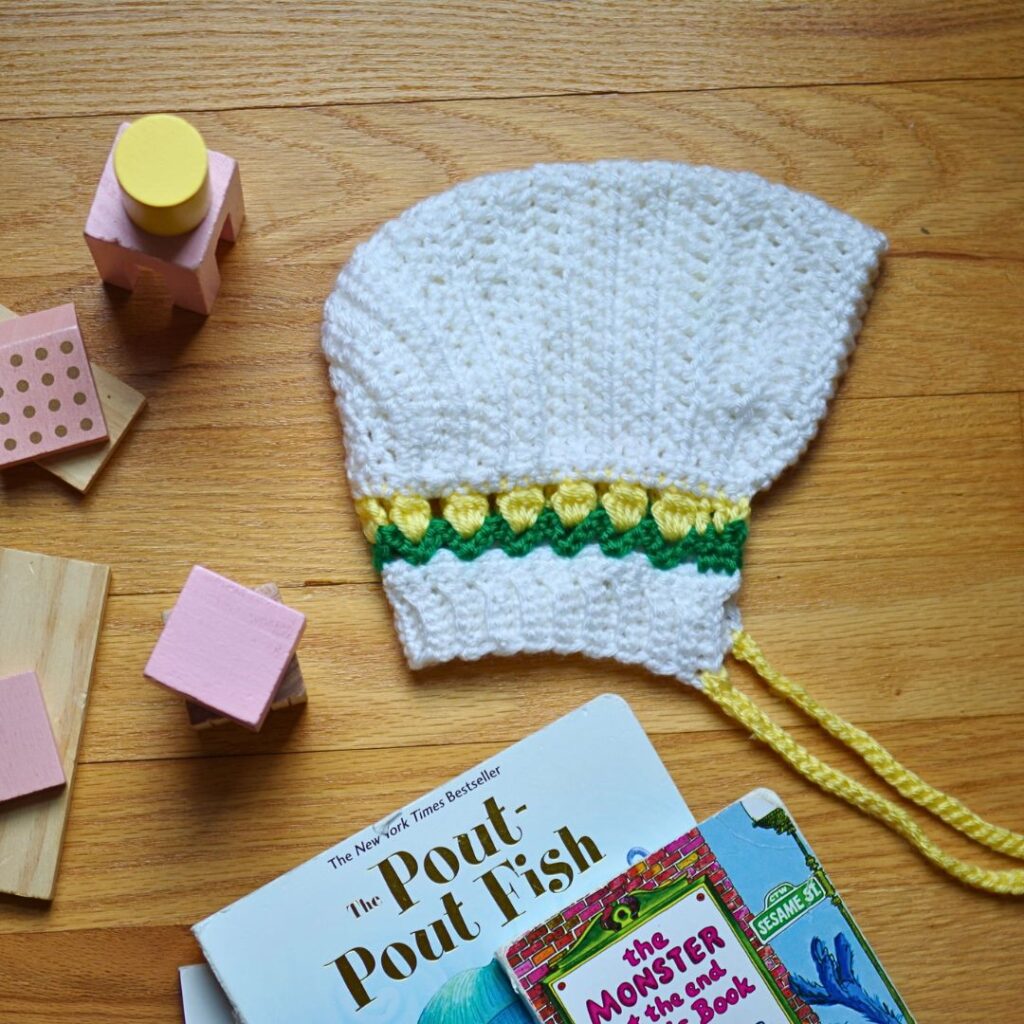
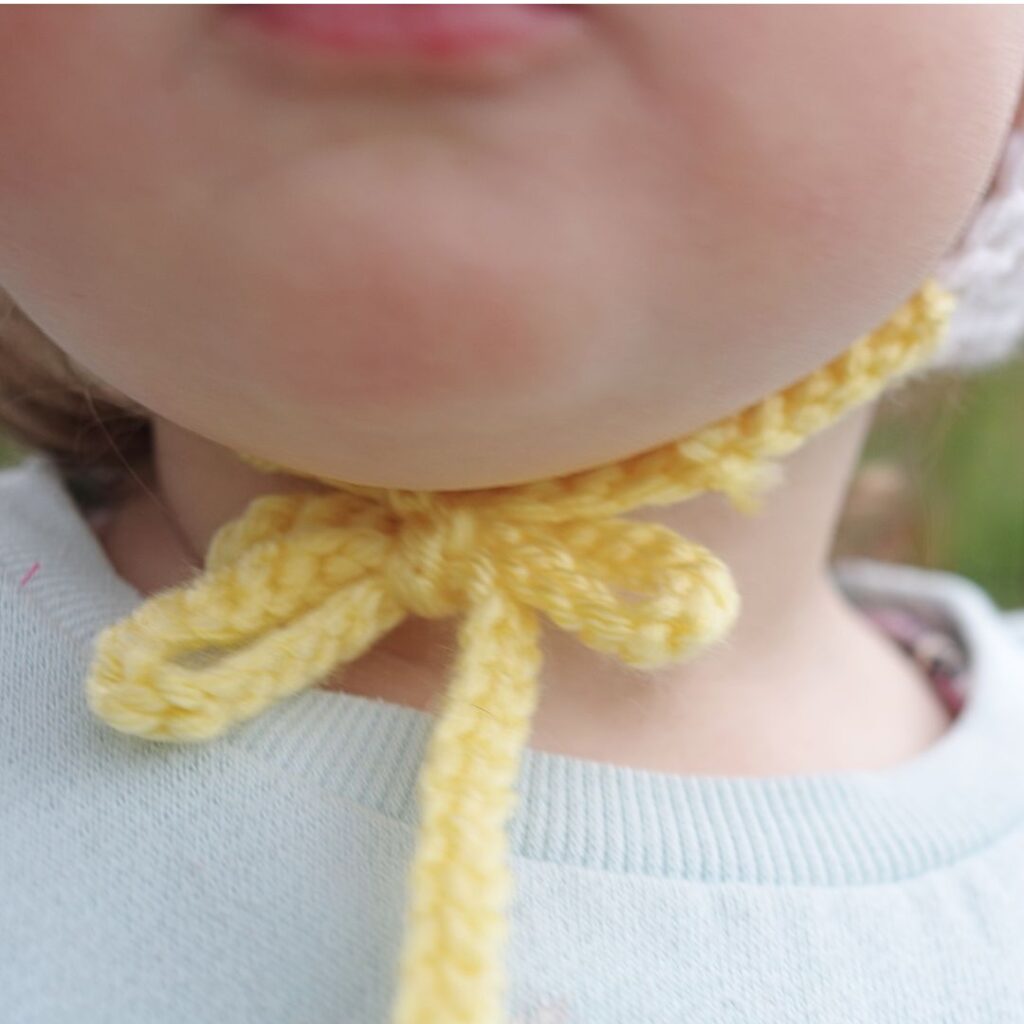
Okay let’s make a bonnet! You’ll need some worsted yarn in three colors, with one of them preferably being green for the leaves. You could do any colors that you like for spring! One of my testers made a gorgeous one with dark and light green and it was lovely! It looks more neutral so if you tend towards a neutral palette you can still make it work!

I used a 5.5 mm hook, and I highly suggest you gauge swatch. If you tend to a looser crochet, you’ll need to size down. You need to have a tapestry needle for weaving in ends and scissors and a measuring tape. I hope you love making this pattern! Please don’t forget to share your work with me on Facebook or Instagram, I’d love to see it!

Here you can find the free version of the pattern. It has all the written information of the pattern. The PDF is available on ravelry, Etsy, and Lovecrafts and that includes a sizing chart and photo guide. I also put each size on its own 2 pages so you could just print the size you want instead of all 12 pages.

Supplies

  • CYC 4 worsted yarn: 100-150 yards color A, 50 yards color B, 50 yards color C (sample is Lion Brand Yarn Basic Stitch: A white, B yellow, C green)
  • crochet hook US size I (5.5 mm) or size needed to obtain gauge
  • tapestry sewing needle
  • scissors and measuring tape/gauge ruler

Stitches (US Terms)

ch = chain

st/sts = stitch/stitches

BLO = back loop only

sc = single crochet

dc = double crochet

sl st = slip stitch

reverse sc= reverse single crochet (also called crab stitch)

hdc = half double crochet

inc = two stitches in the same stitch

dc v-st = double crochet, ch 1, double crochet in same stitch

puff = {4 double crochet cluster} (yo, insert hook in st, pull up a loop, yo, pull through 2 loops on hook) 4 times, yo, pull through all loops on hook
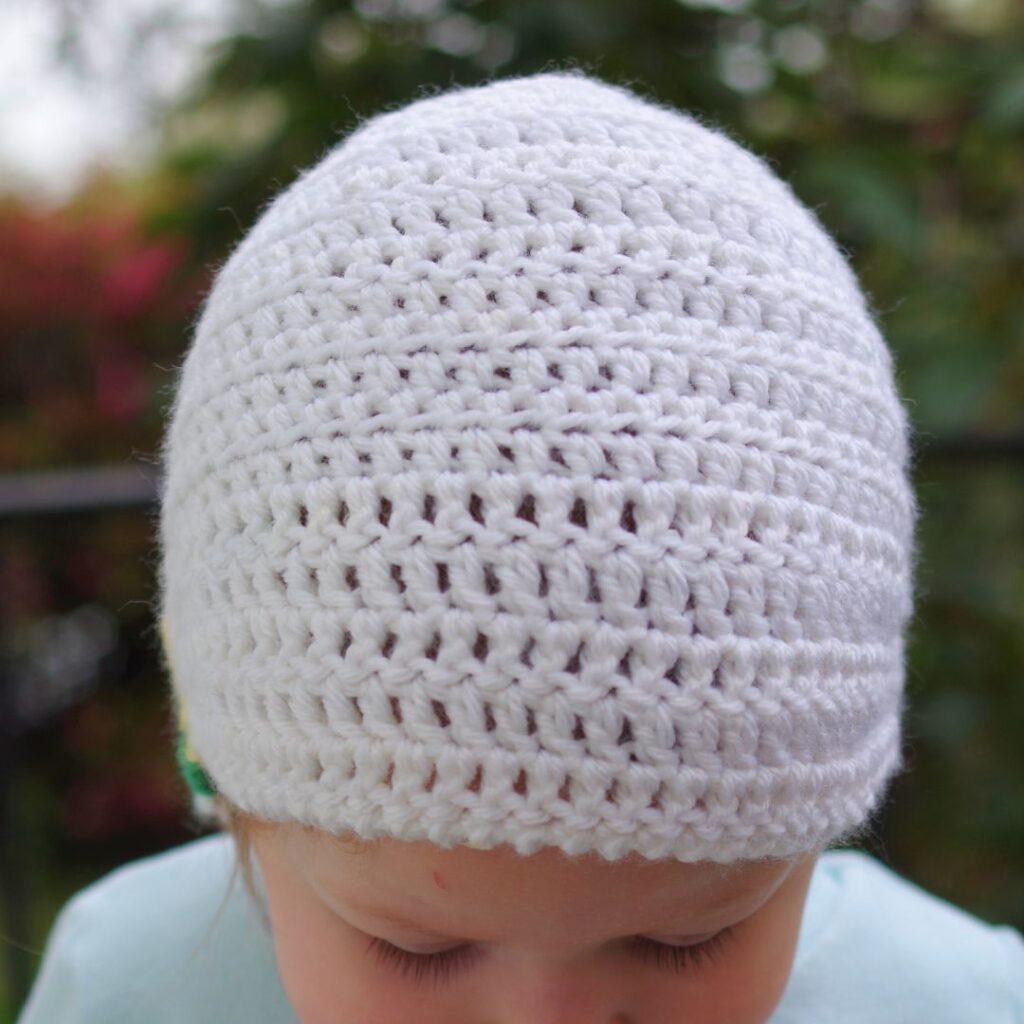
Gauge Swatch

4 in by 4 in swatch = 14 stitches in 12 rows of hdc

Notes

  • For inc, use whatever stitch that row calls for, I’ve put it in bold in each row with increases.
  • Stitch counts are marked in [ ] at the end of each row.
  • After fastening off in row 5 of the bonnet section, you will use sl sts to connect the half circle shaped rows to row 5. These sl sts are not to be worked into; they act as the ch 2 to start the new half circle shaped rows.
  • Each size has its own section in the pattern, find the size you want below!

Written Instructions

Size: Infant (0-6 months)

Neckband

Row 1: Ch 6, sc 2nd ch from hook and each st across, turn. [5 sc]

Row 2: Ch 1, sc, sc BLO each st across, turn. [1 sc, 4 sc BLO]

Row 3: Ch 1, sc BLO until last, sc, turn. [4 sc BLO, 1 sc]

Rows 4-28: Repeat rows 2 and 3 respectively.

Turn to the side.

Bonnet Tulip Section

Row 1: Sc the end of 1st row, 1 sc end of each row to last, turn. [28 sc]

Row 2: Do not chain, inc, *sc next 7, inc, sc next 3, inc, sc next 2, inc , sc next 3, inc, sc next 7 inc. [34 sc]

Change to color B

Row 3: Ch 2, dc next 2, sk st, *dc v-st, sk 2 sts, repeat from * until last 5 sts, sk 2 sts, dc next 2, dc last st, turn. [5 dc, 12 dc v st]

Change to color C

Row 4: Ch 2, dc next 2, puff next ch-1 sp * ch 2, puff next ch-1 sp, repeat from * until last 3, ch 1, dc last 3 sts, turn. [5 dc, 9 puff]

Change to color A

Row 5: Sc first 3 sts, sc in ch-1 sp, *sc, 2 sc in ch-2 sp, repeat from * until last puff, sc in ch-1 sp, sc last 3 sts, turn. [34 sc] Fasten off, weave in ends.

Fasten off, weave in ends.

Bonnet Top

Attach yarn in 17th st of prev row. In this portion of pattern, all the sl sts are going into Row 5 above. The 2 sl sts at the end of each row act as the ch 2 to start the row, and you will not work into these.

Row 1: Ch 3, sl st next 2 sts, turn. [3 ch, 2 sl st]

Row 2: Hdc, 3 hdc, hdc, sl st next 2 sts, turn. [5 hdc, 2 sl st]

Row 3: Hdc next 2, 3 hdc, hdc next 2, sl st next 2 sts, turn. [7 hdc, 2 sl st]

Row 4: 2 hdc each st across, sl st next 2 sts, turn. [14 hdc, 2 sl st]

Row 5: *Inc, hdc, hdc, repeat from * twice, then hdc, inc, hdc next 2, inc, sl st next 2 sts, turn. [20 hdc, 2 sl sts]

Row 5: Hdc each st across, sl st next 2 sts, turn. [20 hdc, 2 sl st]

Row 6: Hdc first 5, dc next 10, hdc last 5, sl st next 2 sts, turn. [10 hdc, 10 dc, 2 sl st]

Row 7-10: Repeat row 6

Row 11-15: Hdc first 3, dc next 14, hdc last 3, sl st next 2 sts, do not turn. [6 hdc, 14 dc, 2 sl st]

Row 16: Reverse sc each st across. [20 reverse sc]

Fasten off, weave in ends

Tie (make 2 all sizes)

With color B or C as desired:

Ch 35, sl st 2nd ch from hook and each ch across. [34 sl st]

Attach with 2 sl sts to bottom corner of neckband, one tie on each corner. Fasten off, weave in ends.
Feeling stuck? This is an intermediate pattern. You might need the PDF! Get it here on ravelry!

Size: Baby (6-12 months)

Neckband

Row 1: Ch 6, sc 2nd ch from hook and each st across, turn. [5 sc]

Row 2: Ch 1, sc, sc BLO each st across, turn. [1 sc, 4 sc BLO]

Row 3: Ch 1, sc BLO until last, sc, turn. [4 sc BLO, 1 sc]

Rows 4-36: Repeat rows 2 and 3 respectively.

Turn to the side.

Bonnet Tulip Section

Row 1: Sc the end of 1st row, 1 sc end of each row to last. [36 sc]

Row 2: Do not chain, inc, *sc next 6, inc, sc next 7, inc, sc next 4, inc , sc next 7, inc, sc next 6, inc, turn. [42 sc]

Change to color B

Row 3: Ch 2, dc next 2, sk st, *dc v-st, sk 2 sts, repeat from * until last 5 sts, dc v-st, sk st, dc next 2, dc last st, turn. [5 dc, 12 dc v st]

Change to color C

Row 4: Ch 2, dc next 2, ch 1, puff next ch-1 sp, *ch 2, puff next ch-1 sp, repeat from * until last 4 sts, ch 1, dc next 2, dc last st, turn. [5 dc, 12 puff]

Change to color A

Row 5: Sc first 3 sts, sc in ch-1 sp, *sc, 2 sc in ch-2 sp, repeat from * until last puff, sc in ch-1 sp, sc last 3 sts, turn. [42 sc]

Fasten off, weave in ends.

Bonnet Top

Attach yarn in 21st st of prev row. In this portion of pattern, all the sl sts are going into Row 5 above. The 2 sl sts at the end of each row act as the ch 2 to start the row, and you will not work into these.

Row 1: Ch 3, sl st next 2 sts, turn. [3 ch, 2 sl st]

Row 2: Hdc, 3 hdc same st, hdc, sl st next 2 sts, turn. [5 hdc, 2 sl st]

Row 3: Inc, hdc, inc, hdc, inc, sl st next 2 sts, turn. [8 hdc, 2 sl st]

Row 4: Inc, hdc, inc, hdc, hdc, inc, hdc, inc, sl st next 2 sts, turn. [12 hdc, 2 sl st]

Row 5: *Inc, hdc, hdc, repeat from *; **hdc, hdc, inc, repeat from **, sl st next 2 sts, turn. [16 hdc, 2 sl st]

Row 6: Inc, hdc next 3, inc, hdc, hdc, inc, inc, hdc, hdc, inc, hdc next 3, inc, sl st next 2 sts, turn. [22 hdc, 2 sl st]

Row 7: Hdc each st across, sl st next 2 sts, turn. [22 hdc, 2 sl st]

Rows 8-10: Hdc first 4, dc next 14, hdc last 4, sl st next 2 sts, turn. [8 hdc, 14 dc, 2 sl st]

Row 11-13: Repeat row 7

Row 14-18: Hdc first 3, dc next 16, hdc last 3, sl st next 2 sts. Do not turn. [6 hdc, 16 dc, 2 sl st]

Row 19: Reverse sc each st across. [22 reverse sc]

Fasten off, weave in ends.

Tie (make 2 all sizes)

With color B or C as desired:

Ch 35, sl st 2nd ch from hook and each ch across. [34 sl st]

Attach with 2 sl sts to bottom corner of neckband, one tie on each corner. Fasten off, weave in ends.

Size: Toddler (1-4 yrs)

Neckband

Row 1: Ch 6, sc 2nd ch from hook and each st across, turn. [5 sc]

Row 2: Ch 1, sc, sc BLO each st across, turn. [1 sc, 4 sc BLO]

Row 3: Ch 1, sc BLO until last, sc, turn. [4 sc BLO, 1 sc]

Rows 4-40: Repeat rows 2 and 3 respectively.

Turn to the side.

Bonnet Tulip Section

Row 1: Sc the end of 1st row, 1 sc end of each row to last, turn. [40 sc]

Row 2: Do not chain, inc, *sc next 7, inc, sc next 7, inc, sc next 3, inc, sc next 3, inc, sc next 7, inc, sc next 7, inc. [48 sc]

Change to color B

Row 3: Ch 2, dc next 2, sk st, *dc v-st, sk 2 sts, repeat from * until last 5 sts, dc v-st, sk st, dc next 2, dc last st, turn. [5 dc, 14 dc v st]

Change to color C

Row 4: Ch 2, dc next 2, ch 1, puff next ch-1 sp, *ch 2, puff next ch-1 sp, repeat from * until last 4 sts, ch 1, dc next 2, dc last st, turn. [5 dc, 14 puff, 28 ch]

Change to color A

Row 5: Sc first 3 sts, sc in ch-1 sp, *sc, 2 sc in ch-2 sp, repeat from * until last puff, sc in ch-1 sp, sc last 3 sts, turn. [48 sc]

Fasten off, weave in ends.

Bonnet Top

Attach yarn in 24th st of prev row. In this portion of pattern, all the sl sts are going into Row 5 above. The 2 sl sts at the end of each row act as the ch 2 to start the row, and you will not work into these.

Row 1: Ch 3, sl st next 2 sts, turn. [3 ch, 2 sl st]

Row 2: Hdc, 3 hdc, hdc, sl st next 2 sts, turn. [5 hdc, 2 sl st]

Row 3: Inc, hdc, inc, hdc, inc 2, sl st next 2 sts, turn. [8 hdc, 2 sl st]

Row 4: 2 hdc each st across, sl st next 2 sts, turn. [16 hdc, 2 sl st]

Row 5: Inc, hdc, hdc, hdc, inc, hdc, hdc, inc, inc, hdc, hdc, inc, hdc, hdc, hdc, inc, sl st next 2 sts of neckband, turn. [22 hdc, 2 sl st]

Row 6: *Inc, hdc, hdc repeat from * until last, inc last st, sl st next 2 sts, turn. [28 hdc, 2 sl st]

Row 7: Hdc each st across, sl st next 2 sts, turn. [28 hdc, 2 sl st]

Row 8: Repeat row 7. [28 hdc, 2 sl st]

Row 9: Hdc first 9, dc next 10, hdc last 9, sl st next 2 sts, turn. [18 hdc, 10 dc, 2 sl st]

Row 10-14: Repeat row 9. [18 hdc, 10 dc, 2 sl st]

Row 15-17: Repeat row 7. [28 hdc, 2 sl st]

Row 18-21: Hdc first 3, dc next 22, hdc last 3, sl st next 2 sts, do not turn. [6 hdc, 22 dc, 2 sl st]

Row 22: Reverse sc each st across. [28 reverse sc]

Fasten off, weave in ends.

Tie (make 2 all sizes)

With color B or C as desired:

Ch 35, sl st 2nd ch from hook and each ch across. [34 sl st]

Attach with 2 sl sts to bottom corner of neckband, one tie on each corner. Fasten off, weave in ends.

Size: Child (4-10 yrs)

Neckband

Row 1: Ch 8, sc 2nd ch from hook and each st across, turn. [7 sc]

Row 2: Ch 1, sc, sc BLO each st across, turn. [1 sc, 6 sc BLO]

Row 3: Ch 1, sc BLO until last, sc, turn. [6 sc BLO, 1 sc]

Rows 4-44: Repeat rows 2 and 3 respectively.

Turn to the side.

Bonnet Tulip Section

Row 1: Sc the end of 1st row, 1 sc end of each row to last, turn. [44 sc]

Row 2: Do not chain, inc, *sc next 7, inc, sc next 7, inc, sc next 4, inc, sc next 5, inc, sc next 7, inc, sc next 7, inc. [51 sc]

Change to color B

Row 3: Ch 2, dc next 2, sk st, *dc v-st, sk 2 sts, repeat from * until last 5 sts, dc v-st, sk st, dc next 2, dc last st, turn. [5 dc, 15 dc v-st]

Change to color C

Row 4: Ch 2, dc next 2, ch 1, puff next ch-1 sp, *ch 2, puff next ch-1 sp, repeat from * until last 4 sts, ch 1, dc next 2, dc last st, turn. [5 dc, 15 puff]

Change to color A

Row 5: Sc first 3 sts, sc in ch-1 sp, *sc, 2 sc in ch-2 sp, repeat from * until last puff, sc in ch-1 sp, sc last 3 sts, turn. [51 sc]

Fasten off, weave in ends.

Bonnet Top

Attach yarn in 25th st of prev row. In this portion of pattern, all the sl sts are going into Row 5 above. The 2 sl sts at the end of each row act as the ch 2 to start the row, and you will not work into these.

Row 1: Ch 3, sl st next 2 sts, turn. [3 ch, 2 sl st]

Row 2: Hdc, 3 hdc, hdc, sl st next 2 sts, turn. [5 hdc, 2 sl st]

Row 3: Hdc next 2, 3 hdc, hdc next 2, sl st next 2 sts, turn. [7 hdc, 2 sl st]

Row 4: 2 hdc each st across, sl st next 2 sts, turn. [14 hdc, 2 sl st]

Row 5: *Inc, hdc, hdc, repeat from *, inc, repeat from * 2 times, inc, sl st next 2 sts, turn. [20 hdc, 2 sl st]

Row 6: *Inc, hdc, repeat from * 2 times hdc, inc, hdc, inc, inc, hdc, inc, hdc, **hdc, inc, repeat from ** 2 times, sl st next 2 sts, turn. [30 hdc, 2 sl st]

Row 7: *Inc, hdc next 4, inc, hdc next 5, inc, hdc next 6, hdc next 5, inc, hdc next 4, inc, sl st next 2 sts, turn. [36 hdc, 2 sl st]

Row 8: Hdc each st across, sl st next 2 sts, turn. [36 hdc, 2 sl st]

Row 9: Repeat row 8 [36 hdc, 2 sl st]

Row 10: Hdc first 10, dc next 16, hdc last 10, sl st next 2 sts, turn. [16 dc, 20 hdc, 2 sl st]

Row 11-15: Repeat row 10 [20 hdc, 16 dc, 2 sl st]

Row 16-18: Repeat row 8 [36 hdc, 2 sl st]

Row 19-24: Hdc first 5, dc next 30, hdc last 5, sl st next 2 sts, turn. [12 hdc, 24 dc, 2 sl st]

Row 25: Reverse sc each st across. [36 reverse sc]

Fasten off, weave in ends.

Tie (make 2 all sizes)

With color B or C as desired

Ch 35, sl st 2nd ch from hook and each ch across. [34 sl st]

Attach with 2 sl sts to bottom corner of neckband, one tie on each corner. Fasten off, weave in ends.

Thank you so much!

I hope you loved this pattern! Please share it with me on social media! And reach out to me there if you have any trouble with the pattern as well, I’m happy to help!


Love it? Share it!

  • Share on X (Opens in new window) X
  • Share on Facebook (Opens in new window) Facebook
  • Share on Pinterest (Opens in new window) Pinterest
  • Print (Opens in new window) Print

February 29, 2024 by Priscilla

For the Love Earrings

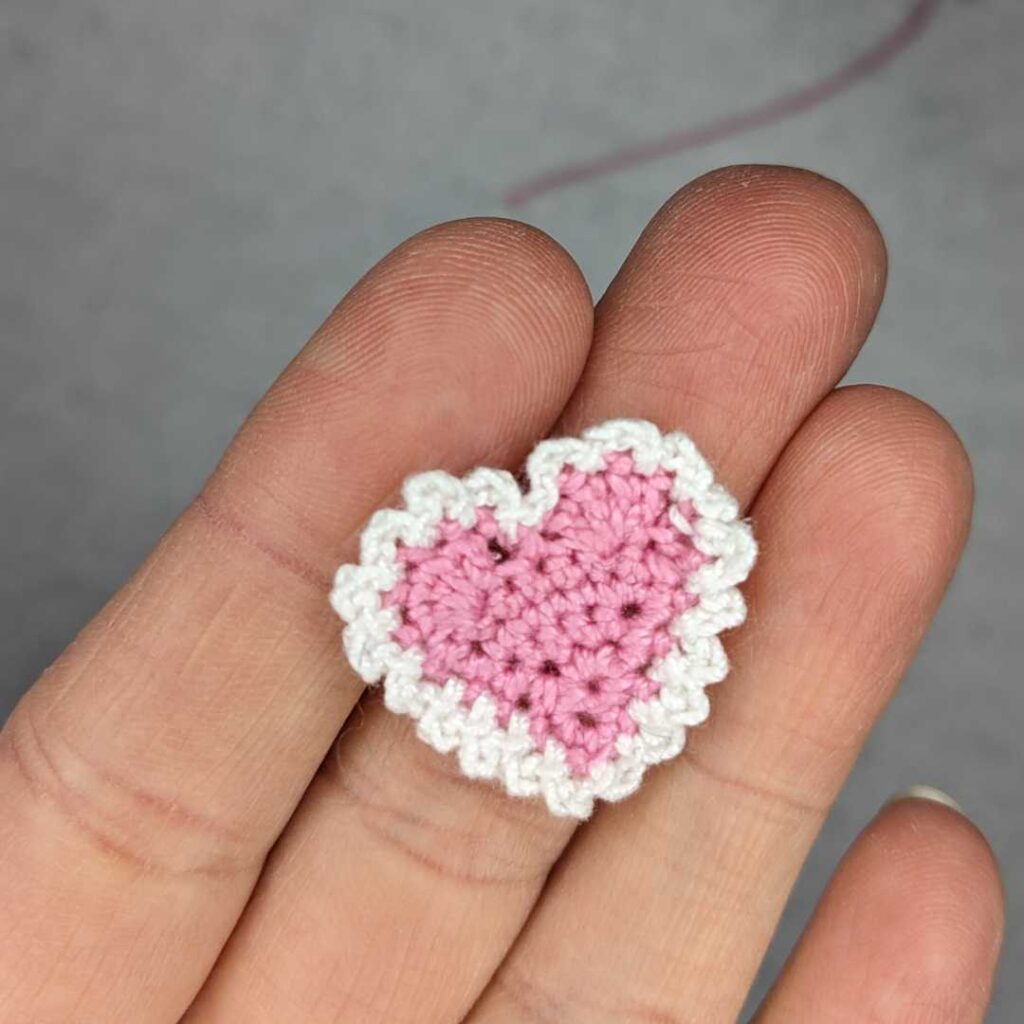
Whew! Last day of the “love” month and here I am, publishing my new heart earrings pattern. I’m fine with it! They are cute any time of year and I think you’ll love making them. Sometimes you just have to roll with the punches and go with what you got. I don’t want to just set the pattern aside and save it for next year.

I wanted to design these to look similar to a paper doily valentine. It was fun to create the delicate border around the simple heart. I made two pairs in traditional colors, but they would also be fun in all sorts of color combos. This is a great beginner earring pattern if you aren’t familiar with thread crochet. The simple stitches are familiar and the shape is easy to make. If you get stuck with the written pattern, head to get the PDF in one of my pattern shops.

Ravelry
Etsy
LoveCrafts

The PDF has a full photo tutorial to go with the written instructions. You are also welcome to come find me on Instagram @motherlodecrafts, where I am available as I obsessively oooh and ahh over other crochet stuff several times a day! Shoot me a question there if you need help with the pattern!

OKAY MY DAHHHLINGS LET’S MAKE SOME EARRINGS! (can you tell we are into the wee hours of the night as I deliriously write this?)

Supplies

  • Size 10 crochet thread in 2 colors as desired, approx 10 yards each, samples are Aunt Lydia’s Crochet Thread size 10 color A: Burgundy, color B: Cream
  • Size 1.5 mm crochet hook
  • Tapestry needle and scissors
  • Earring findings: 2 fishhook style earrings or 2 flat stud earring
  • Fabric stiffener, like Aleene’s Fabric Stiffening Spray, t-pins, and a blocking mat
  • If using flat stud earrings: quick bond glue (cyanoacrylate) like Krazy Glue/Super Glue/Gorilla Glue OR E600 jewelry glue

Stitches (US Terms)

ch = chain

sc = single crochet

sl st = slip stitch

st/sts = stitch/stitches

dc = double crochet

beg = beginning

prev = previous

sk = skip

Notes

  • Pattern is worked in one piece for each earring. (2 pieces total)
  • For the best look, stiffen the earrings. I use Aleene’s Fabric Stiffening Spray and t-pins on a blocking mat.
  • Stitch counts are marked in { } at the end of each row/round.
  • Finished dimensions: 1 1/4 inch diameter

Gauge

Gauge is not really necessary for this pattern. Personally, I find the smallest hook I can handle for the thread size (for earrings) produces the best, tightly stitched look. If you desire to gauge swatch: use double crochet in 5 rows with 11 sts to equal a 1 inch square.

Written Instructions

Make 2) with color A:

Row 1: Ch 2, sc 2nd st from hook, ch 1, turn. {1 sc}

Row 2: 3 sc, ch 1, turn. {3 sc}

Row 3: 2 sc, sc, 2 sc, ch 1, turn. {5 sc}

Row 4: 2 sc, sc next 3, 2 sc, ch 1, turn. {7 sc}

Row 5: Sc each st across, ch 1, turn. {7 sc}

Row 6: Sk 1st st, 4 dc next st, sk next st, sl st, ch 1, sk next st, 4 dc next st, sl st last st of row. {8 dc, 2 sl st}

Struggling? Ask for help on Instagram or get the PDF on ravelry!

Round 1: Sc 11 evenly around the bottom of the heart, placing a ch 1 at the bottom point of the heart, change to color B as you finish with sl st in the 1st dc at the top of the heart. {11 sc, 1 ch, 1 sl st} (This round only goes around the bottom of the heart, not the top part.)

Round 2: Ch 3, sl st next st, ch 3, sl st next st, ch 3, sl st next 3 sts, (ch 3, sl st next st) repeat ( ) around, finishing with sl st in last sl st from prev round. Fasten off and weave in ends. {20 ch-3, 22 sl st}

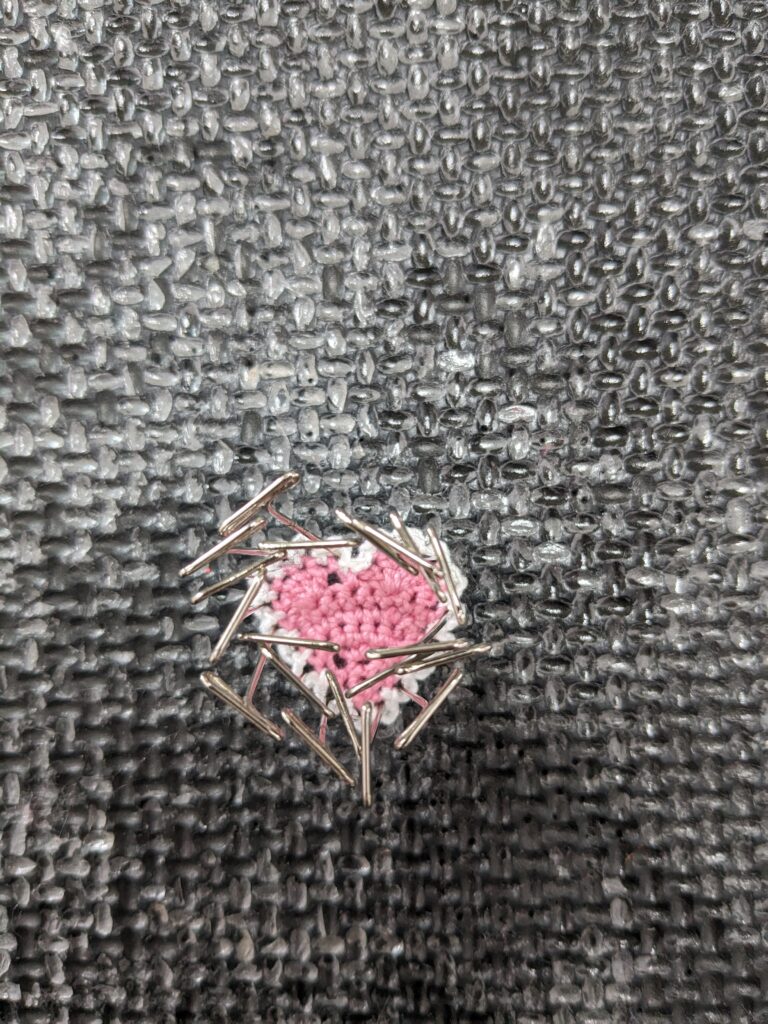
Pin heart to blocking mat. Spray from about 6-10 inches away with fabric stiffening spray, or pour some of the spray liquid into a small cup and paint the liquid on. Once dry, glue to the stud earring finding, or attach fish hook style earring to top of heart, through one of the lace parts. I prefer to attach the fish hook style such that each heart mirrors each other as below.

Ok! I hope you enjoy these little pretties! They are such fun and would be awesome in any color! I’m thinking ahead to some pastel colors for Spring and Easter! Oh I have a light purple thread that would be lovely……..

Share with me! I’d love to see your earrings! Tag me on Instagram @motherlodecrafts

This pattern is for personal use only. You may make and sell finished products from this design, but any altering, sharing, selling, or reproducing the actual pattern in part or whole is prohibited. If you sell products made from this pattern online, please credit The Mother Lode/ Priscilla Allen as the designer. Pattern and photos are the property of Priscilla Allen, and you may not share them as your own. 

Love it? Share it!

  • Share on X (Opens in new window) X
  • Share on Facebook (Opens in new window) Facebook
  • Share on Pinterest (Opens in new window) Pinterest
  • Print (Opens in new window) Print

February 10, 2024 by Priscilla

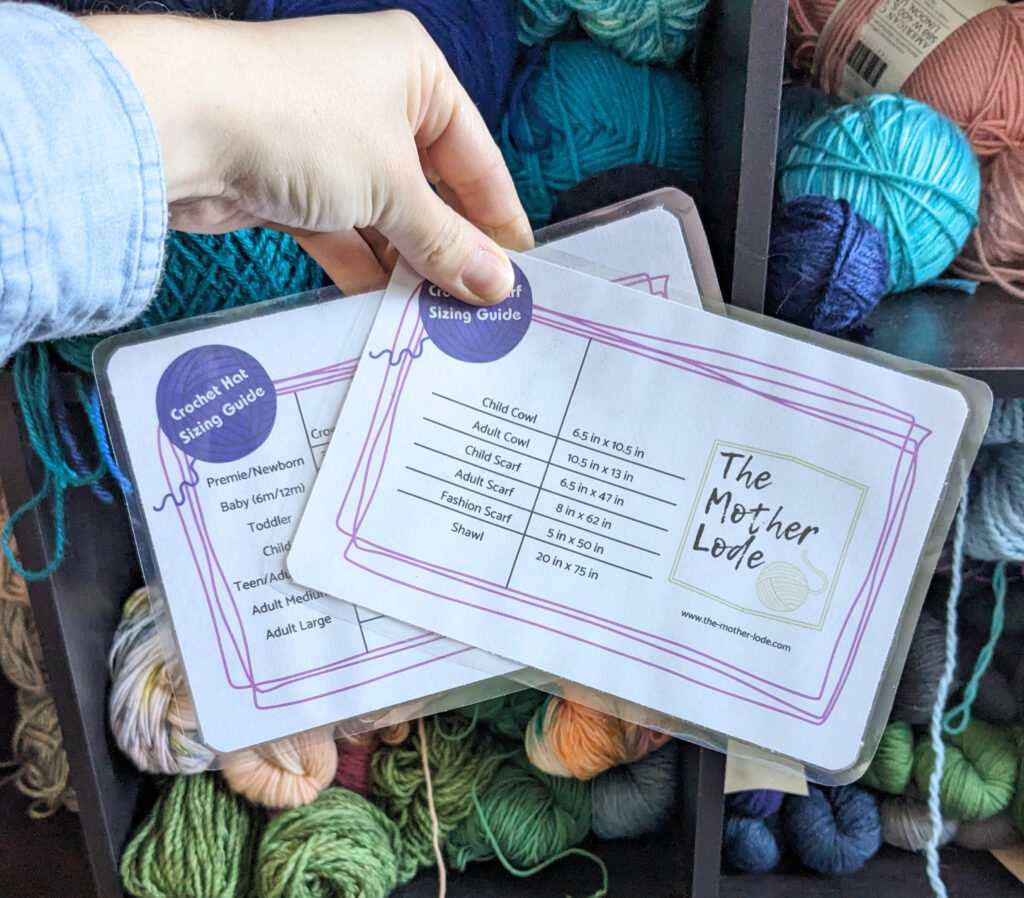
Crochet Hat and Scarf Improvisation Sizing Guide

It’s so great to follow a pattern for crocheting. It takes the guesswork away and it’s less challenging than improvising; however, I LOVE to improvise. Just sitting with the yarn and fiddling around with stitches until I find something I like is so enjoyable. Then, I want to turn it into something! Blankets and dishcloths can pretty much be any size and still be usable, but you can’t just sit down to crochet a hat without some guidelines! I find myself googling over and over again: hat size crochet guide. Which is just plain silly when I have a computer, printer, and laminator!

I’ve created this size guide that you can print, cut, and laminate. If you don’t have a laminator, I suggest you cut them out, glue them together so each chart is on its own side, and put a paper clip on it. Then you can clip it to whatever pattern notes or notebook you like to use! Keep it in your craft supplies and you’ll never need to search out these sizes again. I even strayed from my typical muted colors to make it easier to find in the bottom of your WIP bag!

Grab the PDF here!

Some more suggestions for improvising

In all honesty, I don’t typically block hats. If you are using nice wool yarn for your hat, you may want to block it, in which case you should account for that little bit of extra space you’ll gain in the hat from blocking. For scarves, I do like to block them for a nice drape, so again, think about that when you are improvising a pattern! Commercial yarn skeins often have a little guide on them that tells you how many skeins you need to make a hat, scarf, and sweater. Don’t neglect to use that to help with your creation.

When I’m improvising hats for my own family, I often will make the band first and just keep making them come to me so I can wrap it around their head, haha. Then I go from there to make the rest of the hat. Using real measurements of the person who is going to wear it is always your best bet! (Sidenote: moms of young kids, HOW do you keep tape measures around? Mine keep becoming mysteriously broken………)

The very first project I ever made was actually a scarf! I made it for my mom in 2011. I’m sure there were all kinds of tutorials and patterns on the internet, but for whatever reason I didn’t use one?! It was wonky but I was so proud! I do like to follow patterns, but improvising and designing are just more fun to me! To improvise a scarf, I suggest that you actually write down the stitch count at the beginning. It always seems to me that somehow I added or subtracted a stitch somewhere, and if I don’t know what stitch count I actually started with, it’s much harder to fix.

Grab your favorite stitch book! The one I use the most is called The Crochet Stitch Bible by Betty Barnden. My mom has a good one called The Crochet Stitch Dictionary by Sarah Hazell. These are so useful for providing not only the stitch ideas but they include the stitch multiples, so its much easier to improvise using those versus a YouTube tutorial that just shows how to do the actual stitch.

The most important tip for improvising, of course, is to have FUN. Let yourself enjoy the stitches and if you have to frog, that’s okay. Think of it like an athlete’s training. The crochet version of lifting weights and running on the treadmill!

Love it? Share it!

  • Share on X (Opens in new window) X
  • Share on Facebook (Opens in new window) Facebook
  • Share on Pinterest (Opens in new window) Pinterest
  • Print (Opens in new window) Print

January 12, 2024 by Priscilla

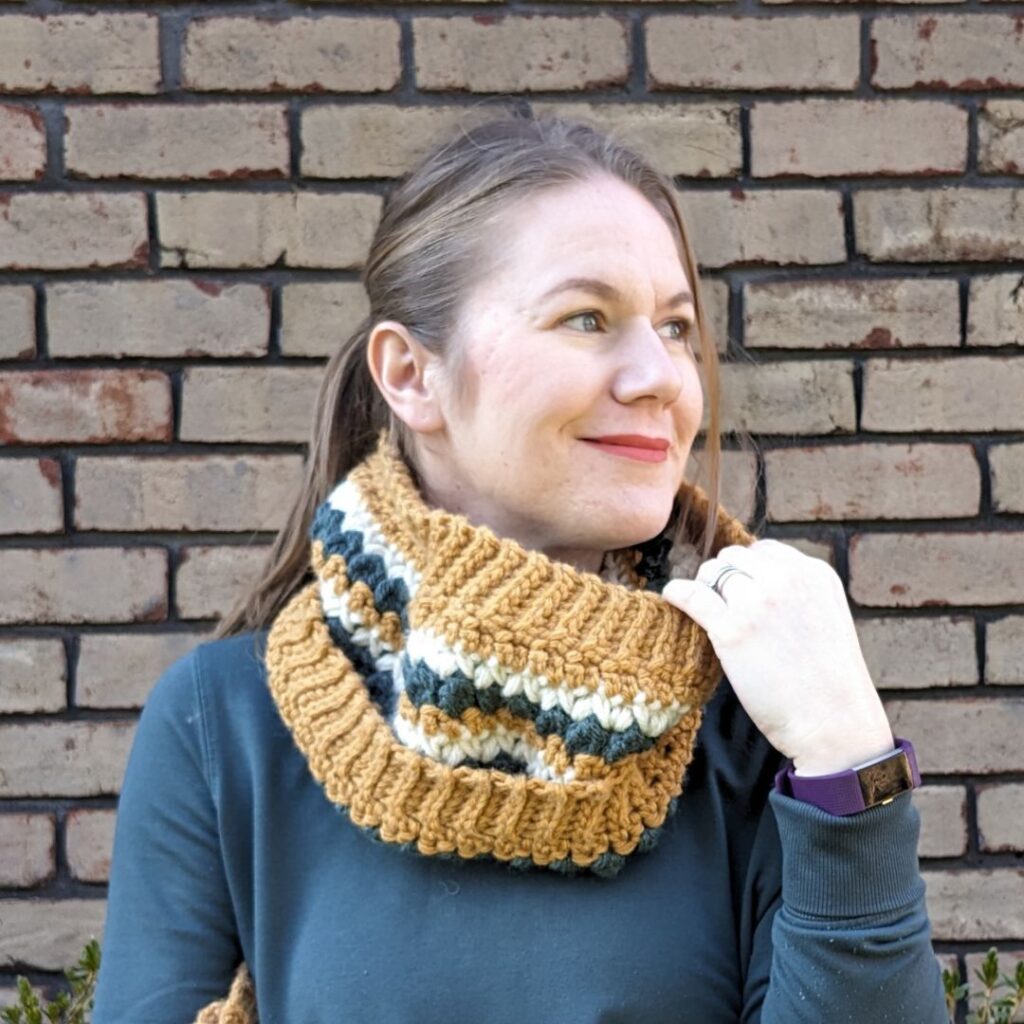
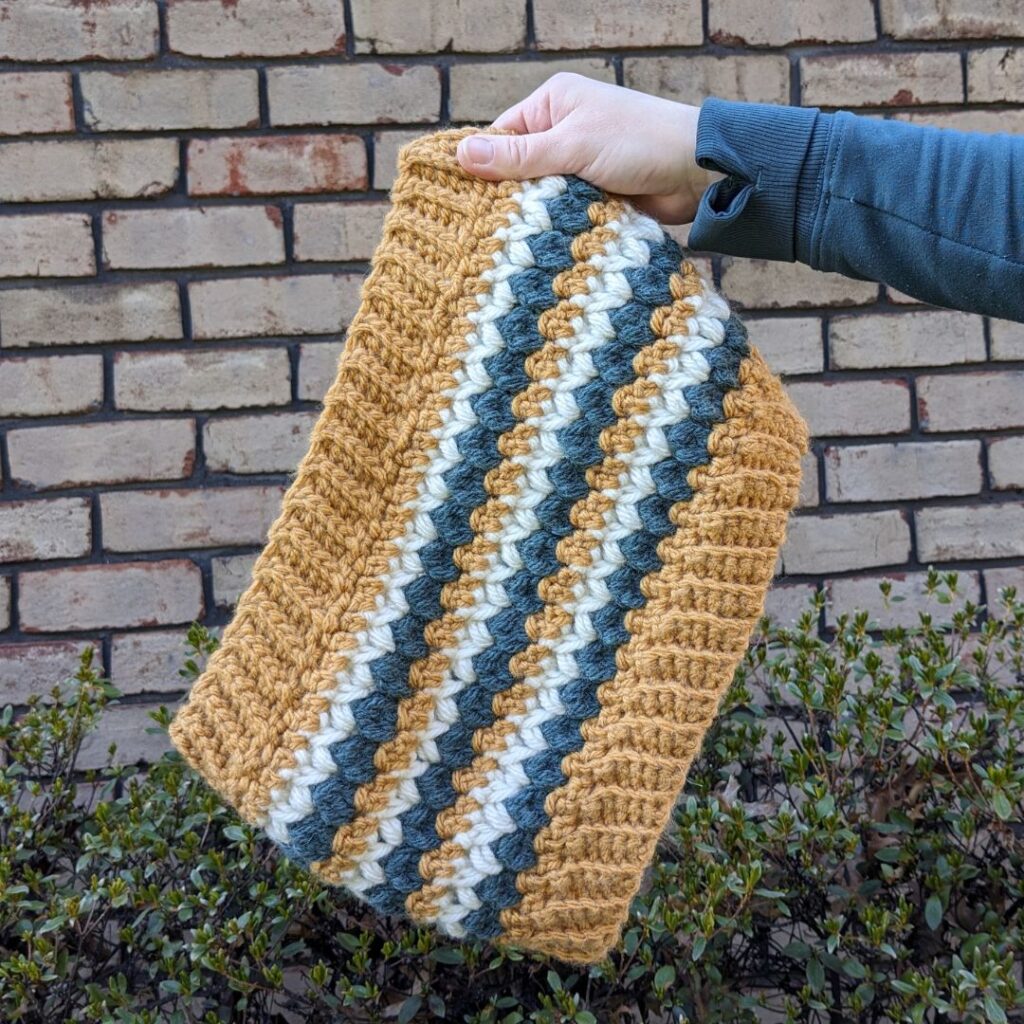
The Blustery Cowl

It’s the start of a new year! It’s definitely winter in Pennsylvania! We even had snow last weekend. I love to play in the snow with the kids. We made a snowman and I pushed them down the tiny hill between our house and the neighbors’. I threw on a cowl to go out with them, and I checked with all of my boys before we went out if they wanted one. Of course after about 5 minutes outside, my 10 year old asked if he could have one. I gave him the one I was wearing and wished I had this one in my laundry room to snag because I knew it would be super warm! I hadn’t taken photos yet, though, so it was still upstairs in my craft room. Next time, I will be wearing it!

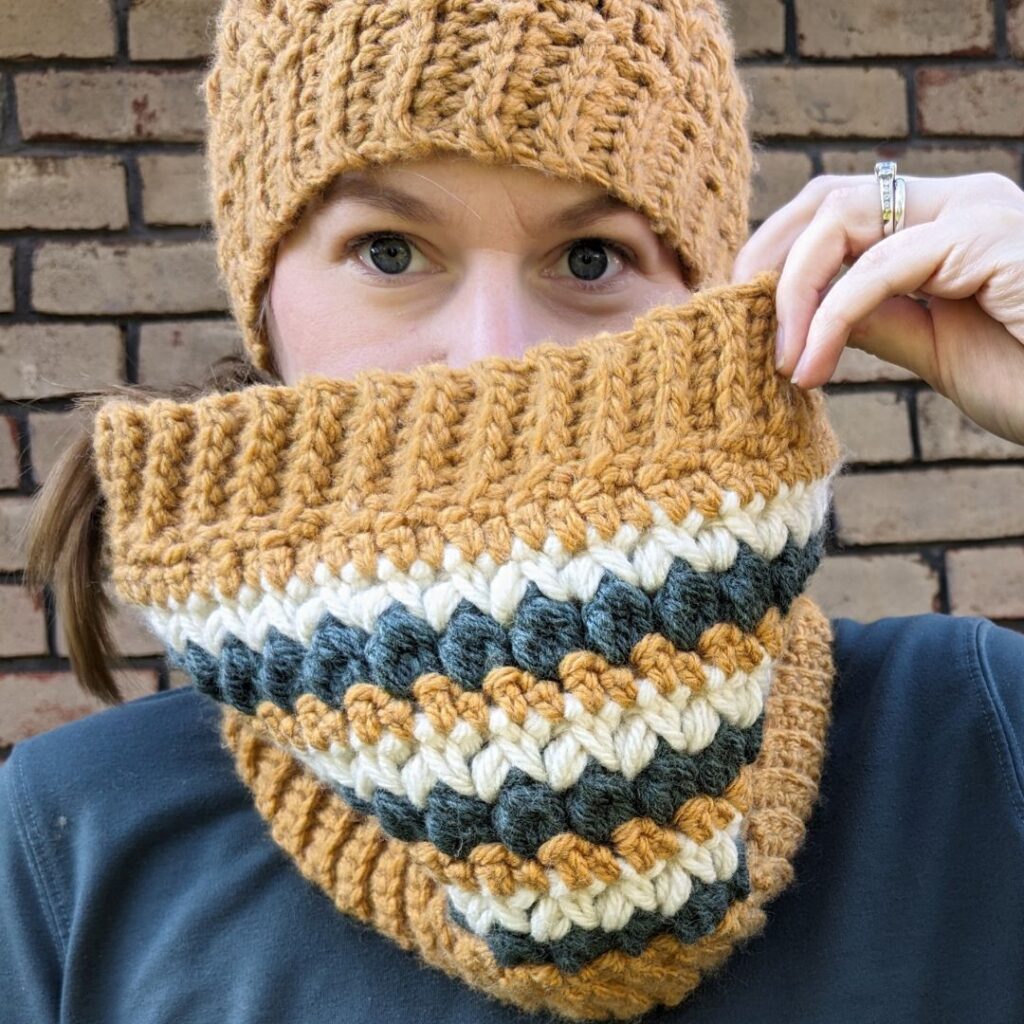
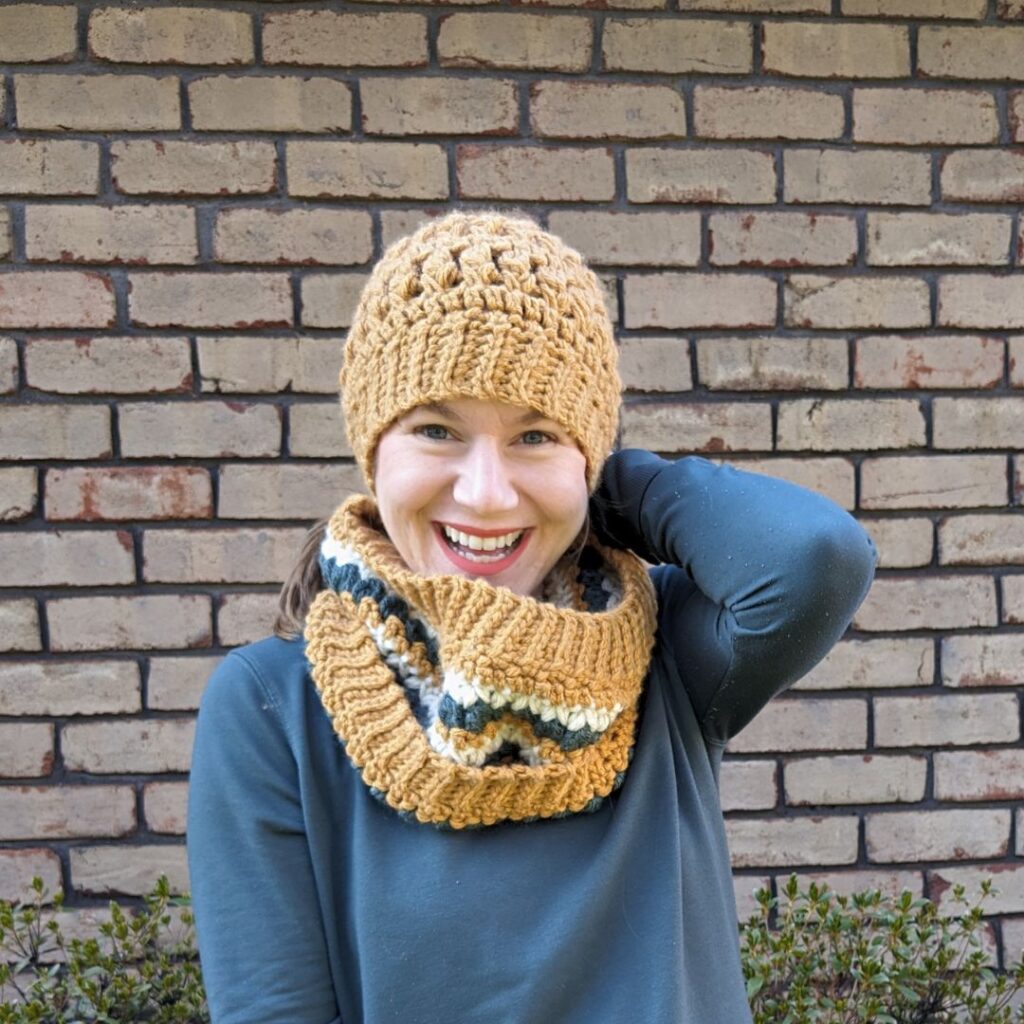
This Cowl is the sibling pattern to the Blustery Beanie! You can make them coordinating colors or the exact same. This MIGHT be my favorite cowl design so far! The colorwork just turned out so great, I think it looks really special.

You can keep reading the full pattern here, or zip over to one of my pattern shops to buy the low cost PDF. It has some photo tutorial pages to help you with the stitches and of course makes it a bit easier to crochet-on-the-couch.

Ravelry
Etsy
LoveCrafts

Supplies:

  • 200 yards bulky (CYC 5) yarn OR for multiple colors: color A: 100 yds, color B: 50 yds, color C: 50 yds, samples: Lion Brand Yarn Hue + Me: color A Mustard, color B Juniper, color C Salt
  • crochet hook US size L (8 mm) or size needed to obtain gauge
  • tapestry sewing needle
  • scissors and measuring tape/gauge ruler

Notes:

  • Finished dimensions after seaming: 15 in by 9 in
  • Stitch counts are marked with ( ).
  • Pattern is worked flat and in the round.
  • For multiple colors: Start with color A for top edging and esc row, change to color B for each CL row and change to color C for each puff row, then change back to color A for esc rows and edging at the bottom.

Stitches:

ch = chain stitch

st/sts = stitch/stitches

BLO = back loop only

sk = skip

esc= extended single crochet

dc = double crochet

sc = single crochet

sl st = slip stitch

sp = space

beg CL = beginning cluster: ch 3, yo, insert hook in same stitch as ch-3, pull up a loop, yo, pull through 2 loops on hook, yo, insert hook in same stitch, pull up a loop, yo, pull through 2 loops on hook, yo, pull through all 4 loops on hook

CL = double crochet 3 stitches together in same stitch

puff = puff stitch: yo, insert hook in next ch-1 space, pull up a loop, yo, insert hook in same stitch, pull up a loop, yo, pull through all 5 loops on hook, sc in previous stitch

Gauge Swatch:

4 in by 4 in swatch = 6 rows of pattern repeat below x 10 esc sts/ 5 CL sts/ 5 puff sts

Row 1: Ch 17, esc 2nd st from hook and each across, ch 3, turn.

Row 2: Beg CL, *ch 1, sk st, CL next st, repeat from * across dc in last st, ch 2, turn.

Row 3: Puff first 2 sts, repeat puff to end of row ch 1, turn.

Repeat rows 1, 2, and 3 respectively.

Written Instructions:

Row 1: With color A, ch 7, sc 2nd ch from hook and each st across, ch 1, turn. (6 sc)

Row 2: Sl st BLO each st across, ch 1, turn. (6 sl st BLO)

Row 3: Sc BLO each st across, ch 1, turn. (6 sc BLO)

Rows 4-78: Repeat rows 2 and 3 respectively.

Row 79: Sl st to row 1.

Turn right side out.

Round 1: Ch 1, esc in end of each row around, sl st to join. (78 esc)

Round 2: Change to color B, ch 1 beg CL, ch 1, skip next st,* CL, ch 1, skip next st, repeat from * around, sl st to join. (1 beg CL, 38 CL, 39 ch-1)

Round 3: Change to color C, ch 1, puff each st around, sl st to top of first puff to join. (39 puff)

Round 4: Change to color A, ch 1, esc each st around, sl st to join.(78 esc)

Rounds 5-10: Repeat rounds 2-4 respectively.

How is it going? Need the PDF photo tutorial pages?

Row 1: Ch 7, sc 2nd ch from hook and next 5 ch, sl st next two row ends, turn. (6 sc)

Row 2: Sl st BLO each st across, ch 1, turn. (6 sl st BLO)

Row 3: Sc BLO each st across, sl st next two row ends, turn. (6 sc BLO, 2 sl st)

Rows 4-78: Repeat rows 2 and 3 respectively.

Row 79: Sl st to row 1. Fasten off. Weave in remaining ends.

I hope you love your cowl! Please share with me on socials! I’d love to see your work!

  • Instagram
  • Pinterest
  • Facebook

Love it? Share it!

  • Share on X (Opens in new window) X
  • Share on Facebook (Opens in new window) Facebook
  • Share on Pinterest (Opens in new window) Pinterest
  • Print (Opens in new window) Print

December 14, 2023 by Priscilla

Christmas Wreath Earrings

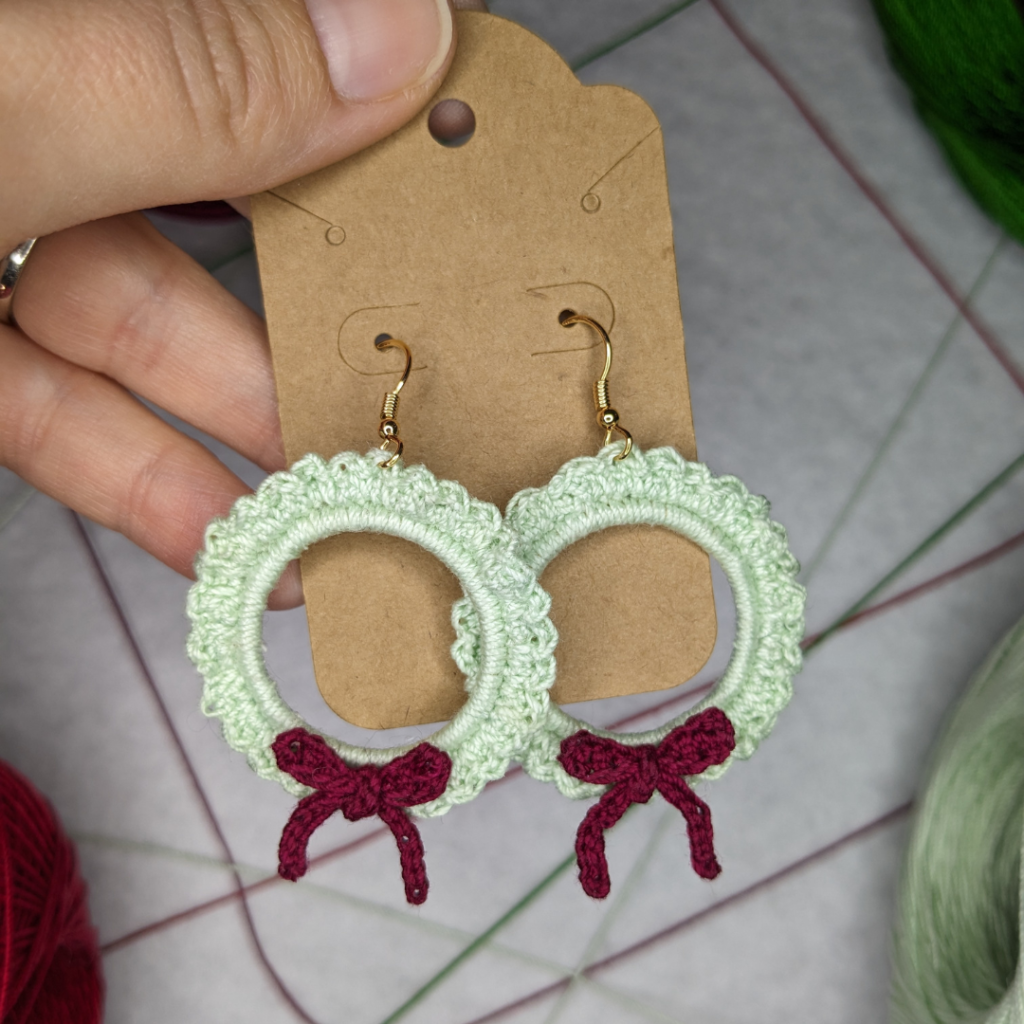
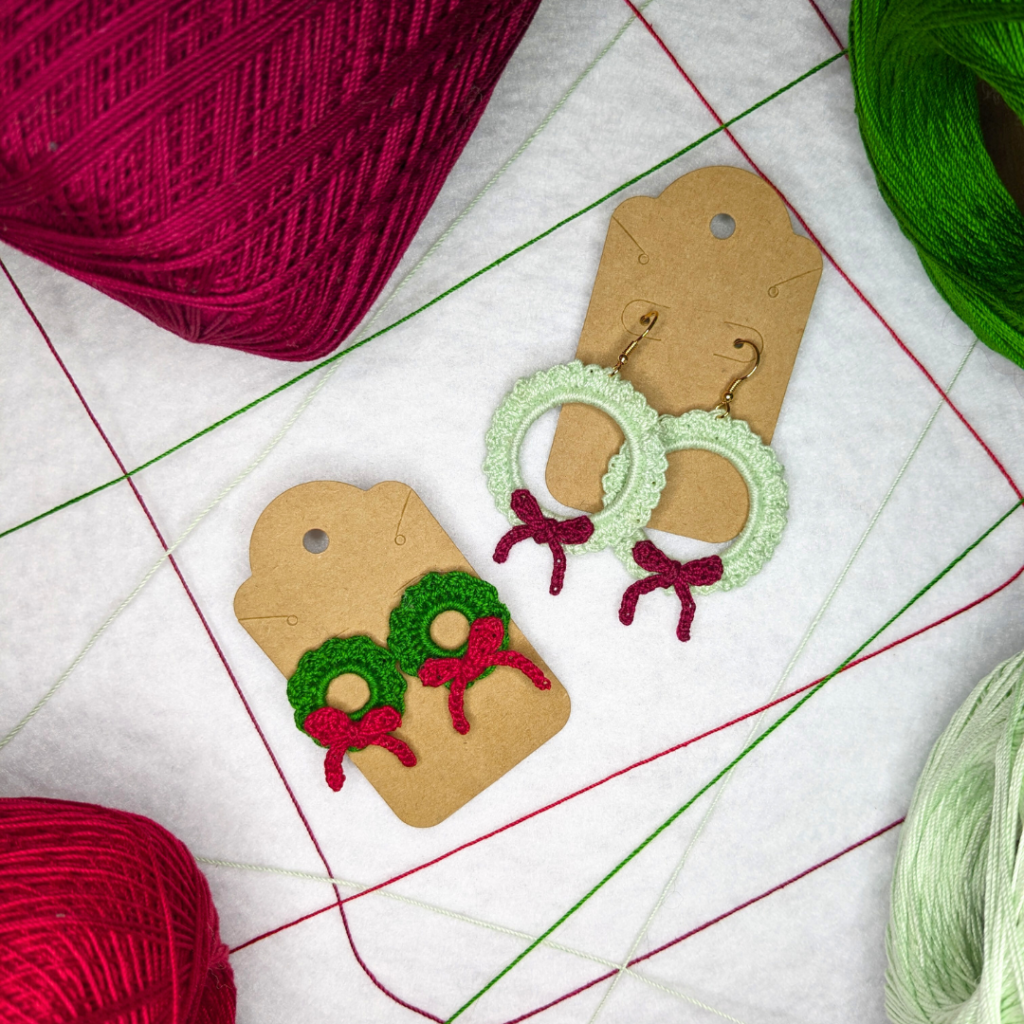
The most wonderful time of the year is here and you need some festive earrings! These Christmas Wreath Earrings are simple and versatile. Make them in your preferred traditions Christmas colors, or go wild with some lime green and hot pink. They could be great gifts or even market items! Use your favorite 1.5 mm hook, size 10 thread, earring findings, glue, and stiffening spray to make these earrings.

I love to offer free versions of my patterns here on the blog. I think it’s an awesome way to spread crochet knowledge. If you want to use the free version, great! Enjoy! The PDF does include photo tutorials that aren’t here on the blog and of course being printable makes it easier. I often use a free pattern from a blog and then when I know OOOO I’m making more of these, I go back and buy the PDF.

ravelry
LoveCrafts
Etsy

Supplies

  • Size 10 crochet thread, preferably red and green, approx 10 yards each, samples are Aunt Lydia’s Crochet Thread size 10 color A: Forest Green, color B: Cardinal Red and color A: Mint Green, color B: Burgundy
  • Size 1.5 mm crochet hook
  • Two 10mm or 25 mm metal jewelry hoops
  • Tapestry needle and scissors
  • Earring findings: 2 fishhook style earrings or 2 flat stud earring
  • Fabric stiffener, like Aleene’s Fabric Stiffening Spray, t-pins, and a blocking mat
  • Optional: Quick bond glue (cyanoacrylate) like Krazy Glue/Super Glue/Gorilla Glue OR E600 jewelry glue

Stitches (US Terms)

  • ch = chain
  • sc = single crochet
  • sl st = slip stitch
  • st/sts = stitch/stitches
  • dc = double crochet
  • hdc = half double crochet
  • beg = beginning

Gauge

Gauge is not really necessary for this pattern. Personally, I find the smallest hook I can handle for the thread size (for earrings) produces the best, tightly stitched look. If you desire to gauge swatch: use double crochet in 5 rows with 11 sts to equal a 1 inch square.

Notes

  • Pattern is worked in several pieces and glued or sewn together.
  • For the best look, stiffen the earrings. I use Aleene’s Fabric Stiffening Spray and t-pins on a blocking mat.
  • Two hoop sizes are given and are noted in the pattern as 10mm (25mm) however, use any hoop size for this pattern: Sc an even number around the hoop.
  • If you are going to sew the bow to the wreath instead of using glue, do not cut the remaining end off the bow and use it to sew onto the wreath before blocking.
  • Stitch counts are marked in { } at the end of each row/round with ( ) noting the sizes.
  • Finished dimensions: 10 mm: 1 inch diameter, 25 mm: 2 inch diameter

Written Instructions

Wreaths with color A: (make 2)

Round 1: Sc 24 (58) around 10 (25) mm hoop, sl st to join. {24 (58) sc}

Round 2: Ch 1, sc , *2 dc, sc , repeat from * around, 2 dc last st, sl st to beg sc, fasten off, weave in ends. {12 (29) sc, 24 (58) dc}

Bows with color B (make 2)

Row 1: Ch 10, dc 3rd ch from hook, dc, hdc, sl st next 2 sts, hdc, dc, dc, ch 2, sl st to beg-ch. Fasten off, weave in ends. {4 dc, 2 hdc, 2 sl st}

Ribbons with color B (make 2)

Row 1: Ch 23, sl st 2nd ch from hook and each remaining ch across, fasten off. Weave in ends. {22 sl st}

Blocking and Assembly

Tie Ribbon tightly around middle of Bow. Pin assembled Bow to the blocking mat to desired shape. Pin Wreath to blocking mat. Spray from about 6-10 inches away with fabric stiffening spray, or pour some of the spray liquid into a small cup and paint the liquid on. Once dry, glue the Bow onto the Wreath and glue to the stud earring, or attach fish hook style earring to top of Wreath.

Christmas Wreath Earrings

Love it? Share it!

  • Share on X (Opens in new window) X
  • Share on Facebook (Opens in new window) Facebook
  • Share on Pinterest (Opens in new window) Pinterest
  • Print (Opens in new window) Print

November 24, 2023 by Priscilla

Minimalist Headband

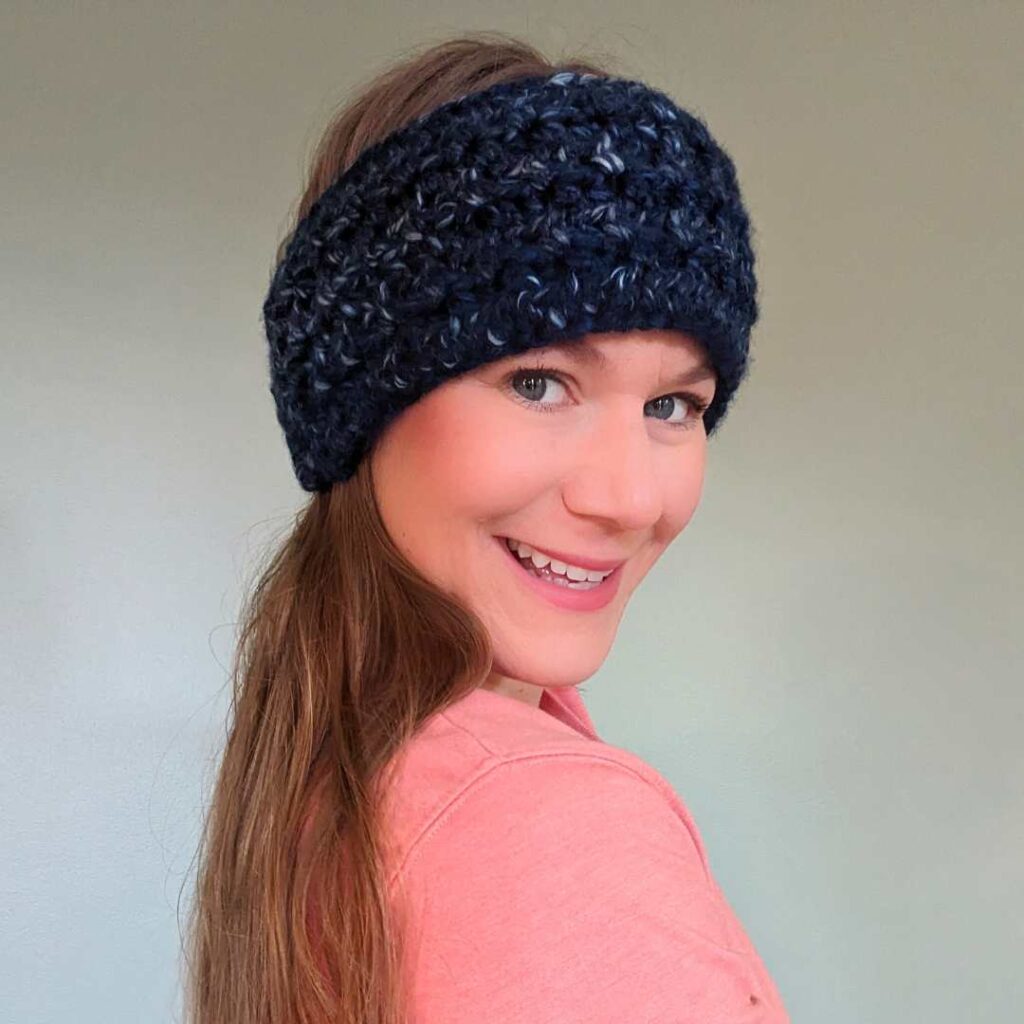
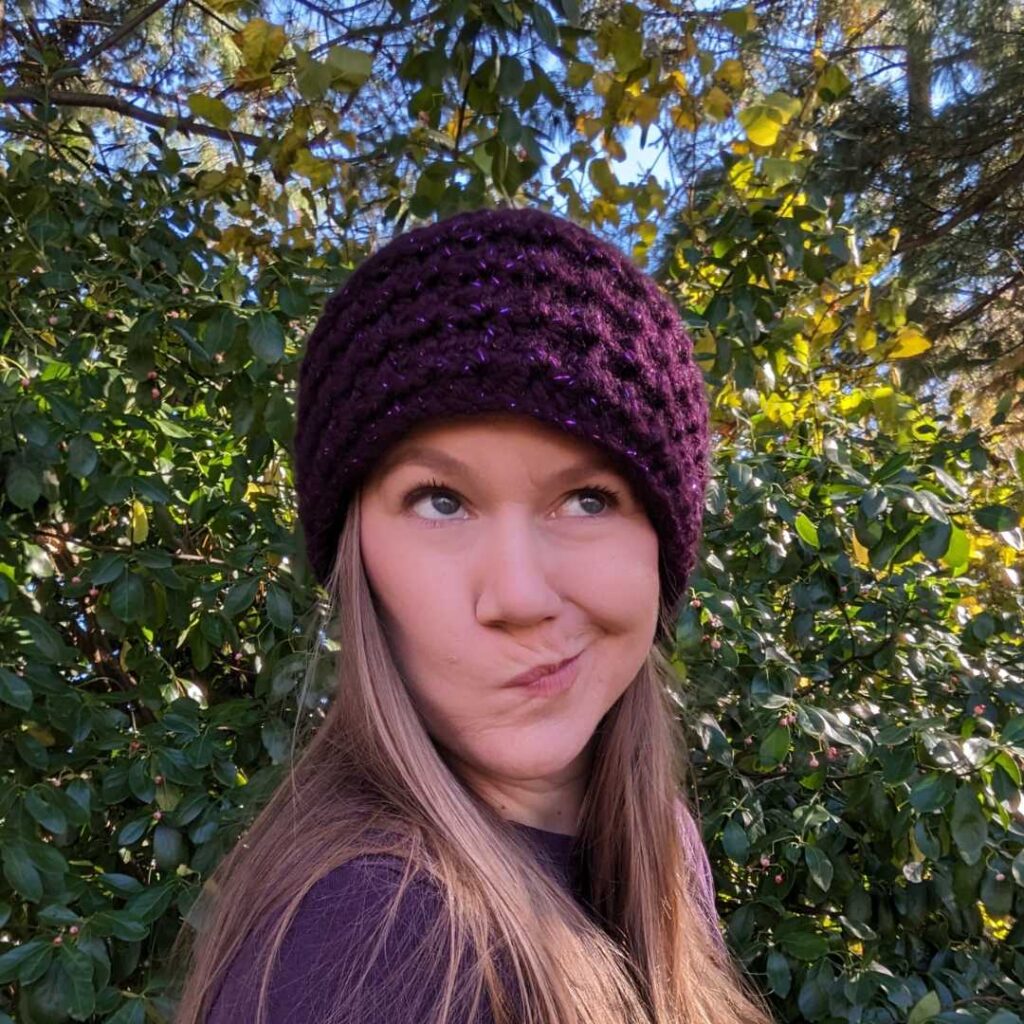
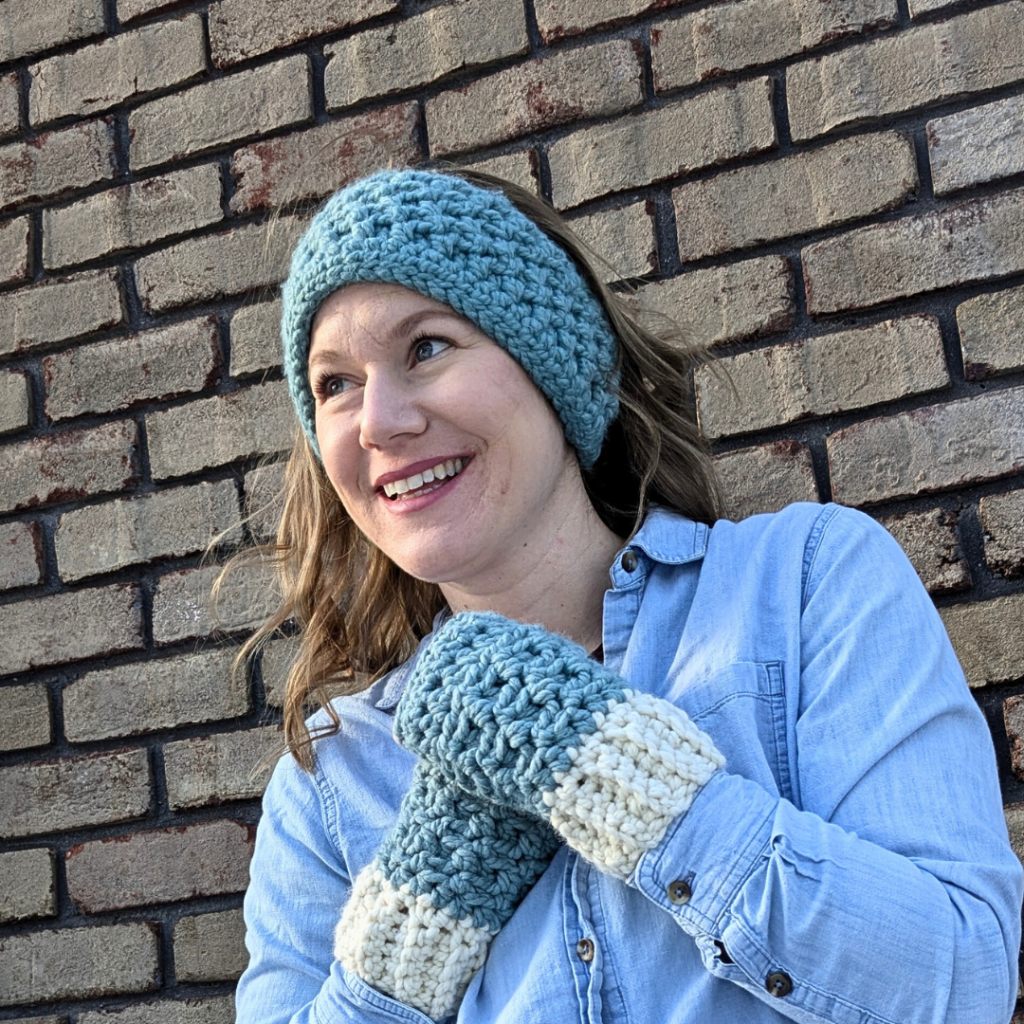
I had a WAY better title picked out for this headband, but unfortunately, ravelry wasn’t understanding that it was a common phrase and not a keyword. Technology, ugh! So Minimalist Headband is the pseudonym for the Long Hair, Don’t Care Headband. Cute, right? This pattern is designed to wear easily under your hair, keeping your ears warm, without adding a bunch of bulk under there.

Minimalist as a title fits, too. It’s an easy repeat, and worked flat with one seam, so it is a pretty minimal pattern! I think it looks very stylish in any of the Lion Brand Yarn Wool Ease Thick and Quick colors. I made three samples with different yarns, a variegated blue called River Run, a deep aqua called Succulent, and a sparkly one! I have to tell you that the sparkle was really fun. I don’t usually use yarn with tinsel in it, but because this yarn is so thick, it’s not hard to work with.

Winter Sets Blog Hop

Let’s get that PDF on ravelry!

Join in the fun of this beautiful Winter Sets Blog Hop hosted by Sandra Stitches! You can get the Minimalist Headband and the new matching Minimalist Mitts together! Hit the button below to head to the blog post for a free coupon code to use on ravelry!

Okay, now scroll down to the ravelry download button to use the code! Both the Minimalist Mitts pattern and the headband pattern files are in each ravelry listing, so you can download them both with either pattern.

Supplies

  • 100 yards super bulky (CYC 6) yarn, sample is Lion Brand Yarn Wool Ease Thick-n-Quick
  • crochet hook US size N (9 mm) or size needed to obtain gauge
  • tapestry sewing needle
  • scissors and measuring tape


Stitches (US Terms)

ch = chain

sc = single crochet

st/sts = stitch/stitches

BLO = back loop only

hdc = half double crochet

sl st = slip stitch

sc2tog = single crochet two stitches together

hdc in the 3rd loop = half double crochet in the 3rd loop on the working side

Notes:

  • Finished dimensions: child: 18 in, teen/adult sm: 20 in, adult med: 21 in, adult lg: 22 in around.
  • Sizes are denoted by parentheses: child (teen/adult sm, adult med, adult lg.)
  • Stitch counts are marked at the end of each row in {brackets}.
  • Pattern is worked flat and seamed at the end.

Gauge Swatch

4 in by 4 in swatch

10 sts in 8 rows of the pattern repeat which is:

*hdc, hdc in the third loop, repeat from * across

Written Instructions

Child (teen/adult sm, adult med, adult lg)

Row 1: Ch 32 (38, 40, 44) hdc second st from hook and each st across, ch 1, turn. {31 (37, 39, 43) hdc}

Row 2: Hdc first st,* hdc in the 3rd loop next st, hdc next st, repeat from * to end of row, ch 1, turn. {16 (19, 20, 22) hdc, 15 ( 18, 19, 21) hdc in the 3rd loop}

Rows 3-6: Repeat row 2.Child/teen skip to row 8.

Adult Med/Lg ONLY: Row 7: Repeat row 2.

Row 8: Hdc each st across. {31 (37, 39, 43) hdc} Do not fasten off.

Next make the band that goes behind the head.

Row 1: Ch 1, sc evenly 9 in the end of rows previously made, ch 1, turn. {9 sc}

Row 2: Sc2tog BLO, sc BLO next 5, sc2tog BLO, ch 1, turn. {2 sc2tog BLO, 5 sc BLO}

Row 3: Sc2tog BLO, sc BLO next 3, sc2tog BLO, ch 1, turn. {2 sc2tog BLO, 3 sc BLO}

Row 4-10: Sc BLO each st across, ch 1, turn. {5 sc BLO}

Row 11: 2 sc BLO, sc BLO each st until last, 2 sc BLO last st, ch 1, turn. {7 sc BLO}

Row 12: 2 sc BLO, sc BLO each st until last, 2 sc BLO last st, ch 1, turn. {9 sc BLO}

Sl st BLO evenly across the other edge of headband (9 sl st BLO). Fasten off, weave in ends.

Don’t forget there is a beautiful new chunky fingerless mittens pattern that matches this headband! It’s available free on the blog right here. Oh and the mittens pattern is QUICK! I made a pair in about an hour!

Love it? Share it!

  • Share on X (Opens in new window) X
  • Share on Facebook (Opens in new window) Facebook
  • Share on Pinterest (Opens in new window) Pinterest
  • Print (Opens in new window) Print

November 18, 2023 by Priscilla

Crochet Christmas Gifts Guide!

SO. You love to crochet. You have some time set aside in the next few weeks to make some handmade gifts for your loved ones. Who are you (realistically) going to make for? What are you going to make? How are you going to get organized so you can get everything done?

I’ve searched around a bit for ideas, organizers, tips, and guides from crocheters and I’m bringing the best here to you, in addition to my own suggestions!

First of all, you can find some great organizers for this. Sarah at SEKHandmade has one specifically for crochet that is beautifully made. That’s the one I’m using this year. (She also has an amazing Gift Guide for things you might want to be gifted this year!) The Knotted Nest has one also that is lovely, the tracker sheet looks particularly helpful. I also use a super simple app on my phone called Gift List to keep both my store bought and crochet plans organized.

This is a really great post from Salty Pearl Crochet if you need a some more tips to get your plans accomplished.

One of my favorite crochet designers is Jess at Make and Do Crew. She has created an awesome library of free patterns that are simple yet elegant and perfect for gifting. I have made her slipper socks for gifting as well as some other patterns. She has an expansive post with great ideas for gifts to make.

Alright on to my creation:

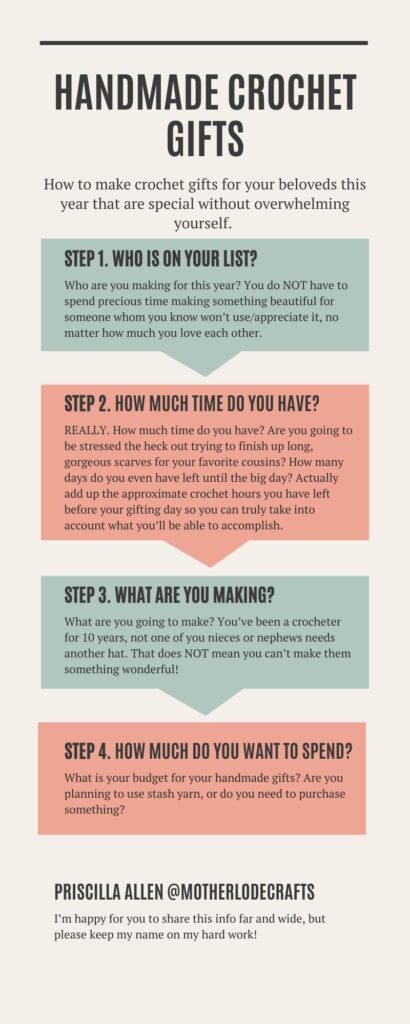
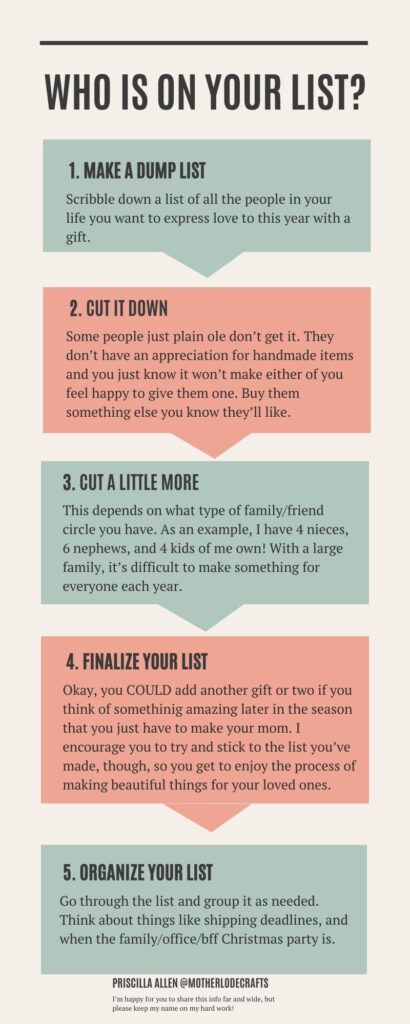
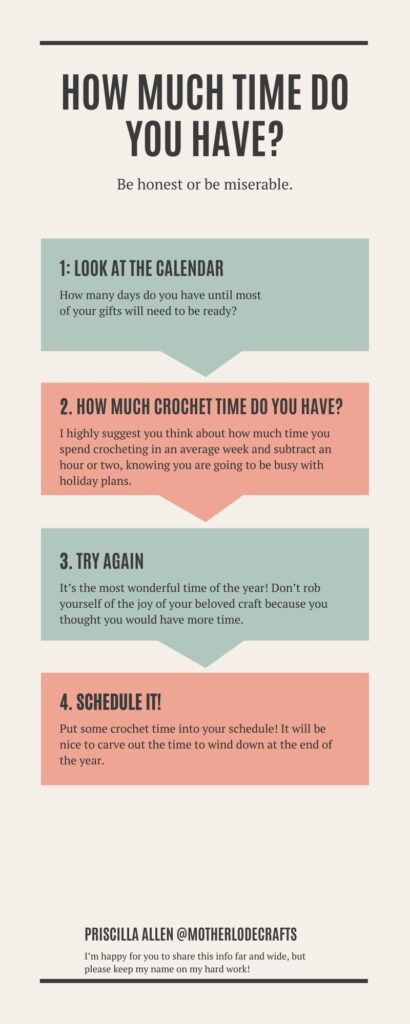
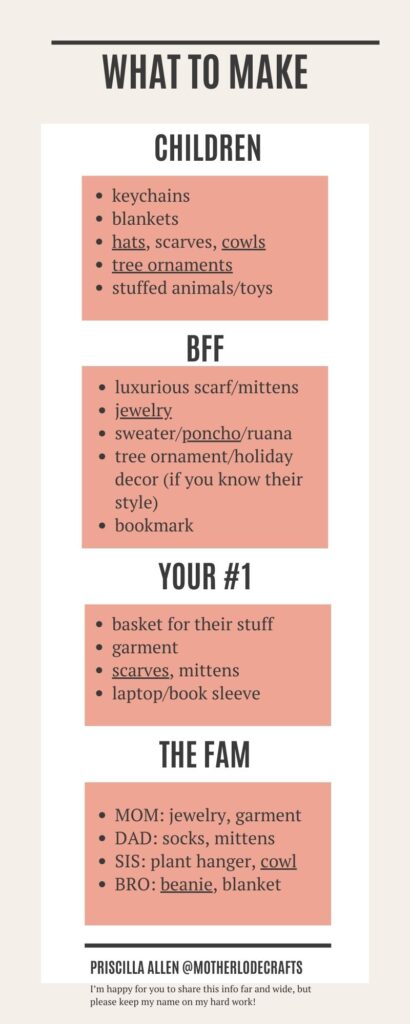
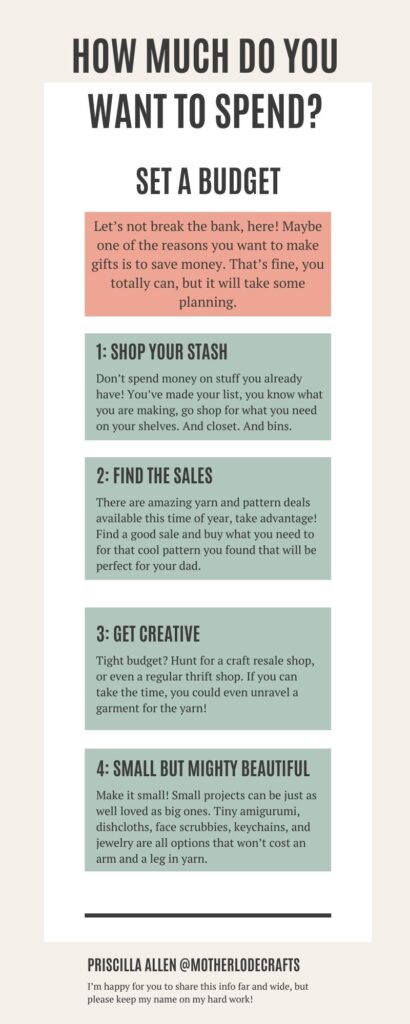
The Step by Step Guide to Crochet Gifts!

Of course when I created this cool graphic (pat on the back, lol) I linked to some of my patterns. Apparently I don’t understand technology, though, so these are just images and the links on there don’t work. SO.

Here are links to some of my patterns that you might like to make for your loved ones this year:

  • Jewelry: Wineglass Earrings, Margarita Earrings, Flower of the Sun Earrings, Flower Cluster Earrings, Heart Tassel Earrings
  • Hats: Chill Stopper Beanie, The Blustery Beanie, Simple Ridges Beanie, Almost Stripes Ear Warmer
  • Cowls: Spring Triangles Cowl, Chill Stopper Cowl
  • Other: Striking Stripes Poncho, The Double Stripe Scarf, Hairbow Scrunchie, Giant Lacy Scrunchie

Okay, I hope this helped you feel ready for the big day, whichever day that is for you! For me, it’s Christmas and I wish you a very happy one!!!!! Enjoy this special season, I hope it fills your heart with hope and joy for the coming year!

Love it? Share it!

  • Share on X (Opens in new window) X
  • Share on Facebook (Opens in new window) Facebook
  • Share on Pinterest (Opens in new window) Pinterest
  • Print (Opens in new window) Print

November 3, 2023 by Priscilla

The Blustery Beanie

I’m over the moon to share my new crochet pattern! Getting back into designing crochet patterns has been a long road this past year. I designed a few things just for family and friends, but I only just got the extra pep in my step to leap back into publishing designs! I truly love doing this and I hope the coming months bring many more designs to you.

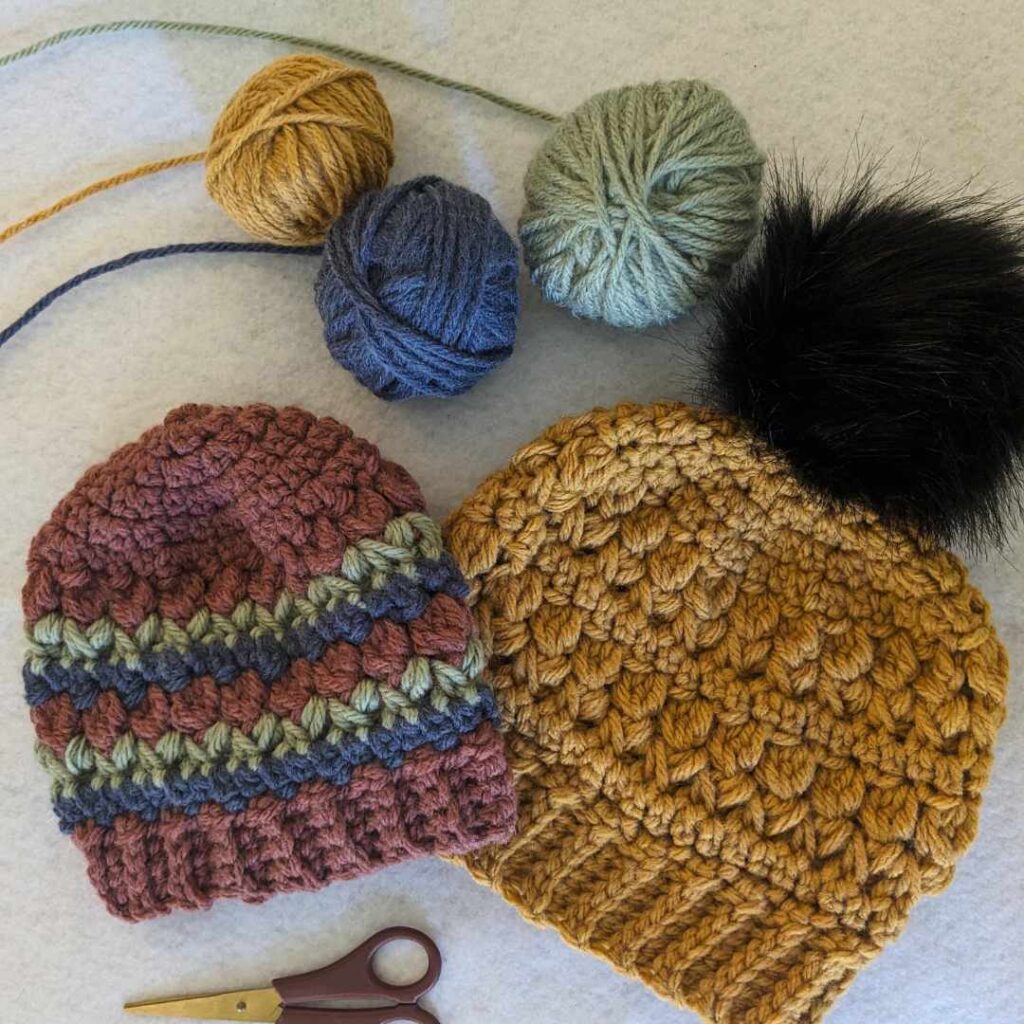
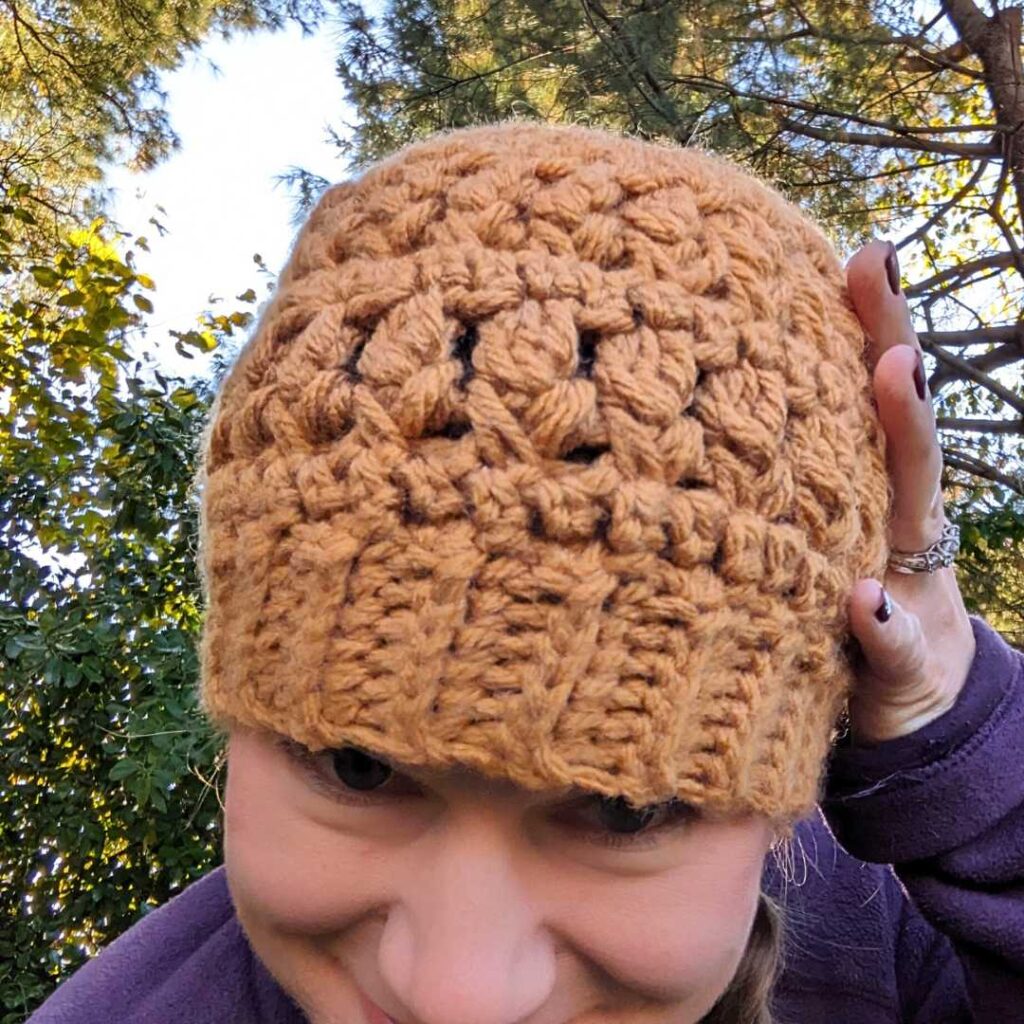
My current favorite yarn is the Lion Brand Hue + Me. I just love the color palette and the coziness of this yarn! I let it inspire me into this bulky weight beanie, perfect for blustery days. This pattern uses large, textured stitches that are fun to make and work up quickly. The texture provides enough interest to make this hat with a single color like mine, but using multiple colors can give you more vibrant look. I wrote the pattern for sizes baby to adult so I could match my mini-me, and you can too! The texture of this hat is a tiny bit feminine, but I think it could work in a solid dark color for a more masculine look, too, so you could do a whole family set with this pattern! I hope you’ll share with me over on ole Instagram if you make one!

I am putting this one up in my shops. Currently it’s available on ravelry and Etsy. The stitches are mildy tricky, my testers rated this pattern intermediate. So if you need extra help, consider the PDF. It has photo tutorial pages for the stitches that will help you!

Supplies

  • 125-150 yards bulky (CYC 5) yarn, samples: Lion Brand Yarn Hue +Me OR for multiple colors: color A: 75-100 yds, color B: 25-50 yds, color C: 25-50 yds
  • crochet hook US size L (8 mm) or size needed to obtain gauge
  • tapestry sewing needle
  • scissors and measuring tape/gauge ruler
  • pom and button to make it removable (optional)

Stitches (US terms)

ch = chain stitch

st/sts = stitch/stitches

BLO = back loop only

sk = skip

esc = extended single crochet

dc = double crochet

sc = single crochet

sl st = slip stitch

MR = magic ring

sp = space

Special Stitches

beg CL = beginning cluster: ch 3, yo, insert hook in same stitch as ch-3, pull up a loop, yo, pull through 2 loops on hook, yo, insert hook in same stitch, pull up a loop, yo, pull through 2 loops on hook, yo, pull through all 4 loops on hook

CL = double crochet 3 stitches together in same stitch

puff = puff stitch: yo, insert hook in next ch-1 space, pull up a loop, yo, insert hook in same stitch, pull up a loop, yo, pull through all 5 loops on hook, sc in previous stitch

If you think you may need help with these stitches, consider purchasing the PDF of this pattern. It has 2 pages of photo tutorials to help you with the special stitches. It’s available here on ravelry or here on Etsy!

Gauge Swatch

4 in by 4 in swatch = 6 rows of pattern repeat below x 10 esc sts/ 5 CL sts/ 5 puff sts

Row 1: ch 17, esc 2nd st from hook and each across, ch 3, turn.

Row 2: Beg CL, *ch 1, sk st, CL next st, repeat from * across dc in last st, ch 2, turn.

Row 3: puff first 2 sts, repeat puff to end of row ch 1, turn.

repeat rows 1, 2, and 3 respectively

Notes

  • Finished hat circumference: baby 15 inches, toddler 16 inches, child 18.5 inches, teen 20 inches, medium 21 inches, large 22 inches
  • Sizes are marked with parentheses (baby {toddler, child} ) and stitch counts are marked at the end of each row in brackets [baby {toddler, child} ].
  • Pattern is worked in the round, except for the band which is worked in rows attached.
  • Alternative to MR : ch 4, sl st to 1st ch, work round 1 as written in pattern.

Written Instructions

Baby, Toddler, Child

Hat Body

Round 1: MR, sc 4 into MR, sl st to first sc to join, ch 1. [4sc]

Round 2: 2 esc each st around, sl st to first esc to join, ch 1. [8 esc]

Round 3: 2 esc each st around, sl st to first esc to join, ch 1. [16 esc]

Round 4: 2 esc first st, esc next st then * 2 esc next st, esc next st repeat from * around, sl st to first esc to join, ch 1. [ 24 esc]

Round 5: 2 esc first st, esc next 3 sts then * 2 esc next st, esc next 3 sts, repeat from *, sl st to first esc to join. [30 esc]

BABY SKIP TO ROUND 7

Round 6: Ch 1, 2 esc first st, esc next 4 sts, *2 esc next st, esc next 4 sts, repeat from * around, sl st to first esc to join. [36 esc]

Round 7: Beg CL, ch 1, *sk next st, CL next st, ch 1, repeat from * around, sl st to top of beg CL, ch 1. [1 beg CL, 15 {18, 18} CL, 15 {18, 18} ch-1]

Round 8: Puff each st around, sl st to top of first puff to join. [15 {18, 18} puff]

Round 9: Ch 1, esc each st around. [30 {36, 36} esc]

Round 10: Repeat round 7

Round 11: Repeat round 8

Round 12: CHILD ONLY Repeat round 9 (baby/toddler skip to brim)

Hat Brim:

Row 1: Ch 5, turn. Sc 2nd st from hook and each st, then sl st in the next 2 sts of the last row of the hat body. Turn. [4 sc, 2 sl st]

Row 2: Sk the sl sts, then sl st BLO each sc, turn, ch 1. [4 sl st BLO]

Row 3: Sc BLO in 4 sts, sl st in the next 2 sts of the last row of the hat body. Turn. [4 sc BLO, 2 sl st]

Repeat rows 2 and 3 respectively until return to first row. Flip hat inside out and sl st the last row to the first row. Fasten off. Weave in ends. If desired, use ends at MR to attach button inside the hat, then attach removable pom to button on the top.

Teen/adult small {adult med, adult lg}

Hat Body

Round 1: MR, sc 6 into MR, sl st to first sc to join, ch 1. [6 sc]

Round 2: 2 esc each st around, sl st to first esc to join, ch 1. [12 esc]

Round 3: 2 esc each st around, sl st to first esc to join, ch 1. [24 esc]

Round 4: 2 esc first st, esc next st then *2 esc next st, esc next st, repeat from * around, sl st to first esc to join, ch 1. [ 36 esc]

Round 5: 2 esc first st, esc next 5 sts then * 2 esc next st, esc next 5 sts, repeat from * around, sl st to first esc to join. [42 esc]

Round 6: Ch 1, 2 esc first st, esc next 6 sts, * 2 esc next st, esc next 6 sts, repeat from * around, sl st to first esc to join. [48 esc]

Teen/adult small and medium skip to round 8

Round 7: Ch 1, 2 esc first st, esc next 7 sts, * 2 esc next st, esc next 7 sts, repeat from * around, sl st to first esc to join. [54 esc]

Round 8: Beg CL, ch 1, *sk next st, CL next st, ch 1, repeat from * around, sl st to top of beg CL, ch 1. [1 beg CL, 24 {24, 27} CL, 24 {24, 27} ch-1]

Round 9: Puff each st around, sl st to top of first puff to join. [24 {24, 27} puff]

Round 10: Ch 1, esc each st around. [48 {48, 54} esc]

Round 11: Repeat round 8

Round 12: Repeat round 9

Round 13: Repeat round 10

Round 14: LG ONLY Repeat round 10

Hat Brim:

Row 1: Ch 7 {9, 11}, turn. Sc 2nd st from hook and each st, then sl st next 2 sts of the last row of the hat body. Turn. [6 {8, 10} sc, 2 sl st]

Row 2: Sk the sl sts, then sl st BLO each sc, turn, ch 1. [6 {8, 10} sl st BLO]

Row 3: Sc BLO in 6 {8, 10} sts, sl st next 2 sts of the last row of the hat body. Turn. [6 {8, 10} BLO, 2 sl st]

Repeat rows 2 and 3 respectively until return to first row. Flip hat inside out and sl st the last row to the first row. Fasten off. Weave in ends. If desired, use ends at MR to attach button inside the hat, then attach removable pom to button on the top.

Using multiple colors?

Start with color A, change to color B for each CL row and change to color C for each puff row, then change back to color A for esc rows and hat brim.

Love it? Share it!

  • Share on X (Opens in new window) X
  • Share on Facebook (Opens in new window) Facebook
  • Share on Pinterest (Opens in new window) Pinterest
  • Print (Opens in new window) Print

October 28, 2023 by Priscilla

Papal Mitre Crochet Pattern

I tried so hard to get myself together this week but I had the FLUUUUUUUU and so here we are late on Saturday night with only a few days until All Saints’ Day. But I know there are some other last minute mamas out there like me who can whip this up before dropping their kiddo at school on Wednesday in their saint costume so here ya go!

I have the full pattern below, AND YOU CAN DOWNLOAD IT FREE at the bottom of this page. So if it’s easier on you to check out this pattern right here, right now, on your phone, go for it, but for my easily distracted people who need the PDF, it’s totally free, go get it, print it out, and enjoy.

Supplies

  • 100 yards CYC 4 worsted yarn, preferably white, held double with 100 yards CYC 4 worsted cotton yarn (for stiffness) 25 yards bulky CYC 5 yarn in golden color (Sample is Lily Sugar N Cream White, Lion Brand Basic Stitch white, and Lion Brand Color Made Easy)
  • crochet hook US size J (6 mm) or size needed to obtain gauge
  • tapestry sewing needle
  • scissors and measuring tape/gauge ruler
  • Aleene’s fabric stiffening spray (optional)

Stitches (US terms)

  • ch = chain stitch
  • st/sts = stitch/stitches
  • BLO = back loop only
  • sc = single crochet
  • sl st = slip stitch

Gauge

2 in by 2 in swatch = 7 stitches in 7 rows of sc

Row 1: Ch 11, sc 2nd st from hook and each across, ch 1, turn. [10 sc]

Row 2: Sc each st across, ch 1, turn. [10sc]

Repeat row 2 six more times.

Notes

  • SIZING: this pattern is sized for a child, but you could make in any size by making the band larger or smaller to fit the head circumference as follows: baby 15 inches, toddler 16 inches, child 18 inches, teen 19 inches, medium 20 inches, large 21 inches
  • Pattern is worked flat, then sewn together.
  • Pattern is written with a gold stripe (Saint Pope John Paul II is often shown with this color mitre) but you can change that to suit your chosen papal saint.
  • As you make the stripe, measure it next to your mitre top and add/subtract rows as necessary to line up correctly with the top and bottom.
  • This pattern calls for yarns held together: crochet with two strands of different yarns held together as you work. It creates a stiff fabric to make the mitre top stand up. I think if you have a bulky or super bulky white yarn and use that with a size J hook, you can probably get the required stiffness. Some of the yarns used in the sample are discontinued, clearly I used stash scrap yarn for this project! If you have a big stash, I bet you can cobble something together that works!
  • Optional: spray the top with some fabric stiffening spray and shape as desired.

Written Instructions

Mitre Top:

Row 1: Ch 23, sc 2nd ch from hook and each st across, ch 1, turn. [22 sc]

Row 2: Sc each st across, ch 1, turn. [22 sc]

Row 3: 2 sc first st, sc each st across until last, 2 sc last st, ch 1, turn. [24 sc]

Rows 4-7: Sc each st across, ch 1, turn. [24 sc]

Row 8: Sc2tog, sc each st across until last 2 sts, sc2tog, ch 1, turn. [20 sc, 2 dec]

Row 9: Sc each st across, ch 1, turn. [22 sc]

Rows 10-24: Repeat rows 8 and 9 respectively. [stitch count will decrease by 2 after each 2 row repeat]

Row 25: Sc2tog, sc2tog, fasten off. [2 sc2tog]

Brim:

Row 1: Ch 7, sc 2 second ch from hook and each st, ch 1, turn. [6 sc]

Row 2: Sc BLO each st, ch 1, turn. [6 sc BLO]

Rows 3-59: Repeat row 2, sl st row 59 to row 1, fasten off, weave in ends.

Stripe:

Row 1: Ch 5, sc 2nd ch from hook and each st across, ch 1, turn. [4 sc]

Row 2: Sc each st across, ch 1, turn. [4 sc]

Rows 3- 27: Repeat row 2, fasten off, use ends to sew to mitre top.

After attaching the gold stripe to the mitre top, sew the pieces together. Sew the brim to the mitre top along the bottom edge of the mitre top and the top edge of the brim.

Download the free Papal Mitre Crochet Pattern PDF

Papal Mitre Crochet PatternDownload

You can also download to your ravelry account if you want to have it in your library! It’s completely free there as well.

Want more Catholic Saint Costume crochet patterns?

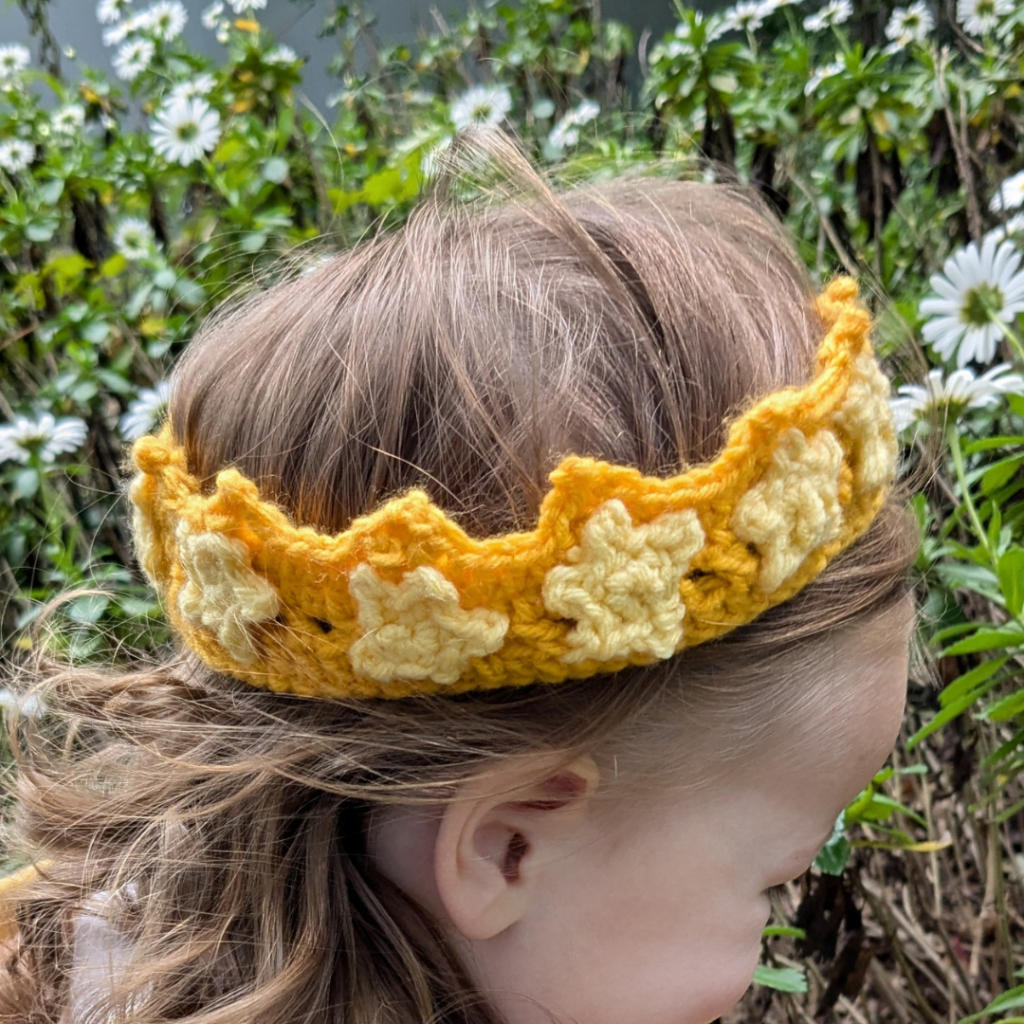
Introducing the Marian Crown! This crown pattern is a simple design with 2 variations to add stars or flowers. It’s the perfect addition to any Mary costume or a saint costume for any other royal saint!

Love it? Share it!

  • Share on X (Opens in new window) X
  • Share on Facebook (Opens in new window) Facebook
  • Share on Pinterest (Opens in new window) Pinterest
  • Print (Opens in new window) Print

April 29, 2022 by Priscilla

It’s a CAL!

Well I am so flippin’ excited to be part of an amazing event: Spring Crochet Earring CAL! 6 designers have created beautiful crochet earring designs for you to make for spring. Led by Amber over at Bliss This, we have wonderful patterns for you to buy at a steep 55% discount! The bundle of 6 patterns is available through May 3rd for only $10.50, then the price goes up to $16.50 until May 21st, which is the last day to purchase the bundle. After that, all the patterns will be available at regular prices in each designer’s shop.

Get the bundle here!

Here are the designs in the bundle:

Xochitl Earrings by Amber Bliss This
Sunflower Ridge Earrings by Momma Grace Creations
Gloriana Earrings by Wish Upon a Hook
Spring Fling Earrings by Teal Dragonfly Creations
Lilith Earrings by Chalia’s Craft
Cherry Blossom Earrings by me!

To go with the bundle there is a CROCHET-A-LONG! It takes place on Amber’s facebook community here. You’ll get tips from the designers for making their patterns as well as general thread crochet tips, so even if you’ve never made crochet earrings before, you can still complete these!

What are you waiting for?! Go snag the bundle, then join Amber’s group for the CAL!

Love it? Share it!

  • Share on X (Opens in new window) X
  • Share on Facebook (Opens in new window) Facebook
  • Share on Pinterest (Opens in new window) Pinterest
  • Print (Opens in new window) Print
  • « Previous Page
  • 1
  • 2
  • 3
  • 4
  • 5
  • 6
  • 7
  • Next Page »

Welcome! My name is Priscilla and I love designing crochet patterns for your family. I live in beautiful Pennsylvania where I enjoy all sorts of crafts, but I’m most passionate about crochet! I’m a Catholic mom of 4 and I sometimes incorporate my faith into my designs. Thank you so much for supporting me by visiting my crochet website and I hope you find something here that you are excited to make.

Recent Posts

  • Cozy Fall Baby Beanie Pattern
  • Spider Basket Crochet Pattern
  • Lacy Edged Crochet Shawl Pattern
  • Crochet Gingerbread Earring Pattern
  • Classic Hairbow Crochet Pattern

Categories

Follow Me

  • Etsy
  • Facebook
  • Instagram
  • Pinterest
  • YouTube

Pretty Chic Theme By: Pretty Darn Cute Design